Fireball3k (talk | contribs) m (→Special Moves) |
m (remove random characters, use aironly button) |
||
| (11 intermediate revisions by 5 users not shown) | |||
| Line 6: | Line 6: | ||
<!-- I know it's a dead meme --> | <!-- I know it's a dead meme --> | ||
Previously, Thanos appeared as a boss in Marvel Super Heroes, but he got screwed up in the transition to MVC2 | Previously, Thanos appeared as a boss in Marvel Super Heroes, but he got screwed up in the transition to MVC2. He doesn’t have all the ridiculous moves he had when he was a boss in MSH, but he does have most of the same super moves. He's considered to be a low-mid tier character in this game, despite how powerful he is in the comics. That said, he's still strong if used right. | ||
He does amazing damage, but really needs super levels to be effective. His mobility is also | Thanos is best used as a middle or an anchor due to his reliance on meter. He does amazing damage, but really needs super levels to be effective. His mobility is also rather limited, and he cannot air throw, unlike everyone else. He’s also the only character in the game with a run instead of a dash. | ||
TODO- Frame data, missing images like taunts and assists, move commentaries, other missing data | TODO- Frame data, missing images like taunts and assists, move commentaries, other missing data | ||
|content2= | |content2= | ||
| Line 56: | Line 41: | ||
{{2 Column Flex|flex1=6|flex2=4 | {{2 Column Flex|flex1=6|flex2=4 | ||
|content1= | |content1= | ||
{{Content Box|content='''Thanos''' wields the Infinity Gauntlet to squash enemies with his selection of powerful super moves. While he does great damage with his whole kit, his biggest weaknesses are his lack of mobility and his reliance on meter. | {{Content Box|content='''Thanos''' wields the Infinity Gauntlet to squash enemies with his selection of powerful super moves. While he does great damage with his whole kit, his biggest weaknesses are his lack of mobility and his heavy reliance on meter. | ||
{{ProConTable | {{ProConTable | ||
|pros= | |pros= | ||
* | * '''Great Supers:''' Thanos has a very nice set of supers. All of them do good damage and come out quick, and can be comboed or DHC'd into for damage or safety. Thanos can also combo super into super, enabling high damage 2 bar and double DHC conversions. | ||
* Death Sphere is a pretty good move whether on point or as an assist. It holds the target in hitstun, meaning you can extend combos with it | * '''The Bubble:''' Death Sphere is a pretty good move, whether on point or as an assist. It holds the target in hitstun, meaning you can extend just about anyone’s combos with it. | ||
* Good | * '''Good Range:''' Thanos is pretty big, so his normals have a lot of reach. All of his supers can hit you from afar as well. | ||
* | * '''Team Synergy:''' Thanos' Death Sphere assist allows just about anyone to extend their combos with ease. | ||
* | * '''Above Average Defense''' He takes about 7% less damage than everyone else, allowing him to tank more hits than some of the other characters. | ||
|cons= | |cons= | ||
* | * '''Lacks Aerial Mobility:''' Thanos has a run, which is helpful, but he's got very little in the way of air mobility. | ||
* Big | * '''Can’t Air Throw:''' Thanos is the only character in the roster that cannot air throw, making it hard for him to defend against aerial camping without meter. | ||
* Reliant | * '''Big Target:'''he's not as big as Sentinel or Juggernaut, but he's quite a bit larger than Cable. | ||
* Outside of his supers, | * '''Reliant On Meter:''' Thanos can't build meter well by himself, so he has to wait for a different character to build it for him before he can utilize it. | ||
* '''Weak To Zoning/Stalling:''' Outside of his supers, Thanos doesn't have much he can do about zoning, especially not if he gets snapped in before he's ready. His lack of an air throw also means he can have a very hard time making a comeback happen if his opponent takes to the skies and turtles up. | |||
}} | }} | ||
}} | }} | ||
| Line 75: | Line 61: | ||
<center><youtube>uLYhh2zida4</youtube></center> | <center><youtube>uLYhh2zida4</youtube></center> | ||
}} | }} | ||
}} | |||
== Character Summary == | |||
{{Content Box|header=Normals & Special Moves|content= | |||
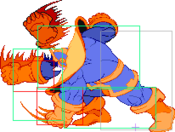
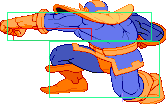
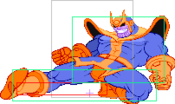
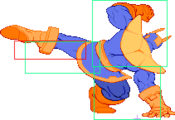
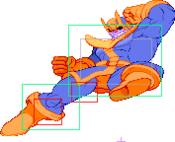
;'''High Kick''' | |||
*{{b}} + {{hk}} | |||
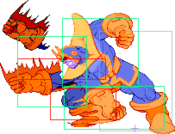
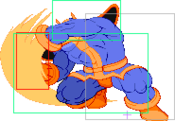
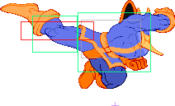
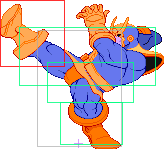
;'''Knee Dive''' | |||
*{{d}} + {{hk}} {{aironly}} | |||
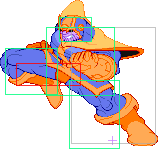
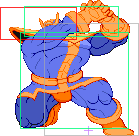
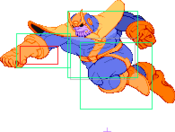
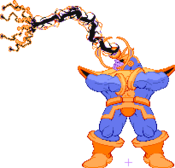
;'''Titan Crush''' | |||
*{{qcf}} + {{lp}} or {{hp}} | |||
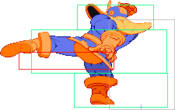
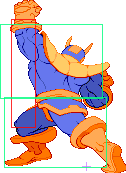
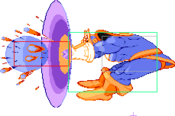
;'''Death Sphere''' | |||
*{{qcf}} + {{lk}} / {{hk}} | |||
}} | }} | ||
| Line 88: | Line 87: | ||
|name= Light Punch | |name= Light Punch | ||
|linkname= 5LP | |linkname= 5LP | ||
|input= {{lp}} | |input= 5LP // {{lp}} | ||
|data= | |data= | ||
{{AttackData-MVSC2 | {{AttackData-MVSC2 | ||
| Line 111: | Line 110: | ||
|name= Medium Punch | |name= Medium Punch | ||
|linkname= 5MP | |linkname= 5MP | ||
|input= {{mp}} | |input= 5MP // {{mp}} | ||
|data= | |data= | ||
{{AttackData-MVSC2 | {{AttackData-MVSC2 | ||
| Line 133: | Line 132: | ||
|name= Heavy Punch | |name= Heavy Punch | ||
|linkname= 5HP | |linkname= 5HP | ||
|input= {{hp}} | |input= 5HP // {{hp}} | ||
|data= | |data= | ||
{{AttackData-MVSC2 | {{AttackData-MVSC2 | ||
| Line 155: | Line 154: | ||
|name= Light Kick | |name= Light Kick | ||
|linkname= 5LK | |linkname= 5LK | ||
|input= {{lk}} | |input= 5LK // {{lk}} | ||
|data= | |data= | ||
{{AttackData-MVSC2 | {{AttackData-MVSC2 | ||
| Line 177: | Line 176: | ||
|name= Medium Kick | |name= Medium Kick | ||
|linkname= 5MK | |linkname= 5MK | ||
|input= {{mk}} | |input= 5MK // {{mk}} | ||
|data= | |data= | ||
{{AttackData-MVSC2 | {{AttackData-MVSC2 | ||
| Line 199: | Line 198: | ||
|name= Heavy Kick | |name= Heavy Kick | ||
|linkname= 5HK | |linkname= 5HK | ||
|input= {{hk}} | |input= 5HK // {{hk}} | ||
|data= | |data= | ||
{{AttackData-MVSC2 | {{AttackData-MVSC2 | ||
| Line 221: | Line 220: | ||
|name= Crouching Light Punch | |name= Crouching Light Punch | ||
|linkname= 2LP | |linkname= 2LP | ||
|input= | |input= 2LP // {{d}} + {{lp}} | ||
|data= | |data= | ||
{{AttackData-MVSC2 | {{AttackData-MVSC2 | ||
| Line 244: | Line 243: | ||
|name= Crouching Medium Punch | |name= Crouching Medium Punch | ||
|linkname= 2MP | |linkname= 2MP | ||
|input= | |input= 2MP // {{d}} + {{mp}} | ||
|data= | |data= | ||
{{AttackData-MVSC2 | {{AttackData-MVSC2 | ||
| Line 265: | Line 264: | ||
|caption= Less damage than 3HP, but much easier to combo into | |caption= Less damage than 3HP, but much easier to combo into | ||
|name= Crouching Heavy Punch | |name= Crouching Heavy Punch | ||
|linkname= | |linkname= 2HP | ||
|input= {{hp}} | |input= 2HP // {{d}} + {{hp}} | ||
|data= | |data= | ||
{{AttackData-MVSC2 | {{AttackData-MVSC2 | ||
| Line 288: | Line 287: | ||
|name= Crouching Light Kick | |name= Crouching Light Kick | ||
|linkname= 2LK | |linkname= 2LK | ||
|input= {{lk}} | |input= 2LK // {{d}} + {{lk}} | ||
|data= | |data= | ||
{{AttackData-MVSC2 | {{AttackData-MVSC2 | ||
| Line 310: | Line 309: | ||
|name= Crouching Medium Kick | |name= Crouching Medium Kick | ||
|linkname= 2MK | |linkname= 2MK | ||
|input= | |input= 2MK // {{d}} + {{mk}} | ||
|data= | |data= | ||
{{AttackData-MVSC2 | {{AttackData-MVSC2 | ||
| Line 332: | Line 331: | ||
|name= Crouching Heavy Kick | |name= Crouching Heavy Kick | ||
|linkname= 2HK | |linkname= 2HK | ||
|input= {{d}} + {{hk}} | |input= 2HK // {{d}} + {{hk}} | ||
|data= | |data= | ||
{{AttackData-MVSC2 | {{AttackData-MVSC2 | ||
| Line 355: | Line 354: | ||
|name= Air Light Punch | |name= Air Light Punch | ||
|linkname= j.LP | |linkname= j.LP | ||
|input= j.{{lp}} | |input= j.LP // {{air}} {{lp}} | ||
|data= | |data= | ||
{{AttackData-MVSC2 | {{AttackData-MVSC2 | ||
| Line 377: | Line 376: | ||
|name= Air Medium Punch | |name= Air Medium Punch | ||
|linkname= j.MP | |linkname= j.MP | ||
|input= j.{{mp}} | |input= j.MP // {{air}} {{mp}} | ||
|data= | |data= | ||
{{AttackData-MVSC2 | {{AttackData-MVSC2 | ||
| Line 399: | Line 398: | ||
|name= Air Heavy Punch | |name= Air Heavy Punch | ||
|linkname= j.HP | |linkname= j.HP | ||
|input= j.{{hp}} | |input= j.HP // {{air}} {{hp}} | ||
|data= | |data= | ||
{{AttackData-MVSC2 | {{AttackData-MVSC2 | ||
| Line 421: | Line 420: | ||
|name= Air Light Kick | |name= Air Light Kick | ||
|linkname= j.LK | |linkname= j.LK | ||
|input= {{ | |input= j.LK // {{air}} {{lk}} | ||
|data= | |data= | ||
{{AttackData-MVSC2 | {{AttackData-MVSC2 | ||
| Line 443: | Line 442: | ||
|name= Air Medium Kick | |name= Air Medium Kick | ||
|linkname= j.MK | |linkname= j.MK | ||
|input= j.{{mk}} | |input= j.MK // {{air}} {{mk}} | ||
|data= | |data= | ||
{{AttackData-MVSC2 | {{AttackData-MVSC2 | ||
| Line 465: | Line 464: | ||
|name= Air Heavy Kick | |name= Air Heavy Kick | ||
|linkname= j.HK | |linkname= j.HK | ||
|input= j.{{hk}} | |input= j.HK // {{air}} {{hk}} | ||
|data= | |data= | ||
{{AttackData-MVSC2 | {{AttackData-MVSC2 | ||
| Line 488: | Line 487: | ||
|name= Back + Heavy Kick | |name= Back + Heavy Kick | ||
|linkname= | |linkname= | ||
|input= | |input= 4HK // {{b}} + {{hk}} | ||
|data= | |data= | ||
{{AttackData-MVSC2 | {{AttackData-MVSC2 | ||
| Line 515: | Line 514: | ||
|name= Universal Launcher (Punch) | |name= Universal Launcher (Punch) | ||
|linkname= Universal Launcher (Punch) | |linkname= Universal Launcher (Punch) | ||
|input= 3HP // {{df}}+{{hp}} | |input= 3HP // {{df}} + {{hp}} | ||
|data= | |data= | ||
{{AttackData-MVSC2 | {{AttackData-MVSC2 | ||
| Line 541: | Line 540: | ||
|name= Throw (Punch) | |name= Throw (Punch) | ||
|linkname= Throw (Punch) | |linkname= Throw (Punch) | ||
|input= 6HP // {{f}}+{{hp}} | |input= 6HP // {{f}} + {{hp}} | ||
|data= | |data= | ||
{{AttackData-MVSC2 | {{AttackData-MVSC2 | ||
| Line 563: | Line 562: | ||
|name= Throw (Kick) | |name= Throw (Kick) | ||
|linkname= Throw (Kick) | |linkname= Throw (Kick) | ||
|input= 6HK // {{f}}+{{hk}} | |input= 6HK // {{f}} + {{hk}} | ||
|data= | |data= | ||
{{AttackData-MVSC2 | {{AttackData-MVSC2 | ||
| Line 585: | Line 584: | ||
|name= Variable Attack (raw tag) | |name= Variable Attack (raw tag) | ||
|linkname= Variable Attack | |linkname= Variable Attack | ||
|input= {{lp}}+{{lk}} | |input= LP + LK / HP + HK // {{lp}} + {{lk}} / {{hp}} + {{hk}} | ||
|data= | |data= | ||
{{AttackData-MVSC2 | {{AttackData-MVSC2 | ||
| Line 610: | Line 609: | ||
|name= Death Sphere | |name= Death Sphere | ||
|linkname= Death Sphere | |linkname= Death Sphere | ||
|input= {{qcf}} + {{k}} | |input= 236 + K // {{qcf}} + {{k}} | ||
|data= | |data= | ||
{{AttackData-MVSC2 | {{AttackData-MVSC2 | ||
| Line 633: | Line 632: | ||
|name= Titan Crush | |name= Titan Crush | ||
|linkname= Titan Crush | |linkname= Titan Crush | ||
|input= {{qcf}} + {{ | |input= 236 + P // {{qcf}} + {{p}} | ||
|data= | |data= | ||
{{AttackData-MVSC2 | {{AttackData-MVSC2 | ||
| Line 658: | Line 657: | ||
|name= Gauntlet Power | |name= Gauntlet Power | ||
|linkname= Gauntlet Power | |linkname= Gauntlet Power | ||
|input= 236+PP // {{qcf}}+{{lp}}+{{hp}} | |input= 236 + PP // {{qcf}} + {{lp}} + {{hp}} | ||
|data= | |data= | ||
{{AttackData-MVSC2 | {{AttackData-MVSC2 | ||
| Line 682: | Line 681: | ||
|name= Gauntlet Reality | |name= Gauntlet Reality | ||
|linkname= Gauntlet Reality | |linkname= Gauntlet Reality | ||
|input= 214+PP // {{qcb}}+{{lp}}+{{hp}} | |input= 214 + PP // {{qcb}} + {{lp}} + {{hp}} | ||
|data= | |data= | ||
{{AttackData-MVSC2 | {{AttackData-MVSC2 | ||
| Line 710: | Line 709: | ||
|name= Gauntlet Space | |name= Gauntlet Space | ||
|linkname= Gauntlet Space | |linkname= Gauntlet Space | ||
|input= 236 + KK // {{qcf}}+{{lk}}+{{hk}} | |input= 236 + KK // {{qcf}} + {{lk}} + {{hk}} | ||
|data= | |data= | ||
{{AttackData-MVSC2 | {{AttackData-MVSC2 | ||
| Line 734: | Line 733: | ||
|name= Gauntlet Soul | |name= Gauntlet Soul | ||
|linkname= Gauntlet Soul | |linkname= Gauntlet Soul | ||
|input= 214+KK // {{qcb}}+{{lk}}+{{hk}} | |input= 214 + KK // {{qcb}} + {{lk}} + {{hk}} | ||
|data= | |data= | ||
{{AttackData-MVSC2 | {{AttackData-MVSC2 | ||
| Line 865: | Line 864: | ||
== Gauntlet Power glitch == | == Gauntlet Power glitch == | ||
Do the Gauntlet Power super but DHC out before it leaves his hand. It won't leave but will instead stick to him. | Do the Gauntlet Power super but DHC out before it leaves his hand. (This is a 3-4 frame window: it has to be done very very quickly.) It won't leave but will instead stick to him. | ||
<br> | <br> | ||
{{Navbox-MVC2}} | {{Navbox-MVC2}} | ||
[[Category:Marvel Vs. Capcom 2]] | [[Category:Marvel Vs. Capcom 2]] | ||
Latest revision as of 17:02, 1 December 2024
Introduction
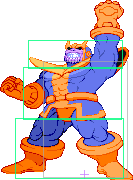
Want to use the Infinity Gauntlet to perfectly balance your opponent's face? Pick this guy!
Previously, Thanos appeared as a boss in Marvel Super Heroes, but he got screwed up in the transition to MVC2. He doesn’t have all the ridiculous moves he had when he was a boss in MSH, but he does have most of the same super moves. He's considered to be a low-mid tier character in this game, despite how powerful he is in the comics. That said, he's still strong if used right.
Thanos is best used as a middle or an anchor due to his reliance on meter. He does amazing damage, but really needs super levels to be effective. His mobility is also rather limited, and he cannot air throw, unlike everyone else. He’s also the only character in the game with a run instead of a dash.
TODO- Frame data, missing images like taunts and assists, move commentaries, other missing data
Thanos wields the Infinity Gauntlet to squash enemies with his selection of powerful super moves. While he does great damage with his whole kit, his biggest weaknesses are his lack of mobility and his heavy reliance on meter.
| Strengths | Weaknesses |
|---|---|
|
|
Character Summary
- High Kick
 +
+ 
- Knee Dive
 +
+ 

- Titan Crush
 +
+  or
or 
- Death Sphere
 +
+  /
/ 
Moves List
Normal Moves
Ground Normals
| Damage | Startup | Active | Recovery | Guard |
|---|---|---|---|---|
| 4 | 7 | - | - | - |
| Special Property | Cancel | Adv. Hit | Adv. Guard | Adv. Pushblock |
| - | - | - | - | - |
| Damage | Startup | Active | Recovery | Guard |
|---|---|---|---|---|
| 7 (5 + 2) | 10 | - | - | - |
| Special Property | Cancel | Adv. Hit | Adv. Guard | Adv. Pushblock |
| - | - | - | - | - |
| Damage | Startup | Active | Recovery | Guard |
|---|---|---|---|---|
| 13 | 16 | - | - | - |
| Special Property | Cancel | Adv. Hit | Adv. Guard | Adv. Pushblock |
| - | - | - | - | - |
| Damage | Startup | Active | Recovery | Guard |
|---|---|---|---|---|
| 4 | 5 | - | - | - |
| Special Property | Cancel | Adv. Hit | Adv. Guard | Adv. Pushblock |
| - | - | - | - | - |
| Damage | Startup | Active | Recovery | Guard |
|---|---|---|---|---|
| 7 | 7 | - | - | - |
| Special Property | Cancel | Adv. Hit | Adv. Guard | Adv. Pushblock |
| - | - | - | - | - |
| Damage | Startup | Active | Recovery | Guard |
|---|---|---|---|---|
| 13 | 8 | - | - | - |
| Special Property | Cancel | Adv. Hit | Adv. Guard | Adv. Pushblock |
| - | - | - | - | - |
| Damage | Startup | Active | Recovery | Guard |
|---|---|---|---|---|
| 4 | 5 | - | - | - |
| Special Property | Cancel | Adv. Hit | Adv. Guard | Adv. Pushblock |
| - | - | - | - | - |
| Damage | Startup | Active | Recovery | Guard |
|---|---|---|---|---|
| 7 | 7 | - | - | - |
| Special Property | Cancel | Adv. Hit | Adv. Guard | Adv. Pushblock |
| Launcher | - | - | - | - |
| Damage | Startup | Active | Recovery | Guard |
|---|---|---|---|---|
| 13 | 10 | - | - | - |
| Special Property | Cancel | Adv. Hit | Adv. Guard | Adv. Pushblock |
| - | - | - | - | - |
| Damage | Startup | Active | Recovery | Guard |
|---|---|---|---|---|
| 4 | 5 | - | - | - |
| Special Property | Cancel | Adv. Hit | Adv. Guard | Adv. Pushblock |
| - | - | - | - | - |
| Damage | Startup | Active | Recovery | Guard |
|---|---|---|---|---|
| 7 | 7 | - | - | - |
| Special Property | Cancel | Adv. Hit | Adv. Guard | Adv. Pushblock |
| - | - | - | - | - |
| Damage | Startup | Active | Recovery | Guard |
|---|---|---|---|---|
| 13 | 9 | - | - | - |
| Special Property | Cancel | Adv. Hit | Adv. Guard | Adv. Pushblock |
| - | - | - | - | - |
Air Normals
| Damage | Startup | Active | Recovery | Guard |
|---|---|---|---|---|
| 4 | 4 | - | - | - |
| Special Property | Cancel | Adv. Hit | Adv. Guard | Adv. Pushblock |
| - | - | - | - | - |
| Damage | Startup | Active | Recovery | Guard |
|---|---|---|---|---|
| 7 | 7 | - | - | - |
| Special Property | Cancel | Adv. Hit | Adv. Guard | Adv. Pushblock |
| - | - | - | - | - |
| Damage | Startup | Active | Recovery | Guard |
|---|---|---|---|---|
| 13 | 13 | - | - | - |
| Special Property | Cancel | Adv. Hit | Adv. Guard | Adv. Pushblock |
| - | - | - | - | - |
| Damage | Startup | Active | Recovery | Guard |
|---|---|---|---|---|
| 4 | 5 | - | - | - |
| Special Property | Cancel | Adv. Hit | Adv. Guard | Adv. Pushblock |
| - | - | - | - | - |
| Damage | Startup | Active | Recovery | Guard |
|---|---|---|---|---|
| 7 | 7 | - | - | - |
| Special Property | Cancel | Adv. Hit | Adv. Guard | Adv. Pushblock |
| - | - | - | - | - |
| Damage | Startup | Active | Recovery | Guard |
|---|---|---|---|---|
| 13 | 13 | - | - | - |
| Special Property | Cancel | Adv. Hit | Adv. Guard | Adv. Pushblock |
| - | - | - | - | - |
Command Normals
| Damage | Startup | Active | Recovery | Guard |
|---|---|---|---|---|
| 13 | 9 | - | - | - |
| Special Property | Cancel | Adv. Hit | Adv. Guard | Adv. Pushblock |
| - | None | - | - | - |
Universal Mechanics
| Damage | Startup | Active | Recovery | Guard | |
|---|---|---|---|---|---|
| 14 | 6 | - | - | - | |
| Special Property | Cancel | Adv. Hit | Adv. Guard | Adv. Pushblock | |
| Launcher (high) | - | - | - | - | |
|
This does slightly more damage than his 2HP, but it's somewhat harder to land this | |||||
| Damage | Startup | Active | Recovery | Guard |
|---|---|---|---|---|
| 16 | - | - | - | - |
| Special Property | Cancel | Adv. Hit | Adv. Guard | Adv. Pushblock |
| - | - | - | - | - |
| Damage | Startup | Active | Recovery | Guard |
|---|---|---|---|---|
| 16 | - | - | - | - |
| Special Property | Cancel | Adv. Hit | Adv. Guard | Adv. Pushblock |
| - | - | - | - | - |
| Damage | Startup | Active | Recovery | Guard |
|---|---|---|---|---|
| 10 | - | - | - | - |
| Special Property | Cancel | Adv. Hit | Adv. Guard | Adv. Pushblock |
| - | - | - | - | - |
Special Moves
| Damage | Startup | Active | Recovery | Guard | |
|---|---|---|---|---|---|
| 15 | - | - | - | - | |
| Special Property | Cancel | Adv. Hit | Adv. Guard | Adv. Pushblock | |
| - | - | - | - | - | |
|
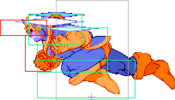
Hit them with this and they get trapped inside of a bubble, letting you extend combos | |||||
| Damage | Startup | Active | Recovery | Guard |
|---|---|---|---|---|
| 18 | - | - | - | - |
| Special Property | Cancel | Adv. Hit | Adv. Guard | Adv. Pushblock |
| - | - | - | - | - |
Hyper Combos
| Damage | Startup | Active | Recovery | Guard |
|---|---|---|---|---|
| 51 (9x6 minus scaling) | - | - | - | - |
| Special Property | Cancel | Adv. Hit | Adv. Guard | Adv. Pushblock |
| - | - | - | - | - |
| Damage | Startup | Active | Recovery | Guard | |
|---|---|---|---|---|---|
| 31-47 | - | - | - | - | |
| Special Property | Cancel | Adv. Hit | Adv. Guard | Adv. Pushblock | |
| - | - | - | - | - | |
|
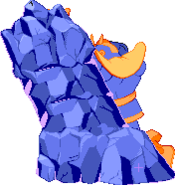
Two slabs of stone come up from the ground and crush your opponent | |||||
| Damage | Startup | Active | Recovery | Guard | |
|---|---|---|---|---|---|
| 29-51 | - | - | - | - | |
| Special Property | Cancel | Adv. Hit | Adv. Guard | Adv. Pushblock | |
| - | - | - | - | - | |
|
Thanos creates a portal directly above him and pulls rocks into it, sending them down on your opponent | |||||
| Damage | Startup | Active | Recovery | Guard |
|---|---|---|---|---|
| 31 | - | - | - | - |
| Special Property | Cancel | Adv. Hit | Adv. Guard | Adv. Pushblock |
| - | - | - | - | - |
Variable Assists
| Damage | Startup | Active | Recovery | Guard | |
|---|---|---|---|---|---|
| 15 | - | - | - | - | |
| Special Property | Cancel | Adv. Hit | Adv. Guard | Adv. Pushblock | |
| - | - | - | - | - | |
|
Variable Assist move. Variable Counter is X. Variable Combination super is Y. | |||||
| Damage | Startup | Active | Recovery | Guard | |
|---|---|---|---|---|---|
| - | - | - | - | - | |
| Special Property | Cancel | Adv. Hit | Adv. Guard | Adv. Pushblock | |
| - | - | - | - | - | |
|
Variable Assist move. Variable Counter is X. Variable Combination super is Y. | |||||
| Damage | Startup | Active | Recovery | Guard | |
|---|---|---|---|---|---|
| - | - | - | - | - | |
| Special Property | Cancel | Adv. Hit | Adv. Guard | Adv. Pushblock | |
| - | - | - | - | - | |
|
Variable Assist move. Variable Counter is X. Variable Combination super is Y. | |||||
Other
| Damage | Startup | Active | Recovery | Guard |
|---|---|---|---|---|
| - | - | - | - | - |
| Special Property | Cancel | Adv. Hit | Adv. Guard | Adv. Pushblock |
| - | None | - | - | - |
Taunt
"Thanos reigns!"
Colors
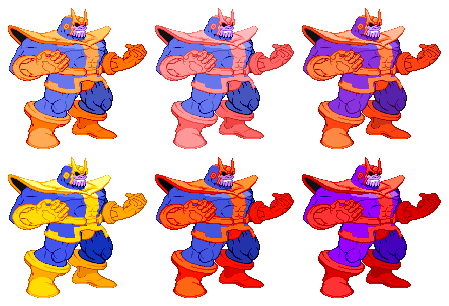
First row: ![]() ,
, ![]() , A1. Second row:
, A1. Second row: ![]() ,
, ![]() , A2.
, A2.
The Basics
Thanos needs levels to be effective. His normals are good, for the most part, but his supers allow him to disregard his mediocre mobility with massive hitboxes that can pin your opponent down for big damage. If you need more meter, though, your options are limited. You may be able to superjump and Titan Crush around for a while to build a little meter, but that doesn't build much. As such, consider having a battery first, and using Thanos-A to set up great combos.
Advanced Strategy
Fun Stuff
Gauntlet Power glitch
Do the Gauntlet Power super but DHC out before it leaves his hand. (This is a 3-4 frame window: it has to be done very very quickly.) It won't leave but will instead stick to him.

