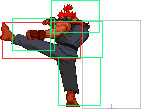
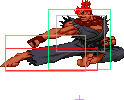
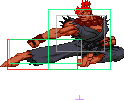
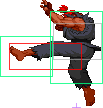
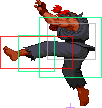
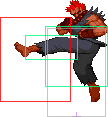
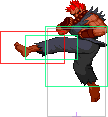
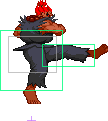
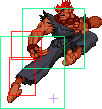
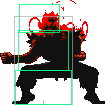
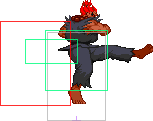
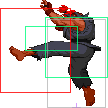
Fireball3k (talk | contribs) (the page should have frame data now, so now there's not so many "Placeholder" fields) |
|||
| (21 intermediate revisions by 5 users not shown) | |||
| Line 11: | Line 11: | ||
{{ProConTable | {{ProConTable | ||
|pros= | |pros= | ||
* Very nice offensive toolkit- plenty of fast and powerful moves | * '''Very nice offensive toolkit'''- plenty of fast and powerful moves, although they lack range outside the projectiles | ||
* | * '''Very damaging Level 3 super'''- the Raging Demon does a lot of damage when you can land it | ||
* '''Five super moves total''', all of them allowing for some big damage | |||
* Five super moves, all of them allowing for some big damage | * '''Above average mobility'''- good wavedash, as well as a quick teleport and a divekick give him some ways to stay slippery | ||
* | |||
|cons= | |cons= | ||
* Terrible defense- he takes more damage from attacks than most of the cast, so | * '''Terrible defense'''- he takes significantly more damage from attacks than most of the cast does, so you'd best not let him get combo'd | ||
* Overall lacks range on his attacks- his normals are | * '''Overall lacks range on his attacks'''- his normals are pretty stubby, so he has to use his projectiles and mobility to compensate | ||
* Struggles against strong zoning. Not completely helpless against it, but his options for evading it are kind of limited | * '''Struggles against strong zoning.''' Not completely helpless against it, but his options for evading it are kind of limited. | ||
* | * '''Needs to remain on offense to have a chance at winning'''- he can't turtle very well | ||
* Raging Demon is quite slow to come out, even though it hurts when it hits | * Raging Demon is quite slow to come out, even though it hurts when it hits | ||
}} | }} | ||
| Line 44: | Line 42: | ||
*{{qcb}} + {{lk}} / {{hk}} ({{airok}}) | *{{qcb}} + {{lk}} / {{hk}} ({{airok}}) | ||
;Tenma Kyuujin Kyaku (Divekick) | ;Tenma Kyuujin Kyaku (Divekick) | ||
*{{ | *{{qcf}} + {{lk}} / {{hk}} ({{aironly}}) | ||
;Jigoku Guruma (Command Throw) | ;Jigoku Guruma (Command Throw) | ||
*{{hcb}} + {{hk}} (close) | *{{hcb}} + {{hk}} (close) | ||
;Ashura Senkuu (Teleport) | |||
*{{dp}} or {{rdp}} + {{lp}} + {{hp}} or {{lk}} +{{hk}} | |||
}} | }} | ||
|content2= | |content2= | ||
| Line 90: | Line 90: | ||
|name= Light Punch | |name= Light Punch | ||
|linkname= 5LP | |linkname= 5LP | ||
|input= 5LP / | |input= 5LP // {{lp}} | ||
|data= | |data= | ||
{{AttackData-MVSC2 | {{AttackData-MVSC2 | ||
| Line 114: | Line 114: | ||
|name= Medium Punch | |name= Medium Punch | ||
|linkname= 5MP | |linkname= 5MP | ||
|input= 5MP / | |input= 5MP // {{mp}} | ||
|data= | |data= | ||
{{AttackData-MVSC2 | {{AttackData-MVSC2 | ||
| Line 136: | Line 136: | ||
|name= Heavy Punch | |name= Heavy Punch | ||
|linkname= 5HP | |linkname= 5HP | ||
|input= 5HP / | |input= 5HP // {{hp}} | ||
|data= | |data= | ||
{{AttackData-MVSC2 | {{AttackData-MVSC2 | ||
| Line 158: | Line 158: | ||
|name= Light Kick | |name= Light Kick | ||
|linkname= 5LK | |linkname= 5LK | ||
|input= 5LK / | |input= 5LK // {{lk}} | ||
|data= | |data= | ||
{{AttackData-MVSC2 | {{AttackData-MVSC2 | ||
| Line 177: | Line 177: | ||
{{MoveData | {{MoveData | ||
|image= MVC2 Akuma 5MK.png | |image= MVC2 Akuma 5MK.png | ||
| | |image2= MVC2 Akuma 5MK 2.png | ||
|caption= Kick | |caption= Kick | ||
|name= Heavy Kick | |name= Heavy Kick | ||
|linkname= 5HK | |linkname= 5HK | ||
|input= 5MK / | |input= 5MK // {{mk}} | ||
|data= | |data= | ||
{{AttackData-MVSC2 | {{AttackData-MVSC2 | ||
| Line 203: | Line 203: | ||
|name= Heavy Kick | |name= Heavy Kick | ||
|linkname= 5HK | |linkname= 5HK | ||
|input= 5HK / | |input= 5HK // {{hk}} | ||
|data= | |data= | ||
{{AttackData-MVSC2 | {{AttackData-MVSC2 | ||
| Line 225: | Line 225: | ||
|name= Crouching Light Punch | |name= Crouching Light Punch | ||
|linkname= 2LP | |linkname= 2LP | ||
|input= 2LP / | |input= 2LP // {{d}} + {{lp}} | ||
|data= | |data= | ||
{{AttackData-MVSC2 | {{AttackData-MVSC2 | ||
| Line 247: | Line 247: | ||
|name= Crouching Medium Punch | |name= Crouching Medium Punch | ||
|linkname= 2MP | |linkname= 2MP | ||
|input= 2MP / | |input= 2MP // {{d}} + {{mp}} | ||
|data= | |data= | ||
{{AttackData-MVSC2 | {{AttackData-MVSC2 | ||
| Line 269: | Line 269: | ||
|name= Crouching Heavy Punch | |name= Crouching Heavy Punch | ||
|linkname= 2HP | |linkname= 2HP | ||
|input= 2HP / | |input= 2HP // {{d}} + {{hp}} | ||
|data= | |data= | ||
{{AttackData-MVSC2 | {{AttackData-MVSC2 | ||
| Line 291: | Line 291: | ||
|name= Crouching Light Kick | |name= Crouching Light Kick | ||
|linkname= 2LP | |linkname= 2LP | ||
|input= | |input= 2LK // {{d}} + {{lk}} | ||
|data= | |data= | ||
{{AttackData-MVSC2 | {{AttackData-MVSC2 | ||
| Line 313: | Line 313: | ||
|name= Crouching Medium Kick | |name= Crouching Medium Kick | ||
|linkname= 2LP | |linkname= 2LP | ||
|input= | |input= 2MK // {{d}} + {{mk}} | ||
|data= | |data= | ||
{{AttackData-MVSC2 | {{AttackData-MVSC2 | ||
| Line 336: | Line 336: | ||
|name= Crouching Heavy Kick | |name= Crouching Heavy Kick | ||
|linkname= 2HK | |linkname= 2HK | ||
|input= 2HK / | |input= 2HK // {{d}} + {{hk}} | ||
|data= | |data= | ||
{{AttackData-MVSC2 | {{AttackData-MVSC2 | ||
| Line 359: | Line 359: | ||
|name= Air Light Punch | |name= Air Light Punch | ||
|linkname= j.LP | |linkname= j.LP | ||
|input= | |input= j.LP // Jump + {{lp}} | ||
|data= | |data= | ||
{{AttackData-MVSC2 | {{AttackData-MVSC2 | ||
| Line 383: | Line 383: | ||
|name= Air Medium Punch | |name= Air Medium Punch | ||
|linkname= j.mp | |linkname= j.mp | ||
|input= Jump+{{mp}} | |input= j.MP // Jump + {{mp}} | ||
|data= | |data= | ||
{{AttackData-MVSC2 | {{AttackData-MVSC2 | ||
| Line 405: | Line 405: | ||
|name= Air Heavy Punch | |name= Air Heavy Punch | ||
|linkname= j.HP | |linkname= j.HP | ||
|input= Jump+{{hp}} | |input= j.HP // Jump + {{hp}} | ||
|data= | |data= | ||
{{AttackData-MVSC2 | {{AttackData-MVSC2 | ||
| Line 427: | Line 427: | ||
|name= Air Light Kick | |name= Air Light Kick | ||
|linkname= j.HK | |linkname= j.HK | ||
|input= Jump+{{lk}} | |input= j.LK // Jump + {{lk}} | ||
|data= | |data= | ||
{{AttackData-MVSC2 | {{AttackData-MVSC2 | ||
| Line 449: | Line 449: | ||
|name= Air Medium Kick | |name= Air Medium Kick | ||
|linkname= j.MK | |linkname= j.MK | ||
|input= Jump+{{mk}} | |input= j.MK // Jump + {{mk}} | ||
|data= | |data= | ||
{{AttackData-MVSC2 | {{AttackData-MVSC2 | ||
| Line 471: | Line 471: | ||
|name= Air Heavy Kick | |name= Air Heavy Kick | ||
|linkname= j.HK | |linkname= j.HK | ||
|input= Jump+{{hk}} | |input= j.HK // Jump + {{hk}} | ||
|data= | |data= | ||
{{AttackData-MVSC2 | {{AttackData-MVSC2 | ||
| Line 491: | Line 491: | ||
{{MoveData | {{MoveData | ||
|image= MVC2 Akuma 6HP.png | |image= MVC2 Akuma 6HP.png | ||
| | |image2= MVC2 Akuma 6HP 2.png | ||
|caption= Karate chop | |caption= Karate chop | ||
|name= Forward Heavy Punch | |name= Forward Heavy Punch | ||
| Line 517: | Line 517: | ||
|name= Forward Heavy Kick | |name= Forward Heavy Kick | ||
|linkname= 6HK | |linkname= 6HK | ||
|input= 6HK /{{f}}+{{hk}} | |input= 6HK // {{f}} + {{hk}} | ||
|data= | |data= | ||
{{AttackData-MVSC2 | {{AttackData-MVSC2 | ||
| Line 540: | Line 540: | ||
|name= Air Up Medium Kick | |name= Air Up Medium Kick | ||
|linkname= j.8MK | |linkname= j.8MK | ||
|input= j.8MK / | |input= j.8MK // Jump + {{u}} + {{mk}} | ||
|data= | |data= | ||
{{AttackData-MVSC2 | {{AttackData-MVSC2 | ||
| Line 564: | Line 564: | ||
|name= Air Up Heavy Kick | |name= Air Up Heavy Kick | ||
|linkname= j.8HK | |linkname= j.8HK | ||
|input= j.8HK / | |input= j.8HK // Jump + {{u}} + {{hk}} | ||
|data= | |data= | ||
{{AttackData-MVSC2 | {{AttackData-MVSC2 | ||
| Line 588: | Line 588: | ||
|name= Launcher | |name= Launcher | ||
|linkname= Launcher | |linkname= Launcher | ||
|input= | |input= 3HP // {{df}} + {{hp}} | ||
|data= | |data= | ||
{{AttackData-MVSC2 | {{AttackData-MVSC2 | ||
| Line 601: | Line 601: | ||
|Adv. Guard= | |Adv. Guard= | ||
|Adv. Pushblock= | |Adv. Pushblock= | ||
|description= | |description= A slightly higher damaging version of Akuma's 2HP. Seems like the same hitbox as well, not much point in using this as it's harder to hit confirm. | ||
}} | }} | ||
}}<br> | }}<br> | ||
| Line 609: | Line 609: | ||
|image= MVC2 Akuma Gohadoken 01.png | |image= MVC2 Akuma Gohadoken 01.png | ||
|image2= MVC2 Akuma Gohadoken 02.png | |image2= MVC2 Akuma Gohadoken 02.png | ||
|imageSize2= 100x100px | |||
|caption2= It's not that color in-game, but the hitbox is the same | |caption2= It's not that color in-game, but the hitbox is the same | ||
|name= Gohadoken | |name= Gohadoken | ||
|linkname= Gohadouken | |linkname= Gohadouken | ||
|input= 236 + P // QCF+P // {{qcf}}+{{p}} | |input= 236 + P // QCF+P // {{qcf}} + {{p}} | ||
|data= | |data= | ||
{{AttackData-MVSC2 | {{AttackData-MVSC2 | ||
| Line 625: | Line 626: | ||
|Adv. Guard= - | |Adv. Guard= - | ||
|Adv. Pushblock= - | |Adv. Pushblock= - | ||
|description= | |description= A standard shoto fireball. HP version travels faster than LP version, but the damage between the two is the same. As a very basic projectile, it doesn't have much use against any character/assist with a beam or highly durable projectile. | ||
}} | }} | ||
}}<br> | }}<br> | ||
| Line 632: | Line 633: | ||
|image= MVC2 Akuma Zankuu Hadoken 01.png | |image= MVC2 Akuma Zankuu Hadoken 01.png | ||
|image2= MVC2 Akuma Zankuu Hadoken 02.png | |image2= MVC2 Akuma Zankuu Hadoken 02.png | ||
|imageSize2= 100x100px | |||
|caption= | |caption= | ||
|name= Zankuu Hadoken | |name= Zankuu Hadoken | ||
|linkname= Zankuu Hadoken | |linkname= Zankuu Hadoken | ||
|input= 236 + P // QCF+P // {{qcf}}+{{p}} | |input= 236 + P // QCF+P // {{qcf}} + {{p}} | ||
|data= | |data= | ||
{{AttackData-MVSC2 | {{AttackData-MVSC2 | ||
| Line 648: | Line 650: | ||
|Adv. Guard= - | |Adv. Guard= - | ||
|Adv. Pushblock= - | |Adv. Pushblock= - | ||
|description= | |description= An Akuma staple. Not as oppressing in this game as in others, but still good at covering some space in the air or for stalling/covering Akuma's descent. Can only be used once when normal jumping but can be used as many times as can be input during a super jump, so TKing the input (2369P) is useful. | ||
}} | }} | ||
}}<br> | }}<br> | ||
| Line 657: | Line 659: | ||
|image3= MVC2 Akuma Goshoryuken 03.png | |image3= MVC2 Akuma Goshoryuken 03.png | ||
|image4= MVC2 Akuma Goshoryuken 04.png | |image4= MVC2 Akuma Goshoryuken 04.png | ||
|caption4= | |caption4= Makes you invincible, like a SRK should do | ||
|name= Goshoryuken | |name= Goshoryuken | ||
|linkname= Goshoryuken | |linkname= Goshoryuken | ||
|input= 623 + P // F,D,DF+P // {{dp}}+{{p}} | |input= 623 + P // F,D,DF+P // {{dp}} + {{p}} | ||
|data= | |data= | ||
{{AttackData-MVSC2 | {{AttackData-MVSC2 | ||
| Line 673: | Line 675: | ||
|Adv. Guard= - | |Adv. Guard= - | ||
|Adv. Pushblock= - | |Adv. Pushblock= - | ||
|description= | |description= A pretty good DP. Multiple hits, goes slightly farther than Ryu's DP but not as far as Ken's (and definitely not Sakura's). Mainly useful as a reversal as it has invincibility on startup (roughly 3 frames). Extremely unsafe on block but does good damage, so it can be useful as a combo ender where j.HP/j.HK won't kill. | ||
}} | }} | ||
}}<br> | }}<br> | ||
| Line 682: | Line 684: | ||
|image3= MVC2 Akuma Tatsumaki Zankuu Kyaku 03.png | |image3= MVC2 Akuma Tatsumaki Zankuu Kyaku 03.png | ||
|image4= MVC2 Akuma Tatsumaki Zankuu Kyaku 04.png | |image4= MVC2 Akuma Tatsumaki Zankuu Kyaku 04.png | ||
|caption4= | |caption4= Pretty good. | ||
|name= Tatsumaki Zankuu Kyaku | |name= Tatsumaki Zankuu Kyaku | ||
|linkname= Tatsumaki Zankuu Kyaku | |linkname= Tatsumaki Zankuu Kyaku | ||
|input= 214 + K // {{ | |input= 214 + K // {{qcb}} + {{k}} | ||
|data= | |data= | ||
{{AttackData-MVSC2 | {{AttackData-MVSC2 | ||
| Line 698: | Line 700: | ||
|Adv. Guard= - | |Adv. Guard= - | ||
|Adv. Pushblock= - | |Adv. Pushblock= - | ||
|description= Like most of his other appearances, this move pops the opponent up for some minor juggles. | |description= Like most of his other appearances, this move pops the opponent up for some minor juggles. The best use of this move is using it in the air either after a magic series, and followed by an air fireball super (j.236PP), or immediately following a launcher (and maybe a j.lp to position the opponent correctly) to abuse the air tatsu glitch, allowing this move to do an extremely high amount of damage with little to no effort and no meter. However, if the air fireball super is used after an air tatsu, characters may fall out of the super, leading to very little damage and possibly a punish on Akuma if rolled and performed low to the ground. This can be generally avoided by ensuring that Akuma is very close to the opponent and at a perfect diagonal so that nearly every fireball hits. | ||
}} | }} | ||
}}<br> | }}<br> | ||
{{MoveData | {{MoveData | ||
|image= | |image= MVC2 Akuma Tenma Kuujin Kyaku 01.png | ||
|caption= | |caption= Makes you fall very quickly | ||
|name= Tenma Kuujin Kyaku | |name= Tenma Kuujin Kyaku | ||
|linkname= Divekick | |linkname= Divekick | ||
|input= | |input= 236 + K // {{qcf}} + {{k}} | ||
|data= | |data= | ||
{{AttackData-MVSC2 | {{AttackData-MVSC2 | ||
|Damage= 12 (light) / 18 (heavy | |Damage= 12 (light) / 18 (heavy, all hits) | ||
|Startup= | |Startup= | ||
|Active= | |Active= | ||
| Line 720: | Line 722: | ||
|Adv. Guard= - | |Adv. Guard= - | ||
|Adv. Pushblock= - | |Adv. Pushblock= - | ||
|description= | |description= Akuma drops like a brick when you use this, so it can be useful for dodging stuff. | ||
}} | }} | ||
}}<br> | }}<br> | ||
| Line 726: | Line 728: | ||
{{MoveData | {{MoveData | ||
|image= | |image= | ||
|caption= | |caption=Uses his grab hitbox, but doesn't have a whiff animation | ||
|name= Jigoku Guruma | |name= Jigoku Guruma | ||
|linkname= Jigoku Guruma (command throw) | |linkname= Jigoku Guruma (command throw) | ||
|input= 63214 + HK // {{hcb}}+{{hk}} | |input= 63214 + HK // {{hcb}} + {{hk}} | ||
|data= | |data= | ||
{{AttackData-MVSC2 | {{AttackData-MVSC2 | ||
|Damage= 16 | |Damage= 16 | ||
|Startup= | |Startup= | ||
|Active= | |Active= | ||
|Recovery= | |Recovery= | ||
|Guard= N/A | |Guard= N/A | ||
|Special Property= | |Special Property= | ||
| Line 745: | Line 747: | ||
}} | }} | ||
}}<br> | }}<br> | ||
=== Hyper Combos === | === Hyper Combos === | ||
{{MoveData | {{MoveData | ||
|image= | |image= MVC2 Akuma Messatsu Gou Shouryuu 01.png | ||
| | |image2= MVC2 Akuma Messatsu Gou Shouryuu 02.png | ||
|image3= MVC2 Akuma Messatsu Gou Shouryuu 03.png | |||
|image4= MVC2 Akuma Messatsu Gou Shouryuu 04.png | |||
|caption4= Akuma's version of the Shoryu Reppa | |||
|name= Messatsu Gou Shouryuu | |name= Messatsu Gou Shouryuu | ||
|linkname= | |linkname= | ||
|input= 236 + PP // {{qcf}}+{{lp}}+{{hp}} | |input= 236 + PP // {{qcf}} + {{lp}} + {{hp}} | ||
|data= | |data= | ||
{{AttackData-MVSC2 | {{AttackData-MVSC2 | ||
| Line 767: | Line 771: | ||
|Adv. Guard= | |Adv. Guard= | ||
|Adv. Pushblock= | |Adv. Pushblock= | ||
|description= | |description= A good reversal super, as it comes out relatively quickly and has a few frames of invincibility on startup. Akuma also moves forward quite far and fast before rising into the air, so it can be used to punish even longer ranged moves or closely thrown fireballs. | ||
}} | }} | ||
}}<br> | }}<br> | ||
{{MoveData | {{MoveData | ||
|image= | |image= MVC2 Akuma Messatsu Gou Hadou 01.png | ||
| | |image2= MVC2 Akuma Messatsu Gou Hadou 02.png | ||
|image3= MVC2 Akuma Messatsu Gou Hadou 03.png | |||
|image4= MVC2 Akuma Messatsu Gou Hadou 04.png | |||
|imageSize3= 100x100px | |||
|imageSize4= 100x100px | |||
|caption3= This is the beam hitbox- it's a bunch of these that overlap | |||
|caption4= Hitbox closest to his hands- not optimal | |||
|name= Messatsu Gou Hadou | |name= Messatsu Gou Hadou | ||
|linkname= | |linkname= | ||
|input= 214 + PP // {{qcb}}+{{lp}}+{{hp}} | |input= 214 + PP // {{qcb}} + {{lp}} + {{hp}} | ||
|data= | |data= | ||
{{AttackData-MVSC2 | {{AttackData-MVSC2 | ||
| Line 789: | Line 799: | ||
|Adv. Guard= | |Adv. Guard= | ||
|Adv. Pushblock= | |Adv. Pushblock= | ||
|description= | |description= Slow startup, but great range. | ||
}} | }} | ||
}}<br> | }}<br> | ||
{{MoveData | {{MoveData | ||
|image= | |image= MVC2 Akuma Messatsu Gou Rasen 01.png | ||
| | |image2= MVC2 Akuma Messatsu Gou Rasen 02.png | ||
|image3= MVC2 Akuma Messatsu Gou Rasen 03.png | |||
|image4= MVC2 Akuma Messatsu Gou Rasen 04.png | |||
|caption4= Rising blender kick- Shinryuken with kicks instead of a punch | |||
|name= Messatsu Gou Rasen | |name= Messatsu Gou Rasen | ||
|linkname= | |linkname= | ||
|input= 214 + KK // {{qcb}}+{{lk}}+{{hk}} | |input= 214 + KK // {{qcb}} + {{lk}} + {{hk}} | ||
|data= | |data= | ||
{{AttackData-MVSC2 | {{AttackData-MVSC2 | ||
| Line 816: | Line 829: | ||
{{MoveData | {{MoveData | ||
|image= | |image= MVC2 Akuma Tenma Gou Zankuu 01.png | ||
| | |image2= MVC2 Akuma Zankuu Hadoken 01.png | ||
|image3= MVC2 Akuma Zankuu Hadoken 02.png | |||
|imageSize3= 100x100px | |||
|caption3= Made up of lots of these. | |||
|name= Tenma Gou Zankuu | |name= Tenma Gou Zankuu | ||
|linkname= | |linkname= | ||
|input= 236 + PP // {{qcb}}+{{lp}}+{{hp}} | |input= 236 + PP // {{qcb}} + {{lp}} + {{hp}} | ||
|data= | |data= | ||
{{AttackData-MVSC2 | {{AttackData-MVSC2 | ||
| Line 833: | Line 849: | ||
|Adv. Guard= | |Adv. Guard= | ||
|Adv. Pushblock= | |Adv. Pushblock= | ||
|description= Useful to | |description= Useful as a combo ender- you can land it after a Tatsu or after an air combo, for example. As previously mentioned, be careful using this super after an air tatsu; if Akuma is not positioned correctly, the opponent can fall out, leading to significantly reduced damage at best, and a punish at worst (thanks Cable). | ||
}} | }} | ||
}}<br> | }}<br> | ||
| Line 839: | Line 855: | ||
{{MoveData | {{MoveData | ||
|image= | |image= MVC2 Akuma Shun Goku Satsu 01.png | ||
|caption= I still have more! | |caption= I still have more! | ||
|name= Shun Goku Satsu (Raging Demon) | |name= Shun Goku Satsu (Raging Demon) | ||
| Line 856: | Line 872: | ||
|Adv. Guard= | |Adv. Guard= | ||
|Adv. Pushblock= | |Adv. Pushblock= | ||
|description= Slow to come out, but does very nice damage if you hit. | |description= Slow to come out, but does very nice damage if you hit.<br> | ||
It's slow, | |||
}} | }} | ||
}} <br> | }} <br> | ||
| Line 864: | Line 881: | ||
|image= MVC2 Akuma Gohadoken 01.png | |image= MVC2 Akuma Gohadoken 01.png | ||
|image2= MVC2 Akuma Gohadoken 02.png | |image2= MVC2 Akuma Gohadoken 02.png | ||
|imageSize2= 100x100px | |||
|caption2= Type α | |caption2= Type α | ||
|name= Projectile Type | |name= Projectile Type | ||
| Line 880: | Line 898: | ||
|Adv. Guard= | |Adv. Guard= | ||
|Adv. Pushblock= | |Adv. Pushblock= | ||
|description= HP Gohadoken. Variable counter is also HP Gohadoken. Variable Combination super is Messatsu Gou Hadou. | |description= HP Gohadoken. Variable counter is also HP Gohadoken. Variable Combination super is Messatsu Gou Hadou. An okay projectile assist, but generally not used as both of his other assists are much better (especially tatsu assist). Also not terribly useful due to his fireball having no durability, in a game where the best projectile assists are literal beams. His alpha counter being a fireball makes this assist even less worthwhile. | ||
}} | }} | ||
}}<br> | }}<br> | ||
| Line 904: | Line 920: | ||
|Adv. Guard= | |Adv. Guard= | ||
|Adv. Pushblock= | |Adv. Pushblock= | ||
|description= HP Goshoryuken. Variable counter is also HP Goshoryuken. Variable Combination super is Messatsu Gou Shouryuu. | |description= HP Goshoryuken. Variable counter is also HP Goshoryuken. Variable Combination super is Messatsu Gou Shouryuu. A good anti-air assist, as Akuma covers a good portion of the screen in front of the point character, and he has invincibility on startup of the move. Also features a great alpha counter in his DP. Despite its practicality, this assist is generally not picked over tatsu assist, especially considering how competitive the anti-air assist niche is in this game. | ||
}} | }} | ||
}}<br> | }}<br> | ||
| Line 928: | Line 942: | ||
|Adv. Guard= | |Adv. Guard= | ||
|Adv. Pushblock= | |Adv. Pushblock= | ||
|description= HK Tatsumaki Zankuu Kyaku. Variable Counter is also HK Tatsumaki Zankuu Kyaku. Variable Combination super is Messatsu Gou Rasen. | |description= HK Tatsumaki Zankuu Kyaku. Variable Counter is also HK Tatsumaki Zankuu Kyaku. Variable Combination super is Messatsu Gou Rasen. Despite this assist's alpha counter being mediocre, and the THC being useless, this is Akuma's preferred assist choice. Travels quite far past the point character, and puts opponent in a lot of hitstun if it connects which makes picking up combos off of this assist very easy. This assist is also great for trapping your opponent and forcing them to eat a mixup if they do block the assist. It does leave Akuma somewhat unsafe after the tatsu, so don't be predictable or carefree when calling this assist unless you want him to get blown up. Overall, a very powerful assist that can quickly catch opponents not paying attention, leading to a high damage conversion, and run the ground-game against opponents who don't counter-call it. | ||
}} | }} | ||
}}<br> | }}<br> | ||
| Line 940: | Line 952: | ||
{{MoveData | {{MoveData | ||
|image= | |image= MVC2 Akuma Ashura Warp 01.png | ||
|caption= | |image2= MVC2 Akuma Ashura Warp 02.png | ||
|caption=Moving | |||
|caption2=Startup | |||
|name= Ashura Warp | |name= Ashura Warp | ||
|linkname= | |linkname= | ||
|input= 241 + PP/KK or 623 + PP/KK // {{dp}} or {{rdp}} + {{lp}}+{{hp}} or {{lk}} + {{hk}} | |input= 241 + PP/KK or 623 + PP/KK // {{dp}} or {{rdp}} + {{lp}} + {{hp}} or {{lk}} + {{hk}} | ||
|data= | |data= | ||
{{AttackData-MVSC2 | {{AttackData-MVSC2 | ||
| Line 957: | Line 971: | ||
|Adv. Guard= | |Adv. Guard= | ||
|Adv. Pushblock= | |Adv. Pushblock= | ||
|description= Full invincible during startup and movement | |description= Full invincible during startup and movement.<br> | ||
the stick input determines the direction- {{dp}} goes forward and {{rdp}} goes backward<br> | |||
PP goes behind your opponent, but KK goes a short distance in either direction | |||
}} | }} | ||
}}<br> | }}<br> | ||
Latest revision as of 02:26, 1 September 2024
Introduction
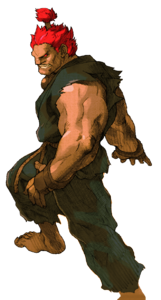
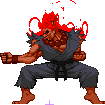
Mastering the Dark Hado wasn't enough for him- Akuma now seeks the mightiest opponent on the battlefield of Marvel vs Capcom 2! Generally, Akuma's considered a lower-middle tier character in this game, but don't write him off. Like many of his other appearances, Akuma is a character of extremes. On one hand, Akuma has a very capable offense. He's got a kit of good shoto normals, as well as useful special moves and supers, a number of which are air-enabled. To balance this offensive flexibility out, however, his defensive ability is pretty bad. He has close to the worst vitality in Marvel vs Capcom 2, so it is very important that you not get hit. He's not as easy to kill as, say, Phoenix is in Marvel vs. Capcom 3, but he's gonna die if you get caught in a combo. He still has special moves like a teleport and a divekick he can use to stay slippery, but he really needs to get into the opponent's face and stay there to be effective. Thankfully, you can bring in assists to help with covering his weak points, so if he sounds appealing, he may make a good addition to your team.
TODO: Add frame data, as well as missing sprites
Gameplay
Akuma is a brutal offensive presence who can use his variety of powerful specials to keep the opponent guessing. His main weaknesses are his dangerously low stamina and his lack of range outside fireballs and beams.
| Strengths | Weaknesses |
|---|---|
|
|
Character Summary
- Gohadoken (Fireball)
 +
+ 
- Zankuu Hadoken (Air fireball)
 +
+  /
/  (
( )
)
- Goshoryuken (Dragon Punch)
 +
+  /
/  (
( )
)
- Tatsumaki Zankuu Kyaku (Hurricane Kick)
 +
+  /
/  (
( )
)
- Tenma Kyuujin Kyaku (Divekick)
 +
+  /
/  (
( )
)
- Jigoku Guruma (Command Throw)
 +
+  (close)
- Ashura Senkuu (Teleport)
 or
or  +
+  +
+  or
or  +
+
- Messatsu Gou Shouryuu (Shoryuken super)
 +
+  +
+ 
- Messatsu Gou Rasen (Hurricane kick super)
 +
+  +
+ 
- Tenma Gou Zankuu (Air fireballs)
 +
+  +
+  (Mashable)
- Messatsu Gou Hadou (Beam super)
 +
+  +
+ 
- Shun Goku Satsu (Raging Demon)
 ,
,  ,
, 
 ,
, 
- Type α - Projectile Type
- Assist:
 Gohadoken
 - Counter:
 Gohadoken
 - Combination: Messatsu Gou Hadou
- Type β - Anti-air Type
- Assist:
 Goshoryuken
 - Counter:
 Goshoryuken
 - Combination: Messatsu Gou Shouryuu
- Type γ - Expansion Type
- Assist:
 Tatsumaki Zankuu Kyaku
 - Counter:
 Tatsumaki Zankuu Kyaku
 - Combination: Messatsu Gou Rasen
Moves List
Normal Moves
Ground Normals
| Damage | Startup | Active | Recovery | Guard | |
|---|---|---|---|---|---|
| 4 | 5 | 4 | 4 | HL | |
| Special Property | Cancel | Adv. Hit | Adv. Guard | Adv. Pushblock | |
| - | Chain, Special, Super | - | - | - | |
|
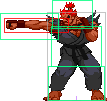
Quick punch, low range and damage with good speed | |||||
| Damage | Startup | Active | Recovery | Guard |
|---|---|---|---|---|
| 7 | 4 | 8 | 15 | HL |
| Special Property | Cancel | Adv. Hit | Adv. Guard | Adv. Pushblock |
| None | Chain, Special, Super | - | - | - |
| Damage | Startup | Active | Recovery | Guard |
|---|---|---|---|---|
| 13 | 6 | 9 | 17 | HL |
| Special Property | Cancel | Adv. Hit | Adv. Guard | Adv. Pushblock |
| None | Special, Super | - | - | - |
| Damage | Startup | Active | Recovery | Guard |
|---|---|---|---|---|
| 13 | 7 | 11 | 7 | HL |
| Special Property | Cancel | Adv. Hit | Adv. Guard | Adv. Pushblock |
| HL | Chain, Special, Super | - | - | - |
| Damage | Startup | Active | Recovery | Guard |
|---|---|---|---|---|
| 13 | 10 | 9 | 8 | HL |
| Special Property | Cancel | Adv. Hit | Adv. Guard | Adv. Pushblock |
| - | Chain, Special, Super | - | - | - |
| Damage | Startup | Active | Recovery | Guard |
|---|---|---|---|---|
| 13 | 10 | 9 | 8 | HL |
| Special Property | Cancel | Adv. Hit | Adv. Guard | Adv. Pushblock |
| - | Special, Super | - | - | - |
| Damage | Startup | Active | Recovery | Guard | |
|---|---|---|---|---|---|
| 4 | 4 | 5 | 5 | HL | |
| Special Property | Cancel | Adv. Hit | Adv. Guard | Adv. Pushblock | |
| - | Chain, Special, Super | - | - | - | |
|
Quick low move, good up close | |||||
| Damage | Startup | Active | Recovery | Guard |
|---|---|---|---|---|
| 7 | 5 | 5 | 9 | HL |
| Special Property | Cancel | Adv. Hit | Adv. Guard | Adv. Pushblock |
| - | Chain, Special, Super | - | - | - |
| Damage | Startup | Active | Recovery | Guard |
|---|---|---|---|---|
| 7 | 5 | 13 | 12 | HL |
| Special Property | Cancel | Adv. Hit | Adv. Guard | Adv. Pushblock |
| - | Chain, Special, Super | - | - | - |
| Damage | Startup | Active | Recovery | Guard |
|---|---|---|---|---|
| 13 | 5 | 7 | 5 | L |
| Special Property | Cancel | Adv. Hit | Adv. Guard | Adv. Pushblock |
| - | Chain, Special, Super | - | - | - |
| Damage | Startup | Active | Recovery | Guard |
|---|---|---|---|---|
| 13 | 6 | 7 | 9 | L |
| Special Property | Cancel | Adv. Hit | Adv. Guard | Adv. Pushblock |
| - | Chain, Special, Super | - | - | - |
| Damage | Startup | Active | Recovery | Guard |
|---|---|---|---|---|
| 13 | 6 | 7 | 9 | L |
| Special Property | Cancel | Adv. Hit | Adv. Guard | Adv. Pushblock |
| - | Special, Super | - | - | - |
Air Normals
| Damage | Startup | Active | Recovery | Guard | |
|---|---|---|---|---|---|
| 4 | 8 | 11 | 1 | High | |
| Special Property | Cancel | Adv. Hit | Adv. Guard | Adv. Pushblock | |
| - | Chain, Special, Super | - | - | - | |
|
Quick air normal | |||||
| Damage | Startup | Active | Recovery | Guard | |
|---|---|---|---|---|---|
| 7 | 6 | 10 | 1 | H | |
| Special Property | Cancel | Adv. Hit | Adv. Guard | Adv. Pushblock | |
| Chain, Special, Super | - | - | - | ||
|
text | |||||
| Damage | Startup | Active | Recovery | Guard | |
|---|---|---|---|---|---|
| 13 | 9 | 7 | 5 | H | |
| Special Property | Cancel | Adv. Hit | Adv. Guard | Adv. Pushblock | |
| - | Special, Super | - | - | - | |
|
Helpful for building meter- usable several times in a super jump | |||||
| Damage | Startup | Active | Recovery | Guard |
|---|---|---|---|---|
| 4 | 8 | 11 | 1 | - |
| Special Property | Cancel | Adv. Hit | Adv. Guard | Adv. Pushblock |
| - | Chain, Special, Super | - | - | - |
| Damage | Startup | Active | Recovery | Guard |
|---|---|---|---|---|
| 7 | 10 | 8 | 10 | High |
| Special Property | Cancel | Adv. Hit | Adv. Guard | Adv. Pushblock |
| - | Chain, Special, Super | - | - | - |
| Damage | Startup | Active | Recovery | Guard |
|---|---|---|---|---|
| 13 | 8 | 7 | 9 | H |
| Special Property | Cancel | Adv. Hit | Adv. Guard | Adv. Pushblock |
| - | Special, Super | - | - | - |
Command Normals
| Damage | Startup | Active | Recovery | Guard | |
|---|---|---|---|---|---|
| 4+6 | 27 | 17 | 9 | H | |
| Special Property | Cancel | Adv. Hit | Adv. Guard | Adv. Pushblock | |
| Template:Overhead | None | - | - | - | |
|
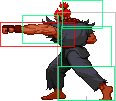
A slow karate chop that works as an overhead. Blockable on reaction and unable to cancel into anything else afterward, so be sure you'll hit before you throw this one. | |||||
| Damage | Startup | Active | Recovery | Guard | |
|---|---|---|---|---|---|
| 7 | 19 | 17 | 5 | H | |
| Special Property | Cancel | Adv. Hit | Adv. Guard | Adv. Pushblock | |
| - | Special, Super | - | - | - | |
|
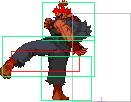
Useful for putting your opponent in position for his air fireball super during an air combo. | |||||
| Damage | Startup | Active | Recovery | Guard | |
|---|---|---|---|---|---|
| 7 | 5 | 17 | 5 | H | |
| Special Property | Cancel | Adv. Hit | Adv. Guard | Adv. Pushblock | |
| - | Chain, Special, Super | - | - | - | |
|
Useful for putting your opponent in position for his air fireball super during an air combo. | |||||
| Damage | Startup | Active | Recovery | Guard | |
|---|---|---|---|---|---|
| 12 | 13 | 7 | 10 | H | |
| Special Property | Cancel | Adv. Hit | Adv. Guard | Adv. Pushblock | |
| - | Special, Super | - | - | - | |
|
Flows from j.8MK pretty well. | |||||
Universal Mechanics
| Damage | Startup | Active | Recovery | Guard | |
|---|---|---|---|---|---|
| 13 | 5 | 13 | 12 | HL | |
| Special Property | Cancel | Adv. Hit | Adv. Guard | Adv. Pushblock | |
| Template:Launcher | Super Jump, Chain, Special, Super | - | - | - | |
|
A slightly higher damaging version of Akuma's 2HP. Seems like the same hitbox as well, not much point in using this as it's harder to hit confirm. | |||||
Special Moves
| Damage | Startup | Active | Recovery | Guard | |
|---|---|---|---|---|---|
| 14 (both versions) | - | - | - | HL | |
| Special Property | Cancel | Adv. Hit | Adv. Guard | Adv. Pushblock | |
| - | Super | - | - | - | |
|
A standard shoto fireball. HP version travels faster than LP version, but the damage between the two is the same. As a very basic projectile, it doesn't have much use against any character/assist with a beam or highly durable projectile. | |||||
| Damage | Startup | Active | Recovery | Guard | |
|---|---|---|---|---|---|
| 13 (both versions) | - | - | - | H | |
| Special Property | Cancel | Adv. Hit | Adv. Guard | Adv. Pushblock | |
| Super | - | - | - | ||
|
An Akuma staple. Not as oppressing in this game as in others, but still good at covering some space in the air or for stalling/covering Akuma's descent. Can only be used once when normal jumping but can be used as many times as can be input during a super jump, so TKing the input (2369P) is useful. | |||||
| Damage | Startup | Active | Recovery | Guard | |
|---|---|---|---|---|---|
| 19 (light) / 16 + 4 + 4 (heavy, 3 hits) | - | - | - | H | |
| Special Property | Cancel | Adv. Hit | Adv. Guard | Adv. Pushblock | |
| Super | - | - | - | ||
|
A pretty good DP. Multiple hits, goes slightly farther than Ryu's DP but not as far as Ken's (and definitely not Sakura's). Mainly useful as a reversal as it has invincibility on startup (roughly 3 frames). Extremely unsafe on block but does good damage, so it can be useful as a combo ender where j.HP/j.HK won't kill. | |||||
| Damage | Startup | Active | Recovery | Guard | |
|---|---|---|---|---|---|
| 6 x 3 (light) / 5 + 5 + 5 + 4 + 4 (heavy) | - | - | - | HL | |
| Special Property | Cancel | Adv. Hit | Adv. Guard | Adv. Pushblock | |
| Super | - | - | - | ||
|
Like most of his other appearances, this move pops the opponent up for some minor juggles. The best use of this move is using it in the air either after a magic series, and followed by an air fireball super (j.236PP), or immediately following a launcher (and maybe a j.lp to position the opponent correctly) to abuse the air tatsu glitch, allowing this move to do an extremely high amount of damage with little to no effort and no meter. However, if the air fireball super is used after an air tatsu, characters may fall out of the super, leading to very little damage and possibly a punish on Akuma if rolled and performed low to the ground. This can be generally avoided by ensuring that Akuma is very close to the opponent and at a perfect diagonal so that nearly every fireball hits. | |||||
| Damage | Startup | Active | Recovery | Guard | |
|---|---|---|---|---|---|
| 12 (light) / 18 (heavy, all hits) | - | - | - | H | |
| Special Property | Cancel | Adv. Hit | Adv. Guard | Adv. Pushblock | |
| None | - | - | - | ||
|
Akuma drops like a brick when you use this, so it can be useful for dodging stuff. | |||||
| Damage | Startup | Active | Recovery | Guard | |
|---|---|---|---|---|---|
| 16 | - | - | - | N/A | |
| Special Property | Cancel | Adv. Hit | Adv. Guard | Adv. Pushblock | |
| - | None | - | - | - | |
|
Command throw. Doesn't have a whiff animation. Because it shares part of the motion with your Tatsumaki Zankuu Kyaku, it can be used as an option select up close. | |||||
Hyper Combos
| Damage | Startup | Active | Recovery | Guard | |
|---|---|---|---|---|---|
| 41 max | - | - | - | HL | |
| Special Property | Cancel | Adv. Hit | Adv. Guard | Adv. Pushblock | |
| - | No | - | - | - | |
|
A good reversal super, as it comes out relatively quickly and has a few frames of invincibility on startup. Akuma also moves forward quite far and fast before rising into the air, so it can be used to punish even longer ranged moves or closely thrown fireballs. | |||||
| Damage | Startup | Active | Recovery | Guard | |
|---|---|---|---|---|---|
| 45-51 if all hits connect | - | - | - | HL | |
| Special Property | Cancel | Adv. Hit | Adv. Guard | Adv. Pushblock | |
| - | - | - | - | - | |
|
Slow startup, but great range. | |||||
| Damage | Startup | Active | Recovery | Guard | |
|---|---|---|---|---|---|
| 45 | - | - | - | - | |
| Special Property | Cancel | Adv. Hit | Adv. Guard | Adv. Pushblock | |
| - | - | - | - | - | |
|
Really good corner carry on the last hit- sends them flying | |||||
| Damage | Startup | Active | Recovery | Guard | |
|---|---|---|---|---|---|
| 45-46 (varies) | - | - | - | - | |
| Special Property | Cancel | Adv. Hit | Adv. Guard | Adv. Pushblock | |
| - | - | - | - | ||
|
Useful as a combo ender- you can land it after a Tatsu or after an air combo, for example. As previously mentioned, be careful using this super after an air tatsu; if Akuma is not positioned correctly, the opponent can fall out, leading to significantly reduced damage at best, and a punish at worst (thanks Cable). | |||||
| Damage | Startup | Active | Recovery | Guard | |
|---|---|---|---|---|---|
| 70 | - | - | - | - | |
| Special Property | Cancel | Adv. Hit | Adv. Guard | Adv. Pushblock | |
| Grab, Level 3 | - | - | - | - | |
|
Slow to come out, but does very nice damage if you hit. | |||||
Variable Assists
| Damage | Startup | Active | Recovery | Guard | |
|---|---|---|---|---|---|
| 13 | - | - | - | - | |
| Special Property | Cancel | Adv. Hit | Adv. Guard | Adv. Pushblock | |
| - | - | - | - | - | |
|
HP Gohadoken. Variable counter is also HP Gohadoken. Variable Combination super is Messatsu Gou Hadou. An okay projectile assist, but generally not used as both of his other assists are much better (especially tatsu assist). Also not terribly useful due to his fireball having no durability, in a game where the best projectile assists are literal beams. His alpha counter being a fireball makes this assist even less worthwhile. | |||||
| Damage | Startup | Active | Recovery | Guard | |
|---|---|---|---|---|---|
| 24 (total) | - | - | - | - | |
| Special Property | Cancel | Adv. Hit | Adv. Guard | Adv. Pushblock | |
| - | - | - | - | - | |
|
HP Goshoryuken. Variable counter is also HP Goshoryuken. Variable Combination super is Messatsu Gou Shouryuu. A good anti-air assist, as Akuma covers a good portion of the screen in front of the point character, and he has invincibility on startup of the move. Also features a great alpha counter in his DP. Despite its practicality, this assist is generally not picked over tatsu assist, especially considering how competitive the anti-air assist niche is in this game. | |||||
| Damage | Startup | Active | Recovery | Guard | |
|---|---|---|---|---|---|
| 23 (total) | - | - | - | - | |
| Special Property | Cancel | Adv. Hit | Adv. Guard | Adv. Pushblock | |
| - | - | - | - | - | |
|
HK Tatsumaki Zankuu Kyaku. Variable Counter is also HK Tatsumaki Zankuu Kyaku. Variable Combination super is Messatsu Gou Rasen. Despite this assist's alpha counter being mediocre, and the THC being useless, this is Akuma's preferred assist choice. Travels quite far past the point character, and puts opponent in a lot of hitstun if it connects which makes picking up combos off of this assist very easy. This assist is also great for trapping your opponent and forcing them to eat a mixup if they do block the assist. It does leave Akuma somewhat unsafe after the tatsu, so don't be predictable or carefree when calling this assist unless you want him to get blown up. Overall, a very powerful assist that can quickly catch opponents not paying attention, leading to a high damage conversion, and run the ground-game against opponents who don't counter-call it. | |||||
Taunt
Other
| Damage | Startup | Active | Recovery | Guard | |
|---|---|---|---|---|---|
| 0 (no hitbox) | - | - | - | - | |
| Special Property | Cancel | Adv. Hit | Adv. Guard | Adv. Pushblock | |
| - | - | - | - | - | |
|
Full invincible during startup and movement. | |||||
