No edit summary |
PuellaSins (talk | contribs) |
||
| (17 intermediate revisions by 2 users not shown) | |||
| Line 1: | Line 1: | ||
= | {{Infobox Character SFEX2 | ||
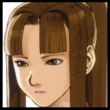
|name= Area (エリア) | |||
|image= SFEX2_Area_Artwork.png | |||
|movef= | |||
|moveb= | |||
|jumpf= | |||
|jumpn= | |||
|jumpb= | |||
|type= | |||
}} | |||
=Movelist= | =Movelist= | ||
==Standing Normals== | ==Standing Normals== | ||
{{MoveData | {{MoveData | ||
|image= | |image= SFEX2_Area_5LP.png | ||
|caption= | |caption= | ||
|name= | |name= s.LP | ||
|input= | |input= {{icon-Capcom|lp}} | ||
|data= | |data= | ||
{{AttackData-EX2PLUS | {{AttackData-EX2PLUS | ||
| Line 27: | Line 35: | ||
{{MoveData | {{MoveData | ||
|image= | |image= SFEX2_Area_5MP.png | ||
|caption= | |caption= | ||
|name= | |name= s.MP | ||
|input= | |input= {{icon-Capcom|mp}} | ||
|data= | |data= | ||
{{AttackData-EX2PLUS | {{AttackData-EX2PLUS | ||
| Line 49: | Line 57: | ||
{{MoveData | {{MoveData | ||
|image= | |image= SFEX2_Area_5HP.png | ||
|caption= | |caption= | ||
|name= | |name= s.HP | ||
|input= | |input= {{icon-Capcom|hp}} | ||
|data= | |data= | ||
{{AttackData-EX2PLUS | {{AttackData-EX2PLUS | ||
| Line 71: | Line 79: | ||
<br> | <br> | ||
{{MoveData | {{MoveData | ||
|image= | |image= SFEX2_Area_5LK.png | ||
|caption= | |caption= | ||
|name= | |name= s.LK | ||
|input= | |input= {{icon-Capcom|lk}} | ||
|data= | |data= | ||
{{AttackData-EX2PLUS | {{AttackData-EX2PLUS | ||
| Line 93: | Line 101: | ||
{{MoveData | {{MoveData | ||
|image= | |image= SFEX2_Area_5MK.png | ||
|caption= | |caption= | ||
|name= | |name= s.MK | ||
|input= | |input= {{icon-Capcom|mk}} | ||
|data= | |data= | ||
{{AttackData-EX2PLUS | {{AttackData-EX2PLUS | ||
| Line 115: | Line 123: | ||
{{MoveData | {{MoveData | ||
|image= | |image= SFEX2_Area_5HK.png | ||
|caption= | |caption= | ||
|name= | |name= s.HK | ||
|input= | |input= {{icon-Capcom|hk}} | ||
|data= | |data= | ||
{{AttackData-EX2PLUS | {{AttackData-EX2PLUS | ||
| Line 138: | Line 146: | ||
==Crouching Normals== | ==Crouching Normals== | ||
{{MoveData | {{MoveData | ||
|image= | |image= SFEX2_Area_2LP.png | ||
|caption= | |caption= | ||
|name=cr.LP | |name=cr.LP | ||
|input= | |input= 2{{icon-Capcom|lp}} | ||
|data= | |data= | ||
{{AttackData-EX2PLUS | {{AttackData-EX2PLUS | ||
| Line 160: | Line 168: | ||
{{MoveData | {{MoveData | ||
|image= | |image= SFEX2_Area_2MP.png | ||
|caption= | |caption= | ||
|name=cr.MP | |name=cr.MP | ||
|input= | |input= 2{{icon-Capcom|mp}} | ||
|data= | |data= | ||
{{AttackData-EX2PLUS | {{AttackData-EX2PLUS | ||
| Line 182: | Line 190: | ||
{{MoveData | {{MoveData | ||
|image= | |image= SFEX2_Area_2HP.png | ||
|caption= | |caption= | ||
|name=cr.HP | |name=cr.HP | ||
|input= | |input= 2{{icon-Capcom|hp}} | ||
|data= | |data= | ||
{{AttackData-EX2PLUS | {{AttackData-EX2PLUS | ||
| Line 204: | Line 212: | ||
<br> | <br> | ||
{{MoveData | {{MoveData | ||
|image= | |image= SFEX2_Area_2LK.png | ||
|caption= | |caption= | ||
|name=cr.LK | |name=cr.LK | ||
|input= | |input= 2{{icon-Capcom|lk}} | ||
|data= | |data= | ||
{{AttackData-EX2PLUS | {{AttackData-EX2PLUS | ||
| Line 226: | Line 234: | ||
{{MoveData | {{MoveData | ||
|image= | |image= SFEX2_Area_2MK.png | ||
|caption= | |caption= | ||
|name=cr.MK | |name=cr.MK | ||
|input= | |input= 2{{icon-Capcom|mp}} | ||
|data= | |data= | ||
{{AttackData-EX2PLUS | {{AttackData-EX2PLUS | ||
| Line 248: | Line 256: | ||
{{MoveData | {{MoveData | ||
|image= | |image= SFEX2_Area_2HK.png | ||
|caption= | |caption= | ||
|name=cr.HK | |name= cr.HK | ||
|input= | |input= 2{{icon-Capcom|hk}} | ||
|data= | |data= | ||
{{AttackData-EX2PLUS | {{AttackData-EX2PLUS | ||
| Line 271: | Line 279: | ||
==Jumping Normals== | ==Jumping Normals== | ||
{{MoveData | {{MoveData | ||
|image= | |image= SFEX2_Area_j.LP.png | ||
|caption= | |caption= | ||
|name=j.LP | |name=j.LP | ||
|input= | |input= j.{{icon-Capcom|lp}} | ||
|data= | |data= | ||
{{AttackData-EX2PLUS | {{AttackData-EX2PLUS | ||
| Line 293: | Line 301: | ||
{{MoveData | {{MoveData | ||
|image= | |image=SFEX2_Area_j.MP.png | ||
|caption= | |caption= | ||
|name=j.MP | |name=j.MP | ||
|input= | |input= j.{{icon-Capcom|mp}} | ||
|data= | |data= | ||
{{AttackData-EX2PLUS | {{AttackData-EX2PLUS | ||
| Line 315: | Line 323: | ||
{{MoveData | {{MoveData | ||
|image= | |image=SFEX2_Area_j.MP.png | ||
|caption= | |caption= | ||
|name=j.HP | |name=j.HP | ||
|input= | |input= j.{{icon-Capcom|hp}} | ||
|data= | |data= | ||
{{AttackData-EX2PLUS | {{AttackData-EX2PLUS | ||
| Line 337: | Line 345: | ||
<br> | <br> | ||
{{MoveData | {{MoveData | ||
|image= | |image=SFEX2_Area_j.LK.png | ||
|caption= | |caption= | ||
|name=j.LK | |name=j.LK | ||
|input= | |input= j.{{icon-Capcom|lk}} | ||
|data= | |data= | ||
{{AttackData-EX2PLUS | {{AttackData-EX2PLUS | ||
| Line 359: | Line 367: | ||
{{MoveData | {{MoveData | ||
|image= | |image=SFEX2 Area j.MK.png | ||
|caption= | |caption= | ||
|name=j.MK | |name=j.MK | ||
|input= | |input= j.{{icon-Capcom|mk}} | ||
|data= | |data= | ||
{{AttackData-EX2PLUS | {{AttackData-EX2PLUS | ||
| Line 381: | Line 389: | ||
{{MoveData | {{MoveData | ||
|image= | |image=SFEX2_Area_j.HK.png | ||
|caption= | |caption= | ||
|name=j.HK | |name=j.HK | ||
|input= | |input= j.{{icon-Capcom|HK}} | ||
|data= | |data= | ||
{{AttackData-EX2PLUS | {{AttackData-EX2PLUS | ||
| Line 401: | Line 409: | ||
}} | }} | ||
}} | }} | ||
==Command Moves== | ==Command Moves== | ||
{{MoveData | {{MoveData | ||
|image= | |image= SFEX2_Area_j2HP.png | ||
|caption= | |caption= | ||
|name=Head Crush | |name=Head Crush | ||
|input=in air, | |input=in air, 2{{icon-Capcom|hp}} | ||
|data= | |data= | ||
{{AttackData-EX2PLUS | {{AttackData-EX2PLUS | ||
| Line 425: | Line 434: | ||
{{MoveData | {{MoveData | ||
|image= | |image=SFEX2_Area_3MP.png | ||
|caption= | |caption= | ||
|name=Shift Stamp Punch | |name=Shift Stamp Punch | ||
|input= | |input= 3{{icon-Capcom|mp}} | ||
|data= | |data= | ||
{{AttackData-EX2PLUS | {{AttackData-EX2PLUS | ||
| Line 447: | Line 456: | ||
{{MoveData | {{MoveData | ||
|image= | |image=SFEX2_Area_3HP.png | ||
|caption= | |caption= | ||
|name=Shift Club Upper | |name=Shift Club Upper | ||
|input= | |input=3{{icon-Capcom|hp}} | ||
|data= | |data= | ||
{{AttackData-EX2PLUS | {{AttackData-EX2PLUS | ||
| Line 469: | Line 478: | ||
{{MoveData | {{MoveData | ||
|image= | |image=SFEX2_Area_6HP.png | ||
|caption= | |caption= | ||
|name=Shift Club Straight | |name=Shift Club Straight | ||
|input= | |input=6{{icon-Capcom|hp}} | ||
|data= | |data= | ||
{{AttackData-EX2PLUS | {{AttackData-EX2PLUS | ||
| Line 491: | Line 500: | ||
{{MoveData | {{MoveData | ||
|image= | |image=SFEX2_Area_6MK.png | ||
|caption= | |caption= | ||
|name=Job Step | |name=Job Step | ||
|input= | |input= 6{{icon-Capcom|mk}} | ||
|data= | |data= | ||
{{AttackData-EX2PLUS | {{AttackData-EX2PLUS | ||
| Line 513: | Line 522: | ||
{{MoveData | {{MoveData | ||
|image= | |image=SFEX2_Area_6HK.png | ||
|caption= | |caption= | ||
|name=Pulldown Leg | |name=Pulldown Leg | ||
|input= | |input= 6{{icon-Capcom|hk}} | ||
|data= | |data= | ||
{{AttackData-EX2PLUS | {{AttackData-EX2PLUS | ||
| Line 533: | Line 542: | ||
}} | }} | ||
}} | }} | ||
==Universal Attacks== | ==Universal Attacks== | ||
{{MoveData | {{MoveData | ||
| Line 579: | Line 589: | ||
{{MoveData | {{MoveData | ||
|image= | |image=SFEX2_Area_Guard_Crush.png | ||
|caption= | |caption= | ||
|name=Guard Crush | |name=Guard Crush | ||
|input=Same strength | |input=Same strength {{icon-Capcom|p}}+{{icon-Capcom|k}} | ||
|data= | |data= | ||
{{AttackData-EX2PLUS | {{AttackData-EX2PLUS | ||
| Line 673: | Line 683: | ||
-Jump HK \/ s.HP XX qcf,qcf + P SC qcf,qcf + K SC qcf,qcf + P | -Jump HK \/ s.HP XX qcf,qcf + P SC qcf,qcf + K SC qcf,qcf + P | ||
=== Palette options === | |||
== | {{ColorGallery | filePrefix=SFEX2_Area_Color_| colors= | ||
{{ColorGallery/Color|1| text= [[file:LP.png]] + [[file:LK.png]]}} | |||
{{ColorGallery/Color|2| text= [[file:MP.png]] + [[file:MK.png]]}} | |||
{{ColorGallery/Color|3| text= [[file:HP.png]] + [[file:HK.png]]}} | |||
}} | |||
{{Navbox-SFEX2P}} | |||
[[Category:Street Fighter EX2 Plus]] | [[Category:Street Fighter EX2 Plus]] | ||
[[Category: Area]] | |||
Latest revision as of 01:49, 6 May 2023
Story
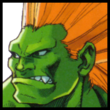
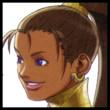
Area is the daughter of a very wealthy and creative inventor, and is in fact testing two of his latest inventions: rocket skates and a giant mechanical arm, codenamed Cancer (キャンサー Kyansā?). She enters fighting tournaments in order to obtain data on various different martial artist's fighting styles, as well as to attract attention to her father's inventions. Dismayed by his daughter's penchant for martial arts combat, her father figures if he cannot dissuade her from entering tournaments, the least he can do is equip her with the latest in technological design to give her an edge.
Overview
| Strengths | Weaknesses |
|---|---|
|
|
| Area (エリア) | |
|---|---|
 | |
| Stats | |
| Forward Walk Speed | |
| Backward Walk Speed | |
| Jumping | |
| Forward Jump Speed | |
| Back Jump Speed | |
Movelist
Standing Normals

| Damage | Startup | Active | Recovery | Total | On Hit | On Block | Guard | Cancel |
|---|---|---|---|---|---|---|---|---|
| 2 | 3 | 6 | 5 | 14 | +2 | 0 | H/L | Ch/Sp/Su |

| Damage | Startup | Active | Recovery | Total | On Hit | On Block | Guard | Cancel |
|---|---|---|---|---|---|---|---|---|
| 15 | 6 | 5 | 14 | 25 | -2 | -3 | H/L | Sp/Su |

| Damage | Startup | Active | Recovery | Total | On Hit | On Block | Guard | Cancel |
|---|---|---|---|---|---|---|---|---|
| 23 | 11 | 6 | 17 | 34 | +6 | +4 | H/L | Su |

| Damage | Startup | Active | Recovery | Total | On Hit | On Block | Guard | Cancel |
|---|---|---|---|---|---|---|---|---|
| 4 | 6 | 8 | 3 | 17 | +2 | 0 | H/L | Ch/Sp/Su |

| Damage | Startup | Active | Recovery | Total | On Hit | On Block | Guard | Cancel |
|---|---|---|---|---|---|---|---|---|
| 15 | 7 | 6 | 11 | 24 | +1 | -1 | H/L | Sp/Su |

| Damage | Startup | Active | Recovery | Total | On Hit | On Block | Guard | Cancel |
|---|---|---|---|---|---|---|---|---|
| 23 | 9 | 7 | 23 | 39 | -1 | -3 | H/L | Su |
Crouching Normals
2

| Damage | Startup | Active | Recovery | Total | On Hit | On Block | Guard | Cancel |
|---|---|---|---|---|---|---|---|---|
| 2 | 4 | 8 | 1 | 13 | +4 | +2 | H/L | Ch/Sp/Su |
2

| Damage | Startup | Active | Recovery | Total | On Hit | On Block | Guard | Cancel |
|---|---|---|---|---|---|---|---|---|
| 13 | 6 | 5 | 9 | 20 | +4 | +2 | L | Sp/Su |
2

| Damage | Startup | Active | Recovery | Total | On Hit | On Block | Guard | Cancel |
|---|---|---|---|---|---|---|---|---|
| 19 | 8 | 7 | 19 | 34 | +3 | +1 | H/L | Su |
2

| Damage | Startup | Active | Recovery | Total | On Hit | On Block | Guard | Cancel |
|---|---|---|---|---|---|---|---|---|
| 2 | 5 | 8 | 2 | 15 | +3 | +1 | L | Ch/Sp/Su |
2

| Damage | Startup | Active | Recovery | Total | On Hit | On Block | Guard | Cancel |
|---|---|---|---|---|---|---|---|---|
| 13 | 6 | 5 | 9 | 20 | +4 | +2 | L | Sp/Su |
2

| Damage | Startup | Active | Recovery | Total | On Hit | On Block | Guard | Cancel |
|---|---|---|---|---|---|---|---|---|
| 18 | 10 | 14 | 22 | 46 | KD | -9 | L | Su |
Jumping Normals
j.

| Damage | Startup | Active | Recovery | Total | On Hit | On Block | Guard | Cancel |
|---|---|---|---|---|---|---|---|---|
| 5 | 3 | 21 | ~ | ~ | ~ | ~ | H | Su |
j.

| Damage | Startup | Active | Recovery | Total | On Hit | On Block | Guard | Cancel |
|---|---|---|---|---|---|---|---|---|
| 14 | 6 | 10 | ~ | ~ | ~ | ~ | H | Su |
j.
| Damage | Startup | Active | Recovery | Total | On Hit | On Block | Guard | Cancel |
|---|---|---|---|---|---|---|---|---|
| 20 | 6 | 10 | ~ | ~ | ~ | ~ | H | Su |
j.

| Damage | Startup | Active | Recovery | Total | On Hit | On Block | Guard | Cancel |
|---|---|---|---|---|---|---|---|---|
| 5 | 4 | 16 | ~ | ~ | ~ | ~ | H | Su |
j.

| Damage | Startup | Active | Recovery | Total | On Hit | On Block | Guard | Cancel |
|---|---|---|---|---|---|---|---|---|
| 14 | 5 | 13 | ~ | ~ | ~ | ~ | H | Su |
j.

| Damage | Startup | Active | Recovery | Total | On Hit | On Block | Guard | Cancel |
|---|---|---|---|---|---|---|---|---|
| 23 | 8 | 5 | ~ | ~ | ~ | ~ | H | Su |
Command Moves
in air, 2

| Damage | Startup | Active | Recovery | Total | On Hit | On Block | Guard | Cancel |
|---|---|---|---|---|---|---|---|---|
| 20 | 18 | 8 | ~ | ~ | ~ | ~ | H | Su |
|
Fast overhead, crushes lows | ||||||||
3

| Damage | Startup | Active | Recovery | Total | On Hit | On Block | Guard | Cancel |
|---|---|---|---|---|---|---|---|---|
| 13 | 6 | 5 | 16 | 27 | -3 | -5 | L | Sp/Su |
3

| Damage | Startup | Active | Recovery | Total | On Hit | On Block | Guard | Cancel |
|---|---|---|---|---|---|---|---|---|
| 19 | 8 | 7 | 19 | 34 | +3 | +1 | H/L | Su |
6

| Damage | Startup | Active | Recovery | Total | On Hit | On Block | Guard | Cancel |
|---|---|---|---|---|---|---|---|---|
| 23 | 11 | 6 | 17 | 34 | +6 | +4 | H/L | Su |
6

| Damage | Startup | Active | Recovery | Total | On Hit | On Block | Guard | Cancel |
|---|---|---|---|---|---|---|---|---|
| 23 | 14 | 6 | 15 | 35 | -3 | -5 | H/L | Su |
6

| Damage | Startup | Active | Recovery | Total | On Hit | On Block | Guard | Cancel |
|---|---|---|---|---|---|---|---|---|
| 20 | 25 | 5 | 23 | 53 | +1 | -1 | H | / |
Universal Attacks
| Damage | Startup | Active | Recovery | Total | On Hit | On Block | Guard | Cancel |
|---|---|---|---|---|---|---|---|---|
| 35 | ~ | ~ | ~ | ~ | KD | ~ | ~ | / |
| Damage | Startup | Active | Recovery | Total | On Hit | On Block | Guard | Cancel |
|---|---|---|---|---|---|---|---|---|
| 30(13+9+8) | ~ | ~ | ~ | ~ | KD | ~ | ~ | / |
Same strength

| Damage | Startup | Active | Recovery | Total | On Hit | On Block | Guard | Cancel |
|---|---|---|---|---|---|---|---|---|
| 17 | ? | ? | ? | ? | ~ | ~ | ~ | / |
Special Moves
Humming Rush qcf + P
Cancer Shell Press PPP on final hit of Humming Rush
Upload Hold PPP to fire, then release
Download Hold d + PPP to fire, then release
Terminator b,d,db + P
Alternative Catch hcb + K
Front b + K during Alternative Catch
Rear f + K during Alternative Catch
Jackson Kick qcf + K
Pop-Up Knee f + LK from Jackson Kick
Partition Break f + MK from Jackson Kick
Pulldown Heel f + HK from Jackson Kick
Cancer Crash LP,LP,f,LK,HP
Super Combos
Great Cancer qcf,qcf + P (hold P to delay)
Great Cancer (Kuuchuu) In air, qcf,qcf + P
Five Star Raid qcf,qcf + K
Meteor Combo
Final Cancer qcb,qcb + PPP
Combos
-Jump D + HP \/ c.MK XX qcf + HP SC qcf,qcf + P
-Jump HK \/ s.MK XX qcf + MP SC qcf,qcf + P
-qcf + K XX f + LK, qcb,qcb + PPP
-d + PPP. (hold PPP) qcf + K XX f + LK (release PPP) /\ Jump HK
-d + PPP, hcb + K, f + K
-qcf + K XX f + LK, (hold f) s.HK
-Press PPP /\ Jump HK
-Jump HK \/ s.MP XX qcf + MP SC qcb,qcb + PPP
-Jump HK \/ s.HP XX qcf,qcf + P SC qcf,qcf + K SC qcf,qcf + P
Palette options