No edit summary |
|||
| (26 intermediate revisions by 7 users not shown) | |||
| Line 1: | Line 1: | ||
= Introduction = | {{TOClimit|3}} | ||
== Introduction == | |||
{{CvS2 Character Subnav|char=Nakoruru|short=Nakoruru}} | |||
<div> | |||
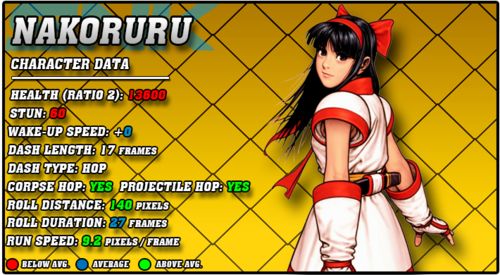
[[File:CVS2_Nakoruru_Data.png|right|500px]] | |||
== Story == | |||
'''Nakoruru''' is a young girl from ancient Japan. She had a connection with nature from a young age, befriending her bird Mamaha for life very early on. One day, as she was playing with her sister Rimururu, Mamaha flew down to her with her fathers sword in his claws. Fearing for the worst, Nakoruru leaves Rimururu at home, and begins a journey to find her father. At the end of her journey, she learns her father was killed by Gaoh, and also learns of Gaoh's war. Gaoh was waging a war against Japan, and had plans to create a new country from the ashes. He was brutalizing nature along the way however. Nakoruru, disgusted at how he treated nature and killed her father, helped to fight and defeat Gaoh. Once he falls, Kamui appears in front of Nakoruru, and asks if she wants to follow in her fathers footsteps. She asks what will happen if she declines, and Kamui simply says that another young maiden would be chosen. Afraid that the other young maiden would be her sister, Nakoruru accepts, and becomes a Kamui Warrior of Kamui Kotan. Nakoruru acts as a nature protecting warrior for the rest of the series, appearing when great evil threatens the planet. | |||
Nakoruru | == Gameplay == | ||
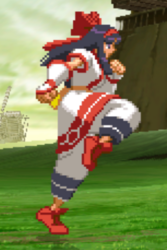
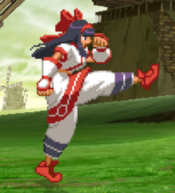
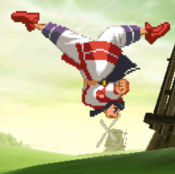
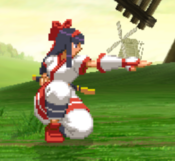
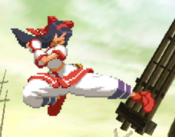
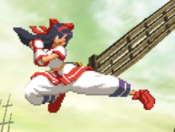
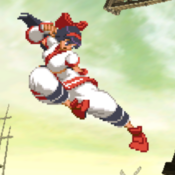
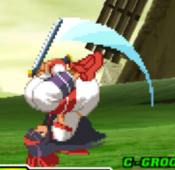
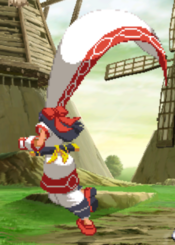
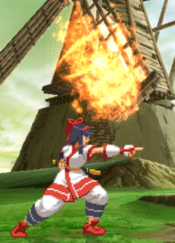
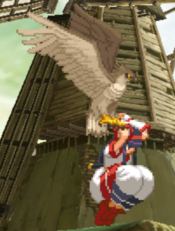
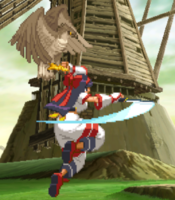
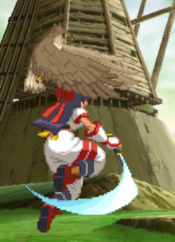
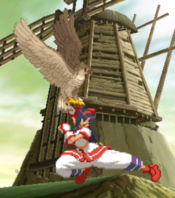
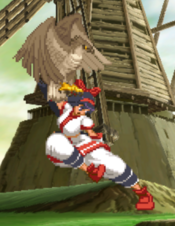
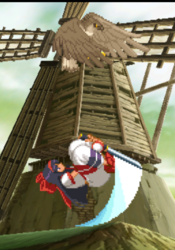
She's | Nakoruru would likely best be described as a pixie character. Her small size makes catching her hard, complimented with her amazing mobility. She's fast on all fronts: great walkspeed, one of the better dashes, one of the best runs, and a fast jump. She can even jump onto her bird, Mamaha, with a 214K input. This allows her to freely fly around the screen, threatening solid air-to-airs, falling slashes, a burning projectile Mamaha, and an extremely fast divekick. This allows her to control the air very safely, as the opponent has to actively chase her down, putting themselves at major risk to eat one of her various followups. Nakoruru also has great normals for pressure and mixup, with plenty of plus frames and a great crossup. | ||
She does have a few big weaknesses keeping her from being as strong as the top tiers. Namely two big ones: her health and her range. Nakoruru has very low health, and no meterless reversal. This means that smart use of her mobility and fast normals is important, as if you slip up, she can get hurt very badly. Her range is also very low, with no poke to make up for the massive range of top tier normals she has to fight. With these two put together, Nakoruru has to make smart use of her movement to evade the opponent until she can get in and run her pressure game. If she gets caught, she hurts hard, but she has every tool available to not get caught. | |||
== | === Groove Selection === | ||
'''Best - K:''' K-Nakoruru is her most popular Groove, which makes a lot of sense. K-Groove fits characters with good mobility and solid punishes, and Nakoruru excels in both of those. Just Defend is great for her, as it allows her to block without taking pushback that would send her out of her optimal range quickly. Shorthop makes her mixups even scarier, and she has one of the fastest runs in the game. Rage juices her damage and gives her the ability to threaten her level 3 supers, though she lacks the ability to easily combo into them. K-Nakoruru has everything she needs, and is comfortably her best Groove overall. | |||
''' | '''Useful - N/P/S:''' N-Nakoruru has a lot of what K-Nakoruru has, but also gets a roll now. This lets her RC some specials, which can be incredibly annoying, especially RC Mamaha. She gets more consistent access to level 1's, which isn't too useful but it lets her use her healing super often so it may be useful depending on the opponent. The sacrifice of Rage's damage potential and the very useful JD holds N-Nakoruru down a bit. P-Nakoruru is a surprisingly decent P-Groove character. Nakoruru doesn't really need meter to win with, so only having it occasionally isn't the worst deal, and she has solid parry punishes. The range you land a parry can heavily decide what your punish is however, and the damage won't be amazing. S-Nakoruru is a surprisingly fitting character. Nakoruru isn't reliant on her meter, and when she gets infinite level 1's she can use healing super in a very annoying way. Charging sucks but she really doesn't need to do it, and she gets run and hop for maximum mobility. However, you still have to grapple with S-Grooves weak mechanics, making it a questionable pick regardless of how she fits in. | ||
'' | |||
'' | |||
'''Worst - C/A:''' C-Nakoruru gets some useful tools, but C-Groove really works well with characters who can easily utilize their supers, and Nakoruru can't really do that. Airblock is useful for her escapes however, but it isn't worth the sacrifices like hop. C-Nakoruru gets to spend meter on Alpha Counters a lot however, which does help her defense a bit. A-Nakoruru is fairly similar. While Custom Combos can be fairly damaging, Nakoruru really doesn't utilize it well. Namely, she lacks any way to anti-air realistically with CC. | |||
{{StrengthsAndWeaknesses | |||
|intro= | |||
--------------------------- | |||
'''Nakoruru''' is a pixie character with great mobility and close-range normals. Her unique mobility using her bird Mamaha and her various evasive tools lets her dodge everything the opponent does until she can get into range to run her mixups. Her low health and low range makes this difficult however. Nakoruru is best in '''K-Groove'''. | |||
'''Difficulty''': Medium<br>'''Tier''': A- | |||
|pros= | |||
* '''Mobility:''' Nakoruru is one of the most mobile characters, being generally fast at everything, but also having Mamaha to fly around the screen freely with | |||
* '''Close Range:''' Her normals when used in close range are great, with plenty of plus frames to threaten a further mixup, made scarier with hop | |||
* '''Damage:''' Nakoruru's combos are both easy and damaging, and if she lands a 2HK she can use her Mamaha super for good damage | |||
* '''Small:''' She's a very small opponent, allowing her to crouch under tons of things, making the opponent play much differently vs her | |||
* '''Annoying:''' The opponent has to constantly commit to their own movement to catch her, and she has every punish option available, especially her Dive, making neutral vs Nakoruru very annoying | |||
|cons= | |||
* '''Health:''' Nakoruru has very low health, so if she gets caught one or two good times she might be dead | |||
* '''Defense:''' Without a reversal, and being popular in K-Groove mainly, Nakoruru tends to rely on system mechanics or her great movement to escape good pressure, which is harder and less rewarding | |||
* '''Poor Super Usage:''' Many of the top tiers have simple and useful supers that are combo friendly and damaging. Nakoruru simply doesn't have one of these, with her only realistic super combo being 2HK > 6321463214K | |||
}} | |||
=== Players to Watch === | |||
{| class="wikitable" | |||
|- | |||
! Name !! Country !! Groove !! Accounts !! Notes | |||
|- | |||
| GAO || Japan || K-Groove || N/A || Makes Nakoruru look scary, once he has an opponent locked down, there's no escaping. <br> [https://www.youtube.com/watch?v=LFxRIoo5AM0&ab_channel=Lionx Sample Match] | |||
|- | |||
| P-Rugal || Japan || P-Groove || Twitter: @oyasuminecalli || Though a pocket of his, P-Rugal makes great use of shorthops and parries to maximize P-Nakoruru's damage. <br> [https://youtu.be/Pmhy-p1aArw?t=1338 Sample Match] | |||
|- | |||
| Kitsune || Japan || K-Groove || Twitter: @cvs2fox <br> Youtube: fox cvs2 || Great K-Groover in general. Plays similarly to GAO. <br> [https://youtu.be/f8jIFdEusAE Sample Match] | |||
|- | |||
|} | |||
<br><br> | |||
'''!!!THIS PAGE IS STILL A WIP. IF YOU NEED FRAME DATA NOW, REFER TO THE CVS2 BIBLE OR LOOK THROUGH EDIT HISTORY TO FIND THE LAST EDIT WITH FRAME DATA IF THERE WAS ONE!!!''' | |||
== Normal Moves == | |||
=== Far Normals === | |||
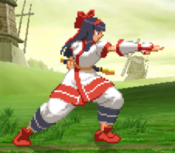
=== <span class="invisible-header">5LP</span> === | |||
{{MoveData | |||
| name = Far Jab | |||
| input = 5LP / Far LP | |||
| subtitle = Far Light Punch | |||
| image = CVS2 Nakoruru 5LP.png | |||
| caption = | |||
| linkname = 5LP | |||
| data = | |||
{{AttackData-CvS2 | |||
| version = Far {{Icon-Capcom|LP}} | |||
| subtitle = | |||
| damage = 200 | |||
| stun = 2 | |||
| cancel = RF/SP/SU | |||
| guard = Mid | |||
| parry = High | |||
| startup = 2 | |||
| active = 4 | |||
| recovery = 8 | |||
| total = 14 | |||
| advHit = +5 | |||
| advBlock = +5 | |||
| invul = None | |||
| description = Placeholder | |||
}} | |||
}} | |||
=== <span class="invisible-header">5MP</span> === | |||
{{MoveData | |||
| name = Far Strong | |||
| input = 5MP / Far MP | |||
| subtitle = Far Medium Punch | |||
| image = CVS2 Nakoruru 5MP.png | |||
| caption = | |||
| linkname = 5MP | |||
| data = | |||
{{AttackData-CvS2 | |||
| version = Far {{Icon-Capcom|MP}} | |||
| subtitle = | |||
| damage = 800 | |||
| stun = 8 | |||
| cancel = SP/SU | |||
| guard = Mid | |||
| parry = High | |||
| startup = 6 | |||
| active = 6 | |||
| recovery = 21 | |||
| total = 33 | |||
| advHit = -1 | |||
| advBlock = -1 | |||
| invul = None | |||
| description = Placeholder | |||
}} | |||
}} | |||
=== <span class="invisible-header">5HP</span> === | |||
{{MoveData | |||
| name = Far Fierce | |||
| input = 5HP / Far HP | |||
| subtitle = Far Heavy Punch | |||
| image = CVS2 Nakoruru 5HP.png | |||
| caption = | |||
| linkname = 5HP | |||
| data = | |||
{{AttackData-CvS2 | |||
| version = Far {{Icon-Capcom|HP}} | |||
| subtitle = | |||
| damage = 1200 | |||
| stun = 12 | |||
| cancel = None | |||
| guard = Mid | |||
| parry = High | |||
| startup = 11 | |||
| active = 4 | |||
| recovery = 34 | |||
| total = 49 | |||
| advHit = -8 | |||
| advBlock = -8 | |||
| invul = None | |||
| description = Placeholder | |||
}} | |||
}} | |||
=== <span class="invisible-header">5LK</span> === | |||
{{MoveData | |||
| name = Far Short | |||
| input = 5LK / Far LK | |||
| subtitle = Far Light Kick | |||
| image = CVS2 Nakoruru 5LK.png | |||
| caption = | |||
| linkname = 5LK | |||
| data = | |||
{{AttackData-CvS2 | |||
| version = Far {{Icon-Capcom|LK}} | |||
| subtitle = | |||
| damage = 400 | |||
| stun = 4 | |||
| cancel = SP/SU | |||
| guard = Mid | |||
| parry = High | |||
| startup = 3 | |||
| active = 5 | |||
| recovery = 9 | |||
| total = 17 | |||
| advHit = +3 | |||
| advBlock = +3 | |||
| invul = None | |||
| description = Placeholder | |||
}} | |||
}} | |||
=== <span class="invisible-header">5MK</span> === | |||
{{MoveData | |||
| name = Far Forward | |||
| input = 5MK / Far MK | |||
| subtitle = Far Medium Kick | |||
| image = CVS2 Nakoruru 5MK.png | |||
| caption = | |||
| linkname = 5MK | |||
| data = | |||
{{AttackData-CvS2 | |||
| version = Far {{Icon-Capcom|MK}} | |||
| subtitle = | |||
| damage = 700 | |||
| stun = 7 | |||
| cancel = None | |||
| guard = Mid | |||
| parry = High | |||
| startup = 9 | |||
| active = 6 | |||
| recovery = 18 | |||
| total = 33 | |||
| advHit = -2 | |||
| advBlock = -2 | |||
| invul = None | |||
| description = Placeholder | |||
}} | |||
}} | |||
=== <span class="invisible-header">5HK</span> === | |||
{{MoveData | |||
| name = Far Roundhouse | |||
| input = 5HK / Far HK | |||
| subtitle = Far Heavy Kick | |||
| image = CVS2 Nakoruru 5HK.png | |||
| caption = | |||
| linkname = 5HK | |||
| data = | |||
{{AttackData-CvS2 | |||
| version = Far {{Icon-Capcom|HK}} | |||
| subtitle = | |||
| damage = 1100 | |||
| stun = 11 | |||
| cancel = None | |||
| guard = Mid | |||
| parry = High | |||
| startup = 13 | |||
| active = 8 | |||
| recovery = 11 | |||
| total = 32 | |||
| advHit = +5 | |||
| advBlock = +5 | |||
| invul = None | |||
| description = Placeholder | |||
}} | |||
}} | |||
=== Close Standing Normals === | |||
=== <span class="invisible-header">clLP</span> === | |||
{{MoveData | |||
| name = Close Jab | |||
| input = cl.LP | |||
| subtitle = Close Light Punch | |||
| image = CVS2 Nakoruru cLP.png | |||
| caption = | |||
| linkname = cl.LP | |||
| data = | |||
{{AttackData-CvS2 | |||
| version = Close {{Icon-Capcom|LP}} | |||
| subtitle = | |||
| damage = 300 | |||
| stun = 3 | |||
| cancel = RF/SP/SU | |||
| guard = Mid | |||
| parry = High | |||
| startup = 2 | |||
| active = 4 | |||
| recovery = 5 | |||
| total = 11 | |||
| advHit = +8 | |||
| advBlock = +8 | |||
| invul = None | |||
| description = Placeholder | |||
}} | |||
}} | |||
=== <span class="invisible-header">clMP</span> === | |||
MP | {{MoveData | ||
| name = Close Strong | |||
| input = cl.MP | |||
| subtitle = | |||
| image = CVS2 Nakoruru cMP.png | |||
| caption = | |||
| linkname = cl.MP | |||
| data = | |||
{{AttackData-CvS2 | |||
| version = Close {{Icon-Capcom|MP}} | |||
| subtitle = | |||
| damage = 800 | |||
| stun = 8 | |||
| cancel = SP/SU | |||
| guard = Mid | |||
| parry = High | |||
| startup = 4 | |||
| active = 4 | |||
| recovery = 14 | |||
| total = 22 | |||
| advHit = +6 | |||
| advBlock = +6 | |||
| invul = None | |||
| description = Placeholder | |||
}} | |||
}} | |||
=== <span class="invisible-header">clHP</span> === | |||
{{MoveData | |||
| name = Close Fierce | |||
| input = cl.HP | |||
| subtitle = Close Heavy Punch | |||
| image = CVS2 Nakoruru cHP.png | |||
| caption = First Hit | |||
| image2 = CVS2 Nakoruru cHP 2.png | |||
| caption2 = Second Hit | |||
| linkname = cl.HP | |||
| data = | |||
{{AttackData-CvS2 | |||
| version = Close {{Icon-Capcom|HP}} | |||
| subtitle = | |||
| damage = 600+700 | |||
| stun = 6+7 | |||
| cancel = SP/SU | |||
| guard = Mid | |||
| parry = High | |||
| startup = 4 | |||
| active = 2(9)4 | |||
| recovery = 22 | |||
| total = 41 | |||
| advHit = +6 | |||
| advBlock = +6 | |||
| invul = None | |||
| description = Placeholder | |||
}} | |||
}} | |||
=== <span class="invisible-header">clLK</span> === | |||
{{MoveData | |||
| name = Close Short | |||
| input = cl.LK | |||
| subtitle = Close Light Kick | |||
| image = CVS2 Nakoruru cLK.png | |||
| caption = | |||
| linkname = cl.LK | |||
| data = | |||
{{AttackData-CvS2 | |||
| version = Close {{Icon-Capcom|LK}} | |||
| subtitle = | |||
| damage = 400 | |||
| stun = 4 | |||
| cancel = SP/SU | |||
| guard = Mid | |||
| parry = High | |||
| startup = 3 | |||
| active = 6 | |||
| recovery = 5 | |||
| total = 14 | |||
| advHit = +6 | |||
| advBlock = +6 | |||
| invul = None | |||
| description = Placeholder | |||
}} | |||
}} | |||
=== <span class="invisible-header">clMK</span> === | |||
{{MoveData | |||
| name = Close Forward | |||
| input = cl.MK | |||
| subtitle = Close Medium Kick | |||
| image = CVS2 Nakoruru cMK.png | |||
| caption = | |||
| linkname = cl.MK | |||
| data = | |||
{{AttackData-CvS2 | |||
| version = Close {{Icon-Capcom|MK}} | |||
| subtitle = | |||
| damage = 700 | |||
| stun = 7 | |||
| cancel = SP/SU | |||
| guard = Mid | |||
| parry = High | |||
| startup = 4 | |||
| active = 7 | |||
| recovery = 10 | |||
| total = 21 | |||
| advHit = +5 | |||
| advBlock = +5 | |||
| invul = None | |||
| description = Placeholder | |||
}} | |||
}} | |||
=== <span class="invisible-header">clHK</span> === | |||
{{MoveData | |||
| name = Close Roundhouse | |||
| input = cl.HK | |||
| subtitle = Close Heavy Kick | |||
| image = CVS2 Nakoruru cHK.png | |||
| caption = First Hit | |||
| image2 = CVS2 Nakoruru cHK 2.png | |||
| caption2 = Second Hit | |||
| linkname = cl.MK | |||
| data = | |||
{{AttackData-CvS2 | |||
| version = Close {{Icon-Capcom|HK}} | |||
| subtitle = | |||
| damage = 600+800 | |||
| stun = 6+8 | |||
| cancel = SU | |||
| guard = Mid | |||
| parry = High | |||
| startup = 6 | |||
| active = 3(5)4 | |||
| recovery = 22 | |||
| total = 40 | |||
| advHit = -2 | |||
| advBlock = -2 | |||
| invul = None | |||
| description = Placeholder | |||
}} | |||
}} | |||
=== Crouching Normals === | |||
=== <span class="invisible-header">2LP</span> === | |||
{{MoveData | |||
| name = Crouch Jab | |||
| input = 2LP / cr.LP | |||
| subtitle = Crouching Light Punch | |||
| image = CVS2 Nakoruru 2LP.png | |||
| caption = | |||
| linkname = 2LP | |||
| data = | |||
{{AttackData-CvS2 | |||
| version = {{Motion|d}}+{{Icon-Capcom|LP}} | |||
| subtitle = | |||
| damage = 200 | |||
| stun = 2 | |||
| cancel = RF/SP/SU | |||
| guard = Mid | |||
| parry = Mid | |||
| startup = 3 | |||
| active = 4 | |||
| recovery = 7 | |||
| total = 14 | |||
| advHit = +6 | |||
| advBlock = +6 | |||
| invul = None | |||
| description = Placeholder | |||
}} | |||
}} | |||
Nakoruru | === <span class="invisible-header">2MP</span> === | ||
{{MoveData | |||
| name = Crouch Strong | |||
| input = 2MP / cr.MP | |||
| subtitle = Crouching Medium Punch | |||
| image = CVS2 Nakoruru 2MP.png | |||
| caption = | |||
| linkname = 2MP | |||
| data = | |||
{{AttackData-CvS2 | |||
| version = {{Motion|d}}+{{Icon-Capcom|MP}} | |||
| subtitle = | |||
| damage = 800 | |||
| stun = 8 | |||
| cancel = SP/SU | |||
| guard = Mid | |||
| parry = Mid | |||
| startup = 4 | |||
| active = 4 | |||
| recovery = 14 | |||
| total = 22 | |||
| advHit = +6 | |||
| advBlock = +6 | |||
| invul = None | |||
| description = Placeholder | |||
}} | |||
}} | |||
=== <span class="invisible-header">2HP</span> === | |||
{{MoveData | |||
| name = Crouch Fierce | |||
| input = 2HP / cr.HP | |||
| subtitle = Crouching Heavy Punch | |||
| image = CVS2 Nakoruru 2HP.png | |||
| caption = | |||
| linkname = 2HP | |||
| data = | |||
{{AttackData-CvS2 | |||
| version = {{Motion|d}}+{{Icon-Capcom|HP}} | |||
| subtitle = | |||
| damage = 1000, 700 | |||
| stun = 10, 7 | |||
| cancel = SP/SU | |||
| guard = Mid | |||
| parry = High | |||
| startup = 4 | |||
| active = 7 | |||
| recovery = 28 | |||
| total = 39 | |||
| advHit = -4 | |||
| advBlock = -4 | |||
| invul = None | |||
| description = Placeholder | |||
}} | |||
}} | |||
=== <span class="invisible-header">2LK</span> === | |||
{{MoveData | |||
| name = Crouch Short | |||
| input = 2LK / cr.LK | |||
| subtitle = Crouching Light Kick | |||
| image = CVS2 Nakoruru 2LK.png | |||
| caption = | |||
| linkname = 2LK | |||
| data = | |||
{{AttackData-CvS2 | |||
| version = {{Motion|d}}+{{Icon-Capcom|LK}} | |||
| subtitle = | |||
| damage = 200 | |||
| stun = 2 | |||
| cancel = RF/SP/SU | |||
| guard = Low | |||
| parry = Low | |||
| startup = 3 | |||
| active = 4 | |||
| recovery = 6 | |||
| total = 13 | |||
| advHit = +7 | |||
| advBlock = +7 | |||
| invul = None | |||
| description = Placeholder | |||
}} | |||
}} | |||
=== <span class="invisible-header">2MK</span> === | |||
{{MoveData | |||
| name = Crouch Forward | |||
| input = 2MK / cr.MK | |||
| subtitle = Crouching Medium Kick | |||
| image = CVS2 Nakoruru 2MK.png | |||
| caption = | |||
| linkname = 2MK | |||
| data = | |||
{{AttackData-CvS2 | |||
| version = {{Motion|d}}+{{Icon-Capcom|MK}} | |||
| subtitle = | |||
| damage = 700 | |||
| stun = 7 | |||
| cancel = SU | |||
| guard = Low | |||
| parry = Low | |||
| startup = 5 | |||
| active = 8 | |||
| recovery = 8 | |||
| total = 21 | |||
| advHit = +6 | |||
| advBlock = +6 | |||
| invul = None | |||
| description = Placeholder | |||
}} | |||
}} | |||
=== <span class="invisible-header">2HK</span> === | |||
{{MoveData | |||
| name = Crouch Roundhouse | |||
| input = 2HK / cr.HK | |||
| subtitle = Crouching Heavy Kick | |||
| image = CVS2 Nakoruru 2HK.png | |||
| caption = | |||
| linkname = 2HK | |||
| data = | |||
{{AttackData-CvS2 | |||
| version = {{Motion|d}}+{{Icon-Capcom|HK}} | |||
| subtitle = | |||
| damage = 1100 | |||
| stun = 11 | |||
| cancel = SU | |||
| guard = Low | |||
| parry = Low | |||
| startup = 6 | |||
| active = 8 | |||
| recovery = 24 | |||
| total = 38 | |||
| advHit = DWN | |||
| advBlock = -6 | |||
| invul = None | |||
| description = | |||
}} | |||
}} | |||
=== Jumping Normals === | |||
=== <span class="invisible-header">j.LP</span> === | |||
{{MoveData | |||
| name = Jump Jab | |||
| input = j.LP | |||
| subtitle = Jumping Light Punch | |||
| image = CVS2 Nakoruru jLP.png | |||
| caption = | |||
| linkname = j.LP | |||
| data = | |||
{{AttackData-CvS2 | |||
| version = {{Motion|ub}}/{{Motion|u}}/{{Motion|uf}}+{{Icon-Capcom|LP}} | |||
| subtitle = | |||
| damage = 400 | |||
| stun = 4 | |||
| cancel = - | |||
| guard = High | |||
| parry = High | |||
| startup = 2 | |||
| active = 22 | |||
| recovery = - | |||
| total = 24 | |||
| advHit = - | |||
| advBlock = - | |||
| invul = None | |||
| description = Placeholder | |||
}} | |||
}} | |||
=== <span class="invisible-header">j.MP</span> === | |||
MP | {{MoveData | ||
| name = Jump Strong | |||
| input = j.MP | |||
| subtitle = Jumping Medium Punch | |||
| image = CVS2 Nakoruru jMP.png | |||
| caption = | |||
| linkname = j.MP | |||
| data = | |||
{{AttackData-CvS2 | |||
| version = {{Motion|ub}}/{{Motion|u}}/{{Motion|uf}}+{{Icon-Capcom|MP}} | |||
| subtitle = | |||
| damage = 800 | |||
| stun = 8 | |||
| cancel = - | |||
| guard = High | |||
| parry = High | |||
| startup = 4 | |||
| active = 4 | |||
| recovery = - | |||
| total = 8 | |||
| advHit = - | |||
| advBlock = - | |||
| invul = None | |||
| description = Placeholder | |||
}} | |||
}} | |||
=== <span class="invisible-header">j.HP</span> === | |||
{{MoveData | |||
| name = Jump Fierce | |||
| input = j.HP | |||
| subtitle = Jumping Heavy Punch | |||
| image = CVS2 Nakoruru jHP.png | |||
| caption = | |||
| linkname = j.HP | |||
| data = | |||
{{AttackData-CvS2 | |||
| version = {{Motion|ub}}/{{Motion|u}}/{{Motion|uf}}+{{Icon-Capcom|HP}} | |||
| subtitle = | |||
| damage = 1100, 1000 | |||
| stun = 11, 10 | |||
| cancel = - | |||
| guard = High | |||
| parry = High | |||
| startup = 7 | |||
| active = 2 | |||
| recovery = - | |||
| total = 9 | |||
| advHit = - | |||
| advBlock = - | |||
| invul = None | |||
| description = Placeholder | |||
}} | |||
}} | |||
=== <span class="invisible-header">j.LK</span> === | |||
{{MoveData | |||
| name = Jump Short | |||
| input = j.LK | |||
| subtitle = Jumping Light Kick | |||
| image = CVS2 Nakoruru jLK.png | |||
| caption = | |||
| linkname = j.LK | |||
| data = | |||
{{AttackData-CvS2 | |||
| version = {{Motion|ub}}/{{Motion|u}}/{{Motion|uf}}+{{Icon-Capcom|LK}} | |||
| subtitle = | |||
| damage = 400 | |||
| stun = 4 | |||
| cancel = - | |||
| guard = High | |||
| parry = High | |||
| startup = 2 | |||
| active = 18 | |||
| recovery = - | |||
| total = 20 | |||
| advHit = - | |||
| advBlock = - | |||
| invul = None | |||
| description = Placeholder | |||
}} | |||
}} | |||
=== <span class="invisible-header">j.MK</span> === | |||
{{MoveData | |||
| name = Jump Forward | |||
| input = j.MK | |||
| subtitle = Jumping Medium Kick | |||
| image = CVS2 Nakoruru jMK.png | |||
| caption = | |||
| linkname = j.MK | |||
| data = | |||
{{AttackData-CvS2 | |||
| version = {{Motion|ub}}/{{Motion|u}}/{{Motion|uf}}+{{Icon-Capcom|MK}} | |||
| subtitle = | |||
| damage = 700 | |||
| stun = 7 | |||
| cancel = - | |||
| guard = High | |||
| parry = High | |||
| startup = 5 | |||
| active = 10 | |||
| recovery = - | |||
| total = 15 | |||
| advHit = - | |||
| advBlock = - | |||
| invul = None | |||
| description = Placeholder | |||
}} | |||
}} | |||
=== <span class="invisible-header">j.HK</span> === | |||
{{MoveData | |||
| name = Jump Roundhouse | |||
| input = j.HK | |||
| subtitle = Jumping Heavy Kick | |||
| image = CVS2 Nakoruru jHK.png | |||
| caption = | |||
| linkname = j.HK | |||
| data = | |||
{{AttackData-CvS2 | |||
| version = {{Motion|ub}}/{{Motion|u}}/{{Motion|uf}}+{{Icon-Capcom|HK}} | |||
| subtitle = | |||
| damage = 1000 | |||
| stun = 10 | |||
| cancel = - | |||
| guard = High | |||
| parry = High | |||
| startup = 6 | |||
| active = 8 | |||
| recovery = - | |||
| total = 14 | |||
| advHit = - | |||
| advBlock = - | |||
| invul = None | |||
| description = Placeholder | |||
}} | |||
}} | |||
== Command Normals == | |||
=== <span class="invisible-header">Chitenzan</span> === | |||
{{MoveData | |||
| name = Chitenzan | |||
| input = 3HP | |||
| subtitle = | |||
| image = CVS2 Nakoruru 3HK.png | |||
| caption = | |||
| linkname = X | |||
| data = | |||
{{AttackData-CvS2 | |||
| version = {{Motion|3}}+{{Icon-Capcom|HP}} | |||
| subtitle = | |||
| damage = 1100 | |||
| stun = 11 | |||
| cancel = None | |||
| guard = Mid | |||
| parry = Mid | |||
| startup = 10 | |||
| active = 12 | |||
| recovery = 18 | |||
| total = 40 | |||
| advHit = +6 | |||
| advBlock = +6 | |||
| invul = None | |||
| description = Placeholder | |||
}} | |||
}} | |||
== Throws == | |||
=== <span class="invisible-header">Punch Throw</span> === | |||
{{MoveData | |||
| name = Ruten Kyogekijin | |||
| input = Near Opponent, 4/6HP | |||
| subtitle = Punch Throw | |||
| image = CVS2 Nakoruru punchthrow.png | |||
| caption = | |||
| linkname = Punch Throw Name | |||
| data = | |||
{{AttackData-CvS2 | |||
| version = Close {{Motion|b}}/{{Motion|f}}+{{Icon-Capcom|HP}} | |||
| subtitle = | |||
| damage = 1600 | |||
| stun = 0 | |||
| cancel = - | |||
| guard = Grab | |||
| parry = - | |||
| startup = 3 | |||
| active = 1 | |||
| recovery = 13 | |||
| total = 17 | |||
| advHit = - | |||
| advBlock = - | |||
| invul = None | |||
| description = Placeholder | |||
}} | |||
}} | |||
=== <span class="invisible-header">Kick Throw</span> === | |||
{{MoveData | |||
| name = Jiten Sanrenkyaku | |||
| input = Near Opponent, 4/6HK | |||
| subtitle = Kick Throw | |||
| image = CVS2 Nakoruru kickthrow.png | |||
| caption = | |||
| linkname = Kick Throw Name | |||
| data = | |||
{{AttackData-CvS2 | |||
| version = Close {{Motion|b}}/{{Motion|f}}+{{Icon-Capcom|HK}} | |||
| subtitle = | |||
| damage = 1700 | |||
| stun = 0 | |||
| cancel = - | |||
| guard = Grab | |||
| parry = - | |||
| startup = 5 | |||
| active = 1 | |||
| recovery = 13 | |||
| total = 19 | |||
| advHit = - | |||
| advBlock = - | |||
| invul = None | |||
| description = Placeholder | |||
}} | |||
}} | |||
== Special Moves == | |||
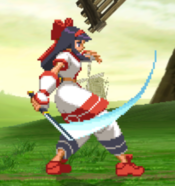
=== <span class="invisible-header">Annu Mutsube</span> === | |||
{{MoveData | |||
| name = Annu Mutsube | |||
| input = 412P | |||
| subtitle = | |||
| image = CVS2 Nakoruru 412P.png | |||
| caption = | |||
| linkname = | |||
| data = | |||
{{AttackData-CvS2 | |||
| version = {{Motion|4}}{{Motion|1}}{{Motion|2}} + {{Icon-Capcom|LP}} | |||
| subtitle = | |||
| damage = 1100 | |||
| stun = 11 | |||
| cancel = None | |||
| guard = Low | |||
| parry = Low | |||
| startup = 11 | |||
| active = 19 | |||
| recovery = 23 | |||
| total = 53 | |||
| advHit = DWN | |||
| advBlock = -27 | |||
| invul = None | |||
}} | |||
{{AttackData-CvS2 | |||
| header = no | |||
| version = {{Motion|4}}{{Motion|1}}{{Motion|2}} + {{Icon-Capcom|MP}} | |||
| subtitle = | |||
| damage = 1200 | |||
| stun = 12 | |||
| cancel = None | |||
| guard = Low | |||
| parry = Low | |||
| startup = 11 | |||
| active = 24 | |||
| recovery = 23 | |||
| total = 53 | |||
| advHit = DWN | |||
| advBlock = -32 | |||
| invul = None | |||
}} | |||
{{AttackData-CvS2 | |||
| header = no | |||
| version = {{Motion|4}}{{Motion|1}}{{Motion|2}} + {{Icon-Capcom|HP}} | |||
| subtitle = | |||
| damage = 1300 | |||
= | | stun = 13 | ||
| cancel = None | |||
| guard = Low | |||
| parry = Low | |||
| startup = 11 | |||
| active = 29 | |||
| recovery = 23 | |||
| total = 53 | |||
| advHit = DWN | |||
| advBlock = -37 | |||
| invul = None | |||
| description = Placeholder | |||
}} | |||
}} | |||
== | |||
= | |||
= | |||
= | |||
= | |||
= | |||
= | |||
= | |||
= | |||
= | |||
= | |||
= | |||
= | |||
= | |||
= | |||
= | |||
= | |||
= | |||
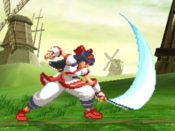
=== | === <span class="invisible-header">Rera Mutsube</span> === | ||
{{MoveData | |||
| name = Rera Mutsube | |||
| input = 236P | |||
| subtitle = | |||
| image = CVS2 Nakoruru 236P.png | |||
| caption = | |||
| linkname = | |||
| data = | |||
{{AttackData-CvS2 | |||
| version = {{Motion|236}} + {{Icon-Capcom|LP}} | |||
| subtitle = | |||
| damage = 1200 | |||
| stun = 12 | |||
| cancel = None | |||
| guard = Mid | |||
| parry = High | |||
| startup = 8 | |||
| active = 11 | |||
| recovery = 56 | |||
| total = 75 | |||
| advHit = DWN | |||
| advBlock = -47 | |||
| invul = None | |||
}} | |||
{{AttackData-CvS2 | |||
| header = no | |||
| version = {{Motion|236}} + {{Icon-Capcom|MP}} | |||
| subtitle = | |||
| damage = 1300 | |||
| stun = 13 | |||
| cancel = None | |||
| guard = Mid | |||
| parry = High | |||
| startup = 8 | |||
| active = 13 | |||
| recovery = 57 | |||
| total = 78 | |||
| advHit = DWN | |||
| advBlock = -50 | |||
| invul = None | |||
}} | |||
{{AttackData-CvS2 | |||
| header = no | |||
| version = {{Motion|236}} + {{Icon-Capcom|HP}} | |||
| subtitle = | |||
| damage = 1400 | |||
| stun = 14 | |||
| cancel = None | |||
| guard = Mid | |||
| parry = High | |||
| startup = 8 | |||
| active = 15 | |||
| recovery = 57 | |||
| total = 81 | |||
| advHit = DWN | |||
| advBlock = -53 | |||
| invul = None | |||
| description = Placeholder | |||
}} | |||
}} | |||
=== | === <span class="invisible-header">Kamui Rimse</span> === | ||
{{MoveData | |||
| name = Kamui Rimse | |||
| input = 421P | |||
| subtitle = | |||
| image = CVS2 Nakoruru 421P.png | |||
| caption = | |||
| image2 = CVS2 Nakoruru 421PP.png | |||
| caption2 = P followup | |||
| linkname = | |||
| data = | |||
{{AttackData-CvS2 | |||
| version = {{Motion|421}} + {{Icon-Capcom|LP}} | |||
| subtitle = | |||
| damage = 800 | |||
| stun = 8 | |||
| cancel = P | |||
| guard = Mid | |||
| parry = High | |||
| startup = 14 | |||
| active = 5 | |||
| recovery = 24 | |||
| total = 43 | |||
| advHit = -5 | |||
| advBlock = -5 | |||
| invul = None | |||
}} | |||
{{AttackData-CvS2 | |||
| header = no | |||
| version = {{Motion|421}} + {{Icon-Capcom|MP}} | |||
| subtitle = | |||
| damage = 900 | |||
| stun = 9 | |||
| cancel = P | |||
| guard = Mid | |||
| parry = High | |||
| startup = 14 | |||
| active = 5 | |||
| recovery = 24 | |||
| total = 43 | |||
| advHit = -5 | |||
| advBlock = -5 | |||
| invul = None | |||
}} | |||
{{AttackData-CvS2 | |||
| header = no | |||
| version = {{Motion|421}} + {{Icon-Capcom|HP}} | |||
| subtitle = | |||
| damage = 1000 | |||
| stun = 10 | |||
| cancel = P | |||
| guard = Mid | |||
| parry = High | |||
| startup = 14 | |||
| active = 5 | |||
| recovery = 24 | |||
| total = 43 | |||
| advHit = -5 | |||
| advBlock = -5 | |||
| invul = None | |||
}} | |||
{{AttackData-CvS2 | |||
| header = no | |||
| version = {{Motion|421}} + {{Icon-Capcom|P}}, {{Icon-Capcom|P}} | |||
| subtitle = | |||
| damage = 500 | |||
| stun = 5 | |||
| cancel = None | |||
| guard = Mid | |||
| parry = High | |||
| startup = 14 | |||
| active = 2 | |||
| recovery = 24 | |||
| total = 40 | |||
| advHit = DWN | |||
| advBlock = -6 | |||
| invul = None | |||
| description = Placeholder | |||
}} | |||
}} | |||
=== | === <span class="invisible-header">Amube Yatoro</span> === | ||
{{MoveData | |||
| name = Amube Yatoro | |||
| input = 63214P | |||
| subtitle = | |||
| image = CVS2 Nakoruru 63214P.png | |||
| caption = | |||
| linkname = | |||
| data = | |||
{{AttackData-CvS2 | |||
| version = {{Motion|63214}} + {{Icon-Capcom|LP}} | |||
| subtitle = | |||
| damage = 900 | |||
| stun = 9 | |||
| cancel = None | |||
| guard = Mid | |||
| parry = High | |||
| startup = 19 | |||
| active = | |||
| recovery = 40 | |||
| total = 59 | |||
| advHit = DWN | |||
| advBlock = 0 | |||
| invul = None | |||
}} | |||
{{AttackData-CvS2 | |||
| header = no | |||
| version = {{Motion|63214}} + {{Icon-Capcom|MP}} | |||
| subtitle = | |||
| damage = 1000 | |||
| stun = 10 | |||
| cancel = None | |||
| guard = Mid | |||
| parry = High | |||
| startup = 19 | |||
| active = | |||
| recovery = 40 | |||
| total = 59 | |||
| advHit = DWN | |||
| advBlock = +1 | |||
| invul = None | |||
}} | |||
{{AttackData-CvS2 | |||
| header = no | |||
| version = {{Motion|63214}} + {{Icon-Capcom|HP}} | |||
| subtitle = | |||
| damage = 1100 | |||
| stun = 11 | |||
| cancel = None | |||
| guard = Mid | |||
| parry = High | |||
| startup = 19 | |||
| active = | |||
| recovery = 40 | |||
| total = 59 | |||
| advHit = DWN | |||
| advBlock = +3 | |||
| invul = None | |||
| description = Placeholder | |||
}} | |||
}} | |||
=== | === <span class="invisible-header">Mamaha Nitsukamara</span> === | ||
{{MoveData | |||
| name = Mamaha Nitsukamara | |||
| input = 214K | |||
| subtitle = Cling | |||
| image = CVS2 Nakoruru 214K.png | |||
| caption = | |||
| linkname = | |||
| data = | |||
{{AttackData-CvS2 | |||
| version = {{Motion|214}} + {{Icon-Capcom|K}} | |||
| subtitle = | |||
| damage = | |||
| stun = | |||
| cancel = | |||
| guard = | |||
| parry = | |||
| startup = | |||
| active = | |||
| recovery = | |||
| total = 15 | |||
| advHit = | |||
| advBlock = | |||
| invul = None | |||
| description = | |||
}} | |||
}} | |||
=== | == Mamaha Movelist == | ||
=== <span class="invisible-header">Mamaha LP</span> === | |||
{{MoveData | |||
| name = Mamaha LP | |||
| input = 214K LP | |||
| subtitle = | |||
| image = CVS2 Nakoruru bird LP.png | |||
| caption = | |||
| linkname = | |||
| data = | |||
{{AttackData-CvS2 | |||
| version = {{Motion|214}} + {{Icon-Capcom|K}}, {{Icon-Capcom|LP}} | |||
| subtitle = | |||
| damage = 500 | |||
| stun = 500 | |||
| cancel = SP | |||
| guard = Mid | |||
| parry = High | |||
| startup = 6 | |||
| active = 2 | |||
| recovery = 17 | |||
| total = 25 | |||
| advHit = -3 | |||
| advBlock = +8 | |||
| invul = None | |||
| description = Placeholder | |||
}} | |||
}} | |||
=== | === <span class="invisible-header">Mamaha MP</span> === | ||
{{MoveData | |||
| name = Mamaha MP | |||
| input = 214K MP | |||
| subtitle = | |||
| image = CVS2 Nakoruru bird MP.png | |||
| caption = | |||
| linkname = | |||
| data = | |||
{{AttackData-CvS2 | |||
| version = {{Motion|214}} + {{Icon-Capcom|K}}, {{Icon-Capcom|MP}} | |||
| subtitle = | |||
| damage = 800 | |||
| stun = 8 | |||
| cancel = SP | |||
| guard = Mid | |||
| parry = High | |||
| startup = 6 | |||
| active = 2 | |||
| recovery = 20 | |||
| total = 28 | |||
| advHit = -6 | |||
| advBlock = +5 | |||
| invul = None | |||
| description = Placeholder | |||
}} | |||
}} | |||
=== | === <span class="invisible-header">Mamaha LK</span> === | ||
{{MoveData | |||
| name = Mamaha LK | |||
| input = 214K LK | |||
| subtitle = | |||
| image = CVS2 Nakoruru bird LK.png | |||
| caption = | |||
| linkname = | |||
| data = | |||
{{AttackData-CvS2 | |||
| version = {{Motion|214}} + {{Icon-Capcom|K}}, {{Icon-Capcom|LK}} | |||
| subtitle = | |||
| damage = 400 | |||
| stun = 4 | |||
| cancel = SP | |||
| guard = Mid | |||
| parry = High | |||
| startup = 4 | |||
| active = 2 | |||
| recovery = 10 | |||
| total = 16 | |||
| advHit = 0 | |||
| advBlock = +11 | |||
| invul = None | |||
| description = Placeholder | |||
}} | |||
}} | |||
=== | === <span class="invisible-header">Mamaha MK</span> === | ||
{{MoveData | |||
| name = Mamaha MK | |||
| input = 214K MK | |||
| subtitle = | |||
| image = CVS2 Nakoruru bird MK.png | |||
| caption = | |||
| linkname = | |||
| data = | |||
{{AttackData-CvS2 | |||
| version = {{Motion|214}} + {{Icon-Capcom|K}}, {{Icon-Capcom|MK}} | |||
| subtitle = | |||
| damage = 700 | |||
| stun = 7 | |||
| cancel = SP | |||
| guard = Mid | |||
| parry = High | |||
| startup = 4 | |||
| active = 2 | |||
| recovery = 10 | |||
| total = 16 | |||
| advHit = 0 | |||
| advBlock = +11 | |||
| invul = None | |||
| description = Placeholder | |||
}} | |||
}} | |||
=== | === <span class="invisible-header">Yatoru Pokku</span> === | ||
{{MoveData | |||
| name = Yatoru Pokku | |||
| input = 214K HP | |||
| subtitle = | |||
| image = CVS2 Nakoruru bird HP.png | |||
| caption = | |||
| linkname = | |||
| data = | |||
{{AttackData-CvS2 | |||
| version = {{Motion|214}} + {{Icon-Capcom|K}}, {{Icon-Capcom|HP}} | |||
| subtitle = | |||
| damage = 1000 | |||
| stun = 10 | |||
| cancel = None | |||
| guard = Mid | |||
| parry = High | |||
| startup = 2 | |||
| active = Varies | |||
| recovery = 6 | |||
| total = Varies | |||
| advHit = +7 | |||
| advBlock = +16 | |||
| invul = None | |||
| description = Placeholder | |||
}} | |||
}} | |||
=== | === <span class="invisible-header">Mamaha Release</span> === | ||
{{MoveData | |||
| name = Mamaha Release | |||
| input = 214K HK | |||
| subtitle = | |||
| image = CVS2 Nakoruru bird HK.png | |||
| caption = | |||
| linkname = | |||
| data = | |||
{{AttackData-CvS2 | |||
| version = {{Motion|214}} + {{Icon-Capcom|K}}, {{Icon-Capcom|HK}} | |||
| subtitle = | |||
| damage = | |||
| stun = | |||
| cancel = | |||
| guard = | |||
| parry = | |||
| startup = | |||
| active = | |||
| recovery = 6L | |||
| total = | |||
| advHit = | |||
| advBlock = | |||
| invul = None | |||
| description = Placeholder | |||
}} | |||
}} | |||
=== | === <span class="invisible-header">Shichikapu Ai</span> === | ||
{{MoveData | |||
| name = Shichikapu Ai | |||
| input = 214K 236P | |||
| subtitle = | |||
| image = CVS2 Nakoruru bird 236P.png | |||
| caption = | |||
| linkname = | |||
| data = | |||
{{AttackData-CvS2 | |||
| version = {{Motion|214}} + {{Icon-Capcom|K}}, {{Motion|236}} + {{Icon-Capcom|LP}} | |||
| subtitle = | |||
| damage = 900 | |||
| stun = 9 | |||
| cancel = None | |||
| guard = Mid | |||
| parry = High | |||
| startup = 1 | |||
| active = Varies | |||
| recovery = 11 | |||
| total = Varies | |||
| advHit = DWN | |||
| advBlock = -4 | |||
| invul = None | |||
}} | |||
{{AttackData-CvS2 | |||
| header = no | |||
| version = {{Motion|214}} + {{Icon-Capcom|K}}, {{Motion|236}} + {{Icon-Capcom|MP}} | |||
| subtitle = | |||
| damage = 1000 | |||
| stun = 10 | |||
| cancel = None | |||
| guard = Mid | |||
| parry = High | |||
| startup = 1 | |||
| active = Varies | |||
| recovery = 11 | |||
| total = Varies | |||
| advHit = DWN | |||
| advBlock = -3 | |||
| invul = None | |||
}} | |||
{{AttackData-CvS2 | |||
| header = no | |||
| version = {{Motion|214}} + {{Icon-Capcom|K}}, {{Motion|236}} + {{Icon-Capcom|HP}} | |||
| subtitle = | |||
| damage = 1100 | |||
| stun = 11 | |||
| cancel = None | |||
| guard = Mid | |||
| parry = High | |||
| startup = 1 | |||
| active = Varies | |||
| recovery = 11 | |||
| total = Varies | |||
| advHit = DWN | |||
| advBlock = -2 | |||
| invul = None | |||
| description = Placeholder | |||
}} | |||
}} | |||
=== Nakoruru === | === <span class="invisible-header">Kamui Mutsube</span> === | ||
{{MoveData | |||
| name = Kamui Mutsube | |||
| input = | |||
| subtitle = 214K 214P | |||
| image = CVS2 Nakoruru bird 214P.png | |||
| caption = | |||
| linkname = | |||
| data = | |||
{{AttackData-CvS2 | |||
| version = {{Motion|214}} + {{Icon-Capcom|K}}, {{Motion|214}} + {{Icon-Capcom|LP}} | |||
| subtitle = | |||
| damage = 1100 | |||
| stun = 11 | |||
| cancel = None | |||
| guard = High | |||
| parry = High | |||
| startup = 4 | |||
| active = Varies | |||
| recovery = 22 | |||
| total = Varies | |||
| advHit = DWN | |||
| advBlock = -8 | |||
| invul = None | |||
}} | |||
{{AttackData-CvS2 | |||
| header = no | |||
| version = {{Motion|214}} + {{Icon-Capcom|K}}, {{Motion|214}} + {{Icon-Capcom|MP}} | |||
| subtitle = | |||
| damage = 1200 | |||
| stun = 12 | |||
| cancel = None | |||
| guard = High | |||
| parry = High | |||
| startup = 4 | |||
| active = Varies | |||
| recovery = 22 | |||
| total = Varies | |||
| advHit = DWN | |||
| advBlock = -8 | |||
| invul = None | |||
}} | |||
{{AttackData-CvS2 | |||
| header = no | |||
| version = {{Motion|214}} + {{Icon-Capcom|K}}, {{Motion|214}} + {{Icon-Capcom|HP}} | |||
| subtitle = | |||
| damage = 1300 | |||
| stun = 13 | |||
| cancel = None | |||
| guard = High | |||
| parry = High | |||
| startup = 4 | |||
| active = Varies | |||
| recovery = 22 | |||
| total = Varies | |||
| advHit = DWN | |||
| advBlock = -8 | |||
| invul = None | |||
| description = Placeholder | |||
}} | |||
}} | |||
=== | == Super Moves == | ||
=== <span class="invisible-header">Shichikapu Kamui Irushika</span> === | |||
{{MoveData | |||
| name = Shichikapu Kamui Irushika | |||
| input = 6321463214P | |||
| subtitle = | |||
| image = CVS2 Nakoruru 6321463214P.png | |||
| caption = | |||
| linkname = | |||
| data = | |||
{{AttackData-CvS2 | |||
| version = {{Motion|63214}}{{Motion|63214}} + {{Icon-Capcom|LP}} | |||
| subtitle = | |||
| damage = 2400 | |||
| stun = 0 | |||
| cancel = None | |||
| guard = Mid | |||
| parry = High | |||
| startup = 5:14 | |||
| active = | |||
| recovery = 19 | |||
| total = 38 | |||
| advHit = DWN | |||
| advBlock = +18 | |||
| invul = 9 (Full) | |||
}} | |||
{{AttackData-CvS2 | |||
| header = no | |||
| version = {{Motion|63214}}{{Motion|63214}} + {{Icon-Capcom|MP}} | |||
| subtitle = | |||
| damage = 3600 | |||
| stun = 0 | |||
| cancel = SP/SU | |||
| guard = Mid | |||
| parry = High | |||
| startup = 5:14 | |||
| active = | |||
| recovery = 19 | |||
| total = 38 | |||
| advHit = DWN | |||
| advBlock = +24 | |||
| invul = 15 (Full) | |||
}} | |||
{{AttackData-CvS2 | |||
| header = no | |||
| version = {{Motion|63214}}{{Motion|63214}} + {{Icon-Capcom|HP}} | |||
| subtitle = | |||
| damage = 5000 | |||
| stun = 0 | |||
| cancel = None | |||
| guard = Mid | |||
| parry = High | |||
| startup = 5:14 | |||
| active = | |||
| recovery = 19 | |||
| total = 38 | |||
| advHit = DWN | |||
| advBlock = +24 | |||
| invul = 22 (Full) | |||
| description = Placeholder | |||
}} | |||
}} | |||
=== | === <span class="invisible-header">Ererushi Kamui Rimse</span> === | ||
{{MoveData | |||
| name = Ererushi Kamui Rimse | |||
| input = 6321463214K | |||
| subtitle = | |||
| image = CVS2 Nakoruru 6321463214K.png | |||
| caption = | |||
| linkname = | |||
| data = | |||
{{AttackData-CvS2 | |||
| version = {{Motion|63214}}{{Motion|63214}} + {{Icon-Capcom|LK}} | |||
| subtitle = | |||
| damage = 2600 | |||
| stun = 0 | |||
| cancel = None | |||
| guard = Mid | |||
| parry = High | |||
| startup = 18:5 | |||
| active = 20 | |||
| recovery = 22 | |||
| total = 65 | |||
| advHit = DWN | |||
| advBlock = -6 | |||
| invul = 15-22 (Full) | |||
}} | |||
{{AttackData-CvS2 | |||
| header = no | |||
| version = {{Motion|63214}}{{Motion|63214}} + {{Icon-Capcom|MK}} | |||
| subtitle = | |||
| damage = 3800 | |||
| stun = 0 | |||
| cancel = SP/SU | |||
| guard = Mid | |||
| parry = High | |||
| startup = 18:5 | |||
| active = 21 | |||
| recovery = 22 | |||
| total = 66 | |||
| advHit = DWN | |||
| advBlock = -6 | |||
| invul = 15-28 (Full) | |||
}} | |||
{{AttackData-CvS2 | |||
| header = no | |||
| version = {{Motion|63214}}{{Motion|63214}} + {{Icon-Capcom|HK}} | |||
| subtitle = | |||
| damage = 5600 | |||
| stun = 0 | |||
| cancel = None | |||
| guard = Mid | |||
| parry = High | |||
| startup = 18:5 | |||
| active = 23 | |||
| recovery = 22 | |||
| total = 68 | |||
| advHit = DWN | |||
| advBlock = -6 | |||
| invul = 15-36 (Full) | |||
| description = Placeholder | |||
}} | |||
}} | |||
=== | === <span class="invisible-header">Shirikoro Kamui Nomi</span> === | ||
{{MoveData | |||
| name = Shirikoro Kamui Nomi | |||
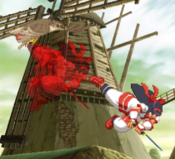
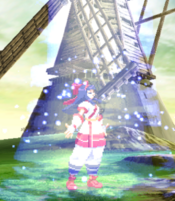
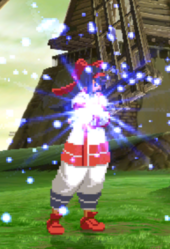
| input = 236236K | |||
| subtitle = | |||
| image = CVS2 Nakoruru 236236K.png | |||
| caption = | |||
| image2 = CVS2 Nakoruru 236236K 2.png | |||
| caption2 = Cancel | |||
| linkname = | |||
| data = | |||
{{AttackData-CvS2 | |||
| version = {{Motion|236}}{{Motion|236}} + {{Icon-Capcom|K}} | |||
| subtitle = | |||
| damage = | |||
| stun = | |||
| cancel = 3K | |||
| guard = | |||
| parry = | |||
| startup = 5:1 | |||
| active = 130 | |||
| recovery = | |||
| total = 136 | |||
| advHit = | |||
| advBlock = | |||
| invul = None | |||
}} | |||
{{AttackData-CvS2 | |||
| header = no | |||
| version = {{Motion|236}}{{Motion|236}} + {{Icon-Capcom|K}}, {{Icon-Capcom|3K}} | |||
| subtitle = | |||
| damage = | |||
| stun = | |||
| cancel = None | |||
| guard = | |||
| parry = | |||
| startup = | |||
| active = | |||
| recovery = | |||
| total = 68 | |||
| advHit = | |||
| advBlock = | |||
| invul = None | |||
| description = Heals 3900 HP if not cancelled | |||
}} | |||
}} | |||
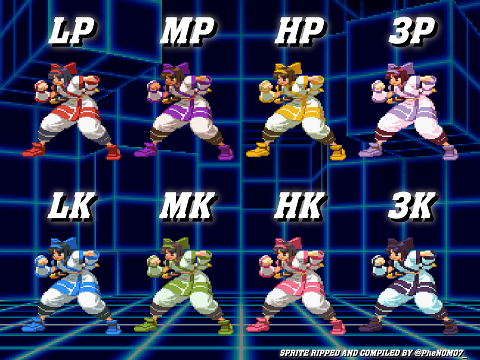
== | == Colors == | ||
[[File:Nakoruru_CvS2_colors.png]] | |||
{{Navbox-CvS2}} | |||
[[Category:Capcom vs SNK 2]] | [[Category:Capcom vs SNK 2]] | ||
[[Category:Nakoruru]] | [[Category:Nakoruru]] | ||
Latest revision as of 23:25, 11 September 2024
Introduction
Story
Nakoruru is a young girl from ancient Japan. She had a connection with nature from a young age, befriending her bird Mamaha for life very early on. One day, as she was playing with her sister Rimururu, Mamaha flew down to her with her fathers sword in his claws. Fearing for the worst, Nakoruru leaves Rimururu at home, and begins a journey to find her father. At the end of her journey, she learns her father was killed by Gaoh, and also learns of Gaoh's war. Gaoh was waging a war against Japan, and had plans to create a new country from the ashes. He was brutalizing nature along the way however. Nakoruru, disgusted at how he treated nature and killed her father, helped to fight and defeat Gaoh. Once he falls, Kamui appears in front of Nakoruru, and asks if she wants to follow in her fathers footsteps. She asks what will happen if she declines, and Kamui simply says that another young maiden would be chosen. Afraid that the other young maiden would be her sister, Nakoruru accepts, and becomes a Kamui Warrior of Kamui Kotan. Nakoruru acts as a nature protecting warrior for the rest of the series, appearing when great evil threatens the planet.
Gameplay
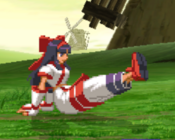
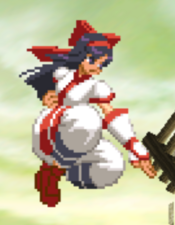
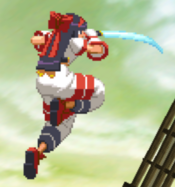
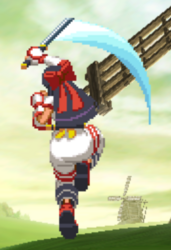
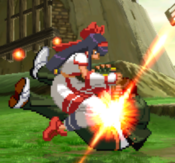
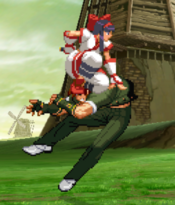
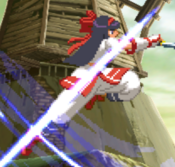
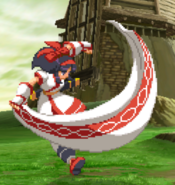
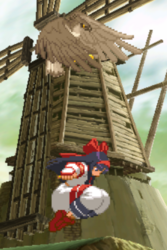
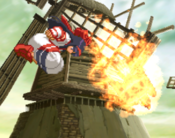
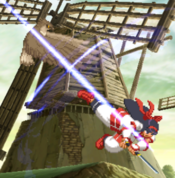
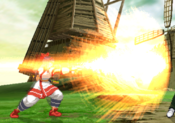
Nakoruru would likely best be described as a pixie character. Her small size makes catching her hard, complimented with her amazing mobility. She's fast on all fronts: great walkspeed, one of the better dashes, one of the best runs, and a fast jump. She can even jump onto her bird, Mamaha, with a 214K input. This allows her to freely fly around the screen, threatening solid air-to-airs, falling slashes, a burning projectile Mamaha, and an extremely fast divekick. This allows her to control the air very safely, as the opponent has to actively chase her down, putting themselves at major risk to eat one of her various followups. Nakoruru also has great normals for pressure and mixup, with plenty of plus frames and a great crossup.
She does have a few big weaknesses keeping her from being as strong as the top tiers. Namely two big ones: her health and her range. Nakoruru has very low health, and no meterless reversal. This means that smart use of her mobility and fast normals is important, as if you slip up, she can get hurt very badly. Her range is also very low, with no poke to make up for the massive range of top tier normals she has to fight. With these two put together, Nakoruru has to make smart use of her movement to evade the opponent until she can get in and run her pressure game. If she gets caught, she hurts hard, but she has every tool available to not get caught.
Groove Selection
Best - K: K-Nakoruru is her most popular Groove, which makes a lot of sense. K-Groove fits characters with good mobility and solid punishes, and Nakoruru excels in both of those. Just Defend is great for her, as it allows her to block without taking pushback that would send her out of her optimal range quickly. Shorthop makes her mixups even scarier, and she has one of the fastest runs in the game. Rage juices her damage and gives her the ability to threaten her level 3 supers, though she lacks the ability to easily combo into them. K-Nakoruru has everything she needs, and is comfortably her best Groove overall.
Useful - N/P/S: N-Nakoruru has a lot of what K-Nakoruru has, but also gets a roll now. This lets her RC some specials, which can be incredibly annoying, especially RC Mamaha. She gets more consistent access to level 1's, which isn't too useful but it lets her use her healing super often so it may be useful depending on the opponent. The sacrifice of Rage's damage potential and the very useful JD holds N-Nakoruru down a bit. P-Nakoruru is a surprisingly decent P-Groove character. Nakoruru doesn't really need meter to win with, so only having it occasionally isn't the worst deal, and she has solid parry punishes. The range you land a parry can heavily decide what your punish is however, and the damage won't be amazing. S-Nakoruru is a surprisingly fitting character. Nakoruru isn't reliant on her meter, and when she gets infinite level 1's she can use healing super in a very annoying way. Charging sucks but she really doesn't need to do it, and she gets run and hop for maximum mobility. However, you still have to grapple with S-Grooves weak mechanics, making it a questionable pick regardless of how she fits in.
Worst - C/A: C-Nakoruru gets some useful tools, but C-Groove really works well with characters who can easily utilize their supers, and Nakoruru can't really do that. Airblock is useful for her escapes however, but it isn't worth the sacrifices like hop. C-Nakoruru gets to spend meter on Alpha Counters a lot however, which does help her defense a bit. A-Nakoruru is fairly similar. While Custom Combos can be fairly damaging, Nakoruru really doesn't utilize it well. Namely, she lacks any way to anti-air realistically with CC.
|
Nakoruru is a pixie character with great mobility and close-range normals. Her unique mobility using her bird Mamaha and her various evasive tools lets her dodge everything the opponent does until she can get into range to run her mixups. Her low health and low range makes this difficult however. Nakoruru is best in K-Groove. Difficulty: MediumTier: A- |
|
| Pros | Cons |
|
|
Players to Watch
| Name | Country | Groove | Accounts | Notes |
|---|---|---|---|---|
| GAO | Japan | K-Groove | N/A | Makes Nakoruru look scary, once he has an opponent locked down, there's no escaping. Sample Match |
| P-Rugal | Japan | P-Groove | Twitter: @oyasuminecalli | Though a pocket of his, P-Rugal makes great use of shorthops and parries to maximize P-Nakoruru's damage. Sample Match |
| Kitsune | Japan | K-Groove | Twitter: @cvs2fox Youtube: fox cvs2 |
Great K-Groover in general. Plays similarly to GAO. Sample Match |
!!!THIS PAGE IS STILL A WIP. IF YOU NEED FRAME DATA NOW, REFER TO THE CVS2 BIBLE OR LOOK THROUGH EDIT HISTORY TO FIND THE LAST EDIT WITH FRAME DATA IF THERE WAS ONE!!!
Normal Moves
Far Normals
5LP
5MP
5HP
5LK
5MK
5HK
Close Standing Normals
clLP
clMP
clHP
clLK
clMK
clHK
Crouching Normals
2LP
2MP
2HP
2LK
2MK
2HK
Jumping Normals
j.LP
j.MP
j.HP
j.LK
j.MK
j.HK
Command Normals
Chitenzan
Throws
Punch Throw
Kick Throw
Special Moves
Annu Mutsube
Rera Mutsube
Kamui Rimse
Amube Yatoro
Mamaha Nitsukamara
Mamaha Movelist
Mamaha LP
Mamaha MP
Mamaha LK
Mamaha MK
Yatoru Pokku
Mamaha Release
Shichikapu Ai
Kamui Mutsube
Super Moves
Shichikapu Kamui Irushika
Ererushi Kamui Rimse
Shirikoro Kamui Nomi
Colors
