No edit summary |
No edit summary |
||
| (4 intermediate revisions by the same user not shown) | |||
| Line 917: | Line 917: | ||
== Variable Assists == | == Variable Assists == | ||
{{MoveData | {{MoveData | ||
|image= Carbonadiumassist.png | |image=Carbonadiumassist.png | ||
|caption= | |caption={{lp}} Carbonadium Coil | ||
|name= | |name=Throw | ||
| | |subtitle=[[File:Alpha.png]] | ||
|input= | |input={{a1}} // {{a2}} | ||
|data= | |data= | ||
{{ | {{AssistData-MVSC2 | ||
|Damage= | |Damage= | ||
|Startup= | |Startup= | ||
|Active= | |Active= | ||
|Recovery= | |Recovery= | ||
| | |AlphaCounter={{hp}} | ||
| | |TeamHyperCombo=Omega Destroyer | ||
| | |description= Light coil throw. Possible to combo off of this but it is a bit tricky. | ||
}} | }} | ||
}}<br> | |||
{{MoveData | {{MoveData | ||
|image= strikeassist.png | |image=strikeassist.png | ||
|caption= | |caption={{hk}} Omega Strike | ||
|name= Anti- | |name=Anti-air | ||
| | |subtitle=[[File:Beta.png]] | ||
|input= | |input={{a1}} // {{a2}} | ||
|data= | |data= | ||
{{ | {{AssistData-MVSC2 | ||
|Damage= | |Damage= | ||
|Startup= | |Startup= | ||
|Active= | |Active= | ||
|Recovery= | |Recovery= | ||
| | |AlphaCounter={{hk}} Omega Strike | ||
| | |TeamHyperCombo=Omega Destroyer | ||
| | |description= HK Omega Strike goes upward in the air. All purpose assist that can cover space or work in combos but it leaves OR exposed afterwards. | ||
}} | }} | ||
}}<br> | |||
{{MoveData | |||
|image= | |image= OmegaCrHk.png | ||
|caption= | |image2= OmegaCrHk2.png | ||
|name= Ground | |caption=Downback+{{hk}} // 1HK Burrowing Coil | ||
| | |name=Ground | ||
|input= | |subtitle=[[File:Gamma.png]] | ||
|input={{a1}} // {{a2}} | |||
|data= | |data= | ||
{{ | {{AssistData-MVSC2 | ||
|Damage= | |Damage= | ||
|Startup= | |Startup= | ||
|Active= | |Active= | ||
|Recovery= | |Recovery= | ||
| | |AlphaCounter={{d}}+{{hp}} | ||
| | |TeamHyperCombo=Omega Destroyer | ||
| | |description= Close burrowing coils. Good priority attack but it doesn't have much range. | ||
}} | }} | ||
}}<br> | |||
{{Navbox-MVC2}} | {{Navbox-MVC2}} | ||
[[Category:Marvel Vs. Capcom 2]] | [[Category: Marvel Vs. Capcom 2]] | ||
Latest revision as of 16:25, 15 August 2024
Story
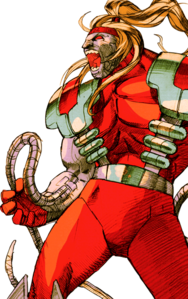
Arkady Gregorivich Rossovich, better known as Omega Red, is a villainous mutant in the Marvel universe and one of Wolverine's major enemies. Once a mutant agent Omega Red was a failed attempt to create a supersoldier in the vein of Captain America. The Soviet government implanted a retractable carbonadium tentacle within each of Omega Red's arms. The carbonadium implants, while great offensive weapons, slowly poisoned him and he was required to regularly drain the life energy of a person using his "death spore" mutation, or perhaps take small amounts from larger numbers of individuals, in order to temporarily sustain his immune system.
Gameplay
Omega Red is a very fast, very flexible character with an emphasis on air control, stray hits, and poking. A character that excels on reaching where he rightfully shouldn't and having no issue with taking sneaky routes around traditional fights. If you like tossing your opponent around and making them regret underestimating the red menace, with a little practice, Omega Red can give (almost) anyone a run for their money.
| Strengths | Weaknesses |
|---|---|
|
|
Character Summary
- Carbonadium Coil
- Forward:236 +

- Diagonal Upwards:236 +

- Straight Upwards:236 +
 +
+ 
- Retract:
 or
or  Any Time During Carbonadium Coil
- Kuuchuu Carbonadium Coil (Air Only)
- Forward: 236 +
 or 236 +
- Diagonal Upwards:236 +

- Straight Upwards:236 +
 +
+ 
- Diagonal Downwards: 236 +

- Straight Downwards: 236 +
 +
+ 
- Retract:
 or
or  Any Time During Kuuchuu Carbonadium Coil
- Energy Drain
 During Any Successful Carbonadium Coil
- Death Factor
 During Any Successful Carbonadium Coil
- Coil Throw
- Single Coil Throw: Any Direction +
 or
or  During Any Successful Carbonadium Coil
 - Double Coil Throw: +
 , Any Direction +
  During Any Successful Carbonadium Coil
- Omega Strike
- Forwards: 236 +

- Diagonal Upwards: 236 +

- Straight Upwards: 236 +
 +
+ 
- Omega Strike Cancel: 1/2/3 +
 During Omega Strike
 - Omega Strike Retract: 4 +
 During Omega Strike
- Omega Destroyer
- 214 +
 +
+ 
- Carbonadium Smash (Air Only)
- 214 +
 +
+ 
- Type α - Throw Type
- Assist:
 Carbonadium Coil
 - Counter:

- Combination: Omega Destroyer
- Type β - Anti-Air Type
- Assist:
 Omega Strike
 - Counter:
 Omega Strike
 - Combination: Omega Destroyer
- Type γ - Ground Type
- Assist: 1+

- Counter: 2 +

- Combination: Omega Destroyer
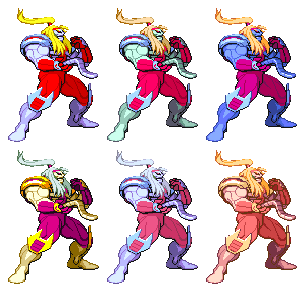
Colors
First row:

 A1.
A1.
Second row:

 A2.
A2.
Moves List
Normal Moves
Ground Normals
| Damage | Startup | Active | Recovery | Guard | |
|---|---|---|---|---|---|
| - | - | - | - | - | |
| Special Property | Cancel | Adv. Hit | Adv. Guard | Adv. Pushblock | |
| - | - | - | - | - | |
|
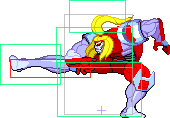
Omega Red tosses out a very fast poke with incredible range for its speed, arguably one of his most important tools as it chains into his standing mp, which starts his combos. Don't use it with reckless abandon, but don't be afraid to abuse its good Startup and fantastic recovery speed, especially for the reward. Doesn't do alot of damage on its own but it doesn't need to | |||||
| Damage | Startup | Active | Recovery | Guard | |
|---|---|---|---|---|---|
| - | - | - | - | - | |
| Special Property | Cancel | Adv. Hit | Adv. Guard | Adv. Pushblock | |
| - | - | - | - | - | |
|
Omega Red's primary combo starter, omega reds 5mp is a good uppercut, with the added benefit of him taking a step forward when performing, which gives it some very nice range. The real strength of this button is the fact that it is hard to punish on block, and is garunteed after you hit a lp in almost any scenario, leading to a full combo. This tool should be your standard punish and your best friend, along with carbonadium coils. | |||||
| Damage | Startup | Active | Recovery | Guard | |
|---|---|---|---|---|---|
| - | - | - | - | - | |
| Special Property | Cancel | Adv. Hit | Adv. Guard | Adv. Pushblock | |
| - | - | - | - | - | |
|
Omega Red slams down into the ground using one of his coils. Boasting the longest range out of any of his grounded normals, this button while slow can be okay for keepout, short blockstrings, and long range punishment, it's alright at that; however, the moves biggest plus in its pushback, able to end most blocked strings with this button and remain safe. This button can also otg opponents, but the uses for this are rather unexplored. More to come in the future as we experiment with this. | |||||
| Damage | Startup | Active | Recovery | Guard | |
|---|---|---|---|---|---|
| - | - | - | - | - | |
| Special Property | Cancel | Adv. Hit | Adv. Guard | Adv. Pushblock | |
| - | - | - | - | - | |
|
A quite useless button in Omega Reds kit. To make Omega Reds lk you take the hitbox of Omega Red's good jab, extend your hurtbox, and make it slower on Startup and recovery. You should almost exclusively avoid this move in favor for his standing lp, because it's literally a worse version of that move. | |||||
| Damage | Startup | Active | Recovery | Guard | |
|---|---|---|---|---|---|
| - | - | - | - | - | |
| Special Property | Cancel | Adv. Hit | Adv. Guard | Adv. Pushblock | |
| - | - | - | - | - | |
|
A very high Upwards facing Kick, Omega Red's mk is not a very useful move at all, nice range and fairly good speed, but utterly useless outside of grounded only combos (which even then his grounded combos are niche and bad). Avoid this. | |||||
| Damage | Startup | Active | Recovery | Guard | |
|---|---|---|---|---|---|
| - | - | - | - | - | |
| Special Property | Cancel | Adv. Hit | Adv. Guard | Adv. Pushblock | |
| - | - | - | - | - | |
|
Omega Red plunges his coils into the ground and kicks the opponent with both of his feet. Good range and good Damage, but slightly slower than his standing fierce. Recovery is mediocre. Your gameplan isn't benefited much by this move. (The button does go over sweeps, but regular Omega Strike would also do that.) You wouldn't miss much if you avoided it, but it does have a use or two. | |||||
| Damage | Startup | Active | Recovery | Guard | |
|---|---|---|---|---|---|
| - | - | - | - | - | |
| Special Property | Cancel | Adv. Hit | Adv. Guard | Adv. Pushblock | |
| - | - | - | - | - | |
|
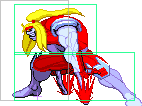
The same as his standing lightpunch essentially, but done while Crouching (crazy I know), the button is good to duck under the opponents moves due to how low to the ground Omega Red stays during his crouch, however it's less useful than his standing jab due to it having the same reward but requiring a unique input inorder to combo it to his mp. But it is still fast, has good range, and allows excellent set-ups and blockstrings. | |||||
| Damage | Startup | Active | Recovery | Guard | |
|---|---|---|---|---|---|
| - | - | - | - | - | |
| Special Property | Cancel | Adv. Hit | Adv. Guard | Adv. Pushblock | |
| - | - | - | - | - | |
|
Omega Red's Crouching Medium Punch, weep for the lost, what was once an incredibly fast and strong anti air, is now practically useless outside of short ground combos. Same boat as the poor standing Medium Kick. Pour one out. | |||||
| Damage | Startup | Active | Recovery | Guard | |
|---|---|---|---|---|---|
| - | - | - | - | - | |
| Special Property | Cancel | Adv. Hit | Adv. Guard | Adv. Pushblock | |
| - | - | - | - | - | |
|
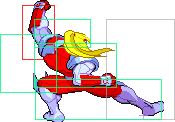
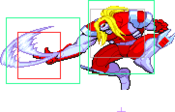
This move is a great compliment to his jumping jab. Omega Red hits the opponents while spinning his coils 3 times (note all 3 hits share the same hitbox despite the animation) containing excellent range and good priority the only downside to this move is its subpar Recovery, which can be mitigated by proper use of his omega strike cancels. This adds some good power to his grounded combos, although funnily enough when hit against airborne opponents only, this move actually acts as a launcher. If you get the chance to OTG, you can connect c.LK, c.HP then an aerial magic series. Very useful, in the correct circumstances. | |||||
| Damage | Startup | Active | Recovery | Guard | |
|---|---|---|---|---|---|
| - | - | - | - | - | |
| Special Property | Cancel | Adv. Hit | Adv. Guard | Adv. Pushblock | |
| - | - | - | - | - | |
|
A good normal in the vein that it's one of Omega Red's few low hitting moves, while not a mixup based character it's a nice tool to have. Slower than his jab but does start otg combos. Generally speaking though, outside of OTG combos the crouching jab is a lot faster. | |||||
| Damage | Startup | Active | Recovery | Guard | |
|---|---|---|---|---|---|
| - | - | - | - | - | |
| Special Property | Cancel | Adv. Hit | Adv. Guard | Adv. Pushblock | |
| - | - | - | - | - | |
|
A generally useless move, another low after another low which would be awesome, if Omega Red had any sort of standing overhead. Avoid this elaborate suicide tactic please | |||||
| Damage | Startup | Active | Recovery | Guard | |
|---|---|---|---|---|---|
| - | - | - | - | - | |
| Special Property | Cancel | Adv. Hit | Adv. Guard | Adv. Pushblock | |
| - | - | - | - | - | |
|
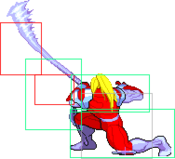
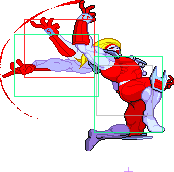
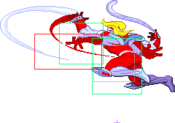
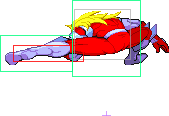
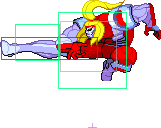
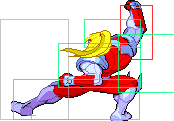
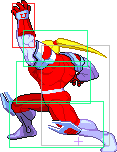
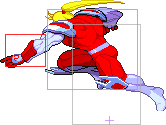
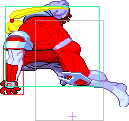
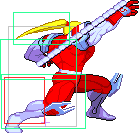
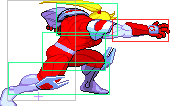
Here we are. Arguably your second most important move in your entire kit, and it's pushing for first. Your canned neutral, your assist poker, your birthright to the ground game. Omega Red punches his coils into the ground and then they appear based on your input. 1+hk putting them infront of you, 2+hk planting them at midscreen, and 3+hk reaching all the way to fullscreen. Thick enough and tall enough to cover any blindspots, omega can quite literally control ANY part of the ground on a whim. Omega Red himself is nowhere near the point of impact, and you can't trade hits with a coil. This means that unless your opponent is completely invulnerable for some reason this WILL beat them out. Finally, the coils can stop any single projectiles. Use it to stop keep-away characters, use it to retaliate from the opposite side of the screen, use it to stop assists, use it to stop on the fly zoning attempts or ground fireballs, use it to do damn near anything you want. Note that there is a slight recovery on the move, but you can cancel it into an Omega Strike and then cancel the Omega Strike almost immediately and almost mitigate all endlag. Nobody would blame you If you based a large chunk of your gameplan around this move. | |||||
Air Normals
| Damage | Startup | Active | Recovery | Guard | |
|---|---|---|---|---|---|
| - | - | - | - | - | |
| Special Property | Cancel | Adv. Hit | Adv. Guard | Adv. Pushblock | |
| - | - | - | - | - | |
|
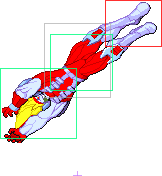
Omega red spins a coil a short distance infront of him Downwards. This move is very similar in use to his standard jab strategy-wise. This still has excellent speed and recovery, and is still an integral part of combos. Outside of combos it's primary purpose is as an interrupt. Use this if you need to, but keep in mind it's stubbier than it looks. | |||||
| Damage | Startup | Active | Recovery | Guard | |
|---|---|---|---|---|---|
| - | - | - | - | - | |
| Special Property | Cancel | Adv. Hit | Adv. Guard | Adv. Pushblock | |
| - | - | - | - | - | |
|
A swing upwards. This is one of your most valuable combo tools as it launches the opponent a little higher into the air mid combo allowing for very freeform combos. As a medium punch, it being relegated to a combo tool, it's virtues should be obvious. | |||||
| Damage | Startup | Active | Recovery | Guard | |
|---|---|---|---|---|---|
| - | - | - | - | - | |
| Special Property | Cancel | Adv. Hit | Adv. Guard | Adv. Pushblock | |
| - | - | - | - | - | |
|
Omega Red takes both of his coils and after a small Startup he wildly flails them infront of his face. It can still be used in air combos, and the range and recovery is good. The primary use is as part of a safe jump-in attack, but the priority is good enough to beat out most other jumping punches and kicks in the game (with correct spacing, of course). | |||||
| Damage | Startup | Active | Recovery | Guard | |
|---|---|---|---|---|---|
| - | - | - | - | - | |
| Special Property | Cancel | Adv. Hit | Adv. Guard | Adv. Pushblock | |
| - | - | - | - | - | |
|
This is a third (potentially 4th if you count his Crouching jab) version of his jab, with nearly the same hitbox and everything. Smaller vertical range than his jumping jab but has more horizontal range. | |||||
| Damage | Startup | Active | Recovery | Guard | |
|---|---|---|---|---|---|
| - | - | - | - | - | |
| Special Property | Cancel | Adv. Hit | Adv. Guard | Adv. Pushblock | |
| - | - | - | - | - | |
|
Omega Red Kick, Medium button, we've already done this song and dance, same distance as his standing jab too, so that makes the third or fourth to be identical. Don't use it | |||||
| Damage | Startup | Active | Recovery | Guard | |
|---|---|---|---|---|---|
| - | - | - | - | - | |
| Special Property | Cancel | Adv. Hit | Adv. Guard | Adv. Pushblock | |
| - | - | - | - | - | |
|
This move is generally too slow and in a niche spot where you'd be better off using his longer range slower air options. You can chain it after super jump hp, but thats about it. | |||||
Universal Mechanics
| Damage | Startup | Active | Recovery | Guard | |
|---|---|---|---|---|---|
| - | - | - | - | HL | |
| Special Property | Cancel | Adv. Hit | Adv. Guard | Adv. Pushblock | |
| Template:Launcher | - | - | - | - | |
|
The same as his standing Medium Punch, so the same strengths still apply. Good range due to the step forward and begins his combos, and safe on block but a bit unwieldy to use without his jab to back it. | |||||
Special Moves
| Damage | Startup | Active | Recovery | Guard | |
|---|---|---|---|---|---|
| - | - | - | - | - | |
| Special Property | Cancel | Adv. Hit | Adv. Guard | Adv. Pushblock | |
| - | - | - | - | - | |
|
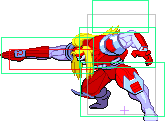
Omega Red throws a coil straight at the opponent. A hit grab that Can usually be thrown out safely, if you make use of the retract by pressing any punch button in the middle of any carbonadium coil in the event of a miss. It can cover the whole screen, but obviously it takes a little while to reach full-screen range. Also an excellent punishing move. | |||||
| Damage | Startup | Active | Recovery | Guard | |
|---|---|---|---|---|---|
| - | - | - | - | - | |
| Special Property | Cancel | Adv. Hit | Adv. Guard | Adv. Pushblock | |
| - | - | - | - | - | |
|
A Diagonal coil reaching at a 45 degree angle, this Coil is very good at its specific uses, but isn't as universal as his horizontal grab. Good to discourage opponents from jump and really hurts slow short range characters. | |||||
| Damage | Startup | Active | Recovery | Guard | |
|---|---|---|---|---|---|
| - | - | - | - | - | |
| Special Property | Cancel | Adv. Hit | Adv. Guard | Adv. Pushblock | |
| - | - | - | - | - | |
|
More of a gimmick coil than anything but still with its own uses. Great for setups and 'resets' but incredibly niche outside of that. One good thing about the double Punch coil grab is how easy it is to land this move, since many people don't expect him to throw a coil at them from that angle, doubly so if he's not on the screen at the time be it from a super jump and stall tactics, as they cannot reasonably react to the coil coming up from below them. | |||||
| Damage | Startup | Active | Recovery | Guard | |
|---|---|---|---|---|---|
| - | - | - | - | - | |
| Special Property | Cancel | Adv. Hit | Adv. Guard | Adv. Pushblock | |
| - | - | - | - | - | |
|
An air only coil, and has the same function as the light punch coil. Infact both of the light punch and light Kick versions of the air coil do the same thing with no differences. A thing of note, all of Omega Red's air coils bring his descent to a crawl, so if you have the ability to, or the need to, super jumping into spamming coils can be a pretty okay laming strategy. | |||||
| Damage | Startup | Active | Recovery | Guard | |
|---|---|---|---|---|---|
| - | - | - | - | - | |
| Special Property | Cancel | Adv. Hit | Adv. Guard | Adv. Pushblock | |
| - | - | - | - | - | |
|
Much the same as its grounded variation, however this one has a very specific very good use. Catching superjumps. If they superjump before you, calling an assist and regular jumping into this Coil can be a good way to catch someone who's not protecting themselves or expecting it after a superjump. | |||||
| Damage | Startup | Active | Recovery | Guard | |
|---|---|---|---|---|---|
| - | - | - | - | - | |
| Special Property | Cancel | Adv. Hit | Adv. Guard | Adv. Pushblock | |
| - | - | - | - | - | |
|
A worse version of the grounded coil as you cannot use it as a way to sneakily grab someone who's on the top of the screen. Generally avoid this one unless you must use a setup. | |||||
| Damage | Startup | Active | Recovery | Guard | |
|---|---|---|---|---|---|
| - | - | - | - | - | |
| Special Property | Cancel | Adv. Hit | Adv. Guard | Adv. Pushblock | |
| - | - | - | - | - | |
|
This Coil is the reason you are jumping as Red alot of the time, I'm not kidding. It covers an insane angle and at a reasonable rate, ontop of being safe as you can choose to retract it and simply not do it at any time. Beats fireballs cleanly if jumping over and further cements you cannot beat Red in a fireball war despite his lack of a projectiles. Can even be used after a superjump if they attempt to super jump back in retaliation if you want to make that guess. Use this. | |||||
| Damage | Startup | Active | Recovery | Guard | |
|---|---|---|---|---|---|
| - | - | - | - | - | |
| Special Property | Cancel | Adv. Hit | Adv. Guard | Adv. Pushblock | |
| - | - | - | - | - | |
|
Another trick grab, but this one isn't even good to setup unlike the pp grab as you really can't set it up I'm afraid. Good as a once per set kind of move but you'll probably forget you have this unless you misinput. | |||||
| Damage | Startup | Active | Recovery | Guard | |
|---|---|---|---|---|---|
| - | - | - | - | - | |
| Special Property | Cancel | Adv. Hit | Adv. Guard | Adv. Pushblock | |
| - | - | - | - | - | |
|
This is Omega Red's chief gimmick and ace in the hole- after grabbing the opponent with a coil, he drains their life and adds it to his own bar, and the benefits of that should be obvious. As an added plus, after an Energy Drain, you can perform a Coil Throw to tack on a little extra damage. Unfortunately, Omega Red can now only regenerate red health, but this is still undeniably useful as he's the only point character who can reliably regenerate on his own while active. Be warned don't get greedy with either this or death factor, as the coils are mashable grabs and they may escape | |||||
| Damage | Startup | Active | Recovery | Guard | |
|---|---|---|---|---|---|
| - | - | - | - | - | |
| Special Property | Cancel | Adv. Hit | Adv. Guard | Adv. Pushblock | |
| - | - | - | - | - | |
|
Basically the same as the energy drain, only instead of draining life, Omega Red will drain super energy. Good for denying your opponent that all-important super in chipping matches. As an added bonus, the Energy Drain and Death Factor are freely interchangeable during a coil drain, so you can fill up a sliver of life then use the remaining drain time to stock up on supers. | |||||
| Damage | Startup | Active | Recovery | Guard | |
|---|---|---|---|---|---|
| - | - | - | - | - | |
| Special Property | Cancel | Adv. Hit | Adv. Guard | Adv. Pushblock | |
| - | - | - | - | - | |
|
After connecting with his coil, Omega Red uses it to throw the opponent, either hefting them up into the air or slamming them straight to the ground. Though nice and damaging, you should always be attempting to either drain something before doing a Coil Throw, or go straight for the Double Coil Slam. Using this alone is simply not making the most of an opportunity. | |||||
| Damage | Startup | Active | Recovery | Guard | |
|---|---|---|---|---|---|
| - | - | - | - | - | |
| Special Property | Cancel | Adv. Hit | Adv. Guard | Adv. Pushblock | |
| - | - | - | - | - | |
|
A rather strange move, Omega Red tosses the opponent into the ground and then slams them anywhere else you decide to throw them. A rather strange Special move as you cannot use any sort of drain during this as your opponent will automatically fall out, not even including mashing which hurts this grab alot. I'd recommend to not use this move or to try to, as you're not only giving up meter or regeneration for very mediocre damage, but it may not even work if they put half a heart into mashing out. | |||||
| Damage | Startup | Active | Recovery | Guard | |
|---|---|---|---|---|---|
| - | - | - | - | - | |
| Special Property | Cancel | Adv. Hit | Adv. Guard | Adv. Pushblock | |
| - | - | - | - | - | |
|
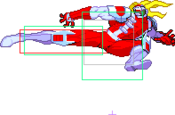
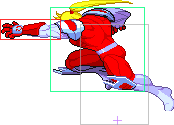
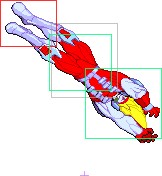
Omega Red's Omega strikes are the reason you will grow to love this character. Insanely fast, insane priority, can cover any angle you would want, and can be canceled or retracted at any time. And that's only looking at it as a special move on its own. See, nearly every single one of Omega Red's normal moves can be canceled into an Omega strike, which can then subsequently be canceled on its own instantly. This allows you to make practically every move instantly end if your execution is high enough. Implementing Strike cancels is the main skill ceiling for how you play Red. Retract if they block, and drop down If it hits for pressure. The light Kick version sends you straight ahead, and pressing 4+ | |||||
| Damage | Startup | Active | Recovery | Guard | |
|---|---|---|---|---|---|
| - | - | - | - | - | |
| Special Property | Cancel | Adv. Hit | Adv. Guard | Adv. Pushblock | |
| - | - | - | - | - | |
|
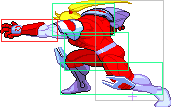
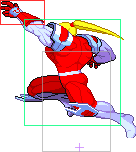
the same benefits as the others but has the added benefit of covering a very nasty angle. The main draw of this move is the fact that A. It's Omega Strike and B. You can use it for movement. Using the heavy Kick Omega Strike and immediately pressing down puts you at half screen and fully actionable if you delay slightly, and you can feint this "jump" by pressing back and a kick button. Deciding to be in the air fully actionable after what is essentially if his hp coil was a dp, this move is very strong. | |||||
| Damage | Startup | Active | Recovery | Guard | |
|---|---|---|---|---|---|
| - | - | - | - | - | |
| Special Property | Cancel | Adv. Hit | Adv. Guard | Adv. Pushblock | |
| - | - | - | - | - | |
|
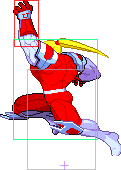
A very strange move. Don't get me wrong it's still Omega Strike, but it's not as good as the lk or hk versions. It sends Omega Red straight up into the air, which can be used for escapes or niche NICHE combos, but not much else. Generally don't do this one. | |||||
Hyper Combos
| Damage | Startup | Active | Recovery | Guard | |
|---|---|---|---|---|---|
| - | - | - | - | - | |
| Special Property | Cancel | Adv. Hit | Adv. Guard | Adv. Pushblock | |
| - | - | - | - | - | |
|
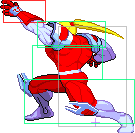
This super is actually pretty decent. When using the Omega Destroyer, there are a number of important things to remember about it. First, outside of helpers and DHCs, you can't combo it in. Period. Don't bother trying. Second, though it eventually covers a majority of the screen, it goes horizontal first. During this horizontal "phase", a jumping opponent can hit Omega Red's head to interrupt the Destroyer (although saying that this is hard is an understatement). Third, once you're finished, your opponent WILL be on the opposite side of the screen, and Omega Red will be safe from most retaliations (but not all, so be careful, particularly against 2f fullscreen loopable beam supers). Finally, this move overpowers any physical move in the game, and a majority of beam and projectile moves/supers too. Use this for chip, hitting and hurting assists, and really hurting crossup attempts. It also provides great safety during team hyper combos, letting them generally retreat safely as omega is still doing his super. Use this if your other characters get tired of burning the meter you build. | |||||
| Damage | Startup | Active | Recovery | Guard | |
|---|---|---|---|---|---|
| - | - | - | - | - | |
| Special Property | Cancel | Adv. Hit | Adv. Guard | Adv. Pushblock | |
| - | - | - | - | - | |
|
Omega Red shouts "Carbonadium Smasher!" and performs the same animation as his air dash, only if he hits the opponent, he launches into an autocombo ending with a coil slam directly down. The Carbonadium Smasher isn't the best super out there, but it isn't the worst either. As with the Omega Destroyer, this cannot be comboed in any way, which makes it more of a surprise move. Pull it off every now and then to see if your opponent is awake, but don't base your game around it. A fun tidbit, you can actually combo this super into otg combos in very specific situations. | |||||
Variable Assists
| Damage | Startup | Active | Recovery | Alpha Counter | Team Hyper Combo |
|---|---|---|---|---|---|
| - | - | - | - | Omega Destroyer | |
|
Light coil throw. Possible to combo off of this but it is a bit tricky. | |||||
| Damage | Startup | Active | Recovery | Alpha Counter | Team Hyper Combo |
|---|---|---|---|---|---|
| - | - | - | - | Omega Destroyer | |
|
HK Omega Strike goes upward in the air. All purpose assist that can cover space or work in combos but it leaves OR exposed afterwards. | |||||
| Damage | Startup | Active | Recovery | Alpha Counter | Team Hyper Combo |
|---|---|---|---|---|---|
| - | - | - | - | Omega Destroyer | |
|
Close burrowing coils. Good priority attack but it doesn't have much range. | |||||
