Capcom vs SNK 2/Blanka: Difference between revisions

From SuperCombo Wiki
No edit summary
Line 68: Line 68:
}}
}}


=== Players to Watch ===
{| class="wikitable"
|-
! Name !! Country !! Groove !! Accounts !! Notes
|-
| Ohara || Japan || C-Groove || N/A || A textbook C-Blanka player who makes great use of meter efficiency. <br> [https://www.youtube.com/watch?v=kFN9YhWNiHU&ab_channel=Lionx Sample Match]
|-
| D44 BAS || Japan || A-Groove || Twitter: @ryo151 <br> Youtube: D44Bas <br> Discord: Bas#4095 || The anchor of BAS' star-studded squad. Pulls off ridiculous customs and is generally dominating the match all around with him at all times. <br> [https://youtu.be/i-SqNIWvhbE?t=205 Sample Match]
|-
| YSK || Japan || A-Groove || Twitter: @yosuke0815 || The king of the SBB (Sakura Bison Blanka) team. Uses Blanka as well as anyone else. <br> [https://www.youtube.com/watch?v=dyAI1fS32_M&ab_channel=Lionx Sample Match]
|-
| Izumi || Japan || P-Groove || Twitter: @IzumiSgroove || Uses P-Blanka extremely efficiently and lands level 3 combos the second he has a chance. <br> [https://www.youtube.com/watch?v=6ROyIkPZpTs&t=1190s&ab_channel=foxcvs2 Sample Match]
|-
| S-Zawa || Japan || P-Groove || Twitter: @Cvs2Fukuoka || Not a flashy player, but his fundamentals are extremely disciplined and takes his offensive opportunities when he has them Also runs CvS2 Fukuoka events in Japan. <br> [https://www.youtube.com/watch?v=BEJSfCfhnFI&t=3316s&ab_channel=%E7%A6%8F%E5%B2%A1%E5%A4%A9%E4%BD%93%E3%82%AB%E3%83%97%E3%82%A8%E3%82%B9%E9%83%A8CVS2FUKUOKA Sample Match]
|-
| Tsuji || Japan || N-Groove || N/A || Old school N-Groover known for his Joe. Uses N-Blanka aggressively with his run and short hop game. <br> [https://www.youtube.com/watch?v=X9hsEZgVfck&ab_channel=Lionx Sample Match]
|-
| Bocchan || Japan || K-Groove || N/A || A strong K-CBS user. His Blanka in particular is calculated but aggressive and uses his momentum to its fullest. <br> [https://youtu.be/wfCMAaRVOq4 Sample Match]
|}
<br><br>
'''!!!THIS PAGE IS STILL A WIP. IF YOU NEED FRAME DATA NOW, REFER TO THE CVS2 BIBLE OR LOOK THROUGH THE EDIT HISTORY FOR THE LAST EDIT CONTAINING FRAME DATA IF THERE WAS ONE!!!'''


Revision as of 16:43, 10 February 2023

Introduction

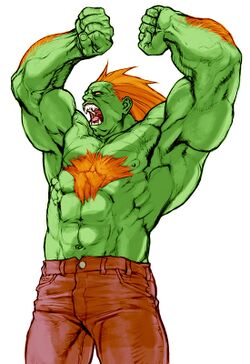
CVS2 Blanka CAPCOM Art.jpg
Health (at Ratio 2)
14800 High
Stun
60 Low
Dash Length
17 Frames Long
Dash Type
Hop Corpse Hop=Yes, Proj. Hop=Yes
Run Speed
7.2 Slow
Roll Distance
140 pixels Far
Roll Duration
28f Long
Wakeup Speed compared to Ryu
6f Very Slow

Story

Blanka, who was born named Jimmy, is a feral man from the Brazilian jungle. One day, a boy named Jimmy unwittingly boarded a plane that was sabatoged by M. Bison and Shadaloo. It crashed somewhere over the Amazon rainforest, where Jimmy was lost. He was raised in the wilderness, becoming feral. He turned green, with orange hair, and learned to control electricity through his now much stronger body. One odd day, he hopped into the back of a car looking to eat a melon, not knowing it was a poachers car. The poacher drove Jimmy back to civilization for the first time in many years, and since then, Jimmy has lived as Blanka. Blanka competed in the first World Warrior tournament, where his mother was spectating, and his story ends with a tearful reunion. He now lives a peaceful life with his mother and his best friends Dan Hibiki and Sakura.

Gameplay

Blanka is a powerhouse of a top tier. Usually considered second only to Sagat in terms of strength, Blanka has all the tools a CvS2 character needs and more. Insane buttons and neutral control, high mobility, solid damage, great metered damage, useful defensive tools, and a few very powerful roll cancels send Blanka to the top of the tier list. He's quite Groove friendly as well, as while you usually see him as the classic anchor for A-Groove and N-Groove teams, Blanka excels in every Groove to some extent. A-Blanka is usually considered the strongest, and is a mainstay on the best A-Groove players teams. His ability to use Custom Combo offensively is stellar, and it gives him a very scary defensive option to work with. Mixed with his amazing neutral, your opponent has to take a risk to get in, which you can punish with a big Custom Combo into a mixup.

Blanka has very few real weaknesses in any setting, and is a simple and reliable pick for your team regardless of Grooves or team composition. He has every tool you would want and then some. If you want to win, and especially if you play A-Groove, you should definitely try out Blanka.

Groove Selection

Best - A/N: A-Blanka, as stated above, is Blanka's most powerful Groove. A-Groove is already widely considered the best Groove in the game thanks to Custom Combo and the other versatile subsystems. Alpha Counters give Blanka a solid get-off-me tool, rolls are useful for everyone but Blanka has two incredible RC specials with RC Electricity and RC Blanka Ball. While he doesn't get access to his admittedly strong supers, Blanka's CC is no joke, and turn his punishes from high damage to very high damage. N-Blanka gets much of the same, but now has run and hop on top of it, in trade for only having level 1 supers to end in. Run is a useful tool for his pressure, but hop is especially powerful. Blanka's hop HK is nigh uncontestable by anything that isn't invincible. Only having level 1 supers isn't that bad either, since Blanka has very useful level 1's. N-Blanka is defined by strong roll cancels, abusive hop pressure, and consistently ending combos in supers for huge damage.

Useful - K/C/P/S: K-Blanka is right behind A and N. Rage and JD make for powerful neutral and high damage punishes. One solid hit from Blanka leads into a super for massive damage, and his Raged pokes are no joke. He can punish pretty reliably after a JD, and his simple poke-based neutral becomes much scarier in Rage. The loss of rolls hurts, but it's really the only big sacrifice. C-Blanka is similar to N-Blanka, but loses the mobility in exchange for airblocking and more versatile meter. Level 2 combos are a powerful tool for consistent damage, and the level 3 supers of C-Groove uniquely don't have any sort of prerequisite to spending them, allowing Blanka a chance at big damage. The loss of mobility hurts however, and A-Blanka Custom Combo is more valuable to him than level 2 supers, so generally C-Blanka loses to A-Blanka. P-Blanka gets parries, which give him more consistent punishes. A parry can easily lead into a punish like 2HK > Hop, starting Blanka's scary Electricity mixups. Sadly, P-Groove has no rolls, so you lose out on RC Electricity, but having hop HK is still strong enough of a neutral tool to not worry as much. S-Groove is the weakest Groove overall, but Blanka is solid enough to not worry about the lacking mechanics. Loss of RC Electricity and RC Blanka Balls is rough, but you still get run and hop, and dodge isn't entirely useless for Blanka.

Worst - None: Blanka is an incredibly solid character overall, and your Groove selection won't hurt him much. He excels in some more than others, but is a valuable pick in every Groove.


Blanka is a powerhouse of a top tier, with incredible buttons and neutral control mixed with scary offense and both a strong roll cancel and strong hop normal. He has no real weaknesses that hold him back. Blanka is best in A-Groove and N-Groove.
Pros Cons
  • Buttons: Blanka has some of the strongest buttons in the game, like 5LP, 5MP, 5HP, 3HP, j.HK, 2MK, 2HK, and more
  • Mobility: His command hops allow him to quickly move backwards and forwards, and mixed with Roll Cancel, these are almost impossible to punish. Solid jumps and forward moving specials also help make him very mobile
  • Mixup: Cancelling normals into hops to reset pressure, generating plus frames with his normals for powerful guard crush strings, and RC Electricity okizeme give Blanka unique but strong mixup potential
  • Damage: Blanka's pokes do solid damage on their own, hitconfirms into super do a lot more however. If you have A-Blanka, you can punish with a Custom Combo as well for massive damage potential
  • Roll Cancels: RC Electricity is a multi-hitting plus on block invincible special that knocks down, RC Blanka Balls are fast moving invincible fireball and poke punishes, and RC Hops are invincible command hops that are airborne so they can't be thrown
  • Meterless: Without spending on a super or CC, Blanka struggles to get meaningful damage or a knockdown. He usually either cancels into a Blanka Ball, which is punishable even on hit, or a hop to push another mixup, which leaves a wide gap
  • Reversals: Blanka's only meterless special with invincibility is Backward Hop, which isn't a strike and can be punished. This forces Blanka to spend meter on invincible reversals or go for a difficult and Groove specific RC Electricity/Blanka Ball reversal.


Players to Watch

Name Country Groove Accounts Notes
Ohara Japan C-Groove N/A A textbook C-Blanka player who makes great use of meter efficiency.
Sample Match
D44 BAS Japan A-Groove Twitter: @ryo151
Youtube: D44Bas
Discord: Bas#4095
The anchor of BAS' star-studded squad. Pulls off ridiculous customs and is generally dominating the match all around with him at all times.
Sample Match
YSK Japan A-Groove Twitter: @yosuke0815 The king of the SBB (Sakura Bison Blanka) team. Uses Blanka as well as anyone else.
Sample Match
Izumi Japan P-Groove Twitter: @IzumiSgroove Uses P-Blanka extremely efficiently and lands level 3 combos the second he has a chance.
Sample Match
S-Zawa Japan P-Groove Twitter: @Cvs2Fukuoka Not a flashy player, but his fundamentals are extremely disciplined and takes his offensive opportunities when he has them Also runs CvS2 Fukuoka events in Japan.
Sample Match
Tsuji Japan N-Groove N/A Old school N-Groover known for his Joe. Uses N-Blanka aggressively with his run and short hop game.
Sample Match
Bocchan Japan K-Groove N/A A strong K-CBS user. His Blanka in particular is calculated but aggressive and uses his momentum to its fullest.
Sample Match


!!!THIS PAGE IS STILL A WIP. IF YOU NEED FRAME DATA NOW, REFER TO THE CVS2 BIBLE OR LOOK THROUGH THE EDIT HISTORY FOR THE LAST EDIT CONTAINING FRAME DATA IF THERE WAS ONE!!!

Normal Moves

Far Normals

5LP

Far Jab
Far Light Punch
5LP / Far LP
CVS2 Blanka 5LP.PNG
Version Damage Stun Cancel Guard Parry Startup Active Recovery Total Adv Hit Adv Block Invul
Far Lp.png 400 4 SP/SU Mid Mid 2 2 11 15 +2 +2 None

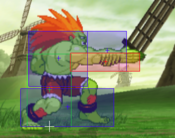
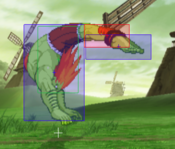
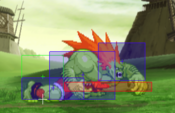
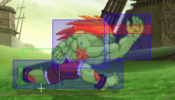
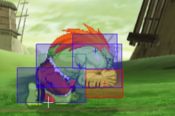
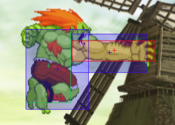
The slap. Stellar jab that starts in 2 frames and can't be crouched. Mix that with great range and you have a mashers dream. It does pay for this in the form of frame advantage, it's only +2 in a game where most jabs are +5 to +7. This means Blanka can't really link out of it, but he also doesn't need to. Great panic button in a multitude of situations.

5MP

Far Strong
Far Medium Punch
5MP / Far MP
CVS2 Blanka 5MP.PNG
Version Damage Stun Cancel Guard Parry Startup Active Recovery Total Adv Hit Adv Block Invul
Far Mp.png 900 9 SU Mid High 7 6 9 22 +5 +5 None

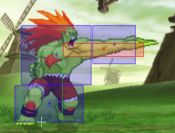
Blanka stabs outward with his hand. One of many useful pokes in Blanka's kit, but not one you'll be spamming too often really.

5HP

Far Fierce
Far Heavy Punch
5HP / Far HP
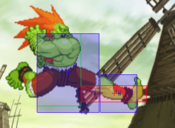
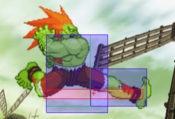
CVS2 Blanka 5HP First.PNG
CVS2 Blanka 5HP Second.PNG
Version Damage Stun Cancel Guard Parry Startup Active Recovery Total Adv Hit Adv Block Invul
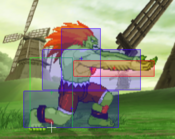
Far Hp.png 1400,1200 14,12 SU* Mid High 6 12 15 33 -3 -3 None

Placeholder

5LK

Far Short
Far Light Kick
5LK / Far LK
CVS2 Blanka 5LK.PNG
Version Damage Stun Cancel Guard Parry Startup Active Recovery Total Adv Hit Adv Block Invul
Far Lk.png 400 4 SU Mid Mid 6 4 11 21 0 0 None

Placeholder

5MK

Far Forward
Far Medium Kick
5MK / Far MK
CVS2 Blanka 5MK.PNG
Version Damage Stun Cancel Guard Parry Startup Active Recovery Total Adv Hit Adv Block Invul
Far Mk.png 1000 10 SU Mid High 7 2 16 25 +2 +2 None

Placeholder

5HK

Far Roundhouse
Far Heavy Kick
5HK / Far HK
CVS2 Blanka 5HK First.PNG
CVS2 Blanka 5HK Second.PNG
Version Damage Stun Cancel Guard Parry Startup Active Recovery Total Adv Hit Adv Block Invul
Far Hk.png 1300,1200 13,12 SU* Mid High 7 6 24 37 -6 -6 None

Placeholder

Close Standing Normals

clLP

Close Jab
Close Light Punch
cl.LP
CVS2 Blanka 5LP.PNG
Version Damage Stun Cancel Guard Parry Startup Active Recovery Total Adv Hit Adv Block Invul
Close Lp.png 400 4 SP/SU Mid Mid 2 2 11 15 +2 +2 None

Identical to 5LP.

clMP

Close Strong
Close Medium Punch
cl.MP
CVS2 Blanka 5MP.PNG
Version Damage Stun Cancel Guard Parry Startup Active Recovery Total Adv Hit Adv Block Invul
Close Mp.png 900 9 SU Mid High 7 6 9 22 +5 +5 None

Identical to 5MP.

clHP

Close Fierce
Close Heavy Punch
cl.HP
CVS2 Blanka 5HP First.PNG
CVS2 Blanka 5HP Second.PNG
Version Damage Stun Cancel Guard Parry Startup Active Recovery Total Adv Hit Adv Block Invul
Close Hp.png 1400,1200 14,12 SU* Mid High 6 12 15 33 -3 -3 None

Identical to 5HP.

clLK

Close Short
Close Light Kick
cl.LK
Version Damage Stun Cancel Guard Parry Startup Active Recovery Total Adv Hit Adv Block Invul
Close Lk.png 500,500 5,5 SP*/SU* Mid High 4 10 17 31 -12 -12 None

Placeholder

clMK

Close Forward
Close Medium Kick
cl.MK
Version Damage Stun Cancel Guard Parry Startup Active Recovery Total Adv Hit Adv Block Invul
Close Mk.png 500+500 5+5 SU* Mid High 6 2,2 28 38 -10 -10 None

Placeholder

clHK

Close Roundhouse
Close Heavy Kick
cl.HK
CVS2 Blanka 5HK First.PNG
CVS2 Blanka 5HK Second.PNG
Version Damage Stun Cancel Guard Parry Startup Active Recovery Total Adv Hit Adv Block Invul
Close Hk.png 1300,1200 13,12 SU* Mid High 7 6 24 37 -6 -6 None

Placeholder

Crouching Normals

2LP

Crouch Jab
Crouching Light Punch
2LP / cr.LP
CVS2 Blanka 2LP.PNG
Version Damage Stun Cancel Guard Parry Startup Active Recovery Total Adv Hit Adv Block Invul
D.png+Lp.png 400 4 SP/SU Mid Mid 4 4 13 21 -2 -2 None

Placeholder

2MP

Crouch Strong
Crouching Medium Punch
2MP / cr.MP
CVS2 Blanka 2MP.PNG
Version Damage Stun Cancel Guard Parry Startup Active Recovery Total Adv Hit Adv Block Invul
D.png+Mp.png 1000 10 SU Mid Mid 8 4 24 36 -8 -8 None

Placeholder

2HP

Crouch Fierce
Crouching Heavy Punch
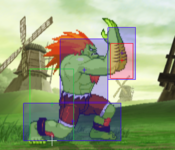
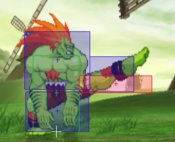
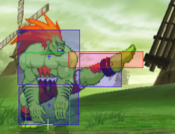
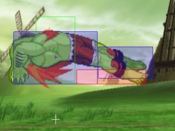
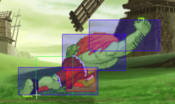
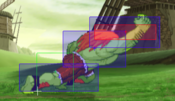
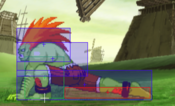
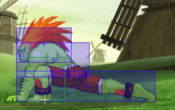
2HP / cr.HP
CVS2 Blanka 2HP First.PNG
First Hitbox
CVS2 Blanka 2HP Second.PNG
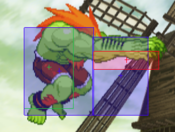
Animation and hitbox don't match
CVS2 Blanka 2HP Third.PNG
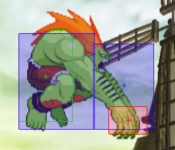
Final Hitbox
Version Damage Stun Cancel Guard Parry Startup Active Recovery Total Adv Hit Adv Block Invul
D.png+Hp.png 1200,1300 12,13 SU* Mid Mid 5 3(2)5 23 38 -4 -4 None

Placeholder

2LK

Crouch Short
Crouching Light Kick
2LK / cr.LK
CVS2 Blanka 2LK.PNG
Version Damage Stun Cancel Guard Parry Startup Active Recovery Total Adv Hit Adv Block Invul
D.png+Lk.png 400 4 SP/SU Low Low 4 4 6 14 +5 +5 None

Placeholder

2MK

Crouch Forward
Crouching Medium Kick
2MK / cr.MK
CVS2 Blanka 2MK.PNG
Version Damage Stun Cancel Guard Parry Startup Active Recovery Total Adv Hit Adv Block Invul
D.png+Mk.png 800 8 SP/SU Low Low 5 6 11 22 +3 +3 None

Placeholder

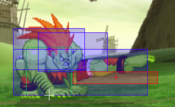
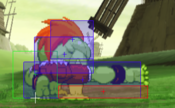
2HK

Crouch Roundhouse
Crouching Heavy Kick
2HK / cr.HK
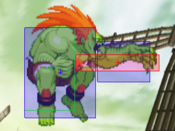
CVS2 Blanka 2HK First.PNG
Active
CVS2 Blanka 2HK Second.PNG
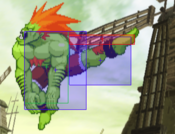
Extended Hurtbox during recovery
Version Damage Stun Cancel Guard Parry Startup Active Recovery Total Adv Hit Adv Block Invul
D.png+Hk.png 1300 13 SU Low Low 7 4 23 34 DWN -3 None

Placeholder

Jumping Normals

j.LP

Jump Jab
Jumping Light Punch
j.LP
CVS2 Blanka jLP.PNG
Version Damage Stun Cancel Guard Parry Startup Active Recovery Total Adv Hit Adv Block Invul
Ub.png/U.png/Uf.png+Lp.png 500 5 None High High 4 22 0 26 Varies Varies None

Placeholder

j.MP

Jump Strong
Jumping Medium Punch
j.MP
CVS2 Blanka jMP.PNG
Version Damage Stun Cancel Guard Parry Startup Active Recovery Total Adv Hit Adv Block Invul
Ub.png/U.png/Uf.png+Mp.png 900 9 None High High 5 10 0 15 Varies Varies None

Placeholder

j.HP

Jump Fierce
Jumping Heavy Punch
j.HP
CVS2 Blanka njHP.PNG
Neutral Jump
CVS2 Blanka jHP First.PNG
CVS2 Blanka jHP Second.PNG
Diagonal Jump
Version Damage Stun Cancel Guard Parry Startup Active Recovery Total Adv Hit Adv Block Invul
U.png+Hp.png 1400 14 None High High 2 8 0 10 Varies Varies None
Ub.png/Uf.png+Hp.png 1000,1200 10,12 None High High 4 5 0 9 Varies Varies None

Placeholder

j.LK

Jump Short
Jumping Light Kick
j.LK
CVS2 Blanka jLK.PNG
Version Damage Stun Cancel Guard Parry Startup Active Recovery Total Adv Hit Adv Block Invul
Ub.png/U.png/Uf.png+Lk.png 500 5 None High High 4 22 0 26 - - -

Placeholder

j.MK

Jump Forward
Jumping Medium Kick
j.MK
CVS2 Blanka njMK.PNG
Neutral Jump
CVS2 Blanka jMK.PNG
Diagonal Jump
Version Damage Stun Cancel Guard Parry Startup Active Recovery Total Adv Hit Adv Block Invul
Ub.png/U.png/Uf.png+Mk.png 800 8 None High High 5 11 0 16 Varies Varies None

Placeholder

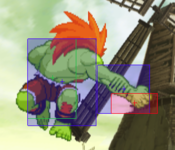
j.HK

Jump Roundhouse
Jumping Heavy Kick
j.HK
CVS2 Blanka jHK First.PNG
CVS2 Blanka jHK Second.PNG
The only attack you'll need
Version Damage Stun Cancel Guard Parry Startup Active Recovery Total Adv Hit Adv Block Invul
Ub.png/U.png/Uf.png+Hk.png 1300 13 None High High 6 8 0 14 Varies Varies None

Placeholder

Command Normals

Rock Crusher

Rock Crusher
Headbutt
Close 4/6MP
Version Damage Stun Cancel Guard Parry Startup Active Recovery Total Adv Hit Adv Block Invul
Close B.png/F.png+Mp.png 600+500 6+5 SP* Mid High 4 2(2)10 17 35 -7 -7 None

Placeholder

Amazon River Run

Amazon River Run
Slide
3HP
CVS2 Blanka 3HP.PNG
Version Damage Stun Cancel Guard Parry Startup Active Recovery Total Adv Hit Adv Block Invul
Df.png+Hp.png 1200 12 None Low Low 9 16 24 49 DWN -16 None

Placeholder

Throws

Wild Fang

Wild Fang
Punch Throw
Near Opponent, 4/6HP
Version Damage Stun Cancel Guard Parry Startup Active Recovery Total Adv Hit Adv Block Invul
Close B.png/F.png+Hp.png 800+200x(2~14) 0 None Grab Grab 3 1 13 17 DWN Grab None

Placeholder

X

Generic Throw Name
Kick Throw
Near Opponent, 4/6HK
Version Damage Stun Cancel Guard Parry Startup Active Recovery Total Adv Hit Adv Block Invul
Close B.png/F.png+Hk.png 2000 0 None Grab Grab 5 1 13 19 DWN Grab None

Placeholder

Specials

Electric Thunder

Electric Thunder
Electricity
Mash P
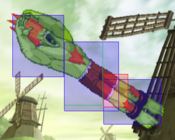
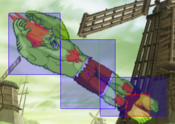
CVS2 Blanka PPP.PNG
Top Tier in one image
Version Damage Stun Cancel Guard Parry Startup Active Recovery Total Adv Hit Adv Block Invul
Mash Lp.png 1400 14 None Mid High 5 4(4)4... 13 30 DWN 0 None
Mash Mp.png 1500 15 None Mid High 7 2(2)2(2)2... 13 30 DWN +6 None
Mash Hp.png 1600 16 None Mid High 9 1(1)1... 14 26 DWN +10 None

Rolling Attack

Rolling Attack
Blanka Ball
[4]6P
CVS2 Blanka 46P.PNG
Version Damage Stun Cancel Guard Parry Startup Active Recovery Total Adv Hit Adv Block Invul
Charge B.png,F.png+Lp.png 1200 12 None Mid High 2 25 3 30 -22 -22 1~27 (Airborne)
Charge B.png,F.png+Mp.png 1300 13 None Mid High 2 32 3 37 -22 -22 1~34 (Airborne)
Charge B.png,F.png+Hp.png 1400 14 None Mid High 2 40 3 45 -22 -22 1~42 (Airborne)

Backstep Roll

Backstep Roll
Backstep Ball
[4]6
CVS2 Blanka 46P.PNG
Version Damage Stun Cancel Guard Parry Startup Active Recovery Total Adv Hit Adv Block Invul
Charge B.png+F.png+Lk.png 1300 13 None Mid High 28 33 3 64 DWN -23 3~18, 25~61 (Airborne)
Charge B.png,F.png+Mk.png 1400 14 None Mid High 28 34 3 65 DWN -25 3~18, 25~62 (Airborne)
Charge B.png,F.png+Hk.png 1500 15 None Mid High 28 36 3 67 DWN -25 3~18, 25~64 (Airborne)

Vertical Rolling

Vertical Rolling
Upward Ball
[2]8K
CVS2 Blanka 28K.PNG
Version Damage Stun Cancel Guard Parry Startup Active Recovery Total Adv Hit Adv Block Invul
Charge D.png,U.png+Lk.png 1200 12 None Mid Mid 2 16 39 57 -23 -23 1~53 (Airborne)
Charge D.png,U.png+Mk.png 1300 13 None Mid Mid 2 15 40 57 -24 -24 1~54 (Airborne)
Charge D.png,U.png+Hk.png 1400 14 None Mid Mid 2 14 42 58 -25 -25 1~55 (Airborne)

Surprise

Surprise
Hop
KKK/4KKK
CVS2 Blanka KKK.PNG
Forward Hop
CVS2 Blanka 4KKK.PNG
Backward Hop
Version Damage Stun Cancel Guard Parry Startup Active Recovery Total Adv Hit Adv Block Invul
3k.png
Forward
None None None None None 3 20 7 30 None None 4~23 (Airborne)
B.png+3k.png
Backward
None None None None None 3 20 7 30 None None 1~13 (Full), 4~23 (Airborne)

Supers

Direct Lightning

Direct Lightning
Electric Super
[4]646P
CVS2 Blanka 4646P.PNG
Version Damage Stun Cancel Guard Parry Startup Active Recovery Total Adv Hit Adv Block Invul
Charge B.png,F.pngB.pngF.png+Lp.png 2400 0 None Mid High 4:4 30 4 42 DWN -19 1~8 (Full)
Charge B.png,F.pngB.pngF.png+Mp.png 3600 0 SP/SU Mid High 4:4 30 4 42 DWN -19 1~14 (Full)
Charge B.png,F.pngB.pngF.png+Hp.png 5000 0 None Mid High 4:4 30 4 42 DWN -19 1~22 (Full)

Ground Shave Rolling

Ground Shave Rolling
Rolling Super
[4]646K
CVS2 Blanka 4646K.PNG
Version Damage Stun Cancel Guard Parry Startup Active Recovery Total Adv Hit Adv Block Invul
Charge B.png,F.pngB.pngF.png+Lk.png 1900 0 None Mid Mid 4:4 22,30~111 15 75~156 DWN +10 None
Charge B.png,F.pngB.pngF.png+Mk.png 3000 0 SP/SU Mid Mid 4:4 28,30~117 15 81~168 DWN +10 1~14 (Full)
Charge B.png,F.pngB.pngF.png+Hk.png 4500 0 None Mid Mid 4:4 34,30~123 15 87~180 DWN +10 1~22 (Full)

Shout of Earth

Shout of Earth
Mash Super
[1]319P
Version Damage Stun Cancel Guard Parry Startup Active Recovery Total Adv Hit Adv Block Invul
Charge Db.png,Df.pngDb.pngUf.png+Lp.png 1600~3200 0 None Mid Mid 4:4 54 26 88 DWN -53 1~8 (Full)
Charge Db.png,Df.pngDb.pngUf.png+Mp.png 1600~4400 0 SP/SU Mid Mid 4:4 54 26 88 DWN -56 1~14 (Full)
Charge Db.png,Df.pngDb.pngUf.png+Hp.png 2800~6400 0 None Mid Mid 4:4 54 26 88 DWN -53 1~22 (Full)


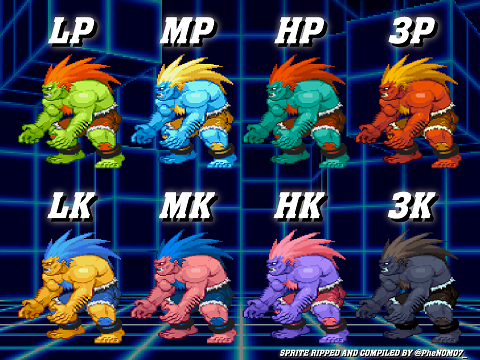
Colors
Blanka CvS2 colors.png


CvS2 Wiki Navigation

General
Controls
Notation
HUD
Glossary
System
Roll Cancel
Combo
CvS2 Versions
Netplay/ Training
FAQ
Grooves
Groove Overview
Groove Subsystems
C-Groove
A-Groove
P-Groove
S-Groove
N-Groove
K-Groove
Capcom Characters
Akuma (Gouki)
Balrog (Boxer)
Blanka
Cammy
Chun-Li
Dan
Dhalsim
Eagle
E.Honda
Guile
Ken
Kyosuke
Maki
M. Bison (Dictator)
Morrigan
Rolento
Ryu
Sagat
Sakura
Vega (Claw)
Yun
Zangief
SNK Characters
Athena
Benimaru
Chang
Geese
Haohmaru
Hibiki
Iori
Joe
Kim
King
Kyo
Mai
Nakoruru
Raiden
Rock
Rugal
Ryo
Terry
Todo
Vice
Yamazaki
Yuri
Boss Characters
Shin Akuma
Ultimate Rugal
Evil Ryu
Orochi Iori