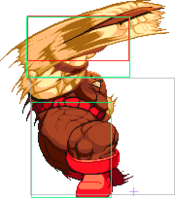
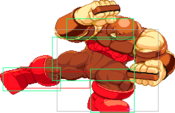
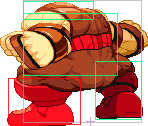
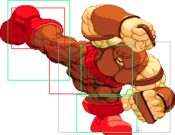
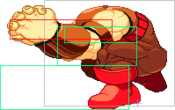
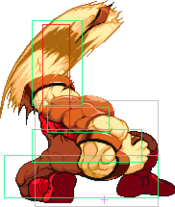
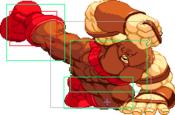
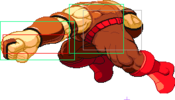
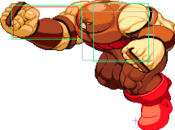
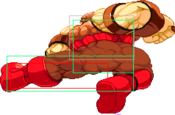
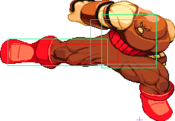
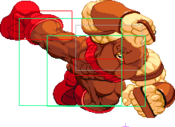
(2021 REVAMP) |
|||
| Line 1: | Line 1: | ||
{{MVC2 Character Intro|char= juggernaut|full=Juggernaut|short=JGN|content= | |||
== Introduction == | == Introduction == | ||
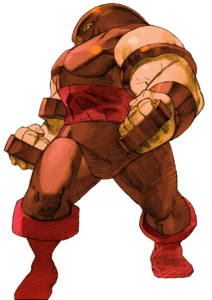
Cain Marko is a regular human who was empowered by a gem belonging to the deity Cyttorak, becoming a literal human juggernaut. He possesses superhuman strength and durability, and is virtually immune to most physical attacks; his helmet also protects him from mental attacks. Although not a mutant, Juggernaut has been featured as a prominent member of the Brotherhood of Mutants. He is also the stepbrother of Professor X. | |||
Juggernaut is the great equalizer. With the help of the Power-Up Glitch even a solo Juggernaut can touch of death most of the cast for next to no execution. A simple Headcrush is usually all it takes to force your opponent to adjust their behavior and shift the momentum of the match. Your normal buttons occupy very popular sections of the screen and the hits add up fast, even more if you're already Glitched. Any assist that you chose will be impossible to ignore, offering many characters the damage they need to compete. | Juggernaut is the great equalizer. With the help of the Power-Up Glitch even a solo Juggernaut can touch of death most of the cast for next to no execution. A simple Headcrush is usually all it takes to force your opponent to adjust their behavior and shift the momentum of the match. Your normal buttons occupy very popular sections of the screen and the hits add up fast, even more if you're already Glitched. Any assist that you chose will be impossible to ignore, offering many characters the damage they need to compete. | ||
On the other hand, Juggernaut has few decent defensive options but ultimately struggles. Juggernaut's Headcrush is great for blowing through projectiles and block strings, Super Armor provides some much needed breathing room when dealing with your opponent's offense, and his Defense is among the highest in the game. However, Juggernaut's large body makes him an easy target for being rushed down, his moves are very slow and punishable, he can't really deal with pressure from above, and he has no strong options for dealing with runaway. These weaknesses really add up against Juggernaut, making him much easier to utilize as an assist. | |||
== Gameplay == | |||
{{2 Column Flex|flex1=6|flex2=4 | |||
|content1= | |||
{{Content Box|content= | |||
'''Juggernaut''' is a simple and powerful character to help with learning the fundamentals of defense in MvC2; A character that is great for beginners and can remain viable in higher level play but might be seen as a gimmick. | |||
{{ProConTable | |||
|pros= | |||
* '''Explosive Damage''': A single touch can lead to death under the right circumstances. | |||
* '''Big Buttons''': Normal buttons that take up huge portions of the screen and last for an extremely long time compared to other characters. | |||
* '''Super Armor''': Lets Juggernaut absorb a number of non-heavy hits or projectile before entering hitstun, even when he's an assist. | |||
* '''Simple Execution''': It doesn't get easier than having a raw super be your optimal punish. | |||
* '''Heavy Weight''': Juggernaut falls faster than average so he's harder for some characters to combo. | |||
* '''Ground Throws''': Good range and monstrous damage potential in the corner. Provides an outstanding reward for dealing with an opponent's offense. | |||
* '''High Defense''': Gives Juggernaut more chances to trade and helps his assists deal with being punished. | |||
* '''Whiff Punishes''': Headcrush and THC Headcrush allow for some punishes that even the best characters might not have access to. | |||
* '''Power-Up Glitch''': Turns Juggernaut and his damage potential into a serious threat which demands respect from the entire cast. | |||
|cons= | |||
* '''Big Body''': Being a larger target means you have to deal with more pressure and mixups than the average character. You'll be stuck on your back unless you can successfully pushblock or call an assist. Makes Juggernaut easier to combo for some characters. | |||
* '''Meter Hungry''': Headcrush is your best source of damage but Juggernaut cannot easily build meter for himself. | |||
* '''Low Mobility''': Juggernaut must rely on his assists to help deal with runaway. Body Press might work in a pinch but tends to be unsafe. | |||
* '''Slow Recovery''': Basically every single move Juggernaut can perform is punishable. All of them are punishable on whiff, most of them on block, even some of them on hit. | |||
* '''Defensive Options''': While Headcrush and Super Armor are great options, sometimes they aren't enough to deal with a properly layered offense. Especially from above. | |||
* '''Power-Up Glitch''': Predictable. Some opponents will make changing characters very punishing and very difficult. | |||
}} | |||
}} | |||
|content2= | |||
{{Content Box|content= | |||
<center><youtube>H1qAtBFdbDs</youtube></center> | |||
}} | |||
}} | |||
== Character Summary == | |||
{{3 Column Flex | |||
|content1= | |||
{{Content Box|header=Special Moves|content= | |||
;Juggernaut Punch | |||
*{{hcf}} + {{p}} | |||
;Juggernaut Body Press | |||
*{{hcf}} + {{k}} | |||
;Earthquake Punch | |||
*{{qcfd}} + {{p}} | |||
;Cyttorak Power-Up | |||
*{{dp}} + {{lp}}{{hp}} | |||
}} | |||
|content2= | |||
{{Content Box|header=Super Moves|content= | |||
;Juggernaut Headcrush (Dash super) | |||
* {{qcf}} + {{lp}} + {{hp}} | |||
}} | |||
|content3= | |||
{{Content Box|header=Assist Moves|content= | |||
;Type α - Ground Type | |||
*Assist: {{lp}}Earthquake Punch | |||
*Counter: {{lp}}Earthquake Punch | |||
*Combination: Juggernaut Headcrush | |||
;Type β - Dash Type | |||
*Assist: {{hp}} Juggernaut Punch | |||
*Counter: {{hp}} Juggernaut Punch | |||
*Combination: Juggernaut Headcrush | |||
;Type γ - Variety Type | |||
*Assist: {{hk}} Body Press | |||
*Counter: {{hk}} Body Press | |||
*Combination: Juggernaut Headcrush | |||
}} | |||
}} | |||
}} | |||
== Colors == | |||
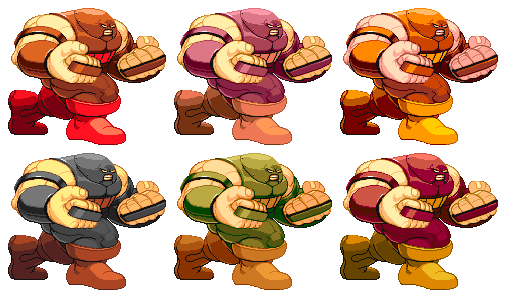
First row: LP, HP, A1. Second row: LK, HK, A2. | |||
[[Image:Mvc2-juggernaut.png]] | |||
== Gameplay == | |||
[[File:MVC2Juggernaut.gif|center]] | [[File:MVC2Juggernaut.gif|center]] | ||
| Line 31: | Line 104: | ||
}} | }} | ||
== | == Moves List == | ||
=== Normal Moves === | |||
{{MoveData | |||
|image= MVC2_Juggernaut_5LP.png | |||
|caption= yes, your light punch is a poke | |||
|name= Light Punch | |||
|linkname= 5LP | |||
|input= 5{{lp}} | |||
|data= | |||
{{AttackData-MVSC2 | |||
|Damage= | |||
|Startup= 9 | |||
|Active= 3 | |||
|Recovery= 20 | |||
|Guard= HL | |||
|Special Property= None | |||
|Cancel= Chain, Special, SJ, Super | |||
|Adv. Hit= - | |||
|Adv. Guard= - | |||
|Adv. Pushblock= - | |||
|description= a quick short attack. Decent damage for a jab.<br>Good priority and a nice lead in for low jump pressure to keep them from air throwing you.<br>Probably one of our my most used attacks. Usually the scariest because after this connects, the follow up is 5{{mp}} or Headcrush.<br>is our most preferred poke / pressure tool | |||
}} | |||
}} | |||
{{MoveData | |||
|image= MVC2_Juggernaut_5MP_3.png | |||
|name= Medium Punch | |||
|linkname= 5MP | |||
|input= 5{{mp}} | |||
|data= | |||
{{AttackData-MVSC2 | |||
|Damage= | |||
|Startup= 10 | |||
|Active= 6 | |||
|Recovery= 29 | |||
|Guard= HL | |||
|Special Property= None | |||
|Cancel= Special, Super, SJ cancellable frames 17~33 | |||
|Adv. Hit= - | |||
|Adv. Guard= - | |||
|Adv. Pushblock= - | |||
|description= This is the second jab hit.<be>Has a slightly shorter range but and doesn't do much damage (read: would be considered plenty of damage for any other character). | |||
}} | |||
}} | |||
{{MoveData | |||
|image= MVC2_Juggernaut_5HP_3.png | |||
|caption= Hitting this at least 3 times a match is mandatory | |||
|name= Heavy Punch | |||
|linkname= 5HP | |||
|input= 5{{hp}} | |||
|data= | |||
{{AttackData-MVSC2 | |||
|Damage= | |||
|Startup= 8 | |||
|Active= 8 | |||
|Recovery= 41 | |||
|Guard= HL | |||
|Special Property= None | |||
|Cancel= Special, SJ, Super | |||
|Adv. Hit= - | |||
|Adv. Guard= - | |||
|Adv. Pushblock= - | |||
|description= will stun anything known by man. 5{{hp}} > Headcrush Deals insane damage even without the glitch<br>can be used as a makeshift anti-air | |||
}} | |||
}} | |||
{{MoveData | |||
|image= MVC2_Juggernaut_6HP.png | |||
|caption= | |||
|name= Forward heavy punch | |||
|linkname= 6HP | |||
|input= 6{{hp}} | |||
|data= | |||
{{AttackData-MVSC2 | |||
|Damage= | |||
|Startup= 20 | |||
|Active= 8 | |||
|Recovery= 28 | |||
|Guard= HL | |||
|Special Property= None | |||
|Cancel= Special, SJ, Super | |||
|Adv. Hit= - | |||
|Adv. Guard= - | |||
|Adv. Pushblock= - | |||
|description= Juggernaut's longest normal<br> has a very long startup so it is mostly used to extend corner combos | |||
}} | |||
}} | |||
{{MoveData | |||
|image= MVC2_Juggernaut_5LK.png | |||
|caption= Ken's kick, but not as good | |||
|name= Light Kick | |||
|linkname= 5LK | |||
|input= 5{{lk}} | |||
|data= | |||
{{AttackData-MVSC2 | |||
|Damage= | |||
|Startup= 6 | |||
|Active= 1 | |||
|Recovery= 21 | |||
|Guard= HL | |||
|Special Property= None | |||
|Cancel= Chain, Special, SJ, Super | |||
|Adv. Hit= - | |||
|Adv. Guard= - | |||
|Adv. Pushblock= - | |||
|description= generic low kick<br>hitbox is way longer than it appears visually but it's still shorter than 5{{lp}} | |||
}} | |||
}} | |||
{{MoveData | |||
|image= MVC2_Juggernaut_5MK_2.png | |||
|caption= | |||
|name= Medium Kick | |||
|linkname= 5MK | |||
|input= 5{{mk}} | |||
|data= | |||
{{AttackData-MVSC2 | |||
|Damage= | |||
|Startup= 6 | |||
|Active= 24 | |||
|Recovery= 22 | |||
|Guard= HL | |||
|Special Property= None | |||
|Cancel= Special, SJ, Super | |||
|Adv. Hit= - | |||
|Adv. Guard= - | |||
|Adv. Pushblock= - | |||
|description= The stomp!<br>I don't recommend this move unless you've already won your opponent. | |||
}} | |||
}} | |||
{{MoveData | |||
|image= MVC2_Juggernaut_5HK.png | |||
|caption= | |||
|name= Heavy Kick | |||
|linkname= 5HK | |||
|input= 5{{hk}} | |||
|data= | |||
{{AttackData-MVSC2 | |||
|Damage= | |||
|Startup= 14 | |||
|Active= 3 | |||
|Recovery= 40 | |||
|Guard= HL | |||
|Special Property= Launcher | |||
|Cancel= Special, SJ, Super | |||
|Adv. Hit= - | |||
|Adv. Guard= - | |||
|Adv. Pushblock= - | |||
|description= a pretty powerful, high, slow kick.<br>Decent range and nice damage and launcher that you can't follow up (except in a corner?). | |||
}} | |||
}} | |||
{{MoveData | |||
|image= MVC2_Juggernaut_2LP.png | |||
|caption= | |||
|name= Crouching Light Punch | |||
|linkname= 2LP | |||
|input= 2{{lp}} | |||
|data= | |||
{{AttackData-MVSC2 | |||
|Damage= | |||
|Startup= 9 | |||
|Active= 3 | |||
|Recovery= 11 | |||
|Guard= L | |||
|Special Property= OTG | |||
|Cancel= Chain, Special, Super | |||
|Adv. Hit= - | |||
|Adv. Guard= - | |||
|Adv. Pushblock= - | |||
|description= 5{{lp}} but low | |||
}} | |||
}} | |||
{{MoveData | |||
|image= MVC2_Juggernaut_2MP.png | |||
|caption= Cactus uppercut | |||
|name= Crouching Medium Punch | |||
|linkname= 2MP | |||
|input= 2{{mp}} | |||
|data= | |||
{{AttackData-MVSC2 | |||
|Damage= | |||
|Startup= 13 | |||
|Active= 6 | |||
|Recovery= 32 | |||
|Guard= HL | |||
|Special Property= None | |||
|Cancel= Chain, Special, Super, SJ Cancellable 22~38 | |||
|Adv. Hit= - | |||
|Adv. Guard= - | |||
|Adv. Pushblock= - | |||
|description= generic hp filler | |||
}} | |||
}} | |||
{{MoveData | |||
|image= MVC2_Juggernaut_2HP_2.png | |||
|caption= | |||
|name= Crouching Heavy Punch | |||
|linkname= 2HP | |||
|input= 2{{hp}} | |||
|data= | |||
{{AttackData-MVSC2 | |||
|Damage= | |||
|Startup= 11 | |||
|Active= 6 | |||
|Recovery= 39 | |||
|Guard= HL | |||
|Special Property= None | |||
|Cancel= Special, SJ, Super | |||
|Adv. Hit= - | |||
|Adv. Guard= - | |||
|Adv. Pushblock= - | |||
|description= Our primary launcher.<br>Attempting to launch someone is rarely a good idea.<br>You can either jump up after this and combo away (ending with this same punch for very nice damage) or body splash (the {{hk}} version does almost as much damage as his arial rave). | |||
}} | |||
}} | |||
{{MoveData | |||
|image= MVC2_Juggernaut_2LK.png | |||
|caption= footsies | |||
|name= Crouching Light Kick | |||
|linkname= 2LK | |||
|input= 2{{lk}} | |||
|data= | |||
{{AttackData-MVSC2 | |||
|Damage= | |||
|Startup= 6 | |||
|Active= 5 | |||
|Recovery= 14 | |||
|Guard= L | |||
|Special Property= None | |||
|Cancel= Chain, Special, SJ, Super | |||
|Adv. Hit= - | |||
|Adv. Guard= - | |||
|Adv. Pushblock= - | |||
|description= very fast, but that's about it | |||
}} | |||
}} | |||
{{MoveData | |||
|image= MVC2_Juggernaut_2MK.png | |||
|caption2= | |||
|name= Crouching Medium Punch | |||
|linkname= 2MK | |||
|input= 2{{mk}} | |||
|data= | |||
{{AttackData-MVSC2 | |||
|Damage= | |||
|Startup= 10 | |||
|Active= 3 | |||
|Recovery= 35 | |||
|Guard= L | |||
|Special Property= None | |||
|Cancel= Special, Super SJ cancellable 22・42 | |||
|Adv. Hit= - | |||
|Adv. Guard= - | |||
|Adv. Pushblock= - | |||
|description= is a sweep, generally useless since Juggernaut usually knocks away opponents in combos and doesn't benefit from being super close to his opponents | |||
}} | |||
}} | |||
{{MoveData | |||
|image= MVC2_Juggernaut_2HK_2.png | |||
|name= Crouching Heavy Kick | |||
|linkname= 2HK | |||
|input= 2{{hk}} | |||
|data= | |||
{{AttackData-MVSC2 | |||
|Damage= | |||
|Startup= 14 | |||
|Active= 5 | |||
|Recovery= 44 | |||
|Guard= L | |||
|Special Property= | |||
|Cancel= | |||
|Adv. Hit= - | |||
|Adv. Guard= - | |||
|Adv. Pushblock= - | |||
|description= slow and not useful.<br>On a successful hit, this move will stun any opponent it does not launch. | |||
}} | |||
}} | |||
{{MoveData | |||
|image= MVC2_Juggernaut_J.LP.png | |||
|caption= God of Creativty | |||
|name= Air Light Punch | |||
|linkname= j.LP | |||
|input= j.{{lp}} | |||
|data= | |||
{{AttackData-MVSC2 | |||
|Damage= | |||
|Startup= 6 | |||
|Active= 14 | |||
|Recovery= 8 | |||
|Guard= H | |||
|Special Property= None | |||
|Cancel= Chain, Special, Super | |||
|Adv. Hit= - | |||
|Adv. Guard= - | |||
|Adv. Pushblock= - | |||
|description= 5{{lp}} but jumping | |||
}} | |||
}} | |||
{{MoveData | |||
|image= MVC2_Juggernaut_J.MP.png | |||
|caption= | |||
|name= Air Medium Punch | |||
|linkname= j.MP | |||
|input= j.{{mp}} | |||
|data= | |||
{{AttackData-MVSC2 | |||
|Damage= | |||
|Startup= 9 | |||
|Active= 5 | |||
|Recovery= 24 | |||
|Guard= H | |||
|Special Property= None | |||
|Cancel= Special, Super | |||
|Adv. Hit= - | |||
|Adv. Guard= - | |||
|Adv. Pushblock= - | |||
|description= 5{{mp}} but jumping | |||
}} | |||
}} | |||
{{MoveData | |||
|image= MVC2_Juggernaut_J.HP_2.png | |||
|name= Jumping Heavy Punch | |||
|linkname= j.HP | |||
|input= j.{{hp}} | |||
|data= | |||
{{AttackData-MVSC2 | |||
|Damage= | |||
|Startup= 12 | |||
|Active= 5 | |||
|Recovery= 32 | |||
|Guard= H | |||
|Special Property= Flying screen | |||
|Cancel= Special, Super | |||
|Adv. Hit= - | |||
|Adv. Guard= - | |||
|Adv. Pushblock= - | |||
|description= a giant sswipe<br>knocks down aerial opponents and deals amazing damage | |||
}} | |||
}} | |||
{{MoveData | |||
|image= MVC2_Juggernaut_J.LK.png | |||
|caption=2LK but jumping | |||
|name= Air Light Kick | |||
|linkname= j.LK | |||
|input= j.{{lk}} | |||
|data= | |||
{{AttackData-MVSC2 | |||
|Damage= | |||
|Startup= 6 | |||
|Active= 12 | |||
|Recovery= 8 | |||
|Guard= H | |||
|Special Property= None | |||
|Cancel= Chain, Special, Super | |||
|Adv. Hit= - | |||
|Adv. Guard= - | |||
|Adv. Pushblock= - | |||
|description= has an alright downward angle | |||
}} | |||
}} | |||
{{MoveData | |||
|image= MVC2_Juggernaut_J.MK.png | |||
|caption= literally just 2HK | |||
|name= Air Medium Kick | |||
|linkname= j.MK | |||
|input= j.{{mk}} | |||
|data= | |||
{{AttackData-MVSC2 | |||
|Damage= | |||
|Startup= 11 | |||
|Active= 5 | |||
|Recovery= 16 | |||
|Guard= H | |||
|Special Property= None | |||
|Cancel= Special, Super | |||
|Adv. Hit= - | |||
|Adv. Guard= - | |||
|Adv. Pushblock= - | |||
|description= filler air combo move | |||
}} | |||
}} | |||
{{MoveData | |||
{ | |image= MVC2_Juggernaut_J.HK.png | ||
|caption= | |||
|name= Air Heavy Kick | |||
|linkname= j.HK | |||
|input= j.{{hk}} | |||
|data= | |||
{{AttackData-MVSC2 | |||
|Damage= | |||
|Startup= 12 | |||
|Active= 6 | |||
|Recovery= 18 | |||
|Guard= H | |||
|Special Property= Flying Screen | |||
|Cancel= Special, Super | |||
|Adv. Hit= - | |||
|Adv. Guard= - | |||
|Adv. Pushblock= - | |||
|description= 5{{hk}} but useful<br>deals great damage and can extend an air combo if they are against the corner | |||
}} | |||
}} | |||
| | |||
| | |||
| | |||
| | |||
| | |||
| | |||
| | |||
| | |||
| | |||
| | |||
| | |||
| | |||
| | |||
| | |||
| | |||
| | |||
=== Special Moves === | === Special Moves === | ||
| Line 236: | Line 544: | ||
{{MvC3MoveListHeader}} | {{MvC3MoveListHeader}} | ||
{{MoveListRow | Juggernaut Punch | {{MoveListRow | Juggernaut Punch | ||
| | | {{hcf}} + {{p}} | ||
| 20 | | 20 / 28 -- 30 / 42 | ||
| {{airok}} Probably Juggernaut's most important special move, due to its insane range, damage and super armor. great to end ground combos. This can be done with either {{lp}}, which is faster but stationary or {{hp}}, which has a dash and deals more damage but is much slower. redefines Juggernaut's character and movement the same way | |||
}} | }} | ||
{{MoveListRow | Juggernaut Body Press | {{MoveListRow | Juggernaut Body Press | ||
| | | {{hcf}} + {{k}} | ||
| 19 | | 19 / 25 -- 23 / 29 -- 29 / 38 | ||
| Jugg jumps in the air and does a body press<br>quite situational but deals alright damage and knocks down<br>has very poor recovery and can't be comboed into easily | |||
}} | }} | ||
{{MoveListRow | Earthquake Punch | {{MoveListRow | Earthquake Punch | ||
| | | {{qcfd}} + {{p}} | ||
| 18 | | 18 / 22 -- 27 / 33 | ||
| {{airok}}{{high}} Slams the ground and sends shockwaves forward<br>great for controlling space and punishing reckless dashes, especially as an assist<br>but you most likely did this while trying to attack low after a dash | |||
}} | }} | ||
{{MoveListRow | Cyttorak Power-Up | {{MoveListRow | Cyttorak Power-Up | ||
| | | {{dp}} + {{lp}}{{hp}} | ||
| | | N/A | ||
| Increases damage for Juggernaut's next attack. The effect is normally canceled whether the attack connects or not. | | Increases damage for Juggernaut's next attack. The effect is normally canceled whether the attack connects or not, but this effect is permanent when using Power-up glitch<br>this makes Juggernaut one of the strongest characters in the game.<br>how the glitch works is explained below | ||
}} | }} | ||
{{MoveListFooter}} | {{MoveListFooter}} | ||
First set of damage is for normal. Second set of damage is for Power-Up. Third set of damage is with Power-Up glitch applied. | First set of damage is for normal. Second set of damage is for Power-Up. Third set of damage is with Power-Up glitch applied. | ||
| Line 263: | Line 572: | ||
{{MvC3MoveListHeader}} | {{MvC3MoveListHeader}} | ||
{{MoveListRow | Juggernaut Headcrush | {{MoveListRow | Juggernaut Headcrush | ||
| | | {{qcf}} + {{lp}}{{hp}} | ||
| 58 | | 58 / 63 / 87 | ||
| [[file:mash.png]] Maximum of 8 hits | | [[file:mash.png]] Maximum of 8 hits | ||
}} | }} | ||
Revision as of 19:16, 16 September 2021
Introduction
Cain Marko is a regular human who was empowered by a gem belonging to the deity Cyttorak, becoming a literal human juggernaut. He possesses superhuman strength and durability, and is virtually immune to most physical attacks; his helmet also protects him from mental attacks. Although not a mutant, Juggernaut has been featured as a prominent member of the Brotherhood of Mutants. He is also the stepbrother of Professor X.
Juggernaut is the great equalizer. With the help of the Power-Up Glitch even a solo Juggernaut can touch of death most of the cast for next to no execution. A simple Headcrush is usually all it takes to force your opponent to adjust their behavior and shift the momentum of the match. Your normal buttons occupy very popular sections of the screen and the hits add up fast, even more if you're already Glitched. Any assist that you chose will be impossible to ignore, offering many characters the damage they need to compete.
On the other hand, Juggernaut has few decent defensive options but ultimately struggles. Juggernaut's Headcrush is great for blowing through projectiles and block strings, Super Armor provides some much needed breathing room when dealing with your opponent's offense, and his Defense is among the highest in the game. However, Juggernaut's large body makes him an easy target for being rushed down, his moves are very slow and punishable, he can't really deal with pressure from above, and he has no strong options for dealing with runaway. These weaknesses really add up against Juggernaut, making him much easier to utilize as an assist.
Gameplay
Juggernaut is a simple and powerful character to help with learning the fundamentals of defense in MvC2; A character that is great for beginners and can remain viable in higher level play but might be seen as a gimmick.
| Strengths | Weaknesses |
|---|---|
|
|
Character Summary
- Juggernaut Punch
 +
+ 
- Juggernaut Body Press
 +
+ 
- Earthquake Punch
 +
+ 
- Cyttorak Power-Up
 +
+ 

- Juggernaut Headcrush (Dash super)
 +
+  +
+ 
- Type α - Ground Type
- Assist:
 Earthquake Punch
 - Counter:
 Earthquake Punch
 - Combination: Juggernaut Headcrush
- Type β - Dash Type
- Assist:
 Juggernaut Punch
 - Counter:
 Juggernaut Punch
 - Combination: Juggernaut Headcrush
- Type γ - Variety Type
- Assist:
 Body Press
 - Counter:
 Body Press
 - Combination: Juggernaut Headcrush
Colors
First row: LP, HP, A1. Second row: LK, HK, A2.
Gameplay
| Pros | Cons |
|
|
Moves List
Normal Moves
| Damage | Startup | Active | Recovery | Guard | |
|---|---|---|---|---|---|
| - | 9 | 3 | 20 | HL | |
| Special Property | Cancel | Adv. Hit | Adv. Guard | Adv. Pushblock | |
| None | Chain, Special, SJ, Super | - | - | - | |
|
a quick short attack. Decent damage for a jab. | |||||
| Damage | Startup | Active | Recovery | Guard | |
|---|---|---|---|---|---|
| - | 10 | 6 | 29 | HL | |
| Special Property | Cancel | Adv. Hit | Adv. Guard | Adv. Pushblock | |
| None | Special, Super, SJ cancellable frames 17~33 | - | - | - | |
|
This is the second jab hit.<be>Has a slightly shorter range but and doesn't do much damage (read: would be considered plenty of damage for any other character). | |||||
| Damage | Startup | Active | Recovery | Guard | |
|---|---|---|---|---|---|
| - | 8 | 8 | 41 | HL | |
| Special Property | Cancel | Adv. Hit | Adv. Guard | Adv. Pushblock | |
| None | Special, SJ, Super | - | - | - | |
|
will stun anything known by man. 5 | |||||
| Damage | Startup | Active | Recovery | Guard | |
|---|---|---|---|---|---|
| - | 20 | 8 | 28 | HL | |
| Special Property | Cancel | Adv. Hit | Adv. Guard | Adv. Pushblock | |
| None | Special, SJ, Super | - | - | - | |
|
Juggernaut's longest normal | |||||
| Damage | Startup | Active | Recovery | Guard | |
|---|---|---|---|---|---|
| - | 6 | 1 | 21 | HL | |
| Special Property | Cancel | Adv. Hit | Adv. Guard | Adv. Pushblock | |
| None | Chain, Special, SJ, Super | - | - | - | |
|
generic low kick | |||||
| Damage | Startup | Active | Recovery | Guard | |
|---|---|---|---|---|---|
| - | 6 | 24 | 22 | HL | |
| Special Property | Cancel | Adv. Hit | Adv. Guard | Adv. Pushblock | |
| None | Special, SJ, Super | - | - | - | |
|
The stomp! | |||||
| Damage | Startup | Active | Recovery | Guard | |
|---|---|---|---|---|---|
| - | 14 | 3 | 40 | HL | |
| Special Property | Cancel | Adv. Hit | Adv. Guard | Adv. Pushblock | |
| Launcher | Special, SJ, Super | - | - | - | |
|
a pretty powerful, high, slow kick. | |||||
| Damage | Startup | Active | Recovery | Guard | |
|---|---|---|---|---|---|
| - | 9 | 3 | 11 | L | |
| Special Property | Cancel | Adv. Hit | Adv. Guard | Adv. Pushblock | |
| OTG | Chain, Special, Super | - | - | - | |
|
5 | |||||
| Damage | Startup | Active | Recovery | Guard | |
|---|---|---|---|---|---|
| - | 13 | 6 | 32 | HL | |
| Special Property | Cancel | Adv. Hit | Adv. Guard | Adv. Pushblock | |
| None | Chain, Special, Super, SJ Cancellable 22~38 | - | - | - | |
|
generic hp filler | |||||
| Damage | Startup | Active | Recovery | Guard | |
|---|---|---|---|---|---|
| - | 11 | 6 | 39 | HL | |
| Special Property | Cancel | Adv. Hit | Adv. Guard | Adv. Pushblock | |
| None | Special, SJ, Super | - | - | - | |
|
Our primary launcher. | |||||
| Damage | Startup | Active | Recovery | Guard | |
|---|---|---|---|---|---|
| - | 6 | 5 | 14 | L | |
| Special Property | Cancel | Adv. Hit | Adv. Guard | Adv. Pushblock | |
| None | Chain, Special, SJ, Super | - | - | - | |
|
very fast, but that's about it | |||||
| Damage | Startup | Active | Recovery | Guard | |
|---|---|---|---|---|---|
| - | 10 | 3 | 35 | L | |
| Special Property | Cancel | Adv. Hit | Adv. Guard | Adv. Pushblock | |
| None | Special, Super SJ cancellable 22・42 | - | - | - | |
|
is a sweep, generally useless since Juggernaut usually knocks away opponents in combos and doesn't benefit from being super close to his opponents | |||||
| Damage | Startup | Active | Recovery | Guard | |
|---|---|---|---|---|---|
| - | 14 | 5 | 44 | L | |
| Special Property | Cancel | Adv. Hit | Adv. Guard | Adv. Pushblock | |
| - | - | - | - | - | |
|
slow and not useful. | |||||
| Damage | Startup | Active | Recovery | Guard | |
|---|---|---|---|---|---|
| - | 6 | 14 | 8 | H | |
| Special Property | Cancel | Adv. Hit | Adv. Guard | Adv. Pushblock | |
| None | Chain, Special, Super | - | - | - | |
|
5 | |||||
| Damage | Startup | Active | Recovery | Guard | |
|---|---|---|---|---|---|
| - | 9 | 5 | 24 | H | |
| Special Property | Cancel | Adv. Hit | Adv. Guard | Adv. Pushblock | |
| None | Special, Super | - | - | - | |
|
5 | |||||
| Damage | Startup | Active | Recovery | Guard | |
|---|---|---|---|---|---|
| - | 12 | 5 | 32 | H | |
| Special Property | Cancel | Adv. Hit | Adv. Guard | Adv. Pushblock | |
| Flying screen | Special, Super | - | - | - | |
|
a giant sswipe | |||||
| Damage | Startup | Active | Recovery | Guard | |
|---|---|---|---|---|---|
| - | 6 | 12 | 8 | H | |
| Special Property | Cancel | Adv. Hit | Adv. Guard | Adv. Pushblock | |
| None | Chain, Special, Super | - | - | - | |
|
has an alright downward angle | |||||
| Damage | Startup | Active | Recovery | Guard | |
|---|---|---|---|---|---|
| - | 11 | 5 | 16 | H | |
| Special Property | Cancel | Adv. Hit | Adv. Guard | Adv. Pushblock | |
| None | Special, Super | - | - | - | |
|
filler air combo move | |||||
| Damage | Startup | Active | Recovery | Guard | |
|---|---|---|---|---|---|
| - | 12 | 6 | 18 | H | |
| Special Property | Cancel | Adv. Hit | Adv. Guard | Adv. Pushblock | |
| Flying Screen | Special, Super | - | - | - | |
|
5 | |||||
Special Moves
quite situational but deals alright damage and knocks down
has very poor recovery and can't be comboed into easily
great for controlling space and punishing reckless dashes, especially as an assist
but you most likely did this while trying to attack low after a dash
this makes Juggernaut one of the strongest characters in the game.
how the glitch works is explained below
First set of damage is for normal. Second set of damage is for Power-Up. Third set of damage is with Power-Up glitch applied.
Super Moves
Assist Moves
The Basics
Beginner Overview
Advanced Overview
Combos
Note: Juggernaut is only allowed a 2 button chain unless he is super jumping so his combos tend to follow a very simple path. Adding to that limitation, a solo Juggernaut can only combo a ground chain into the following buttons:
Your bread and butter. Easy to perform under pressure and, even unmashed, will seriously damage any character when Juggernaut has the Power-Up glitch. If you have the meter, unless you have a specific plan for it, it's highly recommend you just pull the trigger any time you land a hit.
c.LK > s.HP xx Headcrush
A simple, meterless combo. Low damage but can be useful for dealing with assists that might be preventing some other combos.
[Close] c.LK > s.LP xx HP Earthquake
Your strongest, inescapable, meterless combo. Will send the opponent flying which will cause a flying screen dash for you, which can be potentially fatal for Juggernaut depending on the matchup.
[Close] c.LK > s.HP xx LP Juggernaut Punch
A simple way to scramble for damage off of an accidental c.HP.
j.HP \/ c.HP xx HK Body Press
Rollable. The strongest, meterless option off of a sweep. Either strength Juggernaut Punch will connect but LP is safer when the opponent rolls.
c.LK > c.LK xx LP Juggernaut Punch
F + HP is a pretty lackluster move in this game but it might be useful as a meaty in the corner. Also note that this is a superjump cancel, not a jump cancel. Instead of holding up to leave the ground you have to return to neutral, then down, then up.
(Corner) [Close] F + HP /\ sj.LK > sj.MP xx LK Body Press
The dash-in is crucial. A high damage, unrollable route for midscreen Juggernaut Punch.
j.HP \/ d.s.HP xx LP Juggernaut Punch
Meterless style combo for the corner. Builds a ton of meter compared to your other combos. Flying screen is set so you really can't get any more than this. You have the option of leaving the final hit off which forces your opponent to roll into the corner, allowing you to continue your pressure.
(Corner) j.HP \/ c.HP /\ sj.LK > sj.MP > sj.HP > sj.HK \/ c.LK > F + HP
Rollable. The most damaging, midscreen combo Juggernaut has access to.
j.HP \/ c.LK > c.LK xx HP Juggernaut Punch xx Headcrush
This combo allows for Headcrush to be mashed a little easier than others due to the spacing. Useful for when you find yourself without Power-Up glitch and need a little help getting the full 8 hits on Headcrush.
(Corner) j.HP \/ d.s.LK > s.HP xx LP Juggernaut Punch, c.LP xx Headcrush
Rollable. The only possible damage extension after a midscreen ground throw. Works with either throw. Doesn't work on heavy characters.
Throw, HP Juggernaut Punch xx Headcrush
Juggernaut's answer for people putting him in the corner. Juggernaut has surprisingly amazing juggle potential after a throw into the corner which makes this combo pretty forgiving to execute. Works with either throw. Doesn't work on heavy characters.
Throw /\ j.LK > j.HK \/ Headcrush
Strategies
Juggernaut offers the most utility as an assist. With no real options for dealing with runaway a lot of matchups are going to feel like a struggle. Juggernaut is slow, easy to cross-up and combo, uses meter far better than he builds it, everything he does is relatively unsafe and expensive to protect, and he has no super armor in the air. However, Juggernaut has one thing that changes him from an annoyance into a problem, the Power-Up glitch.
Your first goal with Juggernaut is to activate his Power-Up glitch as soon as possible. The fewer bars of meter the opponent has when you change to another character, the harder it will be for them to punish you, especially if you change to a character with high vitality. Once glitched, your assists offers game-changing amounts of damage and your Headcrush threatens to one-shot many popular assists.
Your second goal with Juggernaut is to land his assist as many times as possible. Juggernaut has a lot of health but he's not invincible, his large size means it's going to be harder for him to avoid damage so be ready to protect him when your opponent retaliates. A glitched Juggernaut Punch can kill any assist in 3-5 hits instead of 5-7 hits which makes counter-calling your opponent's assists a powerful, meterless threat.
Your third goal with Juggernaut is to land his Headcrush as many times as possible. Headcrush is pretty easy to combo into from most of Juggernaut's normal buttons, but landing that initial hit can sometimes be difficult. The best buttons to approach an opponent with are probably going to be jumping ![]() and jumping
and jumping ![]() . A throw when near the corner often turns into a guaranteed Headcrush and a potential touch of death with the right assist. The THC Headcrush is unmashable but has a faster startup than a normal Headcrush allowing for monstrous whiff punishes. A DHC from a better point character into Headcrush can turn a stray hit into a potentially favorable match.
. A throw when near the corner often turns into a guaranteed Headcrush and a potential touch of death with the right assist. The THC Headcrush is unmashable but has a faster startup than a normal Headcrush allowing for monstrous whiff punishes. A DHC from a better point character into Headcrush can turn a stray hit into a potentially favorable match.
Cyttorak Power-Up Glitch
The Power-Up glitch increases the damage for Juggernaut on every attack, not just the very next one. The glitch only needs to be performed once per match unless you accidentally deactivate it later. To activate the glitch Juggernaut needs to Power-Up, then change to a different character without finishing an attack or otherwise canceling the effect. If Juggernaut isn't flashing when he leaves the screen then the glitch probably wasn't executed correctly.
When Juggernaut is brought back into play and uses Power-Up again the glitch is deactivated.
When attempting to setup the glitch, the following moves can be whiffed without removing any of the Power-Up effect:
Juggernaut will remain flashing if any of these moves hit, but he will not have the increased damage. Also, performing an additional Power-Up in this state will not give the increased damage back. In this exact situation, the only way to be sure you're gaining the damage increase is to remove the original flashing effect by using any other attacks, then performing another Power-Up.
THC Headcrush
The normal Headcrush is one of Juggernaut's most consistent and punishing threats. The THC Headcrush, on the other hand, has some interesting differences that bring some much needed depth to the table. THC Headcrush is unmashable which might mean less damage up-front, but is Juggernaut's fastest attack by a huge margin. This extra speed allows it to punish basically everything your grounded opponent might consider safe and has the added benefit of being unblockable in certain situations.
Unblockable THC
Having Juggernaut on your team grants you access to the THC Headcrush, even when he's an assist, abuse it if you have the meter and your team allows for it. With Juggernaut as an assist you can THC and his Headcrush has a chance to be unblockable as long as your opponent isn't already in blockstun and you are relatively close to them. This works because THC Headcrush will reach the opponent before the super freeze signals that the opponent can block, but frame skip is what ultimately decides if the Headcrush will connect.
