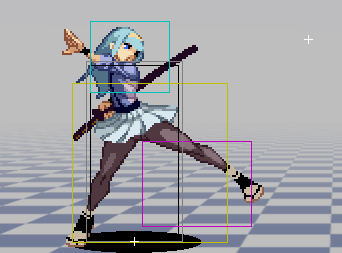
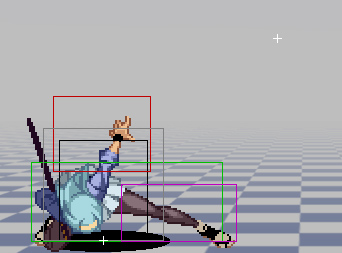
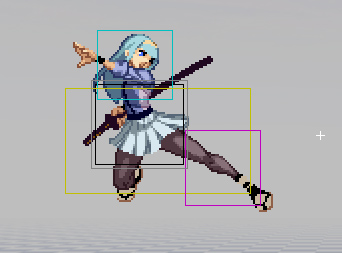
Introduction
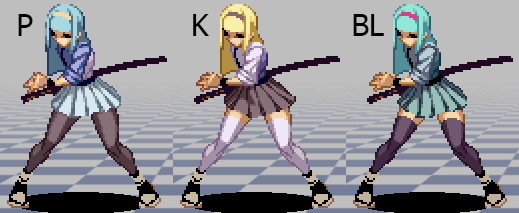
Colors
Move List
Command Normals
Target Combos
Special Moves
Super Special Moves
Move Analysis
Moves will be listed as <move> - <damage>;<scaling>
If something has 60% scaling, the attack after that move will do 60% of its normal damage.
Example of calculating damage:
Shimo:HK>Issenkosa*6 7Hit(15125)
5000 + 2400(.75)
5000 + 12600(.75) + 1000(.9)(.75)
5000 + 9450 + 675
15125
Normal Moves
Command Normals
| Sweep ( <Description here>
|
Target Combos
| HP is special and super cancelable. |
Special Moves
| Shingetsu ( <Description here> |
| Yugizan (during Shingetsu, <Description here> |
| Shinenzan (during Shingetsu, <Description here> |
| Retsugizan (during Shingetsu, <Description here> |
| Stop (during Shingetsu, <Description here> |
| Shinkouenzan (in air, <Description here> |
Super Special Moves
| Kaneanenzan ( Hits once and is very good for ending combos with. Typically you should power up this super as you will have more opportunities to use it. |
| Issen Kousan ( Hits further than Shimo's first super and does more damage however it won't juggle opponents after the first hit. If you cancel Shinenzan (QCF P~C) into this super then only the first hit will connect. You can do this super from a max range guard break however. |
Frame Data
| Move Name | Damage | Hit Level | Cancel Ability | Startup | Active | Recovery | Block Advantage | Hit Advantage | Total Frames |
|---|---|---|---|---|---|---|---|---|---|
| Stand |
2200 | HL | sp/su | 7 | 2 | 14 | -4 | -3 | 22 |
| Stand |
2000 | HL | sp/su | 7 | 2 | 8 | +2 | +3 | 16 |
| Stand |
5700 | HL | su | 11 | 2 | 21 | -3 | +0 | 33 |
| Stand |
5000 | HL | sp/su | 9 | 3 | 17 | +0 | +3 | 28 |
| Crouch |
2000 | HL | su | 5 | 2 | 12 | -2 | -1 | 18 |
| Crouch |
2000 | L | ch/sp/su | 6 | 2 | 8 | +2 | +3 | 15 |
| Crouch |
5000 | HL | sp/su/hj | 9 | 2 | 20 | -5 | -3 | 30 |
| Crouch |
5000 | L | sp/su | 9 | 5 | 12 | +0 | +2 | 25 |
| Jump |
2000 | HL | - | 5 | 2 | - | - | - | - |
| Jump |
2000 | Mid | - | 6 | 7 | - | - | - | - |
| Jump |
5000 | Mid | 8 | 2 | - | - | - | - | - |
| Jump |
5500 | High | - | 14 | 2 | - | - | - | - |
| Jump |
3000 | H | sp | 11 | 5 | - | - | - | - |
| Jump |
3500 | H | - | 13 | 5 | - | - | - | - |
| Sweep | 5600 | L | - | 7 | 2 | 28 | -10 | - | 36 |
| Throw | 6000 | - | - | 4 | 1 | 24 | - | - | - |
| Overhead | 3000 | High | - | 10 | 19 | 33 | -1 | -1 | - |
| Guard Crush | 6000 | - | - | - | - | - | - | - | - |
| L Shingetsu | - | - | - | - | - | - | - | - | 24 |
| H Shingetsu | - | - | - | - | - | - | - | - | 24 |
| EX Shingetsu | - | - | - | - | - | - | - | - | 30 |
| Yuugizan | 5000 | HL | su | 9 | 2 | 18 | -3 | -1 | 28 |
| EX Yuugizan | 5500 | HL | su | 10 | 2 | 15 | +0 | +6 | 26 |
| Shinenzan | 4000*3500 | HL | su | 5 | 2(1)2 | 40 | -25 | - | 49 |
| EX Shinenzan | 3800*3500 | HL | su | 5 | 2(1)2 | 43 | -28 | - | 52 |
| Retsugizan | 5300 | L | su | 14 | 3 | 20 | -6 | - | 36 |
| EX Retsugizan | 5700 | L | su | 14 | 4 | 24 | -11 | - | 41 |
| Stop | - | - | - | - | - | - | - | - | 14 |
| EX Stop | - | - | - | - | - | - | - | - | 9 |
| L Shinkoenzan | 5000 | H | - | 9 | 4 | Until landing +8 | - | - | - |
| H Shinkoenzan | 4500 | H | - | 14 | 4 | Until landing +10 | - | - | - |
| EX Shinkoenzan | 4000*4000 | H | - | 14 | 2*2 | Until landing +10 | - | - | - |
| Kantanenzan | 9000/10800 | HL | - | 7 | 3 | 52 | -35 | - | 61 |
| Issenkousa | 13500/16200 | HL*L*HL*L*HL*HL | - | 8 | 2(10)2(11)2(10)2(8)2(1)4 | 43 | -27 | - | 104 |
Combos
NOTE: PA = UOH
Meterless
2B 2B 236C A/C
2LK*2>Yugizan 3Hit(6800)
2LK*2>Shinenzan*2 4Hit(8288)
Note: 2BB --> Yugizan (236C A) is hard
5D 236C A/B/C
HK>Yugizan 2Hit(8750)
HK>Retsugizan 2Hit(8975)
HK>Shinenzan*2 3Hit(10493)
5B 5C 236C A/B/C
LK>HP>Yugizan 3Hit(9200)
LK>HP>Retsugizan 3Hit(9416)
LK>HP>Shinenzan*2 4Hit(10874)
2D 236C A/B/C
2HK>Yugizan 2Hit(8750)
2HK>Retsugizan 2Hit(8975)
2HK>Shinenzan*2 3Hit(10493)
air to air jump A
j.8A (air-to-air) 236A C 236C C
Shimo:J8LP>Shinenzan*3 4Hit(8229)
Shimo:J8LP>Shinenzan*3 4Hit(7991)
j.8A (air-to-air) 236A C 2C 236C(D) --> Followups
Shimo:J8LP>Shinenzan>2HP 3Hit(7125)
1/2 Meter
2D 236AC A 2B 236C C
Shimo:HK>YugizanEX>2LK>Shinenzan*2 5Hit(12662)
Shimo:HK>YugizanEX>2LK>Shinenzan>Kantanenzan 5Hit(15158)
D/2C 236AC B 2C 236A C 236C C
Shimo:HK>RetsugizanEX>HK>Shinenzan*3 6Hit(16981)
Shimo:HK>RetsugizanEX>2HP>Shinenzan*3 6Hit(17922)
Shimo:2HP>RetsugizanEX>2HP>Shinenzan*3 6Hit(20506)
2C 236AC B 2C 236A C 236C C
Shimo:J2HP>2HP>RetsugizanEX>2HP>Shinenzan*3 7Hit(17853)
Shimo:JHP>2HP>RetsugizanEX>2HP>Shinenzan*3 7Hit(23179)
2C 236AC B 236C A 236C C
Shimo:2HP>RetsugizanEX>Yugizan>Shinenzan 4Hit(15494)
236AC B --> LP Shinkouenzan --> 236CC --> 2C --> 236C(D); Done when clipping limbs with 2C. Same followups as above
1 Meter
Confirms off of 2B
2LK>2LP>Issenkosa*6 8Hit(12780/14614)
2LK*2>Shinenzan>Kantanenzan 4Hit(11632/12726)
Your two go to combos for confirms off of 2B into super, 3rd Strike style. Do whichever you find easier. Personally I think the second one is easier.
236236B
UOH 2A Issenkousa --> Works vs standing opponents
Shimo:PA>2LP>Issenkosa*6 8Hit(13780) --> Standing
UOH 2BB etc --> works vs crouching opponents only
Shimo:PA>2LP>Issenkosa*6 8Hit(15338)
Shimo:PA>2LK>2LP>Issenkosa*6 9Hit(15018)
Shimo:PA>2LK*2>2LP>Issenkosa*6 10Hit(14763)
Shimo:PA>2LK*2>Issenkosa*6 9Hit(14566)
1 1/2 Meter
236AC B 236A C 236236C
Shimo:RetsugizanEX>ShinkoenzanL>Shinenzan>Kantanenzan 4Hit(15204)
Shimo:RetsugizanEX>ShinkoenzanL>Shinenzan>2HP 4Hit(13000)
Note: For above, find a way to stop running ambiguously
j.8A (air-to-air) Shinkouenzan j.D --> Followups (Note: Causes Knockdown)
Shimo:J8LP>JHK>ShinkoenzanL 3Hit(7525)
2C (jump cancel) j.D -> EX Shinkouenzan -> EX Yuugi --> 2C 236CC --> Kantanenzan (Chadha Only)
j.B Shinkouenzan
Shimo:JLK>ShinkoenzanL 2Hit(5500)
Shimo:JLK>ShinkoenzanL>Kantanenzan 3Hit(9280)
Shimo:ShinkoenzanL>Kantanenzan 2Hit(10400)
Info Only Shinkouenzan
LP doesnt cross
HP crosses if done at an angled jump, but doesn't combo with j.B
EX crosses if done at an angled jump, but hits more than once and doesn't combo with j.B
SJ9 j.b Shinkouenzan
C and EX Shinkouenzan have to be delayed to hit.
If EX is done deep after j.B/j.D, it will hit once.
If done high vs Chadha after j.D, it will hit once.
Shimo:J2HP>2LK*2>Shinenzan>Kantanenzan 5Hit(12408)
BL Counter Combos
Anti-air/AA:
2C j.D Shinkouenzan
j.C 5D 236CC Kantenenza
j.C 2C 236CC Kantenenza (More damage)
236CC 236CC (1-Hit) Kantenenza
2C 236C C Kantenenza
2C 236AC B 236C C
5C 236AC B 236AC A 2C --> Followups
2C 236AC A 236AC A 236C C
2C 236AC A 236AC A 236C C (1-Hit, no cancel) Kantenenza
Ground:
j.C 236C A 236AC A 2C --> Followups (note that the combo ends)
5D 236AC D 5BC 236AC B --> Followups
Invalid combos
Normal Unlisted Previously/UOH/Unblockable (anti-air/air-to-air) --> Kantanenzan
Strategy
Shimo
NOTE:
A = LP
B = LK
C = HP
D = HK
Universal Neutral
Effective Neutral Tools
J8>J214A or C or EX (neutral jump>shinkoenzan)
-Attributes-
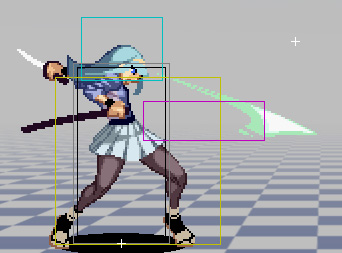
Shinkoenzan has a fairly large hitbox and striking area while having a relatively small hurtbox area where Shimo can be hit as the move is executed. Because of these attributes, Shinkoenzan can be extremely effective for thwarting off aerial approaches, often stuffing incoming attacks clean.
-Application-
Shinkoenzan as a footsie tool can also be extended to use against ground-based approaches. However, one should consider the time it takes to execute a neutral jump as well as the additional time it takes to execute Shinkoenzan on the decent of the jump when applying in air/ground footsies. With this lag in regard, neutral jumping to Shinokenzan is best used when anticipating sudden forward movements (e.g. forward jumping or dashing) and having the attack out for the opponent to run into.
-Other-
It's a good idea not to get into a rhythm of attacking patterns and execute neutral jumping Shinkoenzan at different points in the air to offset the opponent's counter-options you may come across (such as walking/jumping in and parrying Shinokenzan or precisely sweeping the landing recovery of the attack when whiffed). Descending with a late J214C will hold Shimo in the air a bit longer before striking which will require a later parry attempt from the opponent or hover over a sweep attempt hitting the sweep as it misses.
-EX Version-
Shimo is able to further vary attacking patterns with the use of a neutral jumping EX Shinkoenzan. With meter to spare, an occasional EX Shinkoenzan is a sound option to offsetting parry timings as it has a much slower startup than both the J214A and C versions and requires a high guard and/or double parry when defending against this 2-hit attack. Additionally, it's (small) invulnerability frames on startup allows Shimo to evade incoming attacks with precise timing.
2C>HJ9
-Expanding on Neutral Jumping Shinkoenzan-
Another commonly used anti-Shinkoenzan option used by some impatient and over-eager opponents is to attack (or parry) from the air (usually via high jumping) in attempt to swat down Shimo during the neutral jump and before Shinkoenzan can be executed. This is usually successful when the opponent reads for a neutral jump and strikes early. Because this sort of approach relies on a hard read, opponents potentially put themselves at risk to Shimo's other anti-air air options like 2C.
-Attributes Part 1-
2C is an interesting normal because the hurtbox extends outward before the first active frame and it also lingers a bit after the attack is executed. Because of these features, one must be very cautious about throwing out 2C's in close proximity since Shimo is left vulnerable to easy whiff punishment.
-Application Part 1-
The ideal spacing for a 2C would be well outside of your opponents attacking range which, for most characters, would be a bit beyond a J214A or Shimo's 5C. Essentially, 2C should be considered as an anticipatory anti-air attack for when you think the opponent will try to jump in and attack as an answer to neutral jump Shinkoenzan.
-Attributes Part 2-
Another interesting feature about Shimo's 2C is that it can be high jump canceled on hit, guard, or parry either early or late in the attack animation. Having the ability to high jump cancel out of this anti-air-oriented attack is especially important when coming up against opponents who fish for air parries as it allows Shimo to escape and potentially counter-attack this option.
-Application Part 2-
Buffering a forward high jump (quickly 2 then 9) after executing a 2C will allow Shimo to pursue the air approaching opponent with a jump while they are still airborne. Should the opponent air parry the 2C in this instance, Shimo will cancel into a HJ9 and have the option to ascend with a parry to counter the opponent's post air parry attack (air BL Shifting is highly recommended). Should the opponent be hit by anti-air 2C, Shimo will instead high jump forward to land just before the target and in front of them. This situation will allow you to initiate the offensive while being at an advantage. Shimo can also delay landing from the HJ9 by using J214C or EX Shinkoenzan for an alternative mixup option. The final bonus to landing an anticipatory anti-air 2C would be nailing a mistimed air parry attempt by the opponent. By buffering to HJ9 from the 2C, Shimo will pursue the BL Countered target and can potentially follow up with a juggle combo.
J7C
-Application-
Sometimes spacing can be miscalculated and the distance from the opponent is closer than desired. Or perhaps an anticipatory 2C may seem risky in a spot where it could whiff and be punished. In this sort of situation of uncertainty, a player can choose to create some breathing room with a quick back-jumping C either while ascending or near the top of a jump. Jupming back will allow you to escape a potential ground assault and hitting JC while doing so will cover you for a sudden air-to-air assault as well. While this option does result in a loss of ground and close-quarter positioning, it is a safer read against an offensive rush that can be executed sooner than neutral jump Shinkoenzan and is harder to punish than if you were to miss a 2C anti-air read.
-Other-
When retreating with J7C it's good to keep in mind that some overly aggressive players will chance everything to close in and will attempt to air parry any and all of the previously mentioned anti-air tactics. An opponent can sometimes get lucky and unintentionally air parry a J7C when reading for something else. However, all hope isn't lost in a situation where you are parried in the air due to a peculiar system feature that allows you to "volley" attacks and parries with the opponent while airborne. Should J7C be air parried, try to prepare yourself to return an air parry of your own against the opponent's post-parry attack. If Shimo reels back from the JC in time, the option to air parry the opponent's retaliation becomes available if they attack too late (this usually happens when the opponent does air BL followed by a heavy attack). What's even more interesting is that the opponent can in turn parry your post-parry counter attack which can lead to some very interesting air volleying moments.
J9B
-Attributes-
While JB is a light attack that deals minuscule damage, it's practicality is not to be underestimated. Shimo's Jumping B attack has fast start up (5F), has a fairly wide hit area, is more active than any other jumping normal Shimo has (7F), and is angled very low. These four features combined make for a strong pestering tool in Shimo's offense. Jumping B's fast startup, long active frames, and wide hit area make it useful for a low damage air-to-air and, more importantly, its low angle (complemented again by the wide hit area and long active frames) is effective for pinning down grounded opponents. Additionally, Shimo is able to special cancel JB into Shinokenzan which is an essential strategy for opening up a variety of mixup options that can be difficult to defend against. The combination of these attributes (namely the long active frames and wide hit area) can also make anti-airing for the opponent difficult too as it has a tendency to stuff conventional, non-invincible anti-air attempts (e.g. Crow 2C). This alone allows Shimo to jump in a bit more freely than the rest of the cast.
-Application-
The best times to consider advancing with a J9B are:
When reading for an attack with lengthy recovery (e.g. a sweep, heavy normal, or projectile) When the opponent is hesitant to approach (due to conditioning from prior anti-air tactics. see: Neutral Jump Shinkoenzan, 2C>HJ9, etc.) When an opponent is standing from a down
-Extending Application with Shinkoenzan Cancel-
Forward Jumping B alone isn't enough to trample an opponent since it can simply be parried and punished accordingly. However, the ability to air cancel JB to J214A can make defending against this approach more challenging. Using J9B>J214A forces the defender to commit to a double parry in order to punish effectively. Once the idea of the double parry is instilled, additional tactics can be introduced to throw the opponent off their game and lead to a messy mind game (dubbed "The Eight Ways to Hell") should the opponent choose to engage. Some of these options include:
Aiming for early, tip-hit J9B
- JB>J214C or EX Shinokenzan (Offset timing of double parry, EX makes 3-hits instead of two)
- JB>land then throw (Opponent expects Shinkoenzan, is thrown instead)
- JB>land then 2B (Opponent prepares for HBL x2, is hit low after JB)
Even if the opponent chooses not to defend with parry and guards instead, this does not exclude them from having to guess against these options. Their best bet would be to avoid being in that position as much as possible or to utilize more reliable anti-airs (e.g. Crow C Shoryu).
5D
-Attributes-
This swinging mid roundhouse kick is notorious for outright crushing incoming and whiffed normals in footies. It has a small hurtbox which is placed mostly above Shimo's swinging leg, leaving the area below the leg safe from extremely low striking attacks (e.g. sweeps). It's speed (8F) is notable and recovery when whiffed (Duration 27F) isn't horrible making it an ideal poke (and possibly the best poke at Shimo's disposal) when engaging in footsies. The hurtbox doesn't linger too long after a whiff making it that much harder to punish when thrown out. What makes 5D especially powerful in footsies is the ability to special cancel on hit or guard.
-Application-
Because 5D has a tendency to clip limbs from afar, a common tactic used is buffering an EX Run (236A+C) as 5D is performed. Should 5D hit, EX Run is executed, giving way to EX Run>Retsugizan (sweeping sword attack) for a combo that leads to a solid damage option into Shimo's setplay. Other combo options include: 5D>Yuugizan>Issenkousa for a hard knock down and good damage OR 5D>Shinenzan to preserve super meter with soft knock down.
-Other-
While 5D can be highly effective in footsies it's not the end-all to issues you may have in footsies. As previously mentioned, 5D's hurtbox is above Shimo's swinging leg and is actually vulnerable to attacks that hit this area (e.g. Kou 5C or 5A). A player must learn to quickly recognize when an opponent is actively trying to counter a 5D and quickly switch to alternative options to counter accordingly.
Alternative Neutral Options
5C
-Where 5D fails, 5C can succeed-
Shimo's 5C is an excellent complementary attack for when 5D is being countered. Standing C's downward strike can hit the areas where the 5D hurtbox is left vulnerable to attacks like Kou's 5C and 5A. With meter stocked, 5C can become even more dangerous as it is super cancelable on hit/guard. Just as you would with 5D, aim to clip normals when using standing C and buffer Issenkousa (236236K) so that if it should hit, the super command is automatically executed to punish from afar. A bonus of using 5C in footsies is that the downward strike is capable of tagging opponents who forward jump to the air before they can reach the apex. Keep in mind, however, standing C has more recovery on whiff than 5D, leaving Shimo open to severe whiff punish options should your spacing and timing be off. Also, standing C doesn't crush low attacks as well as 5D does so it's important to adjust to which normals the opponent is using and switch back and forth between 5C and 5D whenever necessary.
Command Dash (Running, 236C)
-Closing In-
If you start to take notice to the opponent being passive in neutral or is spending too much time waiting for a particular action from you, try mixing in a 236C to close the gap and initiate a close-quarters game or run briefly then stop (236C~D) to try and provoke a response. It's important to note that this is a somewhat risky tactic and should be used only when confident about the opponent's habits in neutral. Never rule out the possibility that the opponent could be feigning passiveness to get you to advance prematurely into an attack.
Yuugizan (236P~A)
-Unexpected Strike-
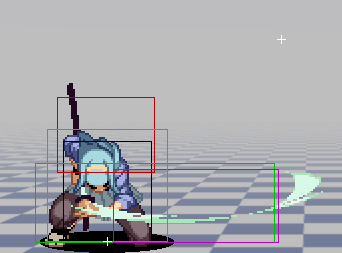
This running slash is another way to quickly close the gap while attacking. It covers much horizontal space on the ground, is fast to start up, and is safe on block (small disadvantage). Because this move is executed from Shimo's 236P command, the option to unexpectedly strike becomes available when running in and conversely the option to simply run then stop is enough to leave opponents second guessing your actions. It's important to be mindful of spacing when executing Yuugizan as connecting the move in close proximity can be unfavorable. On guard, the attack is -3F and finishing the move near the opponent will force a guessing game (throw, parry, jump, backdash, etc.) which you may not want to engage in. With this is mind, it's safest to execute Yuugizan so that it hits at the very tip, leaving room to counter attack or escape more freely. This can usually be done by executing an instant Yuugizan from the running command (236P~A) at about 3 character spaces away.
-Cons-
Because Yuugizan can be high or low parried, one drawback to using it in footsies is that it is suseptible to BL Shifting attempts. A BL shift attempt against Yuugizan greatly increases the odds of a defender successfully parrying it (Basically, it gives two chances to parry the same attack in a small time-frame). Another drawback is that the slash doesn't cover above Shimo's head very well and an opponent reading for Yuugizan can neutral jump then come down with an attack to effortlessly punish the whiffed recovery. Much like with using command running randomly in neutral, it's best to have an understanding of your opponents footsie habits in order to fully exploit this technique.
-EX Yuugizan-
When sitting on extra super meter, the option to close the gap with a stronger version of Yuugizan should be considered. When coupled with EX Running, EX Yuugizan covers more ground sooner than the non-EX versions making it harder for the opponent to react to. Also, EX Yuugizan is neutral (-/+) on guard which can create a more favorable situation when guarded at close proximities (such as counter-poking with 2A [4F startup] to keep the opponent guarding after). The same vulnerabilities apply but so does the option to EX Run then stop to shake up a player is available as well.
Retsugizan (236P~B)
-Attributes-
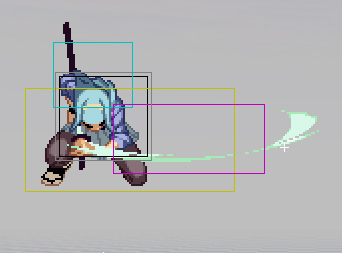
Retsugizan is a fairly slower advancing attack in comparison to Yuuugizan but the longer horizontal attacking range and its low hit properties makes up for this. In addition to being a low attack, Retsugizan can also be high jump canceled on hit. High jump canceling from the normal version won't open many combo options for Shimo but when high jumping forward (HJ9), Shimo can maintain pressure after an opponent has been swept.
-Applying EX Retsugizan-
The EX Retsugizan, however, yields extra juggle points that allows Shimo to tack on some damage if the sweep connects. From about 3/4 screen distance away (and with super meter to spare), try for an EX Retsugizan while buffering HJ9 and should the move connect, a forward high jump will execute allowing for a Shinkoenzan air juggle into the combo ender of your choice (It's typical to see Shimo players opt to 2C reset as the combo finisher).
-Cons-
Similar to the risk of Yuugizan usage in neutral, Retsugizan too is vulnerable to neutral jumping so it's advised to use both of these attacks sparingly. The most opportune times to sneak in a Retsugizan in neutral if the opponent has a tendency to forward/back dash often or walks forward to close the gap/fish for parries.
-Meter Management-
Because Shimo gets a lot of mileage with just 0.5 bars of meter, an occasional EX Run in neutral isn't necessarily a bad idea when sitting on 1 1/2 to 2 stocks. And to reiterate, the option to EX Run>Stop or EX Run to close in and throw or poke are viable decisions when trying to get a reaction out of the opponent. Shimo can choose not to commit to one action with this approach and it is this flexibility in choices that makes this charater so versitile in both the offensive and defensive neutral game.
---
Thanks to dyshwomy for making this.
Matchups
vs. Azure
UOH hops over Reppus on reaction.
Shingetsu (C or EX version) under Shippus on reaction.
Influenza...I mean Shinkoenzan can be used against Azure's Reppus on reads. They will not work as reactions.
Kantanenzan can favorably trade with Shippus.
Stay on Azure and he dies. MU is in your favor.
vs. Kotaro
After parrying her QCF A/C special (The one that rushes her forward on the ground) you can punish it with any Shingetsu (QCF P) follow up immediately or either of Shimo's supers if you wait until Kotaro is near the ground during the recovery. Note that Shinenzan (QCF P~C) hits Kotaro airborne so you will not be able to cancel it into super.
vs. Aja
(No strategies)
vs. Kou
(No strategies)
vs. Hanzo
(No strategies)
vs. Jyuzumaru
(No strategies)
vs. Dark Jyuzumaru
(No strategies)
vs. Hina
(No strategies)
vs. Shimo
(No strategies)
vs. Jet
(No strategies)
vs. Chadha
Bully him to death with j.B shenanigans.
Be careful of using Yugizan in neutral. At certain distances, he can cmd grab you afterwards.
vs. Crow
(No strategies)
