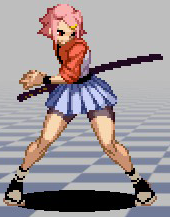
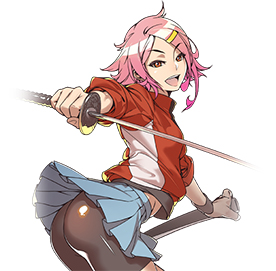
Introduction
Hina is a charge character who excels at controlling the midrange with her great normals and bullying the opponent into the corner with safe, difficult to parry pressure. Although she is not built for pure mixup-heavy aggression like the other "sword sister" Shimo, Hina is not a down-back defensive charge character. Hina's midrange pressure can be varied in several different ways to mess with parry timings and catch opponents off-guard, and once she lands a hit, Hina has powerful, simple hit confirms that put her back in her optimal range - just outside the opponent's footsies. Hina thrives when she can weave in and out of an opponent's range, baiting out normals and whiff punishing or applying powerful pressure that continues itself naturally similar to Street Fighter 4's Bison. In addition, almost every normal and special is very easy to confirm into one of her two supers, giving Hina a potentially enormous payoff for any random hit.
Unfortunately, Hina has a difficult time anti-airing without a charge, her walkspeed is pretty bad, and her normals in general aren't the best for abare at close range when compared to other fighters. In addition, it's very easy for Hina to be punished by an opponent who gets a read on her pressure, since many of her better long-ranged normals are laggy and easily whiff-punished or parried on prediction. Hina has a wide range of tools at her disposal, ranging from solid and predictable pressure tools to high-risk "gimmicks", so Hina players should mix up their approaches and neutral constantly to keep their opponents guessing.
Similar characters: SF4 Bison/Balrog
* Charge time: 42 frames
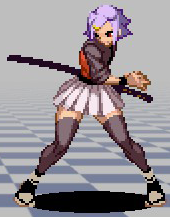
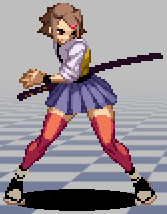
Colors

|

|

|
-- Gongfuren
Move List
Command Normals
Special Moves
Super Special Moves
Move Analysis
Normal Moves
Command Normals
| Sweep ( <Description here>
|
| Stepkick ( <Description here>
|
Special Moves
Super Special Moves
| Kantanenzan (
|
| Issen Kousan (
|
Frame Data
All standing normals must be parried high and all crouching moves must be parried low unless otherwise stated.
Combos
Notation notes: [4]6, and [2]8 will be the notation for Hina's charge moves. A "/" means either button can be used. A "," signifies a link, "xx" signifies a cancel. Damage values listed in parenthesis.
Meterless
2B,2B xx [4]6A (6928)
2B,2B xx [4]6C 623C (8400)
2B,2B xx [2]8A (7120)
2B,2B xx [2]8C (7984)
2B,2B,2A (5880)
2D xx [2]8A (9475)
- At max range can link either Shinenzan after 2D
2D xx [4]6A (9220)
2D xx [4]6C 623C (11175)
2D xx [4]6B/D (9475)
- Using D here gives the same damage and less frame advantage so its not advised.
BL Counter 2D,2B xx [4]6A (12436)
4D xx [4]6A (9420)
4D xx [4]6C 623C (11375)
4D xx [4]6B/D (9675)
- Using D here gives the same damage and less frame advantage so its not advised.
5A xx [4]6A (6620)
2C, [4]6D (9400)
2C, [4]6A, j.D (12240)
2C, [4]6A, 5C (12744) Corner Only
2C, [4]6B, 412369A/C, [2]8A (13684)
412369A/C, [2]8A (7650)
412369A/C, [2]8C (8595)
412369A/C, 2B xx [2]8A (8280)
412369A/C, 2B xx [2]8C (9036)
412369A/C, 2B xx [4]6A (8112)
412369A/C, 2B xx [4]6C 623C (9400)
UOH,[2]8A
UOH,[2]8C
UOH,2B xx [2]8A
UOH,2B xx [2]8C
UOH,2B xx[4]6A
UOH,2B xx [4]6C 623C
- UOH is Universal Overhead. All above UOH combos are possible even if the opponent is standing!
1/2 Meter
2D xx [2]8AC (12742)
- Can link the EX Shinen at max 2D range
2Dxx[4]6BDxx412369A/C, 2C, [4]6B, 412369A/C, [2]8A (17858)
4Dxx[4]6BDxx412369A/C, 2C, [4]6B, 412369A/C, [2]8A (18058)
2Dxx[4]6BD, 2C,[4]6D (15492)
- Non optimal route. Only attempt if you miss the Bogetsu cancel of the BNB route(the combo above). Timing of the D Retsu varies based on how high you hit the opponent with 2C
4Dxx[4]6BD, 2C,[4]6D (15692)
- Non optimal route. See above combo,
2C,[4]6AC, 412369A/C, 412369A/C, [2]8A (14926)
412369AC,2B,2Bxx[2]8A (8688)
- Depending on spacing, sometimes only one 2B is possible.
412369AC,2C,[4]6B,412369A/C,[2]8C (12409)
1 Meter
Notes: All damage values are with Super2 Issenkosa(236236B) buffed
2B,2B,2A xx 236236B
2D xx [4]6B,236236A (15425)
4D xx [4]6B,236236A (15625)
2D xx [4]6A,236236B (18856)
4D xx [4]6A,236236B (19056)
2D xx [4]6BDxx412369A/C,2C,[4]6AC, 412369A/C,412369A/C,[2]8A (18376)
4D xx [4]6BDxx412369A/C,2C,[4]6AC, 412369A/C,412369A/C,[2]8A (18576)
2D xx [4]6BDxx412369A/C,[4]6AC, 412369A, 412369Cx4, [2]8A (17999)
- Best corner carry. Note that an A Bogetsu is needed after the EX Yugi.
4D xx [4]6BDxx412369A/C,[4]6AC, 412369A, 412369Cx4, [2]8A (18199)
- Best corner carry. Note that an A Bogetsu is needed after the EX Yugi.
5D xx 236236B (20890)
412369A/C, 236236B (15140)
412369A/C, 2B xx [4]6A xx 236236B (14458)
Anti Air routes
2C, [4]6B, 412369A/C, [2]8A (13684)
2C, 412369C, 412369C, 412369C, [2]8A (13166)
2C, [4]6D (9400)
2C, [4]6A, j.D (12240)
2C, [4]6A, 5C (12744) Corner Only
2C,[4]6AC, 412369A/C, 412369A/C, [2]8A (14926)
412369A/C, [2]8A
- Anti air A or C Bogetsu hit also allows for a reset with 2B,2D, or 5D
412369AC, 412369A/C, 412369A/C, 412369A/C, 412369A/C, [2]8A (10767)
412369AC, [2]8A, [2]8A (8790)
- Side-swap confirm. Side-swap occurs if ex bogetsu hits late in the opponents jump (if they are on the way down).
[2]8A, 236236A (11500)
Air BL Counter hit, 412369A/Cx5,[2]8A (16387 with j.D starter)
- By "air BL counter hit" we mean an anti air or air to air hit that causes the air BL counter state
Air BL Counter hit, 412369AC,412369A/Cx3,[2]8A (15308 with j.D starter)
- By "air BL counter hit" we mean an anti air or air to air hit that causes the air BL counter state
Video of Hina BNB anti air routes: https://www.youtube.com/watch?v=dI7LouT7TE0
General Hina combo Notes:
For many of Hina's combos involving a Bogetsu juggle either A or C Bogetsu's can be used and will do the same damage, although using the C version will provide better corner carry. Note that the C version has 2 more start up frames and can sometimes be more difficult to land. Judge the spacing properly.
Anywhere that there is a Shinenzan ender after a juggle combo you can instead reset with 2B, 2D or 5D. Depending on the combo the 2D and 5D resets can be more difficult. 2B reset grants the most frame advantage but least damage. 2D reset is solid midscreen and 5D is recommended for corner resets.
Strategy
Hina is a powerful character with strong, simple hit-confirms and who can easily transition between multiple different playstyles based on the matchup and the opponent's tendencies. Similar to SF4's Bison's Scissor Kick pressure, Hina can bully opponents to the corner by poking with crouching ![]() into Yugizan, Retsugizan, or Bogetsuzan, each of which have different parry timings, are mostly unpunishable against most characters when spaced, and all of which can be hit-confirmed into a super. If the opponent blocks a L Yugizan, which should be your bread-and-butter space control and pressure tool, Hina can Retsugizan to catch opponents walking backwards with a fast long-range low, use her fast crouching
into Yugizan, Retsugizan, or Bogetsuzan, each of which have different parry timings, are mostly unpunishable against most characters when spaced, and all of which can be hit-confirmed into a super. If the opponent blocks a L Yugizan, which should be your bread-and-butter space control and pressure tool, Hina can Retsugizan to catch opponents walking backwards with a fast long-range low, use her fast crouching ![]() or standing
or standing ![]() to counterpoke, go over lows with Universal Overhead or Bogetsuzan, or continue the pressure with stepkick, dash up throw, or crouching
to counterpoke, go over lows with Universal Overhead or Bogetsuzan, or continue the pressure with stepkick, dash up throw, or crouching ![]() or
or ![]() . Most characters have only limited tools to defeat this midrange pressure game, and as long as you remain unpredictable such as to not get parried, Hina can quickly force opponents to a purely defensive game where she can get them to the corner or eat a beefy simple hit confirm into super. Hina's jumping normals are serviceable and have decent range if you want to mix up your approach, although in general she is best played mostly on the ground.
. Most characters have only limited tools to defeat this midrange pressure game, and as long as you remain unpredictable such as to not get parried, Hina can quickly force opponents to a purely defensive game where she can get them to the corner or eat a beefy simple hit confirm into super. Hina's jumping normals are serviceable and have decent range if you want to mix up your approach, although in general she is best played mostly on the ground.
Defensively, Hina has a respectable number of options. Standing ![]() , although not special cancellable, has a good hitbox and can be used in the midrange as way to catch movement and limbs. Crouching
, although not special cancellable, has a good hitbox and can be used in the midrange as way to catch movement and limbs. Crouching ![]() is Hina's fastest normal, is slightly disjointed, and is a great way to check lows. Hina has one of the game's few invincible meterless reversals in H Shinenzan as well, and it functions as a serviceable anti-air, hitting slightly behind her as well to check cross-ups. Because of her slow walk speed and relatively slow normals, Hina can have a difficult time anti-airing opponents when caught without a down charge for Shinenzan. If put out fast enough, crouching
is Hina's fastest normal, is slightly disjointed, and is a great way to check lows. Hina has one of the game's few invincible meterless reversals in H Shinenzan as well, and it functions as a serviceable anti-air, hitting slightly behind her as well to check cross-ups. Because of her slow walk speed and relatively slow normals, Hina can have a difficult time anti-airing opponents when caught without a down charge for Shinenzan. If put out fast enough, crouching ![]() offers a full juggle combo and has a decent enough hitbox (though somewhat smaller than the animation implies). One of the less obvious but stronger options is to meet the opponent midair and challenge with her fast neutral jump
offers a full juggle combo and has a decent enough hitbox (though somewhat smaller than the animation implies). One of the less obvious but stronger options is to meet the opponent midair and challenge with her fast neutral jump ![]() or even a back jump
or even a back jump ![]() . In general, however, Hina players must be adept at parrying aerial approaches and must be mindful that their anti-airs not become predictable and parried on prediction. In part due to this weakness and in part due to the generally aggressive nature of the game, Hina players cannot simply hold down-back and try to counter every approach their opponent makes unless they already have a significant life lead - Hina is most suited for a strong midrange style of play where she weaves in and out of the opponent's range and aggressively controls as much space as she can.
. In general, however, Hina players must be adept at parrying aerial approaches and must be mindful that their anti-airs not become predictable and parried on prediction. In part due to this weakness and in part due to the generally aggressive nature of the game, Hina players cannot simply hold down-back and try to counter every approach their opponent makes unless they already have a significant life lead - Hina is most suited for a strong midrange style of play where she weaves in and out of the opponent's range and aggressively controls as much space as she can.
Matchups
vs. Azure
(No strategies)
vs. Kotaro
(No strategies)
vs. Aja
(No strategies)
vs. Kou
(No strategies)
vs. Hanzo
(No strategies)
vs. Jyuzumaru
(No strategies)
vs. Dark Jyuzumaru
(No strategies)
vs. Hina
(No strategies)
vs. Shimo
(No strategies)
vs. Jet
(No strategies)
vs. Chadha
Hina has the advantage on the ground. Stay at mid range to chip his guard/health with A-Yugizan, B-Retsugizan, 5C etc. A-Yugi and 5C can break Chadha's normal attacks (including his 5A and 2A).
However, It's necessary to anti-air to keep that advantage. For example, crouching High Parry -> C Shinenzan to punish both of the Chadha's JD and empty jump -> throw. If you can punish his JD a lot, Hina's 2C also works for high damages. Do not forget mixing-up anti-airs(Parry, jump parry, jump attacks, Shinen and etc.). It is important because Chadha can do a deep jump in light which will beat a crouching High Parry -> C Shinen, so vary your options!
If Chadha is turtling with neutral JD wait until he lands, use parry, sometimes EX-Bogetsu, or sometimes 5C. If you always commit to an option after he lands he can counter with a Dropkick or read your attack, so keeping a balance between waiting and punishing or attacking is important.
(Thank you to OsamuraiZamurai for the Chadha tips!)
vs. Crow
(No strategies)
