Yatagarasu: Attack on Cataclysm/Jyuzumaru

From SuperCombo Wiki
Jyuzu face.jpg

Introduction

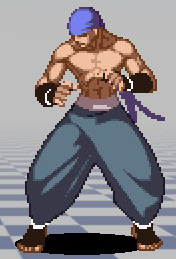
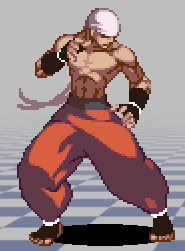
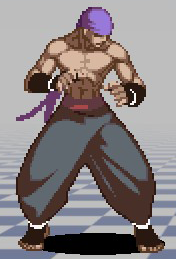
Colors

YataLP.png or YataHP.png YataLK.png or YataHK.png YataHBL.png or YataLBL.png
Juzu Punch.png Juzu Kick.png Juzu Parry.png

-- Gongfuren

Move List

Command Normals

Name
Command
Notes
Sweep
Df.png + Hk.png
Low

Target Combos

Name
Command
Notes
Lk.png ---.png Lk.png
2nd hit launches opponent supercancel
Lp.png ---.png Lp.png
Speccancel.png supercancel

Special Moves

Name
Command
Notes
Rimse
Qcf.png + P.png (up to 3 times)
Okimunpe
Dp.png + P.png
Emsi
Dp.png + K.png
Rela
Qcb.png + P.png
Pekamui
during Rela, Lk.png
Kamuifuchi
during Rela, Hk.png
Okimunpe
during Rela, P.png

Super Special Moves

Name
Command
Notes
Raikurutekunpe
Qcf.png Qcf.png + P.png
Raikuruhoshi
Qcb.png Qcb.png + K.png

Move Analysis

Normal Moves

Standing Lp.png

<Description here>

Crouching Lp.png

<Description here>

Jumping Lp.png

<Description here>

Standing Lk.png

<Description here>

Crouching Lk.png

<Description here>

Jumping Lk.png

<Description here>

Standing Hp.png

<Description here>

Close Hp.png

<Description here>

Crouching Hp.png

<Description here>

Jumping Hp.png

<Description here>

Standing Hk.png

<Description here>

Crouching Hk.png

<Description here>

Jumping Hk.png

<Description here>

Command Normals

Sweep (Df.png + Hk.png)

<Description here>

Target Combos

Lk.png ---.png Lk.png

<Description here>

Lp.png ---.png Lp.png

<Description here>

Special Moves

Rimse (Qcf.png + P.png, up to 3 times)

<Description here>

Okimunpe (Dp.png + P.png)

<Description here>

Emsi (Dp.png + K.png)

<Description here>

Rela (Qcb.png + P.png)

<Description here>

Pekamui (during Rela, Lk.png)

<Description here>

Kamuifuchi (during Rela, Hk.png)

<Description here>

Super Special Moves

Raikurutekunpe (Qcf.png Qcf.png + P.png)

<Description here>

Raikuruhoshi (Qcb.png Qcb.png + K.png)

<Description here>

Frame Data

Move Name Damage Hit Level Cancel Ability Startup Active Recovery Block Advantage Hit Advantage Total Frames
Stand Snka.gif 2100 Mid ch/sp/su 5 3 5 +4 +5 12
Stand Snkb.gif 2200 Mid su 6 3 9 0 +1 17
Stand Snkc.gif 6700 Mid sp/su 12 3 20 -3 0 34
Stand Snkd.gif 6400 Mid - 11 3 18 -1 +2 31
Close Snkc.gif 2100 Mid sp/su 7 4 19 -3 0 29
Crouch Snka.gif 2300 Mid sp/su 6 7 - +2 +3 14
Crouch Snkb.gif 2500 Low sp/su 6 7 - +5 +6 13
Crouch Snkc.gif 5500 Mid sp/su 7 9 - -7 -4 34
Crouch Snkd.gif 2000 Low sp/su 7 9 - -2 0 25
Jump Snka.gif 2000 High - 5 4 - - - -
Jump Snkb.gif 2000 High - 7 7 - - - -
Jump Snkc.gif 5600 High - 9 5 - - - -
Jump Snkd.gif 5600 High - 11 4 - - - -
Sweep

Df.gif + Snkd.gif

5800 Low - 15 3 20 -3 - 37
Throw

Snka.gif + Snkb.gif

6000 - - 4 2 23 - - 28
Overhead

Snka.gif + Snkc.gif

3000 High - 17 11 6 0 0 33
Guard Crush

Snkc.gif + Snkd.gif

6000 Mid - 22 6 12 +14 +5 39
Target Combo

Close Snka.gif > Snka.gif

6000 Mid - 6 3 9 0 +7 17
Target Combo

Close Snkb.gif > Snkb.gif

6000 Mid - 7 5 11 -4 0 22
L Emushi

Dp.gif + Snkb.gif

7000 (3000, 2000, 2000) Mid su 6 4(4)3(4)5 34 -26 0 59
H Emushi

Dp.gif + Snkd.gif

2000 ~ 7200 Mid su 7 4(4)1(4)1(4)1(4)1(8)5 37 -46 0 80
EX Emushi

Dp.gif + Snkb.gif + Snkd.gif

8000 (2000, 1500, 1500, 3000) Mid su 5 2(5)2(4)3(8)5 36 -39 0 69
L Okimunpe

Dp.gif + Snka.gif

3500 Mid su 19 3 18 -1 +2 39
H Okimunpe

Dp.gif + Snkc.gif

7000 Mid su 18 2 21 -3 0 43
EX Okimunpe

Dp.gif + Snka.gif + Snkc.gif

5100 (1500, 4000) Mid su 18 2 21 -3 0 40
L Rera

Qcb.gif + Snka.gif

- Mid - - - 28 0 0 28
H Rera

Qcb.gif + Snkc.gif

- Mid - - - 29 0 0 29
EX Rera

Qcb.gif + Snka.gif + Snkc.gif

- Mid - - - 28 0 0 28
Rera > Pekkamui

Qcb.gif + P.png > Snkb.gif

3500 Mid - 20 6 15 -1 -2 32
Rera > Pekkamui > Rimuse

Qcb.gif + P.png > Snkb.gif > P.png

3500 Mid - 18 2 21 -3 0 40
Rera > Kamuifuchi

Qcb.gif + P.png + Snkc.gif > Snkd.gif

3500 Mid - 18 2 21 -3 0 40
Rera > L Okimunpe

Qcb.gif + P.png > Snka.gif

3500 Mid su 18 2 21 -3 0 40
Rera > H Okimunpe

Qcb.gif + P.png > Snkc.gif

3500 Mid ssu 18 2 21 -3 0 40
EX Rera > Pekkamui

Qcb.gif + Snka.gif + Snkc.gif > Snkb.gif

3500 Mid - 18 2 21 -3 0 40
EX Rera > Pekkamui > Rimuse

Qcb.gif + Snka.gif + Snkc.gif > Snkb.gif > P.png

3500 Mid - 18 2 21 -3 0 40
EX Rera > Kamufuchi

Qcb.gif + Snka.gif + Snkc.gif > Snkd.gif

3500 Mid - 18 2 21 -3 0 40
L Rera > L Okimunpe

Qcb.gif + Snka.gif + Snkc.gif > Snka.gif

3500 Mid su 18 2 21 -3 0 40
EX Rera > H Okimunpe

Qcb.gif + Snka.gif + Snkc.gif > Snkc.gif

3500 Mid su 18 2 21 -3 0 40
L Rimuse 1st

Qcf.gif + Snka.gif

1800 Mid - 13 3 18 -9 -2 33
L Rimuse 2nd

Qcf.gif + Snka.gif

2000 Mid - 13 3 20 -9 -2 33
L Rimuse 3rd

Qcf.gif + Snka.gif

3000 Mid - 13 3 18 -9 -2 33
H Rimuse 1st

Qcf.gif + Snkc.gif

2000 Mid - 13 3 18 -9 -2 33
H Rimuse 2nd

Qcf.gif + Snkc.gif

2300 Mid - 13 3 18 -9 -2 33
H Rimuse 3rd

Qcf.gif + Snkc.gif

3500 Mid - 13 3 18 -9 -2 33
EX Rimuse 1st

Qcf.gif + Snka.gif + Snkc.gif

2500 Mid - 13 3 18 -9 -2 33
EX Rimuse 2nd

Qcf.gif + Snka.gif + Snkc.gif

1200 Mid - 13 3 18 -9 -2 33
EX Rimuse 3rd

Qcf.gif + Snka.gif + Snkc.gif

1200 Mid - 11 3 22 -8 -6 35
EX Rimuse 4th

Qcf.gif + Snka.gif + Snkc.gif

1200 Mid - 10 2 23 -8 -6 34
EX Rimuse 5th

Qcf.gif + Snka.gif + Snkc.gif

5000 Mid - 10 2 33 -18 - 44
Raikurutekunpe

Qcf.gifQcf.gif + K.png

11750 (3200, 3200, 7000) Mid x7 - 3 10 35 -21 - 46
Raikuruhoshi

Qcb.gifQcb.gif + K.png

3000 ~ 15000 - - 9 2(3)1(2)1(2)1(2)1(2)1(2)1(2)1(2)1(8)6 57 -72 - 105

Combos

(Damage is currently based off 4.3, will be updated on AoC release)

Meterless

  • 2D xx 236C x3 - (11758 damage)
  • 2C xx 236C x3 - (11883 damage)
  • close C xx 236C x3 - (12558 damage)
  • stand A x2 xx 236C x3 - (9757 damage)

Easy punish combos into rekkas.

  • close C xx 623D - (12280 damage)
  • 2C xx 623D - (11620 damage)

Crouching C combo has to be done close for all hits to connect.

  • close C xx 623A - (8950 damage)
  • 2C xx 623A - (8475 damage)

Safe blockstrings. You can replace 623A with 214AA for an easier combo, but it can be blown up on block with a DP or super.

  • stand A x2 2C xx 236C x3 (12905 damage)

Max damage meterless combo. 1 frame link for regular Jyuzu, 5 frame link for Dark Jyuzu.

1/2 Meter

  • 2B [x2] xx 236AC x5 - (10960 damage)
  • 2A [x2] xx 236AC x5 - (10775 damage)

Confirms into EX rekkas. The first combo is harder to perform since 2B chains/links weird, but hits low and does more damage so prefer it over the 2A combo.

  • close C xx 623AC - (10390 damage)
  • 2C xx 623AC - (9835 damage)
  • 2D xx 623AC - (9590 damage)
  • stand A x2 xx 623AC - (8022 damage)

Combos into EX shoulder. Midscreen the enemy can only be reset with a jump attack and st.C but doing it in the corner allows more juggling.

Corner

  • 2C xx 214AC>A xx 5D - (13864 damage)
  • 2C xx 214AC>A xx 623D - (14272 damage)

1 Meter

  • Crouch A,Crouch B xx 236236K - (14340 damage)
  • Close B,Crouch B xx 236236K - (15769 damage)
  • Close C xx 623A xx 236236K - (16563 damage)
  • close C xx 623D xx 236236K - (18175 damage)
  • Close C xx 623A xx 214214K - (17050 damage)
  • Close C xx 623D xx 214214K - (21100 damage)

Near to Corner

  • close C xx 623D ,land 214214K - (16223 damage)

1 1/2 Meter

Midscreen

  • 2C xx 623BD xx 214214K - (16023 damage)
  • close C xx 623BD xx 214214K - (16943 damage)
  • Close C xx 214AC>A xx 236236K - (18813 damage)
  • Close C xx 214AC>A xx 236236K - (19300 damage)

Corner

  • Close A>A xx 623BD xx 214214K - (15849 damage
  • Close C xx 623BD xx 214214K - (20182 damage)


2 Meter

Corner

  • Close B>B xx 214214K xx 236236K - (21736 damage)
  • 2C xx 623D xx 214214K xx 236236K - (25270 damage)
  • Close C xx 214214K xx 236236K - (29219 damage)

Strategy

Matchups

vs. Azure

(No strategies)

vs. Kotaro

(No strategies)

vs. Aja

(No strategies)

vs. Kou

(No strategies)

vs. Hanzo

(No strategies)

vs. Jyuzumaru

(No strategies)

vs. Dark Jyuzumaru

(No strategies)

vs. Hina

(No strategies)

vs. Shimo

(No strategies)

vs. Jet

(No strategies)

vs. Chadha

(No strategies)

vs. Crow

(No strategies)
Yatagarasu: Attack on Cataclysm
General
Characters

AjaAzureChadhaCrowHanzoHinaJetJyuzumaruKotaroKouShimo