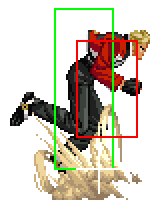
Introduction
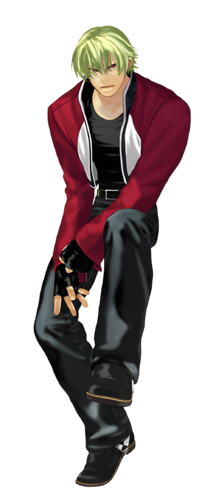
He is the abandoned son of Geese Howard and Mary R. Heinlein, after his mother's death he was a vagabond and then found by Terry Bogard who adopted him as a father figure and legal tutor.
His fighting style its a mix about the reversals of Geese Howard with Terry Bogard rush attacks.
Gameplay
Rock is a neutral/footsies character. His main gameplan is to build meter (mainly with Crack Counter D and Reppuken in neutral) and confirm into his Shine Knuckle super. Shinkuu Nage is a command grab that he can use to open up more defensive opponents in close range and can lead to highly damaging conversions with P-Power.
| Strengths | Weaknesses |
|---|---|
|
|
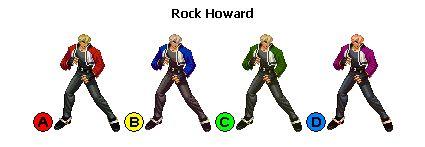
Character Colors
Move List
Frame Data Source : http://www13.atwiki.jp/garoumow/pages/19.html and http://www13.atwiki.jp/garoumow/pages/68.html
| Data Help | |
|---|---|
| Disclaimer: This is meant to teach basic terminology used when describing moves. | |
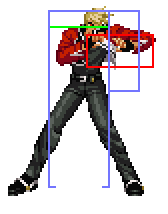
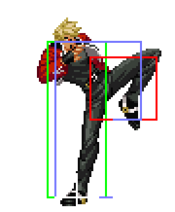
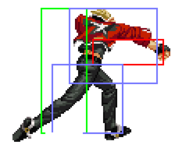
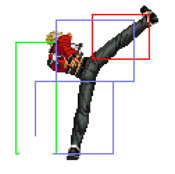
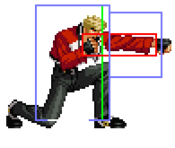
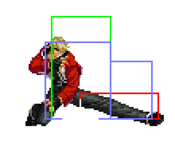
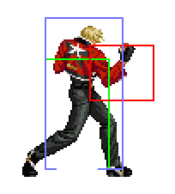
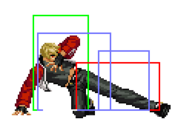
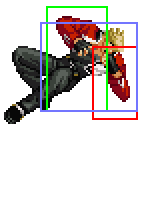
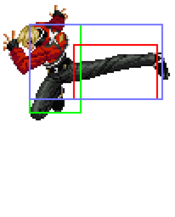
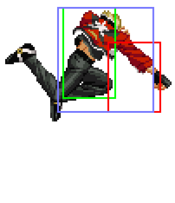
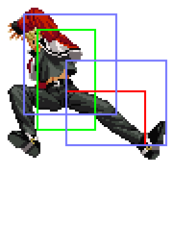
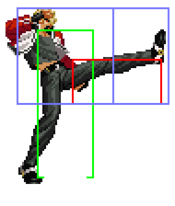
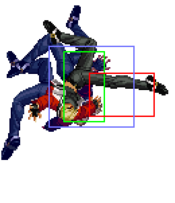
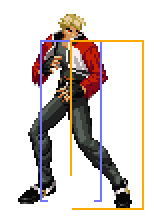
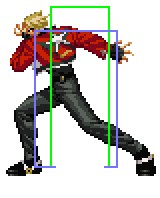
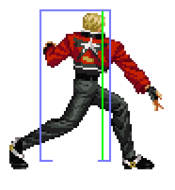
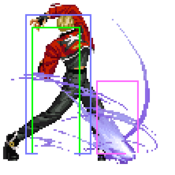
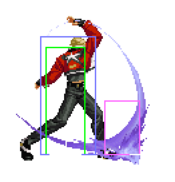
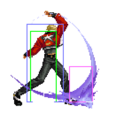
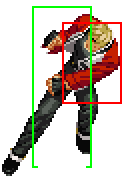
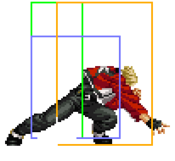
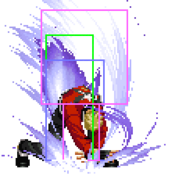
| Hitbox: | A predefined area (usually a rectangle or rectangles) that tells the game how any given attack can come in contact with a character. Hitboxes are invisible to the player when normally playing. |
| Hurtbox: | A predefined area (usually a group of rectangles) that tell the game how your character is allowed to get hit by any incoming attack. Specifically, you'll get hit by (or block) an attack if that attack's hitbox ever overlaps your hurtbox. |
| Throw Box/Range: | Active throw frames and range. Your opponent will be thrown in this field if not in block or hit stun. |
| Projectile Box: | Hitbox on a projectile attack. |
| Guard/Counter Box: | The Guard Box or Counter Box. This appears when blocking or using a counter move. |
| Push Box: | Has no bearing on hit/hurt boxes. Just prevents characters to not pass through each other. (Also known as "Collision Box".) |
| Startup | The number of frames before an attack can hit the opponent. Does not include the first active frame. |
| Guard | The way this move must be blocked.
High or H or Overhead (especially when from the ground) -- must be blocked standing. |
| Damage | "Basic" damage -- Unmodified damage values
"Correct" damage -- Damage values accounting for damage scaling, TOP multiplier, and defense rate |
| Guard Crush Value | Decreases the defender's guard durability gauge by this value. |
| +X | Attacker has X number of advantage frames. |
| -X | Attacker has X number of disadvantage frames. |
| KD | Short for "knockdown", knocks down opponent on hit. |
| ◯ | Cancelable on both hit and block. |
| ∞ | Chain cancelable with the same button (renda cancel). |
| ※ | Cancelable on the first hit/part only. |
| 《X》OR «X» OR <<X>> OR (X) | X number of inactive frames between hits of multihit moves. |
| △ | Only cancelable on block. |
| ▽ | Only cancelable on hit. |
| × OR X | Not cancelable. |
Notes:
- Special/Super moves with "Guard" data in red text are impossible to just defend at 0-pixel health bar.
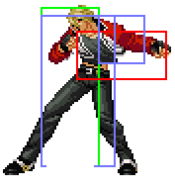
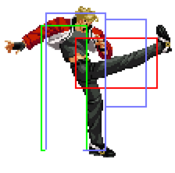
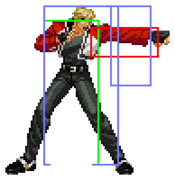
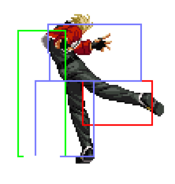
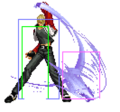
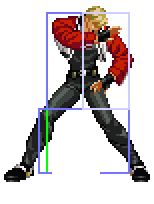
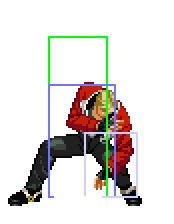
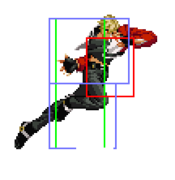
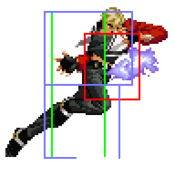
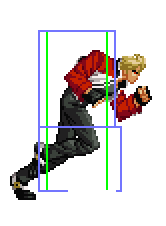
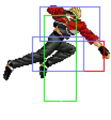
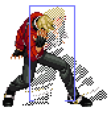
| Standing/Taunting | Crouching | Dashing | Jumping |
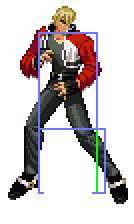 |
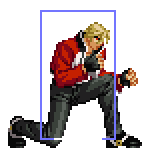 |
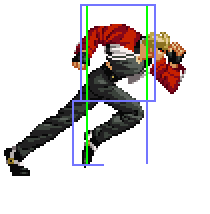 |

|
| 35F |
Close Standing Normals
Close 5A
| Damage | Guard | Startup | Active | Recovery | Total |
|---|---|---|---|---|---|
| 4 | Mid | 3 | 4 | 5 | 12 |
| Hit Adv | Block Adv | Cancel on Hit | Cancel on Block | Guard Crush Value | |
| +6 | +6 | ◯ / ∞ | ◯ / ∞ | 4 | |
|
Standing jab. | |||||
Close 5B
| Damage | Guard | Startup | Active | Recovery | Total |
|---|---|---|---|---|---|
| 6 | Mid | 3 | 1 | 12 | 16 |
| Hit Adv | Block Adv | Cancel on Hit | Cancel on Block | Guard Crush Value | |
| +2 | +2 | ◯ | ◯ | 4 |
Close 5C
| Damage | Guard | Startup | Active | Recovery | Total |
|---|---|---|---|---|---|
| 10 | Mid | 5 | 4 | 25 | 34 |
| Hit Adv | Block Adv | Cancel on Hit | Cancel on Block | Guard Crush Value | |
| -8 | -8 | ◯ | ◯ | 5 |
Close 5D
| c.5D | Damage | Guard | Startup | Active | Recovery | Total |
|---|---|---|---|---|---|---|
| 10 | Mid | 10 | 5 | 22 | 37 | |
| Hit Adv | Block Adv | Cancel on Hit | Cancel on Block | Guard Crush Value | ||
| -6 | -6 | ◯ | ◯ | 5 | ||
| c.5D>6D | Damage | Guard | Startup | Active | Recovery | Total |
| 10 | Overhead | 24 | 3 | 26 | 53 | |
| Hit Adv | Block Adv | Cancel on Hit | Cancel on Block | Guard Crush Value | ||
| -8 | -8 | X | X | 5,9 | ||
|
Target combo from c.5D. Can be done during the startup of c.5D. | ||||||
Far Standing Normals
Far 5A
| Damage | Guard | Startup | Active | Recovery | Total |
|---|---|---|---|---|---|
| 5 | Mid | 3 | 4 | 7 | 14 |
| Hit Adv | Block Adv | Cancel on Hit | Cancel on Block | Guard Crush Value | |
| +4 | +4 | ◯ / ∞ | ◯ / ∞ | 4 |
Far 5B
| Damage | Guard | Startup | Active | Recovery | Total |
|---|---|---|---|---|---|
| 7 | Mid | 7 | 4 | 14 | 25 |
| Hit Adv | Block Adv | Cancel on Hit | Cancel on Block | Guard Crush Value | |
| -3 | -3 | X | X | 4 |
Far 5C
| Damage | Guard | Startup | Active | Recovery | Total |
|---|---|---|---|---|---|
| 14 | Mid | 10 | 2 | 25 | 37 |
| Hit Adv | Block Adv | Cancel on Hit | Cancel on Block | Guard Crush Value | |
| -6 | -6 | X | X | 5 |
Far 5D
| Damage | Guard | Startup | Active | Recovery | Total |
|---|---|---|---|---|---|
| 14 | Mid | 11 | 3 | 27 | 41 |
| Hit Adv | Block Adv | Cancel on Hit | Cancel on Block | Guard Crush Value | |
| -9 | -9 | X | ◯ | 5 | |
|
f.5D whiffs on crouching opponents. | |||||
Crouching Normals
2A
| Damage | Guard | Startup | Active | Recovery | Total |
|---|---|---|---|---|---|
| 4 | Mid | 4 | 4 | 8 | 16 |
| Hit Adv | Block Adv | Cancel on Hit | Cancel on Block | Guard Crush Value | |
| +3 | +3 | ◯ / ∞ | ◯ / ∞ | 4 |
2B
| Damage | Guard | Startup | Active | Recovery | Total |
|---|---|---|---|---|---|
| 6 | Low | 4 | 4 | 6 | 14 |
| Hit Adv | Block Adv | Cancel on Hit | Cancel on Block | Guard Crush Value | |
| +5 | +5 | ◯ / ∞ | ◯ / ∞ | 4 |
2C
| Damage | Guard | Startup | Active | Recovery | Total |
|---|---|---|---|---|---|
| 10 | Mid | 5 | 4 | 20 | 29 |
| Hit Adv | Block Adv | Cancel on Hit | Cancel on Block | Guard Crush Value | |
| -3 | -3 | ◯ | ◯ | 5 |
2D
| Damage | Guard | Startup | Active | Recovery | Total |
|---|---|---|---|---|---|
| 10 | Low | 8 | 3 | 30 | 41 |
| Hit Adv | Block Adv | Cancel on Hit | Cancel on Block | Guard Crush Value | |
| KD | -12 | X | X | 5 |
Jumping Normals
jA
| Damage | Guard | Startup | Active | Recovery | Total |
|---|---|---|---|---|---|
| 6 | High | 3 | 10 | - | - |
| Hit Adv | Block Adv | Cancel on Hit | Cancel on Block | Guard Crush Value | |
| - | - | X | X | 4 |
jB
| Damage | Guard | Startup | Active | Recovery | Total |
|---|---|---|---|---|---|
| 6 | High | 4 | 5 | - | - |
| Hit Adv | Block Adv | Cancel on Hit | Cancel on Block | Guard Crush Value | |
| - | - | X | X | 4 | |
|
Your go-to air to air | |||||
jC
| Damage | Guard | Startup | Active | Recovery | Total |
|---|---|---|---|---|---|
| 9 | High | 8 | 6 | - | - |
| Hit Adv | Block Adv | Cancel on Hit | Cancel on Block | Guard Crush Value | |
| - | - | X | X | 5 |
jD
| Damage | Guard | Startup | Active | Recovery | Total |
|---|---|---|---|---|---|
| 9 | High | 10 | 4 | - | - |
| Hit Adv | Block Adv | Cancel on Hit | Cancel on Block | Guard Crush Value | |
| - | - | X | X | 5 |
Universal Moves
Lower-body Evasion Attack (5AB)
Upper-body Evasion Attack (2AB)
T.O.P. Attack (CD)
| Damage | Guard | Startup | Active | Recovery | Total |
|---|---|---|---|---|---|
| 16 (base damage) | Overhead | 29 | - | - | - |
| Hit Adv | Block Adv | Cancel on Hit | Cancel on Block | Guard Crush Value | |
| KD | -16 | - | - | 25 | |
|
Can be used as an optimal meterless follow-up to his Shinkuu Nage break midscreen. Generally not used outside of that because the move has very slow startup and is very unsafe on block. | |||||
Throws
Ground Throw
| Damage | Guard | Startup | Active | Recovery | Total |
|---|---|---|---|---|---|
| 14 | - | 0 | - | - | - |
| Hit Adv | Block Adv | Cancel on Hit | Cancel on Block | Guard Crush Value | |
| +35 | - | - | - | - | |
|
Normal throw. | |||||
Feints
Forward Feint (6AC)
| Damage | Guard | Startup | Active | Recovery | Total |
|---|---|---|---|---|---|
| - | - | - | - | - | 12 |
| Hit Adv | Block Adv | Cancel on Hit | Cancel on Block | Guard Crush Value | |
| - | - | - | - | - | |
|
Mimics the start of Shine Knuckle. | |||||
Down Feint (2AC)
| Damage | Guard | Startup | Active | Recovery | Total |
|---|---|---|---|---|---|
| - | - | - | - | - | 11 |
| Hit Adv | Block Adv | Cancel on Hit | Cancel on Block | Guard Crush Value | |
| - | - | - | - | - | |
|
Mimics the start of Reppuken. | |||||
Special Moves
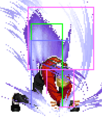
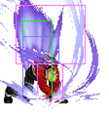
Reppuken (236P)
| A Reppuken |
Damage | Guard | Startup | Active | Recovery | Total |
|---|---|---|---|---|---|---|
| 12 | Mid | 12 | - | - | - | |
| Hit Adv | Block Adv | Cancel on Hit | Cancel on Block | Guard Crush Value | ||
| -3 | -3 | - | - | 7 | ||
|
Rock's fireball is a great way of controlling ground space and is a good check against runs/dashes in mid range. It allows him to contest other characters with fireballs and keep slower characters away. It being a grounded fireball makes it easier to avoid than a traditional fireball, so it is important to be wary of your spacing as it is easier for the opponent to jump or hop over. | ||||||
| C Double Reppuken |
Damage | Guard | Startup | Active | Recovery | Total |
| 9, 10 | Mid | 13 | - | - | - | |
| Hit Adv | Block Adv | Cancel on Hit | Cancel on Block | Guard Crush Value | ||
| +0 | +0 | - | - | 4, 4 | ||
|
Used as a combo ender and to apply pressure in close range, usually in the corner, as it is safe on block. C version first does a point-blank projectile, then sends out a second projectile. Either (1) both projectiles hit as a point-blank, 2-hit ground projectile; or (2) the first projectile dissipates and the second projectile travels out. The single hit of the second projectile will do less damage than his regular Reppuken. | ||||||
Crack Counter (236K)
| B Jou-dan (High/Mid) |
Damage | Guard | Startup | Active | Recovery | Total |
|---|---|---|---|---|---|---|
| 18 | Overhead | 3 | 16 | - | - | |
| Hit Adv | Block Adv | Cancel on Hit | Cancel on Block | Guard Crush Value | ||
| KD | 0 | - | - | 7 | ||
|
The B version is a counter move against mid/high attacks. You can use this to bet against certain attacks on defense or as an anti-air. Not used much since it has long recovery on whiff and is overall very risky. 4~19F upper-body counter, counterattack activates with a 6F startup after hitting. | ||||||
| D Ge-dan (Low) |
Damage | Guard | Startup | Active | Recovery | Total |
| 20 | Overhead | 3 | 16 | - | - | |
| Hit Adv | Block Adv | Cancel on Hit | Cancel on Block | Guard Crush Value | ||
| KD | 0 | - | - | 8 | ||
|
The D version is a counter move against low attacks. Like the B version, it can be used on defense (risky) but its primary use is to build meter in neutral, as it recovers relatively quickly compared to whiffing other special moves. 4~19F lower-body counter, counterattack activates with a 9F startup after hitting. | ||||||
Hard Edge (214P)
| A | Damage | Guard | Startup | Active | Recovery | Total |
|---|---|---|---|---|---|---|
| 12 | Mid | 11 | - | - | - | |
| Hit Adv | Block Adv | Cancel on Hit | Cancel on Block | Guard Crush Value | ||
| KD | -5 | - | - | 6 | ||
|
The A version has Rock do a quick short dash with an elbow attack. It needs to be spaced out so that it hits in its later active frames as a meaty to make it relatively safe on block. Used mainly as a combo ender to his meterless BnBs and as a filler in juggle combos. Rock is considered airborne during the active frames, meaning he will avoid throws and being hit during it will send him farther than if he were grounded. Some characters will have to adjust what GCs they use to punish this move because of this, notoriously The Griffon cant do either 360 or 720 to counter if it's done in the earlier parts of the move. | ||||||
| C | Damage | Guard | Startup | Active | Recovery | Total |
| 10, 9 | Mid | 17 | - | - | - | |
| Hit Adv | Block Adv | Cancel on Hit | Cancel on Block | Guard Crush Value | ||
| KD | -12 | - | - | 6, 6 | ||
|
The C version has him follow up with a punch, but is very unsafe on block. Used mainly in meterless punish combos. | ||||||
Rage Run (214K)
| B Type「Dunk」 |
Damage | Guard | Startup | Active | Recovery | Total |
|---|---|---|---|---|---|---|
| 20 | Overhead | 24 | - | - | - | |
| Hit Adv | Block Adv | Cancel on Hit | Cancel on Block | Guard Crush Value | ||
| KD | -3 | - | - | 7 | ||
|
The B version has him dash up to the opponent then perform an overhead punch. This move is somewhat risky as the punch has some startup delay after the dash and can potentially be punished on block/JD. Best used in close range as it will be less telegraphed from the dash, although it is still somewhat reactable even at point-blank range. | ||||||
| D Type「Shift」 |
Damage | Guard | Startup | Active | Recovery | Total |
| - | - | - | - | - | - | |
| Hit Adv | Block Adv | Cancel on Hit | Cancel on Block | Guard Crush Value | ||
| - | - | - | - | - | ||
|
The D Version will make Rock disappear in front then reappear behind his opponent. After "shifting" behind the opponent, the move can be cancelled into Shinkuu Nage. This is fairly risky and is somewhat reactable, but can used sparingly to catch the opponent off guard. Rock can also use this move as a command dash to close distance after a knockdown, such as after landing a Shine Knuckle. | ||||||
Rising Tackle ([2]8P)
| A | Damage | Guard | Startup | Active | Recovery | Total |
|---|---|---|---|---|---|---|
| 7, 7, 7 | Mid | 3 | - | - | - | |
| Hit Adv | Block Adv | Cancel on Hit | Cancel on Block | Guard Crush Value | ||
| KD | -29 | - | - | 2, 3, 3 | ||
|
1~6F full-body invincibility | ||||||
| C | Damage | Guard | Startup | Active | Recovery | Total |
| 8, 6, 6, 6 | Mid | 3 | - | - | - | |
| Hit Adv | Block Adv | Cancel on Hit | Cancel on Block | Guard Crush Value | ||
| KD | -32 | - | - | 2, 3×3 | ||
|
Functions as an invincible reversal and anti-air, but is fairly risky as Rock has to commit to this move and can't break it. The C version moves him forward more than the A version, so it may potentially whiff if an opponent jumps in from close range right above him. It also deals the most damage out of Rock's specials so it's his best combo ender for juggle combos if you can land all hits. 1~6F full-body invincibility | ||||||
Shinkuu Nage (360C)
| 360C Evac Toss |
Damage | Guard | Startup | Active | Recovery | Total |
|---|---|---|---|---|---|---|
| 20 | - | 11 | - | - | - | |
| Hit Adv | Block Adv | Cancel on Hit | Cancel on Block | Guard Crush Value | ||
| KD | - | - | - | - | ||
|
A command grab that is break-able with AB. Performing the move without breaking it will just have Rock throw his opponent to the opposite side of the screen. | ||||||
| 360C Break Evac Toss Break |
Damage | Guard | Startup | Active | Recovery | Total |
| - | - | - | - | - | - | |
| Hit Adv | Block Adv | Cancel on Hit | Cancel on Block | Guard Crush Value | ||
| - | - | - | - | - | ||
|
Breaking the move with AB will allow Rock to follow up with a special or super for more damage. Rock normally throws the opponent far away, but if cancelled into from his Rage Run Type Shift, he will throw them closer to himself instead, allowing for different follow-ups. | ||||||
| Hold A+B During Break Rasetsu (Follow-up) |
Damage | Guard | Startup | Active | Recovery | Total |
| 11 | - | - | - | - | - | |
| Hit Adv | Block Adv | Cancel on Hit | Cancel on Block | Guard Crush Value | ||
| KD | - | - | - | - | ||
|
Holding A+B during the Shinkuu Nage break will have Rock charge up his fist for an energy blast called Rasetsu. To do this follow-up, continue holding A+B after the break and then release. The timing is strict to get this follow-up to connect. He has more optimal follow-ups from breaking his Shinkuu Nage, so this move is largely useless. | ||||||
Super Moves
Raging Storm (236236P)
| A | Damage | Guard | Startup | Active | Recovery | Total |
|---|---|---|---|---|---|---|
| 33 | Mid | 12 | - | - | - | |
| Hit Adv | Block Adv | Cancel on Hit | Cancel on Block | Guard Crush Value | ||
| KD | -23 | - | - | 15 | ||
|
Can be comboed into from a Rage Run Type Shift > Shinkuu Nage break or from a 2AB. The super can also be used as an OTG conversion off counter hits in close range. If Rock performs the super just as the opponent touches the ground from a knockdown, the super freeze will prevent the opponent from being able to input a tech roll to escape the OTG. The super has limited use overall since it has slow startup and generally isn't effective as an anti-air (the opponent will have a lot of time to react with an air JD and the move will often get hit out of its startup too). Often it may be a better decision to opt for a meterless combo ender instead of using Raging Storm and save the meter for Shine Knuckle instead. 1~9F full-body invincibility. Has a projectile hitbox/hurtbox. | ||||||
| C | Damage | Guard | Startup | Active | Recovery | Total |
| 13, 13, 14, 14 | Mid | 17 | - | - | - | |
| Hit Adv | Block Adv | Cancel on Hit | Cancel on Block | Guard Crush Value | ||
| KD | -51 | - | - | 10×4 | ||
|
Like the A version, it can be comboed into from a Rage Run Type Shift > Shinkuu Nage break. However, it has even more limited use due to its slower startup and isn't used as an OTG. You can hold C at the beginning and release to delay the startup of the super. 1~11F full-body invincibility. Has a projectile hitbox/hurtbox. | ||||||
Shine Knuckle (236236K)
| B | Damage | Guard | Startup | Active | Recovery | Total |
|---|---|---|---|---|---|---|
| 8×5 | Mid | 1 | - | - | - | |
| Hit Adv | Block Adv | Cancel on Hit | Cancel on Block | Guard Crush Value | ||
| KD | -13 | - | - | 3×5 | ||
|
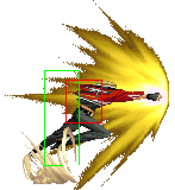
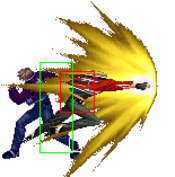
Character-defining super. Has 1f startup and travels a far distance. Very easy to combo into as a hit confirm, as it can essentially be linked into from anything that's slightly plus on hit. The range of the move also let's Rock punish a lot of things other characters would not be able to in neutral, however you may not get the full number of hits and damage if too far. In general, you should try to have at least an S-Power stocked whenever possible, so Rock remains a threat in neutral. It is possible to combo into the B version from an air reset juggle if timed correctly. | ||||||
| D | Damage | Guard | Startup | Active | Recovery | Total |
| 10, 10, 6×9 | Mid | 0 | - | - | - | |
| Hit Adv | Block Adv | Cancel on Hit | Cancel on Block | Guard Crush Value | ||
| KD | -15 | - | - | 30 | ||
|
Similar function to the B verison, but has 0f startup and can be even more easily linked into and used to punish with. The D version doesn't go into the full animation unless it's on hit and can be better used for air juggle combos, as you can often get the full damage from it and even combo into Rising Tackle if it juggles high enough. It is also better used for far range punishes for the same reason as well as counter hit Reppuken conversions in neutral. | ||||||
Deadly Rave Neo
| Damage | Guard | Startup | Active | Recovery | Total |
|---|---|---|---|---|---|
| 2, 5×8, 8×6 | Mid | 0 | - | - | - |
| Hit Adv | Block Adv | Cancel on Hit | Cancel on Block | Guard Crush Value | |
| KD | -2 | - | - | 20 | |
|
Full input: 632146A> A > A > B > B > C > C > D > D > 214C Rock's hidden super that must be inputted as a sequence by timing each hit after the initial command. It has 0f startup like his Shine Knuckle D, but has some travel time as he dashes up to the opponent, giving it less effective range and utility overall. Mainly used as a situational punish when the opponent is near the corner, as it deals more damage in the corner than midscreen. It is possible to perform the full input for the super during the super flash and have the entire super come out without having to manually time each input. It is also possible to opt out of performing the ender with 214C and instead link into a cl.C/2C then cancel into Hard Edge C or Double Reppuken. This will do the same amount of damage midscreen as performing the ender against all characters except for Tizoc and Grant, where it will only do 1 more point of damage. Last hit has a projectile hitbox. | |||||
