Introduction
King Pimp of Pimp Mountain, the lord of all pimps.
He is a decent mid tier but under used compared to his team partners due to the lack of far combat options
Final Edition Change List
- Crouching
 - Cancellable into command moves.
 - Crouching
 - Easier to connect to crouching
- Crouching
 - Cancellable into command moves.
  +
+ Prick Stick - Cancellable if cancelled into
- Crazy Drum - Less knockback on hit, making it easier to get multiple hits. First hit does less damage
 +
+ Spinning Lancer - reflects grounded projectiles
Moves List
Normal Moves
Million Dollar Buster: close, ![]() or
or ![]() +
+ ![]()
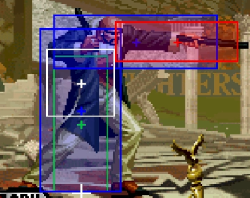
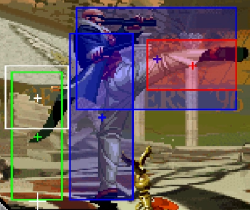
Standing A - A high hitbox attack that is useful for hop AA, and poking for combos provided it won't whiff depending on the matchup.
Standing B - A high hitbox kick aimed slightly upwards. Useful for hop AA. Has some stuffing potential against any heavy normals or special moves that are in a standing position or extend their hurtbox upwards.
Standing C - Mr. Big Lunges at his opponent with two high hitboxes attacks. The first attack is special/ super cancelable. Good for catching someone hopping backwards or poking when someone whiffs a standing attack depending on the matchup.
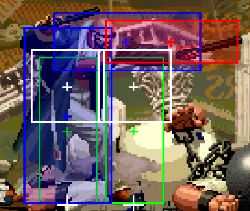
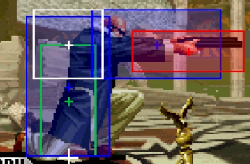
Standing D - A long ranged poke for when your opponents might stand and have a hitbox that will connect. Sometimes good for regular AA depending on the situation.
Standing CD - If you find the right range for it. It's good to use as a followup against attack happy opponents after they start blocking your cr. As. It has a high whiff cancel window if people try to jump over it, so you can prepare with an AA of your choice like MAX Blaster Wave, DP+A, Spinning Lancer B or whatevever is needed for the situation.
It doesn't whiff on these crouchers: Kyo, Daimon, Terry, Ryo, Robert, Ralf, Clark, Chizuru, King, Chang, Shermie, Blue Mary, Masters Team, USA Sports Team, Eiji, Shingo, Rugal, 96 Boss Team
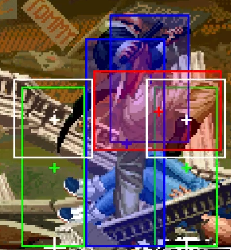
Close A - A high hitbox attack that is useful for hop AA, and poking for combos provided it won't whiff depending on the matchup.
Close B - A downward knee attack that has decent ground coverage
Close C - Uppercut attack that is useful for AA or Jump in combos. Punishable up close. Has good pressure ability for meaty attacks and dashing up on aggressive opponents.
Close D -Knee attack that covers quite downward. Good for jump in combos. Punishable up close.
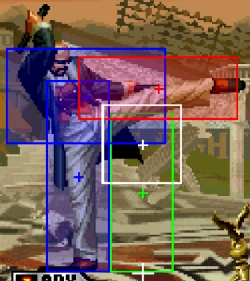
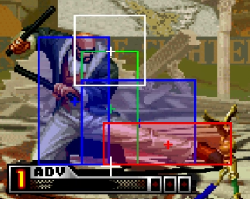
Crouching A - Your go-to long range poke. Good for controlling space despite not being a low attack. Has a little bit of recovery, so it can't be chained into
Crouching B - A quick startup low kick, but lacks range. Chain into cr.A for a hitconfirm, use it to punish whiffed jump-ins, et cetera, et cetera.
Crouching C - A bit sluggish heavy attack that hits low that can be canceled into your command normal, special moves, supers. Quite punishable up close. Has decent knockback on block at the tip of the attack. Easy to be command thrown out of.
Crouching D - A pretty long ranged sweep, but doesn't cover completely the whole foot. Has really good knockback on block for a sweep if done afar. Punishable on block if done at close range with strict timing. Great for catching whiffed attacks.Easy to be command thrown out of.
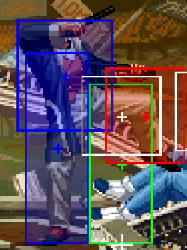
Neutral Jumping A - A quick long range attack that's useful for air to airs where someone is jumping towards you, and you just are meeting in between.
Jumping A - A quick downward air attack that lacks horizontal range. Can be used for hops but doesn't have cover much vertical area as Jumping C or CD
Jumping B - A quick upward kick attack. Good for hop to hop situations where the opponent does a hop attack that is slightly above you that Jumping D may not work. A decent air to air as well in some cases.
Jumping C - Mr Big does two attacks with his batons. As a jump in may not reach the opponent in time if they are crouching. It can reach quite low for a hop attack with slightly better horizontal coverage than Jumping A. Air to Air it's decent for the most part with it's active frames.
Jumping D - An Air version of Mr. Big's Crouching D. Covers a lot of range. Good for hop pressure. Not so great for air to airs due to low vertical range. Your go to jump in tool for punishes that require jump attacks.
Jumping CD - Air attack that lacks horizontal range but as a hop attacks. However It traps the opponent well inside the hitbox. Lacks the overhead properties.
Command Moves
--Overhead attack when not canceled into.
Special Moves
- Ground Blaster
- You have to somewhat condition your opponent to be afraid to attack to be able to use this move since it doesn't cover much vertical height, and can be rolled through. A version combos from heavy attacks in the corner while the C version is +2 frame advantage if blocked.
The C version can be canceled into from cr A or St. CD if close enough in corner to deal mini ground game pressure. Stronger if the opponent has no meter to counter it with guard cancels however.
- Cross Diving
Psycho Crusher type of move. The ![]() version is safe on block at a far distance, however covers less distance than
version is safe on block at a far distance, however covers less distance than ![]() . The
. The ![]() version is punishable unless quick maxed. Both can be evaded/rolled if done too much.
version is punishable unless quick maxed. Both can be evaded/rolled if done too much.
- Spinning Lancer
- Reflects projectiles and a single hit DM projectile back at the opponent.
![]() version can be used as a predictive AA
version can be used as a predictive AA
![]() version can be used as retaliation for opponents who disrespect air to air hits.
version can be used as retaliation for opponents who disrespect air to air hits.
By trying to neutral air guard next time or jumping again.
The former which they can't air guard from. Very Situational
- Drum Shot
- Somewhat short range for a command throw. If you can get down the range, then it can be a decent combo ender.
- Crazy Drum
- Avoid at all costs
- California Romance
Super Moves
The Basics
- Be accurate with your inputs involving
 and
and  or else a Crazy Drum comes out, and what happens next is not a pretty sight
- Well timed Spinning Lancers to very early jump ins,
 version California Romance, Cl.
  are some of your best AA options
- If you are far from your opponent you can poke with Far
 and you can also sometimes throw out your Far
  and whiff cancel the first hit into a
  version Grand Blaster if they think it's okay to attack you.If the first hit doe connect at the very tip of the attack on block make sure to cancel, because the 2nd hit misses crouching opponents.Set in practice mode the opponent to
  +
+  Counter on block to get the hang of range. Don't do very often if your opponent has invincible moves/supers/ or fireball eating supers/special moves.
- Mix up highs and low attacks a lot.
- Empty hyper hopping to Rising Spear can work sometimes to break someone's guard. Just be careful of doing too often as they will be more vigilant to stop it.
- Your
 +
+  if it hits as an AA on CH puts your opponent in a juggleable state like a CH
  +
+  would. Allowing you to follow up with special moves or a Blaster Wave.
Making it worthwhile to try to land this attack if your opponent is attacking in the air.
- Your cr.
 , cr.
, cr.  at the tip, and cr.
 are great zoning tools for controlling space due to further range given by the batons. Just keep in mind your cr.
  can't be thrown out as often due to it's slower startup.
- Your St.
 won't whiff on crouching Chang Koehan, Lucky Glauber, Wolfgang Krauser, Mr. Big and Heavy D! and can be used freely without worrying if they are standing or not.
- Your Spinning Lancer won't whiff on crouching Chang Koehan, and Lucky Glauber.
Frame Data
Advanced Strategy
Combos
- his low hit combo
- When your opponent is standing when hit or playing against Chang/Lucky and just need an easy hit confirm combo
- A great high hit combo with command move
- Best Jump In Combo
- Ways to combo his command grab
- His low hit super combo
- Timing is the key to this combo to land all the hits(Should be Rush 9 hits). Works on big characters like Chang, Krauser, Brian. It should be used only on specific characters.
- Timing is the key to this combo to land all the hits(Should be Rush 7 hits). Works best on somewhat wider hitbox characters like Krauser, etc but won't get all the hits on someone like Yuri or Choi.It should be used only on specific characters.
- The best way to land his super grab command
- An easy confirm combo if you hit with a hop attack within the tip of your low B or closer.
During MAX Mode

