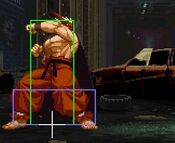
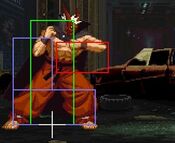
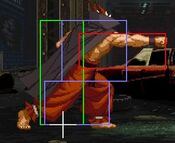
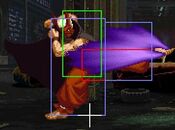
Introduction
Grant is the mid boss in MOTW. If you're playing against the computer, you will end up facing him no matter what, but depending on how well (or poorly) you perform in the game (winning grade) he may end up being the last boss.
How to Select Grant
In the MVS (Arcade) version of the game, highlight Kim Dong Hwan on the character select screen, hold down the start button (random select, cursor will start moving around) and without letting go, input ↑ ↑ ↓ ↓ ↑ ↓ and Grant's portrait will appear. You are then free to release the start button and select your color.
In the AES (Home Port) version of the game, simply move your selection off of the character select screen either one space left of Rock or two spaces right of Terry and Grant will be there to select.
Gameplay
Grant is considered by many to be the most brain dead (easiest) character in the game. Many believe that he can be picked up in mere minutes and become a character that can compete on any level. He is called cheap, ridiculous, overpowered, and at times some call for him being banned from competitive play due to being 'over powered.'
While Grant is one of the most powerful characters in the game, he has to play cautious. If he just goes all out and rushes blindly he will end up losing against seasoned players. He may seem all mighty to many players out there, but he is not as bad as he is made out to be.
| Strengths | Weaknesses |
|---|---|
|
|
Character Colors
Move List
Frame Data Source: https://w.atwiki.jp/garoumow/pages/31.html and https://w.atwiki.jp/garoumow/pages/69.html
| Data Help | |
|---|---|
| Disclaimer: This is meant to teach basic terminology used when describing moves. | |
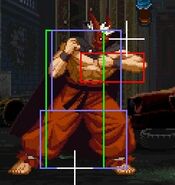
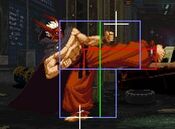
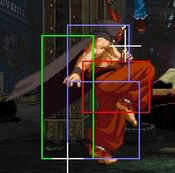
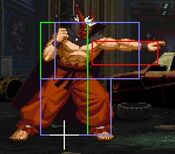
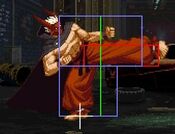
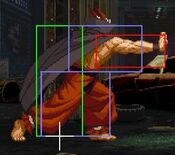
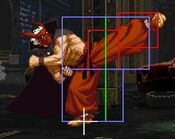
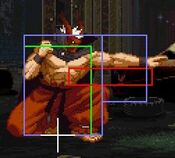
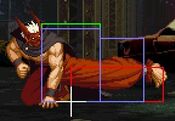
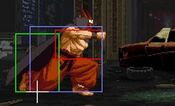
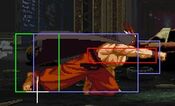
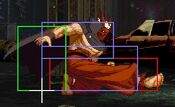
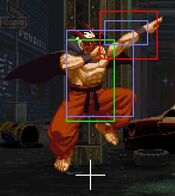
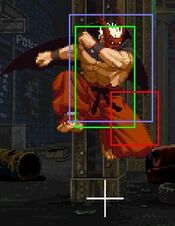
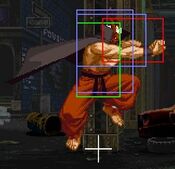
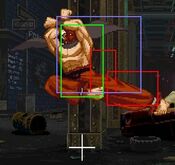
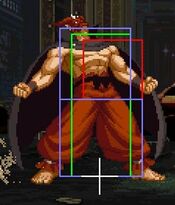
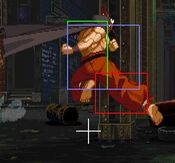
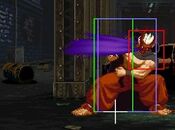
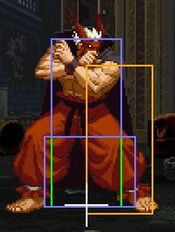
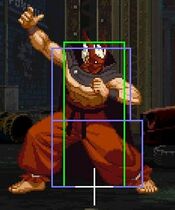
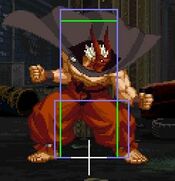
| Hitbox: | A predefined area (usually a rectangle or rectangles) that tells the game how any given attack can come in contact with a character. Hitboxes are invisible to the player when normally playing. |
| Hurtbox: | A predefined area (usually a group of rectangles) that tell the game how your character is allowed to get hit by any incoming attack. Specifically, you'll get hit by (or block) an attack if that attack's hitbox ever overlaps your hurtbox. |
| Throw Box/Range: | Active throw frames and range. Your opponent will be thrown in this field if not in block or hit stun. |
| Projectile Box: | Hitbox on a projectile attack. |
| Guard/Counter Box: | The Guard Box or Counter Box. This appears when blocking or using a counter move. |
| Push Box: | Has no bearing on hit/hurt boxes. Just prevents characters to not pass through each other. (Also known as "Collision Box".) |
| Startup | The number of frames before an attack can hit the opponent. Does not include the first active frame. |
| Guard | The way this move must be blocked.
High or H or Overhead (especially when from the ground) -- must be blocked standing. |
| Damage | "Basic" damage -- Unmodified damage values
"Correct" damage -- Damage values accounting for damage scaling, TOP multiplier, and defense rate |
| Guard Crush Value | Decreases the defender's guard durability gauge by this value. |
| +X | Attacker has X number of advantage frames. |
| -X | Attacker has X number of disadvantage frames. |
| KD | Short for "knockdown", knocks down opponent on hit. |
| ◯ | Cancelable on both hit and block. |
| ∞ | Chain cancelable with the same button (renda cancel). |
| ※ | Cancelable on the first hit/part only. |
| 《X》OR «X» OR <<X>> OR (X) | X number of inactive frames between hits of multihit moves. |
| △ | Only cancelable on block. |
| ▽ | Only cancelable on hit. |
| × OR X | Not cancelable. |
Notes:
- Special/Super moves with "Guard" data in red text are impossible to just defend at 0-pixel health bar.
Close Standing Normals
Close 5A
| Damage | Guard | Startup | Active | Recovery | Total |
|---|---|---|---|---|---|
| 5 | Mid | 3 | 4 | 5 | 12 |
| Hit Adv | Block Adv | Cancel on Hit | Cancel on Block | Guard Crush Value | |
| +6 | +6 | X | X | 4 | |
|
Your typical good jab to open people up and for basic pressure. | |||||
Close 5B
| Damage | Guard | Startup | Active | Recovery | Total |
|---|---|---|---|---|---|
| 7 | Mid | 6 | 4 | 6 | 16 |
| Hit Adv | Block Adv | Cancel on Hit | Cancel on Block | Guard Crush Value | |
| +5 | +5 | X | X | 4 | |
|
Another good poke, especially since it can link into his B/D super. Its best to use this at max distance since Grants close A and crouch A are better once grant gets in close on the opponent. | |||||
Close 5C
| Damage | Guard | Startup | Active | Recovery | Total |
|---|---|---|---|---|---|
| 11 | Mid | 8 | 3 | 30 | 41 |
| Hit Adv | Block Adv | Cancel on Hit | Cancel on Block | Guard Crush Value | |
| -12 | -12 | X | X | 6 |
Close 5D
| Damage | Guard | Startup | Active | Recovery | Total |
|---|---|---|---|---|---|
| 11 | Mid | 9 | 3 | 13 | 25 |
| Hit Adv | Block Adv | Cancel on Hit | Cancel on Block | Guard Crush Value | |
| +5 | +5 | X | X | 8 |
Far Standing Normals
Far 5A
| Damage | Guard | Startup | Active | Recovery | Total |
|---|---|---|---|---|---|
| 6 | Mid | 6 | 4 | 7 | 17 |
| Hit Adv | Block Adv | Cancel on Hit | Cancel on Block | Guard Crush Value | |
| +4 | +4 | X | X | 4 |
Far 5B
| Damage | Guard | Startup | Active | Recovery | Total |
|---|---|---|---|---|---|
| 8 | Mid | 6 | 4 | 6 | 16 |
| Hit Adv | Block Adv | Cancel on Hit | Cancel on Block | Guard Crush Value | |
| +5 | +5 | X | X | 4 | |
|
Another good poke, especially since it can link into his B/D super. Its best to use this at max distance since Grants close A and crouch A are better once grant gets in close on the opponent. | |||||
Far 5C
| Damage | Guard | Startup | Active | Recovery | Total |
|---|---|---|---|---|---|
| 14 | Mid | 9 | 5 | 22 | 36 |
| Hit Adv | Block Adv | Cancel on Hit | Cancel on Block | Guard Crush Value | |
| -6 | -6 | X | X | 6 | |
|
Is also a good anti air, and a great overall poke from max distance. It beats out many moves and pokes in the game, deals a lot of damage for a normal, and also deals a fair amount of guard crush damage. | |||||
Far 5D
| Damage | Guard | Startup | Active | Recovery | Total |
|---|---|---|---|---|---|
| 14 | Mid | 14 | 5 | 20 | 39 |
| Hit Adv | Block Adv | Cancel on Hit | Cancel on Block | Guard Crush Value | |
| KD | -4 | X | X | 10 | |
|
Makes a good anti air if timed correctly, but should not be abused, since it is very easy to bait. This move is Grants most common kara-canceled move since it inches him forward allowing for his special attack to go slightly further. It has pretty bad recover and can be punished by the entire cast. | |||||
Crouching Normals
2A
| Damage | Guard | Startup | Active | Recovery | Total |
|---|---|---|---|---|---|
| 5 | Mid | 4 | 4 | 6 | 14 |
| Hit Adv | Block Adv | Cancel on Hit | Cancel on Block | Guard Crush Value | |
| +5 | +5 | X | X | 4 | |
|
One of your go-to moves, confirms into super | |||||
2B
| Damage | Guard | Startup | Active | Recovery | Total |
|---|---|---|---|---|---|
| 6 | Low | 5 | 3 | 10 | 18 |
| Hit Adv | Block Adv | Cancel on Hit | Cancel on Block | Guard Crush Value | |
| +2 | +2 | X | X | 4 |
2C
| Damage | Guard | Startup | Active | Recovery | Total |
|---|---|---|---|---|---|
| 7, 7 | Mid | 10 | 1, (1), 3 | 38 | 53 |
| Hit Adv | Block Adv | Cancel on Hit | Cancel on Block | Guard Crush Value | |
| -20 | -20 | X | X | 10, 10 | |
|
This attack shouldn't be used too often. it has pretty bad recovery and Grant cannot link anything after it. It has horrible recovery on hit and block. Its a decent poke from afar as its his longest reaching attack, but many characters can punish it. Grant players will want to use this as little as possible. | |||||
2D
| Damage | Guard | Startup | Active | Recovery | Total |
|---|---|---|---|---|---|
| 11 | Low | 8 | 4 | 31 | 43 |
| Hit Adv | Block Adv | Cancel on Hit | Cancel on Block | Guard Crush Value | |
| KD | -14 | X | X | 5 | |
|
A solid sweep, nothing special. | |||||
Jumping Normals
jA
| Damage | Guard | Startup | Active | Recovery | Total |
|---|---|---|---|---|---|
| 6 | High | 3 | 11 | - | - |
| Hit Adv | Block Adv | Cancel on Hit | Cancel on Block | Guard Crush Value | |
| - | - | ◯ | ◯ | 4 | |
|
Is great for beating people who love to do air specials. It can beat out everything in the air, as long as Grant remains under the opponent. The attack is angled at 45° so there's a good chance it will whiff if the oppnent is leveled with Grant. | |||||
jB
| Damage | Guard | Startup | Active | Recovery | Total |
|---|---|---|---|---|---|
| 6 | High | 3 | 10 | - | - |
| Hit Adv | Block Adv | Cancel on Hit | Cancel on Block | Guard Crush Value | |
| - | - | ◯ | ◯ | 4 | |
|
Forward or backward small jump B can beat out upper-body evasion attacks. | |||||
jC
| Damage | Guard | Startup | Active | Recovery | Total |
|---|---|---|---|---|---|
| 11 | High | 7 | 6 | - | - |
| Hit Adv | Block Adv | Cancel on Hit | Cancel on Block | Guard Crush Value | |
| - | - | ◯ | ◯ | 5 | |
|
Good air-to-air, just get the timing right. Off of a hit you can play ground games since you can dash under to the exact spot the opponent will land for a crossup. Also lets you do a 0 frame super, being unblockable with good timing. | |||||
jD
| Damage | Guard | Startup | Active | Recovery | Total |
|---|---|---|---|---|---|
| 11 | High | 6 | 6 | - | - |
| Hit Adv | Block Adv | Cancel on Hit | Cancel on Block | Guard Crush Value | |
| - | - | ◯ | ◯ | 5 | |
|
A great attack to use if your opponent loves to jump in from far away. instant jump back D will beat just about every air attack in the game. try to bait your opponent into jumping by using his ground normals and locking them down until the opponent feels they have to jump in and then stick this out. | |||||
Command Normals
Ma-heki (3C)
| Damage | Guard | Startup | Active | Recovery | Total |
|---|---|---|---|---|---|
| 10 | Mid | 12 | 4 | 26 | 42 |
| Hit Adv | Block Adv | Cancel on Hit | Cancel on Block | Guard Crush Value | |
| KD | -9 | X | X | 12 | |
|
Grants 'Chest Hump' attack. This is rarely used outside of the corner for juggle purposes. If it connects it will lead to a free special/super. Note: This move cannot be feint canceled. Earlier versions of the game are used for many combo videos, and in it Grant is able to FC this attack. He does not have an infinite | |||||
Universal Moves
Lower-body Evasion Attack (5AB)
| Damage | Guard | Startup | Active | Recovery | Total |
|---|---|---|---|---|---|
| 11 | Overhead | 21 | 11 | 11 | 43 |
| Hit Adv | Block Adv | Cancel on Hit | Cancel on Block | Guard Crush Value | |
| -3 | +3 | - | - | 5 | |
|
Kara cancelable while airborne at the latter part of startup. | |||||
Upper-body Evasion Attack (2AB)
| Damage | Guard | Startup | Active | Recovery | Total |
|---|---|---|---|---|---|
| 6, 6 | Mid | 8 | 3, (5), 5 | 22 | 43 |
| Hit Adv | Block Adv | Cancel on Hit | Cancel on Block | Guard Crush Value | |
| -8 | -2 | X | X | 3, 3 | |
| |||||
T.O.P. Attack (CD)
| Damage | Guard | Startup | Active | Recovery | Total |
|---|---|---|---|---|---|
| 7x3 (base damage) | Mid | 16 | - | - | - |
| Hit Adv | Block Adv | Cancel on Hit | Cancel on Block | Guard Crush Value | |
| KD | -15 | - | - | 10×3 | |
|
A decent T.O.P attack. A great poke once in a while, and can even work as a anti-air. | |||||
Throws
Ground Throw
| Damage | Guard | Startup | Active | Recovery | Total |
|---|---|---|---|---|---|
| 14 | - | 0 | - | - | - |
| Hit Adv | Block Adv | Cancel on Hit | Cancel on Block | Guard Crush Value | |
| +33 | - | - | - | - | |
|
Will whiff and return 5C if the opponent is crouching, unless they are in the corner. | |||||
Feints
Forward Feint (6AC)
| Damage | Guard | Startup | Active | Recovery | Total |
|---|---|---|---|---|---|
| - | - | - | - | - | 10 |
| Hit Adv | Block Adv | Cancel on Hit | Cancel on Block | Guard Crush Value | |
| - | - | - | - | - | |
|
Mimics the start of Koku Enryuu. | |||||
Down Feint (2AC)
| Damage | Guard | Startup | Active | Recovery | Total |
|---|---|---|---|---|---|
| - | - | - | - | - | 19 |
| Hit Adv | Block Adv | Cancel on Hit | Cancel on Block | Guard Crush Value | |
| - | - | - | - | - | |
|
Mimics the start of Majin Haten Dan. | |||||
Special Moves
Kokuen-ryuu (214P)
| A | Damage | Guard | Startup | Active | Recovery | Total |
|---|---|---|---|---|---|---|
| 12 | Mid | 13 | - | - | - | |
| Hit Adv | Block Adv | Cancel on Hit | Cancel on Block | Guard Crush Value | ||
| KD | -11 | - | - | 7 | ||
| C | Damage | Guard | Startup | Active | Recovery | Total |
| 15 | Mid | 20 | - | - | - | |
| Hit Adv | Block Adv | Cancel on Hit | Cancel on Block | Guard Crush Value | ||
| KD | -3 | - | - | 8 |
Kyou Chou-jin (623P)
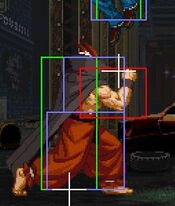
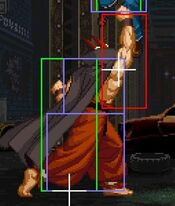
The hitbox to this move is also a bit funny.
If Grant's forearm isn't touching the opponent, then the move won't hit, so if you're close enough to see only the hand hit, the move will whiff, remember this when trying to break the move as it will leave you open. (Both versions)
| A | Damage | Guard | Startup | Active | Recovery | Total |
|---|---|---|---|---|---|---|
| 7, 6 | Mid | 7 | - | - | - | |
| Hit Adv | Block Adv | Cancel on Hit | Cancel on Block | Guard Crush Value | ||
| KD | -24 | - | - | 3, 3 | ||
|
The weak version vertically travels about jump height. 1~2F full-body invincibility. | ||||||
| Air 2B/D Messhou Hisetsu (Follow-up) |
Damage | Guard | Startup | Active | Recovery | Total |
| - | High | - | - | - | - | |
| Hit Adv | Block Adv | Cancel on Hit | Cancel on Block | Guard Crush Value | ||
| - | - | - | - | - | ||
|
For differences between B and D versions see the separate entry for Messhou Hisetsu. | ||||||
| A Break | Damage | Guard | Startup | Active | Recovery | Total |
| 7 | Mid | 7 | - | - | - | |
| Hit Adv | Block Adv | Cancel on Hit | Cancel on Block | Guard Crush Value | ||
| KD | +7 | - | - | 3 | ||
|
When you break the move, it leads to free special/super, and in the corner, it leads to free 3C juggle, which can then be followed by special/super. | ||||||
| C | Damage | Guard | Startup | Active | Recovery | Total |
| 7, 6, 6, 8 | Mid, Mid, Mid, Low | 5 | - | - | - | |
| Hit Adv | Block Adv | Cancel on Hit | Cancel on Block | Guard Crush Value | ||
| KD | -12 | - | - | 4, 4, 4 | ||
|
The strong version basically lets you fly. If you don't break or follow up with divekick, the strong version ends with a low-hitting "ground pound". Grant can play a very annoying keep away game with this move. 1~3F full-body invincibility. | ||||||
| C Break | Damage | Guard | Startup | Active | Recovery | Total |
| 7 | Mid | 5 | - | - | - | |
| Hit Adv | Block Adv | Cancel on Hit | Cancel on Block | Guard Crush Value | ||
| KD | +7 | - | - | 4 | ||
|
When you break the move, it leads to free special/super, and in the corner, it leads to free 3C juggle, which can then be followed by special/super. | ||||||
Messhou Hisetsu (j2K)
Both versions have a bit of start up time and come down slowly, plus the move doesn't have much priority and can be beat out or trade with plenty of attacks.
You can use this as a follow up to both versions of Kyou Choujin if you don't break it -- and it is very useful for wake up mix ups.
Can beat out upper-body evasion attacks.
| B | Damage | Guard | Startup | Active | Recovery | Total |
|---|---|---|---|---|---|---|
| 8 | High | 17 | - | - | - | |
| Hit Adv | Block Adv | Cancel on Hit | Cancel on Block | Guard Crush Value | ||
| -2~+5 | -2~+6 | - | - | 7 | ||
|
Instant air B into this works very well. | ||||||
| D | Damage | Guard | Startup | Active | Recovery | Total |
| 8 | High | 17 | - | - | - | |
| Hit Adv | Block Adv | Cancel on Hit | Cancel on Block | Guard Crush Value | ||
| -4~+5 | -4~+6 | - | - | 7 | ||
|
Startup is 16F if canceled into from Kyou Choujin. This move also helps with running away after Kyou Choujin, and will annoy your opponent if they don't know how to deal with it. | ||||||
Gou Dangai (236K)
Opponents who stick something out while jumping back will generally beat this movie, so try not to use it against players who do that.
| B | Damage | Guard | Startup | Active | Recovery | Total |
|---|---|---|---|---|---|---|
| 18 | Mid | 11 | - | - | - | |
| Hit Adv | Block Adv | Cancel on Hit | Cancel on Block | Guard Crush Value | ||
| KD | -5 | - | - | 7 | ||
|
The B version is very punishable on block, doing the B version as a follow up to dragon punch break is the best option mid screen, with or without meter. | ||||||
| D | Damage | Guard | Startup | Active | Recovery | Total |
| 22 | Mid | 21 | - | - | - | |
| Hit Adv | Block Adv | Cancel on Hit | Cancel on Block | Guard Crush Value | ||
| KD | -1 | - | - | 10 | ||
|
The D version will leave you at -1, so only a few supers can punish this, also throws if you do it too close to the corner. | ||||||
Gou Retsu-shou (646P)
| A | Damage | Guard | Startup | Active | Recovery | Total |
|---|---|---|---|---|---|---|
| 7, 7, 7 | Overhead, Overhead, Mid | 19 | - | - | - | |
| Hit Adv | Block Adv | Cancel on Hit | Cancel on Block | Guard Crush Value | ||
| KD | -16 | - | - | 3×2, 5 | ||
| C | Damage | Guard | Startup | Active | Recovery | Total |
| 7, 7, 8 | Overhead, Overhead, Mid | 25 | - | - | - | |
| Hit Adv | Block Adv | Cancel on Hit | Cancel on Block | Guard Crush Value | ||
| KD | -16 | - | - | 3×2, 5 |
Super Moves
Majin Haten Dan (236236P)
| A | Damage | Guard | Startup | Active | Recovery | Total |
|---|---|---|---|---|---|---|
| 31 | Mid | 11 | - | - | - | |
| Hit Adv | Block Adv | Cancel on Hit | Cancel on Block | Guard Crush Value | ||
| KD | -11 | - | - | 20 | ||
|
1~12F full-body invincibility. | ||||||
| C | Damage | Guard | Startup | Active | Recovery | Total |
| 45 | Mid | 9 | - | - | - | |
| Hit Adv | Block Adv | Cancel on Hit | Cancel on Block | Guard Crush Value | ||
| KD | -11 | - | - | 30 | ||
|
1~13F full-body invincibility. Pretty rarely used super, only for situations it'll for sure it and you want extra damage. | ||||||
Majin Engetsu Rin (236236K)
| B | Damage | Guard | Startup | Active | Recovery | Total |
|---|---|---|---|---|---|---|
| 4×13, 12 | Mid | 0 | - | - | - | |
| Hit Adv | Block Adv | Cancel on Hit | Cancel on Block | Guard Crush Value | ||
| KD | -2 | - | - | 1×13, 3 | ||
|
1~2F full-body invincibility. | ||||||
| D | Damage | Guard | Startup | Active | Recovery | Total |
| 5×13, 16 | Mid | 0 | - | - | - | |
| Hit Adv | Block Adv | Cancel on Hit | Cancel on Block | Guard Crush Value | ||
| KD | -2 | - | - | 1×13, 5 | ||
|
1~4F full-body invincibility. Not used too much, typical P super for more damage to seal a kill. | ||||||


