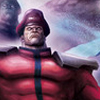
Street Fighter X Tekken/M Bison

From SuperCombo Wiki
Street Fighter X TekkenSFxTLogo.png
Street Fighter X Tekken#CharactersStreet Fighter X Tekken/Character HealthStreet Fighter X Tekken/Basic ElementsStreet Fighter X Tekken/MovementStreet Fighter X Tekken/Solo OffenseStreet Fighter X Tekken/Capcom Juggle SystemSFxTHeaderButtons.png

M. Bison

Sfxt mbison face.jpg

Ideal Team Position: Point


The Emperor of Evil emerged from the v2013 balance changes better off than he been previously, and he has risen through the ranks to find himself on many high placements in tournaments while complementing a variety of partner playstyles, including 2nd at Capcom Cup 2013 with Rolento and 1st at EVO 2017 with Heihachi. While he’s not in the top tier and there are some matchups that he has considerable difficulty against, he is knocking on the door of the Top 10 characters in the game thanks largely in part to his fast, lengthy buttons that can stop an opponent’s momentum in its tracks.

Bison benefits from the Cross Rush system better than almost anyone else in the game, using his long limbs to strike enemies from afar and confirm into a full combo when necessary. If his boost combos are blocked, punishing it can be very difficult for most of the cast, and the necessary punish for those characters that can pull it off are often esoteric. If Bison is faced with an opponent wise to that, he has several effective block strings that can further whittle away at an opponent, namely his LK Scissors Kick that is 0 on block. If the LK Scissors hits, Bison is then allowed to continue pressure with deep- hitting jumping attacks or utilizing his fast ground walk and quick normals. On some occasions, Bison even gets a full juggle off of a very ambiguous Psycho Crusher, allowing him to make a huge statement off of just one lapse in defense. His main weakness is that he is very easy to block on the ground if the opponent is wise to his tactics, and his jump is floaty enough where he can be susceptible to anti-airs. Use him as a point character as he excels at bringing in his partner with the Cross Rush system, and that partner can in turn create the openings that Bison cannot.

Strengths Weaknesses

{{{5}}}

{{{6}}}


Moves

Normal Attacks

Name
Command
Notes
Standing Light Punch
Lp.png
Rpdfire.png Speccancel.png
Standing Medium Punch
Mp.png
Speccancel.png
Standing Hard Punch
Hp.png
Speccancel.png
Standing Light Kick
Lk.png
Speccancel.png
Standing Medium Kick
Mk.png
Standing Hard Kick
Hk.png
Close Light Punch
(near opponent) Lp.png
Speccancel.png
Rpdfire.png
Close Medium Punch
(near opponent) Mp.png
Speccancel.png
Close Hard Punch
(near opponent) Hp.png
Speccancel.png
Close Medium Kick
(near opponent) Mk.png
Close Hard Kick
(near opponent) Hk.png
Crouching Light Punch
D.png + Lp.png
Rpdfire.png
Speccancel.png
Crouching Medium Punch
D.png + Mp.png
Speccancel.png
Crouching Hard Punch
D.png + Hp.png
Crouching Light Kick
D.png + Lk.png
Low.png
Speccancel.png
Crouching Medium Kick
D.png + Mk.png
Low.png
Speccancel.png
Crouching Hard Kick
D.png + Hk.png
Low.png
Hardknockdown.png
Neutral Jump Light Punch
U.png + Lp.png
High.png
Neutral Jump Medium Punch
U.png + Mp.png
High.png
Neutral Jump Hard Punch
U.png + Hp.png
High.png
Neutral Jump Light Kick
U.png + Lk.png
High.png
Neutral Jump Medium Kick
U.png + Mk.png
High.png
Neutral Jump Hard Kick
U.png + Hk.png
High.png
Angled Jump Light Punch
Ub.png / Uf.png + Lp.png
High.png
Angled Jump Medium Punch
Ub.png / Uf.png + Mp.png
High.png
Knockdown.png vs airborne
Angled Jump Hard Punch
Ub.png / Uf.png + Hp.png
High.png
Angled Jump Light Kick
Ub.png / Uf.png + Lk.png
High.png
Angled Jump Medium Kick
Ub.png / Uf.png + Mk.png
High.png
crossup
Angled Jump Hard Kick
Ub.png / Uf.png + Hk.png
High.png


Unique Attacks

Name
Command
Notes
Hell Attack
(during angled jump) Mp.png ---.png Mp.png
Knockdown.png vs airborne

Throws

Name
Command
Notes
Deadly Throw
F.png or N.png + Lp.png + Lk.png
Throw.png
Death Tower
B.png + Lp.png + Lk.png
Throw.png

Special Moves

Name
Command
Notes
Psycho Crusher
B.png (charge) F.png + P.png
Ex.png
Knockdown.png
Proj.png armor on Ex.png
Head Press
"Head Stomp"
D.png (charge) U.png + K.png
Ex.png
Knockdown.png vs airborne
Hardknockdown.png on Ex.png
   Somersault Skull Diver
Head Press ---.png P.png
High.png Ex.png
Devil Reverse
D.png (charge) U.png + P.png ---.png P.png
Ex.png
Knockdown.png
Bison Warp
Dp.png or Rdp.png + 3p.png or 3k.png
Double Knee Press
B.png (charge) F.png + K.png
Ex.png Chrg.png
Knockdown.png on 2nd hit
Low.png on 5th hit on Ex.png
Hardknockdown.png on 5th hit on Ex.png

Super Combo

Name
Command
Notes
Knee Press Nightmare
B.png (charge) F.png + 3k.png


Move Analysis

Normal Moves

N/A


Unique Attacks

N/A


Normal Throws

N/A


Special Moves

N/A


Super Combos

N/A


The Basics

N/A


Advanced Strategy

N/A


Combos

Bread and Butters

  • N/A

Hit Confirm Combos

  • N/A

Advanced Combos

  • N/A

Combos Into Supers

  • N/A

Game Navigation

General
Controls
Notation
HUD
Glossary
System
FAQ
Street Fighter Characters
Abel
Akuma
Balrog
Blanka
Cammy
Chun Li
Cody
Dhalsim
Dudley
Elena
Guile
Guy
Hugo
Ibuki
Juri
Ken
M Bison
Poison
Rolento
Rufus
Ryu
Sagat
Sakura
Vega
Zangief
Tekken Characters
Alisa
Asuka
Bob
Bryan
Christie
Heihachi
Hwoarang
Jack X
Jin
Julia
Kazuya
King
Kuma
Lars
Law
Lei
Lili
Marduk
Nina
Ogre
Paul
Raven
Steve
Xiaoyu
Yoshimitsu
Guest Characters
Cole
Kuro
Mega Man
Pac Man
Toro