Introduction
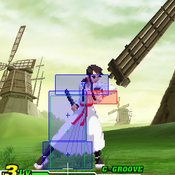
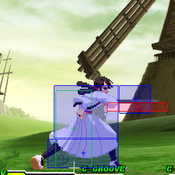
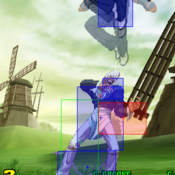
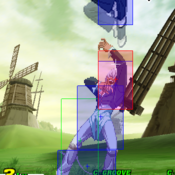
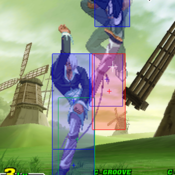
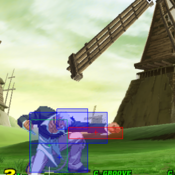
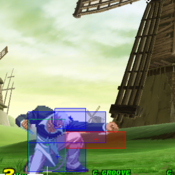
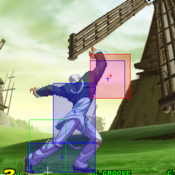
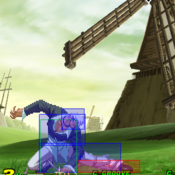
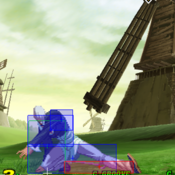
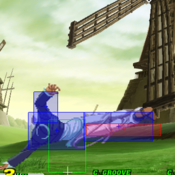
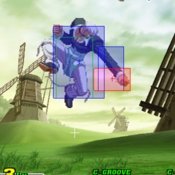
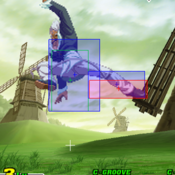
Hibiki Takane (Japanese: 高嶺響, Takane Hibiki) is a character from SNK's The Last Blade fighting game series, first appearing in the 1998 release The Last Blade 2.
A young girl with a calm and shy personality, Hibiki is thrust into a quest for vengeance. Her father, Genzou Takane, was a retired swordsmith. One day, an evil silver-haired man compelled Genzou to fashion a sword against his will. After completing the task, Genzou fell gravely ill, telling Hibiki on his deathbed that this was the silver-haired man's fault. In his last words to his daughter, Genzou said that while he "cannot approve of such actions," Hibiki should "go find that man and the sword. The thing that I saw, what I felt...even you must understand." Hibiki reluctantly heeded her father's final words, packing her sword Kodama and leaving the family home.
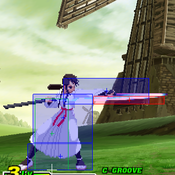
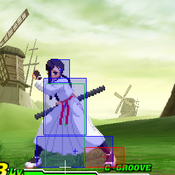
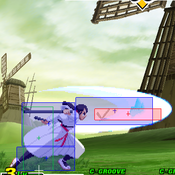
Hibiki uses the Musō Shinden-ryū branch of the Iaido fighting style. Standing with Kodama sheathed at all times, Hibiki draws it with quick distance slashes, running attacks, and counter-attack techniques. Though a young girl, Hibiki does not shy away from violence when necessary, even going as far as blaming defeated opponents for their own deaths. Despite this, she still has a strong sense of justice, having no qualms of vanquishing evil, particularly in the pursuit of seeking vengeance for her father.
Before her appearance in Capcom vs. SNK 2, Hibiki appeared in two games from The Last Blade series: Her debut in The Last Blade 2 (1998) and The Last Blade: Beyond the Destiny (2000) for Neo Geo Pocket Color. Both games have since been rereleased to modern consoles. Perhaps as a result of her popularity from CvS2, in 2021 SNK made Hibiki a DLC crossover character for Samurai Shodown (2019), with her representing The Last Blade series as a whole. She has been thought as a female equivalent of Ukyo Tachiban from the Samurai Shodown series, sharing similar demeanors sword-drawing techniques.
Data
| Health (at Ratio 2) | 14000 | Just Below Average | |
| Stun | 60 | Lowest | |
| Stun Duration | +0f | Normal | |
| Guard Guage Recovery Rate | Fast Type | Best | |
| Dash Length | 81 pixels | ||
| Dash Duration | |||
| Dash Height | 0 | Grounded | |
| Run Speed | 7.2 | Average | |
| Roll Distance | 120 pixels | ||
| Roll Duration | 27f | ||
| Roll Recovery Frames | 6u+4f | Poor | |
| Wakeup Speed compared to Ryu | 4f | Very fast |
CvS2 Gameplay Overview & General Game Plan
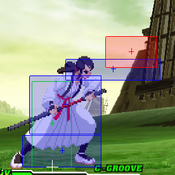
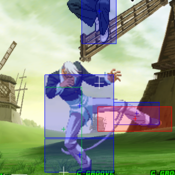
With her far-reaching pokes and special attacks, plus extremely damaging super combo potential, Hibiki is high-tier character. She is primarily a zoner that is at her best at a distance from her opponents, away from the effective range of the majority of the rest of the cast. Coupled with her movement options to help control space, her very strong anti-air attacks, and the threat of her counter, approaching Hibiki can be very difficult. Once zoning dominance has been established, Hibiki can use her quickness and deceptive special moves to approach and attack up close, either with her BnB combos or confirming into super moves.
Hibiki performs very well against much of the top-tier in CvS2. However, her playstyle requires at least some proximity to inflict big damage to opponents. Due to her limited options in that range she will quickly run out of options in prolonged or forced close combat. She can escape situations well with roll cancel Running Slash, which will cross through opponents and quickly go under jumping ones. Without RCs in K-Groove, which is a very popular groove for her, practical escape paths become more risky.
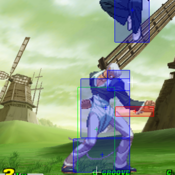
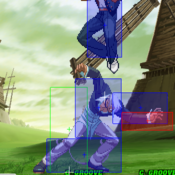
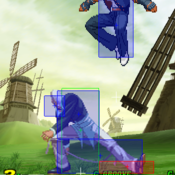
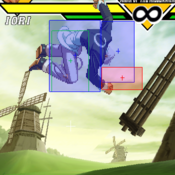
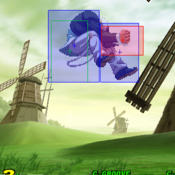
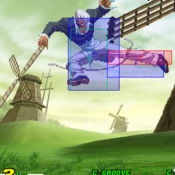
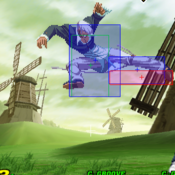
Even so, some of the advantages Hibiki has over the rest of the cast are strong. Hibiki has a special dodge (available to her in all grooves; her dodge has different properties than the S-Groove subsystem Dodge) that also has unique movement options, setting up things guaranteed dead body crossups and instant air attacks in the corners. Her jumping ![]() comes out directly below her and Running Slash attacks can cross up on wakeup, creating ambiguous 50/50 situations. Her mid/upper counter stance can juggle into a super for free damage. Her primary super combo, a "rave" style super, can be stopped mid-rave on block for mixup options, and extra damage added to the end of the rave on hit.
comes out directly below her and Running Slash attacks can cross up on wakeup, creating ambiguous 50/50 situations. Her mid/upper counter stance can juggle into a super for free damage. Her primary super combo, a "rave" style super, can be stopped mid-rave on block for mixup options, and extra damage added to the end of the rave on hit.
And she has the coolest super in the game. So there's that.
Moves List
Normal Moves
This section is currently under construction, using the Iori page as a template.
Far Standing Normals
5LP
| Damage | Stun | Cancel | Guard | Parry | Startup | Active | Recovery | Total | Adv Hit | Adv Block | Invul |
|---|---|---|---|---|---|---|---|---|---|---|---|
| 200 | _ | RF/SP/SU | H/L | H/L | 3 | 4 | 8 | 15 | +5 | +5 | - |
| |||||||||||
5MP
| Damage | Stun | Cancel | Guard | Parry | Startup | Active | Recovery | Total | Adv Hit | Adv Block | Invul |
|---|---|---|---|---|---|---|---|---|---|---|---|
| 800 | _ | SU | H/L | H | 6 | 4 | 17 | 27 | +3 | +3 | - |
| |||||||||||
5HP
| Damage | Stun | Cancel | Guard | Parry | Startup | Active | Recovery | Total | Adv Hit | Adv Block | Invul |
|---|---|---|---|---|---|---|---|---|---|---|---|
| 1000 | _ | X | H/L | H | 7 | 4 | 41 | 52 | -15 | -15 | - |
HK is your de facto anti-air button, although whether you use it standing far, standing close, or crouching will depending on the trajectory of the incoming character.
| |||||||||||
5LK
| Damage | Stun | Cancel | Guard | Parry | Startup | Active | Recovery | Total | Adv Hit | Adv Block | Invul |
|---|---|---|---|---|---|---|---|---|---|---|---|
| 300 | _ | SP/SU | H/L | H/L | 5 | 8 | 7 | 20 | +2 | +2 | - |
| |||||||||||
5MK
| Damage | Stun | Cancel | Guard | Parry | Startup | Active | Recovery | Total | Adv Hit | Adv Block | Invul |
|---|---|---|---|---|---|---|---|---|---|---|---|
| 700 | _ | X | H/L | H | 13 | 3 | 28 | 44 | Down | -8 | - |
| |||||||||||
5HK
| Damage | Stun | Cancel | Guard | Parry | Startup | Active | Recovery | Total | Adv Hit | Adv Block | Invul |
|---|---|---|---|---|---|---|---|---|---|---|---|
| 1100 | _ | X | H/L | H | 12 | 4 | 40 | 56 | -8 | -8 | - |
| |||||||||||
Close Standing Normals
cl5LP
| Damage | Stun | Cancel | Guard | Parry | Startup | Active | Recovery | Total | Adv Hit | Adv Block | Invul |
|---|---|---|---|---|---|---|---|---|---|---|---|
| 400 | 4 | RF,SP,SU | H/L | H/L | 2 | 4 | 6 | 12 | +7 | +7 | - |
Iori's close jab is very useful for many reasons:
| |||||||||||
cl5MP
| Damage | Stun | Cancel | Guard | Parry | Startup | Active | Recovery | Total | Adv Hit | Adv Block | Invul |
|---|---|---|---|---|---|---|---|---|---|---|---|
| - | - | - | - | - | - | - | - | - | - | - | - |
| |||||||||||
cl5HP
| Damage | Stun | Cancel | Guard | Parry | Startup | Active | Recovery | Total | Adv Hit | Adv Block | Invul |
|---|---|---|---|---|---|---|---|---|---|---|---|
| 1200, 1100 | 12, 11 | SP/SU, SU | H/L | H | 3 | 6 | 24 | 33 | 0 | 0 | - |
Outside of combos, the main use for this move is for anti-cross ups. Close roundhouse is your main anti-cross up, but you'll want to use close fierce against characters with bigger jumps like Blanka. | |||||||||||
cl5LK
| Damage | Stun | Cancel | Guard | Parry | Startup | Active | Recovery | Total | Adv Hit | Adv Block | Invul |
|---|---|---|---|---|---|---|---|---|---|---|---|
| - | - | - | - | - | - | - | - | - | - | - | - |
| |||||||||||
cl5MK
| Damage | Stun | Cancel | Guard | Parry | Startup | Active | Recovery | Total | Adv Hit | Adv Block | Invul |
|---|---|---|---|---|---|---|---|---|---|---|---|
| - | - | - | - | - | - | - | - | - | - | - | - |
| |||||||||||
cl5HK
| Damage | Stun | Cancel | Guard | Parry | Startup | Active | Recovery | Total | Adv Hit | Adv Block | Invul |
|---|---|---|---|---|---|---|---|---|---|---|---|
| 1400 | 14 | SU | H/L | H | 6 | 3 | 21 | 30 | 3 | 3 | N/A |
close jab is a one frame link though, meaning it's a little too difficult to do really consistently. How does Iori manage to kick so high with that funky little cord tying his legs together? | |||||||||||
Crouching Normals
2LP
| Damage | Stun | Cancel | Guard | Parry | Startup | Active | Recovery | Total | Adv Hit | Adv Block | Invul |
|---|---|---|---|---|---|---|---|---|---|---|---|
| - | - | - | - | - | - | - | - | - | - | - | - |
| |||||||||||
2MP
| Damage | Stun | Cancel | Guard | Parry | Startup | Active | Recovery | Total | Adv Hit | Adv Block | Invul |
|---|---|---|---|---|---|---|---|---|---|---|---|
| 900 | 9 | SP, SU | H/L | H/L | 4 | 6 | 9 | 19 | 5 | 5 | N/A |
The basic rule of thumb is if you're close but not within point blank range, hit low strong. It will beat most anything, and if blocked you can immediately do a standing roundhouse after for a nice big chunk of guard bar. Whiffing it intentionally can also be pretty good against certain characters, as it tends to beat a lot of long range moves... especially the low ones. Blanka's low fierce and slide, Dhalsim's limbs, shotos' low forwards... they all get beat cleanly by this move. 6/13/03 - the move also makes for Iori's best and safest meter builder in a pinch. I really wouldn't make turtling and building meter a core strategy with Iori, though, since he builds meter so much faster just by playing normally. However, if you're a few slivers away from having that 2nd meter, by all means mash on low strong. 6/13/03 - Sometimes your opponent will randomly be able to block a rekka ken after a max range low strong. Even worse, sometimes it whiffs completely for no apparent reason. 99% of the time it works fine, but sometimes the low strong x2 combo goes awry. | |||||||||||
2HP
| Damage | Stun | Cancel | Guard | Parry | Startup | Active | Recovery | Total | Adv Hit | Adv Block | Invul |
|---|---|---|---|---|---|---|---|---|---|---|---|
| 1100 | 11 | SP/SU | H/L | H/L | 4 | 5 | 20 | 29 | -1 | -1 | N/A |
Iori's other crouchable move. It doesn't really matter, though, since you'll probably never use this move as anything except as an anti-air at the 45 degree angle. It works fairly well as anti-air as long as you stick it out early enough, but it does tend to trade with the really high priority jump ins. When you use it as anti air you can buffer it into a fierce fireball to make your opponent land on it, but I would recommend throwing a jab fireball instead so that you can run after it and use it as cover to attempt to get in. | |||||||||||
2LK
| Damage | Stun | Cancel | Guard | Parry | Startup | Active | Recovery | Total | Adv Hit | Adv Block | Invul |
|---|---|---|---|---|---|---|---|---|---|---|---|
| 200 | 2 | RF/SP/SU | L | L | 4 | 4 | 8 | 16 | 5 | 5 | N/A |
| |||||||||||
2MK
| Damage | Stun | Cancel | Guard | Parry | Startup | Active | Recovery | Total | Adv Hit | Adv Block | Invul |
|---|---|---|---|---|---|---|---|---|---|---|---|
| 800 | 8 | SU | L | L | 5 | 4 | 20 | 29 | -2 | -2 | N/A |
I hardly ever use this move since low strong is just better all around. Also, the animation of this move is very misleading. Iori's entire foot doesn't have an active hitbox on it, making the move a lot shorter than it looks. Its actual range is nearly identical to Iori's low short, which is a lot better move to use in more situations. However, the move can only be canceled into supers, so if you're having a tough time landing B&B's into maiden masher due to accidental moves coming out, this could certainly help you out. You can also toss the move out and empty buffer the super behind it ala Chun in 3rd strike, but the hitbox on the move isn't THAT good. | |||||||||||
2HK
| Damage | Stun | Cancel | Guard | Parry | Startup | Active | Recovery | Total | Adv Hit | Adv Block | Invul |
|---|---|---|---|---|---|---|---|---|---|---|---|
| 1300 | 13 | N/A | Low | Low | 9 | 4 | 36 | 49 | DWN | -16 | N/A |
The move is usually essential to get in against an opponent with good defense since you can't always rely on low jumping, rolling, or guard crushing your way in. How is the move used? Well the best application of the move would be to punish a whiffed move that you baited out. The less recommended use would be to catch somebody standing from roughly 1/3rds screen distance away. This works most often against footsie-reliant characters like Chun Li or Cammy since they're generally never crouching unless you're right next to them. The move has tremendous recovery, meaning throwing it out without being SURE it's going to hit will certainly be the death of you. At max distance it's generally safe if blocked, but most any level 3 super will punish it fairly easily. If it's whiffed, well... you're gonna get hurt. Bad. A connected roundhouse rewards you with the all-important knockdown that insures Iori's way in. After a successful low roundhouse you can either walk forward a bit and go for cross up/non-cross up roll mix ups, or run forward a bit and go for a jumping cross up. An opponent that tech rolls the low roundhouse is impossible to punish, unfortunately, so the best thing to do if this happens is to throw a jab fireball and run after it. 7/5/03 - SOMETIMES you can punish a tech-rolled low roundhouse with another run-up low roundhouse. Doesn't really work if the first low roundhouse was at the absolute max distance, though, and it works a lot better on big characters. Try to low roundhouse tech rolls on reaction, rather than guessing. However, of all the times that I've whiffed a low roundhouse against an opponent who didn't tech roll, I don't recall being punished for it once. In fact, I've hit several uppercuts on people who've tried to punish it. Hrmm... to be safe, though, I'd recommend RC rekka'ing instead of doing uppercuts after the whiffed low roundhouse. | |||||||||||
Air Normals
8LP
| Damage | Stun | Cancel | Guard | Parry | Startup | Active | Recovery | Total | Adv Hit | Adv Block | Invul |
|---|---|---|---|---|---|---|---|---|---|---|---|
| 600 | 6 | - | H | H | 3 | 22 | - | - | - | - | - |
I don't use this personally, but I've seen many good Iori users use this as their preferred jump in. It has pretty good priority and sticks out for a long time, too. Low jumping and immediately pressing jab is an overhead on every character in the game, but you might as well use jumping strong if you're gonna do that. 7/5/03 - This probably Iori's best option if you want to jump directly on top of your opponent's head. Jumping roundhouse and strong also work well for that purpose, but I've noticed that this move beats a lot of anti-airs meant to hit directly above the opponent's head. Use this when jumping on an opponent in the corner. | |||||||||||
8MP
| Damage | Stun | Cancel | Guard | Parry | Startup | Active | Recovery | Total | Adv Hit | Adv Block | Invul |
|---|---|---|---|---|---|---|---|---|---|---|---|
| 900 | 9 | - | H | H | 4 | 7 | - | - | - | - | - |
6/13/03 - Dunno why I didn't add this before, but low jumping BACKWARDS and doing overhead strong still works, and is a whole lot safer. You do have to be quite a bit closer, though. It works after doing one jab/short. | |||||||||||
8HP
| Damage | Stun | Cancel | Guard | Parry | Startup | Active | Recovery | Total | Adv Hit | Adv Block | Invul |
|---|---|---|---|---|---|---|---|---|---|---|---|
| 1300 | 13 | - | H | H | 11 | 3 | - | - | - | - | - |
| |||||||||||
8LK
| Damage | Stun | Cancel | Guard | Parry | Startup | Active | Recovery | Total | Adv Hit | Adv Block | Invul |
|---|---|---|---|---|---|---|---|---|---|---|---|
| - | - | - | - | - | - | - | - | - | - | - | - |
| |||||||||||
8MK
| Damage | Stun | Cancel | Guard | Parry | Startup | Active | Recovery | Total | Adv Hit | Adv Block | Invul |
|---|---|---|---|---|---|---|---|---|---|---|---|
| - | - | - | - | - | - | - | - | - | - | - | - |
| |||||||||||
8HK
| Damage | Stun | Cancel | Guard | Parry | Startup | Active | Recovery | Total | Adv Hit | Adv Block | Invul |
|---|---|---|---|---|---|---|---|---|---|---|---|
| - | - | - | - | - | - | - | - | - | - | - | - |
| |||||||||||
Command Normals
Special Moves
| Forward Slash | (Distance Slash) |
| QCF+P | |
| Running Slash | (Beckoning Slash) |
| QCB+P | |
| Overhead | (Piercing Moon Pounce) |
| DP+K | |
| Counter | (Melding Being Blade) |
| HCF+K | |
| Dodge | (Narrow Escape) |
| KKK | |
| dodge run/hop | (Essential Crunch) |
| During Narrow Escape Towards + K or Away + K |
Supers
| Dash Super | (Heavenly Spirit of Victory) |
| QCB, HCF+P | |
| Blackout | (No Fear Feint) |
| F, HCF+P | |
| Rave Super | (Going My Way) |
| HCB, F + K (Begin Roots 1, 2, or 3 upon 1st hit of super) | |
| Root 1 LP, MP, HP, LP pause MP, HP, LP, MP qcf+HP | |
| Root 2 LP, MP, HP, LP pause MP, HP, LK, MK qcf+HK | |
| Root 3 LP, MP, HP, LK, MK, LK, HK |
The Basics
Bread and Butter Combos
d.lk x 3, d.lp xx qcf+mp
You want to use qcf+mp instead of LP because it recovers faster (slightly)
Try to do the d.lk's as slow as possible so it still combos to prevent being punished by moves such as Bison's short Scissor kicks.
d.lp xx qcf+mp
Whereas the combo listed above is done if they're close, this is done primarily to establish/maintain Hibiki's excellent ranged defense. For best results it's best executed by tagging the opponent with the tip of her sword while inputting the qcf+mp motion so that the slash combos only if the jab hits. Since it is a jab practice so you don't accidentally kara-cancel this.
close s.HK xx qcb+HP xx qcf+HP
Punisher BnB, scores knockdown and set's up Hibiki's Wake-Up Pressure Game.
RC qcb+HP xx qcf+HP
Roll groove Hibiki's wakeup reversal, as well as an effective knockdown mixup. Like any instance where she uses a crossup beckoning slash xx fierce distance slash she sets up her deadly mixups. Its benefits over a wakeup dp:
-hit confirmation into qcf+HP or Supers.
-safety. As it crosses up its harder to punish, also messes up charge characters
-If blocked it still gets you out of corners
-If you land it you have the initiative.
counter, qcb+LP
Best non-meter use followup to a counter with good setups after.
Openings
Hibiki's fairly descent at zoning, with some strong defensive moves based around her Fierce. However some of her strongest attacks for the most part leave her fairly open.
d.HP
Perhaps Hibiki's strongest whiff punisher outside of her standing/crouching MP, if she misjudges the distance she is in for a hurting as the recovery is somewhat long.
Forward Slashes
....qcf+MP....
Best used in her B&B's for positioning purposes, if done at near max distance it's nigh unpunishable by anything short of fast lvl 3's such as Balrog's lvl 3 Gigaton Blow. The reason you want to use the strong version is the -17 frames you'd be at on the hit or block vs the jab version's -19. This isn't so much of an opening as it is a reminder to stay sharp.
....qcf+HP....
A good move she could throw out to catch whiffs, or to use in response to Fireballs (Although the best move for that'd be RC qcb+p). The lag on this move is horrible when whiffed however. You can roll it on reaction and kill her if she's too predictable.
qcb+LP
The biggest reason Hibiki uses this move is to bait your stronger moves with greater startup and recovery so that she can block and punish in turn. She is quite vulnerable to fast long range moves during this moves recovery. HOWEVER this move is excellent for more than just baiting whiffs.
Jump attacks
Hibiki likes to jump on people with her j.HK. It's ambiguous, even for the player at times if not used right. If used too early she can even be punished on recovery. Not to mention if she mistimes or doesn't set-up her jump, the somewhat slow speed of her jumps make her vulnerable.
Rolls
120 [27/6U/4R] Referenced from Buk's Sys. Guide I don't think I need to describe in too much detail why she will die doing this randomly. I do think it may have some use for a crossup roll following a knockdown though.
For those too lazy to figure out what those numbers mean, thats
120 pixels covered by the roll 27 frames full body invincibility 6 frames upper body 4 frames recovery
So in other words don't do this too often.
Just Defense/Parry
While not really an opening for Hibiki, her usual single hit anti-airs are very risky vs P/K grooves and she shouldn't rely on them too much.
Super Combos
Info from Buktooth
-close roundhouse xx qcb+fierce xx qcf+fierce:
3400 dmg, 34 stun
Your big mistake punisher. The trip slash can be swapped with a level 1 super (not recommended, only 1200 more damage) or higher. However, if you have a level 3 available you wouldn't want to do this combo anyway. The non-super combo is great as it does good damage and a whopping 34 stun; halfway to dizzying any character. Great set ups after also.
close roundhouse xx deadly rave, close roundhouse xx qcb+fierce xx qcf+fierce:
7878 dmg, 47 stun
Your big mistake punisher into level 3. Very good damage, HUGE stun damage and great set ups after. If you hit this, chances are you're going to win.
The way to do the finisher combo when you're in the corner is to input the close s.HK xx qcb+HP xx qcf+HP part as if you DIDN'T cross-up with the qcb+HP running slash. Do the qcf+HP knockdown slash as if you're FACING the corner, not as if you crossed up and your back is to the corner like you would naturally think.
(S/N-Grooves only) deadly rave, close roundhouse xx qcb+fierce xx level 1:
7979 dmg, 0 stun
After a deadly rave super, the combo hit count is high enough that damage scaling becomes fairly severe on the running slash xx trip slash combo. The level 1 super becomes more worth it in this case, doing roughly 1600 more dmg. By comboing into the deadly rave super you can do roughly 10000 dmg in one combo.
-counter, level 1/3 super/blackout super:
2900/5500/6100 dmg, 0 stun
Doing the level 1 generally isn't worth it, but the level 3 is good for a nice chunk of free damage. N-Groove can also activate after the counter and still land the level 3.
The most damaging finisher after the counter is the Blackout Super. To do it consistently in both run or dash grooves, input f, f (hold for a brief second), hcf+P.
-dp+kick, level 1/3 qcb, hcf+P super:
3100/5700 dmg, 8 stun
The overhead will only cancel into the super when it HITS. So go ahead and buffer the super input every time. You don't need to worry about accidently wasting your meter.
Custom Combos
Info from Buktooth
For R1 Damage I referenced Buk's System's Guide (-18%)
Since the damage output on most of her CC's as an R1 do pitiful damage, it's practically mandatory that you master usage of her Resets to make her worth it as a user
It should also be noted that upon finishing these CC's following up with knockdown mixups is cake and highly recommended, and by those alone following a CC you can take a round because after all the Resets are in the end another mixup.
CC, (close RHx2, c.HP xx qcb+LP)x2, (c.LPx4, c.HP xx qcb+LP)x2, c.LPx4, c.HK xx super:
7892 damage (R2)
6471.44 damage (R1)
Very respectable damage. This generic ground CC is your "big punisher CC" and also the CC to use when you activate randomly. First hits hitting low is nice too, but I find that it's a little too slow to use as trip guard anti-air.
CC, qcf+MP, qcb+LP, qcb+MPx3, qcf+MP, c.LK (whiff), (jump HPx5)x2, super:
6864 damage (R2)
5268.48 damage (R1)
This is your anti-air CC. The beauty of this CC is that you can anti-air somebody from REALLY far away on reaction and get a whole CC out of it. Is Blanka jumping up and down? Kill it. Blanka low jumping up and down? Kill it. Did you just block a Bison psycho crusher (or Blanka ball)? Kill it. Sak whiffing dive kicks? Kill it. You get the point.
kick throw, CC, qcf+MP, qcb+MPx4, qcf+MP, c.LK (whiff), (jump HPx5)x2, super:
6812 damage (R2)
5585.84 damage (R1)
This is lovely. Guaranteed CC after a midscreen throw. You can also activate, THEN throw and combo off of that for a bit less damage. Still worth it, though, and pretty much guaranteed to work several times on everybody before they start catching on. And then when they start trying to jump out you do a low move and go into the ground CC...
CC, jump HKx4, c.HP, then go into generic ground CC:
7760 damage (R2)
6363.2 damage (R1)
Overhead CC on big characters. Works on characters Eagle-sized and taller. Also handy as an easy reset mid-CC, or if you went for a low hitting CC and they blocked.
Eagle sized logically would mean while crouching
Referenced from Buk's system's guide->Eagle, Zangief, Sagat, Geese, Chang & Raiden
CC, qcb+LP, c.HP, (qcb+LP, c.HPx2)x2, (c.LPx4, c.HP, qcb+LP)x2, c.LPx4, c.HK, super:
7672 damage (R2)
6291.04 damage (R1)
Whiff punisher CC. Also works as one of the best anti-projectile CCs in the game. Hibiki can be really far away from the fireball thrower and still get a CC off of it.
To get an idea how far this can connect imagine the opponent in the corner and you opposite corner and dash forward.
Counter, CC
The damage for CC's off this varies. If you're midscreen, you could probably get away with the anti-air CC. If you're in the corner and throw them there just go for [j.HPx5]xN, super.
Advanced Strategy
CC Resets
qcb+mp, just as you pass through and past the opponent KKK ~ b+K, you will hop back over the opponent. j.HK, j.MP, c.LK into ground CC.
While normally used when the opponent blocks your CC, it can also be used mid-CC to reset the combo meter.
--Can be avoided standing, in which case you mixup after the dodge with either a low attack or kickthrow
Dodge KKK, d.mk
Also a mixup following the dodge on the 1st reset. If they stand, go low with d.mk and continue the CC.
---This is a good alternative if the opponent stands to avoid the 1st Reset. Probably better than the next since the kickthrow takes a lot of time from the meter.
Dodge KKK, kick throw
Another followup to the dodge on the 1st Reset, it suffers in comparison due to the time (and hence damage) it takes from CC's, and it effectively nukes the chances for further resets.
---This is mashable of course, but for mixups it's there.
s.HK xx dp+k continue CC
Getto old-school reset. s.HK has enough hit-stun so that the similar looking dp+k will counter-hit jabs/shorts. It will catch people trying to jump out as a nice bonus.
--This is roll-able (hence RC, lvl 3, dp reversable). The timing fortunately IS strict. It is of course blockable standing if they see it coming.
d.HK, qcb+P, continue CC
Sweep then cross them up with the qcb+P Beckoning Slash and continue with the generic Ground CC.
---It's a crossup.
Wake-Up Pressure/Knockdown Mixups
Do these on the opponent as he gets up off the ground.
Block low for a split second, now either go for a kick throw or go for a d.LK with counter hit timing
Your basic "option select" as the opponent gets up off the ground. The wait, throw variation is useful against Blanka players who like to wake up with RC electricity. Not only are you safe from a wake up super (because you were blocking as he got up), if you time your throw properly and Blanka did wake up RC electricity instead, you grab him right out of it.
Learn how to consistently option select on another guy's wake-up before you learn ANYTHING else. Consider the rest of the mixups listed here as gimmicks.
close s.MP xx dp + K
A random guess where you buffer a super after your dp+K move.
meaty close s.MK, counter hit d.LK, d.LP xx combo attempt
Close s.MK give the most frame advantage out of all of Hibiki's useful meaty attacks. If the opponent was mashing as he got up and got hit by Hibiki's close s.MK, go ahead and combo d.LK, d.LP xx super after that.
d.lkx2 xx dp+k xx qcf+HP
You could RC the dp+K at your pleasure, just be sure to hit with the tip since you're not quite so safe being at -9. You can swap the special for the dash super for more damage, though lvl 1's are only slightly more damaging, and her deadly rave super is generally better use of lvl 3's unless the other will kill them.
d.LK, walk forward, tick kickthrow
d.LK, wait, counter hit d.LK xx combo
s.HK xx qcb+HP xx qcf+HP
This isn't as safe as using d.LKs as the opponent gets up, but close s.HK must be blocked low.
super jump forward, instant j.HK
Much, Much faster hitting overhead attack than dp+K. Hit HK as soon as you leave the ground.Only worth doing if you'll win with that one hit though or you're sure it'll stun.
qcb+HP xx qcf+HP
Crossup qcb+HP xx qcf+HP
The timing is to release the qcb+HP move a little earlier than when the opponent completely gets up. The move hits meaty from the other side and he needs to block the other way now.
Opponent can escape the mixup by using an invincible reversal special though. Both Hibiki and his character pass right through each other in that instance.
Dash Mixups
Basic dash mixups(d.lk x 2 dash kickthrow/>insert mixup</activate), while her throw is much shorter than the norm at only 44 pixels, her dash (81 pixels) more than makes up for it.
Run Strategies
The fact that her run and her run slash look exactly alike is a mixup in itself simply just picking run groove Hibiki. Combine that with the long range of her d.LP (which is safe vs rolls) to both cancel runs and to control space by locking the opponent down.
Make the opponent get used to running low jabs and next time you can be a little bolder, run up a little closer and switch up to low shorts to hit confirm into super.
-d.LK, d.LK (blocked), run right up to your face, d.LK, d.LK, d.LK xx Deadly Rave.The frame advantage from the d.LK is one of the best things about Hibiki, and again, it's tricky how the run looks exactly like the Running Slash move.
You can also cancel runs into RC's in N groove for additional mixups with run slash, or even her roll-cancelled overhead.
Hibiki's run, skid animation is really short and deceptive looking. -Kick throw to knock you down, then fake and it totally looks like you're going for meaty cross-up running slash (that the opponent needs to block the other way), but in fact you do f, f run and skid, throws JUST as the opponent gets up. Very cheesy and hard to react to.
Low Jump Mixups
Low jump is always nice. In N/K/P..S Hibiki gets to "corpse hop," after a fashion. Mix up her landings with kickthrow or other previously mentioned mixups. High/low mixups like close s.MP or d.LK are always good.
- Low Jump HK, land qcb+HP xx qcf+HP
Hard to learn/time at first but worth it. The jumping roundhouse is really ambiguous, following a knockdown a low jump HK is practically a sure thing. It crosses up, hence messing with reversals. Cancel the low jump moves recovery with the two frame startup run slash and this sequence becomes really hard to block.
Common Combo Openings For Non-A-groove Hibiki
-After a tech throw, d.LK, d.LP xx Level 3 qcb, hcf+P super.
-After a reletively early j.HK right on top of the opponent's head, it's hard to determine which side Hibiki will land on sometimes. Combo low shorts into super.
Matchups
VEGA(CLAW)
Provided A-Hibiki is put in the user position, and starts this matchup with either a full bar or close to it activation helps her dearly; if she lands her CC at all he's done. Otherwise, this matchup typically goes to Vega.
She could try to play it defensive, but typically the match will result in Vega whittling away at Hibiki's life.
-His pokes pretty much own hers. Particularly d.mp. At the range where this move hits, give or take, is where Vega wants to be fighting Hibiki, or just about anyone really.
-His anti-airs (s.HK, airthrow, jump back mashing)are solid.
-Vega's fast enough to take advantage of all her openings
Fortunately her s.HP seems to work just fine as anti-air, though a low jumping Vega would give her fits.
Seems like the only way Hibiki can kill Vega is to knockdown, get up close and mixup 'till Vega dies. Keep in mind he's a charge character so crossup run slashes/shortjump mixups are golden. The problem is landing that initial knockdown. Her only moves that give her that are qcf+HP, s.MK, d.HK, and her kickthrow. Vega's not too likely to give her the opportunity to land the latter 3, so she's dependant almost entirely on qcf+HP, which he can easily take advantage of if she's too predictable.
There's of course landing her CC, which sets up her mixups nicely.
Vega likes to jump straight up. A lot. If he does you could nail him as he comes down with RC run slash/forward slash, or anti-air CC.
CAMMY
Where Vega zones Hibiki to death, Cammy rushes with her close s.HP following a knockdown. When that happens Hibiki's options are exceedingly limited outside CC activation or counter-attacks (a plus for C/N/K grooves) since she lacks a good reversal outside RC run slash. She ends up blocking the Fierces or getting thrown.
-Never let Cammy score that knockdown, hence never leting her get close enough to work that s.HP, unless you've taken the initiative with a knockdown of your own, then feel free to mix-up.
-You can anti-air fairly freely between s.HP or counters
-As with Vega, keep a close eye on your openings, especially vs P/K Cammy
-Don't try any forward slashes if she has a lvl 3 stored, though if you're feeling gutsy you could aim for a qcf+HP while she's dancing back and forth.
A-SAKURA
Sak's got too much going for her for A-Hibiki to try to challenge her up close without meter. While both have nice mixups when they've got the intiative, this match is best done at range. In particular, just barely past the reach of her s.HK.
At that range you can prepare yourself for a drawn out match.
-Hibiki can d.HP whiffed Sak's s.HK's, RC Fireballs
-counter RC Hurricane Kicks
-use d.LP xx qcf+MP to keep her out
-anti-airs are pretty solid vs Sak, but don't get too predictable when she has bar. That as well as including her dive kick give her unique setups for her CC's.
-You don't want to whiff anything. Sak's roll at 112 [27/4R] is not quite Iori fast, but its fast enough to punish all of Hibiki's whiffs outside s.MP, d.MP, d.LP. Her mixups are strong enough that vs Hibiki it's practically guaranteed that you'll at the very least loose 1/3 of your guardbar if you let her land her BnB once. Watch your openings.
-Sak's normal anti-airs are susceptible to Hibiki's ambiguous j.hk crossup attempts. You can beat her close s.HP or d.HP between good distancing and varying the timing of the hits.
-Sakura lacks naturally invicible attacks outside CC activation, so she's highly vulnerable to Hibiki activating point blank (for her that's a mixup in itself) and throwing or just throw and activate.
-Vs Sak's who end their CC's with HK hurricane kicks to super you can grab her with Hibiki's counter during that gap between the 1st and last hits of the hurricane kick.
CHUN-LI
Need more input on Chun besides "She beat Hibiki."
M.BISON
SAGAT
BLANKA
E.HONDA
Random Tricks/Notes
Proximity Cancel Dodge
This is Hibiki's version of escaping CC's similarly to how Vega and Blanka would. If you poke with a special cancelable poke, and they activate through it, you can mash on all three kick buttons to kara-cancel the dodge once the flash is gone. The dodge has 20 frames of invincibility, so use it for what its worth and wait for the whiffed attack before doing the backhop (b + k). I'd recommend mashing on the appropriate normal to tag them during the backhop. If you cancel the dodge immediately into the backhop you'll loose invincibility and get nailed by whatever normal/special they stuck out during the backhop's startup.
Anti-Air close s.HP (hold/double tap) kara-cancel command normal to Dodge
I don't know if anyone has a better name for this. Anyway her anti-airs vs P or K grooves leave her open if they're Parried/Just Defended. Only works if you anti-air close though. You can kara-cancel the Fierce Downward Slash as soon as you see it start to animate, then backhop (attack even), or run beneath them.
Anti-Crossup Trick
Done in a similar way to her 1st CC Reset, you dodge the crossup while holding forward and hit HK when they actually crossup. Forward "becomes" back and you hop back over the opponent (or not, depending on how deep the crossup was) and get a "low" j.HK mixup of your own (Always a boon for non-low jump Hibiki's). This works mostly because most (if not all) characters are designed such that they'd want to go low after a crossup. Like the reset if they stand this doesn't really work too well but due to its nature and as its a response to a crossup it should work fine.
Extended Dodge Run
I forgot who found this, but I remember reading about it long before. If for any reason though you do the dodge run (toward + K), and you run past/through your opponent, switch directions on the stick once you pass (toward now being behind) and hold it and you'll continue running to the opposite side of the screen.
Dash Super Execution
Whereas Kyo could do qcb, hcf + p for his Serpent Wave, he could get away with finishing the input at down forward + P. Hibiki's execution of the move is actually qcb, (from there) qcd, f + P. You can't do the shortcut at all. That means full qcb, hcf + P motions.
Discussion

