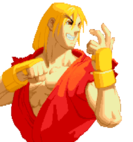
Introduction
A disciple of the Shotokan school of karate and past training partner of Ryu, Ken has an amazing fighting spirit, but an even larger ego. Convinced he is the best fighter, Ken seeks a confrontation with his long-time rival.

Ken is one of the top four in A2. Great normals, crazy roll, great cc, and the one of the games best acs. Ken is very solid, naturally, being a shoto, being able to effectively zone, rush, or turtle. Ken is solid with standard mix ups as well as little tricks such as being able to cross up roll to confuse opponents. Great character to learn the game with.
Pros:
- Alot of excellent tools overall
- Kick AC is easily one of the best ones in the game
- Alot of combo potential
Cons:
- More of a personal opinion, but its important for Ken to constantly have and build meter to fully appreciate him in this game.
Moves List
Normal Moves
- st.LP - Quick jab, with small frames advantage, you can walk and do these on any opponent that can't crouch them.

- st.MP
Quick one arm uppercut, good anti-air and cancelable to a special move.


- st.HP
Straight punch which can be used as anti-air in some instances, and stop hurricane kicks etc. Not cancelable.

- st.LK

Good ranged kick to the shin, cancelable, good priority and range.
- st.MK


A two hit upward angled kick that can be canceled into a special /superon the first hit, super on the second. This is very god to keep characters that cant duck it pinned down, and a quick anti-jump if you suspect the opponen is gonna attempt to jump towards you, as well as a good anti-air.
- st.HK

A long ranged poke, with good priority.
- cr.LP
Little jab to the shin, not really all that great range wise.

- cr.MP
A straight punch with good priority and frame advantage, cancelable.

- cr.HP
Uppercut, probably one of the best normal anti-airs in the game. Also this is a super meaty, allowing link after ward.


- cr.LK
Quick kick to the foot, combo starter, cancelable

- cr.MK
A good reaching low kick, probably overall best poke, gives frame advantage, awesome meaty, and cancelable.

- cr.HK
A really good sweep with good range, usually a poke string ender. Note that if not cancelled its a free cc on you, and if you cancel into a hadouken, free cc on you if your opponent has a lvl 3.

Jumping:

Hp- A fist to the face >_<. Good jump in with good priority, especially when done early. When done close Ken will do a rolling throw.


Mk- His cross-up, self-explanatory, looks different form Ryu/Akuma.

Hk- Best when used when jumping from far away, good priority.
Command:


f+mk- A overhead with very good range, safe on block.
Throws
Jigoku Guruma
- ← or → + MP or HP
Tsukami Nage
- ← or → + MK or HK
- Press any buttons rapidly for more hits
Jigoku Fusha
- ( In Air ) ← or → + MP or HP
Alpha Counters
![]() +
+![]() - This AC is good for punishing jump-ins you are having trouble reacting to with your normal anti-air tools. Be careful though, because it can't be used against jump attacks that are timed late since your opponent will likely have time to block it.
- This AC is good for punishing jump-ins you are having trouble reacting to with your normal anti-air tools. Be careful though, because it can't be used against jump attacks that are timed late since your opponent will likely have time to block it.


![]() +
+![]() - A very dominant move at mid range, combining great range with respectable damage. It is possible to counter pretty much any poke with this move, including projectiles. This move is highly abusable in the footsie game, so be sure to use it whenever needed. Arguably the best Kick AC in the game. It's -5 on HIT, so the opponent can reversal CC or super sometimes.
- A very dominant move at mid range, combining great range with respectable damage. It is possible to counter pretty much any poke with this move, including projectiles. This move is highly abusable in the footsie game, so be sure to use it whenever needed. Arguably the best Kick AC in the game. It's -5 on HIT, so the opponent can reversal CC or super sometimes.

Special Moves
Hadou Ken
- (↓↘→ + P)


Essential to Ken's overall strategy. Slower than Ryu and Akuma's
Shoryu Ken
- (→↓↘ + P)


Ken's signature special move. Notice how Jab, Strong, and Fierce all have different properties within the first two active frames. Check out "Defensive Notes" for more info.
Tatsumaki Senpu Kyaku
- (↓↙←+K)


- Can also be done in the air
Can be combo'd into or it can be used to go over projectiles.
Zenpo Tenshin
- (↓↙←+P)
Ken rolls forward towards the opponent, with each punch strength determining the distance of it (lp for shortest, hp for farthest). This move is great for mixing up combos and throwing off a defensive player.
Zento
- (↓↘→ + Start)
Ken does a forward flip which causes him to lay on the ground. Really no use for this move due to its poor recovery and overall uselessness.
Super Moves
Shoryu Reppa
- (↓↘→↓↘→ + P)


This super can be cancelled from a various array of normals such as stand MK.
Shinryu Ken
- (↓↘→↓↘→ + K)
- Press kick rapidly for more hits


Good anti-air with its great hitbox
The Basics
Ken's Hadouken and Tatsus aren't as good as Ryu's but he has more than enough tools to hold his own. He has a well rounded arsenal of normals applicable to a lot of situations, namely cr.MK, st.LK and cr.HK. Kens Kick AC is a dominant midrange tool that also does solid damage and is able to punish long reaching normals and projectiles when meter is available. Zenpo Tenshin ( forward roll ) is another important tool in Kens arsenal, giving him the ability to apply mixup pressure off of a knockdown. Additionally, cancelling the LP version of the roll from cr.LK leaves Ken at range to punish recovery roll, making any recovery rolls unsafe against an aware Ken player.
Basic Offense
Firstly close range is usually established by landing cr.HK from max range. If you believe cr.HK will hit, cancel into LP Zenpo Tenshin to punish recovery roll if they attempt one. In order to effectively counter without sacrificing positioning for a wake up attack, immediately perform cr.MK xx HP Hadouken. If they roll the combo will come out for a 2 hit and if not only cr.MK will come out. You'll still be able to gameplan on wakeup if they don't roll so be sure to establish this.
When you dont have meter available, cr.MP serves as your best attack starter. It links right into cr.MK xx HP Hadouken for decent damage. If the cr.MP doesn't hit then you can walk forward for a throw or immediately perform cr.HK xx Zenpo Tenshin if you think they will attempt to counter your throw. When Ken has meter, cr.LK x2 will provide opportunities for safe damage. cr.LK x2 can be chained into st.LK which can be cancelled to any level Shoryu Reppa for really good damage. If cr.LK x2 is blocked, you have a few options to continue your offense, the first of which is walk-up Tsukami Nage. This is most useful when you have the opponent in a defensive posture. Number 2, walk-up and perform cr.LK>st.LK xx Shoryu Reppa (any level). This is most useful when your opponent is looking to counter your throw attempts. Finally there is cr.HK xx LP Zenpo Tenshin. This is useful for beating early attempts by your opponent to attack out of blockstun. This will keep you close to your opponent and give you an opportunity to attempt Tsukami Nage or cr.MK xx HP Hadouken.
Defensive Notes
Use the LP version of Shoryuken to counter jump-ins. The MP Shoryu is useful as a wakeup reversal, or as a risky option to catch an opponents extended limbs in the footsie game. st.MK, cr.HP and st.MP all work well as anti air options. If you have meter, Shinryuken can punish jumps for solid damage and a crossup opportunity.
Frame Data
- Adv numbers are on block. Add +1 to the Frame Advantage if the attack hits the opponent
Standing Normals:
Jab
Startup: 4
Adv: +4
Active: 4
Strong
Startup: 4
Adv: -4
Active: 9
Fierce
Startup: 8
Adv: -3
Active: 6
Short
Startup: 7
Adv: -4
Active: 6
Forward
Startup: 7
Adv: -10
Active: 9
Roundhouse
Startup: 14
Adv: -7
Active: 4
Crouching Normals:
Jab
Startup: 4
Adv: +4
Active: 4
Strong
Startup: 5
Adv: +5
Active: 4
Fierce
Startup: 5
Adv: -2
Active: 12
Short
Startup: 5
Adv: +2
Active: 4
Forward
Startup: 6
Adv: +3
Active: 6
Roundhouse
Startup: 7
Adv: -9
Active: 6
Command Normal:
Overhead
Startup: 33
Adv: +3
Active: 8
Neutral Air Normals:
Jab
Startup: 6
Active: 10
Strong
Startup: 6
Active: 8
Fierce
Startup: 9
Active: 6
Short
Startup: 7
Active: 10
Forward
Startup: 7
Active: 6
Roundhouse
Startup: 13
Active: 6
Forward/Backward Air Normals:
Jab
Startup: 6
Active: 10
Strong
Startup: 6
Active: 8
Fierce
Startup: 6
Active: 6
Short
Startup: 8
Active: 10
Forward
Startup: 9
Active: 12
Roundhouse
Startup: 7
Active: 6
Special Moves:
Hadouken (LP)
Startup: 14
Adv: -9
Active: 51
Hadouken (MP)
Startup: 14
Adv: -9
Active: 52
Hadouken (HP)
Startup: 14
Adv: -8
Active: 53
Shoryuken (LP)
Startup: 6
Adv: -24
Active: 50
Shoryuken (MP)
Startup: 6
Adv: -25 (first or second hit only), -31 (both hits)
Active: 61
Shoryuken (HP)
Startup: 4
Adv: -42
Active: 72
Tatsumaki Senpukyaku (LK)
Startup: 6
Adv: -4
Active: 40
Tatsumaki Senpukyaku (MK)
Startup: 6
Adv: -4
Active: 47
Tatsumaki Senpukyaku (HK)
Startup: 13
Adv: -4
Active: 54
Alpha Counters:
Punch
Startup: 25
Adv: -38
Active: 88
Kick
Startup: 29
Adv: -7
Active: 57
Super Combos:
Shoryu Reppa (Lvl 1)
Startup: 58
Adv: -23
Active: 134
Shoryu Reppa (Lvl 2)
Startup: 54
Adv: -34
Active: 149
Shoryu Reppa (Lvl 3)
Startup: 58
Adv: -33
Active: 182
Shinryuken (Lvl 1)
Startup: 67
Adv: +1
Active: 117
Shinryuken (Lvl 2)
Startup: 67
Adv: -4
Active: 122
Shinryuken (Lvl 3)
Startup: 67
Adv: -15
Active: 151
Combos
cr.MP>cr.MK xx HP Hadouken
Cr.LK x2>s.LK xx Shoryu Reppa
j.HP,cr.HP xx HP Shoryu
j.HP>st.MK(2hits)xx Shoryu Reppa
Advanced Strategy
Learn the spacing game and utilize your AA tools (DP, ACs, etc.) depending on the jump in. Also utilize the shoto roll if you prefer a more annoying, yet super aggressive style. As the mixup in rolls can open up the opponent to multiple ways of losing a ton of life.
Combos
Cr HP xx Heavy DP
St MP xx Heavy DP
Jump HP/HK xx Cr MP/MK xx Heavy Fireball/DP
Crossup Jump MK xx Cr HP xx Heavy DP
Crossup Jump MK xx St MP xx Heavy DP
Cr LK x3 xx Heavy DP/Shoryureppa
Jump HP xx St MK xx Shoryureppa
St MK xx Shoryureppa
Custom Combos
Ken: any lvl- c.rh xx lp dp xN, hp dp ender (if not close enough you can use hk hurricane after c.rh instead of the first lp dp)
aa cc- s.mp xx lp dp xN, hp dp
Level One Activation
cr.HK xx qcb+HK, HP SRK

c.hk (close) xx fp dp, fp dp
Level Three Activation
- Crouching HK, HK Tatsumaki Senpuu Kyaku, LP Shoryuken x2, HP Shoryuken
Match-ups
Vs. Adon: 6-4
This is a match-up that should be played patiently by Ken. Off of a blocked L or M Jaguar Kick, Ken can consistently cancel cr.MP into Hadouken for a punish. If he blocks Adon's H Jaguar Kick, he can easily use his Punch Alpha Counter against it. Resist the urge to Rushdown needlessly as Adon has some beefy CC's to punish when Ken makes a mistake. If he uses Jaguar Tooth, be sure to counter with a Punch AC or CC.
Vs. Akuma: 6-4
Play the footsie game in this match-up, since Ken has the walk speed and poke range advantage. From mid-range and beyond, throw Hadoukens but be careful of his Tatsus. If he misreads your Hadouken timing, hit him with cr.HP to Hadouken. Ken can really limit Akuma's options by forcing him into the corner. If Akuma jumps in the corner, use st.MK or a Shoryuken. Careful anti-airing Akuma's dive kick with Shoryukens because it can hit you out of the move at certain angles. after blocking Akumas dive kick you have the option to AC. You should be able to also cc his dive kick when hes close to the ground. You can counter his Zankuu ( air ) Hadoukens by walking under and shoryuken'ing him, instant air HK before the fireball actually comes out, block then AC or CC him to pass through and go for a juggle.
Vs. Birdie: 8-2
Vs. Charlie: 6-4
This MU depends on what Charlie does within the first few seconds of the round start. If he throws a Sonic Boom right out the gate, you can punish him with a jump in and follow up with a BnB. If he walks back and start turtling, you want to play more patient and play the fireball war, but slowly edge yourself foward and play solid footsies. While you do this, you are slowly building meter which will come in handy. Once you're in a good distance, you can punish Sonic Boom or one of his normals with Kick AC. Once you score the AC, the Charlie player will either jump after getting hit, or throw another Boom if your meter is fully depleted. Lastly, if you play defensively, make meter build your number one priority with fireballs or whiff some normals. The tables can be easily turned once you have full meter and you have ACs, CCs, and supers at your disposal.
Vs. Chun-Li: 5-5
Much easier than ryu because you have some normals that compete with her range. Again s.lk is good and stuffs her low fwd when timed right and if she wiffs low fwd, s.rh with ken is guaranteed I believe. Establish the same type of FB game as you would with ryu but try to play from half screen. If she tries to empty jump or jump out of your dp ranges, s.mk will eat her up most of the time as an easy counter.
A big advantage that ken has over ryu in this fight is kens ac+K. It lets ken compete on the same footsie level with her to an extent. Esepcially when you have bar. She’ll be less likely to abuse footsie. Which gives you time to break her down. However, I have encountered players that know how to AC reversal so its vital that you AC on moves that she can’t cancel from or catch her during awkward footsie battles where a cancel would be impossible or very hard to pull off.
Try to win the first around to force her to dump her bar the 2nd round so you can have the cc advantage the 3rd just like ryu. This actually can be used against any character that has powerful cc’s like rolento or sagat. Its a universal strats thats not directly applied to one character but towards the characters that have great cc’s.
One day I was playing maxstah and he kept CCing through my lp DP. After he was done raping me, he told me that mp dp makes it much harder to CC through his AA. It hits twice @ 2 different points and cc invincibility only lasts for so long. Its not impossible to cc through it but its like 10x harder to cc through it compared to LP which is easier by comparison.
chun is really dominanting from mid screen. She controls it but she has to fight out of the corner in which case AC’s come into play and overheads with tick throw mixups. One of kens best features is that his damn mp throw will pratically throw them into corner and it can lead to winning around or good solid life to establish a life lead. So Mp throw is quite a good tool in this fight.
and from personal EXP, its almost impossible to cross her up. She already has a small enough sprite box. Then to add to the fact that she has incredible walk speed. Its almost impossible to catch someone who knows what they’re doing with kens crossup. You might land it once or maybe even twice, but never consistently. It still can be used but don’t count on it as your gameplan.
Vs. Dan: 8-2
Vs. Dhalsim:
Vs. Gen:
Vs. Guy:
Vs. Ken (self):
Vs. M. Bison (dictator):
Vs. Rolento:
Vs. Rose:
Vs. Ryu:
Vs. Sagat:
Vs. Sakura:
Vs. Sodom:
Vs. Zangief: