Capcom vs SNK 2/Rolento

From SuperCombo Wiki

Introduction

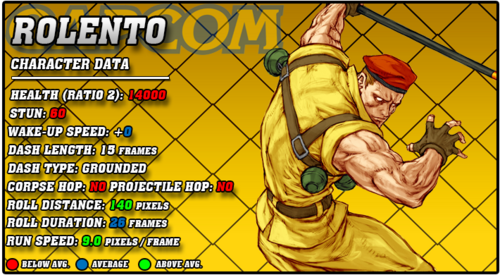
CVS2 Rolento Data.png

Story

Rolento Schugerg is a German-American man with a patriotic passion for military. Early on in his career, he joined the Red Berets, an elite task force for the U.S. Military. Eventually, he left the team, selling himself as a mercenary. He was in multiple conflicts around the world, touring to places like South America, Central America, and working for questionably ethical groups like the East German Stasi. Eventually, his tour of duty ended during the Vietnam War, where he became disillusioned with the world and the state of politics. He began dreaming of a utopian society: By the military man, for the military man. He chases that dream throughout his many adventures in the Final Fight and Street Fighter story.

Gameplay

Rolento is a highly mobile rushdown and pressure character. While he lacks in any fullscreen zoning options, his stellar close range power with his fast walkspeed and amazing brawling normals allows him to lock opponents in blockstun for forever. Even just walking forward and doing repeated 5LP's is hard to deal with. Any confirmed hit can lead into his 236P Patriot Circle rekkas as well, giving him a great knockdown and a chance for a mixup. Rolento's offensive pressure is one of the best in the game, and even his neutral can be hard to deal with thanks to his fast mobility and long reaching buttons. He can also zone a little with his 623K Stinger knife tosses, and these are also very useful for pressure as well.

What holds Rolento back is his defense. Without roll cancelling, Rolento has no meterless reversal, and RC doesn't exactly give him a good one either. Rolento often has to commit to a big risk to get something invincible, and that can be both expensive and damaging should he miss it. While he can zone and play neutral decently, he doesn't exactly want to, and often has to stay very mobile to avoid being pinned down and punished. Keep yourself moving on the offensive, and evade the opponents attacks so you can lock them down and make them block for a long time to truly play Rolento.

Groove Selection

Best - C/A: C-Rolento gives Rolento all he really needs: consistent access to supers, rolls, and a good defensive tool with Alpha Counter. His mobility is solid without run or hop, and his dash is very fast. While he doesn't get much in the way of level 2 combos, just being able to spend on supers consistently is good enough, and it means he can save it more for the next character or for an Alpha Counter if he needs it. A-Rolento gets much of the same tools, except instead of just consistent access to supers, he gets a very damaging Custom Combo. This puts his damage a lot higher, and makes his punishes a lot scarier. CC is also just a solid defensive mechanic on it's own, and gives him a real reversal option as well.

Useful - N/K/P: N-Rolento gets a lot more mobility using run and hop, which is sorta just a bonus on top of his already great mobility. His mixups are scarier with hop, and run makes his jab pressure strings even better. He also gets very consistent access to level 1 supers for reversals, and can roll cancel moves like Patriot Circle to punish errant fireballs. K-Rolento gets the same movement buff, but gets less access to supers. In trade, he gets Just Defend, which is useful for him as he can easily punish with a Patriot Circle combo after a good JD. He also gets Rage, which buffs his damage, and makes the threat of a level 3 Take No Prisoner super present, which is massive damage overall. P-Rolento is a bit less strong, but he gets good punishes off of pokes, and a parry gives him a solid knockdown. This is great for him as he can transition from a parry into his mixup well, and P-Groove having hops aids in that case as well. Lack of rolls or consistent supers makes his defense a lot weaker however.

Worst - S: S-Rolento loses out on a lot. Without charging, Rolento gets no access to any meter usage, and with no roll he can't RC for reversal or neutral purposes. Charging is a huge risk for Rolento as well, as he often wants to be staying mobile, and charging is the exact opposite of that. Run and hop help, but not enough to justify the loss overall, and the infinite level 1 supers is fairly useful but still not enough to make him worthwhile.


Rolento is a highly mobile aggressive character, with lots of specials that allow him to freely move around the screen, and solid mixups. He can turn any good poke into a Patriot Cirle knockdown and push pressure from there. He just has to watch out for getting caught, as his defense is fairly weak. Rolento is best in C-Groove and A-Groove.

Difficulty: Hard
Tier: B+
Pros Cons
  • Mobility: Between three command jumps, a walljump, a great jump arc, great walkspeed, and a stellar run and dash, Rolento has every tool he needs to stay highly mobile
  • Offense: His pressure with walking in and doing plus frame normals over and over while threatening a throw, and high/low/crossup mix on an opponents wakeup, give Rolento plenty of ways to open up opponents
  • Simple Knockdowns: Rolento can easily cancel many pokes into Patriot Circle rekkas for solid damage and a knockdown
  • Buttons: Between moves like 5LP, 5MP, 2HP, 2MK, and 2HK, Rolento has plenty of useful normals in neutral
  • Defense: Rolento has no special with any invincibility, forcing him to utilize Roll Cancel to reversal properly, which sadly doesn't work out too well as he still has no solid RC reversal. Often, this means he has to risk a reversal super, which can leave him wide open for punishment and cost him some meter as well
  • Zoning: Despite his high mobility, Rolento is quite weak against solid zoning and defense, and he himself struggles to keep out strong rushdown opponents
  • Meter Hungry: While Patriot Circle gives a solid knockdown, it doesn't do much damage, and as previously stated Rolento relies on supers for their invincibility. This makes him quite meter hungry overall


Players to Watch

Name Country Groove Accounts Notes
MoMo Japan C-Groove Twitter: @MoMo_oMoM Though limited in his movement, MoMo is a skilled player who still manages to play a very erratic hit and run playstyle.
Sample Match
Daidouraku Japan N-Groove Twitter: @DAIDOURAKU Plays the textbook hit and run playstyle with Rolento, but also has the defensive options to get him out of tough situations.
Sample Match
Tobari Japan K-Groove Twitter: @cvs2event_Tobari One of Tobari's specialties. Uses Rolento's crazy movement options to it's fullest.
Sample Match


!!!THIS PAGE IS STILL A WIP. IF YOU NEED FRAME DATA NOW, REFER TO THE CVS2 BIBLE OR LOOK THROUGH EDIT HISTORY TO FIND THE LAST EDIT CONTAINING FRAME DATA IF THERE WAS ONE!!!

Normal Moves

Far Normals

5LP

Far Jab
Far Light Punch
5LP / Far LP
CVS2 Rolento 5LP.png
Version Damage Stun Cancel Guard Parry Startup Active Recovery Total Adv Hit Adv Block Invul
Far Lp.png 300 3 SP/SU Mid - 3 4 6 13 +5 +5 None

Placeholder

5MP

Far Strong
Far Medium Punch
5MP / Far MP
CVS2 Rolento 5MP.png
Version Damage Stun Cancel Guard Parry Startup Active Recovery Total Adv Hit Adv Block Invul
Far Mp.png 900 9 None Mid - 9 8 8 25 +4 +4 None

Placeholder

5HP

Far Fierce
Far Heavy Punch
5HP / Far HP
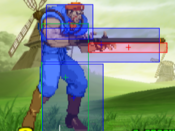
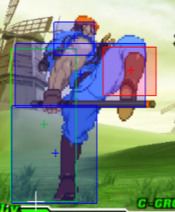
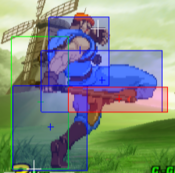
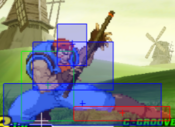
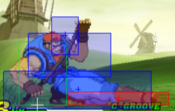
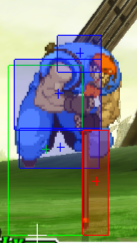
CVS2 Rolento 5HP.png
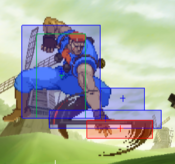
First Hitbox
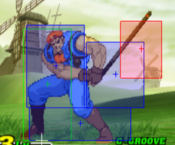
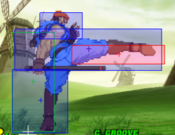
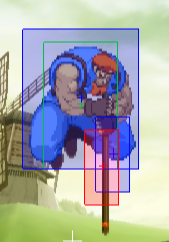
CVS2 Rolento 5HP 2.png
Second Hitbox
Version Damage Stun Cancel Guard Parry Startup Active Recovery Total Adv Hit Adv Block Invul
Far Hp.png 400+900 4+9 None Mid - 8 4(2)4 28 46 -8 -8 None

Placeholder

5LK

Far Short
Far Light Kick
5LK / Far LK
CVS2 Rolento 5LK.png
Version Damage Stun Cancel Guard Parry Startup Active Recovery Total Adv Hit Adv Block Invul
Far Lk.png 500 5 SP/SU Mid - 5 4 10 19 +1 +1 None

Placeholder

5MK

Far Forward
Far Medium Kick
5MK / Far MK
CVS2 Rolento 5MK.png
Version Damage Stun Cancel Guard Parry Startup Active Recovery Total Adv Hit Adv Block Invul
Far Mk.png 900 9 SU Mid - 6 6 16 28 -1 -1 None

Placeholder

5HK

Far Roundhouse
Far Heavy Kick
5HK / Far HK
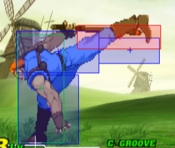
CVS2 Rolento 5HK.png
Version Damage Stun Cancel Guard Parry Startup Active Recovery Total Adv Hit Adv Block Invul
Far Hk.png 1300 13 None Mid - 10 3 28 41 -7 -7 None

Placeholder

Close Standing Normals

clHP

Close Fierce
Close Heavy Punch
cl.HP
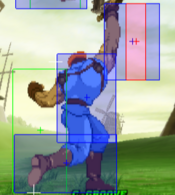
CVS2 Rolento cHP.png
Version Damage Stun Cancel Guard Parry Startup Active Recovery Total Adv Hit Adv Block Invul
Close Hp.png 1200, 1000 12, 10 SP/SU Mid - 7 4 27 38 -7 -7 None

Placeholder

clMK

Close Forward
Close Medium Kick
cl.MK
CVS2 Rolento cMK.png
Version Damage Stun Cancel Guard Parry Startup Active Recovery Total Adv Hit Adv Block Invul
Close Mk.png 800 8 SP/SU Mid - 6 5 15 26 0 0 None

Placeholder

Crouching Normals

2LP

Crouch Jab
Crouching Light Punch
2LP / cr.LP
CVS2 Rolento 2LP.png
Version Damage Stun Cancel Guard Parry Startup Active Recovery Total Adv Hit Adv Block Invul
D.png+Lp.png 400 4 SP/SU Mid - 3 4 7 14 +4 +4 None

Placeholder

2MP

Crouch Strong
Crouching Medium Punch
2MP / cr.MP
CVS2 Rolento 2MP.png
Version Damage Stun Cancel Guard Parry Startup Active Recovery Total Adv Hit Adv Block Invul
D.png+Mp.png 300x3 3x3 None Mid - 10 1(3)1(3)4 14 36 +2 +2 None

Placeholder

2HP

Crouch Fierce
Crouching Heavy Punch
2HP / cr.HP
CVS2 Rolento 2HP.png
Version Damage Stun Cancel Guard Parry Startup Active Recovery Total Adv Hit Adv Block Invul
D.png+Hp.png 1300 13 None Mid - 8 4 22 34 -2 -2 None

Placeholder

2LK

Crouch Short
Crouching Light Kick
2LK / cr.LK
CVS2 Rolento 2LK.png
Version Damage Stun Cancel Guard Parry Startup Active Recovery Total Adv Hit Adv Block Invul
D.png+Lk.png 400 4 SP/SU Low Low 4 4 10 18 +1 +1 None

Placeholder

2MK

Crouch Forward
Crouching Medium Kick
2MK / cr.MK
CVS2 Rolento 2MK.png
Version Damage Stun Cancel Guard Parry Startup Active Recovery Total Adv Hit Adv Block Invul
D.png+Mk.png 800 8 SP/SU Low Low 4 4 17 25 -1 -1 None

Placeholder

2HK

Crouch Roundhouse
Crouching Heavy Kick
2HK / cr.HK
CVS2 Rolento 2HK.png
Version Damage Stun Cancel Guard Parry Startup Active Recovery Total Adv Hit Adv Block Invul
D.png+Hk.png 1200 12 None Low Low 8 10 24 42 DWN -10 None

Jumping Normals

j.LP

Jump Jab
Jumping Light Punch
j.LP
CVS2 Rolento jLP.png
Version Damage Stun Cancel Guard Parry Startup Active Recovery Total Adv Hit Adv Block Invul
Ub.png/U.png/Uf.png+Lp.png 600 6 - High High 3 16 - 19 - - None

Placeholder

j.MP

Jump Strong
Jumping Medium Punch
j.MP
CVS2 Rolento jMP.png
Version Damage Stun Cancel Guard Parry Startup Active Recovery Total Adv Hit Adv Block Invul
Ub.png/U.png/Uf.png+Mp.png 300x3 3x3 - High High 7 12 - 19 - - None

Placeholder

j.HP

Jump Fierce
Jumping Heavy Punch
j.HP
CVS2 Rolento jHP.png
Version Damage Stun Cancel Guard Parry Startup Active Recovery Total Adv Hit Adv Block Invul
Ub.png/U.png/Uf.png+Hp.png 1300 13 - High High 10 4 - 14 - - None

Placeholder

j.LK

Jump Short
Jumping Light Kick
j.LK
CVS2 Rolento jLK.png
Version Damage Stun Cancel Guard Parry Startup Active Recovery Total Adv Hit Adv Block Invul
Ub.png/U.png/Uf.png+Lk.png 500 5 - High High 5 10 - 15 - - None

Placeholder

j.MK

Jump Forward
Jumping Medium Kick
j.MK
CVS2 Rolento jMK.png
Version Damage Stun Cancel Guard Parry Startup Active Recovery Total Adv Hit Adv Block Invul
Ub.png/U.png/Uf.png+Mk.png 800 8 - High High 10 8 - 18 - - None

Placeholder

j.HK

Jump Roundhouse
Jumping Heavy Kick
j.HK
CVS2 Rolento jHK.png
Version Damage Stun Cancel Guard Parry Startup Active Recovery Total Adv Hit Adv Block Invul
Ub.png/U.png/Uf.png+Hk.png 1200 12 - High High 10 6 - 16 - - None

Placeholder

Command Normals

Fake Rod

Fake Rod
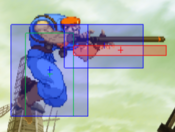
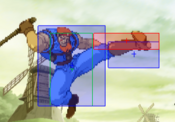
6MK
CVS2 Rolento 6MK.png
Version Damage Stun Cancel Guard Parry Startup Active Recovery Total Adv Hit Adv Block Invul
F.png + Mk.png 700 7 None Mid - 9 3 37 49 -20 -25 None

Placeholder

Spike Rod

Spike Rod
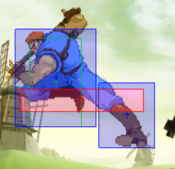
j.2MK
CVS2 Claw j2MK.png
Version Damage Stun Cancel Guard Parry Startup Active Recovery Total Adv Hit Adv Block Invul
In Air, D.png + Mk.png 1100 11 - High High 6 10 - 16 - - None

Placeholder

Throws

Punch Throw

Deadly Package
Punch Throw
Near Opponent, 4/6HP
Version Damage Stun Cancel Guard Parry Startup Active Recovery Total Adv Hit Adv Block Invul
Close B.png/F.png+Hp.png 1900 0 - Grab - 3 1 9 13 - - -

Placeholder

Kick Throw

Colonel Carrier
Kick Throw
Near Opponent, 4/6HK
Version Damage Stun Cancel Guard Parry Startup Active Recovery Total Adv Hit Adv Block Invul
Close B.png/F.png+Hk.png 2100 0 - Grab - 6 1 9 16 - - -

Placeholder

Special Moves

Trick Landing

Trick Landing
KKK when landing
Version Damage Stun Cancel Guard Parry Startup Active Recovery Total Adv Hit Adv Block Invul
When Landing, 3k.png - - - - - - - - - - - -

Placeholder

Patrior Circle

Patriot Circle
236P x 3
Version Damage Stun Cancel Guard Parry Startup Active Recovery Total Adv Hit Adv Block Invul
Qcf.png + P.png
1st
200x4 2x4 236P Mid - 14 7 59 80 -40 -40 None
Qcf.png + P.png
2nd
200x4 2x4 236P Mid - 15 7 59 81 -36 -36 None
Qcf.png + P.png
3rd
200x3 2x3 None Mid - 12 7 44 63 DWN -21 None

Placeholder

Stinger

Stinger
623K + P/K
Version Damage Stun Cancel Guard Parry Startup Active Recovery Total Adv Hit Adv Block Invul
Dp.png + Lk.png - - - - - - - - - - - -
Dp.png + Mk.png - - - - - - - - - - - -
Dp.png + Hk.png - - - - - - - - - - - -
Dp.png + K.png, P.png/K.png 700 7 None Mid - 16 - 12 Varies -3 -3 None

Placeholder

Mekong Delta Air Raid

Mekong Delta Air Raid
214P + P
Version Damage Stun Cancel Guard Parry Startup Active Recovery Total Adv Hit Adv Block Invul
Qcb.png + Lp.png - - - - - 7 - 13 20 - - None
Qcb.png + Mp.png - - - - - 7 - 25 32 - - None
Qcb.png + Hp.png - - - - - 7 - 37 44 - - None
Qcb.png + P.png, Lp.png 1200 12 None High High 36 4 16 56 -4 -2 None
Qcb.png + P.png, Mp.png 1300 13 None High High 36 4 16 56 +2 +3 None
Qcb.png + P.png, Hp.png 1400 14 None High High 36 4 16 56 +5 +7 None

Mekong Delta Escape

Mekong Delta Escape
214K
Version Damage Stun Cancel Guard Parry Startup Active Recovery Total Adv Hit Adv Block Invul
Qcb.png + K.png - - - - - - - - - - - -

Placeholder

Mekong Delta Attack

Mekong Delta Attack
PPP + P
Version Damage Stun Cancel Guard Parry Startup Active Recovery Total Adv Hit Adv Block Invul
3p.png - - - - - 48 - 1 49 - - None
3p.png, Lp.png 1000 10 None Mid - - 17 14 31 -39 -39 None
3p.png, Mp.png 1100 11 None Mid - - 21 14 35 -34 -34 None
3p.png, Hp.png 1200 12 None Mid - - 25 14 39 -30 -30 None

Placeholder

Scouter Jump

Scouter Jump
KKK
Version Damage Stun Cancel Guard Parry Startup Active Recovery Total Adv Hit Adv Block Invul
3k.png - - - - - - - - - - - -

Placeholder

Super Moves

Take No Prisoner

Take No Prisoner
236236P
Version Damage Stun Cancel Guard Parry Startup Active Recovery Total Adv Hit Adv Block Invul
Qcf.png Qcf.png + Lp.png 2600 0 None Low Low 4:1 32 25 62 DWN -11 8 (Full)
Qcf.png Qcf.png + Mp.png 3800 0 None Low Low 4:1 31 25 61 DWN -11 11 (Full)
Qcf.png Qcf.png + Hp.png 5600 0 None Low Low 4:3 21 25 53 DWN -11 14 (Full)

Placeholder

Steel Rain

Steel Rain
236236K
Version Damage Stun Cancel Guard Parry Startup Active Recovery Total Adv Hit Adv Block Invul
Qcf.png Qcf.png + Lk.png 1800 0 None Mid - 4 - 53 57 +32 +32 7 (Full)
Qcf.png Qcf.png + Mk.png 3000 0 None Mid - 4 - 53 57 +35 +35 12 (Full)
Qcf.png Qcf.png + Hk.png 4200 0 None Mid - 4 - 53 57 +41 +41 19 (Full)

Placeholder

Mine Sweeper

Mine Sweeper
214214P
Version Damage Stun Cancel Guard Parry Startup Active Recovery Total Adv Hit Adv Block Invul
Qcb.png Qcb.png + Lp.png 3000 0 None Mid - 3:33 15 56 107 DWN -23 7 (Full)
Qcb.png Qcb.png + Mp.png 4500 0 SP/SU Mid - 3:33 31 56 123 DWN -20 14 (Full)
Qcb.png Qcb.png + Hp.png 6000 0 None Mid - 3:33 47 56 139 DWN -10 18 (Full)

Placeholder

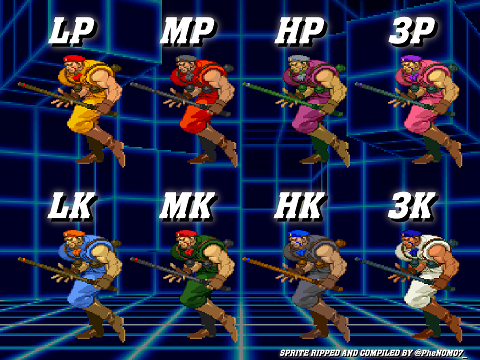
Colors

Rolento CvS2 colors.png


CvS2 Wiki Navigation

General
Controls
Notation
HUD
Glossary
System
Roll Cancel
Combo
CvS2 Versions
Netplay/ Training
FAQ
Grooves
Groove Overview
Groove Subsystems
C-Groove
A-Groove
P-Groove
S-Groove
N-Groove
K-Groove
Capcom Characters
Akuma (Gouki)
Balrog (Boxer)
Blanka
Cammy
Chun-Li
Dan
Dhalsim
Eagle
E.Honda
Guile
Ken
Kyosuke
Maki
M. Bison (Dictator)
Morrigan
Rolento
Ryu
Sagat
Sakura
Vega (Claw)
Yun
Zangief
SNK Characters
Athena
Benimaru
Chang
Geese
Haohmaru
Hibiki
Iori
Joe
Kim
King
Kyo
Mai
Nakoruru
Raiden
Rock
Rugal
Ryo
Terry
Todo
Vice
Yamazaki
Yuri
Boss Characters
Shin Akuma
Ultimate Rugal
Evil Ryu
Orochi Iori