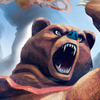
Street Fighter X Tekken/Kuma

From SuperCombo Wiki
Street Fighter X TekkenSFxTLogo.png
Street Fighter X Tekken#CharactersStreet Fighter X Tekken/Character HealthStreet Fighter X Tekken/Basic ElementsStreet Fighter X Tekken/MovementStreet Fighter X Tekken/Solo OffenseStreet Fighter X Tekken/Capcom Juggle SystemSFxTHeaderButtons.png

Kuma

Sfxt kuma face.jpg

Ideal Team Position: Anchor


Kuma’s relevance in high level Street Fighter x Tekken was cemented when Sethlol defeated Infiltration at Final Round 16, showing the world just how capable he could be with the right partner. His damage output is absurd and he has a number of ways he can tag in his partner to continue his painful combos if he finishes with Frolicking Bear (hcb+k). While he’s typically slow in his regular stance walking forward, his special Hunting Stance greatly increases his speed to a point where he suddenly gets one of the best forward dashes in the game. Furthermore, his f.lp (which looks almost identical to his regular standing jab) leads to a painful target combo that can cancelled into his combo extending Bear Claw, which in turn gives him a long hit confirm where he can either finish the combo or end the safe blockstring to see if the opponent will attempt to reversal out of his pressure. With superior range on his punches, his leg attacks are very weak which gives him limited access to worthwhile low attacks unless he is in Hunting Stance. His giant standing hurtbox can make him vulnerable to close range jump attacks, and all of his reversals are vulnerable to neutral jumps. Due to those limitations, it’s best to use Kuma when the opponent is already on the defensive, which a point character can help him with. Once the opponent is on the defensive, Kuma can use his high damage combos, excellent mobility of his Hunting Stance, and command throws to drastically reduce the opponent’s health.


Strengths Weaknesses

+High damage output

+Able to clear long gaps of distance quickly thanks to Hunting Stance

+Hunting Stance greatly shrinks his hurtbox

+Can start full combos from f.LP target combo, a move that reaches far and can be cancelled into a safe blockstring through use of an empty Bear Claw, and even bait reversals.

+Long punch attacks can make opponents respect his space

+Possesses a fully invincible reversal that is safe on block (hcf+PP)

+Weird vulnerable hitboxes work to his favor, denying other characters standard combos and pressure strings

-Giant standing hurtbox makes him highly vulnerable to several jumping attacks

-Almost no useful low attacks outside Hunting Stance attacks thanks to terrible hitboxes on his legs

-Very slow walkspeed

-Reversals are vulnerable to neutral jumps for full combo punishes

-All of his specials have long recovery, making him highly vulnerable to whiffing


Moves

Normal Attacks

Name
Command
Notes
Standing Light Punch
Lp.png
Speccancel.png
Standing Medium Punch
Mp.png
Speccancel.png
Standing Hard Punch
Hp.png
Speccancel.png
Standing Light Kick
Lk.png
Standing Medium Kick
Mk.png
Speccancel.png
Standing Hard Kick
Hk.png
Speccancel.png
Crouching Light Punch
D.png + Lp.png
Speccancel.png
Crouching Medium Punch
D.png + Mp.png
Speccancel.png
Crouching Hard Punch
D.png + Hp.png
Speccancel.png
Knockdown.png
Crouching Light Kick
D.png + Lk.png
Low.png
Speccancel.png
Crouching Medium Kick
D.png + Mk.png
Low.png
Speccancel.png
Crouching Hard Kick
D.png + Hk.png
Low.png
Hardknockdown.png
Speccancel.png
Jump Light Punch
Ub.png / U.png / Uf.png + Lp.png
High.png
Jump Medium Punch
Ub.png / U.png / Uf.png + Mp.png
High.png
Jump Hard Punch
Ub.png / U.png / Uf.png + Hp.png
High.png
Jump Light Kick
Ub.png / U.png / Uf.png + Lk.png
High.png
Jump Medium Kick
Ub.png / U.png / Uf.png + Mk.png
High.png
Jump Hard Kick
Ub.png / U.png / Uf.png + Hk.png
High.png


Unique Attacks

Name
Command
Notes
Left Right Bear Claw
Lp.png ---.png B.png + Mp.png
Speccancel.png
Knockdown.png vs airborne on 2nd hit
Double Wild Slap
Hp.png ---.png Mp.png
Knockdown.png vs airborne on 2nd hit
Jab Elbow Smash
Mp.png ---.png Mp.png ---.png Hp.png
Knockdown.png vs airborne on
2nd and 3rd hit
Jab Elbow Stomp
Mp.png ---.png Mp.png ---.png Lk.png
Knockdown.png vs airborne on
2nd and 3rd hit
Triple Hammer
B.png + Hp.png ---.png Hp.png ---.png Hp.png
High.png on 1st hit
Knockdown.png vs airborne
Knockdown.png on 2nd hit
Hardknockdown.png vs airborne on 3rd hit
Groundbounce.png on Counterhit.png on 3rd hit
G-Clef Cannon
F.png + Lp.png ---.png Mp.png ---.png Hp.png
Knockdown.png vs airborne
Speccancel.png on 2nd and 3rd hit
Bear Smash
F.png + Hp.png
Speccancel.png on 1st hit
Big Tree
(Hunting Stance) ---.png
F.png + Mp.png
Knockdown.png vs airborne
Grizzly Fling
(Hunting Stance) ---.png
F.png + Hp.png
Low.png Knockdown.png
Break'n
(Hunting Stance) ---.png
B.png + Hp.png
Armored.png
Knockdown.png
can be steered with B.png and F.png
Hunting Spear
(Hunting Stance) ---.png
B.png + Mp.png
Wallbounce.png
Light Attack
(Hunting Stance) ---.png
Lp.png or Lk.png
Knockdown.png vs airborne
Medium Attack
(Hunting Stance) ---.png
Mp.png or Mk.png
Knockdown.png vs airborne
Heavy Attack
(Hunting Stance) ---.png
Hp.png or Hk.png
Low.png
Hardknockdown.png
Knockdown.png vs airborne
Feral Crouch
(Hunting Stance) ---.png
D.png + P.png + P.png
Stance Change
3k.png

Throws

Name
Command
Notes
Bear Hug
F.png or N.png + Lp.png + Lk.png
Throw.png
Bear Slam
B.png + Lp.png + Lk.png
Throw.png
Swing Swung
(Hunting Stance) ---.png
Lp.png + Lk.png
Throw.png

Special Moves

Name
Command
Notes
Rock 'n Roll Circus
Hcb.png F.png + P.png
Ex.png Throw.png
Megaton Claw
Hcf.png + P.png
Ex.png
   Grizzly Claws
Megaton Claw ---.png Lp.png
Knockdown.png
   Grizzly Claw Smash
Megaton Claw ---.png Mp.png or Hp.png
High.png Groundbounce.png
Headbutt
(close) 360.png + P.png
Ex.png Standthrow.png
Rolling Bear
(far) 360.png + P.png
Ex.png
    Rolling Bear Headbutt
Rolling Bear ---.png P.png
Standthrow.png
Frolicking Bear
Hcb.png + K.png
Ex.png Chrg.png
Knockdown.png
walbounce on Ex.png

Super Combo

Name
Command
Notes
Fatal Wind
Hcb.png + 3k.png


Move Analysis

Normal Moves

N/A


Unique Attacks

N/A


Normal Throws

N/A


Special Moves

N/A


Super Combos

N/A


The Basics

N/A


Advanced Strategy

N/A


Combos

Bread and Butters

  • st.HP xx hcf+HP>MP, st.HK xx hcf+HP>LP (403)

(0bar, easy)


Hit Confirm Combos

  • st.LP>b+MP xx hcf+LP>LP (194)

(0bar, easy)

  • f+LP>MP>HP xx hcf+HP>MP, st.HK xx hcf+HP>MP (363)

(0bar, easy)

  • f+LP>MP>HP xx hcf+HP>MP, st.HK xx hcb+HK (369)

(0bar, easy)

  • f+LP>MP>HP xx hcf+HP>MP, st.HK xx hcf+LP, st.MK~cr.HK (373)

(0bar, corner, easy)


Post-launch Combos

  • st.HP xx hcf+HP>MP

(0bar, easy)

  • st.HP xx hcf+LP, st.MK~cr.HK

(0bar, corner, easy)


Advanced Combos

  • st.HP>MP~st.HP xx hcf+PP>MP, st.HK xx hcb+HK (442)

(1bar, easy)

  • hcf+PP>MP, st.HK xx hcf+HP>LP (342)

(1bar, easy)

Combos Into Supers

  • N/A

Game Navigation

General
Controls
Notation
HUD
Glossary
System
FAQ
Street Fighter Characters
Abel
Akuma
Balrog
Blanka
Cammy
Chun Li
Cody
Dhalsim
Dudley
Elena
Guile
Guy
Hugo
Ibuki
Juri
Ken
M Bison
Poison
Rolento
Rufus
Ryu
Sagat
Sakura
Vega
Zangief
Tekken Characters
Alisa
Asuka
Bob
Bryan
Christie
Heihachi
Hwoarang
Jack X
Jin
Julia
Kazuya
King
Kuma
Lars
Law
Lei
Lili
Marduk
Nina
Ogre
Paul
Raven
Steve
Xiaoyu
Yoshimitsu
Guest Characters
Cole
Kuro
Mega Man
Pac Man
Toro