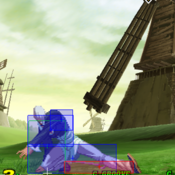
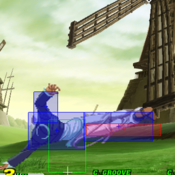
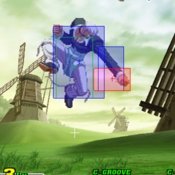
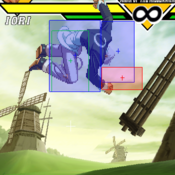
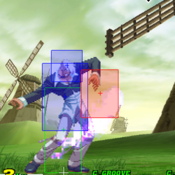
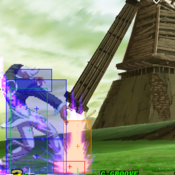
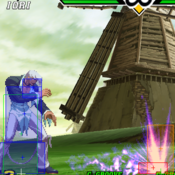
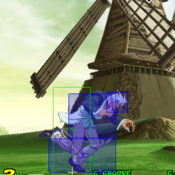
Capcom vs SNK 2/Iori

From SuperCombo Wiki
CVS2 Iori SNK Art.jpg
Health (at Ratio 2)
14000 Slightly Below Average
Stun
70 Average
Dash Length
18 Frames Very Long
Dash Type
Slide Corpse Hop=No, Proj. Hop=No
Run Speed
7.4 Slightly Above Average
Roll Distance
132 pixels Slightly Above Average
Roll Duration
27f Long
Wakeup Speed compared to Ryu
0f Average

Story

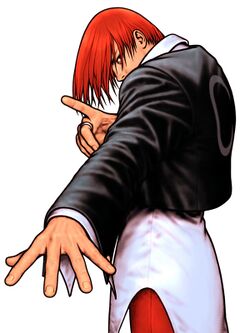
Iori Yagami (Japanese: 八神 庵, Hepburn: Yagami Iori) is a character from SNK's The King of Fighters video game series. The character first appeared in The King of Fighters '95 as the leader of the Rivals Team, as the initial enemy and later rival of Kyo Kusanagi. Iori is the heir of the Yagami clan, who use pyrokinetic powers and sealed the Orochi devil along with the Kusanagi and Yata clans. Iori suffers from a curse – "The Riot of the Blood" (血の暴走, Chi no Bōso) – under which he becomes faster, stronger and wilder, exhibiting a deadly tendency to indiscriminately attack everyone in close proximity. In this state, Iori is commonly called "Wild Iori" or "Orochi Iori" (月の夜大蛇の血に狂う庵, Tsuki no Yoru Orochi no Chi ni Kuruu Iori, lit. Insane Iori with Blood of Orochi Under the Night of the Moon).[3] Aside from the main series, Iori appears in several other media series, including spin-offs, crossover video games and comic adaptations of the series.

Iori was created as Kyo's rival; his name and abilities were designed to relate him with the legend of Yamata no Orochi. The designers ended up liking him so much they are careful of the character's development as the series expands. As a result, Iori sometimes helps Kyo to have the opportunity to fight him. Finding his design appealing, new outfits presented the SNK staff with difficulties as they devised new appearances for the character that would retain his popularity.

Video game journalists have praised Iori Yagami as one of the most powerful characters in the series. Reviewers have also cited Iori as one of the best characters from the games, labeling him as a veteran character and praising his appearance as one of SNK's best creations. "Miss X", Iori's crossdressing form from SNK Gals' Fighters and the additional female one of SNK Heroines: Tag Team Frenzy, also received attention for its humor. A series of collectible items based on Iori's likeness, including key chains and figurines, have been manufactured.


Gameplay

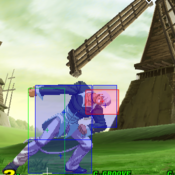
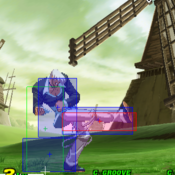
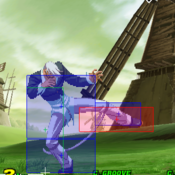
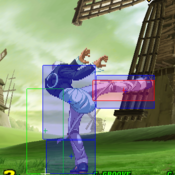
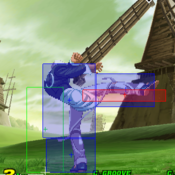
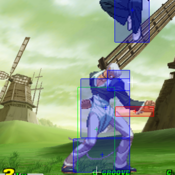
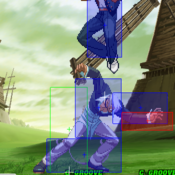
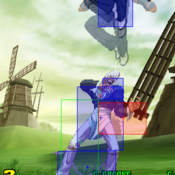
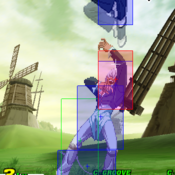
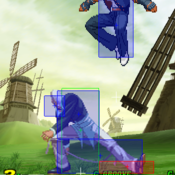
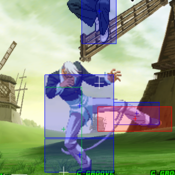
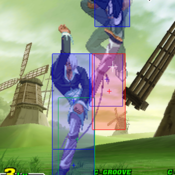
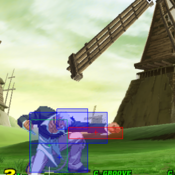
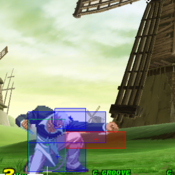
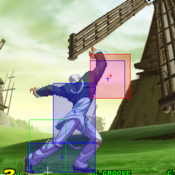
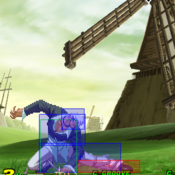
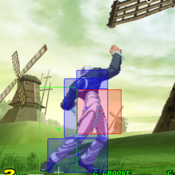
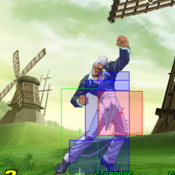
Iori is a very versatile character whose moveset lends him to a rush-down/mixup style with damage mainly coming from his Rekka combos. Coupled with that, he has very serviceable pokes, good anti air, and a good reversal DP for use in defense and neutral situations. He also has one of the best poke RCs in the game with his Rekka, is the shortest character in the game, and has the best roll in the game.

His drawbacks are getting in against dominant "big button" characters (Sagat, Blanka, Cammy, etc), a relatively low ceiling of one shot burst damage (his supers aren't very strong), and characters who duck and outpoke his Stand Roundhouse.

In CvS2, he is often considered a "high" tier character, just below the established top tiers. He is a staple on N groove teams, as well as one of the Best SNK characters in the game. Conventional wisdom is that he is one of the easiest characters to use, and recent Japanese tourney play features him on two of the best players' teams. In C and A grooves, even.

Iori's what? Since people play better and more focused when they have a set goal in mind rather than "uh...imma just hit guy and win! And do combos!", it's good to know what your character's main objective is before playing. A kind of a fighting game thesis, if you will.

Iori's objective is to get within point blank range of his opponent.

(Simple, right? It's supposed to be)

Why?

Simple. When you're up close you have the threat of the Scum Gale grab, which lends itself to high damage 50/50 mix ups, all of which knock down the opponent and set up another mix up.

How is this objective accomplished? In order of best method to worst method: 1) Knocking the opponent down 2) Getting 3/4ths to full screen, throwing a jab fireball and running after it 3) Establishing Iori's strong mid-range ground game, which drains the opponent's guard bar. The draining of your opponent's guard bar entices him to make mistakes that enable you to achieve method 1). 4) By trying to roll through or jump/low jump over your opponent's moves.

Since 1) is hard to do on a good opponent and the distance for 2) can be difficult to establish, Iori spends most of his time doing 3).

Groove Selection

Best - N/C: N-Groove is Iori's best Groove for a few reasons. Iori has one of the best rolls in the game, and a great special to roll cancel with his rekkas. N-Groove gives him run and hop to aid his mixup and rushdown, and while the meter isn't great, level 1 Maiden Masher is an easy and simple confirm for a damage increase anyway. C-Groove is only a little behind, as while he gives up run and hop, he gets a very damaging level 2 combo in exchange that can be easily combo'd into. Air block and Alpha Counters are also helpful in a lot of situations.

Useful - A/K: A-Groove is a little behind, and Iori is usually ran on point. Custom Combo is powerful and useful, and Iori has a decent one. Lack of run or hop hurts his offense a bit, but it isn't a huge tradeoff, and he still has roll. K-Iori is a higher risk Iori, with a major downside in the missing roll. Rage makes him scary though, as one good hit confirms into level 3 Maiden Masher for big damage, and he can usually punish something after a JD.

Worst - P/S: P-Iori isn't bad, he gets good meterless reward after all. However, just like K-Iori, the missing roll is very hard to deal with as it's important to his gameplan. S-Groove has very little going for it, especially for Iori, but it has the basics in run, hop, and roll. Just that you will almost never have meter for a Maiden Masher.


Iori is a powerful rushdown vortex character, with great mixups from his hard knockdown rekkas. His neutral is also solid, with good pokes and one of the best RC specials in rekkas. He just has to be in range to utilize them. Iori is best in N-Groove and C-Groove.
Pros Cons
  • Vortex: Amazing rushdown and mixup, with overheads, a command grab, a great low confirm, and a dedicated crossup command normal that all lead into a hard knockdown and another mixup
  • Pressure: Great pressure with his very useful jabs and mixing up with his rekkas
  • Strong Fireball: The best grounded fireball, as it recovers quite fast making it useful for pressure
  • Top Tier Roll: A stellar roll that recovers very very fast, allowing even for ambiguous crossups after some knockdowns, alongside an amazing roll cancel with RC rekkas
  • Simple: Easy to learn and a simple gameplan
  • Risk/Reward: Iori has to win neutral and begin his offense to secure the round, forcing him to play either patient and hunt for a hit or very risky to try and force the hit
  • Low Damage Super: Maiden Masher is easy to combo into but tends to do less damage than other supers of it's kind
  • Situational Pokes: His main poke, 5HK, can be ducked or low profiled, forcing him to rely on riskier or worse normals


Normal Moves

Far Standing Normals

5LP

Stand Jab
Lp.png
5LP
CVS2 Iori 5lp.png
Light Punch
Damage Stun Cancel Guard Parry Startup Active Recovery Total Adv Hit Adv Block Invul
300 4 RF/SP/SU H/L H/L 2 4 8 14 +5 +5 -
  • While sharing almost the exact same traits as the close jab, the standing jab doesn't have that many tactical uses; You're too far away to tick into throws, and Iori's walking speed is too slow for repeated walk up jabs to set up anything threatening. If you're at this range hit low strong instead.

5MP

Stand Strong
Mp.png
5MP
CVS2 Iori 5mp.png
Medium Punch
Damage Stun Cancel Guard Parry Startup Active Recovery Total Adv Hit Adv Block Invul
800 8 SP/SU H/L H 7 3 25 35 -5 -5 -
  • This move has the special property of being able to chain into Iori's f+strong. There's only one instance in which I use this move, and that's to combo after a connected Scum Gale. Even though it's a far reaching bufferable move, buffering into fireballs is not safe, and the move itself leaves much to be desired in terms of priority and speed. It reaches farther than the f+strong, but at that distance a fierce rekka ken will completely miss. Needless to say, a whiffed rekka ken will lead to a lot of hurt.

5HP

Stand Fierce
Hp.png
5HP
CVS2 Iori 5hp.png
Heavy Punch
CVS2 Iori 5hp 1.png
Heavy Punch
Damage Stun Cancel Guard Parry Startup Active Recovery Total Adv Hit Adv Block Invul
1300/1400 13/14 SP/SU (1st part only) H/L H 7 5 26 38 -5 -5 -
  • Reading on the left of the commas refer to when Iori's head is going OUT. Reading on the right refers to when Iori's head is going UP.

This move doesn't really have much tactical use since the distance to get the bufferable version of the fierce is really specific. However, the bufferable version happens to be Iori's most damaging bufferable move, and there's ONE useful set up to get it shown below (see Running Grab).

5LK

Stand Short
Lk.png
5LK
CVS2 Iori 5lk.png
Light Kick
Damage Stun Cancel Guard Parry Startup Active Recovery Total Adv Hit Adv Block Invul
500 5 SU H/L H/L 6 6 8 20 +3 +3 -
  • AKA "kickin 'em to da curb". Other than randomly whiffing it every now and then as a fake fireball, the only use for this move I have is for combos. See combo section.

5MK

Stand Forward
Mk.png
5MK
CVS2 Iori 5mk.png
Medium Kick
Damage Stun Cancel Guard Parry Startup Active Recovery Total Adv Hit Adv Block Invul
1000 10 SU H/L H/L 6 3 26 35 -6 -6 -
  • I probably don't use this move as much as I should. It's quick, has surprising range, and even more surprising priority. I'd use it against characters that can crouch the standing roundhouse if you can get into the range to use it.

6/13/03 - Some Japanese players like to punish whiffs with s.forward into super, but I find that whenever I bait a whiff I'm too far away to hit with a s.forward. I just do a low/standing roundhouse instead. I also noticed that Japanese players have set-ups for COUNTER HIT s.forward and buffer the super on reaction, but to me that's in-humanly difficult (the window to buffer is 3 frames long, 1/20th of a second). That super isn't one that you want to have blocked.


5HK

Stand Roundhouse
Hk.png
5HK
CVS2 Iori 5hk 1.png
Heavy Kick
CVS2 Iori 5hk 2.png
Heavy Kick
Damage Stun Cancel Guard Parry Startup Active Recovery Total Adv Hit Adv Block Invul
1300 13 X H/L H/L 9 7 22 38 -2 -2 -
  • Iori's best poke by far, despite having the distinction of being one of Iori's two crouchable moves. Any character bigger than a shoto is fair game, however. You can use it fairly liberally against the characters that cannot crouch it to slowly drain their guard meter and entice them into making a mistake that will get you the all-important knockdown Iori needs to get in. Be aware, though, that the move is not safe against a fast roll and that Sagat can punish you hard with a standing fierce into super if you whiff it.
  • Crouchable by half the cast (every female character, Ryo, shotos, Rolento, Haohmaru, Vega, Yun, Kim, Rock, Iori)
  • Treat this move like a budget Sakura or Yamazaki stand RH (yama speed/damage, but -2 instead of +2 on block)

Close Standing Normals

cl5LP  
Close Stand Jab
Close Lp.png
cl5LP
CVS2 Iori CL 5lp.png
Close Light Punch
Damage Stun Cancel Guard Parry Startup Active Recovery Total Adv Hit Adv Block Invul
400 4 RF,SP,SU H/L H/L 2 4 6 12 +7 +7 -

Iori's close jab is very useful for many reasons:

  1. ) Comes out in 2 frames, making it Iori's fastest move. 2 frames are as fast as moves get in CvS2 with the exception of Zangief's SPD, which is the only 1 frame move in the game. So what does this mean? Whenever you're in a situation where you have to mash a move, such as trying to avoid a throw, this is the move to mash.
  2. ) +7 advantage, also the most out of any of Iori's moves. 7 frames is a fairly huge advantage as far as CvS2 goes, meaning most links afterwards are brain-dead easy if the jab hits, and if blocked you have ample time to set up stuff safely like walk up to your opponent again and get another close jab. A perfectly timed close jab tick into Scum Gale (8 frames) is very difficult to reverse by jabs or throws. All tick throws can be escaped by jumps, however.
  3. ) At 400 damage, it's the most damaging out of all of Iori's weak attacks that can be chained together.
cl5MP  
Close Stand Strong
Close Mp.png
cl5MP
CVS2 Iori CL 5mp.png
Medium Punch
Damage Stun Cancel Guard Parry Startup Active Recovery Total Adv Hit Adv Block Invul
- - - - - - - - - - - -
  • Lorem ipsum dolor sit amet, consectetur adipiscing elit, sed do eiusmod tempor incididunt ut labore et dolore magna aliqua.
 cl5HP  
Close Stand Fierce
Close Hp.png
cl5HP
CVS2 Iori CL 5hp 1.png
Heavy Punch
CVS2 Iori CL 5hp 2.png
Heavy Punch
Damage Stun Cancel Guard Parry Startup Active Recovery Total Adv Hit Adv Block Invul
1200, 1100 12, 11 SP/SU, SU H/L H 3 6 24 33 0 0 -
  • For the commas above, the reading on the left refers to the first portion of the fierce, where Iori's fist is around his waist level. The second reading refers to when Iori's fist is over his head.

Outside of combos, the main use for this move is for anti-cross ups. Close roundhouse is your main anti-cross up, but you'll want to use close fierce against characters with bigger jumps like Blanka.

cl5LK  
Close Stand Short
Close Lk.png
cl5LK
CVS2 Iori CL 5lk.png
Light Kick
Damage Stun Cancel Guard Parry Startup Active Recovery Total Adv Hit Adv Block Invul
- - - - - - - - - - - -
  • Lorem ipsum dolor sit amet, consectetur adipiscing elit, sed do eiusmod tempor incididunt ut labore et dolore magna aliqua.
cl5MK  
Close Stand Forward
CloseMk.png
cl5MK
CVS2 Iori CL 5mk.png
Medium Kick
Damage Stun Cancel Guard Parry Startup Active Recovery Total Adv Hit Adv Block Invul
- - - - - - - - - - - -
  • Lorem ipsum dolor sit amet, consectetur adipiscing elit, sed do eiusmod tempor incididunt ut labore et dolore magna aliqua.
cl5HK  
Close Stand Roundhouse
CloseHk.png
cl5HK
CVS2 Iori CL 5hk.png
Heavy Kick
Damage Stun Cancel Guard Parry Startup Active Recovery Total Adv Hit Adv Block Invul
1400 14 SU H/L H 6 3 21 30 3 3 N/A
  • Best used as an anti-cross up, only a few characters can get over this move that I can think of (Blanka and Chun Li). Also has the distinction of being Iori's most damaging move that can be buffered into a super. The link from a

close jab is a one frame link though, meaning it's a little too difficult to do really consistently. How does Iori manage to kick so high with that funky little cord tying his legs together?

Crouching Normals

 2LP  
Crouching Jab
D.pngLp.png
2LP
CVS2 Iori 2lp.png
Crouching Light Punch
Damage Stun Cancel Guard Parry Startup Active Recovery Total Adv Hit Adv Block Invul
- - - - - - - - - - - -
  • Because this version is 1 hit and has a lot of lower invincibility (not to mention lower recovery), it's best used in the neutral game or when the opponent is far from Iori.
2MP  
Crouching Strong
D.pngMp.png
2MP
CVS2 Iori 2mp.png
Medium Punch
Damage Stun Cancel Guard Parry Startup Active Recovery Total Adv Hit Adv Block Invul
900 9 SP, SU H/L H/L 4 6 9 19 5 5 N/A
  • A great move to throw out every now and then or to build meter, as it has high priority and recovers fast enough to be nearly impossible to punish on reaction. As the frame data shows, this move links into itself. Although it's a one frame link, 2 low strongs into fierce rekka kens does a whopping 4000 damage without a power up. That's clearly enough damage to be an incentive to go for the combo when the opportunity arises... particularly situations where you can throw out the low strong meaty, therefore making the link much easier in the process. Also, the +5 frame advantage basically insures the next move you throw out will not get beaten by your opponent and will actually produce a lot of counter hits. This makes guard crush strings like low strong, low strong, standing roundhouse possible.

The basic rule of thumb is if you're close but not within point blank range, hit low strong. It will beat most anything, and if blocked you can immediately do a standing roundhouse after for a nice big chunk of guard bar.

Whiffing it intentionally can also be pretty good against certain characters, as it tends to beat a lot of long range moves... especially the low ones. Blanka's low fierce and slide, Dhalsim's limbs, shotos' low forwards... they all get beat cleanly by this move.

6/13/03 - the move also makes for Iori's best and safest meter builder in a pinch. I really wouldn't make turtling and building meter a core strategy with Iori, though, since he builds meter so much faster just by playing normally. However, if you're a few slivers away from having that 2nd meter, by all means mash on low strong.

6/13/03 - Sometimes your opponent will randomly be able to block a rekka ken after a max range low strong. Even worse, sometimes it whiffs completely for no apparent reason. 99% of the time it works fine, but sometimes the low strong x2 combo goes awry.

2HP  
Crouching Fierce
D.pngHp.png
2HP
CVS2 Iori 2hp.png
Heavy Punch
Damage Stun Cancel Guard Parry Startup Active Recovery Total Adv Hit Adv Block Invul
1100 11 SP/SU H/L H/L 4 5 20 29 -1 -1 N/A

Iori's other crouchable move. It doesn't really matter, though, since you'll probably never use this move as anything except as an anti-air at the 45 degree angle. It works fairly well as anti-air as long as you stick it out early enough, but it does tend to trade with the really high priority jump ins. When you use it as anti air you can buffer it into a fierce fireball to make your opponent land on it, but I would recommend throwing a jab fireball instead so that you can run after it and use it as cover to attempt to get in.

2LK  
Crouching Short
D.pngLk.png
2LK
CVS2 Iori 2lk.png
Crouching Light Kick
Damage Stun Cancel Guard Parry Startup Active Recovery Total Adv Hit Adv Block Invul
200 2 RF/SP/SU L L 4 4 8 16 5 5 N/A
  • Used mainly as your low combo starter and as a roll punisher, this move is pretty self-explanatory. Low shorts x3 into rekkas whenever the opportunity arises. The +5 frame advantage also lends this move into being another good Scum Gale tick, with the added advantage that people tend to sit and block after blocking one low short... they expect two more. The main weakness of this move is its relatively slow speed at 4 frames. When situations arise where you need a fast move, mash on standing/low jab (depending on distance) instead.
 2MK  
Crouching Forward
D.pngMk.png
2MK
CVS2 Iori 2mk.png
Crouching Medium Kick
Damage Stun Cancel Guard Parry Startup Active Recovery Total Adv Hit Adv Block Invul
800 8 SU L L 5 4 20 29 -2 -2 N/A

I hardly ever use this move since low strong is just better all around. Also, the animation of this move is very misleading. Iori's entire foot doesn't have an active hitbox on it, making the move a lot shorter than it looks. Its actual range is nearly identical to Iori's low short, which is a lot better move to use in more situations. However, the move can only be canceled into supers, so if you're having a tough time landing B&B's into maiden masher due to accidental moves coming out, this could certainly help you out. You can also toss the move out and empty buffer the super behind it ala Chun in 3rd strike, but the hitbox on the move isn't THAT good.

2HK  
Crouching Roundhouse
D.pngHk.png
2HK
CVS2 Iori 2hk.png
Crouching Heavy Kick
Damage Stun Cancel Guard Parry Startup Active Recovery Total Adv Hit Adv Block Invul
1300 13 N/A Low Low 9 4 36 49 DWN -16 N/A
  • In my opinion, use of the low roundhouse is what makes or breaks an Iori user.

The move is usually essential to get in against an opponent with good defense since you can't always rely on low jumping, rolling, or guard crushing your way in. How is the move used? Well the best application of the move would be to punish a whiffed move that you baited out. The less recommended use would be to catch somebody standing from roughly 1/3rds screen distance away. This works most often against footsie-reliant characters like Chun Li or Cammy since they're generally never crouching unless you're right next to them.

The move has tremendous recovery, meaning throwing it out without being SURE it's going to hit will certainly be the death of you. At max distance it's generally safe if blocked, but most any level 3 super will punish it fairly easily. If it's whiffed, well... you're gonna get hurt. Bad.

A connected roundhouse rewards you with the all-important knockdown that insures Iori's way in. After a successful low roundhouse you can either walk forward a bit and go for cross up/non-cross up roll mix ups, or run forward a bit and go for a jumping cross up. An opponent that tech rolls the low roundhouse is impossible to punish, unfortunately, so the best thing to do if this happens is to throw a jab fireball and run after it.

7/5/03 - SOMETIMES you can punish a tech-rolled low roundhouse with another run-up low roundhouse. Doesn't really work if the first low roundhouse was at the absolute max distance, though, and it works a lot better on big characters.

Try to low roundhouse tech rolls on reaction, rather than guessing. However, of all the times that I've whiffed a low roundhouse against an opponent who didn't tech roll, I don't recall being punished for it once. In fact, I've hit several uppercuts on people who've tried to punish it. Hrmm... to be safe, though, I'd recommend RC rekka'ing instead of doing uppercuts after the whiffed low roundhouse.

Air Normals

 8LP  
Jumping Jab
Ub.png,U.png,or Uf.png+Lp.png
8LP
CVS2 Iori 8lp.png
Jumping Light Punch
Damage Stun Cancel Guard Parry Startup Active Recovery Total Adv Hit Adv Block Invul
600 6 - H H 3 22 - - - - -
  • NOTE: All of Iori's straight up jump moves are the same as his jumping forward/backwards moves.

I don't use this personally, but I've seen many good Iori users use this as their preferred jump in. It has pretty good priority and sticks out for a long time, too. Low jumping and immediately pressing jab is an overhead on every character in the game, but you might as well use jumping strong if you're gonna do that.

7/5/03 - This probably Iori's best option if you want to jump directly on top of your opponent's head. Jumping roundhouse and strong also work well for that purpose, but I've noticed that this move beats a lot of anti-airs meant to hit directly above the opponent's head. Use this when jumping on an opponent in the corner.

8MP  
Jumping Strong
Ub.png,U.png,or Uf.png+Mp.png
8MP
CVS2 Iori 8mp.png
Medium Punch
Damage Stun Cancel Guard Parry Startup Active Recovery Total Adv Hit Adv Block Invul
900 9 - H H 4 7 - - - - -
  • Probably Iori's highest priority jump in, also a decent air to air due to its high speed. Range is a little lacking, though. Low jumping and immediately pressing strong is also an instant overhead on every character in the game. Do it while jumping backwards to make it safer. Low jumping forward and hitting strong gives the overhead surprising range, though; you can still connect it after doing three low shorts.

6/13/03 - Dunno why I didn't add this before, but low jumping BACKWARDS and doing overhead strong still works, and is a whole lot safer. You do have to be quite a bit closer, though. It works after doing one jab/short.

8HP  
Jumping Fierce
Ub.png,U.png,or Uf.png+Hp.png
8HP
CVS2 Iori 8hp.png
Heavy Punch
Damage Stun Cancel Guard Parry Startup Active Recovery Total Adv Hit Adv Block Invul
1300 13 - H H 11 3 - - - - -
  • Iori's highest damage jump in, so this is the one to use when your opponent is dizzy. It comes out painfully slow, but not slow enough so that you can use it for fakes to land a Scum Gale.
8LK  
Jumping Short
Ub.png,U.png,or Uf.png+Lk.png
8LK
CVS2 Iori 8lk.png
Light Kick
Damage Stun Cancel Guard Parry Startup Active Recovery Total Adv Hit Adv Block Invul
- - - - - - - - - - - -
  • Lorem ipsum dolor sit amet, consectetur adipiscing elit, sed do eiusmod tempor incididunt ut labore et dolore magna aliqua.
8MK  
Jumping Forward
Ub.png,U.png,or Uf.png+Mk.png
8MK
CVS2 Iori 8mk.png
Medium Kick
Damage Stun Cancel Guard Parry Startup Active Recovery Total Adv Hit Adv Block Invul
- - - - - - - - - - - -
  • Lorem ipsum dolor sit amet, consectetur adipiscing elit, sed do eiusmod tempor incididunt ut labore et dolore magna aliqua.
8HK  
Jumping Roundhouse
Ub.png,U.png,or Uf.png+Hk.png
8HK
CVS2 Iori 8hk.png
Jumping Heavy Kick
Damage Stun Cancel Guard Parry Startup Active Recovery Total Adv Hit Adv Block Invul
- - - - - - - - - - - -
  • Lorem ipsum dolor sit amet, consectetur adipiscing elit, sed do eiusmod tempor incididunt ut labore et dolore magna aliqua.

Command Normals

Universal Mechanics

Throws

Roll

Counter Attack

Guard Cancel Movement

Dodge Attacks

Small Jump

Dash

Run

Special Moves

Rekka Kens
Deadly Flower / "Hyakunijuunanashiki Aoihana "
Rekka
214+P
CVS2 Iori rekka 1.png
CVS2 Iori rekka 2.png
CVS2 Iori rekka 3.png
Version Damage Stun Cancel Guard Parry Startup Active Recovery Total Adv Hit Adv Block Invul
1st rekka
Qcb.png + P.png
400/500/600 2 None Mid Mid 12 4 29 45 -5 -5 N/A
Version Damage Stun Cancel Guard Parry Startup Active Recovery Total Adv Hit Adv Block Invul
2nd rekka
Qcb.png + P.png
400/500/600 2 None Mid Mid 12 4 37 53 -DWN -13 N/A
Version Damage Stun Cancel Guard Parry Startup Active Recovery Total Adv Hit Adv Block Invul
3rd rekka
Qcb.png + P.png
800/900/1000 5 None High High 16 8 40 64 -DWN -13 N/A
  • THere's a 25 frame window to cancel the first rekka into the second rekka. From the second to third hit there's a 27 frame window to cancel. The different damage numbers correspond to different button strengths.

Outside of its obvious use in combos, the rekka ken doesn't have much use. Start RCing it, though, and you have a different beast entirely. The result is a high priority (invincible, even), high damage (2200 if you get all 3), long range (Iori's longest ranged move, farther than his standing/low roundhouses) poke that enables Iori to compete with the Sagats and Cammys of the world.

The catch? The move carries a ton of risk behind it. As much as a fireball, even. The move is most easily punished by either a straight up jump (which results in a full jump in combo since Iori conveniently moves right under them) or a well timed roll. The move can also be baited into whiffing and then easily punished also. As if that weren't enough, the move isn't even totally safe if blocked! As you can see from the data above, the move carries a -5 frame disadvantage, enough for a few characters to get a low forward combo in. However, the move is mostly safe if blocked around max distance, though. You can actually punish attempts to hit a well-ranged RC rekka ken with... another RC rekka ken! DO NOT fall into the habit of doing RC rekka ken, then another RC rekka ken, though. It's killed me more times than I care to remember.

If your rekka ken is rolled through, try to get away from the opponent by doing the second and third rekkas. This works well if you're in the middle of field, but if you're opponent was in the corner you're not going anywhere.

So given all those ways to punish the move, how does Iori go about using the RC rekka without getting killed? The first step is to punish your opponents attempts to stop the rekka ken; anti-airing straight up jumps with either standing roundhouse or a super, punishing rolls with Iori's easy assortment of damaging rekka ken combos. The second step is to try to not fall into patterns; even if you punish every single random straight up jump or roll that your opponent does you will still get killed if you fall into the habit of RC rekka ken'ing in the same situations every time. Once you've got your opponent grounded and playing the ground game with you, THEN you can throw in the RC rekka kens every now and then.

The second and third rekka kens are obviously very unsafe, so do not continue the series unless you SEE the first one hit. Luckily doing the first rekka ken and then reacting to whether it was blocked or not is pretty easy, just watch your opponent's sprite and then continue if you see the sprite flinch.

Aside from its usefulness as a powerful footsie tool, I also use the RC rekka ken to pressure fallen opponents in the corner, since you cannot cross them up with your rolls or jumps like you normally can. Meaty RC rekka ken (done from a good distance) is almost totally safe for the most part. If the opponent wakes up and does anything besides block he gets hit. This conditions the opponent to not wake up with uppercuts or supers, which in turn lets you do Iori's powerful mix ups on rising opponents.

You can punish an opponent tech rolling rekka kens by running forward a bit and doing f+strong into rekka kens. It's great when you get it but it's a little difficult. People who get hit by that usually never tech hit again, though. Heh.

After knocking an opponent down with the rekka kens you can either run forward a bit and superjump for the b+forward cross up, or run forward a bit and roll to cross up. For the most part the second option is better since it's really dificult for your opponent to wake up with an uppercut since the cross up happens so fast. However, doing a super jump cross up every now and then is recommended to keep your opponent on his toes with some cross up b+short into Scum Gale set ups.

6/13/03 - Unlike most cross-up setups, since Iori's rekkas have a good deal of recovery, the cross up b+short after a connected rekka series isn't meaty. In fact, your opponent has time to jump before you hit the b+short. C-Groove can air block it and land safely far enough away to be out of Iori's mix up range, but other grooves take the hit and bounce, allowing you to throw a meaty jab fireball they have to land on which also covers your run-in. That's even worse than blocking the cross up, so most non-C-Groove players will just get up and block the cross up. If you are playing against C-Groove, just do the roll mix-ups. Another thing to add about the b+short cross up on wake up, it's a lot more difficult to uppercut than other cross ups. Since Iori crosses you up late you cannot do the normal f,df,d,db method for cross up uppercuts. You have to actually wait till the last second and input the uppercut command in the other direction.

6/13/03 - Something to keep in mind: If you roll after knocking the opponent down with rekka kens and end up in FRONT of your opponent, you have a slight advantage since your roll ended just before your opponent gets up. However, if the roll ends up BEHIND the opponent, the opponent can actually throw you for free since it takes a bit longer to get to that distance. Mix it up. If you end up in front of your opponent and he's mashing on throw, you can easily get counter hit jabs/shorts into a combo.

6/13/03 - Something I forgot to add. Iori's rekkas (as well as Kyo's) do very little stun damage. A full triple-hit series gets you 2200 damage, but only does 9 stun damage on the opponent. This is one of the few moves that is the exception to CvS2's "stun = damage/100" rule.

Man. That's a lot written about one move. It's a necessary move, though. It's like Iori's missing link.

Dragon Punch
Fire Ball / "Hyakushiki Oniyaki"
Uppercut
623+P
CVS2 Iori hp dp 1.png
HP version
CVS2 Iori hp dp 2.png
HP Version
CVS2 Iori hp dp 3.png
HP Version
Version Damage Stun Cancel Guard Parry Startup Active Recovery Total Adv Hit Adv Block Invul
LP
Dp.png + Lp.png
1700 17 None Mid Mid 4 10 38 52 DWN -33 4 (full), 10(lower)

Footsies DP

  • Because this version is 1 hit and has a lot of lower invincibility (not to mention lower recovery), it's best used in the neutral game or when the opponent is far from Iori.
MP
Dp.png + Mp.png
700+1100 7+11 None Mid Mid 4 [3/9] 48 64 DWN -42 7 full/ 9 lower

Best DP

  • This version has the highest amount of total invulnerability, so it's the best wakeup reversal and anti air. Make sure to hit the opponent deep to get both hits, otherwise you're missing out on damage compared to LP.
HP
Dp.png + Hp.png
400+600+1000 4+6+10 None Mid Mid 4 [2/2/5] 59 72 DWN -51 6 full/ 7 lower

Most Damage DP

  • This is the damage DP. Perfectly usable as anti air or reversals, but only when the opponent is point blank. Also the recovery is so bad, Iori loses okizeme opportunities by using it.
Fireball
Dark Thrust / "Hyakuhachishiki Yamibarai "
Fireball
236+P
CVS2 Iori fireball 1.png
CVS2 Iori fireball 2.png
Version Damage Stun Cancel Guard Parry Startup Active Recovery Total Adv Hit Adv Block Invul
LP
Qcf.png + Lp.png
800 8 None Mid Mid 12 - 45 57 -12 -12 N/A
MP
Qcf.png + Mp.png
900 9 None Mid Mid 4 [3/9] 48 64 DWN -42 7 full/ 9 lower
HP
Qcf.png + Hp.png
1000 4+6+10 None Mid Mid 12 - 45 57 -12 -12 N/A
  • As far as ground fireballs go, Iori's is the second best in the game. That's not really saying much, though, since ground fireballs as a whole really suck and are vastly inferior to conventional air-based fireballs.

Unfortunately, Iori's fireball is a very necessary tool for him, both as a footsie tool and as a means to get in. 3/4ths to full screen away throw a jab fireball and run after it to get in. 2/5ths to half screen away use it as a footsie tool. Any closer and you should never use it. NEVER buffer a fireball off of a normal move. Your opponent can easily roll on reaction and kill you. Also, since varying ground fireball speeds really doesn't get you anywhere, always throw jab fireballs since those you can follow easily. The other two speeds are unnecessary to the way Iori plays.

One of the main reasons that Iori is dependant on his fireball is because CvS2 is a game where you cannot walk backwards if there is something on the screen you can block. Meaning, if Iori throws his fireball and runs after it, his opponent cannot keep his distance by walking backwards as he will go into his blocking animation. This is a very handy tool, especially when fighting characters who walk backwards stupidly fast like Vega, Cammy and Chun Li.

The fact that the fireball is so essential to Iori and that it's a ground fireball is really bad. Characters that can easily punish ground fireballs like Bison, Blanka or Honda all give Iori a really hard time. RCing the fireball doesn't really make a difference either, since you never want to do the fireball up close, and if you RC it from far away the invincibility is gone by the time your opponent reaches you with a Psycho Crusher or Blanka Ball or whatever. Bleh.


Running Grab
212 Shiki: Kototsuki In / "Nihyakujuunishiki Kototsuki In "
Running Grab
63214+K
CVS2 Iori running hit grab 1.png
CVS2 Iori running hit grab 2.png
Version Damage Stun Cancel Guard Parry Startup Active Recovery Total Adv Hit Adv Block Invul
LP
Hcb.png + Lk.png
1800 0 None Mid Mid 5 32 12 49 DWN -18 N/A
MP
Hcb.png + Mk.png
1900 0 None Mid Mid 5 48 12 65 DWN -18 N/A
HK
Hcb.png + Hk.png
2000 0 None Mid Mid 5 64 12 81 DWN -18 N/A
  • The above frame data for the three button strengths represent what happens if Iori never makes contact with the enemy. For example, a roundhouse whiffed Running Grab has 5 frames start up, runs for 64 frames, then has 12 frame recovery. If at any time during those 64 frames of running Iori makes contact with his opponent, he then takes 4 frames for his arm to whip around, which has an active hitbox for 5 frames, and has a 29 frame recovery. Whew! Writing and explaining frame data isn't easy!

Most of the time I wish this move simply didn't exist, since 90% of the times I use it is totally on accident screwing up the command for RC rekka kens. As the -18 frame disadvantage tells you, this move isn't anywhere near safe if blocked. It's also very vulnerable if the move whiffs completely also, unlike Kyo's.

It does have its tactical uses, though. As stated above, the move does almost the exact same amount of guard bar damage as a jab uppercut (if you don't know, that's a lot), so if your opponent's guard bar is flashing and you can't get close enough to do a fierce into jab uppercut to guard break you can do f+strong into Running Grab instead. And again, guard breaking with a Running Grab just happens to leave you at the perfect distance to get a damaging far fierce into rekka kens. Another use for this move is to chip somebody to death. If you're not within fierce uppercut range to chip somebody (fierce uppercut does 325 points of chip damage), the next best option is to f+strong into Running Grab, as that does 300 chip damage. 2 Rekka kens only do 200 damage, and a fireball does 100. 300 damage from the running grab is enough to insure that you never fall victim to the "Magic Pixel" that has claimed many a player. RCing the move can be useful from time to time, like when you REALLY need that chip damage to kill the opponent but can't find a way to f+strong them, or to punish somebody buffering moves into a fireball. You could theoretically use an RC Running Grab as an anti-air from afar, but I wouldn't recommend it since the move comes out pretty slow.

Super Moves

Maiden Masher
Maiden Masher / "Sansennihyakujuuichishiki Yaotome "
Rush Super
23663214+P
CVS2 Iori Lvl 1 maiden masher.png
CVS2 Iori Lvl 1 maiden masher 2.png
CVS2 Iori Lvl 1 maiden masher 3.png
Version Damage Stun Cancel Guard Parry Startup Active Recovery Total Adv Hit Adv Block Invul
Level 1
Qcf.pngHcb.png + Lp.png
2200 0 None Mid Mid 4:8 8 33 53 DWN -10 8full/12upper
Level 2
Qcf.pngHcb.png + Mp.png
3700 0 SP/SU Mid Mid 4:8 24 33 69 DWN -10 14 full/ 22 upper
Level 3
Qcf.pngHcb.png + Hp.png
5000 0 None Mid Mid 4:8 24 33 69 DWN -10 22full/ 30 upper
  • Your basic all-purpose super; functions as anti-air, anti-fireball, anti-poke,

works in combos. There's a few unique things about it, though: the upper body invincibility granted to the move give it the ability to punish fireballs from much farther away. Other supers run out of invincibility if you do it too early, and if you wait long enough to go through the fireball the opponent has usually recovered already. The upper body invincibility also makes ths move great for punishing straight up jumps, even at level 1.

6/13/03 - If you try to anti-air with the super and your opponent didn't press anything they will be able to land and block it every time. Fortunately most people never jump up and down without pressing anything, and if they do you can just standing roundhouse them instead. Something to think about vs P and K grooves, though.

On the down side, the super's damage is pretty low. Level 1 damage is the same as a set of fierce rekka kens, so you should only use level 1's as straight up jump anti-air. Level 3 damage is a below-average 5000. Not earth shattering, but still enough to warrant its use. One should note that a connected level 3 super switches sides with the opponent also.

The range on the level 1 version of the super isn't nearly as long as you'd think it is. It's roughly the same range as a fierce rekka. Luckily, that's well within the range to hit Sagats, Blankas and Bisons jumping up and down.

The range on the level 3 is obviously a lot better, and it has an added benefit: When you're throwing fireballs as a footsie tool and your opponent jumps straight up over it, sometimes when you try to anti-air their straight up jump with a level 3 they get pushed BACK into the fireball they just jumped over. This not only makes the super safe, it gives you frame advantage AND puts you right into point blank range for a free mix-up. Doesn't happen EVERY time your opponent jumps over your fireball, though. It's kinda random. =/

Whenever you hit with the level 1 super you get a free roll cross-up that's one of the most ambiguous out of all of Iori's set ups. Also, your opponent can't tech roll to safety since you can't tech roll supers. Run forward about half a second and roll. TOTALLY ambiguous. Makes up for the measly 2200 damage pretty well... justifying the use of a meter. Iori gets meter fast anyway.

Unfortunately, hitting with a level 3 doesn't set up much of anything since your opponent is thrown really far away and Iori doesn't recover until the opponent is almost fully standing. Just throw a jab fireball as they're getting up and run after it.

"One-For-The-Road" Blast
Pillar Super
21441236+P
Version Damage Stun Cancel Guard Parry Startup Active Recovery Total Adv Hit Adv Block Invul
Level 1
Qcb.pngHcf.png + Lp.png
? ? ? ? ? ? ? ? ? ? ? ?
Level 2
Qcb.pngHcf.png + Mp.png
? ? ? ? ? ? ? ? ? ? ? ?
Level 3
Qcb.pngHcf.png + Hp.png
? ? ? ? ? ? ? ? ? ? ? ?
  • Pillar super; what does it do? I don't know, but someone forgot about it, can't be too fundamental

Colors
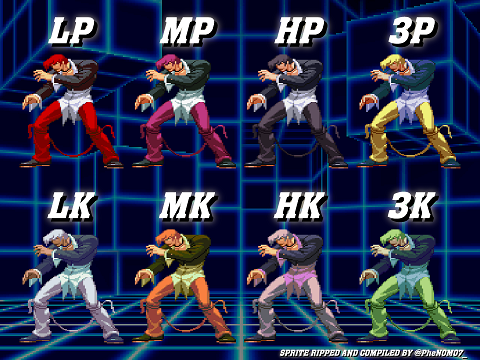
Iori CvS2 colors.png


CvS2 Wiki Navigation

General
Controls
Notation
HUD
Glossary
System
Roll Cancel
Combo
CvS2 Versions
Netplay/ Training
FAQ
Grooves
Groove Overview
Groove Subsystems
C-Groove
A-Groove
P-Groove
S-Groove
N-Groove
K-Groove
Capcom Characters
Akuma (Gouki)
Balrog (Boxer)
Blanka
Cammy
Chun-Li
Dan
Dhalsim
Eagle
E.Honda
Guile
Ken
Kyosuke
Maki
M. Bison (Dictator)
Morrigan
Rolento
Ryu
Sagat
Sakura
Vega (Claw)
Yun
Zangief
SNK Characters
Athena
Benimaru
Chang
Geese
Haohmaru
Hibiki
Iori
Joe
Kim
King
Kyo
Mai
Nakoruru
Raiden
Rock
Rugal
Ryo
Terry
Todo
Vice
Yamazaki
Yuri
Boss Characters
Shin Akuma
Ultimate Rugal
Evil Ryu
Orochi Iori