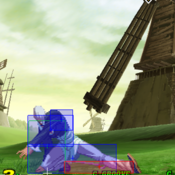
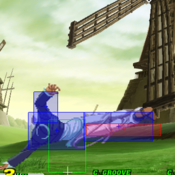
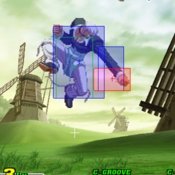
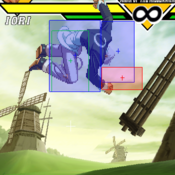
Introduction
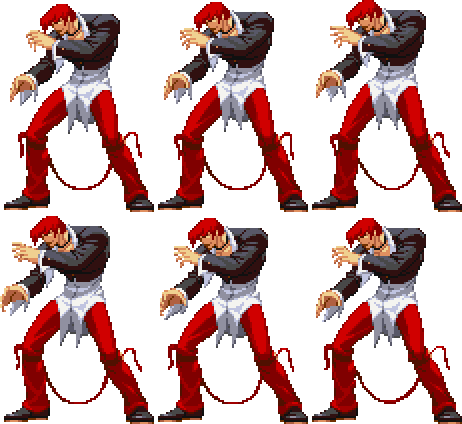
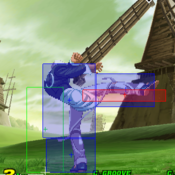
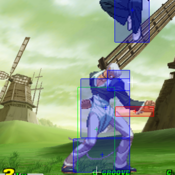
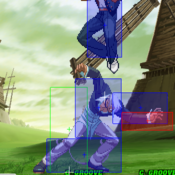
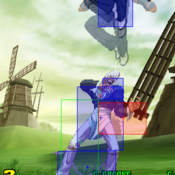
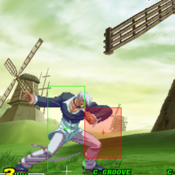
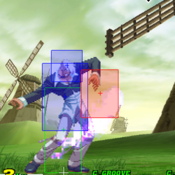
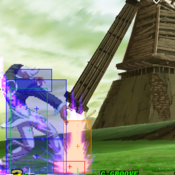
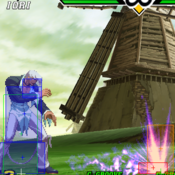
Iori Yagami (Japanese: 八神 庵, Hepburn: Yagami Iori) is a character from SNK's The King of Fighters video game series. The character first appeared in The King of Fighters '95 as the leader of the Rivals Team, as the initial enemy and later rival of Kyo Kusanagi. Iori is the heir of the Yagami clan, who use pyrokinetic powers and sealed the Orochi devil along with the Kusanagi and Yata clans. Iori suffers from a curse – "The Riot of the Blood" (血の暴走, Chi no Bōso) – under which he becomes faster, stronger and wilder, exhibiting a deadly tendency to indiscriminately attack everyone in close proximity. In this state, Iori is commonly called "Wild Iori" or "Orochi Iori" (月の夜大蛇の血に狂う庵, Tsuki no Yoru Orochi no Chi ni Kuruu Iori, lit. Insane Iori with Blood of Orochi Under the Night of the Moon).[3] Aside from the main series, Iori appears in several other media series, including spin-offs, crossover video games and comic adaptations of the series.
Iori was created as Kyo's rival; his name and abilities were designed to relate him with the legend of Yamata no Orochi. The designers ended up liking him so much they are careful of the character's development as the series expands. As a result, Iori sometimes helps Kyo to have the opportunity to fight him. Finding his design appealing, new outfits presented the SNK staff with difficulties as they devised new appearances for the character that would retain his popularity.
Video game journalists have praised Iori Yagami as one of the most powerful characters in the series. Reviewers have also cited Iori as one of the best characters from the games, labeling him as a veteran character and praising his appearance as one of SNK's best creations. "Miss X", Iori's crossdressing form from SNK Gals' Fighters and the additional female one of SNK Heroines: Tag Team Frenzy, also received attention for its humor. A series of collectible items based on Iori's likeness, including key chains and figurines, have been manufactured.
Data
| Health | 14000 | Just Below Average | |
| Stun | 70 | Average | |
| Stun Duration | +60f | Poor | |
| Guard Guage Recovery Rate | Fast Type | Best | |
| Dash Length | 102 pixels | ||
| Dash Duration | |||
| Dash Height | 0 | Grounded | |
| Run Speed | 7.4 | Average | |
| Roll Distance | 132 pixels | ||
| Roll Duration | 27f | ||
| Roll Recovery Frames | 3f | Best | |
| Wakeup Speed compared to Ryu | 0f | Average |
CvS2 Gameplay Overview & General Gameplan
Iori is a very versatile character whose moveset lends him to a rush-down/mixup style with damage mainly coming from his Rekka combos. Coupled with that, he has very serviceable pokes, good anti air, and a good reversal DP for use in defense and neutral situations. He also has one of the best poke RCs in the game with his Rekka, is the shortest character in the game, and has the best roll in the game.
His drawbacks are getting in against dominant "big button" characters (Sagat, Blanka, Cammy, etc), a relatively low ceiling of one shot burst damage (his supers aren't very strong), and characters who duck and outpoke his Stand Roundhouse.
In CvS2, he is often considered a "high" tier character, just below the established top tiers. He is a staple on N groove teams, as well as one of the Best SNK characters in the game. Conventional wisdom is that he is one of the easiest characters to use, and recent Japanese tourney play features him on two of the best players' teams. In C and A grooves, even.
Iori's what? Since people play better and more focused when they have a set goal in mind rather than "uh...imma just hit guy and win! And do combos!", it's good to know what your character's main objective is before playing. A kind of a fighting game thesis, if you will.
Iori's objective is to get within point blank range of his opponent.
(Simple, right? It's supposed to be)
Why?
Simple. When you're up close you have the threat of the Scum Gale grab, which lends itself to high damage 50/50 mix ups, all of which knock down the opponent and set up another mix up.
How is this objective accomplished? In order of best method to worst method: 1) Knocking the opponent down 2) Getting 3/4ths to full screen, throwing a jab fireball and running after it 3) Establishing Iori's strong mid-range ground game, which drains the opponent's guard bar. The draining of your opponent's guard bar entices him to make mistakes that enable you to achieve method 1). 4) By trying to roll through or jump/low jump over your opponent's moves.
Since 1) is hard to do on a good opponent and the distance for 2) can be difficult to establish, Iori spends most of his time doing 3).
Normal Moves
Far Standing Normals
5LP
| Damage | Stun | Cancel | Guard | Parry | Startup | Active | Recovery | Total | Adv Hit | Adv Block | Invul |
|---|---|---|---|---|---|---|---|---|---|---|---|
| 300 | 4 | RF/SP/SU | H/L | H/L | 2 | 4 | 8 | 14 | +5 | +5 | - |
| |||||||||||
5MP
| Damage | Stun | Cancel | Guard | Parry | Startup | Active | Recovery | Total | Adv Hit | Adv Block | Invul |
|---|---|---|---|---|---|---|---|---|---|---|---|
| 800 | 8 | SP/SU | H/L | H | 7 | 3 | 25 | 35 | -5 | -5 | - |
| |||||||||||
5HP
| Damage | Stun | Cancel | Guard | Parry | Startup | Active | Recovery | Total | Adv Hit | Adv Block | Invul |
|---|---|---|---|---|---|---|---|---|---|---|---|
| 1300/1400 | 13/14 | SP/SU (1st part only) | H/L | H | 7 | 5 | 26 | 38 | -5 | -5 | - |
This move doesn't really have much tactical use since the distance to get the bufferable version of the fierce is really specific. However, the bufferable version happens to be Iori's most damaging bufferable move, and there's ONE useful set up to get it shown below (see Running Grab). | |||||||||||
5LK
| Damage | Stun | Cancel | Guard | Parry | Startup | Active | Recovery | Total | Adv Hit | Adv Block | Invul |
|---|---|---|---|---|---|---|---|---|---|---|---|
| 500 | 5 | SU | H/L | H/L | 6 | 6 | 8 | 20 | +3 | +3 | - |
| |||||||||||
5MK
| Damage | Stun | Cancel | Guard | Parry | Startup | Active | Recovery | Total | Adv Hit | Adv Block | Invul |
|---|---|---|---|---|---|---|---|---|---|---|---|
| 1000 | 10 | SU | H/L | H/L | 6 | 3 | 26 | 35 | -6 | -6 | - |
6/13/03 - Some Japanese players like to punish whiffs with s.forward into super, but I find that whenever I bait a whiff I'm too far away to hit with a s.forward. I just do a low/standing roundhouse instead. I also noticed that Japanese players have set-ups for COUNTER HIT s.forward and buffer the super on reaction, but to me that's in-humanly difficult (the window to buffer is 3 frames long, 1/20th of a second). That super isn't one that you want to have blocked. | |||||||||||
5HK
| Damage | Stun | Cancel | Guard | Parry | Startup | Active | Recovery | Total | Adv Hit | Adv Block | Invul |
|---|---|---|---|---|---|---|---|---|---|---|---|
| 1300 | 13 | X | H/L | H/L | 9 | 7 | 22 | 38 | -2 | -2 | - |
| |||||||||||
Close Standing Normals
cl5LP
| Damage | Stun | Cancel | Guard | Parry | Startup | Active | Recovery | Total | Adv Hit | Adv Block | Invul |
|---|---|---|---|---|---|---|---|---|---|---|---|
| 400 | 4 | RF,SP,SU | H/L | H/L | 2 | 4 | 6 | 12 | +7 | +7 | - |
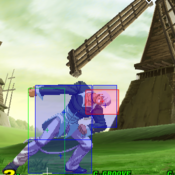
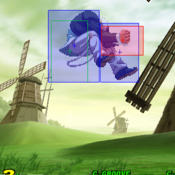
Iori's close jab is very useful for many reasons:
| |||||||||||
cl5MP
| Damage | Stun | Cancel | Guard | Parry | Startup | Active | Recovery | Total | Adv Hit | Adv Block | Invul |
|---|---|---|---|---|---|---|---|---|---|---|---|
| - | - | - | - | - | - | - | - | - | - | - | - |
| |||||||||||
cl5HP
| Damage | Stun | Cancel | Guard | Parry | Startup | Active | Recovery | Total | Adv Hit | Adv Block | Invul |
|---|---|---|---|---|---|---|---|---|---|---|---|
| 1200, 1100 | 12, 11 | SP/SU, SU | H/L | H | 3 | 6 | 24 | 33 | 0 | 0 | - |
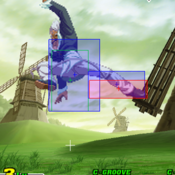
Outside of combos, the main use for this move is for anti-cross ups. Close roundhouse is your main anti-cross up, but you'll want to use close fierce against characters with bigger jumps like Blanka. | |||||||||||
cl5LK
| Damage | Stun | Cancel | Guard | Parry | Startup | Active | Recovery | Total | Adv Hit | Adv Block | Invul |
|---|---|---|---|---|---|---|---|---|---|---|---|
| - | - | - | - | - | - | - | - | - | - | - | - |
| |||||||||||
cl5MK
| Damage | Stun | Cancel | Guard | Parry | Startup | Active | Recovery | Total | Adv Hit | Adv Block | Invul |
|---|---|---|---|---|---|---|---|---|---|---|---|
| - | - | - | - | - | - | - | - | - | - | - | - |
| |||||||||||
cl5HK
| Damage | Stun | Cancel | Guard | Parry | Startup | Active | Recovery | Total | Adv Hit | Adv Block | Invul |
|---|---|---|---|---|---|---|---|---|---|---|---|
| 1400 | 14 | SU | H/L | H | 6 | 3 | 21 | 30 | 3 | 3 | N/A |
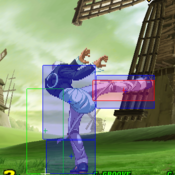
close jab is a one frame link though, meaning it's a little too difficult to do really consistently. How does Iori manage to kick so high with that funky little cord tying his legs together? | |||||||||||
Crouching Normals
2LP
| Damage | Stun | Cancel | Guard | Parry | Startup | Active | Recovery | Total | Adv Hit | Adv Block | Invul |
|---|---|---|---|---|---|---|---|---|---|---|---|
| - | - | - | - | - | - | - | - | - | - | - | - |
| |||||||||||
2MP
| Damage | Stun | Cancel | Guard | Parry | Startup | Active | Recovery | Total | Adv Hit | Adv Block | Invul |
|---|---|---|---|---|---|---|---|---|---|---|---|
| 900 | 9 | SP, SU | H/L | H/L | 4 | 6 | 9 | 19 | 5 | 5 | N/A |
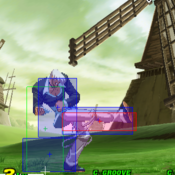
The basic rule of thumb is if you're close but not within point blank range, hit low strong. It will beat most anything, and if blocked you can immediately do a standing roundhouse after for a nice big chunk of guard bar. Whiffing it intentionally can also be pretty good against certain characters, as it tends to beat a lot of long range moves... especially the low ones. Blanka's low fierce and slide, Dhalsim's limbs, shotos' low forwards... they all get beat cleanly by this move. 6/13/03 - the move also makes for Iori's best and safest meter builder in a pinch. I really wouldn't make turtling and building meter a core strategy with Iori, though, since he builds meter so much faster just by playing normally. However, if you're a few slivers away from having that 2nd meter, by all means mash on low strong. 6/13/03 - Sometimes your opponent will randomly be able to block a rekka ken after a max range low strong. Even worse, sometimes it whiffs completely for no apparent reason. 99% of the time it works fine, but sometimes the low strong x2 combo goes awry. | |||||||||||
2HP
| Damage | Stun | Cancel | Guard | Parry | Startup | Active | Recovery | Total | Adv Hit | Adv Block | Invul |
|---|---|---|---|---|---|---|---|---|---|---|---|
| 1100 | 11 | SP/SU | H/L | H/L | 4 | 5 | 20 | 29 | -1 | -1 | N/A |
Iori's other crouchable move. It doesn't really matter, though, since you'll probably never use this move as anything except as an anti-air at the 45 degree angle. It works fairly well as anti-air as long as you stick it out early enough, but it does tend to trade with the really high priority jump ins. When you use it as anti air you can buffer it into a fierce fireball to make your opponent land on it, but I would recommend throwing a jab fireball instead so that you can run after it and use it as cover to attempt to get in. | |||||||||||
2LK
| Damage | Stun | Cancel | Guard | Parry | Startup | Active | Recovery | Total | Adv Hit | Adv Block | Invul |
|---|---|---|---|---|---|---|---|---|---|---|---|
| 200 | 2 | RF/SP/SU | L | L | 4 | 4 | 8 | 16 | 5 | 5 | N/A |
| |||||||||||
2MK
| Damage | Stun | Cancel | Guard | Parry | Startup | Active | Recovery | Total | Adv Hit | Adv Block | Invul |
|---|---|---|---|---|---|---|---|---|---|---|---|
| 800 | 8 | SU | L | L | 5 | 4 | 20 | 29 | -2 | -2 | N/A |
I hardly ever use this move since low strong is just better all around. Also, the animation of this move is very misleading. Iori's entire foot doesn't have an active hitbox on it, making the move a lot shorter than it looks. Its actual range is nearly identical to Iori's low short, which is a lot better move to use in more situations. However, the move can only be canceled into supers, so if you're having a tough time landing B&B's into maiden masher due to accidental moves coming out, this could certainly help you out. You can also toss the move out and empty buffer the super behind it ala Chun in 3rd strike, but the hitbox on the move isn't THAT good. | |||||||||||
2HK
| Damage | Stun | Cancel | Guard | Parry | Startup | Active | Recovery | Total | Adv Hit | Adv Block | Invul |
|---|---|---|---|---|---|---|---|---|---|---|---|
| 1300 | 13 | N/A | Low | Low | 9 | 4 | 36 | 49 | DWN | -16 | N/A |
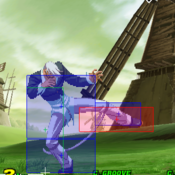
The move is usually essential to get in against an opponent with good defense since you can't always rely on low jumping, rolling, or guard crushing your way in. How is the move used? Well the best application of the move would be to punish a whiffed move that you baited out. The less recommended use would be to catch somebody standing from roughly 1/3rds screen distance away. This works most often against footsie-reliant characters like Chun Li or Cammy since they're generally never crouching unless you're right next to them. The move has tremendous recovery, meaning throwing it out without being SURE it's going to hit will certainly be the death of you. At max distance it's generally safe if blocked, but most any level 3 super will punish it fairly easily. If it's whiffed, well... you're gonna get hurt. Bad. A connected roundhouse rewards you with the all-important knockdown that insures Iori's way in. After a successful low roundhouse you can either walk forward a bit and go for cross up/non-cross up roll mix ups, or run forward a bit and go for a jumping cross up. An opponent that tech rolls the low roundhouse is impossible to punish, unfortunately, so the best thing to do if this happens is to throw a jab fireball and run after it. 7/5/03 - SOMETIMES you can punish a tech-rolled low roundhouse with another run-up low roundhouse. Doesn't really work if the first low roundhouse was at the absolute max distance, though, and it works a lot better on big characters. Try to low roundhouse tech rolls on reaction, rather than guessing. However, of all the times that I've whiffed a low roundhouse against an opponent who didn't tech roll, I don't recall being punished for it once. In fact, I've hit several uppercuts on people who've tried to punish it. Hrmm... to be safe, though, I'd recommend RC rekka'ing instead of doing uppercuts after the whiffed low roundhouse. | |||||||||||
Air Normals
8LP
| Damage | Stun | Cancel | Guard | Parry | Startup | Active | Recovery | Total | Adv Hit | Adv Block | Invul |
|---|---|---|---|---|---|---|---|---|---|---|---|
| 600 | 6 | - | H | H | 3 | 22 | - | - | - | - | - |
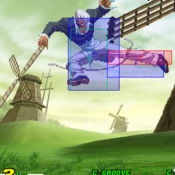
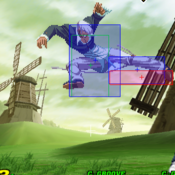
I don't use this personally, but I've seen many good Iori users use this as their preferred jump in. It has pretty good priority and sticks out for a long time, too. Low jumping and immediately pressing jab is an overhead on every character in the game, but you might as well use jumping strong if you're gonna do that. 7/5/03 - This probably Iori's best option if you want to jump directly on top of your opponent's head. Jumping roundhouse and strong also work well for that purpose, but I've noticed that this move beats a lot of anti-airs meant to hit directly above the opponent's head. Use this when jumping on an opponent in the corner. | |||||||||||
8MP
| Damage | Stun | Cancel | Guard | Parry | Startup | Active | Recovery | Total | Adv Hit | Adv Block | Invul |
|---|---|---|---|---|---|---|---|---|---|---|---|
| 900 | 9 | - | H | H | 4 | 7 | - | - | - | - | - |
6/13/03 - Dunno why I didn't add this before, but low jumping BACKWARDS and doing overhead strong still works, and is a whole lot safer. You do have to be quite a bit closer, though. It works after doing one jab/short. | |||||||||||
8HP
| Damage | Stun | Cancel | Guard | Parry | Startup | Active | Recovery | Total | Adv Hit | Adv Block | Invul |
|---|---|---|---|---|---|---|---|---|---|---|---|
| 1300 | 13 | - | H | H | 11 | 3 | - | - | - | - | - |
| |||||||||||
8LK
| Damage | Stun | Cancel | Guard | Parry | Startup | Active | Recovery | Total | Adv Hit | Adv Block | Invul |
|---|---|---|---|---|---|---|---|---|---|---|---|
| - | - | - | - | - | - | - | - | - | - | - | - |
| |||||||||||
8MK
| Damage | Stun | Cancel | Guard | Parry | Startup | Active | Recovery | Total | Adv Hit | Adv Block | Invul |
|---|---|---|---|---|---|---|---|---|---|---|---|
| - | - | - | - | - | - | - | - | - | - | - | - |
| |||||||||||
8HK
| Damage | Stun | Cancel | Guard | Parry | Startup | Active | Recovery | Total | Adv Hit | Adv Block | Invul |
|---|---|---|---|---|---|---|---|---|---|---|---|
| - | - | - | - | - | - | - | - | - | - | - | - |
| |||||||||||
Command Normals
Universal Mechanics
Throws
Roll
Counter Attack
Guard Cancel Movement
Dodge Attacks
Small Jump
Dash
Run
Special Moves
Rekka Kens
Dragon Punch
Fireball
Running Grab
Super Moves
Maiden Masher
Combos
Meterless combos:
Low Hit Confirm
cr.short x 3 X qcb + fierce x 3
Fast Hit Confirm
s.jab x 3, qcb + fierce x 3
Frame Trap Hit Confirm
s.jab, s.fierce, qcb + fierce x 3
s.short, s.jab, s.short, qcb + fierce x 3 cr.strong x 2, qcb + fierce x 3 cr.short x 2, cr.strong, qcb + fierce x 3
Non Hit Confirms (punish combos) s.fierce, qcb + fierce x 3 close s.fierce, hcb + roundhouse close s.fierce xx Fierce DP s.strong, twd.strong, qcb + fierce x 3
jump fierce, Cl. Fierce, DP+Fierce (optimal stun damage)
Low Jump strong/roundhouse-> DP+Jab
-cross-up-
b+short, s.jab, s.fierce, qcb + fierce x 3
Almost any Iori B&B combo can be started with hcb-twd + punch (Scum Gale).
Super Combos:
cr.short x 3, qcf-hcb + punch (any level)
s.strong, twd.strong, qcf-hcb + punch (any level)
S.jab, S.Fierce, qcf-hcb + punch (any level) (max damage)
C.forward kick xx qcf-hcb + punch (any level) (c.mk is super cancel only, easy to do)
Advanced Strategy
Grooves & Groove specific strategy
C Groove
C-Groove Level 2 Cancel Combos
-
Iori uses level 2 cancels pretty well. After his maiden masher is complete, Iori can cancel into any of his specials. The foremost being his Dragon Punch. Since maiden masher at level 3 only does 5000 damage, The cancels give Iori a much better damage/meter ratio, and allows him to use a meter for defensive purposes or be ready for another level 2 in a very short time.
Since Maiden masher is so easy to combo into, you'll get a lot of opportunities to land this.
Level 2 Maiden Masher
Cancel into
-Level 1 Maiden Masher (most damage, no tech roll)
-Fierce DP (1000 less damage, saves a level and 20 more stun) -Jab/Strong DP (even less damage, more time to setup or punish tech roll) -Level 1 wine cups, then Jump HP, HP, HP DP (Full combo can instant stun characters, cancel maiden masher early if combo will stun for more damage on post dizzy combo)
Anti C-Groove
A Groove
Ground Customs
Anti-Air Customs
Blocked Customs
Other Customs
Anti A-Groove
P Groove
Anti P-Groove
S Groove
Anti S-Groove
N Groove
Anti N-Groove
K Groove
Anti K-Groove
Matchups
Check here for matchup analysis, notes, and errata. Could be as simple as optimal punishes, safe jump setups, and effective counter pokes.
| #Sagat | #Blanka | #M.Bison | #Cammy |
| #Vega | #Hibiki | #aChun-Li | #Guile |
| #E.Honda | #Geese | #Rolento | #Ken |
| #Rock | #Kyo | #Sakura | #Iori |
| #Yamazaki | #Rugal | #Vice | #Eagle |
| Example | Example | Example | Example |
For example:
Blanka
Blanka ball punishes- Any level Maiden Masher, run a little and sweep (low HK), A groove activate sweep custom.
Sagat
N-Iori Vs C-Sagat
5:5
On the ground Iori actually has the advantage in this match up. With standing roundhouse and RC rekka ken to work with, all Sagat can do is try to make you whiff your moves and standing fierce them. RC rekkas against Sagat are VERY risky, though, since Sagat tends to be jumping up and down a lot in this fight.
If he jumps when you rekka, prepare to eat a nice jumping roundhouse, standing fierce into super combo. Also, Iori can't anti-air Sagat's straight up jump roundhouse with his own standing roundhouse; he has to either use his supers or or make Sagat block a standing roundhouse when he lands. Of course, Sagat can counter your standing roundhouse when he lands with an uppercut or (more likely) a roll. Watch out for those and punish accordingly.
Trying to go all out and attack Sagat is generally a lost cause. You can't jump at him obviously, and his ultra-annoying standing shorts will stop almost anything you try to do to get in. Again, running up to him and RC rekka ken'ing isn't advised since Sagat tends to jump up and and down a lot in this match. Just push Sagat to the corner with the standing roundhouses. From there Iori is in complete control of the match. Work the guard bar faster from there with repeated standing roundhouses, counter whatever Sagat does on reaction.
REMINDER: If Sagat (or any other character, really) buffers a move into a super such as low forward into low tiger super, Iori can easily counter roll on reaction after the super flash animation and get a big free combo.
6/13/03 - Iori's footsie range in this fight is well outside Sagat's low fierce and low forward range. If he whiffs either of these moves, low roundhouse him if you are confident, standing roundhouse if not. At this range the only moves Sagat can do are his standing short, standing forward, standing fierce, and fireballs.
Iori's standing roundhouse and Sagat's low fierce have roughly the same priority; whoever presses it first usually wins. However, since you're hanging around well outside the range of his fierce Sagat can't randomly press it or else you can easily punish his whiff with a standing/low roundhouse.
Smart Sagats will do nothing but standing shorts and jump up and down randomly, since Sagat's standing short is arguably the best normal move in the game; it's nearly impossible to punish if whiffed and has insane range/speed/priority. It's not damaging on its own but it all but shuts down his opponent's offense and sets up the opponent to make mistakes which will all lead to huge damage.
Standing forward isn't generally a good idea for Sagat but most will still throw it out every now and then. It's his longest ranged normal and has good priority, but its recovery time is similar to Hibiki's slash. Iori MIGHT be able to block it and level 3 super him for free. I'll have to test it before my next revision. Anyway, if Sagat does standing forward and Iori does ANY of his attack mix ups (RC rekka, roll, jump, etc.), Iori gets a free combo plus knockdown.
Sagat's standing fierce has a lot of range and players who aren't careful tend to walk into them a lot. However, Iori can crouch it and easily punish it on sight with a low roundhouse.
Sagat really doesn't want to throw fireballs either, for the same reason as the standing forward. Moreover, Iori players can usually roll through fireballs and punish on reaction.
-7/5/03 - The key things to think about in this match are to stay out of Sagat's range so you can punish his whiffs, and to find a way to stop Sagat from jumping up and down. Making him block a standing roundhouse when he lands is usually good enough... but again, be aware of rolls and uppercuts when he lands. The guessing game is totally in your favor, though.
M.Bison
Cammy
N-Iori Vs C-Cammy 6.5:3.5
Even though Cammy is a short character, I believe Iori wins this match mainly because he can bully Cammy around with RC rekkas and ground fireballs. Cammy has a really tough time fighting RC rekkas; she doesn't have any good RC moves herself to fight it with. Her roll is so slow, Iori can punish HER for rolling through a rekka ken. Her straight up jump moves to counter a rekka ken aren't very good either, Iori can counter them easily with a standing roundhouse.
Getting into rekka ken range can sometimes be a problem, though, since it's within Cammy's standing roundhouse range. You can try matching her roundhouses with RC rekkas but I wouldn't advise that since at that range she can easily bait you into whiffing them. If you're out of rekka range throw fireballs instead. Cammy can't drill through them, and even if she RCs the drill she still gets caught by the tail end of the fireball. She can try dashing over the fireballs but almost every player I've seen (even the Japanese) can't do it consistently and end up landing on the fireball and getting knocked down. Bonus! Cammy's jump is also fairly slow; you can punish most attempts to jump over your fireballs unless she jumps EXACTLY when you threw the fireball. That's basically a guess, so throw plenty of fakes along with your fireballs to mess her up. If she blocks one of your fireballs, throw another jab one and run after it since you've just created the ideal distance for yourself.
Most Cammy players will get baited at least a few times by whiffing something and then immediately rolling. Whiff a low strong, Cammy sticks out her standing roundhouse, you roll through it and beat her up.
Added 7/5/03 - Iori has two major advantages against "walk back" characters like Cammy, Vega and Chun. By "walk back" characters, I mean one of their most effective traits is their incredible backwards walking speed; you can almost never cross them up without knocking them down first since they walk backwards faster than your jump and just stay in front of you. They bait whiffs very well by dancing in and out of your effective footsie range, then easily punish a whiff with an easy one button long range move (i.e. Cammy standing roundhouse, Vega low strong). Running at them trying to get in generally doesn't work either, since their backwards walk is just slightly slower than you RUNNING forward. They can easily stick out a move while walking backwards that you'll run into, or you'll stick out a move that you THINK should hit, but your opponent will just walk backwards out of range and punish you for it.
Anyway, Iori has two major advantages on these types of characters. First, his ability to run after a fireball. When the fireball is on the screen, the opponent can't walk back! Unlike other recent games like Alpha 3, CvS2 will make your opponent go into his blocking animation if you ever hold back on the stick while there's something to block on the screen (the fireball). The result? Your opponent is stuck in place while you're running right at them, and the strategies for that are all listed in the '3/4ths - full screen distance' section of the Strategy chapter.
The weakness to this strategy is that it works best when the opponent is at 3/4ths to full screen, and any good player will not easily let you establish that distance. So how do you get that far away? Well, sometimes it's just given to you after certain knockdown moves that knock you far away. Just get up and throw a fireball and run after it. The simplest way for YOU to earn that distance is to jump/dash back and throw a fireball. This is painfully obvious, however, and you'll probably get punish hard for it eventually. It could lead to baited opponent jump-ins, though...
The safest way to get far away from your opponent is to use your fireball as a footsie tool. RC fierce fireball as a poke or after your opponent whiffs a move. If your opponent blocks it he'll be pushed out to roughly 3/4ths distance where you can throw another jab fireball and run after it.
Iori's other tool against "walk back" characters is his low roundhouse. His sweep has incredible range and of course, hits low. 'Walk back'-types generally never block low unless you're really close so they can make your moves whiff. Roundhouses from far away will catch them standing (or rather, walking back) really often. If your opponent catches on and crouch blocks sooner so that he doesn't get caught by a low roundhouse, that's good also since you now can run up to your opponent easier without him walking back to keep the distance.
As a final note, with the exception of Chun Li "walk back" characters hardly do any damage; they let the damage add up over time since they're usually in control of the match. This tips the risk/reward ratio of random rolls, jumps and low jumps more in Iori's favor. Go for broke and attack when the opportunity presents itself.
Vega
Hibiki
Chun-Li
Guile
E.Honda
Geese
Rolento
