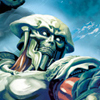
Street Fighter X Tekken/Yoshimitsu

From SuperCombo Wiki
Street Fighter X TekkenSFxTLogo.png
Street Fighter X Tekken#CharactersStreet Fighter X Tekken/Character HealthStreet Fighter X Tekken/Basic ElementsStreet Fighter X Tekken/MovementStreet Fighter X Tekken/Solo OffenseStreet Fighter X Tekken/Capcom Juggle SystemSFxTHeaderButtons.png

Yoshimitsu

Sfxt yoshimitsu face.jpg

Ideal Team Position: Point


Yoshimitsu is a fairly complex character, but not necessarily in a manner that is high execution. Most of his buttons are very awkward to use in a traditional sense, and even seemingly good hitboxes on his sword-based normals aren’t as good as they may appear to be. To compensate for this, Yoshimitsu makes due with the other tools he has at his disposal to confound opponents. He has numerous ways he can safely tag in his partner, chief among them his Sword Poke Windmill that can lure opponents closer to him. This is especially useful as a whiff punish on the ground, and sometimes it will even catch opponents in the air. His Overhead target combo is another safe tag-in option, and counts as an “off the ground” attack that will crush certain low attacks. His j.HP is a powerful offensive weapon, as it is active for a long time, starts up quickly, and has a hitbox that completely protects his hurtbox when activated. This makes it useful for both jump-in and air-to-airs, and he can get full combos off both. Yoshimitsu is also well-equipped to deal with aerial assaults from the ground, as his DP has air crush properties and leads to a follow-up juggle. If you have meter and life to spare, Yoshimitsu’s EX Suicide into a tag combo can lead to absurd damage, potentially turning the tide of battle into your favor. Because Yoshimitsu has so many options to safely tag in his partner, and because his own solo damage is lacking, it is best to have Yoshimitsu start the match and utilize his assortment of safe tag options to bring his partner into the match.


Strengths Weaknesses

+Multiple ways to safely tag cancel into his partner (P and K variations of Slap U Silly, Sword Poke Windmill) or to continue a combo

+Possesses a DP with air crush properties that can lead into a full combo.

+Teleport allows him to advance or retreat quickly

+Overhead Target Combo can lead to a safe tag cancel on block or hit

+EX Suicide Tag Combos, if successful, can lead to massive damage

+j.HP is one of the best high-priority air normals in the entire game and is extremely difficult to anti-air

-Lackluster solo combos

-Not very threatening without meter

-Struggles offensively thanks to his normal attacks having bad priority, awkward hitboxes, limited utility, or all of the above

-Only his EX DP has ground invincibility


Moves

Normal Attacks

Name
Command
Notes
Standing Light Punch
Lp.png
Speccancel.png
Standing Medium Punch
Mp.png
Standing Hard Punch
Hp.png
Standing Light Kick
Lk.png
Speccancel.png
Standing Medium Kick
Mk.png
Speccancel.png
Standing Hard Kick
Hk.png
Close Light Punch
(near opponent) Lp.png
Speccancel.png
Close Medium Punch
(near opponent) Mp.png
Speccancel.png
Close Hard Punch
(near opponent) Hp.png
Speccancel.png
Close Light Kick
(near opponent) Lk.png
Low.png
Crouching Light Punch
D.png + Lp.png
Speccancel.png
Crouching Medium Punch
D.png + Mp.png
Speccancel.png
Crouching Hard Punch
D.png + Hp.png
Crouching Light Kick
D.png + Lk.png
Low.png
Speccancel.png
Crouching Medium Kick
D.png + Mk.png
Speccancel.png
Crouching Hard Kick
D.png + Hk.png
Low.png
Hardknockdown.png
Jump Light Punch
Ub.png / U.png / Uf.png + Lp.png
High.png
crossup
Jump Medium Punch
Ub.png / U.png / Uf.png + Mp.png
High.png
Jump Hard Punch
Ub.png / U.png / Uf.png + Hp.png
High.png
Knockdown.png vs airborne
Jump Light Kick
Ub.png / U.png / Uf.png + Lk.png
High.png
Jump Medium Kick
Ub.png / U.png / Uf.png + Mk.png
High.png
crossup
Jump Hard Kick
Ub.png / U.png / Uf.png + Hk.png
High.png
Knockdown.png vs airborne

Unique Attacks

Name
Command
Notes
Flea
D.png + 3k.png
   Flea to
Sliding Headbutt
Flea ---.png K.png
Low.png Stagger.png
   Jumping Flea
Flea ---.png Uf.png or U.png or Ub.png
High.png
   Flea Crouch
Flea ---.png D.png
can crouch under projectiles
   Flea Dash
Flea ---.png F.png , F.png
forward dash
   Flea Release
Flea ---.png P.png
Cancels Flea Stance
Triple Roundhouse Combo
F.png + Hk.png
can be repeated 2 more times
Knockdown.png on 3rd hit
Knockdown.png vs airborne
Poison Wind Bronze Fist
F.png + Mk.png ---.png Mp.png ---.png B.png b
High.png on 1st hit
Knockdown.png vs airborne
Poison Wind Silver Fist
F.png + Mk.png ---.png Mp.png ---.png K.png
High.png on 1st hit
Knockdown.png vs airborne
Poison Wind Gold Fist
F.png + Mk.png ---.png Mp.png ---.png
K.png ---.png P.png
High.png on 1st hit
Knockdown.png on 5th hit
Knockdown.png vs airborne
Poison Wind
Bronze Fist
Steel Fist
F.png + Mk.png ---.png Mp.png ---.png F.png + Mk.png
High.png on 1st hit
High.png on 5th hit
Knockdown.png vs airborne

Throws

Name
Command
Notes
Sword Face Smash
F.png or N.png + Lp.png + Lk.png
Throw.png
Oni Killer
B.png + Lp.png + Lk.png
Throw.png

Special Moves

Name
Command
Notes
Poison Breath
Hcb.png + K.png
Ex.png
Crumple.png on Ex.png
Knockdown.png vs airborne
Flea to Poison Breath
Flea ---.png Hcb.png + K.png
Ex.png
Crumple.png on Ex.png
Knockdown.png vs airborne
Gehosen
Dp.png + P.png
Ex.png
Knockdown.png
Suicide
Hcb.png F.png + P.png
Ex.png
Crumple.png
Knockdown.png vs airborne
deals damage to self
causes self-crumple
Slap U Silly
Qcf.png + P.png
rapidly press P.png
for additional hits
Ex.png
Knockdown.png vs airborne
after 6 hits, causes
Yoshimitsu to crumple
Ex.png cannot be followed up
Ex.png will prevent self-crumple
Stone Fists
Qcf.png + K.png
rapidly press K.png
for additional hits
Ex.png
Knockdown.png vs airborne
after 6 hits, causes
Yoshimitsu to crumple
Ex.png cannot be followed up
Ex.png will prevent self-crumple
Indian Stance Vacuum Dance
Dp.png or Rdp.png + 3p.png or 3k.png
teleport
Sword Poke Windmill
Hcb.png + P.png
Ex.png Chrg.png
vacuum effect
Hardknockdown.png on Ex.png

Super Combo

Name
Command
Notes
Sword Poke Whirlwind
Hcf.png + 3p.png
vacuum effect


Move Analysis

Normal Moves

N/A


Unique Attacks

N/A


Normal Throws

N/A


Special Moves

N/A


Super Combos

N/A


The Basics

N/A


Advanced Strategy

N/A


Combos

Bread and Butters

  • st.MK xx dp+HP, st.LK, st.LK, st.MK xx dp+HP (306)

(0bar, easy)


Hit Confirm Combos

  • f+HK>f+HK>f+HK, st.MK xx dp+HP (238)

(0bar, easy)


Post-launch Combos

  • cl.MP, cr.LP, st.MK xx dp+HP

(0bar, easy)

  • cl.MP xx CADC, cl.MP, st.MK xx dp+HP

(0bar, medium)


Advanced Combos

  • f+MK, st.MK xx dp+HP, st.LK, st.LK, st.MK xx dp+HP (311)

(0bar, overhead, counterhit, easy)

  • dp+MP, st.LK, st.LK, st.MK xx dp+HP (262)

(0bar, invincible, easy)

  • dp+LP, st.LK, st.LK, st.MK xx dp+HP (242)

(0bar, anti-air, easy)


Combos Into Supers

  • N/A

Game Navigation

General
Controls
Notation
HUD
Glossary
System
FAQ
Street Fighter Characters
Abel
Akuma
Balrog
Blanka
Cammy
Chun Li
Cody
Dhalsim
Dudley
Elena
Guile
Guy
Hugo
Ibuki
Juri
Ken
M Bison
Poison
Rolento
Rufus
Ryu
Sagat
Sakura
Vega
Zangief
Tekken Characters
Alisa
Asuka
Bob
Bryan
Christie
Heihachi
Hwoarang
Jack X
Jin
Julia
Kazuya
King
Kuma
Lars
Law
Lei
Lili
Marduk
Nina
Ogre
Paul
Raven
Steve
Xiaoyu
Yoshimitsu
Guest Characters
Cole
Kuro
Mega Man
Pac Man
Toro