The King of Fighters '98: Ultimate Match/Saisyu Kusanagi: Difference between revisions
| Line 27: | Line 27: | ||
==In-depth Overview== | ==In-depth Overview== | ||
===Normal Throws=== | |||
'''b or f+C''' - Forward knockdown, face forward, un-rollable. | |||
'''b or f+D''' - Reverse knockdown, back turned, un-rollable. | |||
D throw preferred, not only because of back turned wakeups, but because it takes longer for the blue grab 'effect' to appear, making it a bit harder to break on reaction. | |||
===[[The_King_of_Fighters_2002/Normals_Guide|Movelist]]=== | ===[[The_King_of_Fighters_2002/Normals_Guide|Movelist]]=== | ||
{|border="1" | {|border="1" | ||
| Line 223: | Line 231: | ||
|colspan="2" | [[image:Saisyu98_fB.png|center]] | |colspan="2" | [[image:Saisyu98_fB.png|center]] | ||
| Always the same speed and not overhead or cancelable, but big advantage on block or hit. Good to cancel into for pressure, and you can link some moves from it (refer to combos below). BE WARY OF OVERUSE! Can be low profiled by a good number of sweeps. | | Always the same speed and not overhead or cancelable, but big advantage on block or hit. Good to cancel into for pressure, and you can link some moves from it (refer to combos below). BE WARY OF OVERUSE! Can be low profiled by a good number of sweeps. | ||
|- | |||
|colspan="8" align="center"| '''Special Moves''' | |||
|- | |||
!align="center"|'''Fireball (qcf+P)''' | |||
|align="center"|-/-/- | |||
|align="center"|-/- | |||
|align="center"|- | |||
|align="center"|- | |||
|colspan="2" | [[image:example.png|center]] | |||
|A little more recovery than Iori's, but still great. Cancel into this when your moves get blocked! Whiff cancel moves into it! It's a good fireball, not much more to say. | |||
|- | |||
!align="center"|'''Flame Uppers (qcb+P~qcb+P)''' | |||
|align="center"|-/-/- | |||
|align="center"|-/- | |||
|align="center"|- | |||
|align="center"|- | |||
|colspan="2" | [[image:example.png|center]] | |||
|C version recommended since it goes further and allows you to combo after (look above for combos). Not safe any way you cut it, so please hit-confirm. Like I said before, I think this move sucks compared to his Slam Kick (dp+K). | |||
|- | |||
!align="center"|'''Dragon Punch (dp+P)''' | |||
|align="center"|-/-/- | |||
|align="center"|-/- | |||
|align="center"|- | |||
|align="center"|- | |||
|colspan="2" | [[image:example.png|center]] | |||
|It's that time again. Time to do a DP. A version is invincible up to the hit (ie will trade with meaties), while C version is fully invincible at startup. The C version doesn't knock down on the first hit, so don't use it against a grounded opponent. | |||
|- | |||
!align="center"|'''Slam Kick (dp+K)''' | |||
|align="center"|-/-/- | |||
|align="center"|-/- | |||
|align="center"|- | |||
|align="center"|- | |||
|colspan="2" | [[image:example.png|center]] | |||
|Main meterless combo move. D version combos from hard hits, B version combos from light hits. Slams them down and give you un-rollable wakeups, so you can do whatever you want. I recommend an ambiguous roll cross/anti-cross. Saisyu's roll is actually pretty bullshit here. Try rolling very close to them, when you are in a position where with any other character you'd expect to cross over, Saisyu magically stays on the same side. Honestly this is very hard to block, so your opponent better be able to reversal roll! | |||
|- | |||
!align="center"|'''Overhead Elbow (hcb+K)''' | |||
|align="center"|-/-/- | |||
|align="center"|-/- | |||
|align="center"|- | |||
|align="center"|- | |||
|colspan="2" | [[image:example.png|center]] | |||
|Overhead attack. Both B and D are overhead, but D is slower.............sooooooo just use the B version. Very punishable on block, however, so pick your spots. | |||
|- | |||
|colspan="8" align="center"| '''Desperation Moves''' | |||
|- | |||
|align="center"|'''Horrid Kwanzaa (qcb,hcf+P)''' | |||
|align="center"|-/-/- | |||
|align="center"|-/- | |||
|align="center"|- | |||
|align="center"|- | |||
|colspan="2" | [[image:example.png|center]] | |||
|Saisyu's bread and butter! You can charge it...if you want, I guess. Safe on block, too. Not invincible at all. You can do shenanigans on block with A strength DP after to stuff/trade whatever they try to do. MAX version does more damage and gives advantage on block. Even more shenanigans! | |||
|- | |||
|align="center"|'''Flame Pillar (qcf,qcf+P)''' | |||
|align="center"|-/-/- | |||
|align="center"|-/- | |||
|align="center"|- | |||
|align="center"|- | |||
|colspan="2" | [[image:example.png|center]] | |||
|A version combos from lights. The C version is actually invincible on startup, but is really slow. MAX version has C version invincibility and A version speed. | |||
|} | |} | ||
==Combos== | ==Combos== | ||
Revision as of 19:02, 28 December 2014
Introduction
After losing a few bets with the Yakuza, Saisyu becomes an alcoholic and has to go into hiding. He then becomes a Getbacker, living day to day doing oddjobs trying to bring a smile to the faces of those who have lost theirs.
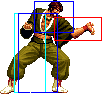
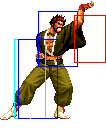
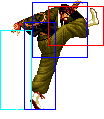
Colors

|

|

|

|
Final Edition Change List
- DP+B - second hit has a larger hitbox so it shouldn't whiff if the first connects.
- HCB+K - less recovery, second hit should be easier to connect if the first connects.
- QCB+P - First hit has a bigger hitbox and less recovery.
- QCFx2+P - A version and MAX version have faster startup.
Gameplay Overview
Saisyu is a zoning/pressure/raw damage character. He lacks the options/normals of Iori or '95 Kyo, but he still has some great tools specific to him. His main weakness is the lack of fast short hop anti-airs and mid/long-range pokes. He is lighter on execution than most characters, the hardest things he has are f+A to super or cr.B,cr.A to dp. He is a great character for a beginner.
In-depth Overview
Normal Throws
b or f+C - Forward knockdown, face forward, un-rollable.
b or f+D - Reverse knockdown, back turned, un-rollable.
D throw preferred, not only because of back turned wakeups, but because it takes longer for the blue grab 'effect' to appear, making it a bit harder to break on reaction.
Movelist
Combos
- cl.C (2 hits) xx DP+D/QCB+C, QCB+C/QCB,HCF+P
- cl.C (1 hit),f+A xx DP+D/QCB+C, QCB+C/QCB,HCF+P
- If you've gotten this confirm you should really avoid the rekka. Any air reset you get doesn't match the damage you'd get from either additional option and doesn't match the ambiguous roll or other mixup you'd get from Slam Kick.
- cr.B,cr.A/cl.B xx DP+B/ QCF,QCF+A
- B Slam Kick is the Saisyu BnB. It's tricky to do but you need to learn it, preferably from cr.A.
- cr.B, cl.C (2 hits) xx DP+D/QCB,HCF+P
- cr.B, cl.C,f+A xx DP+D/QCB,HCF+P
- Adding in the f+A. Learn this BnB instead of the previous just for the sake of consistency.
- f+B, st.B/st.D/DP+B/cr.A xx QCF,QCF+A
- Newly buffed A Flame Pillar makes landing this more of a threat if you can confirm.
Basic Strategy
Always combo into super when you get a chance!
After you land the Flame Uppers, you can do either A Dragon Punch (dp+A) is you are close or a superjump B for a reset. Though personally, I think that move is useless when the Slam Kick does more damage and gives you un-rollable wakeups.
Note that generally, close C (1 hit) into f+A is your best bet. Close C (2 hits) by itself is easier to buffer motions from, but the 2nd hit whiffs if your opponent is back turned + crouching. You can still use close C by itself, just be aware when things have the potential to hit back turned (ie after a crossup, certain knockdowns, etc.). Close C (2 hits) into f+A will only connect if you are very close, but does connect from a jump-in if you perform the jump-in early/close enough.
Crouching B links into close C, although it is much harder now.
