(added grabs/throws section) |
(added generic move names) |
||
| Line 244: | Line 244: | ||
{{MoveData | {{MoveData | ||
|image= NASB2_Lucy_LightForwardAir-FangsAttack.png | |image= NASB2_Lucy_LightForwardAir-FangsAttack.png | ||
|caption= | |caption= | ||
|name= Fangs Attack | |name= Fangs Attack | ||
|input= Forward+Light (Airborne) | |input= Forward+Light (Airborne) | ||
| Line 262: | Line 262: | ||
{{MoveData | {{MoveData | ||
|image= NASB2_Lucy_LightBackAir-BackAxeKick.png | |image= NASB2_Lucy_LightBackAir-BackAxeKick.png | ||
|caption= | |caption= | ||
|name= Back Axe Kick | |name= Back Axe Kick | ||
|input= Back+Light (Airborne) | |input= Back+Light (Airborne) | ||
| Line 280: | Line 280: | ||
{{MoveData | {{MoveData | ||
|image= NASB2_Lucy_LightUpAir-ThreeOfSwords.png | |image= NASB2_Lucy_LightUpAir-ThreeOfSwords.png | ||
|caption= | |caption= | ||
|name= Three of Swords | |name= Three of Swords | ||
|input= Up+Light (Airborne) | |input= Up+Light (Airborne) | ||
| Line 298: | Line 298: | ||
{{MoveData | {{MoveData | ||
|image= NASB2_Lucy_LightDownAir-SpadeSlice.png | |image= NASB2_Lucy_LightDownAir-SpadeSlice.png | ||
|caption= | |caption= | ||
|name= Spade Slice | |name= Spade Slice | ||
|input= Down+Light (Airborne) | |input= Down+Light (Airborne) | ||
| Line 320: | Line 320: | ||
{{MoveData | {{MoveData | ||
|image= NASB2_Lucy_ChargeForward-CrystalBallEdwinEtherealPower.png | |image= NASB2_Lucy_ChargeForward-CrystalBallEdwinEtherealPower.png | ||
|caption= "Like a cat with a vase | |caption= "Like a cat with a vase" | ||
|name= Crystal Ball (Normal Mode) | |name= Crystal Ball (Normal Mode) | ||
|input= Strong | |input= Strong | ||
| Line 337: | Line 337: | ||
{{MoveData | {{MoveData | ||
|image= NASB2_Lucy_ChargeForward-EtherealPower.png | |image= NASB2_Lucy_ChargeForward-EtherealPower.png | ||
|caption= "They really made Luigi's Fireball but better | |caption= "They really made Luigi's Fireball but better" | ||
|name= Ethereal Power (Ghost Mode) | |name= Ethereal Power (Ghost Mode) | ||
|input= Strong | |input= Strong | ||
| Line 354: | Line 354: | ||
{{MoveData | {{MoveData | ||
|image= NASB2_Lucy_ChargeForward-Edwin.png | |image= NASB2_Lucy_ChargeForward-Edwin.png | ||
|caption= "Bugs Bunny antics | |caption= "Bugs Bunny antics" | ||
|name= Edwin (Vampire Mode) | |name= Edwin (Vampire Mode) | ||
|input= Strong | |input= Strong | ||
| Line 372: | Line 372: | ||
{{MoveData | {{MoveData | ||
|image= NASB2_Lucy_ChargeUp-Sigh.png | |image= NASB2_Lucy_ChargeUp-Sigh.png | ||
|caption= | |caption= | ||
|name= Sigh | |name= Sigh | ||
|input= Up+Strong | |input= Up+Strong | ||
| Line 390: | Line 390: | ||
{{MoveData | {{MoveData | ||
|image= NASB2_Lucy_ChargeDown-CoffinSlam.png | |image= NASB2_Lucy_ChargeDown-CoffinSlam.png | ||
|caption= | |caption= | ||
|name= Coffin Slam | |name= Coffin Slam | ||
|input= Down+Strong | |input= Down+Strong | ||
| Line 412: | Line 412: | ||
{{MoveData | {{MoveData | ||
|image= NASB2_Lucy_ChargeForwardAir-UmbrellaPokeShovelPoke.png | |image= NASB2_Lucy_ChargeForwardAir-UmbrellaPokeShovelPoke.png | ||
|caption= | |caption= | ||
|name= Umbrella Poke / Shovel Poke | |name= Umbrella Poke / Shovel Poke | ||
|input= Strong (Airborne) | |input= Strong (Airborne) | ||
| Line 430: | Line 430: | ||
{{MoveData | {{MoveData | ||
|image= NASB2_Lucy_ChargeUpAir-AerialScythe.png | |image= NASB2_Lucy_ChargeUpAir-AerialScythe.png | ||
|caption= | |caption= | ||
|name= Aerial Scythe | |name= Aerial Scythe | ||
|input= Up+Strong (Airborne) | |input= Up+Strong (Airborne) | ||
| Line 448: | Line 448: | ||
{{MoveData | {{MoveData | ||
|image= NASB2_Lucy_ChargeDownAir-FalloutDigger.png | |image= NASB2_Lucy_ChargeDownAir-FalloutDigger.png | ||
|caption= | |caption= | ||
|name= Fallout Digger | |name= Fallout Digger | ||
|input= Down+Strong (Airborne) | |input= Down+Strong (Airborne) | ||
| Line 470: | Line 470: | ||
{{MoveData | {{MoveData | ||
|image= NASB2_Lucy_SpecialNeutral-DarkBite.png | |image= NASB2_Lucy_SpecialNeutral-DarkBite.png | ||
|caption= "I was bitten by Lana's liberated vampire bat | |caption= "I was bitten by Lana's liberated vampire bat" | ||
|name= Dark Bite | |name= Dark Bite | ||
|input= Special | |input= Special | ||
| Line 491: | Line 491: | ||
{{MoveData | {{MoveData | ||
|image= NASB2_Lucy_SpecialForward-Jumpscare.png | |image= NASB2_Lucy_SpecialForward-Jumpscare.png | ||
|caption= "I'm standing right here | |caption= "I'm standing right here" | ||
|name= Jumpscare | |name= Jumpscare | ||
|input= Forward+Special | |input= Forward+Special | ||
| Line 511: | Line 511: | ||
{{MoveData | {{MoveData | ||
|image= NASB2_Lucy_SpecialDown-APoem.png | |image= NASB2_Lucy_SpecialDown-APoem.png | ||
|caption= "Failure. It is not an option | |caption= "Failure. It is not an option" | ||
|name= A Poem | |name= A Poem | ||
|input= Down+Special | |input= Down+Special | ||
| Line 529: | Line 529: | ||
{{MoveData | {{MoveData | ||
|image= NASB2_Lucy_SpecialUp-FlightOfTheBatsLucilleSongOfSilence.png | |image= NASB2_Lucy_SpecialUp-FlightOfTheBatsLucilleSongOfSilence.png | ||
|caption= "Hurry, Fangs. We're gonna be late | |caption= "Hurry, Fangs. We're gonna be late" | ||
|name= Flight of the Bats / Lucille / Song of Silence | |name= Flight of the Bats / Lucille / Song of Silence | ||
|input= Up+Special | |input= Up+Special | ||
| Line 553: | Line 553: | ||
|image= NASB2_Lucy_Grab.png | |image= NASB2_Lucy_Grab.png | ||
|caption= | |caption= | ||
|name= | |name= Grab | ||
|input= Grab | |input= Grab | ||
|data= | |data= | ||
| Line 571: | Line 571: | ||
|image= NASB2_Lucy_Pummel.png | |image= NASB2_Lucy_Pummel.png | ||
|caption= | |caption= | ||
|name= | |name= Grab Pummel | ||
|input= Light (Grabbing) | |input= Light (Grabbing) | ||
|data= | |data= | ||
| Line 589: | Line 589: | ||
|image= NASB2_Lucy_UpThrow.png | |image= NASB2_Lucy_UpThrow.png | ||
|caption= | |caption= | ||
|name= | |name= Up Throw | ||
|input= Up (Grabbing) | |input= Up (Grabbing) | ||
|data= | |data= | ||
| Line 607: | Line 607: | ||
|image= NASB2_Lucy_ForwardThrow.png | |image= NASB2_Lucy_ForwardThrow.png | ||
|caption= | |caption= | ||
|name= | |name= Forward Throw | ||
|input= Forward (Grabbing) | |input= Forward (Grabbing) | ||
|data= | |data= | ||
| Line 625: | Line 625: | ||
|image= NASB2_Lucy_DownThrow.png | |image= NASB2_Lucy_DownThrow.png | ||
|caption= | |caption= | ||
|name= | |name= Down Throw | ||
|input= Down (Grabbing) | |input= Down (Grabbing) | ||
|data= | |data= | ||
| Line 643: | Line 643: | ||
|image= NASB2_Lucy_BackThrow.png | |image= NASB2_Lucy_BackThrow.png | ||
|caption= | |caption= | ||
|name= | |name= Back Throw | ||
|input= Back (Grabbing) | |input= Back (Grabbing) | ||
|data= | |data= | ||
| Line 664: | Line 664: | ||
{{MoveData | {{MoveData | ||
|image= NASB2_Lucy_Super.png | |image= NASB2_Lucy_Super.png | ||
|caption= | |caption= | ||
|name= | |name= Super | ||
|input= Slime+Light | |input= Slime+Light | ||
|data= | |data= | ||
| Line 686: | Line 686: | ||
{{MoveData | {{MoveData | ||
|image= NASB2_Lucy_TauntNeutral.png | |image= NASB2_Lucy_TauntNeutral.png | ||
|caption= "My future predicts that you will lose a stock | |caption= "My future predicts that you will lose a stock" | ||
|name= | |name= Taunt | ||
|input= Taunt | |input= Taunt | ||
|data= | |data= | ||
| Line 705: | Line 705: | ||
|image= NASB2_Lucy_TauntDown.png | |image= NASB2_Lucy_TauntDown.png | ||
|caption= "Greatest, Day, EVER!" | |caption= "Greatest, Day, EVER!" | ||
|name= | |name= Down Taunt | ||
|input= Down+Taunt | |input= Down+Taunt | ||
|data= | |data= | ||
| Line 722: | Line 722: | ||
{{MoveData | {{MoveData | ||
|image= NASB2_Lucy_TauntUp.png | |image= NASB2_Lucy_TauntUp.png | ||
|caption= "It's Madame Lucy | |caption= "It's Madame Lucy" | ||
|name= | |name= Up Taunt | ||
|input= Up+Taunt | |input= Up+Taunt | ||
|data= | |data= | ||
Revision as of 19:43, 7 June 2024
About
Goth and gloomy. In a poetic way.
Playstyle
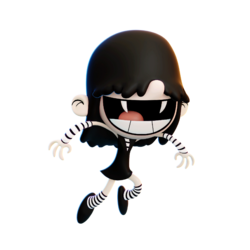
Lucy is a stance changing fighter who has access to the most variety of tools in the game, easily making her one of the most versatile and technical characters in the cast. She mainly specializes in offensive pressure, opening opponents up with her quick normals, hard to react teleport specials, and one of the best grabs in the game before punishing them with her devastating combo potential.
Lucy's Normal Mode is her most defensive stance. Its higher weight, focus on higher damage dealing moves, and access to one of her best out of shield options in the form of Jumpscare makes it a lower risk stance that is ideal to swap to when in put in a tight spot, such as when Lucy is above 80 percent. Her combo potential should not be taken lightly either when in this mode, as many of her normals can lead into her Umbrella Poke, which in this mode is a devastating Forward Air Charge attack that can lead to death regardless of how the opponent DI's due to both having high knockback and the ability to combo into itself on DI-in. In exchange, this mode has lackluster neutral tools and arguably the worst recovery of Lucy's modes, with Jumpscare having too many total frames to be thrown out lightly in neutral or as a recovery, and Flight of the Bats being incapable of snapping to the ledge in spite of its high vertical recovery. Quickly swapping to her other two modes on the fly will help cover these weaknesses, however.
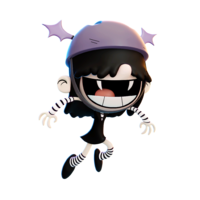
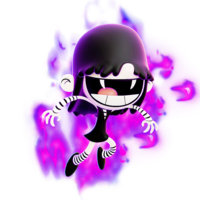
Ghost Mode has access to high movement speed, incredible frame data, and one of the best combo games of the cast. While some of Lucy's moves in this stance have low damage, her ability to string her moves together, particularly her Dash Attack, Forward Air, and Up Air, is unrivaled. She can easily rack up high damage on even the lightest and floatiest characters. In addition, Lucy's Jumpscare in this mode moves her quickly and has low endlag, making it versatile as both an offensive zone-breaking tool and as a means to mix up her landing and recovery. Her Up Special Lucile is also fantastically versatile due to her ability to act out of it with any aerial attack or special, making her recovery unpredictable and allowing her to extend her combos to the farthest reaches of the stage. As a consequence for having all this power though, her weight is the lightest of all characters when she is in this mode. This combined with her middling gravity means that she is especially fragile in this stance, as she is surprisingly susceptible to kill confirms in spite of her light weight. Any mistake in this stance can end up leading to her death, making this mode the highest risk-reward of the bunch.
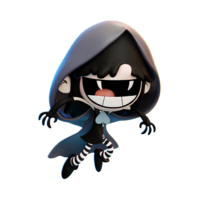
When Lucy needs to finish off a stock she also has access to Vampire Mode, a stance with extremely powerful attacks with knock back that rival even the strongest of the cast. Changing into this mode means even Lucy's quick aerials like her Forward Air become dangerous kill moves, and her slower charge attacks like her Forward Air Charge can take stocks at very surprising percents. This combined with her Jumpscare in this mode turning into a quick teleport with a huge hitbox at the end with high kill power makes this stance the best at edgeguarding. In addition, Lucy's Forward Charge in Vampire Mode drops a powerful projectile that falls straight down when used at the ledge, making opponents with weaker low recoveries think twice about how they get back on stage. In spite of this mode's potent tools however, its incredibly slow movement speed while still having lighter weight than Lucy's Normal Mode means that this stance should be used sparingly.
If you are looking for a character who rewards your technical prowess with one of the most relentless punishes in any platform fighter, then look no further than Lucy Loud.
| Strengths | Weaknesses |
|---|---|
|
|
Moveset
Ground Light Attacks
| Jab 1 | Damage | Startup | Active Frames | Total Frames | Safety | |
|---|---|---|---|---|---|---|
| 3% | 3 | 2 (3-4) | 20 | -9 | ||
|
One of the fastest jabs in the game, while also having a disjointed hitbox.
| ||||||
| Jab 2 | Damage | Startup | Active Frames | Total Frames | Safety | |
| 3% | 3 | 2 (3-4) | 20 | -9 | ||
|
Practically identical to Jab 1 in all but animation. | ||||||
| Jab Infinite | Damage | Startup | Active Frames | Total Frames | Safety | |
| 1% | 4 | 8 (4-11) | 11 | - | ||
| Jab Finisher | Damage | Startup | Active Frames | Total Frames | Safety | |
| 4% | 2 | 6 (2-7) | 38 | -22 | ||
|
Finisher with very long reach compared to the initial hits.
| ||||||
| Damage | Startup | Active Frames | Total Frames | Safety | |
|---|---|---|---|---|---|
| 8% | 5 | 6 (5-10) | 25 | -13 | |
|
Fast, disjointed normal that moves Lucy forward.
| |||||
| Damage | Startup | Active Frames | Total Frames | Safety | |
|---|---|---|---|---|---|
| 6% | 5 | 11 (5-15) | 30 | -17 | |
|
Fast anti-air projectile with long vertical range. Great for combo extensions. | |||||
| Damage | Startup | Active Frames | Total Frames | Safety | |
|---|---|---|---|---|---|
| 2% (initial), 6% (middle), 8/6/9% (late) | 6 | 7 (6-12) | 31 (IASA 23) | -8 | |
|
Another fast disjointed normal of Lucy's. The hitbox is deceptively big and lasts long, and the move itself provides a large amount of forward momentum almost akin to a dash attack.
| |||||
| Damage | Startup | Active Frames | Total Frames | Safety | |
|---|---|---|---|---|---|
| 12% | 8 | 9 (8-16) | 34 | -19 | |
|
A decently quick Dash Attack with very good damage, but does not cover a lot of distance.
| |||||
| Damage | Startup | Active Frames | Total Frames | Safety | |
|---|---|---|---|---|---|
| 10% | 5 | 12 (5-16) | 31 | -23 | |
|
One of the best Dash Attacks in the game. Covers low distance, but makes up for it in having a very good launch angle for combos. You can take fast fallers to high percents with this move alone.
| |||||
| Damage | Startup | Active Frames | Total Frames | Safety | |
|---|---|---|---|---|---|
| 7% | 29 | 2 (29-30) | 45 | -9 | |
|
In addition to having one of the best dash attack in the game, she also has one of the worst ones in the game. This acts very similar to Vampire Mode's Side Special but without the distance or kill power. Strangely also the weakest dash attack of Lucy's kit damage wise.
| |||||
Air Light Attacks
| Damage | Startup | Active Frames | Total Frames | Safety | |
|---|---|---|---|---|---|
| 10% (initial), 7% (late) | 8 | 15 (8-9 (initial), 10-22 (late)) | 40 | - | |
| |||||
| Damage | Startup | Active Frames | Total Frames | Safety | |
|---|---|---|---|---|---|
| 00% | 0 | 0-0 | 0 | -0 | |
| |||||
| Damage | Startup | Active Frames | Total Frames | Safety | |
|---|---|---|---|---|---|
| 00% | 0 | 0-0 | 0 | -0 | |
| |||||
| Damage | Startup | Active Frames | Total Frames | Safety | |
|---|---|---|---|---|---|
| 00% | 0 | 0-0 | 0 | -0 | |
| |||||
| Damage | Startup | Active Frames | Total Frames | Safety | |
|---|---|---|---|---|---|
| 00% | 0 | 0-0 | 0 | -0 | |
| |||||
Ground Strong Attacks
| Damage | Startup | Active Frames | Total Frames | Safety | |
|---|---|---|---|---|---|
| 00% | 0 | 0-0 | 0 | -0 | |
| |||||
| Damage | Startup | Active Frames | Total Frames | Safety | |
|---|---|---|---|---|---|
| 00% | 0 | 0-0 | 0 | -0 | |
| |||||
| Damage | Startup | Active Frames | Total Frames | Safety | |
|---|---|---|---|---|---|
| 00% | 0 | 0-0 | 0 | -0 | |
| |||||
| Damage | Startup | Active Frames | Total Frames | Safety | |
|---|---|---|---|---|---|
| 00% | 0 | 0-0 | 0 | -0 | |
| |||||
| Damage | Startup | Active Frames | Total Frames | Safety | |
|---|---|---|---|---|---|
| 00% | 0 | 0-0 | 0 | -0 | |
| |||||
Air Strong Attacks
| Damage | Startup | Active Frames | Total Frames | Safety | |
|---|---|---|---|---|---|
| 00% | 0 | 0-0 | 0 | -0 | |
| |||||
| Damage | Startup | Active Frames | Total Frames | Safety | |
|---|---|---|---|---|---|
| 00% | 0 | 0-0 | 0 | -0 | |
| |||||
| Damage | Startup | Active Frames | Total Frames | Safety | |
|---|---|---|---|---|---|
| 00% | 0 | 0-0 | 0 | -0 | |
| |||||
Special Attacks
| Damage | Startup | Active Frames | Total Frames | Safety | |
|---|---|---|---|---|---|
| 00% | 0 | 0-0 | 0 | -0 | |
| |||||
| Damage | Startup | Active Frames | Total Frames | Safety | |
|---|---|---|---|---|---|
| 00% | 0 | 0-0 | 0 | -0 | |
| |||||
| Damage | Startup | Active Frames | Total Frames | Safety | |
|---|---|---|---|---|---|
| 00% | 0 | 0-0 | 0 | -0 | |
| |||||
| Damage | Startup | Active Frames | Total Frames | Safety | |
|---|---|---|---|---|---|
| 00% | 0 | 0-0 | 0 | -0 | |
| |||||
Grab/Throws
| Damage | Startup | Active Frames | Total Frames | Safety | |
|---|---|---|---|---|---|
| 00% | 0 | 0-0 | 0 | -0 | |
| |||||
| Damage | Startup | Active Frames | Total Frames | Safety | |
|---|---|---|---|---|---|
| 00% | 0 | 0-0 | 0 | -0 | |
| |||||
| Damage | Startup | Active Frames | Total Frames | Safety | |
|---|---|---|---|---|---|
| 00% | 0 | 0-0 | 0 | -0 | |
| |||||
| Damage | Startup | Active Frames | Total Frames | Safety | |
|---|---|---|---|---|---|
| 00% | 0 | 0-0 | 0 | -0 | |
| |||||
| Damage | Startup | Active Frames | Total Frames | Safety | |
|---|---|---|---|---|---|
| 00% | 0 | 0-0 | 0 | -0 | |
| |||||
| Damage | Startup | Active Frames | Total Frames | Safety | |
|---|---|---|---|---|---|
| 00% | 0 | 0-0 | 0 | -0 | |
| |||||
Super
| Damage | Startup | Active Frames | Total Frames | Safety | |
|---|---|---|---|---|---|
| 00% | 0 | 0-0 | 0 | -0 | |
| |||||
Taunts
| Damage | Startup | Active Frames | Total Frames | Safety | |
|---|---|---|---|---|---|
| 00% | 0 | 0-0 | 0 | -0 | |
| |||||
| Damage | Startup | Active Frames | Total Frames | Safety | |
|---|---|---|---|---|---|
| 00% | 0 | 0-0 | 0 | -0 | |
| |||||
| Damage | Startup | Active Frames | Total Frames | Safety | |
|---|---|---|---|---|---|
| 00% | 0 | 0-0 | 0 | -0 | |
| |||||
Strategy
- PLACEHOLDER
- PLACEHOLDER
- PLACEHOLDER
Techniques
- PLACEHOLDER
- PLACEHOLDER
- PLACEHOLDER
Combos
- PLACEHOLDER
- PLACEHOLDER
- PLACEHOLDER
Matchups
| +2 | |
| +1 | |
| 0 | |
| 1 | |
| 2 |
Other Resources
- PLACEHOLDER
- PLACEHOLDER
- PLACEHOLDER
Videos
PLACEHOLDER
Costumes


