JtheSaltyy (talk | contribs) |
JtheSaltyy (talk | contribs) |
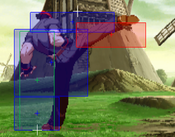
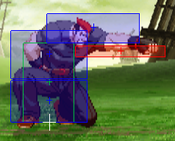
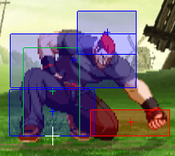
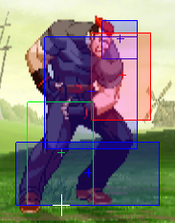
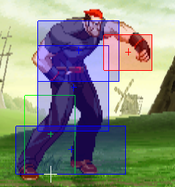
||
| Line 101: | Line 101: | ||
| input = 5LP / Far LP | | input = 5LP / Far LP | ||
| subtitle = Far Light Punch | | subtitle = Far Light Punch | ||
| image = | | image = CVS2_Yamazaki_5LP.png | ||
| caption = | | caption = | ||
| linkname = 5LP | | linkname = 5LP | ||
| Line 108: | Line 108: | ||
| version = Far {{Icon-Capcom|LP}} | | version = Far {{Icon-Capcom|LP}} | ||
| subtitle = | | subtitle = | ||
| damage = | | damage = 300 | ||
| stun = | | stun = 3 | ||
| cancel = | | cancel = SP/SU/RF | ||
| guard = | | guard = Mid | ||
| parry = | | parry = High | ||
| startup = | | startup = 3 | ||
| active = | | active = 4 | ||
| recovery = | | recovery = 7 | ||
| total = | | total = 14 | ||
| advHit = | | advHit = +6 | ||
| advBlock = | | advBlock = +6 | ||
| invul = - | | invul = - | ||
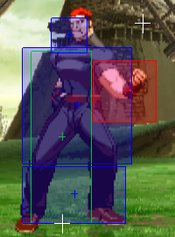
| description = | | description = A basic jab. Nothing much else to it. Has a lot of plus frames and a quick startup for emergency anti-airs. | ||
}} | }} | ||
}} | }} | ||
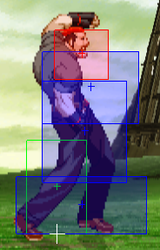
| Line 129: | Line 129: | ||
| input = 5MP / Far MP | | input = 5MP / Far MP | ||
| subtitle = Far Medium Punch | | subtitle = Far Medium Punch | ||
| image = | | image = CVS2_Yamazaki_5MP.png | ||
| caption = | | caption = | ||
| linkname = 5MP | | linkname = 5MP | ||
| Line 136: | Line 136: | ||
| version = Far {{Icon-Capcom|MP}} | | version = Far {{Icon-Capcom|MP}} | ||
| subtitle = | | subtitle = | ||
| damage = | | damage = 1000 | ||
| stun = | | stun = 10 | ||
| cancel = | | cancel = SU | ||
| guard = | | guard = Mid | ||
| parry = | | parry = High | ||
| startup = | | startup = 6 | ||
| active = | | active = 7 | ||
| recovery = | | recovery = 17 | ||
| total = | | total = 30 | ||
| advHit = - | | advHit = -2 | ||
| advBlock = - | | advBlock = -2 | ||
| invul = - | | invul = - | ||
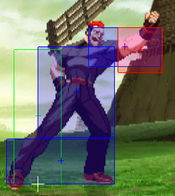
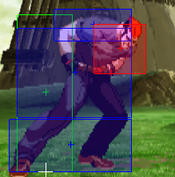
| description = | | description = One of Yamazaki's anti-airs. If Serpent Slash is too slow and the jump is farther out this button will work nicely. Doesn't have much other use besides that. | ||
}} | }} | ||
}} | }} | ||
| Line 157: | Line 157: | ||
| input = 5HP / Far HP | | input = 5HP / Far HP | ||
| subtitle = Far Heavy Punch | | subtitle = Far Heavy Punch | ||
| image = | | image = CVS2_Yamazaki_5HP.png | ||
| caption = | | caption = | ||
| linkname = 5HP | | linkname = 5HP | ||
| Line 164: | Line 164: | ||
| version = Far {{Icon-Capcom|HP}} | | version = Far {{Icon-Capcom|HP}} | ||
| subtitle = | | subtitle = | ||
| damage = | | damage = 1100 | ||
| stun = | | stun = 11 | ||
| cancel = | | cancel = SP/SU | ||
| guard = | | guard = Mid | ||
| parry = | | parry = Mid | ||
| startup = | | startup = 7 | ||
| active = | | active = 4 | ||
| recovery = | | recovery = 19 | ||
| total = - | | total = - | ||
| advHit = +1 | | advHit = +1 | ||
| advBlock = +1 | | advBlock = +1 | ||
| invul = - | | invul = - | ||
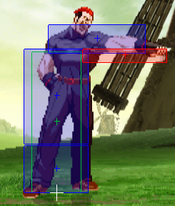
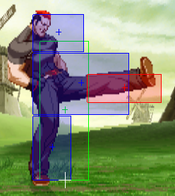
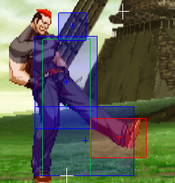
| description = | | description = One of only two cancellable 5HPs in the game. Has very good reach. 5HP xx Serpent Slash is safe and works on guard bar very well. The move is very safe on block if not canceled as well, being +1. | ||
}} | }} | ||
}} | }} | ||
| Line 185: | Line 185: | ||
| input = 5LK / Far LK | | input = 5LK / Far LK | ||
| subtitle = Far Light Kick | | subtitle = Far Light Kick | ||
| image = | | image = CVS2_Yamazaki_5LK.png | ||
| caption = | | caption = | ||
| linkname = 5LK | | linkname = 5LK | ||
| Line 192: | Line 192: | ||
| version = Far {{Icon-Capcom|LK}} | | version = Far {{Icon-Capcom|LK}} | ||
| subtitle = | | subtitle = | ||
| damage = | | damage = 500 | ||
| stun = | | stun = 5 | ||
| cancel = | | cancel = SU | ||
| guard = | | guard = Mid | ||
| parry = | | parry = High | ||
| startup = | | startup = 7 | ||
| active = | | active = 4 | ||
| recovery = | | recovery = 8 | ||
| total = | | total = 19 | ||
| advHit = | | advHit = +3 | ||
| advBlock = | | advBlock = +3 | ||
| invul = - | | invul = - | ||
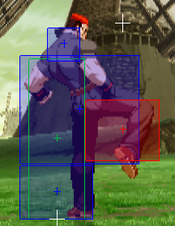
| description = | | description = A decent counter poke and pressure tool. Has a large start-up, but is still somewhat quick nonetheless. | ||
}} | }} | ||
}} | }} | ||
| Line 213: | Line 213: | ||
| input = 5MK / Far MK | | input = 5MK / Far MK | ||
| subtitle = Far Medium Kick | | subtitle = Far Medium Kick | ||
| image = | | image = CVS2_Yamazaki_5MK.png | ||
| caption = | | caption = | ||
| linkname = 5MK | | linkname = 5MK | ||
| Line 220: | Line 220: | ||
| version = Far {{Icon-Capcom|MK}} | | version = Far {{Icon-Capcom|MK}} | ||
| subtitle = | | subtitle = | ||
| damage = | | damage = 1000 | ||
| stun = | | stun = 10 | ||
| cancel = | | cancel = None | ||
| guard = | | guard = Mid | ||
| parry = | | parry = Mid | ||
| startup = | | startup = 8 | ||
| active = | | active = 9 | ||
| recovery = | | recovery = 13 | ||
| total = | | total = 30 | ||
| advHit = | | advHit = 0 | ||
| advBlock = | | advBlock = 0 | ||
| invul = - | | invul = - | ||
| description = | | description = Not really useful. Has no cancels and is not rewarding on hit at all. | ||
}} | }} | ||
}} | }} | ||
| Line 241: | Line 241: | ||
| input = 5HK / Far HK | | input = 5HK / Far HK | ||
| subtitle = Far Heavy Kick | | subtitle = Far Heavy Kick | ||
| image = | | image = CVS2_Yamazaki_5HK.png | ||
| caption = | | caption = | ||
| linkname = 5HK | | linkname = 5HK | ||
| Line 248: | Line 248: | ||
| version = Far {{Icon-Capcom|HK}} | | version = Far {{Icon-Capcom|HK}} | ||
| subtitle = | | subtitle = | ||
| damage = | | damage = 1300 | ||
| stun = | | stun = 13 | ||
| cancel = | | cancel = None | ||
| guard = | | guard = Mid | ||
| parry = | | parry = High | ||
| startup = | | startup = 9 | ||
| active = | | active = 7 | ||
| recovery = | | recovery = 17 | ||
| total = | | total = 33 | ||
| advHit = | | advHit = +2 | ||
| advBlock = | | advBlock = +2 | ||
| invul = - | | invul = - | ||
| description = One of the best universal pokes in the game. This button is very dominant is most matches and plus on block/hit. Most matches this will be abused while mixing in Serpent slashes from a distance. | | description = One of the best universal pokes in the game. This button is very dominant is most matches and plus on block/hit. Most matches this will be abused while mixing in Serpent slashes from a distance. | ||
| Line 270: | Line 270: | ||
| input = cl.LP | | input = cl.LP | ||
| subtitle = Close Light Punch | | subtitle = Close Light Punch | ||
| image = | | image = CVS2_Yamazaki_clLP.png | ||
| caption = | | caption = | ||
| linkname = cl.LP | | linkname = cl.LP | ||
| Line 277: | Line 277: | ||
| version = Close {{Icon-Capcom|LP}} | | version = Close {{Icon-Capcom|LP}} | ||
| subtitle = | | subtitle = | ||
| damage = | | damage = 400 | ||
| stun = | | stun = 4 | ||
| cancel = | | cancel = SP/SU/RF | ||
| guard = | | guard = Mid | ||
| parry = | | parry = High | ||
| startup = | | startup = 2 | ||
| active = | | active = 4 | ||
| recovery = | | recovery = 8 | ||
| total = | | total = 14 | ||
| advHit = | | advHit = +7 | ||
| advBlock = | | advBlock = +7 | ||
| invul = - | | invul = - | ||
| description = | | description = Good anti-pressure tool since it has a 2F startup. Besides that it can't do much else. | ||
}} | }} | ||
}} | }} | ||
| Line 298: | Line 298: | ||
| input = cl.MP | | input = cl.MP | ||
| subtitle = | | subtitle = | ||
| image = | | image = CVS2_Yamazaki_clMP.png | ||
| caption = | | caption = | ||
| linkname = cl.MP | | linkname = cl.MP | ||
| Line 305: | Line 305: | ||
| version = Close {{Icon-Capcom|MP}} | | version = Close {{Icon-Capcom|MP}} | ||
| subtitle = | | subtitle = | ||
| damage = | | damage = 900 | ||
| stun = | | stun = 9 | ||
| cancel = | | cancel = SP/SU | ||
| guard = | | guard = Mid | ||
| parry = | | parry = High | ||
| startup = | | startup = 5 | ||
| active = | | active = 3 | ||
| recovery = | | recovery = 23 | ||
| total = | | total = 31 | ||
| advHit = - | | advHit = -6 | ||
| advBlock = - | | advBlock = -6 | ||
| invul = - | | invul = - | ||
| description = | | description = Not a good button to throw out. It is -6 and though it has a cancel, it's not particularly rewarding compared to confirming from 2LP. | ||
}} | }} | ||
}} | }} | ||
| Line 326: | Line 326: | ||
| input = cl.HP | | input = cl.HP | ||
| subtitle = Close Heavy Punch | | subtitle = Close Heavy Punch | ||
| image = | | image = CVS2_Yamazaki_clHP.png | ||
| caption = | | caption = | ||
| linkname = cl.HP | | linkname = cl.HP | ||
| Line 333: | Line 333: | ||
| version = Close {{Icon-Capcom|HP}} | | version = Close {{Icon-Capcom|HP}} | ||
| subtitle = | | subtitle = | ||
| damage = | | damage = 1300 | ||
| stun = | | stun = 13 | ||
| cancel = | | cancel = SP/SU | ||
| guard = | | guard = Mid | ||
| parry = | | parry = High | ||
| startup = | | startup = 7 | ||
| active = | | active = 10 | ||
| recovery = | | recovery = 20 | ||
| total = | | total = 37 | ||
| advHit = - | | advHit = -4 | ||
| advBlock = - | | advBlock = 4- | ||
| invul = - | | invul = - | ||
| description = | | description = A big. damaging headbutt. Great to use in stun combos as it is the most damaging confirm into Serpent Slash. | ||
}} | }} | ||
}} | }} | ||
| Line 354: | Line 354: | ||
| input = cl.LK | | input = cl.LK | ||
| subtitle = Close Light Kick | | subtitle = Close Light Kick | ||
| image = | | image = CVS2_Yamazaki_clLK.png | ||
| caption = | | caption = | ||
| linkname = cl.LK | | linkname = cl.LK | ||
| Line 361: | Line 361: | ||
| version = Close {{Icon-Capcom|LK}} | | version = Close {{Icon-Capcom|LK}} | ||
| subtitle = | | subtitle = | ||
| damage = | | damage = 500 | ||
| stun = | | stun = 5 | ||
| cancel = | | cancel = SP/SU | ||
| guard = | | guard = Mid | ||
| parry = | | parry = Low | ||
| startup = | | startup = 4 | ||
| active = | | active = 4 | ||
| recovery = | | recovery = 6 | ||
| total = | | total = 14 | ||
| advHit = | | advHit = +5 | ||
| advBlock = | | advBlock = +5 | ||
| invul = - | | invul = - | ||
| description = | | description = Good up-close pressure tool, but nothing much else. | ||
}} | }} | ||
}} | }} | ||
| Line 410: | Line 382: | ||
| input = cl.HK | | input = cl.HK | ||
| subtitle = Close Heavy Kick | | subtitle = Close Heavy Kick | ||
| image = | | image = CVS2_Yamazaki_clHK1.png | ||
| caption = | | caption = 1st Hit | ||
| image2 = CVS2_Yamazaki_clHK2.png | |||
| caption2 = 2nd Hit | |||
| linkname = cl.MK | | linkname = cl.MK | ||
| data = | | data = | ||
| Line 417: | Line 391: | ||
| version = Close {{Icon-Capcom|HK}} | | version = Close {{Icon-Capcom|HK}} | ||
| subtitle = | | subtitle = | ||
| damage = | | damage = 600+800 | ||
| stun = | | stun = 6+8 | ||
| cancel = | | cancel = SU (1st Hit) | ||
| guard = | | guard = Mid | ||
| parry = | | parry = High | ||
| startup = | | startup = 5 | ||
| active = | | active = 3+8 | ||
| recovery = | | recovery = 16 | ||
| total = | | total = 32 | ||
| advHit = | | advHit = +2 | ||
| advBlock = | | advBlock = +2 | ||
| invul = - | | invul = - | ||
| description = | | description = Good to use as a closer range anti-air, has very high priority. | ||
}} | }} | ||
}} | }} | ||
| Line 439: | Line 413: | ||
| input = 2LP / cr.LP | | input = 2LP / cr.LP | ||
| subtitle = Crouching Light Punch | | subtitle = Crouching Light Punch | ||
| image = | | image = CVS2_Yamazaki_2LP.png | ||
| caption = | | caption = | ||
| linkname = 2LP | | linkname = 2LP | ||
| Line 446: | Line 420: | ||
| version = {{Motion|d}}+{{Icon-Capcom|LP}} | | version = {{Motion|d}}+{{Icon-Capcom|LP}} | ||
| subtitle = | | subtitle = | ||
| damage = | | damage = 300 | ||
| stun = | | stun = 3 | ||
| cancel = | | cancel = SP/SU/RF | ||
| guard = | | guard = Mid | ||
| parry = | | parry = Low | ||
| startup = | | startup = 3 | ||
| active = | | active = 4 | ||
| recovery = | | recovery = 7 | ||
| total = | | total = 14 | ||
| advHit = | | advHit = +4 | ||
| advBlock = | | advBlock = +4 | ||
| invul = - | | invul = - | ||
| description = | | description = A basic 2LP, has quick speed and is Yamazaki's go-to combo starter. | ||
}} | }} | ||
}} | }} | ||
| Line 467: | Line 441: | ||
| input = 2MP / cr.MP | | input = 2MP / cr.MP | ||
| subtitle = Crouching Medium Punch | | subtitle = Crouching Medium Punch | ||
| image = | | image = CVS2_Yamazaki_2MP.png | ||
| caption = | | caption = | ||
| linkname = 2MP | | linkname = 2MP | ||
| Line 474: | Line 448: | ||
| version = {{Motion|d}}+{{Icon-Capcom|MP}} | | version = {{Motion|d}}+{{Icon-Capcom|MP}} | ||
| subtitle = | | subtitle = | ||
| damage = | | damage = 1000 | ||
| stun = | | stun = 10 | ||
| cancel = | | cancel = None | ||
| guard = | | guard = Low | ||
| parry = | | parry = Low | ||
| startup = | | startup = 8 | ||
| active = | | active = 4 | ||
| recovery = | | recovery = 19 | ||
| total = | | total = 31 | ||
| advHit = - | | advHit = -3 | ||
| advBlock = - | | advBlock = -3 | ||
| invul = - | | invul = - | ||
| description = | | description = Useless button. Has no cancels and has very slow start-up for a measly 1000 damage. | ||
}} | }} | ||
}} | }} | ||
| Line 495: | Line 469: | ||
| input = 2HP / cr.HP | | input = 2HP / cr.HP | ||
| subtitle = Crouching Heavy Punch | | subtitle = Crouching Heavy Punch | ||
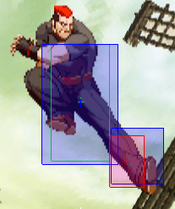
| image = | | image = CVS2_Yamazaki_2HP1.png | ||
| caption = | | caption = 1st Hitbox | ||
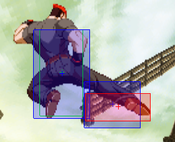
| image2 = CVS2_Yamazaki_2HP2.png | |||
| caption2 = 2nd Hitbox | |||
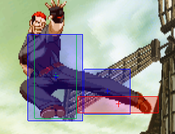
| image3 = CVS2_Yamazaki_2HP3.png | |||
| caption3 = 3rd Hitbox | |||
| linkname = 2HP | | linkname = 2HP | ||
| data = | | data = | ||
| Line 502: | Line 480: | ||
| version = {{Motion|d}}+{{Icon-Capcom|HP}} | | version = {{Motion|d}}+{{Icon-Capcom|HP}} | ||
| subtitle = | | subtitle = | ||
| damage = | | damage = 1200,900,700 | ||
| stun = | | stun = 12,9,7 | ||
| cancel = | | cancel = SP/SU (1st Hit), SU (2nd Hit) | ||
| guard = | | guard = Mid | ||
| parry = | | parry = High | ||
| startup = | | startup = 4 | ||
| active = | | active = 6 | ||
| recovery = | | recovery = 28 | ||
| total = | | total = 38 | ||
| advHit = - | | advHit = -12 | ||
| advBlock = - | | advBlock = -12 | ||
| invul = - | | invul = - | ||
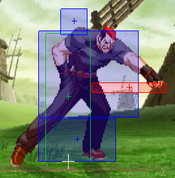
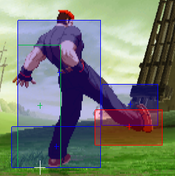
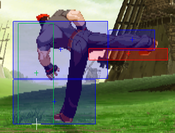
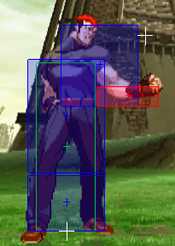
| description = A very solid anti air that cover the space around his head, very difficult to get around this move. Most matches it will have no issues doing it job, while other matches (like | | description = A very solid anti air that cover the space around his head, very difficult to get around this move. Most matches it will have no issues doing it job, while other matches (like Claw) can see it lose or trade at times. In those cases mix up with counter or RC Sand Spray xx Serpent Slash. | ||
}} | }} | ||
}} | }} | ||
| Line 523: | Line 501: | ||
| input = 2LK / cr.LK | | input = 2LK / cr.LK | ||
| subtitle = Crouching Light Kick | | subtitle = Crouching Light Kick | ||
| image = | | image = CVS2_Yamazaki_2LK.png | ||
| caption = | | caption = | ||
| linkname = 2LK | | linkname = 2LK | ||
| Line 530: | Line 508: | ||
| version = {{Motion|d}}+{{Icon-Capcom|LK}} | | version = {{Motion|d}}+{{Icon-Capcom|LK}} | ||
| subtitle = | | subtitle = | ||
| damage = | | damage = 400 | ||
| stun = | | stun = 4 | ||
| cancel = | | cancel = SP/SU | ||
| guard = | | guard = Low | ||
| parry = | | parry = Low | ||
| startup = | | startup = 3 | ||
| active = | | active = 4 | ||
| recovery = | | recovery = 7 | ||
| total = | | total = 14 | ||
| advHit = | | advHit = +4 | ||
| advBlock = | | advBlock = +4 | ||
| invul = - | | invul = - | ||
| description = | | description = Mostly used as either Yamazaki's cancel into Sand Spray or his custom combo starter. Besides that, 2LP is the better option when the space is closed in most times. | ||
}} | }} | ||
}} | }} | ||
| Line 551: | Line 529: | ||
| input = 2MK / cr.MK | | input = 2MK / cr.MK | ||
| subtitle = Crouching Medium Kick | | subtitle = Crouching Medium Kick | ||
| image = | | image = CVS2_Yamazaki_2MK.png | ||
| caption = | | caption = | ||
| linkname = 2MK | | linkname = 2MK | ||
| Line 558: | Line 536: | ||
| version = {{Motion|d}}+{{Icon-Capcom|MK}} | | version = {{Motion|d}}+{{Icon-Capcom|MK}} | ||
| subtitle = | | subtitle = | ||
| damage = | | damage = 800 | ||
| stun = | | stun = 8 | ||
| cancel = | | cancel = SP/SU | ||
| guard = | | guard = Low | ||
| parry = | | parry = Low | ||
| startup = | | startup = 4 | ||
| active = | | active = 6 | ||
| recovery = | | recovery = 11 | ||
| total = | | total = 21 | ||
| advHit = | | advHit = +3 | ||
| advBlock = | | advBlock = +3 | ||
| invul = - | | invul = - | ||
| description = | | description = A decent meterbuild tool and counter poke. Not the best reward from farther out but can confirm into the usual Sand Spray > Serpent Slash combo if close enough. | ||
}} | }} | ||
}} | }} | ||
| Line 579: | Line 557: | ||
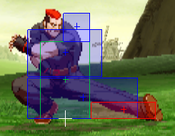
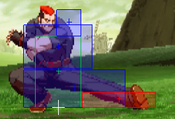
| input = 2HK / cr.HK | | input = 2HK / cr.HK | ||
| subtitle = Crouching Heavy Kick | | subtitle = Crouching Heavy Kick | ||
| image = | | image = CVS2_Yamazaki_2HK.png | ||
| caption = | | caption = | ||
| linkname = 2HK | | linkname = 2HK | ||
| Line 586: | Line 564: | ||
| version = {{Motion|d}}+{{Icon-Capcom|HK}} | | version = {{Motion|d}}+{{Icon-Capcom|HK}} | ||
| subtitle = | | subtitle = | ||
| damage = | | damage = 1300 | ||
| stun = | | stun = 13 | ||
| cancel = | | cancel = None | ||
| guard = | | guard = Low | ||
| parry = | | parry = Low | ||
| startup = | | startup = 7 | ||
| active = | | active = 6 | ||
| recovery = | | recovery = 23 | ||
| total = | | total = 36 | ||
| advHit = | | advHit = KND | ||
| advBlock = | | advBlock = -5 | ||
| invul = | | invul = - | ||
| description = | | description = A very long ranged sweep. Decent damage and is safe when spaced. One of Yamazaki's better pokes, but spacing is needed to avoid some punishes. | ||
}} | }} | ||
}} | }} | ||
| Line 608: | Line 586: | ||
| input = j.LP | | input = j.LP | ||
| subtitle = Jumping Light Punch | | subtitle = Jumping Light Punch | ||
| image = | | image = CVS2_Yamazaki_jLP.png | ||
| caption = | | caption = | ||
| linkname = j.LP | | linkname = j.LP | ||
| Line 615: | Line 593: | ||
| version = {{Motion|ub}}/{{Motion|u}}/{{Motion|uf}}+{{Icon-Capcom|LP}} | | version = {{Motion|ub}}/{{Motion|u}}/{{Motion|uf}}+{{Icon-Capcom|LP}} | ||
| subtitle = | | subtitle = | ||
| damage = | | damage = 600 | ||
| stun = | | stun = 6 | ||
| cancel = - | | cancel = - | ||
| guard = | | guard = High | ||
| parry = | | parry = High | ||
| startup = | | startup = 6 | ||
| active = | | active = 23 | ||
| recovery = - | | recovery = - | ||
| total = | | total = 29 | ||
| advHit = - | | advHit = - | ||
| advBlock = - | | advBlock = - | ||
| invul = - | | invul = - | ||
| description = | | description = Good for a meaty jump-in and air-to-air, but a relatively weak normal on it's own. | ||
}} | }} | ||
}} | }} | ||
| Line 636: | Line 614: | ||
| input = j.MP | | input = j.MP | ||
| subtitle = Jumping Medium Punch | | subtitle = Jumping Medium Punch | ||
| image = | | image = CVS2_Yamazaki_jMP.png | ||
| caption = | | caption = | ||
| linkname = j.MP | | linkname = j.MP | ||
| Line 643: | Line 621: | ||
| version = {{Motion|ub}}/{{Motion|u}}/{{Motion|uf}}+{{Icon-Capcom|MP}} | | version = {{Motion|ub}}/{{Motion|u}}/{{Motion|uf}}+{{Icon-Capcom|MP}} | ||
| subtitle = | | subtitle = | ||
| damage = | | damage = 900 | ||
| stun = | | stun = 9 | ||
| cancel = - | | cancel = - | ||
| guard = | | guard = High | ||
| parry = | | parry = High | ||
| startup = | | startup = 4 | ||
| active = | | active = 12 | ||
| recovery = - | | recovery = - | ||
| total = | | total = 16 | ||
| advHit = - | | advHit = - | ||
| advBlock = - | | advBlock = - | ||
| invul = - | | invul = - | ||
| description = | | description = Same as j.LP, but has less startup frames, more active frames and more damage. Generally used more than j.LP. | ||
}} | }} | ||
}} | }} | ||
| Line 664: | Line 642: | ||
| input = j.HP | | input = j.HP | ||
| subtitle = Jumping Heavy Punch | | subtitle = Jumping Heavy Punch | ||
| image = | | image = CVS2_Yamazaki_jHP.png | ||
| caption = | | caption = | ||
| linkname = j.HP | | linkname = j.HP | ||
| Line 671: | Line 649: | ||
| version = {{Motion|ub}}/{{Motion|u}}/{{Motion|uf}}+{{Icon-Capcom|HP}} | | version = {{Motion|ub}}/{{Motion|u}}/{{Motion|uf}}+{{Icon-Capcom|HP}} | ||
| subtitle = | | subtitle = | ||
| damage = | | damage = 1300 | ||
| stun = | | stun = 13 | ||
| cancel = - | | cancel = - | ||
| guard = | | guard = High | ||
| parry = | | parry = High | ||
| startup = | | startup = 4 | ||
| active = | | active = 7 | ||
| recovery = - | | recovery = - | ||
| total = | | total = 11 | ||
| advHit = - | | advHit = - | ||
| advBlock = - | | advBlock = - | ||
| invul = - | | invul = - | ||
| description = | | description = A decent air to air, but mostly used as Yamazaki's preferred juggle move during his custom combos. | ||
}} | }} | ||
}} | }} | ||
| Line 692: | Line 670: | ||
| input = j.LK | | input = j.LK | ||
| subtitle = Jumping Light Kick | | subtitle = Jumping Light Kick | ||
| image = | | image = CVS2_Yamazaki_jLK.png | ||
| caption = | | caption = Neutral Jump | ||
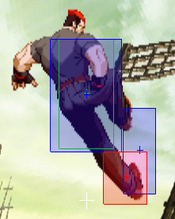
| image2 = CVS2_Yamazaki_djLK.png | |||
| caption2 = Diagonal Jump | |||
| linkname = j.LK | | linkname = j.LK | ||
| data = | | data = | ||
{{AttackData-CvS2 | {{AttackData-CvS2 | ||
| version = | | version = {{Motion|u}}+{{Icon-Capcom|LK}} | ||
| subtitle = | | subtitle = | ||
| damage = | | damage = 600 | ||
| stun = | | stun = 6 | ||
| cancel = - | | cancel = - | ||
| guard = | | guard = High | ||
| parry = | | parry = High | ||
| startup = | | startup = 5 | ||
| active = | | active = 22 | ||
| recovery = - | | recovery = - | ||
| total = | | total = 27 | ||
| advHit = - | | advHit = - | ||
| advBlock = - | | advBlock = - | ||
| invul = - | | invul = - | ||
| description = Placeholder | | description = Placeholder | ||
}} | |||
{{AttackData-CvS2 | |||
| version = {{Motion|ub}}/{{Motion|uf}}+{{Icon-Capcom|LK}} | |||
| subtitle = | |||
| damage = 500 | |||
| stun = 5 | |||
| cancel = - | |||
| guard = High | |||
| parry = High | |||
| startup = 6 | |||
| active = 22 | |||
| recovery = - | |||
| total = 28 | |||
| advHit = - | |||
| advBlock = - | |||
| invul = - | |||
| description = Diagonal j.LK is a good air-to-air with high active frames, but has low priority. Neutral j.LK works as an instant overhead, but j.HK does that job a lot better. | |||
}} | }} | ||
}} | }} | ||
| Line 720: | Line 717: | ||
| input = j.MK | | input = j.MK | ||
| subtitle = Jumping Medium Kick | | subtitle = Jumping Medium Kick | ||
| image = | | image = CVS2_Yamazaki_jMK.png | ||
| caption = | | caption = | ||
| linkname = j.MK | | linkname = j.MK | ||
| Line 727: | Line 724: | ||
| version = {{Motion|ub}}/{{Motion|u}}/{{Motion|uf}}+{{Icon-Capcom|MK}} | | version = {{Motion|ub}}/{{Motion|u}}/{{Motion|uf}}+{{Icon-Capcom|MK}} | ||
| subtitle = | | subtitle = | ||
| damage = | | damage = 800 | ||
| stun = | | stun = 8 | ||
| cancel = - | | cancel = - | ||
| guard = | | guard = High | ||
| parry = | | parry = High | ||
| startup = | | startup = 5 | ||
| active = | | active = 12 | ||
| recovery = - | | recovery = - | ||
| total = | | total = 17 | ||
| advHit = - | | advHit = - | ||
| advBlock = - | | advBlock = - | ||
| invul = - | | invul = - | ||
| description = | | description = An infamous button. It has a ton of range and a ton of priority. Also has a lot of disjoint, making it one of the best air-to-airs in the game. Besides that, it's an okay jump-in, but this is definitely the button to use in air-to-air situations. | ||
}} | }} | ||
}} | }} | ||
| Line 748: | Line 745: | ||
| input = j.HK | | input = j.HK | ||
| subtitle = Jumping Heavy Kick | | subtitle = Jumping Heavy Kick | ||
| image = | | image = CVS2_Yamazaki_jHK.png | ||
| caption = | | caption = | ||
| linkname = j.HK | | linkname = j.HK | ||
| Line 755: | Line 752: | ||
| version = {{Motion|ub}}/{{Motion|u}}/{{Motion|uf}}+{{Icon-Capcom|HK}} | | version = {{Motion|ub}}/{{Motion|u}}/{{Motion|uf}}+{{Icon-Capcom|HK}} | ||
| subtitle = | | subtitle = | ||
| damage = | | damage = 1200 | ||
| stun = | | stun = 12 | ||
| cancel = - | | cancel = - | ||
| guard = | | guard = High | ||
| parry = | | parry = High | ||
| startup = | | startup = 7 | ||
| active = | | active = 6 | ||
| recovery = - | | recovery = - | ||
| total = | | total = 13 | ||
| advHit = - | | advHit = - | ||
| advBlock = - | | advBlock = - | ||
| invul = - | | invul = - | ||
| description = | | description = Has no horizontal range, but works as a very good instant overhead, especially on fatter characters. Besides being an instant overhead, it's weak in most other areas. <br> Against Sagat, Raiden, Geese, Chang and Zangief, you can do an instant overhead CC, which is basically unblockable since almost every CC starts with a 3f low. | ||
}} | }} | ||
}} | }} | ||
Revision as of 16:55, 20 February 2023
Introduction
Story
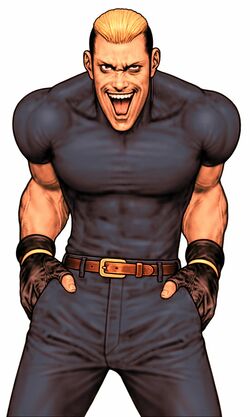
Ryuji Yamazaki is a Japanese yakuza who also happens to be one of the Heavenly Kings of Orochi on the side. Yamazaki was orphaned at a young age, and had to wander the streets of his hometown. He was miserable, until one day, he saw a Yakuza boss named Sorimanchi. Yamazaki decided to dedicate the rest of his life to becoming like Sorimanchi, and quickly began participating in the Japanese criminal underworld. He rose the ranks quickly, and soon he became one of Sorimanchi's personal bodyguards. This was the happiest time in his life, as he felt Sorimanchi was a surrogate father figure for him.
However, on a business trip to Osaka, Yamazaki started to get a funny feeling. They were ambushed by a rival gang, and Sorimanchi was kidnapped. They would go on to brutally torture and kill the man Yamazaki saw as his idol. This snapped Yamazaki's fragile mind in two, causing him to become obsessed with violence. He immediately took revenge on Sorimanchi, murdering the boss who ordered his death, and fled to Hong Kong. From there, Yamazaki doesn't remember much. When the KOF series starts picking up, Geese sends Billy Kane to force Yamazaki into joining. Billy took a few goons with him for protection. Yamazaki refused to join, and a fight broke out. After Yamazaki brutally maimed one of the guards, the Orochi blood in him began pulsing, and he decided to join. At the end of the tournament, it is revealed that Yamazaki is actually one of the Hakkeshu, or Heavenly Kings of Orochi. However, Yamazaki's own tormented psyche keeps the power of Orochi at bay, and Yamazaki doesn't really want much to do with the Orochi clan in general.
Gameplay
Yamazaki is a neutral-oriented zoner style character. He has plenty of great tools to control neutral with, from his simple normals like 5HK to his 214P Serpent Slashes, which can be angled depending on strength to cover different parts of the screen. He has plenty of ways to poke, anti-air, and punish from far away. His aggressive potential is also quite high, with high damage combos using his 214K Spray Sand, which cancels into Serpent Slashes, or his 236236P Drill combo ending super. Yamazaki also builds a lot of meter because of the aforementioned Spray Sand cancels, and whiffing Spray Sand in general builds notable meter, making Yamazaki an amazing point on C/A-Groove teams. His mixup is surprisingly potent as well, with an overhead command normal and special, and a command grab.
Yamazaki lacks much in the way of knockdowns, and can also struggle hard on defense. He lacks any reversal for escaping pressure, and even with Roll Cancels, none of his specials exactly excel at this. Yamazaki has to keep opponents out and away to win, but he is much more than capable of doing that consistently, and punishing you with big damage as well.
Groove Selection
Best - A/C: A-Yamazaki is a beast of a point character. His meterbuild is stellar, you basically guarantee that your mid character with have a CC ready on entry. Yamazaki's own CC is fairly good as well, though somewhat difficult. He can play around saving the meter, keeping himself safe, and activating when he knows he has the punish for big damage, then building meter for another CC. C-Yamazaki is fairly similar, although he gets a few new tools. The cheaper Alpha Counters gives him a way to escape out of pressure, and again, his meterbuild makes it even more worth considering. He also gets more consistent damage using level 2 Guillotine and cancelling it into Spray Sand xx Serpent Slash or a level 1 Guillotine. Yamazaki has very good RCs.
Useful - S/N/P: S-Yamazaki is a great point character again. He doesn't have much reliance on meter, but thanks to his oppressive zoning, charging is actually fairly safe with him. When in Desperation he can end every combo in a level 1 Guillotine for a knockdown and a mixup, and that mixup can involve his super command grab Drill. N-Yamazaki is, again, a great point character for his meterbuilding potential. He gets to use guard cancels more often, and has guard cancel roll as well. Run and hop give him more mixup options and make his aggression scarier in general. Activating Max Mode gives him a small damage buff as well, which can be helpful. P-Yamazaki gets to parry into low damage but amazing meter gain, and that can be important for a P-Groove team where your mid can come in with a full bar. Even Yamazaki himself can parry into a level 3 Guillotine for solid damage once or twice a round.
Worst - K: K-Yamazaki has a lot less going for him. His amazing meterbuild is gone entirely, and while JD isn't useless, he doesn't get the greatest punishes from it. Yamazaki also prefers to be the one pressing buttons, not trying to interrupt the opponents buttons. When Raged, he does have higher damage, and his mixup is scarier overall. However, it just isn't worth it for such a defensive battery character.
|
Yamazaki is a neutral powerhouse, focusing on mindgames around his pokes and Serpent Slashes to keep the opponent at bay. When he gets in, he has decent mixup ability, and his meterbuild is some of the best in the game, making him amazing on point. Just be ready to struggle on defense. Yamazaki is best in A-Groove and C-Groove. |
|
| Pros | Cons |
|
|
Players to Watch
| Name | Country | Groove | Accounts | Notes |
|---|---|---|---|---|
| MoMo | Japan | C-Groove | Twitter: @MoMo_oMoM | A great C-Groover who perfected C-Yama's neutral game and meter usage. Sample Match |
| D44 BAS | Japan | A-Groove | Twitter: @ryo151 Youtube: D44Bas Discord: Bas#4095 |
Widely considered the best CvS2 player in the world as of now. Single handedly inspired tons of Yamazaki players to pick him up from his dominant play style. Sample Match |
| GunterJPN | Japan | A-Groove | Twitter: @GunterJPN Youtube: GunterJPN |
Before BAS popularized Yamazaki, Gunter was doing the same thing decades ago. You can find a lot of similarities in their play. Sample Match |
| P-Rugal | Japan | P-Groove | Twitter: @oyasuminecalli | The textbook example of using P-Yamazaki on point and efficiently building meter. Has an insane parry game. Sample Match |
| Tom23 | Japan | K-Groove | N/A | Very old school player. Made K-Yama look like a rushdown beast instead of a space controlling defensive wall. Sample Match |
!!!THIS PAGE IS STILL A WIP. IF YOU NEED FRAME DATA NOW, REFER TO THE CVS2 BIBLE OR LOOK THROUGH EDIT HISTORY TO FIND THE LAST EDIT CONTAINING FRAME DATA IF THERE WAS ONE!!!
Normal Moves
Far Normals
5LP
5MP
5HP
5LK
5MK
5HK
Close Standing Normals
clLP
clMP
clHP
clLK
clHK
Crouching Normals
2LP
2MP
2HP
2LK
2MK
2HK
Jumping Normals
j.LP
j.MP
j.HP
j.LK
j.MK
j.HK
Command Normals
X
| Version | Damage | Stun | Cancel | Guard | Parry | Startup | Active | Recovery | Total | Adv Hit | Adv Block | Invul |
|---|---|---|---|---|---|---|---|---|---|---|---|---|
| - | - | - | - | - | - | - | - | - | - | - | - | - |
Placeholder | ||||||||||||
Throws
X
X
Universal Combos
Bread and Butter
- c.lp, c.lp, c.lk xx HK Sand Spray xx MP Serpent Slash
One of the best BnBs in the game. Does great damage while pushing the opponent away so you can continue to zone. Very good meter build and safe on block. Use MP Serpent Slash on hit and HP Serpent Slash on block.
Metered Combo
Bold text
