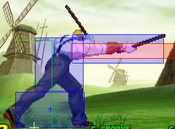
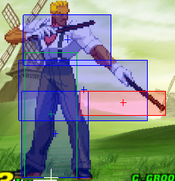
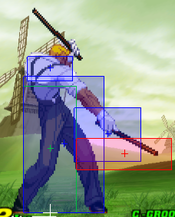
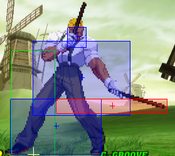
RagingStormX (talk | contribs) |
JtheSaltyy (talk | contribs) No edit summary |
||
| Line 47: | Line 47: | ||
=== Groove Selection === | === Groove Selection === | ||
'''Best - C/A/K:''' C-Eagle is a powerful defensive character that can hitconfirm into a level 2 Union Jack Platinum for solid damage. While his Alpha Counter isn't the greatest, it's a useful defensive tool, and one that Eagle heavily appreciates. He can roll cancel Lariats for a more reliable anti-air, and his mobility with dash isn't too bad. C-Eagle is a | '''Best - C/A/K:''' C-Eagle is a powerful defensive character that can hitconfirm into a level 2 Union Jack Platinum for solid damage. While his Alpha Counter isn't the greatest, it's a useful defensive tool, and one that Eagle heavily appreciates. He can roll cancel Lariats for a more reliable anti-air, and his mobility with dash isn't too bad, as it can hop over lows and low fireballs. He also has great oki after a punch throw as he can dash over the opponent and meaty for a left-right mix and use instant overhead j.MK (one of the best IOHs in the game) for a surprisingly effective high low mix, essentially giving him a 4-way mix, albeit slightly reactable but still really strong. Overall, C-Eagle is a reliable and footsies-based Eagle playstyle, great for fundamentally sound players. A-Eagle is similar to C-Eagle, but sacrifices any threat of a hitconfirmed super in exchange for Custom Combos. Eagle's CC is fairly damaging and overall good, though usually not as scary as a level 2 or 3 Union Jack Platinum. What Eagle loses in damage he gains as versatility. Eagle is able to combo into CC off light confirms or 2MK or build meter post CC. Raw custom does big damage and he gains a true anti-air custom, comboing into CC off lights does roughly the same as a level 2 C-cancel. On the SNK side, K-Eagle is the antithesis to the footsies based Eagle in C and A. He makes an immediate major sacrifice by losing RC Lariat and RC Sticks, but gains a few big things in return. Run and hop make his rushdown a lot scarier, and he can be surprisingly good at it too. Rage lets him hitconfirm into a level 3 Union Jack Platinum for great damage, and since he has great range, JD is a reliable defensive tool for him. K-Eagle is a more rushdown focused Eagle with a decent comeback factor. Although his mixup game isn't nearly as strong as in dash grooves, he still has access to things like IOH j.MK and a short hop to create a crossover hop. | ||
'''Useful - N/P:''' N-Eagle is a bit of a mix between C-Eagle and K-Eagle. You get the mobility of K and the reliable supers and rolls of C, but you sacrifice a lot of potential damage, making him a bit less scary overall. N-Eagle is good for a more simple style. P-Eagle gets parries, which are alright for him as he has decent ranged punishes and damage. While it is rare, a parry from P-Eagle into 5MK > Level 3 Union Jack Platinum does massive damage and is very scary. | '''Useful - N/P:''' N-Eagle is a bit of a mix between C-Eagle and K-Eagle. You get the mobility of K and the reliable supers and rolls of C, but you sacrifice a lot of potential damage (lvl.2 Union Jack and multiple lvl.3 Union Jacks), making him a bit less scary overall. N-Eagle is good for a more simple style. P-Eagle gets parries, which are alright for him as he has decent ranged punishes and damage. While it is rare, a parry from P-Eagle into 5MK > Level 3 Union Jack Platinum does massive damage and is very scary. | ||
'''Worst - S:''' S-Eagle doesn't have much going for him. While Eagle doesn't exactly need meter, he really likes having it, so without low health being forced to charge is very demanding. At low health, you can confirm into level 1 Union Jack Platinum over and over again. This gives you more consistent knockdowns and damage, but the damage isn't as high as other Grooves are capable of. You lose out on rolls for RC Lariat/Sticks in exchange for a dodge, which doesn't help much. Run and hop are strong, but are also present in K-Groove and N-Groove which are better for Eagle overall. | '''Worst - S:''' S-Eagle doesn't have much going for him. While Eagle doesn't exactly need meter, he really likes having it, so without low health being forced to charge is very demanding. At low health, you can confirm into level 1 Union Jack Platinum over and over again. This gives you more consistent knockdowns and damage, but the damage isn't as high as other Grooves are capable of. You lose out on rolls for RC Lariat/Sticks in exchange for a dodge, which doesn't help much. Run and hop are strong, but are also present in K-Groove and N-Groove which are better for Eagle overall. | ||
| Line 58: | Line 58: | ||
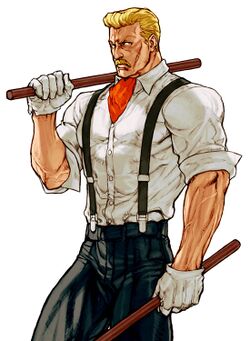
'''Eagle''' is a poking and punishing character with lots of good normals and hitconfirms. He doesn't get consistent knockdowns without meter, and his best anti-air requires you to roll cancel it, but otherwise he's a very solid neutral-oriented character. Eagle is best in '''C-Groove''', '''A-Groove''', and '''K-Groove'''. | '''Eagle''' is a poking and punishing character with lots of good normals and hitconfirms. He doesn't get consistent knockdowns without meter, and his best anti-air requires you to roll cancel it, but otherwise he's a very solid neutral-oriented character. Eagle is best in '''C-Groove''', '''A-Groove''', and '''K-Groove'''. | ||
|pros= | |pros= | ||
* '''Normals | * '''Normals''': Thanks to the long reach of his sticks, Eagle has solid normals for keeping the opponent at range or to confirm into Union Jack and Sticks | ||
* '''Super | * '''Super''': Union Jack Platinum is a great and damaging combo ending super that lets Eagle melt the opponent with Level 2 cancels or Raged level 3's, level 3 Manchester Gold (lariat super) is one of the best wake moves in the game being -1 on block. | ||
* '''Roll Cancels | * '''Roll Cancels''': RC Lariat is a fairly annoying roll cancel that works as a great anti-air, and RC LK Sticks is fairly safe on wake up (-2 on block), with MK and HK variants being great anti-fireball tools. | ||
* '''Offense | * '''Offense''': Not only can his normals be oppressive with the right timing and usage, but his hop and dash can make his rushdown intimidating as well. | ||
|cons= | |cons= | ||
* '''Comeback | * '''Comeback Factor''': Eagle is very solid at keeping out, but getting in can be a struggle against many top tiers as he is better at zoning when low on health | ||
* '''Meterless Combos | * '''Meterless Combos''': While his meterless combos are still damaging, Eagle can struggle to secure a knockdown without spending meter, and his main BnB leaves him at -2. To make it even worse he requires a link into 2MP or 5MK to combo into his Oxford Red (Sticks), which is punishable on block if not executed correctly | ||
* '''Reliance on Roll | * '''Reliance on Roll''': Eagle's best anti-air special has to be roll cancelled, since it only has upper body invuln on the startup and doesn't go into the first active frame | ||
* '''Defense | * '''Defense''': Eagle has no true meterless reversal, so he is forced to either hold pressure on any far knockdowns or spend meter on an unsafe reversal. He certainly has the normals to prevent rushdown but can be opened up due to the commitment of some of his defensive options | ||
* ''' | * '''5HP/2HK''': Eagle has some of the farthest reaching buttons in the game, but at the cost of being really punishable if not used correctly. If an opponent jumps or rolls past these normals, you will get punished hard. Using his 5HP and 2HK must be done with caution. Both buttons are also very vulnerable to parries and JDs | ||
}} | }} | ||
''' | '''THIS PAGE IS STILL A WORK IN PROGRESS''' | ||
== Normal Moves == | == Normal Moves == | ||
| Line 80: | Line 80: | ||
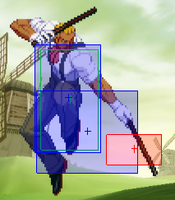
| input = 5LP / Far LP | | input = 5LP / Far LP | ||
| subtitle = Far Light Punch | | subtitle = Far Light Punch | ||
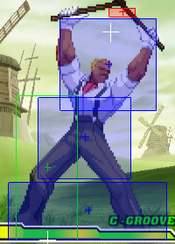
| image = | | image = CVS2_Eagle_5LP.png | ||
| caption = | | caption = | ||
| linkname = 5LP | | linkname = 5LP | ||
| Line 88: | Line 88: | ||
| subtitle = | | subtitle = | ||
| damage = 300 | | damage = 300 | ||
| stun = | | stun = 3 | ||
| cancel = | | cancel = SP/SU | ||
| guard = | | guard = Mid | ||
| parry = | | parry = High | ||
| startup = | | startup = 3 | ||
| active = | | active = 4 | ||
| recovery = | | recovery = 5 | ||
| total = | | total = 12 | ||
| advHit = +7 | | advHit = +7 | ||
| advBlock = +7 | | advBlock = +7 | ||
| invul = | | invul = None | ||
| description = | | description = | ||
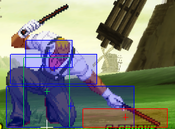
A quick standing punch. | |||
* Though a nice normal to have for panic anti-airs, it's crouchable and hits a lower than most other standing jabs, 2LP is better against grounded opponents. | |||
}} | }} | ||
}} | }} | ||
| Line 108: | Line 110: | ||
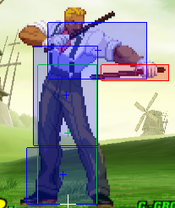
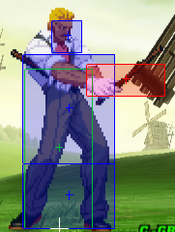
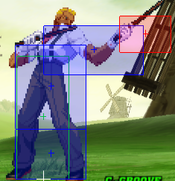
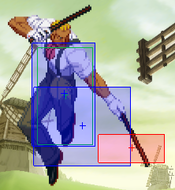
| input = 5MP / Far MP | | input = 5MP / Far MP | ||
| subtitle = Far Medium Punch | | subtitle = Far Medium Punch | ||
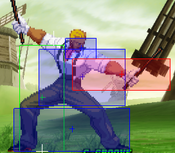
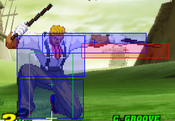
| image = | | image = CVS2_Eagle_5MP1.png | ||
| caption = | | caption = First Hitbox | ||
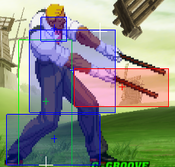
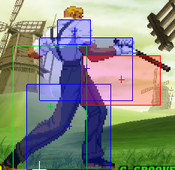
| image2 = CVS2_Eagle_5MP2.png | |||
| caption2 = Second Hitbox | |||
| linkname = 5MP | | linkname = 5MP | ||
| data = | | data = | ||
| Line 116: | Line 120: | ||
| subtitle = | | subtitle = | ||
| damage = 400+800 | | damage = 400+800 | ||
| stun = | | stun = 4+8 | ||
| cancel = | | cancel = SP/SU (first hit) | ||
| guard = | | guard = Mid | ||
| parry = | | parry = High | ||
| startup = | | startup = 4 | ||
| active = | | active = 2 [5] 7 | ||
| recovery = | | recovery = 17 | ||
| total = | | total = 35 | ||
| advHit = -1 | | advHit = -1 | ||
| advBlock = -1 | | advBlock = -1 | ||
| invul = | | invul = None | ||
| description = | | description = | ||
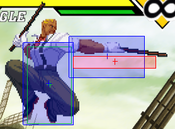
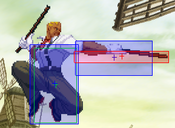
Eagle does a double swipe of the sticks. | |||
* One of Eagle's main anti-airs. The disjoint on the second hitbox usually means it will beat out a good amount of jump-ins. Timing the anti-air to have the second hitbox be the one hitting is key to using this button effectively. | |||
}} | }} | ||
}} | }} | ||
| Line 136: | Line 142: | ||
| input = 5HP / Far HP | | input = 5HP / Far HP | ||
| subtitle = Far Heavy Punch | | subtitle = Far Heavy Punch | ||
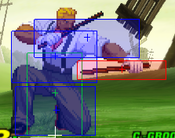
| image = | | image = CVS2_Eagle_5HP.png | ||
| caption = | | caption = | ||
| linkname = 5HP | | linkname = 5HP | ||
| Line 144: | Line 150: | ||
| subtitle = | | subtitle = | ||
| damage = 1300 | | damage = 1300 | ||
| stun = | | stun = 13 | ||
| cancel = | | cancel = None | ||
| guard = | | guard = Mid | ||
| parry = | | parry = High | ||
| startup = | | startup = 8 | ||
| active = | | active = 3 | ||
| recovery = | | recovery = 38 | ||
| total = | | total = 49 | ||
| advHit = -17 | | advHit = -17 | ||
| advBlock = -17 | | advBlock = -17 | ||
| invul = | | invul = None | ||
| description = One of Eagle's | | description = | ||
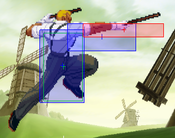
Eagle does a huge haymaker swing with one of his sticks. | |||
* One of Eagle's main normals at a distance. If used effectively, you can frustrate your opponent by badgering them and getting in free damage and guard bar. | |||
* Has huge recovery, so if whiffed, you will be punished. Reversal rolls and jumps will beat this normal hard, so don't use it predictably. | |||
* Some reversal supers can punish this normal hard on block, and even worse, on hit. | |||
* Great for whiff punishes and poking, but the many flaws will make this button difficult yet rewarding to use. | |||
}} | }} | ||
}} | }} | ||
| Line 164: | Line 175: | ||
| input = 5LK / Far LK | | input = 5LK / Far LK | ||
| subtitle = Far Light Kick | | subtitle = Far Light Kick | ||
| image = | | image = CVS2_Eagle_5LK.png | ||
| caption = | | caption = | ||
| linkname = 5LK | | linkname = 5LK | ||
| Line 171: | Line 182: | ||
| version = Far {{Icon-Capcom|LK}} | | version = Far {{Icon-Capcom|LK}} | ||
| subtitle = | | subtitle = | ||
| damage = | | damage = 500 | ||
| stun = | | stun = 5 | ||
| cancel = | | cancel = SP/SU | ||
| guard = | | guard = Mid | ||
| parry = | | parry = High | ||
| startup = | | startup = 4 | ||
| active = | | active = 4 | ||
| recovery = | | recovery = 11 | ||
| total = | | total = 19 | ||
| advHit = | | advHit = +2 | ||
| advBlock = | | advBlock = +2 | ||
| invul = | | invul = None | ||
| description = | | description = | ||
Eagle does a lower hitting swipe from his stick. | |||
* placeholder | |||
}} | }} | ||
}} | }} | ||
| Line 192: | Line 205: | ||
| input = 5MK / Far MK | | input = 5MK / Far MK | ||
| subtitle = Far Medium Kick | | subtitle = Far Medium Kick | ||
| image = | | image = CVS2_Eagle_5MK.png | ||
| caption = | | caption = | ||
| linkname = 5MK | | linkname = 5MK | ||
| Line 199: | Line 212: | ||
| version = Far {{Icon-Capcom|MK}} | | version = Far {{Icon-Capcom|MK}} | ||
| subtitle = | | subtitle = | ||
| damage = | | damage = 900 | ||
| stun = | | stun = 9 | ||
| cancel = | | cancel = SP/SU | ||
| guard = | | guard = Mid | ||
| parry = | | parry = High | ||
| startup = | | startup = 4 | ||
| active = | | active = 6 | ||
| recovery = | | recovery = 16 | ||
| total = | | total = 26 | ||
| advHit = | | advHit = 0 | ||
| advBlock = | | advBlock = 0 | ||
| invul = | | invul = None | ||
| description = | | description = | ||
A quick midsection stab from the stick. | |||
* One of your main confirms into Union Jacks and Oxford Red/Sticks (43216K), does okay damage but being a good special and super cancel makes it even more useful. | |||
* Can be used in neutral to beat out certain anticipated pokes and counterpokes, due to it's relatively fast speed whiff punishing this normal is not really a situation you will find yourself in. | |||
}} | }} | ||
}} | }} | ||
| Line 220: | Line 236: | ||
| input = 5HK / Far HK | | input = 5HK / Far HK | ||
| subtitle = Far Heavy Kick | | subtitle = Far Heavy Kick | ||
| image = | | image = CVS2_Eagle_5HK.png | ||
| caption = | | caption = | ||
| linkname = 5HK | | linkname = 5HK | ||
| Line 227: | Line 243: | ||
| version = Far {{Icon-Capcom|HK}} | | version = Far {{Icon-Capcom|HK}} | ||
| subtitle = | | subtitle = | ||
| damage = | | damage = 1300 | ||
| stun = 13 | |||
| cancel = SU | |||
| guard = Mid | |||
| parry = High | |||
| startup = 7 | |||
| active = 3 | |||
| recovery = 32 | |||
| total = 42 | |||
| advHit = -11 | |||
| advBlock = -11 | |||
| invul = None | |||
| description = | |||
A quick roundabout swing from the stick. | |||
* placeholder | |||
| stun = | |||
| cancel = | |||
| guard = | |||
| parry = | |||
| startup = | |||
| active = | |||
| recovery = | |||
| total = | |||
| advHit = - | |||
| advBlock = - | |||
| invul = | |||
| description | |||
}} | }} | ||
}} | }} | ||
| Line 305: | Line 266: | ||
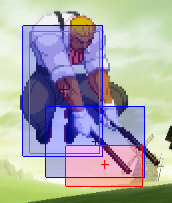
| input = cl.HP | | input = cl.HP | ||
| subtitle = Close Heavy Punch | | subtitle = Close Heavy Punch | ||
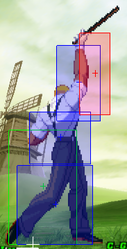
| image = | | image = CVS2_Eagle_clHP1.png | ||
| caption = | | caption = First Hitbox | ||
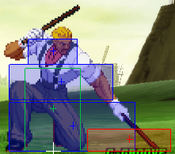
| image2 = CVS2_Eagle_clHP2.png | |||
| caption2 = Second Hitbox | |||
| linkname = cl.HP | | linkname = cl.HP | ||
| data = | | data = | ||
| Line 312: | Line 275: | ||
| version = Close {{Icon-Capcom|HP}} | | version = Close {{Icon-Capcom|HP}} | ||
| subtitle = | | subtitle = | ||
| damage = | | damage = 1100,1300 | ||
| stun = | | stun = 11,13 | ||
| cancel = | | cancel = SU | ||
| guard = | | guard = Mid | ||
| parry = | | parry = High | ||
| startup = | | startup = 5 | ||
| active = | | active = 8 | ||
| recovery = | | recovery = 26 | ||
| total = | | total = 39 | ||
| advHit = - | | advHit = -2 | ||
| advBlock = - | | advBlock = -2 | ||
| invul = | | invul = None | ||
| description = | | description = | ||
Eagle does a downwards strike with the sticks. | |||
* Eagle's main anti-crossup tool and one of his anti-airs. Due to the really small first hitbox (the one that will anti-air) it may be difficult to use it at first but timing will be key, and knowing when to use it when there are variable jump times between characters is key to not getting opened up by constant jump-ins and crossups. | |||
* Vulnerable to jump-in parries and to a lesser extent JDs, due to Eagle's lack of a special cancel on this button he may just have to mash lights or hope to get a lariat out in time before the punish. | |||
* Good and damaging confirm into Union Jack, but cannot confirm into specials. | |||
}} | }} | ||
}} | }} | ||
| Line 389: | Line 300: | ||
| input = cl.HK | | input = cl.HK | ||
| subtitle = Close Heavy Kick | | subtitle = Close Heavy Kick | ||
| image = | | image = CVS2_Eagle_clHK.png | ||
| caption = | | caption = | ||
| linkname = cl. | | linkname = cl.HK | ||
| data = | | data = | ||
{{AttackData-CvS2 | {{AttackData-CvS2 | ||
| version = Close {{Icon-Capcom|HK}} | | version = Close {{Icon-Capcom|HK}} | ||
| subtitle = | | subtitle = | ||
| damage = | | damage = 1400 | ||
| stun = | | stun = 14 | ||
| cancel = | | cancel = None | ||
| guard = | | guard = Mid | ||
| parry = | | parry = High | ||
| startup = | | startup = 8 | ||
| active = | | active = 9 | ||
| recovery = | | recovery = 17 | ||
| total = | | total = 34 | ||
| advHit = | | advHit = +2 | ||
| advBlock = | | advBlock = +2 | ||
| invul = | | invul = None | ||
| description = | | description = | ||
A quick double swing from the sticks. | |||
* placeholder | |||
}} | }} | ||
}} | }} | ||
| Line 418: | Line 331: | ||
| input = 2LP / cr.LP | | input = 2LP / cr.LP | ||
| subtitle = Crouching Light Punch | | subtitle = Crouching Light Punch | ||
| image = | | image = CVS2_Eagle_2LP.png | ||
| caption = | | caption = | ||
| linkname = 2LP | | linkname = 2LP | ||
| Line 425: | Line 338: | ||
| version = {{Motion|d}}+{{Icon-Capcom|LP}} | | version = {{Motion|d}}+{{Icon-Capcom|LP}} | ||
| subtitle = | | subtitle = | ||
| damage = | | damage = 300 | ||
| stun = | | stun = 3 | ||
| cancel = | | cancel = SP/SU | ||
| guard = | | guard = Mid | ||
| parry = | | parry = Low | ||
| startup = | | startup = 3 | ||
| active = | | active = 4 | ||
| recovery = | | recovery = 6 | ||
| total = | | total = 13 | ||
| advHit = | | advHit = +7 | ||
| advBlock = | | advBlock = +7 | ||
| invul = | | invul = None | ||
| description = | | description = | ||
A quick low jab | |||
* Average low jab. As per usual with most other characters, this button is Eagle's main combo starter and is very plus. It can also be used as a last minute defensive option to get an aggressive opponent off of you. | |||
* Optimal links from 2LP are 5MK (3f link), 2MP (3f link), and 2MK (2f link). These are all really simple and easy links and are key to getting Eagle's optimal special/super confirms. | |||
}} | }} | ||
}} | }} | ||
| Line 446: | Line 362: | ||
| input = 2MP / cr.MP | | input = 2MP / cr.MP | ||
| subtitle = Crouching Medium Punch | | subtitle = Crouching Medium Punch | ||
| image = | | image = CVS2_Eagle_2MP1.png | ||
| caption = | | caption = First Hitbox | ||
| image2 = CVS2_Eagle_2MP2.png | |||
| caption2 = Second Hitbox | |||
| linkname = 2MP | | linkname = 2MP | ||
| data = | | data = | ||
| Line 453: | Line 371: | ||
| version = {{Motion|d}}+{{Icon-Capcom|MP}} | | version = {{Motion|d}}+{{Icon-Capcom|MP}} | ||
| subtitle = | | subtitle = | ||
| damage = | | damage = 400+800 | ||
| stun = | | stun = 4+8 | ||
| cancel = | | cancel = SP/SU (first hit) | ||
| guard = | | guard = Mid | ||
| parry = | | parry = Low | ||
| startup = | | startup = 4 | ||
| active = | | active = 2 [6] 4 | ||
| recovery = | | recovery = 22 | ||
| total = | | total = 38 | ||
| advHit = - | | advHit = -2 | ||
| advBlock = - | | advBlock = -2 | ||
| invul = | | invul = None | ||
| description = | | description = | ||
A double hitting swing from the sticks. | |||
* While it can confirm into super, it's mainly used for being a more reliable but less damaging confirm into Sticks. The first hit is cancellable and does good hitstun, but the very weak 400 damage means it essentially is slightly more damaging than a triple light normal confirm. It has a lot more range than 5MK though, so confirms won't fall out as much with this button. Essentially you're trading 500 damage for near 100% consistent confirms, it just depends on the spacing that 2LP/2MK hits at. | |||
* Due to the spacing that both hits leave the opponent, it's basically impossible to punish on block, so it's a nice poke on the ground with long reach. However, like 5HP, rolls and jumps can beat this normal easily, so you can't spam it too much as there is a risk involved when whiffing this button. | |||
}} | }} | ||
}} | }} | ||
| Line 474: | Line 395: | ||
| input = 2HP / cr.HP | | input = 2HP / cr.HP | ||
| subtitle = Crouching Heavy Punch | | subtitle = Crouching Heavy Punch | ||
| image = | | image = CVS2_Eagle_2HP1.png | ||
| caption = | | caption = First Hitbox | ||
| image2 = CVS2_Eagle_2HP2.png | |||
| caption2 = Second Hitbox | |||
| linkname = 2HP | | linkname = 2HP | ||
| data = | | data = | ||
| Line 481: | Line 404: | ||
| version = {{Motion|d}}+{{Icon-Capcom|HP}} | | version = {{Motion|d}}+{{Icon-Capcom|HP}} | ||
| subtitle = | | subtitle = | ||
| damage = | | damage = 1200,1000 | ||
| stun = | | stun = 12,11 | ||
| cancel = | | cancel = SP (first hit), SU | ||
| guard = | | guard = Mid | ||
| parry = | | parry = High | ||
| startup = | | startup = 5 | ||
| active = | | active = 9 | ||
| recovery = | | recovery = 29 | ||
| total = | | total = 43 | ||
| advHit = - | | advHit = -14 | ||
| advBlock = - | | advBlock = -14 | ||
| invul = | | invul = None | ||
| description = | | description = | ||
A big upward swing from the stick. | |||
* Very similar in animation to a shoto 2HP. It is also one of Eagle's anti-airs, but hits more close to him than other ones. Mostly used as an anti-crossup tool since the space is mostly controlled around Eagle's head. | |||
* Max damage confirm into Sticks from 2LP, just note that if this ends up whiffing, you are getting punished. It is a 2f link, so it's not too difficult to execute but the risk of the button potentially falling out usually means that 5MK and 2MP are the preferred combo routes. | |||
}} | }} | ||
}} | }} | ||
| Line 502: | Line 428: | ||
| input = 2LK / cr.LK | | input = 2LK / cr.LK | ||
| subtitle = Crouching Light Kick | | subtitle = Crouching Light Kick | ||
| image = | | image = CVS2_Eagle_2LK.png | ||
| caption = | | caption = | ||
| linkname = 2LK | | linkname = 2LK | ||
| Line 509: | Line 435: | ||
| version = {{Motion|d}}+{{Icon-Capcom|LK}} | | version = {{Motion|d}}+{{Icon-Capcom|LK}} | ||
| subtitle = | | subtitle = | ||
| damage = | | damage = 400 | ||
| stun = | | stun = 4 | ||
| cancel = | | cancel = SP/SU | ||
| guard = | | guard = Low | ||
| parry = | | parry = Low | ||
| startup = | | startup = 3 | ||
| active = | | active = 4 | ||
| recovery = | | recovery = 8 | ||
| total = | | total = 15 | ||
| advHit = | | advHit = +2 | ||
| advBlock = | | advBlock = +2 | ||
| invul = | | invul = None | ||
| description = | | description = | ||
A quick low hitting swipe from the stick. | |||
* placeholder | |||
}} | }} | ||
}} | }} | ||
| Line 530: | Line 458: | ||
| input = 2MK / cr.MK | | input = 2MK / cr.MK | ||
| subtitle = Crouching Medium Kick | | subtitle = Crouching Medium Kick | ||
| image = | | image = CVS2_Eagle_2MK.png | ||
| caption = | | caption = | ||
| linkname = 2MK | | linkname = 2MK | ||
| Line 537: | Line 465: | ||
| version = {{Motion|d}}+{{Icon-Capcom|MK}} | | version = {{Motion|d}}+{{Icon-Capcom|MK}} | ||
| subtitle = | | subtitle = | ||
| damage = | | damage = 800 | ||
| stun = | | stun = 8 | ||
| cancel = | | cancel = SU | ||
| guard = | | guard = Low | ||
| parry = | | parry = Low | ||
| startup = | | startup = 5 | ||
| active = | | active = 6 | ||
| recovery = | | recovery = 11 | ||
| total = | | total = 22 | ||
| advHit = | | advHit = +6 | ||
| advBlock = | | advBlock = +6 | ||
| invul = | | invul = None | ||
| description = | | description = | ||
A slower low hitting swipe from the stick. | |||
* A very low committing move to control space and check buttons with. Has good speed and priority, and unlike 2MP, it's a poke that you can whiff pretty safely for the most part. It's not exactly great meterbuild but it's something Eagle can throw out to control the space with. It's similar to Dictator's 2MK, albeit less threatening due to the lack of a special cancel, but both like to occasionally throw it out there in neutral to maintain space control. | |||
* Due to being +6, it's one of Eagle's main moves to pressure with, it can link into itself and 5MK among other things. | |||
* One of Eagle's go-to cancels into Union Jack. The fact that it is +6 means that confirming on reaction is really easy. | |||
}} | }} | ||
}} | }} | ||
| Line 558: | Line 490: | ||
| input = 2HK / cr.HK | | input = 2HK / cr.HK | ||
| subtitle = Crouching Heavy Kick | | subtitle = Crouching Heavy Kick | ||
| image = | | image = CVS2_Eagle_2HK.png | ||
| caption = | | caption = | ||
| linkname = 2HK | | linkname = 2HK | ||
| Line 565: | Line 497: | ||
| version = {{Motion|d}}+{{Icon-Capcom|HK}} | | version = {{Motion|d}}+{{Icon-Capcom|HK}} | ||
| subtitle = | | subtitle = | ||
| damage = | | damage = 1200 | ||
| stun = | | stun = 12 | ||
| cancel = | | cancel = None | ||
| guard = | | guard = Low | ||
| parry = | | parry = Low | ||
| startup = | | startup = 11 | ||
| active = | | active = 4 | ||
| recovery = | | recovery = 29 | ||
| total = | | total = 44 | ||
| advHit = | | advHit = HKND | ||
| advBlock = | | advBlock = -9 | ||
| invul = | | invul = None | ||
| description = | | description = | ||
Eagle lunges forward and does a double sweep with the sticks. | |||
* Like 5HP, this is a button with many gives and takes. While the range is crazy and can check opponents from wonky distances, Eagle risks a lot by using this button in neutral. | |||
* Rolls and jumps can beat this move hard if the opponent knows it's coming. Using sweep as a blockstring ender from 2MK isn't bad but it also leaves a big gap for a roll or a jump. If you know the opponent will try to psychic jump a 2HK, you can get a free anti-air in. | |||
* Has less recovery than 5HP, but also has longer startup. At max range, landing this move usually leads to no okizeme since the opponent is very far away from Eagle. If spaced, it's actually really difficult to punish on block as it is -9, although reversal supers like Dictator's Super Psycho Crusher and Boxer's Gigaton Blow will do the job fine, but again the main risk is the move whiffing altogether, so use this button sparingly, as excessive use can lead to some very undesirable outcomes. | |||
}} | }} | ||
}} | }} | ||
| Line 587: | Line 523: | ||
| input = j.LP | | input = j.LP | ||
| subtitle = Jumping Light Punch | | subtitle = Jumping Light Punch | ||
| image = | | image = CVS2_Eagle_jLP.png | ||
| caption = | | caption = | ||
| linkname = j.LP | | linkname = j.LP | ||
| Line 594: | Line 530: | ||
| version = {{Motion|ub}}/{{Motion|u}}/{{Motion|uf}}+{{Icon-Capcom|LP}} | | version = {{Motion|ub}}/{{Motion|u}}/{{Motion|uf}}+{{Icon-Capcom|LP}} | ||
| subtitle = | | subtitle = | ||
| damage = | | damage = 600 | ||
| stun = | | stun = 6 | ||
| cancel = | | cancel = None | ||
| guard = | | guard = High | ||
| parry = | | parry = High | ||
| startup = | | startup = 3 | ||
| active = | | active = 20 | ||
| recovery = - | | recovery = - | ||
| total = | | total = 23 | ||
| advHit = - | | advHit = - | ||
| advBlock = - | | advBlock = - | ||
| invul = | | invul = None | ||
| description = | | description = | ||
A quick outward stab from the stick. | |||
* Though it is a very good air-to-air, it is largely outclassed by j.MP, which has the same startup and more damage but less active frames. | |||
}} | }} | ||
}} | }} | ||
| Line 615: | Line 553: | ||
| input = j.MP | | input = j.MP | ||
| subtitle = Jumping Medium Punch | | subtitle = Jumping Medium Punch | ||
| image = | | image = CVS2_Eagle_jMP.png | ||
| caption = | | caption = | ||
| linkname = j.MP | | linkname = j.MP | ||
| Line 622: | Line 560: | ||
| version = {{Motion|ub}}/{{Motion|u}}/{{Motion|uf}}+{{Icon-Capcom|MP}} | | version = {{Motion|ub}}/{{Motion|u}}/{{Motion|uf}}+{{Icon-Capcom|MP}} | ||
| subtitle = | | subtitle = | ||
| damage = | | damage = 1000 | ||
| stun = | | stun = 10 | ||
| cancel = | | cancel = None | ||
| guard = | | guard = High | ||
| parry = | | parry = High | ||
| startup = | | startup = 3 | ||
| active = | | active = 10 | ||
| recovery = - | | recovery = - | ||
| total = | | total = 13 | ||
| advHit = - | | advHit = - | ||
| advBlock = - | | advBlock = - | ||
| invul = | | invul = None | ||
| description = | | description = | ||
A slower outward stab from the stick. | |||
* Great air-to-air with long reach. Can beat out a decent chunk of aerial moves if done early, the disjoint makes it favorably trade or outright win in most of those interactions. | |||
}} | }} | ||
}} | }} | ||
| Line 643: | Line 583: | ||
| input = j.HP | | input = j.HP | ||
| subtitle = Jumping Heavy Punch | | subtitle = Jumping Heavy Punch | ||
| image = | | image = CVS2_Eagle_jHP.png | ||
| caption = | | caption = | ||
| linkname = j.HP | | linkname = j.HP | ||
| Line 650: | Line 590: | ||
| version = {{Motion|ub}}/{{Motion|u}}/{{Motion|uf}}+{{Icon-Capcom|HP}} | | version = {{Motion|ub}}/{{Motion|u}}/{{Motion|uf}}+{{Icon-Capcom|HP}} | ||
| subtitle = | | subtitle = | ||
| damage = | | damage = 1300 | ||
| stun = | | stun = 13 | ||
| cancel = | | cancel = None | ||
| guard = | | guard = High | ||
| parry = | | parry = High | ||
| startup = | | startup = 7 | ||
| active = | | active = 6 | ||
| recovery = - | | recovery = - | ||
| total = | | total = 13 | ||
| advHit = - | | advHit = - | ||
| advBlock = - | | advBlock = - | ||
| invul = | | invul = None | ||
| description = | | description = | ||
A large aerial swing from the stick. | |||
* Has 4 frames more startup than j.MP, but it adds on an extra 300 damage and even more range and disjoint. If done as an early air-to-air, it's a really strong tool, and wins in a lot of aerial interactions. | |||
* The fairly low 6 active frames means that timing the air-to-air is much more strict compared to other air-to-airs in Eagle's arsenal. | |||
}} | }} | ||
}} | }} | ||
| Line 671: | Line 614: | ||
| input = j.LK | | input = j.LK | ||
| subtitle = Jumping Light Kick | | subtitle = Jumping Light Kick | ||
| image = | | image = CVS2_Eagle_jLK.png | ||
| caption = | | caption = | ||
| linkname = j.LK | | linkname = j.LK | ||
| Line 678: | Line 621: | ||
| version = {{Motion|ub}}/{{Motion|u}}/{{Motion|uf}}+{{Icon-Capcom|LK}} | | version = {{Motion|ub}}/{{Motion|u}}/{{Motion|uf}}+{{Icon-Capcom|LK}} | ||
| subtitle = | | subtitle = | ||
| damage = | | damage = 500 | ||
| stun = | | stun = 5 | ||
| cancel = | | cancel = None | ||
| guard = | | guard = High | ||
| parry = | | parry = High | ||
| startup = | | startup = 3 | ||
| active = | | active = 20 | ||
| recovery = - | | recovery = - | ||
| total = | | total = 23 | ||
| advHit = - | | advHit = - | ||
| advBlock = - | | advBlock = - | ||
| invul = | | invul = None | ||
| description = | | description = | ||
A quick downward swipe from the stick. | |||
* placeholder | |||
}} | }} | ||
}} | }} | ||
| Line 699: | Line 644: | ||
| input = j.MK | | input = j.MK | ||
| subtitle = Jumping Medium Kick | | subtitle = Jumping Medium Kick | ||
| image = | | image = CVS2_Eagle_jMK.png | ||
| caption = | | caption = | ||
| linkname = j.MK | | linkname = j.MK | ||
| Line 706: | Line 651: | ||
| version = {{Motion|ub}}/{{Motion|u}}/{{Motion|uf}}+{{Icon-Capcom|MK}} | | version = {{Motion|ub}}/{{Motion|u}}/{{Motion|uf}}+{{Icon-Capcom|MK}} | ||
| subtitle = | | subtitle = | ||
| damage = | | damage = 900 | ||
| stun = | | stun = 9 | ||
| cancel = | | cancel = None | ||
| guard = | | guard = High | ||
| parry = | | parry = High | ||
| startup = | | startup = 3 | ||
| active = | | active = 10 | ||
| recovery = - | | recovery = - | ||
| total = | | total = 13 | ||
| advHit = - | | advHit = - | ||
| advBlock = - | | advBlock = - | ||
| invul = | | invul = None | ||
| description = | | description = | ||
A slower downward swipe from the stick. | |||
* A stellar air normal overall. 3-frame startup, decent active frames and can function as both an air-to-air and a jump-in. As an air-to-air, it has great disjoint and usually comes out way before the opponent's aerial move as it has 3 frames of startup, and as a jump-in it hits very low, so it usually carries that hitstun into a combo starter. | |||
* Great low-jump button in hop grooves as well. Since it hits very low, Eagle's low jump can be very hard to react to when he uses low jump j.MK in conjunction with something like 2LK or 2MK. The threat of that high-low mixup can definitely be effective. | |||
* Also one of the most consistent IOHs in the game. Using this button as an instant overhead gives Eagle another dimension of mixup, even if the returns on hit aren't as great, but this mix can be scary if the round is coming to a close and the opponent is one hit away from death. Easier to land in hop grooves but can still be done in non-hop grooves as well. | |||
}} | }} | ||
}} | }} | ||
| Line 727: | Line 676: | ||
| input = j.HK | | input = j.HK | ||
| subtitle = Jumping Heavy Kick | | subtitle = Jumping Heavy Kick | ||
| image = | | image = CVS2_Eagle_jHK.png | ||
| caption = | | caption = | ||
| linkname = j.HK | | linkname = j.HK | ||
| Line 734: | Line 683: | ||
| version = {{Motion|ub}}/{{Motion|u}}/{{Motion|uf}}+{{Icon-Capcom|HK}} | | version = {{Motion|ub}}/{{Motion|u}}/{{Motion|uf}}+{{Icon-Capcom|HK}} | ||
| subtitle = | | subtitle = | ||
| damage = | | damage = 1200 | ||
| stun = | | stun = 12 | ||
| cancel = | | cancel = None | ||
| guard = | | guard = High | ||
| parry = | | parry = High | ||
| startup = | | startup = 8 | ||
| active = | | active = 7 | ||
| recovery = - | | recovery = - | ||
| total = | | total = 15 | ||
| advHit = - | | advHit = - | ||
| advBlock = - | | advBlock = - | ||
| invul = | | invul = None | ||
| description = | | description = | ||
Eagle does a downward axe handle with the sticks. | |||
* Eagle's main jump-in by design. Does great damage and has tons of hitstun allowing easy jump-in confirms. While the 8-frame startup is the slowest of Eagle's air normals, it's still effective with good timing. Against big characters this button has cross-up potential but it very inconsistent in that department. | |||
* As a low-jump normal it can still be good, it deals more damage than j.MK but j.MK is much more difficult of a button to react to, so it just depends on the spacing. | |||
}} | }} | ||
}} | }} | ||
== Throws == | == Throws == | ||
=== <span class="invisible-header"> | === <span class="invisible-header">Pile of Fools</span> === | ||
{{MoveData | {{MoveData | ||
| name = | | name = Pile of Fools | ||
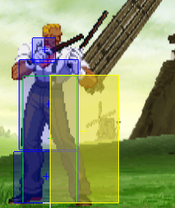
| input = Near Opponent, 4/6HP | | input = Near Opponent, 4/6HP | ||
| subtitle = Punch Throw | | subtitle = Punch Throw | ||
| image = | | image = CVS2_Eagle_Rangethrow.png | ||
| caption = | | caption = Throw Range | ||
| image2 = CVS2_Eagle_Pthrow.png | |||
| caption2 = Pile of Fools | |||
| linkname = Punch Throw Name | | linkname = Punch Throw Name | ||
| data = | | data = | ||
| Line 792: | Line 717: | ||
| version = Close {{Motion|b}}/{{Motion|f}}+{{Icon-Capcom|HP}} | | version = Close {{Motion|b}}/{{Motion|f}}+{{Icon-Capcom|HP}} | ||
| subtitle = | | subtitle = | ||
| damage = | | damage = 1900 | ||
| stun = - | | stun = - | ||
| cancel = - | | cancel = - | ||
| guard = - | | guard = - | ||
| parry = - | | parry = - | ||
| startup = | | startup = 3 | ||
| active = | | active = 1 | ||
| recovery = | | recovery = 21 | ||
| total = | | total = 25 | ||
| advHit = - | | advHit = - | ||
| advBlock = - | | advBlock = - | ||
| invul = | | invul = None | ||
| description = | | description = | ||
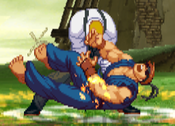
Eagle knocks his opponent down and drives his sticks into their stomach. | |||
* One of the better throws in the game due to the fact that it is untechable and puts Eagle right next to the opponent. Definitely the go-to throw. | |||
* After the throw, Eagle has many options. He can dash (or short hop) over the opponent to get them to block the opposite way, or he can stay on the same side. He could do an IOH j.MK, or hit a meaty 2MK to create a good high low mix, or for parry-happy opponents he can hit a meaty 5MK/5HK and pressure afterward. After the meaty he can push more pressure and potentially another throw. This mixup is really strong and one Eagle really likes for the sake of damage and pressure. | |||
}} | }} | ||
}} | }} | ||
=== <span class="invisible-header"> | === <span class="invisible-header">Fool Percussion</span> === | ||
{{MoveData | {{MoveData | ||
| name = | | name = Fool Percussion | ||
| input = Near Opponent, 4/6HK | | input = Near Opponent, 4/6HK | ||
| subtitle = Kick Throw | | subtitle = Kick Throw | ||
| image = | | image = CVS2_Eagle_Rangethrow.png | ||
| caption = | | caption = Throw Range | ||
| image2 = CVS2_Eagle_Kthrow.png | |||
| caption2 = Fool Percussion | |||
| linkname = Kick Throw Name | | linkname = Kick Throw Name | ||
| data = | | data = | ||
| Line 820: | Line 750: | ||
| version = Close {{Motion|b}}/{{Motion|f}}+{{Icon-Capcom|HK}} | | version = Close {{Motion|b}}/{{Motion|f}}+{{Icon-Capcom|HK}} | ||
| subtitle = | | subtitle = | ||
| damage = | | damage = 2100 | ||
| stun = | | stun = 21 | ||
| cancel = | | cancel = None | ||
| guard = - | | guard = - | ||
| parry = - | | parry = - | ||
| startup = | | startup = 5 | ||
| active = | | active = 1 | ||
| recovery = | | recovery = 21 | ||
| total = | | total = 27 | ||
| advHit = - | | advHit = - | ||
| advBlock = - | | advBlock = - | ||
| invul = | | invul = None | ||
| description = | | description = | ||
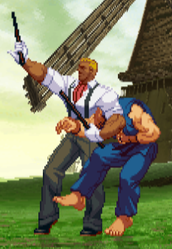
Eagle puts the opponent in a headlock and then jabs them with his stick. | |||
* While a funny-looking throw, it is far outclassed by his punch throw, so if you want to throw your opponent use the punch one. | |||
}} | }} | ||
}} | }} | ||
Revision as of 09:27, 7 August 2022
Introduction
Story
Eagle is a British Bojutsu fighter who works as a bouncer at a bar. He was one of the original enemies Ryu fought in Street Fighter 1, and was one of the most powerful of them. He was hired as a hitman to kill Sagat, thought he sadly failed. He returned home a living legend for his fighting however. Alpha 3 and its stories are questionably canon, but during the events of Alpha 3, Eagle started travelling to perfect his Bojutsu martial art style. He challenged anyone he thought was strong, most notably Guile, who Eagle beats. Guile shares that he's on a mission to stop Shadaloo and fight M. Bison, and also sharing that Sagat is there as well. Eagle follows, eager to fight his previous rival. Upon seeing Sagat, Eagle is disappointed that he's just become a lackey of Shadaloo. They fight, and Eagle wins. M. Bison is impressed, and fights Eagle himself, also being defeated by the Bojutsu master. They rescue Charlie and destroy the Psycho Driver, and Eagle thanks Guile for one last romp on the battlefield.
Gameplay
Eagle is mostly a poking character with solid anti-airs, simple combos, good roll cancels, and effective supers. He can be quite simple to play, relying mostly on using his sticks to beat out opponents buttons on the ground and comboing into his Oxford Red stick rush special. Hitconfirming into his supers is fairly easy as well, and he has a versatile combo ending super in Union Jack Platinum. While his best anti-air special requires a roll cancel to be effective, roll cancelling does make it VERY effective. Overall, Eagle is just a simple poking and hitconfirming character.
He does have his weaknesses however. His main meterless combo ender, while it does good damage, doesn't give any knockdown. His anti-air special also requires roll cancelling to make it effective, and RC Sticks is a powerful fireball punish, limiting his use in non-roll Grooves heavily. He lacks any sort of zoning tools outside of his normals, and his mixups aren't the best without run/hop Grooves. Not having a reliable reversal (his lariet trades or loses quite a bit) also hurts, since it means he has to commit to something like a super to wake up with something invincible. If you want a poking character with good and fun hitconfirms, Eagle is your guy.
Groove Selection
Best - C/A/K: C-Eagle is a powerful defensive character that can hitconfirm into a level 2 Union Jack Platinum for solid damage. While his Alpha Counter isn't the greatest, it's a useful defensive tool, and one that Eagle heavily appreciates. He can roll cancel Lariats for a more reliable anti-air, and his mobility with dash isn't too bad, as it can hop over lows and low fireballs. He also has great oki after a punch throw as he can dash over the opponent and meaty for a left-right mix and use instant overhead j.MK (one of the best IOHs in the game) for a surprisingly effective high low mix, essentially giving him a 4-way mix, albeit slightly reactable but still really strong. Overall, C-Eagle is a reliable and footsies-based Eagle playstyle, great for fundamentally sound players. A-Eagle is similar to C-Eagle, but sacrifices any threat of a hitconfirmed super in exchange for Custom Combos. Eagle's CC is fairly damaging and overall good, though usually not as scary as a level 2 or 3 Union Jack Platinum. What Eagle loses in damage he gains as versatility. Eagle is able to combo into CC off light confirms or 2MK or build meter post CC. Raw custom does big damage and he gains a true anti-air custom, comboing into CC off lights does roughly the same as a level 2 C-cancel. On the SNK side, K-Eagle is the antithesis to the footsies based Eagle in C and A. He makes an immediate major sacrifice by losing RC Lariat and RC Sticks, but gains a few big things in return. Run and hop make his rushdown a lot scarier, and he can be surprisingly good at it too. Rage lets him hitconfirm into a level 3 Union Jack Platinum for great damage, and since he has great range, JD is a reliable defensive tool for him. K-Eagle is a more rushdown focused Eagle with a decent comeback factor. Although his mixup game isn't nearly as strong as in dash grooves, he still has access to things like IOH j.MK and a short hop to create a crossover hop.
Useful - N/P: N-Eagle is a bit of a mix between C-Eagle and K-Eagle. You get the mobility of K and the reliable supers and rolls of C, but you sacrifice a lot of potential damage (lvl.2 Union Jack and multiple lvl.3 Union Jacks), making him a bit less scary overall. N-Eagle is good for a more simple style. P-Eagle gets parries, which are alright for him as he has decent ranged punishes and damage. While it is rare, a parry from P-Eagle into 5MK > Level 3 Union Jack Platinum does massive damage and is very scary.
Worst - S: S-Eagle doesn't have much going for him. While Eagle doesn't exactly need meter, he really likes having it, so without low health being forced to charge is very demanding. At low health, you can confirm into level 1 Union Jack Platinum over and over again. This gives you more consistent knockdowns and damage, but the damage isn't as high as other Grooves are capable of. You lose out on rolls for RC Lariat/Sticks in exchange for a dodge, which doesn't help much. Run and hop are strong, but are also present in K-Groove and N-Groove which are better for Eagle overall.
|
Eagle is a poking and punishing character with lots of good normals and hitconfirms. He doesn't get consistent knockdowns without meter, and his best anti-air requires you to roll cancel it, but otherwise he's a very solid neutral-oriented character. Eagle is best in C-Groove, A-Groove, and K-Groove. |
|
| Pros | Cons |
|
|
THIS PAGE IS STILL A WORK IN PROGRESS
Normal Moves
Far Normals
5LP
5MP
5HP
5LK
5MK
5HK
clHP
clHK
Crouching Normals
2LP
2MP
2HP
2LK
2MK
2HK
Jumping Normals
j.LP
j.MP
j.HP
j.LK
j.MK
j.HK
Throws
Pile of Fools
Fool Percussion
Colors
