JtheSaltyy (talk | contribs) No edit summary |
JtheSaltyy (talk | contribs) No edit summary |
||
| Line 111: | Line 111: | ||
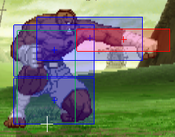
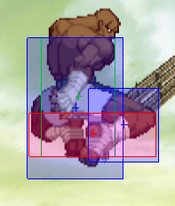
A quick elbow. | A quick elbow. | ||
* Solid jab. While it may have fairly short range, it can be used in guard crush strings and jail the opponent in the corner with repeated use of it. | * Solid jab. While it may have fairly short range, it can be used in guard crush strings and jail the opponent in the corner with repeated use of it. | ||
* Can | * Can work as both a combo starter and guard break pressure, as it links into 2MK and 5MP, as well it frame traps into 2HP. | ||
* Can be a usable anti air as well, however note | * It is a 2f jab, which is something not a lot of characters have, meaning Sagat can poke out of pressure that has noticeable gaps in it, which really helps out Sagat's defense. | ||
* Can be a usable anti air as well, however note it can't be rapid fired for any last-minute panic situations. | |||
* Only weakness is the fact that it will whiff on most crouchers, but that doesn't take away it's use as an anti air and something to poke out of pressure with. | |||
}} | }} | ||
}} | }} | ||
| Line 129: | Line 131: | ||
| subtitle = | | subtitle = | ||
| damage = 1100 | | damage = 1100 | ||
| stun = | | stun = 11 | ||
| cancel = SP/SU | | cancel = SP/SU | ||
| guard = Mid | | guard = Mid | ||
| Line 194: | Line 196: | ||
| subtitle = | | subtitle = | ||
| damage = 1300 / 1100 | | damage = 1300 / 1100 | ||
| stun = 13/11 | | stun = 13 / 11 | ||
| cancel = SP/SU (1st Hit Only) | | cancel = SP/SU (1st Hit Only) | ||
| guard = Mid | | guard = Mid | ||
| Line 340: | Line 342: | ||
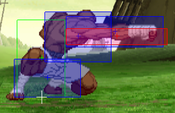
A sluggish low punch | A sluggish low punch | ||
* Just a far more gimped version of 5LP. Not only is it a very slow jab, it does not even hit low, so there's no real situations where this move warrants use over 5LP. | * Just a far more gimped version of 5LP. Not only is it a very slow jab, it does not even hit low, so there's no real situations where this move warrants use over 5LP. | ||
* If you want a poke that could hit every crouching character, which is the main weakness of 5LP, then use 2LK. Just ignore this button for the most part. | |||
}} | }} | ||
}} | }} | ||
| Line 356: | Line 359: | ||
| subtitle = | | subtitle = | ||
| damage = 1000 | | damage = 1000 | ||
| stun = | | stun = 10 | ||
| cancel = SP/SU | | cancel = SP/SU | ||
| guard = Mid | | guard = Mid | ||
| Line 369: | Line 372: | ||
| description = | | description = | ||
A slower low punch. | A slower low punch. | ||
* Another overlooked button. It can work as a good melee poke but nothing more. | * Another overlooked button. It can work as a good melee poke and blockstring filler but nothing more. | ||
* It's actually really plus, however it's just overshadowed by other better buttons. | * It's actually really plus, however it's just overshadowed by other better buttons. | ||
}} | }} | ||
| Line 449: | Line 452: | ||
| subtitle = | | subtitle = | ||
| damage = 1000 | | damage = 1000 | ||
| stun = | | stun = 10 | ||
| cancel = SP/SU | | cancel = SP/SU | ||
| guard = Low | | guard = Low | ||
| Line 512: | Line 515: | ||
| subtitle = | | subtitle = | ||
| damage = 600 | | damage = 600 | ||
| stun = | | stun = 6 | ||
| cancel = None | | cancel = None | ||
| guard = High | | guard = High | ||
| Line 542: | Line 545: | ||
| subtitle = | | subtitle = | ||
| damage = 1100 | | damage = 1100 | ||
| stun = | | stun = 11 | ||
| cancel = None | | cancel = None | ||
| guard = High | | guard = High | ||
| Line 573: | Line 576: | ||
| subtitle = | | subtitle = | ||
| damage = 1600 | | damage = 1600 | ||
| stun = | | stun = 16 | ||
| cancel = None | | cancel = None | ||
| guard = H | | guard = H | ||
| Line 741: | Line 744: | ||
| description = | | description = | ||
Sagat tosses the opponent over his shoulder. | Sagat tosses the opponent over his shoulder. | ||
* Go-to throw | * Go-to throw. Deals great damage especially when raged. | ||
}} | }} | ||
}} | }} | ||
| Line 791: | Line 794: | ||
| subtitle = {{Motion|236}} + {{Icon-Capcom|LP}} | | subtitle = {{Motion|236}} + {{Icon-Capcom|LP}} | ||
| damage = 800 | | damage = 800 | ||
| stun = | | stun = 8 | ||
| cancel = None | | cancel = None | ||
| guard = Mid | | guard = Mid | ||
| Line 811: | Line 814: | ||
| subtitle = {{Motion|236}} + {{Icon-Capcom|MP}} | | subtitle = {{Motion|236}} + {{Icon-Capcom|MP}} | ||
| damage = 900 | | damage = 900 | ||
| stun = | | stun = 9 | ||
| cancel = None | | cancel = None | ||
| guard = Mid | | guard = Mid | ||
| Line 877: | Line 880: | ||
| subtitle = {{Motion|236}} + {{Icon-Capcom|LK}} | | subtitle = {{Motion|236}} + {{Icon-Capcom|LK}} | ||
| damage = 700 | | damage = 700 | ||
| stun = | | stun = 7 | ||
| cancel = None | | cancel = None | ||
| guard = Mid | | guard = Mid | ||
| Line 897: | Line 900: | ||
| subtitle = {{Motion|236}} + {{Icon-Capcom|MK}} | | subtitle = {{Motion|236}} + {{Icon-Capcom|MK}} | ||
| damage = 800 | | damage = 800 | ||
| stun = | | stun = 8 | ||
| cancel = None | | cancel = None | ||
| guard = Mid | | guard = Mid | ||
| Line 916: | Line 919: | ||
| subtitle = {{Motion|236}} + {{Icon-Capcom|HK}} | | subtitle = {{Motion|236}} + {{Icon-Capcom|HK}} | ||
| damage = 900 | | damage = 900 | ||
| stun = | | stun = 9 | ||
| cancel = None | | cancel = None | ||
| guard = Mid | | guard = Mid | ||
| Line 1,256: | Line 1,259: | ||
| name = Tiger Genocide | | name = Tiger Genocide | ||
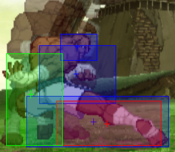
| input = {{Motion|236}}{{Motion|236}}+{{Icon-Capcom|K}} | | input = {{Motion|236}}{{Motion|236}}+{{Icon-Capcom|K}} | ||
| subtitle = 236236+K / | | subtitle = 236236+K / QCF,QCF+K | ||
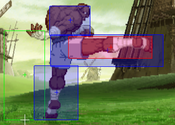
| image = CVS2_Sagat_236236K1.png | | image = CVS2_Sagat_236236K1.png | ||
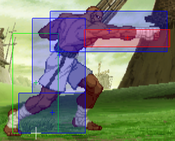
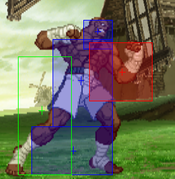
| caption = First Knee Hitbox | | caption = First Knee Hitbox | ||
| Line 1,304: | Line 1,307: | ||
| description = | | description = | ||
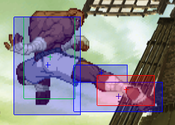
Sagat does a Tiger Knee and follows up with a Tiger Uppercut. | Sagat does a Tiger Knee and follows up with a Tiger Uppercut. | ||
* | * Below average level 2 cancel by Sagat's standards. It does do a hefty amount of damage by itself but level 2 cancels don't add anything big to the combo damage. All of Sagat's other level 2s are much more useful. | ||
}} | }} | ||
{{AttackData-CvS2 | {{AttackData-CvS2 | ||
| Line 1,328: | Line 1,331: | ||
}} | }} | ||
}} | }} | ||
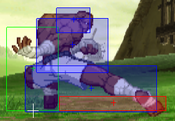
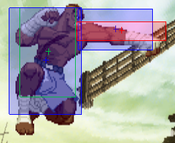
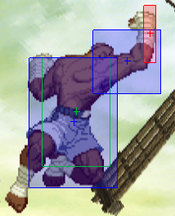
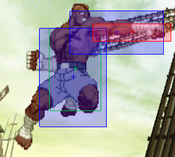
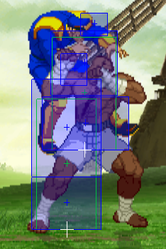
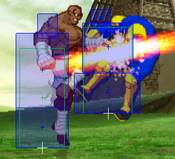
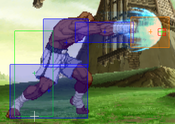
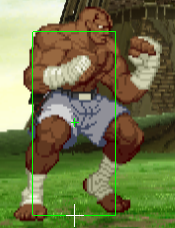
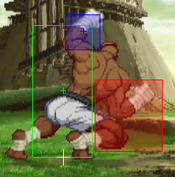
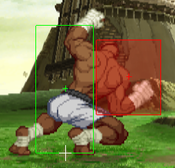
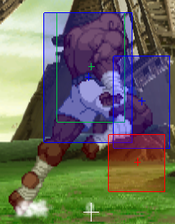
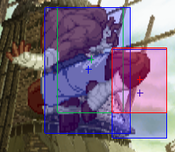
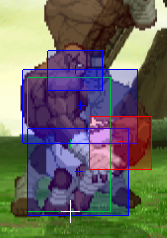
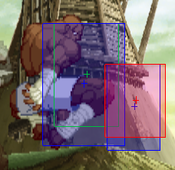
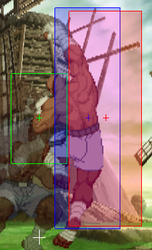
=== <span class="invisible-header">Tiger Raid</span> === | |||
{{MoveData | |||
| name = Tiger Genocide | |||
| input = {{Motion|214}}{{Motion|214}}+{{Icon-Capcom|K}} | |||
| subtitle = 214124+K / QCB,QCB+K | |||
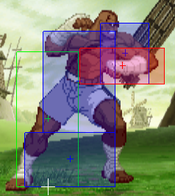
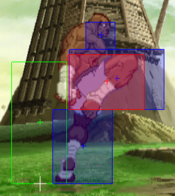
| image = CVS2_Sagat_214214K1.png | |||
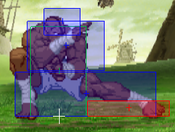
| caption = First Hitbox | |||
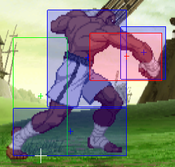
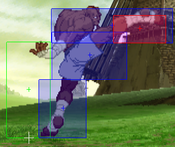
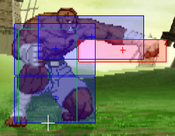
| image2 = CVS2_Sagat_214214K2.png | |||
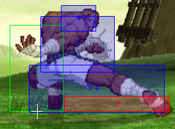
| caption2 = Ending Hitbox | |||
| linkname = Tiger Genocide | |||
| data = | |||
{{AttackData-CvS2 | |||
| version = {{Motion|214}}{{Motion|214}}+{{Icon-Capcom|LK}} | |||
| subtitle = | |||
| damage = 2700 | |||
| stun = 0 | |||
| cancel = None | |||
| guard = Low (First Hit), Mid | |||
| parry = Low (First Hit), High | |||
| startup = 8 | |||
| active = 2 [10] 4 [16] 2+2+2+2 | |||
| recovery = 29 | |||
| total = 77 | |||
| advHit = HKND | |||
| advBlock = -27 | |||
| invul = 8 (Full) | |||
| description = | |||
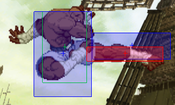
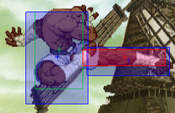
Sagat does a sweep followed by a midsection kick and ends with a flying outward kick. | |||
* In terms of damage, this is probably the most damaging level 1 combo ender for Sagat, but like Tiger Genocide, it will fail to do damage against moves in the air. | |||
* Not nearly as versatile as the other two levels, if Sagat wants to use this super it's best to wait until he has a level 2 or 3. The Tiger Cannons are better as level 1s. | |||
}} | |||
{{AttackData-CvS2 | |||
| header = no | |||
| version = {{Motion|214}}{{Motion|214}}+{{Icon-Capcom|MK}} | |||
| subtitle = | |||
| damage = 4000 | |||
| stun = 0 | |||
| cancel = SP/SU | |||
| guard = Low (First Hit), Mid | |||
| parry = Low (First Hit), High | |||
| startup = 8 | |||
| active = 2 [10] 4 [10] 4 [16] 2+2+2+2 | |||
| recovery = 24 | |||
| total = 86 | |||
| advHit = HKND | |||
| advBlock = -35 | |||
| invul = 14 (Full) | |||
| description = | |||
Sagat does a Tiger Knee and follows up with a Tiger Uppercut. | |||
* Arguably Sagat's best level 2. When cancelled into a heavy Tiger Uppercut, the damage on this super is great. The only problem is that the move has limited range, but if you find yourself at a distance where this super will land, hitconfirming into a Lvl.2 Tiger Raid is not a bad option at all, it's probably the best one available for damage and resource management. | |||
* Also has the same startup tech as the level 3 version (see level 3), but to a slightly lesser degree. If the opponent switches from stand block to crouch block within around 2 frames of the super freeze, they will block the move. If they don't, then even if they hold down-back they are getting hit. This is because while Lvl.3 Tiger Raid is basically a 0f move, Lvl.2 Tiger Raid is a 2f move, so if the opponent holds downback within the 2 frames, their input will be registered, but afterwards, their input will not be registered and will get hit by the attack. In terms of mixups, it's still viable but not nearly as powerful as the level 3 version, as well Sagat doesn't have a shorthop in C groove so the high-low isn't as scary in neutral but it can still be effective, especially in okizeme situations. | |||
* If blocked, the move itself is -2 so Sagat usually won't get punished too hard for it, at worst he gets hit by a reversal special or super after attempting a followup attack. | |||
}} | |||
{{AttackData-CvS2 | |||
| header = no | |||
| version = {{Motion|214}}{{Motion|214}}+{{Icon-Capcom|HK}} | |||
| subtitle = | |||
| damage = 5700 | |||
| stun = 0 | |||
| cancel = None | |||
| guard = Low (First Hit), Mid | |||
| parry = Low (First Hit), High | |||
| startup = 8 | |||
| active = 2 [10] 4 [10] 4 [16] 2+2+2+2 | |||
| recovery = 26 | |||
| total = 88 | |||
| advHit = HKND | |||
| advBlock = -34 | |||
| invul = 22 (Full) | |||
| description = | |||
Sagat does a Tiger Knee and follows up with a Tiger Uppercut. | |||
* One of Sagat's most powerful level 3s. Not only is it his second highest damaging level 3, but it can be combo'd into from just about anything with hitstun. | |||
* What makes this super scary is the fact that it's technically a 0-frame startup move. The super freeze caused by the level 3 not only disables the opponent's movement, but their ability to block as well, and the super freeze ends the 1st frame that the hitbox appears. If the opponent was not already crouch blocking before the super freeze, this super will hit them. The only knock is the limited range, as with other levels. In hop grooves, this creates a 50/50 mixup between Sagat's low jump HK and his lvl.3 Tiger Raid. Low jump HK is really difficult to react to, and the only way to block the Tiger Raid is to crouch block. This makes Sagat's pressure even scarier when he has a level 3, but don't pressure mindlessly as j.HK isn't invincible and his lowjump is not as fast as some other characters. It's still a really strong option to have and should be used if applicable. | |||
}} | |||
}} | |||
<br> | |||
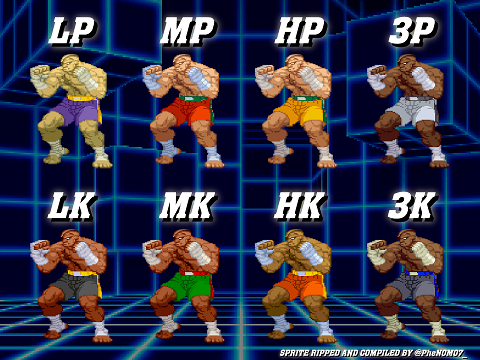
== Colors == | == Colors == | ||
Revision as of 17:25, 27 July 2022
Introduction
Story
Sagat is a Muai Thai practitioner from Thailand. He is considered the "Emperor of Muai Thai" because of how unstoppable he was when he fought. Nobody could defeat him, and soon became the strongest fighter in the world. He uses typical Muai Thai moves like fierce kicks, stiff knees and devastating punches, however he also has the ability to shoot projectiles (Tiger Shot), and uses a variation of Ryu's Shoryuken (Tiger Blow / Tiger Uppercut) as payback for Ryu scarring him. He dedicates his life to the martial arts, and works hard every day to make sure he retains his status as the best Muai Thai fighter to ever live, and that hard work payed off well as when he is at full strength, nothing can stop him. He is a proud and humble individual who knows and appreciates the work he and his opponents put into every fight.
Sagat used to be one of the key antagonists of Street Fighter, first starting out as the final boss of the first Street Fighter. Once he lost to Ryu, he let his hate and anger lead him down to dark paths. He became one of the main members of the crime syndicate Shadaloo, becoming one of the 4 Heavenly Kings and Dictator's personal bodyguard. After Dictator brainwashed Ryu during the events of Street Fighter Alpha 3, Sagat realized the moral wrongdoings of Shadaloo. He left the organization, and soon became one of the protagonists of the game.
In a majority of Street Fighter games Sagat has made an appearance in, he was usually an incredibly strong character and remained near or at the very top of the tier lists. Old Sagat from Super Turbo and SFIV Vanilla Sagat are notable examples of really strong variants of Sagat. In each game he appears in, he's very strong for a different reason. O. Sagat was strong because of his zoning, SFIV Vanilla Sagat is strong because of his insane damage output, and you'll see why CvS2 Sagat is right up there with them.
Overview
Sagat is generally regarded as the king of CvS2. He is at the very top of every tierlist, usually listed as the best character in the whole game in multiple grooves. He's a great character in any groove you throw him on. He is all about playing neutral and using his big buttons to confirm into big damage. He has it all: high health, high damage output, good defensive options, great pressure, the best buttons in the game, you can't ask for anything more in a character. He's relatively easy to play if you know when to use each of his buttons, since they serve a variety of uses.
Unfortunately, while a majority of this cast becomes much better thanks to RCs (Roll Cancels), Sagat doesn't get too much from it, outside of RC Tiger Knee, there's no need to RC any of his specials. They won't offer much in the long run as they serve only a couple uses, but overall in neutral these specials don't serve much purpose at all.
Most if not all top CvS2 players have Sagat on their main C and K groove team, usually as their R2 guy in the back. If he is on a team, should be there, since he is just too strong to be passed up on, and as said before, he's not that hard of a character to learn in any groove. Outside of his own core gameplay design, he doesn't deviate too much from his gameplay in different grooves. Even in grooves like S and P, he's the best character available for those grooves.
Generally the best spot you want to be in is either in neutral or pressuring up close. While Sagat's defensive options are great, it might get difficult to deal with rushdown heavy characters due to Sagat's sluggish speed and above average size, so it's best he's in a position where his speed isn't a part of the equation. You'll chip away at the opponent's health in neutral, but your main source of damage is from a confirm into super. It bags massive damage, as Sagat has the most reliable supers to give him that burst damage.
Groove Selection
Best - K/C: While Sagat performs well in every Groove, he still favors some more than others. K-Sagat is the best of them, and is the best character in the game. Rage benefits Sagat a ton, as his already ridiculous damage skyrockets. He can easily confirm into a Tiger Cannon for great damage as well. Run and shorthop legitimize his mixup game, and JD gives him a solid defensive option to deal with rushdown, and even has a true 50/50 when raged. C-Sagat is likely right behind. C-Groove gives Sagat an even better defensive tool in Alpha Counter, which more than makes up for the mobility loss, and air blocking can give Sagat more room to jump. Sagat also has a great level 2 combo, and since he has such great meter build he can do it often. While his roll isn't stellar, it's still a roll, and it can get him out of sticky situations when he needs it.
Useful - N/A/S/P: N-Sagat is his third best Groove. He gets access to the mobility of K-Sagat with a lot more chances to cancel into a level 1 super for good damage. He doesn't like guard cancel roll as much since his roll isn't the best, but it's more than welcome as a defensive option. Sagat doesn't like having to get into Max Mode for his level 3s however, and his meterbuild isn't as stellar since N-Groove has to build a bigger bar. A-Sagat, while on paper would sound like his best Groove, falls flat a bit. His CC isn't as good as you might hope, and while activation is still a ridiculously powerful mechanic and Sagat gets a lot of mileage from it, he just can't convert with it as well as other A-Groove characters. He would rather spend meter on a level 3 super usually, as those are more common for him and more reliable. Still, A-Sagat can make a nice battery character. S-Sagat is the best S-Groove character, and it still isn't the best Groove for him. He retains shorthop and run, which are inherently great for him, and at low health he can replace his Tiger Shots with Tiger Cannons. However, lack of supers often and unreliable sources of meter make it hard to do well with him until you reach low health. P-Sagat loses the run, but shorthop is more important for him anyway. Parries are a useful tool for him, as he can parry into a simple punish for decent damage, but he will rarely have a super to make that scary.
Worst - None: Sagat excels in every Groove and every team, regardless of your team composition.
|
Sagat is the best character in CvS2, and is a beast in every situation he is in. Simple and unbelievably strong, there's little reason not to play him. Sagat is best in K-Groove and C-Groove, but famously works in every Groove well |
|
| Pros | Cons |
|
|
THIS PAGE IS STILL WORK IN PROGRESS
Normal Moves
5LP
5MP
5HP
cl5HP
5LK
5MK
5HK
2LP
2MP
2HP
2LK
2MK
2HK
j.LP
j.MP
j.HP
j.LK
j.MK
dj.MK
j.HK
Throws
Tiger Toss
King's Clutch
Special Moves
Tiger Shot
Low Tiger Shot
Tiger Uppercut
Tiger Crush
Super Moves
Tiger Cannon
Low Tiger Cannon
Tiger Genocide
Tiger Raid
Colors

