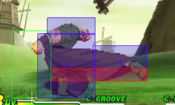
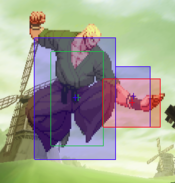
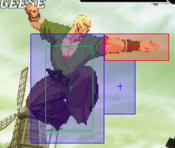
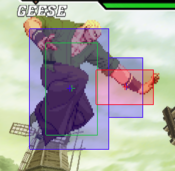
Callie Rose (talk | contribs) No edit summary |
Callie Rose (talk | contribs) No edit summary |
||
| Line 86: | Line 86: | ||
| data = | | data = | ||
{{AttackData-CvS2 | {{AttackData-CvS2 | ||
| version | | version = Far {{Icon-Capcom|LP}} | ||
| subtitle = | |||
| damage = 300 | | damage = 300 | ||
| stun = 4 | | stun = 4 | ||
| cancel = RF/SP/SU | | cancel = RF/SP/SU | ||
| guard = | | guard = Mid | ||
| parry = | | parry = Mid | ||
| startup = 3 | | startup = 3 | ||
| active = 4 | | active = 4 | ||
| Line 777: | Line 777: | ||
| advHit = Varies | | advHit = Varies | ||
| advBlock = Varies | | advBlock = Varies | ||
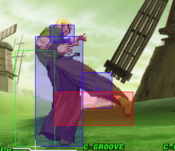
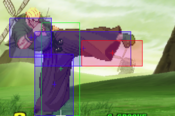
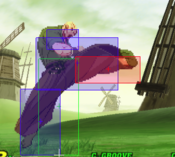
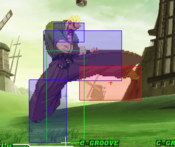
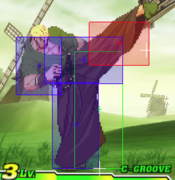
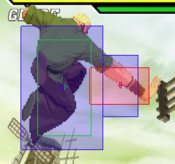
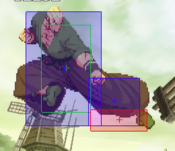
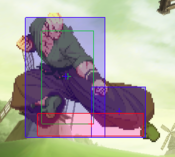
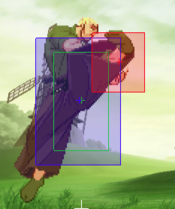
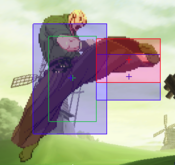
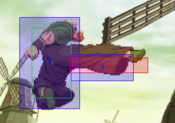
| invul = Neutral j.HK is a move very similar to 5HK, and diagonal j.HK is a far reaching kick. With nj.HK, it can be a useful neutral jump air-to-air, but you usually won't use it much. Diagonal j.HK is likely the main move you'll use during a jump, as it is both a great jump-in and a solid air-to-air with long reach. While both hits of j.HP together do more damage, you usually won't get both hits, making this a much more consistent jump starter for damage. | | invul = None | ||
| description = Neutral j.HK is a move very similar to 5HK, and diagonal j.HK is a far reaching kick. With nj.HK, it can be a useful neutral jump air-to-air, but you usually won't use it much. Diagonal j.HK is likely the main move you'll use during a jump, as it is both a great jump-in and a solid air-to-air with long reach. While both hits of j.HP together do more damage, you usually won't get both hits, making this a much more consistent jump starter for damage. | |||
}} | }} | ||
}} | }} | ||
| Line 864: | Line 865: | ||
| invul = None | | invul = None | ||
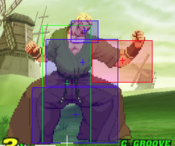
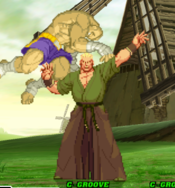
| description = Geese slams the opponent over his shoulder. Great damage and an amazing knockdown makes for a very rewarding throw overall. A slight microwalk backwards allows you to easily set up a crossup j.MK safejump. Slightly slower than his punch throw, but this makes tick throws from Geese's very plus 2LP a bit easier, so that can almost be a benefit outside of punish situations. | | description = Geese slams the opponent over his shoulder. Great damage and an amazing knockdown makes for a very rewarding throw overall. A slight microwalk backwards allows you to easily set up a crossup j.MK safejump. Slightly slower than his punch throw, but this makes tick throws from Geese's very plus 2LP a bit easier, so that can almost be a benefit outside of punish situations. | ||
}} | |||
}} | |||
== Specials == | |||
=== <span class="invisible-header">Reppuken</span> === | |||
{{MoveData | |||
| name = Reppuken | |||
| input = 236LP/MP | |||
| subtitle = Fireball | |||
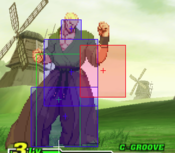
| image = CVS2_Geese_236P.PNG | |||
| caption = | |||
| linkname = Reppuken | |||
| data = | |||
{{AttackData-CvS2 | |||
| version = {{Motion|236}}+{{Icon-Capcom|LP}} | |||
| subtitle = | |||
| damage = 900 | |||
| stun = 9 | |||
| cancel = None | |||
| guard = Mid | |||
| parry = High | |||
| startup = 12 | |||
| active = Traveling | |||
| recovery = 46 | |||
| total = 58 | |||
| advHit = -13 | |||
| advBlock = -13 | |||
| invul = None | |||
}} | |||
{{AttackData-CvS2 | |||
| header = no | |||
| version = {{Motion|236}}+{{Icon-Capcom|MP}} | |||
| subtitle = | |||
| damage = 1000 | |||
| stun = 10 | |||
| cancel = None | |||
| guard = Mid | |||
| parry = High | |||
| startup = 12 | |||
| active = Traveling | |||
| recovery = 46 | |||
| total = 58 | |||
| advHit = -13 | |||
| advBlock = -13 | |||
| invul = None | |||
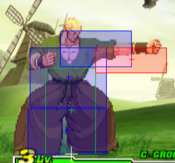
| description = Zoning tools and blockstring enders. The LP version is a slow tool to toss at fullscreen to take up space, while the MP version is your go-to blockstring ender for safety and guard crush, though it always ends your string. Grounded fireballs are universally inferior for zoning, as they're much easier to evade, so using these as you would usually use a fireball doesn't work as well as a high flying fireball would. This sorta limits them to blockstrings, close range pressure, and meaties, though they excel in these categories. | |||
}} | |||
}} | |||
=== <span class="invisible-header">Double Reppuken</span> === | |||
{{MoveData | |||
| name = Double Reppuken | |||
| input = 236HP | |||
| subtitle = Double Fireball | |||
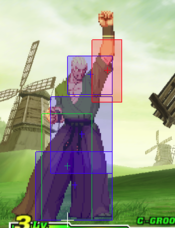
| image = CVS2_Geese_236HP_First.PNG | |||
| caption = Windup | |||
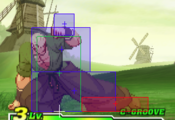
| image2 = CVS2_Geese_236HP_Second.PNG | |||
| caption2 = Traveling Hitbox | |||
| linkname = Double Reppuken | |||
| data = | |||
{{AttackData-CvS2 | |||
| version = {{Motion|236}}+{{Icon-Capcom|HP}} | |||
| subtitle = | |||
| damage = 600+1000 | |||
| stun = 6+10 | |||
| cancel = None | |||
| guard = Mid | |||
| parry = High | |||
| startup = 12 | |||
| active = 20~Traveling | |||
| recovery = 43 | |||
| total = 74 | |||
| advHit = -10 | |||
| advBlock = -10 | |||
| invul = None | |||
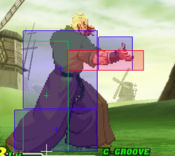
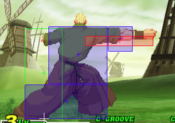
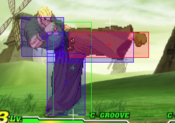
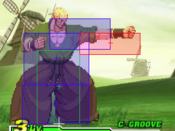
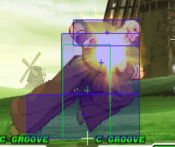
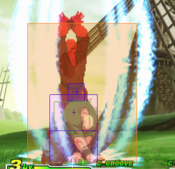
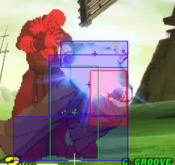
| description = Geese spins a bit of energy up in front of him before sending it out as a Reppuken. Useful counter-zoning tools, as the first half deletes projectiles and will still send out the second part. Still not super useful for zoning sadly, even moreso because of the very long total duration. If both hits connect it does more damage than a Reppuken, but most of the time only the fireball will connect, which is identical to MP Reppuken. | |||
}} | |||
}} | |||
=== <span class="invisible-header">Shippuken</span> === | |||
{{MoveData | |||
| name = Shippuken | |||
| input = j.214P | |||
| subtitle = Air Fireball | |||
| image = CVS2_Geese_j214P.PNG | |||
| caption = | |||
| linkname = Shippuken | |||
| data = | |||
{{AttackData-CvS2 | |||
| version = In Air {{Motion|214}}+{{Icon-Capcom|LP}} | |||
| subtitle = | |||
| damage = 700 | |||
| stun = 7 | |||
| cancel = None | |||
| guard = Mid | |||
| parry = High | |||
| startup = 16 | |||
| active = Traveling | |||
| recovery = Till Landing +6 | |||
| total = 20+ | |||
| advHit = -7 | |||
| advBlock = -5 | |||
| invul = None | |||
}} | |||
{{AttackData-CvS2 | |||
| header = no | |||
| version = In Air {{Motion|214}}+{{Icon-Capcom|MP}} | |||
| subtitle = | |||
| damage = 800 | |||
| stun = 8 | |||
| cancel = None | |||
| guard = Mid | |||
| parry = High | |||
| startup = 16 | |||
| active = Traveling | |||
| recovery = Till Landing +6 | |||
| total = 20+ | |||
| advHit = -7 | |||
| advBlock = -5 | |||
| invul = None | |||
}} | |||
{{AttackData-CvS2 | |||
| header = no | |||
| version = In Air {{Motion|214}}+{{Icon-Capcom|HP}} | |||
| subtitle = | |||
| damage = 900 | |||
| stun = 9 | |||
| cancel = None | |||
| guard = Mid | |||
| parry = High | |||
| startup = 16 | |||
| active = Traveling | |||
| recovery = Till Landing +6 | |||
| total = 20+ | |||
| advHit = -7 | |||
| advBlock = -5 | |||
| invul = None | |||
| description = Geese tosses a fireball out midair and flies backwards. Useful zoning and anti-air bait tools, but they do have a bit of lag, so watch for spamming them as they can be punished into big damage. Against opponents who are trying to rush Geese down these can be very useful for escaping and zoning. The backwards movement can also be useful to bait and punish anti-airs, though invincible ones or fast ones will still usually win because of the high startup. | |||
}} | |||
}} | |||
=== <span class="invisible-header">Jaeiken</span> === | |||
{{MoveData | |||
| name = Jaeiken | |||
| input = 63214K | |||
| subtitle = Rush | |||
| image = CVS2_Geese_63214K.PNG | |||
| caption = | |||
| linkname = Jaeiken | |||
| data = | |||
{{AttackData-CvS2 | |||
| version = {{Motion|63214}}+{{Icon-Capcom|LK}} | |||
| subtitle = | |||
| damage = 400x2+1000 | |||
| stun = 4x2+10 | |||
| cancel = None | |||
| guard = Mid | |||
| parry = High | |||
| startup = 7, 8~28 +2 | |||
| active = (2)4(5)4(11)6 | |||
| recovery = 11/41 | |||
| total = 58~101 | |||
| advHit = DWN | |||
| advBlock = -23 | |||
| invul = None | |||
}} | |||
{{AttackData-CvS2 | |||
| header = no | |||
| version = {{Motion|63214}}+{{Icon-Capcom|MK}} | |||
| subtitle = | |||
| damage = 400x2+1100 | |||
| stun = 4x2+11 | |||
| cancel = None | |||
| guard = Mid | |||
| parry = High | |||
| startup = 12, 13~33 +2 | |||
| active = 4(5)4(11)6 | |||
| recovery = 11/41 | |||
| total = 51~106 | |||
| advHit = DWN | |||
| advBlock = -23 | |||
| invul = None | |||
}} | |||
{{AttackData-CvS2 | |||
| header = no | |||
| version = {{Motion|63214}}+{{Icon-Capcom|HK}} | |||
| subtitle = | |||
| damage = 500x2+1200 | |||
| stun = 5x2+12 | |||
| cancel = None | |||
| guard = Mid | |||
| parry = High | |||
| startup = 17, 18~38 +2 | |||
| active = 4(5)4(11)6 | |||
| recovery = 11/41 | |||
| total = 61~111 | |||
| advHit = DWN | |||
| advBlock = -23 | |||
| invul = None | |||
| description = Geese rushes forward, and once in proximity of the opponent, goes into a series of strikes ending in a double palm for a knockdown. Your primary combo ender off of heavy hits, though you usually can't combo into the HK version. They can also be decent roll cancels to go through fireballs. Very unsafe on block, so make sure you know they'll hit or you'll eat a punish. The HK version is a guard crush monster, and when they're at about half guard bar, you can basically guarantee it will guard break. | |||
}} | |||
}} | |||
=== <span class="invisible-header">Atemi</span> === | |||
{{MoveData | |||
| name = Atemi Counters | |||
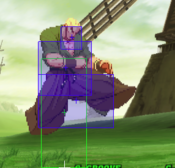
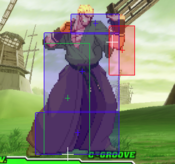
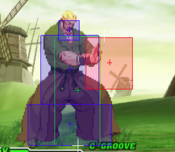
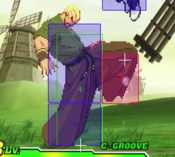
| input = 63214P | |||
| subtitle = Counters | |||
| image = CVS2_Geese_63214LP.PNG | |||
| caption = High Counter, Jodan | |||
| image2 = CVS2_Geese_63214MP.PNG | |||
| caption2 = Mid Counter, Chudan | |||
| image3 = CVS2_Geese_63214HP.PNG | |||
| caption3 = Low Counter, Gedan | |||
| linkname = Atemi | |||
| data = | |||
{{AttackData-CvS2 | |||
| version = {{Motion|63214}}+{{Icon-Capcom|LP}} | |||
| subtitle = Jodan Atemi | |||
| damage = 1900 | |||
| stun = 19 | |||
| cancel = None | |||
| guard = N/A | |||
| parry = N/A | |||
| startup = 0 | |||
| active = 1~18 | |||
| recovery = 32 | |||
| total = 50 | |||
| advHit = DWN | |||
| advBlock = N/A | |||
| invul = High (Counters from frame 1 to 18) | |||
}} | |||
{{AttackData-CvS2 | |||
| header = no | |||
| version = {{Motion|63214}}+{{Icon-Capcom|MP}} | |||
| subtitle = Chudan Atemi | |||
| damage = 2100 | |||
| stun = 0 | |||
| cancel = None | |||
| guard = N/A | |||
| parry = N/A | |||
| startup = 0 | |||
| active = 1~18 | |||
| recovery = 32 | |||
| total = 50 | |||
| advHit = DWN | |||
| advBlock = N/A | |||
| invul = Mid (Counters from frame 1 to 18) | |||
}} | |||
{{AttackData-CvS2 | |||
| header = no | |||
| version = {{Motion|63214}}+{{Icon-Capcom|HP}} | |||
| subtitle = Gedan Atemi | |||
| damage = 2000 | |||
| stun = 0 | |||
| cancel = None | |||
| guard = N/A | |||
| parry = N/A | |||
| startup = 0 | |||
| active = 1~18 | |||
| recovery = 32 | |||
| total = 50 | |||
| advHit = DWN | |||
| advBlock = N/A | |||
| invul = Low (Counters from frame 1 to 18) | |||
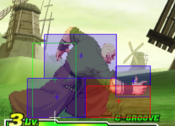
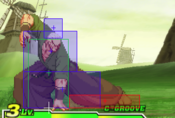
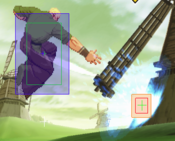
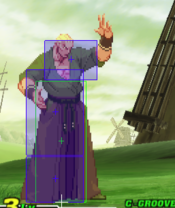
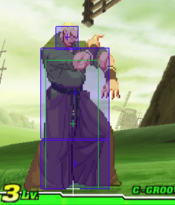
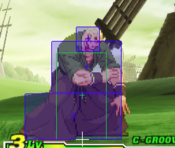
| description = Geese holds out his hands either at his head, around his torso, or down on the ground. If the opponent does an attack that comes in contact with his hands, he grabs them and knocks them down. High risk/high reward tools for calling out obvious pressure, jump-ins, and repetitive pokes. If you do get one of these, you take a chunk of the opponents lifebar and get a hard knockdown. However, they have a long total duration, so the opponent can easily punish into a combo if you whiff these or guess wrong on what parry you do. Frame 1 startup means that they can be reversals, but they aren't as reliable as a reversal DP while carrying just as much risk. They also don't beat throws like a reversal DP would. The high version can be a useful anti-air as well, but again, not as much as a reversal DP. Simply empty jumping will make Geese whiff the counter and allow the opponent to punish him. | |||
}} | |||
}} | |||
== Supers == | |||
=== <span class="invisible-header">Raging Storm</span> === | |||
{{MoveData | |||
| name = Raging Storm | |||
| input = 1632143P | |||
| subtitle = Anti-Air, Reversal Super | |||
| image = CVS2_Geese_1632143P.PNG | |||
| caption = | |||
| linkname = Raging Storm | |||
| data = | |||
{{AttackData-CvS2 | |||
| version = {{Motion|db}}{{Motion|63214}}{{Motion|df}}+{{Icon-Capcom|LP}} | |||
| subtitle = | |||
| damage = 3300 | |||
| stun = 0 | |||
| cancel = None | |||
| guard = Mid | |||
| parry = High | |||
| startup = 4:10 | |||
| active = 9(3)9(3)9 | |||
| recovery = 30 | |||
| total = 77 | |||
| advHit = DWN | |||
| advBlock = -7 | |||
| invul = 1~8 (Full) | |||
}} | |||
{{AttackData-CvS2 | |||
| header = no | |||
| version = {{Motion|db}}{{Motion|63214}}{{Motion|df}}+{{Icon-Capcom|MP}} | |||
| subtitle = | |||
| damage = 4800 | |||
| stun = 0 | |||
| cancel = SP/SU | |||
| guard = Mid | |||
| parry = High | |||
| startup = 4:10 | |||
| active = 9(3)9(3)9(3)9 | |||
| recovery = 30 | |||
| total = 89 | |||
| advHit = DWN | |||
| advBlock = -7 | |||
| invul = 1~14 (Full) | |||
}} | |||
{{AttackData-CvS2 | |||
| header = no | |||
| version = {{Motion|db}}{{Motion|63214}}{{Motion|df}}+{{Icon-Capcom|HP}} | |||
| subtitle = | |||
| damage = 6500 | |||
| stun = 0 | |||
| cancel = None | |||
| guard = Mid | |||
| parry = High | |||
| startup = 4:10 | |||
| active = 9(3)9(3)9(3)9(3)9 | |||
| recovery = 30 | |||
| total = 101 | |||
| advHit = DWN | |||
| advBlock = -7 | |||
| invul = 1~22 (Full) | |||
| description = Geese sends a huge storm of energy up and around him. These act as massive damage anti-airs, as long as you can do the input fast enough. Only the level 3 one is a reversal, and while it's a very good one, you usually want to save the level 3 for a Deadly Rave cancel rather than a high damage reversal. Slow startup makes these hard to use in general as well, with 10 frame startup after the super flash. While -7 sounds pretty safe for a reversal, some characters can still punish with a fast poke into super, so be sure what punish options every character has. | |||
}} | |||
}} | |||
=== <span class="invisible-header">Deadly Rave</span> === | |||
{{MoveData | |||
| name = Deadly Rave | |||
| input = 632146K... | |||
| subtitle = Rave Super | |||
| image = CVS2_Geese_632146K.PNG | |||
| caption = | |||
| linkname = Deadly Rave | |||
| data = | |||
{{AttackData-CvS2 | |||
| version = {{Motion|63214}}{{Motion|f}}+{{Icon-Capcom|K}}>{{Icon-Capcom|LP}}>{{Icon-Capcom|LP}}>{{Icon-Capcom|LK}}>{{Icon-Capcom|LK}}>{{Icon-Capcom|MP}}>{{Icon-Capcom|MK}}>{{Icon-Capcom|HP}}>{{Icon-Capcom|HK}}>{{Motion|214}}+{{Icon-Capcom|HP}} | |||
| subtitle = | |||
| damage = 6200 | |||
| stun = 0 | |||
| cancel = None | |||
| guard = Mid | |||
| parry = High | |||
| startup = 4:4 | |||
| active = 41 | |||
| recovery = 23 | |||
| total = 72 | |||
| advHit = DWN | |||
| advBlock = +13 | |||
| invul = 22 (Full) | |||
| description = Geese rushes forward before going into a series of attacks tied to your inputs. One of the reasons Geese is the top tier he is. This super does massive damage, the rush is +13 making it a safe fireball callout, and you can link after the HK part of the root for a damage increase. Combos from a lot of Geese's normals as well, making a single Geese punish capable of going through 70% of a lifebar. Mixed with Geese's amazing pressure, a guard crush can confirm into this easily. Your main way to end this isn't the 214HP ender, but instead, link a cl.LK, and then do cl.HP > 63214MK for much higher damage. | |||
}} | }} | ||
}} | }} | ||
Revision as of 02:39, 9 July 2022
Introduction
Story
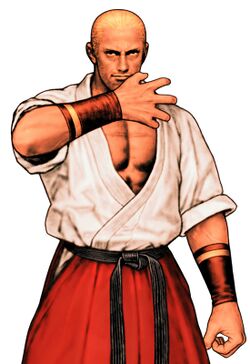
Geese Howard is the infamous villain of the Fatal Fury franchise. Born in South Town, he is the son of a poverish American woman and an Austrian terrorist. Geese's father immediately abandoned him. Once he came of age, Geese worked many jobs to support his mother. Eventually, his mother's health started failing, and she would come to pass when Geese was 15. Enraged at the fact that his very wealthy father never aided them, Geese hunted him down. He found his fathers name, Rudolph Krauser von Stroheim, and would hunt him down in Austria to assassinate him. He was stopped, however, by his half brother Wolfgang Krauser. Humiliated by defeat, Geese quickly learned that power ruled over all. He took to training in martial arts, and started to study under a master named Tung Fu Rue. Tung Fu Rue trained Geese and two other students, Jeff Bogard (who would become Terry's adoptive father) and Cheng Sinzan. The three became known as The Three Brothers of Godly Battle.
Geese could never shake his obsession with power however. Tung Fu Rue knew this, and instead passed the secrets of his martial arts to Jeff Bogard. Enraged, Geese left the dojo, overthrew the local crime bosses, and became the mastermind behind organized crime in South Town. With more and more money flowing in, he started his own business, Howard Connections. He uses this money to fund his plots for revenge and also begin the first ever King of Fighters tournaments, which he used to find new recruits. Geese would eventually start his road to revenge by killing his old training partner and friend, Jeff Bogard, right in front of his two adoptive sons Terry and Andy. The two brothers would chase Geese for years, and eventually put an end to his life by tossing him off the roof of his tower... twice.
Gameplay
Geese is a ridiculously damaging rushdown character. Often ranked in the top tiers or just outside of it, Geese has the ability to rack up damage like nobody else can, and crush guard bars into dust. His infamous Deadly Rave gives him some of the highest damage potential in the game from almost any starter. Great normals for brawling allow Geese to control the close range and threaten massive damage. His neutral isn't entirely anything to scoff at either, with a useful fireball in Reppuken and a few solid normals. His various Atemi counters allow him to call out careless move usage for big damage and a mixup, and while he lacks any sort of reversal without meter, his level 3 Raging Storm is an incredible reversal when he has it. Even if you do end up landing a hit on him, he has one of the highest health values in the game, allowing him to take a few hits and keep going.
Geese can still struggle in some situations however. He's quite tall and somewhat slow, meaning he struggles to escape potent rushdown without calling it out with a mash or counter. His neutral isn't bad, but he lacks any solid ranged poke, and his best anti-air is 2HP which lacks any invinciblity or a knockdown. Geese often has to commit to an approach to maximize his potential, which can be very risky. Still, he has every tool required for this, especially in K-Groove where he truly excels.
Groove Selection
Best - K: It can be hard to justify playing any Geese besides K-Geese. K-Geese has everything he could ever want and more. Just Defend gives Geese a solid and safe way to deal with mindless button pressing in neutral, and thanks to his very stable and damaging combo potential with Jaeiken and Deadly Rave, it often makes the opponent hurt a lot more than they would hurt you. Run and hop give him scary mixup potential that loops into itself as well. Rage makes Geese a true nightmare, giving him access to 80% damage combos and two-touch guard crush strings. If you can get in while Raged with Geese, the round may very well be over, as even without Rage getting Geese off of you is difficult. Lack of a roll basically means nothing, as Geese has no powerful roll cancels, and JD makes up for the lack of it anyway.
Useful - N/P/A: N-Geese is a bit of a lesser K-Geese. He maintains run and hop, with the added benefit of roll. While Geese doesn't need roll, it does give him access to RC Double Reppuken, which is a solid tool overall. A big benefit of N-Geese is that he can utilize Max Mode as if it was a weaker on-command Rage. By waiting until a good moment to capitalize, N-Geese can guarantee having a Deadly Rave to make the punish hurt, while K-Geese can't. Still, Rage is much scarier overall, and without JD Geese struggles a lot more on defense and in neutral. P-Geese is an obviously useful pick, as parries live and die by how well you can punish, and Geese can punish very well. Parries work like a more potent JD as well, giving you all the same strengths but being even more likely to get you a punish. The downside is that you'll rarely have a Deadly Rave to make that punish do good damage, and you lose the guard crush ability. A-Geese gets to use powerful Custom Combos, and he can utilize them fairly well. Roll and Alpha Counter are appreciated defensive tools as well. Custom Combo just doesn't match up in damage to a Raged Deadly Rave cancel however.
Worst - C/S: C-Geese gets very little that A-Geese doesn't get, and A-Geese isn't that good either. While being able to sit on a level 3 for as long as you want is quite nice, Geese gets nothing from a level 2 since level 2 Raging Storm isn't fully startup invincible. If it was, C-Geese would likely be a lot better. He also doesn't abuse level 2 cancels very well, with level 2 Raging Storm into a level 1 Raging Storm being the only thing he really gets. S-Geese is not useful in any way really. Dodge is meaningless to him and his is fairly bad, level 1 Raging Storm isn't very good at all, and not having consistent access to level 3's cuts his damage in half.
|
Geese is a damage and guard crushing rushdown machine who shines when putting the opponent into scary close-range situations. He can end rounds quick using his powerful Deadly Rave super for massive damage. Arguably no other character synergizes with K-Groove like he does. Geese is best in K-Groove. |
|
| Pros | Cons |
|
|
!!!THIS PAGE IS STILL A WIP. IF YOU NEED FRAME DATA NOW, REFER TO THE CVS2 BIBLE OR LOOK THROUGH EDIT HISTORY TO FIND THE LAST EDIT CONTAINING FRAME DATA IF THERE WAS ONE!!!
Normal Moves
Far Normals
5LP
5MP
5HP
5LK
5MK
5HK
Close Standing Normals
clLP
clMP
clHP
clLK
clMK
clHK
Crouching Normals
2LP
2MP
2HP
2LK
2MK
2HK
Jumping Normals
j.LP
j.MP
j.HP
j.LK
j.MK
j.HK
Command Normals
Fudo Kassatsuriken
Throws
Shinkuu Nage
Toraya
Specials
Reppuken
Double Reppuken
Shippuken
Jaeiken
Atemi
Supers
Raging Storm
Deadly Rave
Colors
