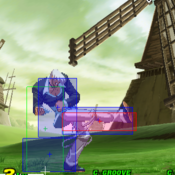
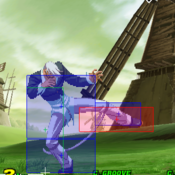
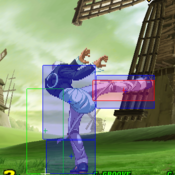
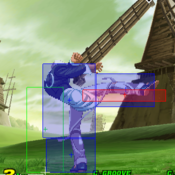
|
|
| Line 2: |
Line 2: |
| {{CvS2 Character Subnav|char=Iori|short=Iori}} | | {{CvS2 Character Subnav|char=Iori|short=Iori}} |
| <div> | | <div> |
| | |
| {| class="wikitable" style="float:right; margin-left: 10px;" | | {| class="wikitable" style="float:right; margin-left: 10px;" |
| |- | | |- |
| Line 1,334: |
Line 1,335: |
| }} | | }} |
|
| |
|
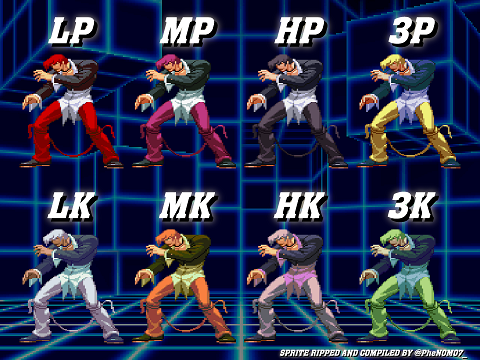
| == Combos == | | === Colors === |
| | | [[File:Iori CvS2 colors.png]] |
| === Meterless combos: === | |
| | |
| | |
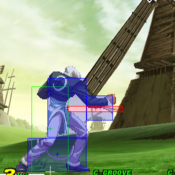
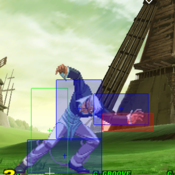
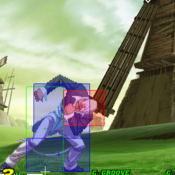
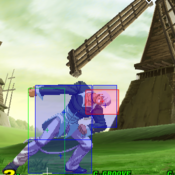
| ==== Low Hit Confirm ====
| |
| cr.short x 3 X qcb + fierce x 3
| |
| | |
| {{Motion|2}}+{{Icon-Capcom|lk}},{{Motion|2}}+{{Icon-Capcom|lk}},{{Motion|2}}+{{Icon-Capcom|lk}} x {{Motion|QCB}}+{{Icon-Capcom|hp}} x {{Motion|QCB}}+{{Icon-Capcom|hp}} x {{Motion|QCB}}+{{Icon-Capcom|hp}}
| |
| | |
| ==== Fast Hit Confirm ====
| |
| s.jab x 3, qcb + fierce x 3
| |
| | |
| {{Icon-Capcom|lp}},{{Icon-Capcom|lp}},{{Icon-Capcom|lp}}x {{Motion|QCB}}+{{Icon-Capcom|hp}} x {{Motion|QCB}}+{{Icon-Capcom|hp}} x {{Motion|QCB}}+{{Icon-Capcom|hp}}
| |
| | |
| ==== Frame Trap Hit Confirm ====
| |
| s.jab, s.fierce, qcb + fierce x 3
| |
| | |
| CL{{Icon-Capcom|lp}}, CL{{Icon-Capcom|hp}} x {{Motion|QCB}}+{{Icon-Capcom|hp}} x {{Motion|QCB}}+{{Icon-Capcom|hp}} x {{Motion|QCB}}+{{Icon-Capcom|hp}}
| |
| | |
| s.short, s.jab, s.short, qcb + fierce x 3
| |
| cr.strong x 2, qcb + fierce x 3
| |
| cr.short x 2, cr.strong, qcb + fierce x 3
| |
| | |
| Non Hit Confirms (punish combos)
| |
| s.fierce, qcb + fierce x 3
| |
| close s.fierce, hcb + roundhouse
| |
| close s.fierce xx Fierce DP
| |
| s.strong, twd.strong, qcb + fierce x 3
| |
| | |
| jump fierce, Cl. Fierce, DP+Fierce (optimal stun damage)
| |
| | |
| Low Jump strong/roundhouse-> DP+Jab
| |
| | |
| -cross-up-
| |
| | |
| b+short, s.jab, s.fierce, qcb + fierce x 3
| |
|
| |
|
| Almost any Iori B&B combo can be started with hcb-twd + punch (Scum Gale).
| |
|
| |
| === Super Combos: ===
| |
|
| |
| cr.short x 3, qcf-hcb + punch (any level)
| |
|
| |
| s.strong, twd.strong, qcf-hcb + punch (any level)
| |
|
| |
| S.jab, S.Fierce, qcf-hcb + punch (any level) (max damage)
| |
|
| |
| C.forward kick xx qcf-hcb + punch (any level) (c.mk is super cancel only, easy to do)
| |
|
| |
| == Advanced Strategy ==
| |
|
| |
|
| |
| === <big>'''Grooves & Groove specific strategy'''</big> ===
| |
|
| |
|
| |
| [[File:Cvs2 C-Groove Label.png|frameless|left]]
| |
| [[File:CVS2 CGrooveBar.png|frameless|right]]
| |
| ----
| |
|
| |
|
| |
| <big>'''C-Groove Level 2 Cancel Combos'''</big>
| |
| ----
| |
|
| |
| Iori uses level 2 cancels pretty well. After his maiden masher is complete, Iori can cancel into any of his specials. The foremost being his Dragon Punch.
| |
| Since maiden masher at level 3 only does 5000 damage, The cancels give Iori a much better damage/meter ratio, and allows him to use a meter for defensive purposes or be ready for another level 2 in a very short time.
| |
|
| |
| Since Maiden masher is so easy to combo into, you'll get a lot of opportunities to land this.
| |
|
| |
|
| |
| Level 2 Maiden Masher
| |
|
| |
| Cancel into
| |
|
| |
| -Level 1 Maiden Masher (most damage, no tech roll)
| |
|
| |
| -Fierce DP (1000 less damage, saves a level and 20 more stun)
| |
| -Jab/Strong DP (even less damage, more time to setup or punish tech roll)
| |
| -Level 1 wine cups, then Jump HP, HP, HP DP (Full combo can instant stun characters, cancel maiden masher early if combo will stun for more damage on post dizzy combo)
| |
|
| |
| <big>'''Anti C-Groove'''</big>
| |
| ----
| |
| N-Iori Vs C-Groove
| |
|
| |
| The popularity of C-Groove has really shot up as of late. Fortunately for Iori, most of C-Groove's bonuses and tendencies aren't really much of a bother for him.
| |
|
| |
| * Air Blocking:
| |
|
| |
| While slightly annoying, still not a really big deal for Iori, since the only move you're likely to have air-blocked is your jumping/low jump roundhouse.
| |
| Each air-blocked jumping roundhouse does a fat chunk of guard bar and pushes your opponent towards the corner, so everything's peachy in the end.
| |
|
| |
| Adjustments Needed: None
| |
|
| |
| * Frequent Alpha Counters:
| |
|
| |
| This is the real annoyance. Spend the whole round jockeying for position, finally get in, then BAM. You're back out again at the press of two buttons AND took 600 damage. 10 seconds later, your opponent has another level 1 ready.
| |
|
| |
| Adjustments Needed:
| |
|
| |
| 1) Bait the alpha counter - Not in a Alpha 2 sense where you draw out the alpha counter and uppercut it (though that's certainly a viable solution if you can do it), but getting them to input the Alpha Counter command without blocking anything. Why is that good? Well, for a lot of characters, it isn't. But against certain characters like Sagat, Rolento, Chun Li and Ryu, it is.
| |
|
| |
| When your opponent hits f+strong and forward without blocking anything, the game automatically recognizes the command as simply f+forward. When Sagat does that he gets standing forward, a REALLY laggy move. Rolento gets his ground pogo move, which is very vulnerable but is also an air-based move. Do an uppercut or Running Grab to punish that. Chun Li gets her f+forward step kick, which Iori can crouch under and punish. Likewise for Ryu, who gets his hop kick.
| |
|
| |
| 2) Alpha Counter the Alpha Counter - There's a large number of slow Alpha Counters that are often blocked, but still safe like Rolento's, Bison's, Blanka's etc. Even though you didn't get hit by the Alpha Counter, you're still pushed out of that point blank range you worked so hard to get into. By Alpha Countering their Alpha Counter, you not only regain the momentum and get a free mix up, your opponent is almost always near guard crush also having just lost a large chunk of their own guard bar by Alpha Countering.
| |
|
| |
| * Level 2's/Holding on to the super:
| |
|
| |
| This is pretty annoying also, since once your opponent gets to level 2 you usually have to fight a lot less agressively. Fortunately, since Iori is best used as a leadoff character you usually have about half the round to get buck wild on your opponent before you have to slow it down.
| |
|
| |
| Adjustments Needed:
| |
|
| |
| 1) Slow down - Don't take any unnecessary risks to get in, as a level 2 will often hurt just as much, if not more than a level 3. Lean on standing roundhouse and RC rekkas more and focus on pushing your opponent to the corner.
| |
| When the opportunity arises (usually opponent wake up) try baiting the super with an RC rekka. Also, crossing up a downed opponent with a roll and attacking afterwards is still basically safe except charge supers (which CvS2 will always steer in the right direction for no apparent reason) since you mess up your opponent's inputs by switching sides.
| |
|
| |
| * Faster Jumps:
| |
|
| |
| All low jump grooves take longer to leave the ground as the game gives them extra leeway (sp?) for inputting the low jump command. C and A grooves leave the ground in two frames, with Honda, Zangief and Raiden being the exceptions.
| |
| Their jumps have a five frame start up to facilitate their 360 motions. All low jump grooves take 6 frames to jump.
| |
|
| |
| Adjustments Needed:
| |
|
| |
| 1) Speed up your jab/short mix-ups: You suspect your opponent thinks you're going for a jab into Scum Gale tick, so you do jab, wait, jab jab. If you don't do it fast enough, your opponent sometimes will be able to jump in between.
| |
| However, you can easily hit them out of the air with a close fierce/roundhouse on reaction but that's not nearly as much damage as the successful mix up would have got you, not to mention the knockdown.
| |
|
| |
| 2) Go for cross up b+shorts less: If you knock your a C-Groove opponent down and do a normal super jump b+short cross up your opponent will be able to jump and air-block it. From there he gets to land safely and the match is resetted.
| |
| Go for roll cross ups instead.
| |
|
| |
| * Roll Cancels:
| |
|
| |
| The one thing that 99% of America doesn't know how to fight against. Counters to different Roll Cancels sometimes differ per character, but most the most common counters are listed below.
| |
|
| |
| Adjustments Needed:
| |
|
| |
| 1) Roll on reaction: Self explanatory, and works against the vast majority of Roll Cancel moves in the game. Again, Iori's excellent roll suits this purpose real well. The most common RC moves that get countered by rolls are Sakura's hurricane kick, Sakura's fireball, Iori's own rekkas, any fireball, Chun Li's Spinning Bird Kick (which Iori can crouch anyway), E.Honda's slaps, Yamazaki's arm whips, and Vega's rolling claw.
| |
|
| |
| 2) Jump up/back: Counters almost any Roll Cancel that rolling won't. Also, randomly jumping up and down is pretty safe against most characters. Problem is, it's really hard to jump over a RC move on reaction; it HAS to be done either in anticipation or randomly. Jumping up/back counters prominent moves such as Chun Li's lightning legs, Blanka's electricity (as long as he doesn't keep mashing), Rolento's patriot circles, Rock's elbow, and Yun's rush punch thingie.
| |
|
| |
| 3) Throw it: This mainly applies to opponents who wake up with Roll Cancel moves way more often then they should. It's also the best counter to Blanka's dreaded RC electricity. When an opponent knocks you down and you anticipate an RC grab as you're getting up, the best solution by far is to pre-emptively throw your opponent.
| |
|
| |
| 4) Counter Roll: this only applies to a handful of moves, but when it does work it's a major advantage for Iori. A few RC moves that can be punished with a counter roll: Most fireballs (if blocked somewhat close), Vega's rolling claw, etc
| |
|
| |
|
| |
| [[File:Cvs2 A-Groove Label.png|frameless|left]][[File:CVS2 AGrooveBar.png|frameless|right]]
| |
| ----
| |
|
| |
| https://tinyurl.com/IoriCCs
| |
|
| |
| <big>'''Ground Customs'''</big>
| |
|
| |
| <big>'''Anti-Air Customs'''</big>
| |
|
| |
| <big>'''Blocked Customs'''</big>
| |
|
| |
| <big>'''Other Customs'''</big>
| |
|
| |
| <big>'''Anti A-Groove'''</big>
| |
| ----
| |
| N-Iori vs A-Groove
| |
|
| |
| A-Groove is a pain to fight, but that's more because every A-Groove team has Bison on it than anything else. The groove-specific things aren't too much to worry about.
| |
|
| |
| * Random Customs:
| |
|
| |
| Even the best A-Groove players do it from time to time. Here are the most common scenarios:
| |
|
| |
| -Roll into custom: You really shouldn't get hit by this unless your opponent rolled through one of your RC rekkas. Practice punishing those rolls!
| |
|
| |
| -"Anti-air" custom: By "anti-air" I mean customs that start with low forward and hope that their opponent disabled their trip guard in the air by sticking out a move. People who do this are easily baited by empty jumps, or even better, empty LOW jumps.
| |
|
| |
| -Dash into custom: This one can be pretty scary since your opponent can easily mix it up with dash into throw. My advice would be either to take the throws and wait for him to eventually mix it up with dash into custom, or jump straight up if you have fast enough reflexes. Be careful though, if you jump too late your opponent can still activate and low forward you during your "takeoff" animation.
| |
|
| |
| -Jump behind you, custom: This one gets me more than I care to admit. I'm always mashing on those low shorts when somebody misses their cross up distance on me. Bleh. If you predict your opponent doing this, immediately jump over him as he's about to land. You can often get a free b+short cross up into a fat combo if he activates. If he doesn't, you probably still got him to block the cross up and established the point blank range.
| |
|
| |
| -Jump at you, custom: Designed to bait people into trying to uppercut their jump, this is another one I fall for a lot more than i should. I love my uppercuts! Anyway, if your opponent has a custom ready, NEVER anti-air them from the ground. Either go for air-to-airs or stay out of the jump in's range and make them block something when they land.
| |
|
| |
| -Walk up, custom: The simplest one, yet most effective. For some reason, this set-up never really caught on in America. It's a huge footsie tool for A-Groove players, as they can mix it up with walk-up throws or walk up and do guard crush patterns.
| |
|
| |
| -Wake up, custom: Simple enough, just do your RC rekka as they get up later than usual and you'l counter the CC activation clean.
| |
|
| |
| Adjustments Needed: All listed above.
| |
|
| |
| * Roll Cancels:
| |
|
| |
| See C-Groove.
| |
|
| |
| * Faster Jumps:
| |
|
| |
| See C-Groove.
| |
|
| |
| [[File:Cvs2 P-Groove Label.png|frameless|left]]
| |
| [[File:CVS2 PGrooveBar.png|frameless|right]]
| |
| ----
| |
|
| |
| If you're a P-groove player before anything else, Iori is a great fit on a P-Groove team.
| |
| He's:
| |
| * all around solid, doesn't *NEED* parry offensively or defensively
| |
| * great B&B damage without meter to capitalize off successful parries
| |
| * decent low jump game
| |
| * good option select parry/throw tech button (stand fierce)
| |
| * really great parry bait. Blocked rekka is -5, but you can parry to make it -4. Also spaced properly, no high only parry should be able to hit you there.
| |
|
| |
| The only downside is that Iori doesn't utilize a full meter well, it doesn't do a whole lot of damage, and he can't land it off big pokes like Cammy or Sagat.
| |
|
| |
| However, If you're an Iori player first and foremost, P-Groove does not have roll, and subsequently, Roll Cancel. You're going to want to look elsewhere.
| |
|
| |
| *CvS2 EO Update* In CvS2 EO (or EX Grooves on console versions), Iori can do all three rekkas and cancel into Maiden Masher. This is obviously stupid, but also incredible.
| |
|
| |
|
| |
|
| |
| <big>'''Anti P-Groove'''</big>
| |
| ----
| |
| N-Iori vs P-Groove
| |
|
| |
| I have VERY little experience against P Groove as there isn't a single P-Groove specialist in my area. Most of the following is pure theory-fighter but it makes pretty good sense in my head. -_-
| |
|
| |
| * Wake-up Parries:
| |
|
| |
| Self explantory.
| |
|
| |
| Adjustments Needed:
| |
|
| |
| 1) This is a guessing game that's totally in your favor. Just mix up standing jab (which has to be parried high) with low shorts and Scum Gales. Grabbing a P-Groove opponent as he's getting up works especially well, since most P-Players that I've seen can't resist going for a parry of some sort. Also, I'd recommend doing standing jab more often then low short since players tend to try to parry down a lot more often than parrying forward.
| |
|
| |
| * Jump-in Parries:
| |
|
| |
| We've all seen this a million times...empty jump in, try to parry something, mash on throw when you land. Fortunately for Iori, throws aren't instant in this game like they are in Third Strike so you can actually make them block something when they land without getting thrown.
| |
|
| |
| Adjustments Needed:
| |
|
| |
| 1) Run under them: One of the things that makes me happy that I still play this antiquated groove, running under your opponent and hitting them out of the air from behind is by far the best option. It's parryable, but your opponent has to parry the other way and I have yet to see somebody do that yet. Also, even if the move is parried your opponent is still facing the wrong direction and usually cannot punish you.
| |
|
| |
| 2) Wait until the last second, mix-up when they land: If you don't have time to run under your opponent this is the next best option. Block high until your opponent is so close to the ground they can't possibly stick out a move before reaching the ground, then commit to standing jab/low short/Scum Gale mix up.
| |
| If you want to Scum Gale your opponent immediately when he lands without getting grabbed yourself you'll have to do the grab when the opponent is a little in the air. Standing jab is the most consistent option, since by jumping in and blocking your jab your opponent is pretty much voluntarily giving you a free mix up.
| |
|
| |
| The weakness to this strategy is if your opponent actually did a jumping attack you'll have to block it and deal with whatever guard crush string or mix up he does next.
| |
|
| |
| 3) Test your opponent's parrying skills: I would almost never recommend doing this, but most of us just can't resist. Including me. :P Rather the usual jab into uppercut or air-to-air attacks that I'm sure any good P-Player is used to, I'd recommend low fierce at the tip (which is a good anti-air anyway) into jab uppercut. The parry timing for the uppercut is a lot slower than it looks so it should catch your opponent at least the first two or three times you try it.
| |
|
| |
| 4) Roll!: Yes, it's a pretty easy solution, but it's pretty much 100% safe.
| |
| After rolling you can immediately jump and go for a b+short cross up (watch out for parries!) or just play normally until your opponent jumps again. Hopefully you'll be able to run under it and counter it.
| |
|
| |
| * Ground Parries:
| |
|
| |
| Besides jumping up and down, ground parries are P-Groove's only defense against Iori's RC rekkas. Since it's really hard to parry RC rekkas on reaction, P-players will probably be looking for the only real "set-up" for an RC rekka:
| |
| ... a blocked RC rekka. Besides that, the other main instance a P-Groove player goes for a ground parry is after he whiffs a move.
| |
|
| |
| Adjustments Needed:
| |
|
| |
| 1) Mix it up: while this should go without saying, mixing up your moves and timing is the best way to throw off ground parries. For example, your opponent blocks an RC rekka and is expecting another one. You can do a whole bunch of things that would never work against any other groove (other than K) like run up and grab afterwards, sweep, roll, etc. Take advantage of the fact that both Iori's run and roll look similar to his rekkas.
| |
|
| |
| 2) After a whiffed move: Ideally you should be able to punish the whiff every time with a low roundhouse or something, but not all of us are fast enough to able to do that every single time. Just mixing up standing/low roundhouse after a whiffed move works well enough, and it's also a good opportunity to low jump roundhouse in since they usually aren't looking for it.
| |
|
| |
| *Low Jumps:
| |
|
| |
|
| |
| Definitely something to get used to... but for the most part easily dealt with after some practice.
| |
|
| |
| Adjustments Needed:
| |
|
| |
| 1) Actively look for low jumps: While some people have fast enough reflexes to be able to easily uppercut low jumps on reaction, most of the time I'm not one of them. However, once you've trained yourself to fight on the ground without having to think about it much, you can actively look for low jumps to uppercut without hurting your overall gameplay too much. The good part is, Iori's uppercut has a lot of horizontal range so the low jump attack/empty low jump mix ups are a little less effective on him.
| |
|
| |
| Some days your reflexes are exceptionally slow... you can be looking for nothing but low jumps and STILL not be able to uppercut them on time. In this case I would recommend hitting standing roundhouse a lot more than normal if your opponent can't crouch it. If they do happen to randomly low jump it'll probably get stopped by your boot. This also applies to low jumps that are usually just too fast to hit on reaction like Blanka's, Vega's and Mai's.
| |
|
| |
| If you're having a bad reflex day AND your opponent can crouch your standing roundhouse, I would recommend going all out and trying to attack them instead.
| |
| Rather than unsuccessfully trying to anti-air low jumps and taking hits, put your life bar to better use by sacrificing it trying to get in and score a knockdown. You're much more likely to win that way.
| |
|
| |
| [[File:Cvs2 S-Groove Label.png|frameless|left]]
| |
| [[File:CVS2 SGrooveBar.png|frameless|right]]
| |
| ----
| |
|
| |
| <big>'''Anti S-Groove'''</big>
| |
| ----
| |
|
| |
| [[File:Cvs2 N-Groove Label.png|frameless|left]]
| |
| [[File:CVS2 NGroovebar.png|frameless|right]]
| |
| ----
| |
|
| |
| <big>'''Anti N-Groove'''</big>
| |
| ----
| |
|
| |
| [[File:Cvs2 K-Groove Label.png|frameless|left]]
| |
| [[File:CVS2 KGrooveBar.png|frameless|right]]
| |
| ----
| |
|
| |
|
| |
| <big>'''Anti K-Groove'''</big>
| |
| ----
| |
|
| |
| === <big>'''Matchups'''</big> ===
| |
| Check here for matchup analysis, notes, and errata.
| |
| Could be as simple as optimal punishes, safe jump setups, and effective counter pokes.
| |
|
| |
| {| class="wikitable"
| |
| |+ Iori Matchups Guide
| |
| |-
| |
| | [[#Sagat]] || [[#Blanka]] || [[#M.Bison]] || [[#Cammy]] || [[#Vega]] || [[#Hibiki]] || [[#Chun-Li]]|| [[#Guile]]
| |
| |-
| |
| | [[#E.Honda]] || [[#Geese]]|| [[#Rolento]]|| [[#Ken]] || [[#Rock]] || [[#Kyo]] || [[#Sakura]]|| [[#Iori]]
| |
|
| |
| |-
| |
| | [[#Yamazaki]] || [[#Rugal]] || [[#Kim]] || [[#Eagle]] || [[#Morrigan]] || [[#Ryu]] || [[#Mai]]|| [[#Vice]]
| |
|
| |
| |-
| |
| | [[#Akuma]] || [[#Nakoruru]] || [[#Todo]] || [[#Maki]] || [[#Athena]] || [[#Raiden]] || [[#Terry]]|| [[#Ryo]]
| |
| |-
| |
| | [[#Balrog]] || [[#Benimaru]] || [[#Joe]] || [[#Chang]] || [[#Evil Ryu]] || [[#Orochi Iori]] || [[#God Rugal]]|| [[#Shin Akuma]]
| |
| |-
| |
| | [[#Dhalsim]] || [[#Haohmaru]] || [[#Zangief]] || [[#Yuri]] || [[#Kyosuke]] || [[#Yun]] || [[#King]]|| [[#Dan]]
| |
| |}
| |
|
| |
| For example:
| |
|
| |
| <span id=" Blanka"><big>'''Blanka'''</big> </span>
| |
| ----
| |
|
| |
| Blanka ball punishes- Any level Maiden Masher, run a little and sweep (low HK), A groove activate sweep custom.
| |
|
| |
|
| |
| N-Iori Vs Any groove Blanka
| |
| 4:6 (changed from 3:7)
| |
|
| |
| Another tough match, played almost exactly the same as Bison's. Blanka doesn't have the luxury of being able to roll through Iori's rekkas or scissor kick into custom, though, so it's a bit more do-able.
| |
|
| |
| Blanka's straight up jumping roundhouse is one of the hardest for Iori to stop.
| |
| It's fast enough that supering it is difficult, and standing roundhouse definitely doesn't work. Low fierce hits Blanka's roundhouse decently if you hit it really early, but it tends to trade a lot more often than I would like.
| |
| Most often the best thing to do is make Blanka block a standing roundhouse when he lands from the jump. In fact, standing roundhouse is 90% of this match for Iori since he really can't do much else. RC rekkas work well if you can get Blanka to stop jumping up and down, but if he's jumping up and down a LOT then you can probably throw a fireball and run after it. However, Blanka will usually have his charge immediately after blocking the fireball so he'll be able to ball right through your RC rekka after the fireball's stun is gone. Of course you can bait it out by blocking it the Ball and punishing it with a run up low roundhouse, but to do that you will have to WALK up to Blanka so that you'll be able to block in time.
| |
|
| |
| Actually, running at Blanka is hardly ever a good idea. Blanka can just do a Ball to counter your run and there isn't much you can do about it. You can't block, obviously, and attempts to avoid the Ball with a roll or RC rekka ken will work but Blanka will go right through either move, leaving him unscathed all the way at the other end of the screen.
| |
|
| |
| Since the vogue thing with Blanka nowadays is to show off how good you are with RC electricity, landing a Scum Gale on Blanka's wake up can be quite easy.
| |
| Another Blanka-specific grab set up is after blocking a Blanka Ball. Instead of doing the normal run up and low roundhouse, sometimes you can run all the way up to Blanka and grab him while he's still expecting to be swept. Not the safest thing to do, but it might be good to try in a pinch.
| |
|
| |
| In all, the best thing to do against Blanka is just standing roundhouse him every chance you get. Blanka can easily punish a whiffed standing roundhouse with his low fierce, but Blanka isn't played to bait whiffs. If the Blanka player is getting low fierce-happy, just get inside the range of his low fierce and repeatedly whiff low strongs... you'll beat it clean. As an added bonus you'll also beat any random slides with low strong also. Iori also crouches Blanka's low strong so the only long range move Blanka has left to use is his low roundhouse which can be low jumped or rolled through with some anticipation. Blanka's sweep will generally lose to standing roundhouse anyway so it's better to just stick with that instead of trying all kinds of fancy stuff.
| |
|
| |
| -added 7/5/03 - Even though it looks like it isn't possible, a whiffed Blanka low fierce is easily punishable by an Iori low roundhouse. Even though it appears that you're out of range to hit him, hitting Blanka's still-extended arm is fairly easy on reaction.
| |
|
| |
| Iori's jumping strong seems to work wonders in this fight, and as long as you hit it early enough it seems to beat Blanka's infamous straight up jump fierce with pretty good frequency.
| |
|
| |
| <span id=" Sagat"><big>'''Sagat'''</big></span>
| |
| ----
| |
| -----------------
| |
|
| |
| N-Iori Vs C-Sagat
| |
| 5:5
| |
|
| |
|
| |
| On the ground Iori actually has the advantage in this match up. With standing roundhouse and RC rekka ken to work with, all Sagat can do is try to make you whiff your moves and standing fierce them. RC rekkas against Sagat are VERY risky, though, since Sagat tends to be jumping up and down a lot in this fight.
| |
| If he jumps when you rekka, prepare to eat a nice jumping roundhouse, standing fierce into super combo. Also, Iori can't anti-air Sagat's straight up jump roundhouse with his own standing roundhouse; he has to either use his supers or or make Sagat block a standing roundhouse when he lands. Of course, Sagat can counter your standing roundhouse when he lands with an uppercut or (more likely) a roll. Watch out for those and punish accordingly.
| |
|
| |
| Trying to go all out and attack Sagat is generally a lost cause. You can't jump at him obviously, and his ultra-annoying standing shorts will stop almost anything you try to do to get in. Again, running up to him and RC rekka ken'ing isn't advised since Sagat tends to jump up and and down a lot in this match.
| |
| Just push Sagat to the corner with the standing roundhouses. From there Iori is in complete control of the match. Work the guard bar faster from there with repeated standing roundhouses, counter whatever Sagat does on reaction.
| |
|
| |
| REMINDER: If Sagat (or any other character, really) buffers a move into a super such as low forward into low tiger super, Iori can easily counter roll on reaction after the super flash animation and get a big free combo.
| |
|
| |
| 6/13/03 - Iori's footsie range in this fight is well outside Sagat's low fierce and low forward range. If he whiffs either of these moves, low roundhouse him if you are confident, standing roundhouse if not. At this range the only moves Sagat can do are his standing short, standing forward, standing fierce, and fireballs.
| |
|
| |
| Iori's standing roundhouse and Sagat's low fierce have roughly the same priority; whoever presses it first usually wins. However, since you're hanging around well outside the range of his fierce Sagat can't randomly press it or else you can easily punish his whiff with a standing/low roundhouse.
| |
|
| |
| Smart Sagats will do nothing but standing shorts and jump up and down randomly, since Sagat's standing short is arguably the best normal move in the game; it's nearly impossible to punish if whiffed and has insane range/speed/priority.
| |
| It's not damaging on its own but it all but shuts down his opponent's offense and sets up the opponent to make mistakes which will all lead to huge damage.
| |
|
| |
| Standing forward isn't generally a good idea for Sagat but most will still throw it out every now and then. It's his longest ranged normal and has good priority, but its recovery time is similar to Hibiki's slash. Iori MIGHT be able to block it and level 3 super him for free. I'll have to test it before my next revision. Anyway, if Sagat does standing forward and Iori does ANY of his attack mix ups (RC rekka, roll, jump, etc.), Iori gets a free combo plus knockdown.
| |
|
| |
| Sagat's standing fierce has a lot of range and players who aren't careful tend to walk into them a lot. However, Iori can crouch it and easily punish it on sight with a low roundhouse.
| |
|
| |
| Sagat really doesn't want to throw fireballs either, for the same reason as the standing forward. Moreover, Iori players can usually roll through fireballs and punish on reaction.
| |
|
| |
| -7/5/03 - The key things to think about in this match are to stay out of Sagat's range so you can punish his whiffs, and to find a way to stop Sagat from jumping up and down. Making him block a standing roundhouse when he lands is usually good enough... but again, be aware of rolls and uppercuts when he lands. The guessing game is totally in your favor, though.
| |
|
| |
| <span id=" M.Bison"><big>'''M.Bison'''</big></span>
| |
| ----
| |
|
| |
| N-Iori Vs A-Bison
| |
| 2:8
| |
|
| |
| Ouch. This match is bad. REALLY bad. You can't ever throw a fireball unless Bison lost his charge, which he'll probably never do. If Bison has his CC meter, then you DEFINITELY can't ever throw a fireball. You can't jump or low jump at Bison because he can standing fierce or low fierce, respectively.
| |
| RC rekkas to get in are also bad since Bison can punish you HARD with a jump up roundhouse, standing strong into scissor kicks (into custom) or simply a roll into custom. Bison's straight up jump roundhouse also beats Iori's standing roundhouse.
| |
|
| |
| So what do you have left? Well, against his straight up jump roundhouse low fierce works pretty well... just hit his leg. Try to keep him on the ground and push him to the corner with standing roundhouses while working his guard bar. A good Bison will punish a whiffed standing roundhouse with a slide, a scissor kick (into custom), or even activate custom and slide on reaction. It sucks. If you do manage to get Bison in the corner, Bison can simply opt to pay 1300 life and RC psycho crusher out of the corner. Sure, you get a free sweep, but Bison tech rolls your sweep and you're all the way across the screen again.
| |
|
| |
| Running at Bison generally isn't recommended since Bison can easily counter your run with a psycho crusher. If you expect this to happen you can attempt to counter the psycho crusher with an RC rekka... your fist will hit Bison's feet and knock him down right next to you. If Bison RCs his psycho crushers, you're pretty much screwed. No running for you. This is especially frustrating since Bison tends to sit at the other side of the screen and build meter, while you're almost powerless to do anything about it except WALK up to him and try to roundhouse him.
| |
|
| |
| Here's a list of things you can do to counter Bison:
| |
|
| |
| * -Blocked psycho crusher - low roundhouse
| |
| * -Blocked (2 hit) scissor kick - low short into rekkas
| |
| * -Devil's Reverse - RC Running Grab or fireball
| |
| * -Straight up jumping roundhouse - Low fierce, super, RC Running Grab, make him land on a jab fireball
| |
| * -Whiffed ground moves - low roundhouse if you're confident, standing roundhouse otherwise
| |
| * -(added 7/5/03) Blocked scissor kick super (usually during a blocked Custom Combo) - Counter Roll as early as possible, run up behind Bison and combo him
| |
|
| |
| This match more than any other depends on Iori getting the knockdown and successfully mixing it up to win. Unfortunately, since it's very hard to attack Bison more often than not you'll have to keep walking up to Bison and hope he makes a mistake you can punish. Otherwise you'll just have to roundhouse away and hope for the best. Bleh.
| |
|
| |
| -added 7/5/03 - Your standing roundhouse DOES outrange Bison's moves on the ground, so RANDOMLY roundhouse (so you don't get RC psycho crusher'ed) every now and then to whittle his guard bar. If Bison has close to a full meter he'll probably just block the roundhouses and let his guard bar go down in exchange for meter.
| |
| If he doesn't have that much meter he'll probably opt to try to fight you on the ground instead. This is where you have a chance to win the fight. If he has no meter and is trying to fight with you on the ground he's probably lost his charge. You can now fight him as a normal opponent without fear of RC Psycho Crusher and random Customs. Better make it count before he gets his meter again.
| |
|
| |
| -added 7/5/03 - Something everybody should practice, when you block a Psycho Crusher and have a level 3 ready, super him in the back! It's really pretty easy to do as long as you wait until Bison is all the way past you before you start inputting the motions.
| |
|
| |
| Iori's low roundhouse will trade 99% of the time with Bison's jumping straight up roundhouse. A good trade if you ask me, since you just knocked Bison down and get to cross him up.
| |
|
| |
| <span id=" Cammy"><big>'''Cammy'''</big></span>
| |
| ----
| |
|
| |
| N-Iori Vs C-Cammy
| |
| 6.5:3.5
| |
|
| |
| Even though Cammy is a short character, I believe Iori wins this match mainly because he can bully Cammy around with RC rekkas and ground fireballs. Cammy has a really tough time fighting RC rekkas; she doesn't have any good RC moves herself to fight it with.
| |
| Her roll is so slow, Iori can punish HER for rolling through a rekka ken. Her straight up jump moves to counter a rekka ken aren't very good either, Iori can counter them easily with a standing roundhouse.
| |
|
| |
| Getting into rekka ken range can sometimes be a problem, though, since it's within Cammy's standing roundhouse range. You can try matching her roundhouses with RC rekkas but I wouldn't advise that since at that range she can easily bait you into whiffing them. If you're out of rekka range throw fireballs instead. Cammy can't drill through them, and even if she RCs the drill she still gets caught by the tail end of the fireball. She can try dashing over the fireballs but almost every player I've seen (even the Japanese) can't do it consistently and end up landing on the fireball and getting knocked down.
| |
| Bonus! Cammy's jump is also fairly slow; you can punish most attempts to jump over your fireballs unless she jumps EXACTLY when you threw the fireball.
| |
| That's basically a guess, so throw plenty of fakes along with your fireballs to mess her up. If she blocks one of your fireballs, throw another jab one and run after it since you've just created the ideal distance for yourself.
| |
|
| |
| Most Cammy players will get baited at least a few times by whiffing something and then immediately rolling. Whiff a low strong, Cammy sticks out her standing roundhouse, you roll through it and beat her up.
| |
|
| |
| Added 7/5/03 - Iori has two major advantages against "walk back" characters like Cammy, Vega and Chun. By "walk back" characters, I mean one of their most effective traits is their incredible backwards walking speed; you can almost never cross them up without knocking them down first since they walk backwards faster than your jump and just stay in front of you.
| |
| They bait whiffs very well by dancing in and out of your effective footsie range, then easily punish a whiff with an easy one button long range move (i.e. Cammy standing roundhouse, Vega low strong). Running at them trying to get in generally doesn't work either, since their backwards walk is just slightly slower than you RUNNING forward. They can easily stick out a move while walking backwards that you'll run into, or you'll stick out a move that you THINK should hit, but your opponent will just walk backwards out of range and punish you for it.
| |
|
| |
| Anyway, Iori has two major advantages on these types of characters. First, his ability to run after a fireball. When the fireball is on the screen, the opponent can't walk back! Unlike other recent games like Alpha 3, CvS2 will make your opponent go into his blocking animation if you ever hold back on the stick while there's something to block on the screen (the fireball). The result? Your opponent is stuck in place while you're running right at them, and the strategies for that are all listed in the '3/4ths - full screen distance' section of the Strategy chapter.
| |
|
| |
| The weakness to this strategy is that it works best when the opponent is at 3/4ths to full screen, and any good player will not easily let you establish that distance. So how do you get that far away? Well, sometimes it's just given to you after certain knockdown moves that knock you far away.
| |
| Just get up and throw a fireball and run after it. The simplest way for YOU to earn that distance is to jump/dash back and throw a fireball. This is painfully obvious, however, and you'll probably get punish hard for it eventually. It could lead to baited opponent jump-ins, though...
| |
|
| |
| The safest way to get far away from your opponent is to use your fireball as a footsie tool. RC fierce fireball as a poke or after your opponent whiffs a move. If your opponent blocks it he'll be pushed out to roughly 3/4ths distance where you can throw another jab fireball and run after it.
| |
|
| |
| Iori's other tool against "walk back" characters is his low roundhouse. His sweep has incredible range and of course, hits low. 'Walk back'-types generally never block low unless you're really close so they can make your moves whiff.
| |
| Roundhouses from far away will catch them standing (or rather, walking back) really often. If your opponent catches on and crouch blocks sooner so that he doesn't get caught by a low roundhouse, that's good also since you now can run up to your opponent easier without him walking back to keep the distance.
| |
|
| |
| As a final note, with the exception of Chun Li "walk back" characters hardly do any damage; they let the damage add up over time since they're usually in control of the match. This tips the risk/reward ratio of random rolls, jumps and low jumps more in Iori's favor. Go for broke and attack when the opportunity presents itself.
| |
|
| |
| <span id=" Vega">Vega</span>
| |
| ----
| |
|
| |
| <span id=" Hibiki">Hibiki</span>
| |
| ----
| |
|
| |
| <span id=" Chun-Li">Chun-Li</span>
| |
| ----
| |
|
| |
| <span id=" Guile">Guile</span>
| |
| ----
| |
|
| |
| <span id=" E.Honda">E.Honda</span>
| |
| ----
| |
|
| |
| <span id=" Geese">Geese</span>
| |
| ----
| |
|
| |
| <span id=" Rolento"><big>'''Rolento'''</big></span>
| |
| ----
| |
|
| |
| N-Iori vs C-Rolento
| |
| 7:3
| |
| (added 6/13/03)
| |
|
| |
| This match is both fun and annoying at the same time. On one hand, you can bully Rolento fairly well with low jump roundhouse and RC rekkas. He has a hard time stopping the jumping roundhouse on the ground, and most of his air attacks lose to it as well (except for jumping jab, but who cares about that).
| |
| Your jumping roundhouse will be air-blocked pretty frequently, but that's okay too since air-blocked moves do much more guard damage and have the added benefit of pushing your opponent to the corner.
| |
|
| |
| On the other hand, it's annoying since you're chasing Rolento the whole entire match. When you do manage to get in, most of the time you get alpha countered (Rolento is tied for best alpha counter in the game. +10 frame advantage if blocked!) and then you have chase him some more.
| |
|
| |
| For the most part, though, Iori totally dictates the match. Throw a fireball and run after it, counter what Rolento does. A lot of times Rolento will jump off the wall and run away, and you just throw a jab fireball and run after it AGAIN. When you get within half screen and Rolento isn't running around, just low jump roundhouse away. You might take a jumping jab or a standing strong here and there, but it'll take like twenty of those to kill you. If he alpha counters you and you block it, just alpha counter him back and he's on the ground with hardly any guard bar left.
| |
|
| |
| A few things to remember:
| |
|
| |
| -Rolento can wake up with RC pogo jump. Be especially aware of this when you have him in the corner, since he can RC pogo jump backwards and come down with a jumping strong combo. Uppercut it! If you're mid-screen, just be safe and do a normal throw (into totally ambiguous roll cross up). Trying to Scum Gale Rolento out of a RC pogo jump is really difficult.
| |
|
| |
| -Rolento's jumping strong beats any normal move anti-air you have. You HAVE to uppercut, and you have to do it earlier than you think.
| |
|
| |
| -When running at Rolento without the cover of a fireball, Rolento can easily standing forward -> tripwire you.
| |
|
| |
| -When Rolento is crossing you up, just roll. Don't try to counter it or block it. Rolento has the Cross Up From Hell: ambiguous cross ups in several NON knock-down situations.
| |
|
| |
| -When blocking a Patriot Circle, wait until he cannot do a 2nd or 3rd twirl and THEN hit him with f+strong into rekkas. Don't get caught by delayed patriot circles! Also, Rolento moves REALLY far forward when he does the circles, so you often can't punish him when you counter roll it.
| |
|
| |
| -(added 7/5/03) A high percentage of Rolento's Alpha Counters are blocked.
| |
| Again, it's safe and gives Rolento a +10 advantage. However, you can quickly turn the momentum back into your favor by Alpha Countering his Alpha Counter!
| |
| Puts him on his back for a free mix up AND he probably has hardly any guard bar left also.
| |
|
| |
| -------------------
| |
| N-Iori vs A-Rolento
| |
| 7:3
| |
| -------------------
| |
| (added 6/13/03)
| |
|
| |
| Back in CvS2's infancy, A-Rolento was one of the most used characters in the game. If you used A-Groove, you used A-Rolento. Now, he's been mostly replaced by A-Sak/Bison/Blanka teams, and is generally inferior to his C-Groove version. Why? Air blocking and (plentiful) alpha counters supplement Rolento's game much better than his Custom Combo.
| |
|
| |
| Anyway, the fight is basically exactly the same as vs C-Rolento except without the two obvious things: Alpha counters and air blocking. This makes it much easier for you to get in and stay in. The only thing you have to worry about is Rolento's Custom Combo, which really isn't THAT much of a threat since he doesn't have any (useful) ways to land it guaranteed. He has to do it randomly and hope you stuck out something. While it does good damage if he does land it, you can bait it out of him the same as you can against any other A-Groove character.
| |
|
| |
|
| |
| <span id=" Sakura"><big>'''Sakura'''</big></span>
| |
| ----
| |
|
| |
| N-Iori vs A-Sakura
| |
| 5:5
| |
|
| |
| FUNKY QUIRK: Iori cannot do the normal strong into f+strong chain after a connected Scum Gale on Sakura. The f+strong whiffs! (thanks Crowbait!)
| |
|
| |
| -added 7/5/03 - This is played somewhat similar to other "walk back" characters. When Sakura doesn't have a full CC ready there isn't a whole lot of risk to jumping at her. She also has a small problem with Iori's low jump roundhouse when it's mixed up with an empty low jump. Against low jump she has to do either early standing roundhouses, which is difficult on reaction, or RC hurricane kicks. The hurricane kick will only hit once for piddly damage so it's nothing to worry about. It does knock you down, though.
| |
|
| |
| Haphazardly rolling at Sakura isn't recommended, though. Her basic combo not only does really good damage, it also gives Sakura a ton of meter as well. Even if she throws you out of the roll, her punch throw sets up a whole mess of different things, all of them scary, all of them damaging.
| |
|
| |
| The main move that will give Iori problems in this match is Sakura's standing roundhouse. It has incredibly fast recovery, so countering it with rolls or jumps isn't an option; you have to either RC rekka it or low roundhouse it when she whiffs it. Neither of these options are easy to accomplish (particularly the latter) or safe since Sakura can punish these moves hard if whiffed.
| |
| Iori also can't match her roundhouse with his own standing roundhouse since Sakura can easily crouch it; you'll have to use RC rekka as your main ground move in this fight, and that's really risky since Sakura has an above average roll to work with as well.
| |
|
| |
| On the flipside, Sakura can't really attack Iori all that well either. Her fearsome RC roundhouse hurricane kick can be easily crouched on the 2nd hit and punished, so she has to resort to her inferior (but still powerful) RC forward hurricane kick. This leaves her at a -1 disadvantage on block, so as long as you have good timing you should win any priority battles afterwards with standing jab. If you don't want to risk that, Alpha Countering the hurricane kick works beautifully and will either get you a free mix up or a free low roundhouse if Sakura tech rolls. If she's trying to use RC forward hurricane kick as a ground move, its inferior range makes her use it a lot closer than the Sakura player would like. That's good for Iori. Also, the move is rather easy to roll through on reaction which will usually earn you at least a free low roundhouse depending on distance.
| |
|
| |
| Her other dominant special move against other characters, her dive kick, is also rendered somewhat useless against Iori. The huge horizontal range on Iori's uppercut will easily scoop up Sakura's dive kick if it gets anywhere remotely near Iori, neutering most of Sakura's whiff dive kick patterns severely. The move is still unreasonably hard to stop as a meter building tool from afar, so my advice would be to either try to get her to land on a fireball or to use the opportunity to establish full screen distance and run after a jab fireball.
| |
|
| |
| As long as you stay out of the corner (where EVERY character dies to Sakura) you should at least be very competetive in this match. Like many other matches, the deciding factor will usually be how well you use Iori's low roundhouse and how well you made your mix up opportunities count.
| |
|
| |
| === Videos ===
| |
| === Colors ===
| |
| [[File:Iori CvS2 colors.png|frame|Iori Color Selections]]
| |
|
| |
|
| === External Links ===
| |
| {{Navbox-CvS2}} | | {{Navbox-CvS2}} |
| [[Category:Capcom vs. SNK 2]] | | [[Category:Capcom vs. SNK 2]] |
| | [[Category:Iori]] |
