Callie Rose (talk | contribs) (→Supers) |
Callie Rose (talk | contribs) mNo edit summary |
||
| Line 761: | Line 761: | ||
| invul = None | | invul = None | ||
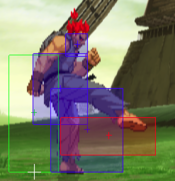
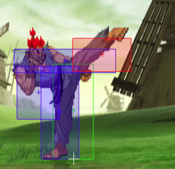
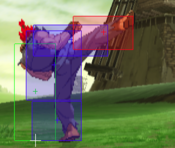
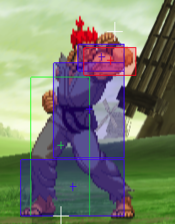
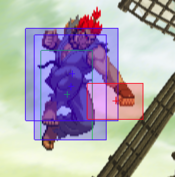
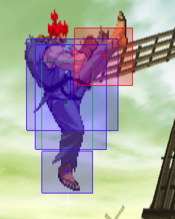
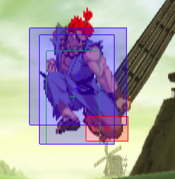
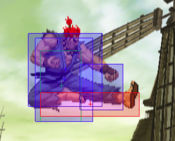
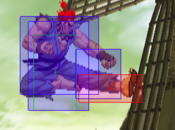
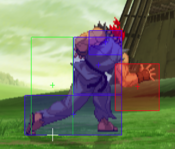
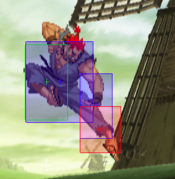
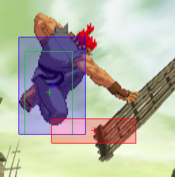
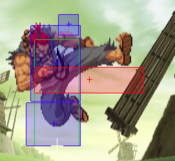
| description = Akuma's j.HK is his main jump normal for a mix of range and damage. While it does less damage than j.HP, it's much more likely to hit. nj.HK is your main air-to-air, and if you hit it early on in the active frames it can actually special cancel. | | description = Akuma's j.HK is his main jump normal for a mix of range and damage. While it does less damage than j.HP, it's much more likely to hit. nj.HK is your main air-to-air, and if you hit it early on in the active frames it can actually special cancel. | ||
}} | |||
}} | |||
== Throws == | |||
=== <span class="invisible-header">Seoi Nage</span> === | |||
{{MoveData | |||
| name = Seoi Nage | |||
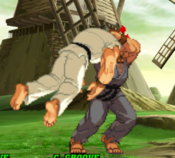
| input = Near Opponent, 4/6HP | |||
| subtitle = Punch Throw | |||
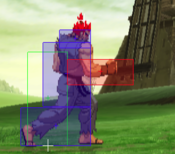
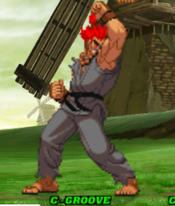
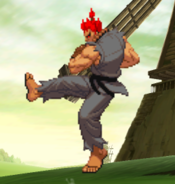
| image = CVS2_Akuma_PThrow.PNG | |||
| caption = | |||
| linkname = Punch Throw | |||
| data = | |||
{{AttackData-CvS2 | |||
| version = Close {{Motion|b}}/{{Motion|f}}+{{Icon-Capcom|HP}} | |||
| subtitle = | |||
| damage = 1700 | |||
| stun = 0 | |||
| cancel = None | |||
| guard = Grab | |||
| parry = Grab | |||
| startup = 3 | |||
| active = 1 | |||
| recovery = 13 | |||
| total = 17 | |||
| advHit = -DWN | |||
| advBlock = Grab | |||
| description = Akuma tosses the opponent over his shoulder. Both of his grabs give mediocre okizeme, so the only difference is the damage and startup. Punch throw is 3 frames of startup but does 300 less damage, making it better for situations where speed is preferable like punishes or tic throws. | |||
}} | |||
}} | |||
=== <span class="invisible-header">Tomoe Nage</span> === | |||
{{MoveData | |||
| name = Tomoe Nage | |||
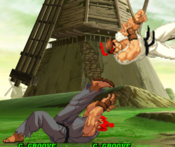
| input = Near Opponent, 4/6HK | |||
| subtitle = Kick Throw | |||
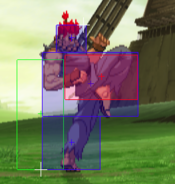
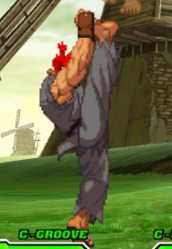
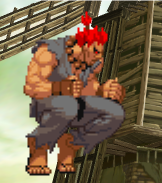
| image = CVS2_Akuma_KThrow.PNG | |||
| caption = | |||
| linkname = Kick Throw | |||
| data = | |||
{{AttackData-CvS2 | |||
| version = Close {{Motion|b}}/{{Motion|f}}+{{Icon-Capcom|HK}} | |||
| subtitle = | |||
| damage = 2000 | |||
| stun = 0 | |||
| cancel = None | |||
| guard = Grab | |||
| parry = Grab | |||
| startup = 5 | |||
| active = 1 | |||
| recovery = 13 | |||
| total = 19 | |||
| advHit = -DWN | |||
| advBlock = Grab | |||
| invul = None | |||
| description = Akuma rolls on his back and kicks the opponent far away. Better for damage but has 2 frames slower startup, so this is more preferrable for mixups. | |||
}} | }} | ||
}} | }} | ||
Revision as of 15:34, 9 June 2022
Introduction
Akuma, called Gouki in Japan, is one of the most powerful warriors in the Street Fighter universe. He is emotionless, and trains hard to master the dark power known as the Satsui no Hado. In his younger years, he trained together with his brother Gouken under a master named Goutetsu who taught them a nameless fighting style made for killing. They also learned the Shun Goku Satsu, usually called Raging Demon, which is a life-threatening move with notable strength. As Akuma and Gouken learned, they began to dispute over the true nature of their learnings, with Gouken unable to accept the Satsui no Hado and the violent nature of what they learned. Gouken left to create his own dojo with what he learned, while Akuma continued to train under Goutetsu and accepted the emotionless nature of Satsui no Hado into himself. Akuma left to train on an island alone to learn the Shun Goku Satsu, and while there, gave in fully to the Satsui no Hado. He became inhuman, obsessed with fighting to the death. When he returned, he challenged his master to a death match, which he won. His master died happily knowing he had trained such a powerful pupil, and Akuma still wears his masters prayer beads around his neck to this day.
In CvS2, Akuma is a glass cannon rushdown character. Akuma has powerful rushdown and mixup capabilities, especially in Grooves where he has a run and hop. While he possesses the same basic kit as the other shotos, Ken and Ryu, most of his tools are more geared towards high damage combos and great ability to maintain knockdowns. His normal fireball can knock down when close, and his red fireball knocks down at any range. His air fireballs don't stall or change his air momentum, and have very little landing lag allowing him to combo after them. He also has great neutral, with a powerful DP anti-air and useful normals for close range poking. All of these tools give Akuma a very simple gameplan that he can apply in many ways: get a knockdown, maintain your pressure, and loop mixups until they die.
Akuma has one massive issue however, which is what makes him such a glass cannon. His health is the lowest base health value, only beaten by Claw without a mask, and his stun is the absolute lowest in the game. This means that if the opponent escapes his onslaught long enough to put him on the backfoot, it can very quickly spiral into a loss. While he does have two reversals in his DP and his teleport, these can be baited and punished for huge damage. Just like a few wrong guesses gets Akuma the win, a few right guesses from the opponent means Akuma will always lose. His matches will almost always be heavily one-sided because of this, but when Akuma wins he wins convincingly.
Groove Choice
Akuma has one Groove clearly above the rest with N-Groove. N-Akuma has everything he needs, from run and hop to easy access to roll cancel specials, and a way to store his level 3 Raging Demon and hide the input for scarier mixups using the animation for activating Max Mode. Max Mode in general makes him scary, as his damage gets much higher, and the threat of a Raging Demon command grab mixup means the opponent will be scared into getting hit more often. Akuma also benefits from rolls, and guard cancel roll is a very powerful defensive mechanic that can help turn the tides back in Akuma's favor.
K-Groove Akuma is slightly behind N-Groove. K-Akuma maintains the scary mixup and mobility of N-Akuma, and Rage makes for a similar situation to Max Mode where he has the threat of a Demon to let him land more hits. Rage also increases the damage more than Max Mode, making it a bit more powerful. K-Akuma gives up rolls and the defensive guard cancel roll or offensive roll cancel specials however, and K-Groove meter only builds when getting hit or performing a JD, making it harder for K-Akuma to build enough meter without risking his life. C-Akuma and A-Akuma are both right behind K-Akuma, with both making a major sacrifice with no run or hop in exchange for high damage level 2 combos in C-Groove or powerful Custom Combos in A-Groove. Lacking run or hop really hurts C-Akuma and A-Akuma however.
P-Groove is one of the worst Grooves in CvS2, and P-Akuma is one of the worst Grooves for Akuma. While parry does help his gameplan, the lack of any other options hurts a lot more, especially the lack of a run. Akuma does appreciate having hops, but he would much rather have a run, and the lack of any other real benefits and barely ever having the threat of a Demon makes P-Akuma weak. S-Groove is the worst Akuma, as S-Akuma has to actively give up space and aggression in neutral to build any meter. S-Akuma also only gets access to a Demon at low health, which is a massive risk for him, and the infinite level 1 supers don't exactly give him much more than damage increases in combos.
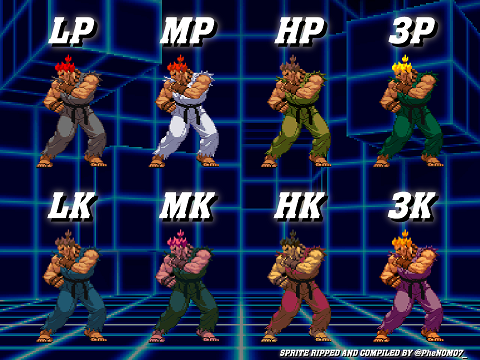
Color List
Normal Moves
Far Normals
5LP
5MP
5HP
5LK
5MK
5HK
Close Normals
clLP
clMP
clHP
clLK
clMK
clHK
Crouching Normals
2LP
2MP
2HP
2LK
2MK
2HK
Jumping Normals
8LP
8MP
8HP
8LK
8MK
8HK
Throws
Seoi Nage
Tomoe Nage
Command Normals
6MP
j2MK
Special Moves
Gouhadouken
Zanku Hadouken
Shakunetsu Hadouken
Goushoryuken
Tatsumaki Zankukyaku
Air Tatsu
Hyakkishu
Hyakki Gozan
Hyakki Gosho
Hyakki Godan
Hyakki Gosai
Hyakki Gotsui
Ashura Senku
Zenpou Tenshin
Supers
Messatsu Gouhadouken
Messatsu Goushoryuken
Tenma Gouzanku
Shun Goku Satsu
The Basics
Target Combo: standing opponent jump in FP, c.lp, c.hp, mk hurricane (2 hits), dp juggle
Bread and Butter Combos
(opp standing)
- c.lk(or c.lp) x2, lk hurricane, dp (or lk hurricane again)
(opp crouching) note: all these combos also work on standing opponents too
- c.lk x2, hp fireball
- c.mk, hp fireball
- c.lk, lk hurricane, dp
- (c.lk/c.lp), c.lp, c.hk, lk hurricane, dp (or lk hurricane) Note: The d.LP, d.HK link is only for when you're fishing for counter hits with d.LP anyway. It's just as easy to hit confirm a counter hit crouching jab and link it into sweep xx qcb+LK
- c.lp, c.hp, hp fireball
Note: all of these combos can be done after a crossup fireball setup. If the fireball hits you can do the standing combos because the fireball will cause your opponent to stand.
for all intents and purposes these are all the NON meter b&b combos. there are many variations of these that you can use but its just personal style from here.
Super Combos
- c.lk x2 or 3, qcfx2 + p
- c.lp, c.hp, qcfx2 + p
- c.lk, c.lp, c.mk, qcb x2 + p
and as usual you can add jump ins and modify these combos slightly for different situations.
Getting Close
Akuma sometimes has a hard time getting close to opponents with good pokes. There are a variety of different ways to earn your position, but he doesn't have any of the "One button" strategies like the top tiers have. In other words, there is no magical crouching fierce or standing roundhouse to get the job done. It requires a bit of work, and a bit of luck.
- Crouching MK
Poking wise, his basic nice mid-range poke is crouching mk. This can link to a fireball if it connects. To capitalize on this, throw out the c.mk and immediately do a fireball. If it hits, it will cancel to the fireball. Be warned if they block the c.mk and the fireball comes it, they can roll on reaction from the fireball.
- Crouching HK
Not quite as much range as a MK, but this one knocks down. Use for punishment and whiffs. Much like the buffer into fireball trick above, buffer this move into a lk hurricane kick. The RH -> Hurricane Kick can be followed up by a dragon punch.
- Mid-Screen Red Fireball
Not good if they are expecting it, but good for punishment and whiffs. Scores a knockdown if it hits. Good chip/Guard Crush damage if it is blocked. Don't throw these out predictably unless you want to eat an RC or a Jump in combo.
- Standing RH
Nice distance, good for punishing low jumps and jump ins. Will beat out a handful of low pokes.
- Tiger Knee Fireball
This is one move you MUST learn in order to play Akuma. In A groove and C groove, this is possibly the most important aspect of his footsies game due to his lack of mobility. The concept of "Tiger Kneeing" a move basically means that you do a special move as close to off the ground as possible. It comes from the fact that in SF:Championship Edition, Sagats "Tiger Knee" move was d df f fu + kick. This is the same motion you need to do for his fireball. Input D, DF, F, FU + Punch. Akuma will leap off the ground and throw an air fireball instantly. For best results, use MP or LP fireballs, as the FP fireball is generally too fast.
The goal here is to have the fireball come out, and then akuma flies over his opponent, crossing them up. The fireball hits them in the back as Akuma hits them in the front. Even if they block the fireball, it allows Akuma to move in close for free (Except for Alpha counters, or S groove dodge attacks through the fireball). If it hits, it allows Akuma to follow up with a bnb combo, setting up another knockdown and putting him into prime position above them.
Advanced Strategy
Basic Match Strategy
With Akuma, you really need to get close and deal some damage. Luckily, he is provided with a lot of mixup options to help you get the job done. You need to think Rushdown with Akuma. Rushdown implies the fact that you are constantly keeping the pressure on your opponent, forcing them to make quick decisions and take big damage if they guess wrong. It is basically the opposite of turtling.
1) Step one in a basic match is to score a knockdown. How can he do this? Well, he has a few options
- Red Fireball (3 hits) Knocks down
- c.lk, lk hurricane kick, juggle with dragon punch (lp)
- c.RH (sweep)
- c.mk, fireball (FP) knocks down up close
- dragon punch any jump in
The goal is to score the knock down, then run in close over the opponents body, and set up stage two.
2) Step two, now that you're standing over the opponents body, throw in some mix ups. Again, he has a few options.
- c.lk (as they wake up), lk hurricane kick, dragon punch (lp) juggle
- lk hurricane kick(over their body) into cross up, c.lk, lk hurricane kick, dragon punch (lp) juggle
- lk hurricane kick(over their body) for fake cross up, c.lk, lk hurricane kick, dragon punch (lp) juggle
- low jump mk (cross up), c.lk, lk hurricane kick, dragon punch (lp) juggle
- Punch throw, Teleport (F D DF + PPP) to their body. You recover before they do
- Raging Demon setup (See Raging Demon setup section
- low jump empty jump (Cross up), c.lk, lk hurricane kick, dragon punch (lp) juggle
- (corner only) Teleport (F D DF + PPP) into corner. Akuma will glitch, and you will cross them up and come out of the teleport instantly. Follow up with c.lk (as they wake up), lk hurricane kick, dragon punch (lp) juggle
- (corner only) Teleport (F D DF + PPP) into corner. Akuma will glitch, and you will cross them up and come out of the teleport instantly. Follow up with lk hurricane kick (Cross up) c.lk, lk hurricane kick, dragon punch (lp) juggle
- Block. Used if expecting a wake up uppercut/super, though a late teleport also cures this (usually)
From here, if you succeed, then step 2 loops back around to itself. You should still be over their grounded body. If not, go back to step 1 and score another knockdown.
Dealing with Quick Recover
When you work so hard to set up your opponent after a knockdown, the last thing you want is to have them quick roll your way out of the setup. Luckily, every setup listed gives you ample time to recover before your opponent. The answer to this is simple if you are in a run groove: Simply run up to your opponent after every knockdown. If you see them quick roll, just do c.lk -> Punishment of your choice. If they don't quick roll, then go into your mixups (c.lk, lk hurricane kick, stop -> throw, etc). You should be able to control the flow of the match very effectively with this tactic. Because of this, you should WANT the opponent to quick roll, as it results in free damage for you.
Note on Dragon Punch juggle
Akuma thrives on juggling with his dragon punch. Every version hits 3 times. However, the damage of the 3 hits is greatly different. On the LP uppercut, the damage is 1000 for the first hit, 400 for the second, and 300 for the last. Therefore, when juggling, it is in your best interest to juggle with the FIRST hit. Thus, the later the juggle, the better.
As well, it is best to juggle with the lp version, since it only does 200 damage less than the FP version, but leaves you in a major advantage standing over their grounded body.
C-Groove Combos
Firstly I'm gonna exclude dizzy comboes as they aren't really practical IMO, as well as comboes that start with 'jump straight up qcf+lp, then tigerknee qcf+hp' and the like for the same reason.
Also, although these all start with 'j.hp, c.hp', that's not the only way to land them. That's the best way to land them as you get the most damage out of it, but you won't get a free jump in that often. When they're dizzy though go for it ;). More practically though you can replace the 'j.hp, c.hp' with 'c.lk, c.lk' or 'c.mk' to start any of these.
Here are some of C-Groove Akuma's most damaging combos in a variety of situations.
- Level 2, Anywhere on Screen
j.hp, c.hp, qcfx2+mp xx (last hit, but you still on ground) qcb+lk, dp+hp (2 hits) Damage:7902
- Level 3, Anywhere on Screen
j.hp, c.hp, qcfx2+mp xx (last hit, but you still on ground) hcbx2+lp Damage:8715
- Level 2, Opponent In or Near Corner
j.hp, c.hp, qcfx2+mp xx (2nd last hit) hcb+hp, dp+hp (2 hits) Damage:8086
- Level 3, Opponent In or Near Corner
j.hp, c.hp, qcfx2+mp xx (2nd last hit) hcbx2+lp, dp+hp (2 hits) Damage:9571
- Level 2, Mid-Screen, Pseudo Combo
Most damage with lvl2, does not work in corner, DOES NOT COMBO: j.hp, c.hp, qcfx2+mp xx (2nd last hit) dp+lk, f+hp xx dp+hp (2 hits) Damage:8715
- Level 3, Mid-Screen, Pseudo Combo
Most damage with lvl3, does not work in corner, DOES NOT COMBO: j.hp, c.hp, qcfx2+mp xx (2nd last hit) dp+lk, f+hp xx qcfx2+lp (4hits) Damage:8925
NOTE: Those last two have a hole in the combo between the lvl2 super cancel and the grab off the demon flip. Each of them is actually two comboes. The point of listing this is that 9.99993% of players getting hit with the traditional lvl2 combo will either:
- sit back and do nothing.
- hold on block in case you're too slow on a cancel and miss it.
This means that if you cancel the lvl2 into demon kick and command grab them, they will NOT react in time to you doing so. Hence they will get grabbed and you can continue the combo as listed.
These two do more damage than the traditional lvl2 cancels, but are risky. They are to only be used extremely scarcely as gimmicks in casual, or if you know that you only need 100 more damage to kill off a character. In which case they can be used. Generally though do the first 4, as the more consistent you are with them, the less they will expect the mixup ones.
Custom Combos
- Mid Screen (Hit confirmable)
C.lk, C.lk, lk hurricane kick, lk hurricane kick (juggle), activate, lk hurricane kick (juggle) x N (repeat until they are in the corner), Red Fireball (FP) x N (Time these to keep them juggled in the air), end with HCB HCB + P (Fireball Super)
- Corner (hit confirmable)
C.lk, C.lk, lk hurricane kick, activate, FP (juggle), Red Fireball (FP) x N, end with HCB HCB + P (Fireball Super)
- Mid Screen (Hit Confirmable)
Demon Flip + P Near opponents head (to throw), lk hurricane kick (juggle), activate, lk hurricane kick x N (juggle) until opponent is in corner, Red Fireball (FP) X N, HCB HCB + P (Fireball Super)
- Guard Crush String (Corner)
Activate, Red Fireball (FP) X N, once guard is crushed, follow up with HCB HCB + P (Fireball Super)
- Guard Crush String (Mid Screen)
Activate, Dragon Punch (FP) X N until crushed, follow up with QCF QCF + P (Uppercut super)
Insanely Hard Combos
- choi special (corner only)
c/s.mk, hp red fireball, lp dp (1 hit), hp dp (1 hit).
- Osiris:
J.Hp,land S.Lp,S.Hp into HCBX2(lV.1), QCB.Lk, QCF.Mp(LV.2) and while akuma is coming down QCB.HK and finish with DP.HP
- Air Juggle
j.mp -> j.hk hurricane, land, lk hurricane (juggle), Dragon Punch any strength(Juggle)
- Fireball Juggle (Corner Only) All grooves except A
C.mk, HCB HCB + FP (Level 3 super fireball), juggle afterwards with lk hurricane kick, juggle with Dragon Punch (LP) for one hit
- Double DP Juggle
Anti-Air a move with a Dragon punch that only hits with one hit (i.e. you hit them high). When you land, run forward a little and do another dragon punch, this will allow you to land 2 more hits. Only works in run grooves, though sometimes they are "Deep" enough to not need to run forward a bit.
- Triple DP Juggle
This is more for show than for damage. Get the opponent into the corner, and on their wakeup, do a Raging Demon. If they jump straight up to get away (like most do), do a Dragon Punch (lp) for one hit, follow up with a Dragon Punch (lp) for a second hit, and then finally throw out a Deep Dragon Punch (lp) for the third hit. It does more damage to just do the first Dragon Punch (lp), followed by a Deep 2 hit Dragon Punch (lp).
Raging Demon Setups
A lot of Akumas power comes from the fact that one mistake the opponent makes can lead to big damage from his Raging Demon. Akuma luckily has a lot of way to set up these guessing games, and land his raging demons for huge damage.
- [blocked] crossup MK, land, s.lp, s.fp, whiff lk hurricane, land, demon
- [after BnB], small pause, TK mp FB crossup (whiffs), land, demon.
- [blocked] c.lp, c.lp, dash > demon
- Knockdown your opponent in the corner. From here, DP + PPP teleport into the corner. This will cross them up, and also give Akuma a nice glitch where he instantly comes out of the teleport. From here, pull the Raging Demon (by buffering the command within the teleport). Mix this up with Teleport -> Hurricane Kick -> Dragon Punch so that if/when they try to jump the demon, they get caught with this instead. Because of this, it sets up a 50/50 mind game with the opponent. Also, teleport -> Fireball super works when they jump, expecting a Raging Demon, but instead eat a level 3 fireball super.
- Back to corner, RDP + PPP Telport in place, Demon. Most people don't expect it, but don't get used to using this.
- C.lk, lk hurricane kick (all blocked), demon as you land. Not 100% safe, but with perfect timing, you can catch a lot of punishment attempts.
- While opponent is knocked down, throw out S.mp. This is Akumas 2 hit overhead. From here, cancel into the Raging Demon BEFORE it connects with the opponent. At point blank range, if they are crouching, this is un-escapable.
- [N-Groove Only] Walk up, break stock/pop (HP + HK), into Raging Demon. This is the ultimate in quick Demon inputs. For tips, Pop with your pinky+thumb, start the LP quickly with your index finder, and then practice doing F (joystick hand) -> LK (thumb) -> HP (Ring finger/Pinky).
