Callie Rose (talk | contribs) |
Callie Rose (talk | contribs) (→Supers) |
||
| Line 1,587: | Line 1,587: | ||
==Supers== | ==Supers== | ||
=== <span class="invisible-header">Final Showdown</span> === | |||
{{MoveData | |||
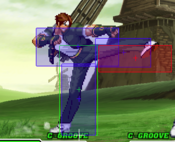
| name = Final Showdown | |||
| input = 236236P | |||
| subtitle = Beatdown Super | |||
| image = CVS2_Kyo_236236P.PNG | |||
| caption = | |||
| linkname = 236236P | |||
| data = | |||
{{AttackData-CvS2 | |||
| version = {{Motion|236}}{{Motion|236}}+{{Icon-Capcom|LP}} | |||
| subtitle = | |||
| damage = 2800 | |||
| stun = 0 | |||
| cancel = None | |||
| guard = Mid | |||
| parry = High | |||
| startup = 5:8 | |||
| active = 56 | |||
| recovery = 35 | |||
| total = 104 | |||
| advHit = -DWN | |||
| advBlock = -17 | |||
| invul = 9 (Full) | |||
* | |||
}} | |||
{{AttackData-CvS2 | |||
| header = no | |||
| version = {{Motion|236}}{{Motion|236}}+{{Icon-Capcom|MP}} | |||
| subtitle = | |||
| damage = 4400 | |||
| stun = 0 | |||
| cancel = SP/SU | |||
| guard = Mid | |||
| parry = High | |||
| startup = 5:8 | |||
| active = 56 | |||
| recovery = 30 | |||
| total = 99 | |||
| advHit = -DWN | |||
| advBlock = -12 | |||
| invul = 15 (Full) | |||
* | |||
}} | |||
{{AttackData-CvS2 | |||
| header = no | |||
| version = {{Motion|236}}{{Motion|236}}+{{Icon-Capcom|HP}} | |||
| subtitle = | |||
| damage = 5800 | |||
| stun = 0 | |||
| cancel = None | |||
| guard = Mid | |||
| parry = High | |||
| startup = 5:8 | |||
| active = 56 | |||
| recovery = 30 | |||
| total = 99 | |||
| advHit = -DWN | |||
| advBlock = -12 | |||
| invul = 23 (Full) | |||
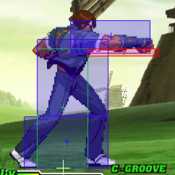
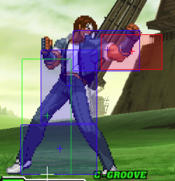
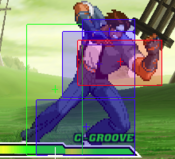
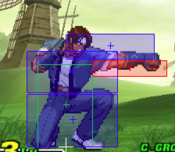
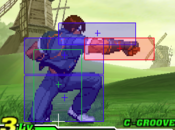
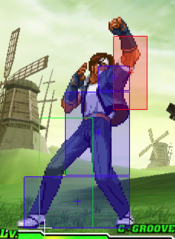
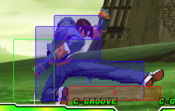
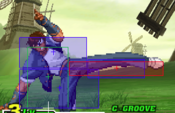
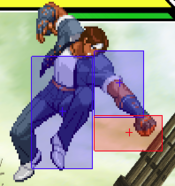
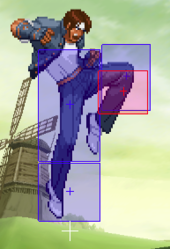
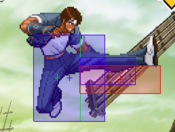
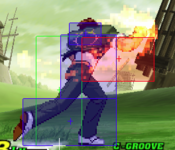
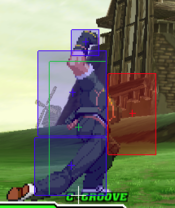
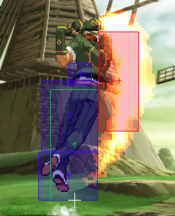
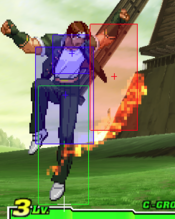
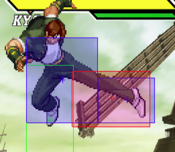
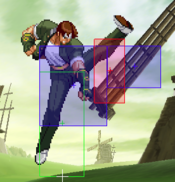
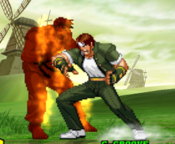
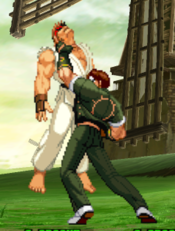
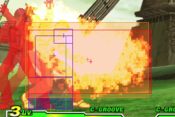
| description = Kyo summons a huge pillar of fire, and lunges at the opponent with a hook like his Aragami. Level 1 ends with one punch, level 2 adds another punch, and level 3 adds a high damage Oniyaki ender. Easier to combo into than Orochinagi, but does do less damage. Will combo off of lights and quick buffers, but requires a bit of close range. Gains a lot more utility in C-Groove where it can cancel into 236HKK, leading to an Orochinagi for big damage. Despite the ridiculously tall hitbox, air opponents will not get hit by this fully, making it useless as an anti-air. | |||
* | |||
}} | |||
}} | |||
=== <span class="invisible-header">Orochinagi</span> === | |||
{{MoveData | |||
| name = Ura 108 Shiki: Orochinagi | |||
| input = 2141236P | |||
| subtitle = Flame Super | |||
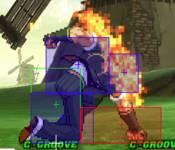
| image = CVS2_Kyo_2141236P_First.PNG | |||
| caption = Charging | |||
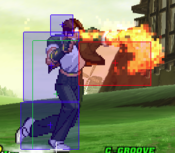
| image2 = CVS2_Kyo_2141236P_Second.PNG | |||
| caption2 = The Classic | |||
| linkname = 2141236P | |||
| data = | |||
{{AttackData-CvS2 | |||
| version = {{Motion|214}}{{Motion|41236}}+{{Icon-Capcom|LP}} | |||
| subtitle = | |||
| damage = 2500 | |||
| stun = 0 | |||
| cancel = None | |||
| guard = Mid | |||
| parry = High | |||
| startup = 5:1~15 | |||
| active = 1~53 | |||
| recovery = 53 | |||
| total = 73 | |||
| advHit = -DWN | |||
| advBlock = -20 | |||
| invul = 9 (full) | |||
* | |||
}} | |||
{{AttackData-CvS2 | |||
| header = no | |||
| version = {{Motion|214}}{{Motion|41236}}+{{Icon-Capcom|MP}} | |||
| subtitle = | |||
| damage = 3700 | |||
| stun = 0 | |||
| cancel = SP/SU | |||
| guard = Mid | |||
| parry = High | |||
| startup = 5:1~15 | |||
| active = 1~53 | |||
| recovery = 53 | |||
| total = 73 | |||
| advHit = -DWN | |||
| advBlock = -17 | |||
| invul = 15 (Full) | |||
* | |||
}} | |||
{{AttackData-CvS2 | |||
| header = no | |||
| version = {{Motion|214}}{{Motion|41236}}+{{Icon-Capcom|HP}} | |||
| subtitle = | |||
| damage = 1000+4700 | |||
| stun = 0 | |||
| cancel = None | |||
| guard = Mid | |||
| parry = High | |||
| startup = 5:1~15 | |||
| active = 1~53 | |||
| recovery = 53 | |||
| total = 73 | |||
| advHit = -DWN | |||
| advBlock = -14 | |||
| invul = 23 (Full) | |||
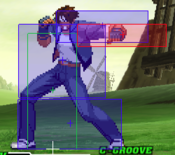
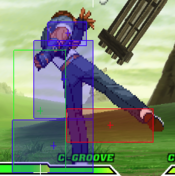
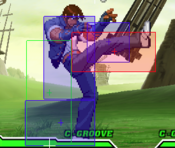
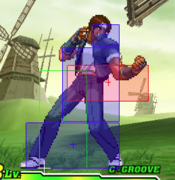
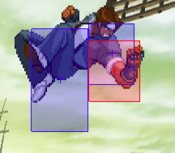
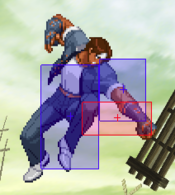
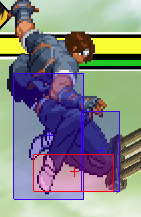
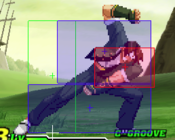
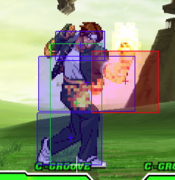
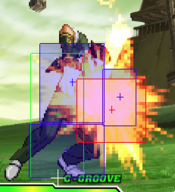
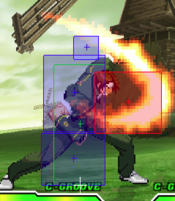
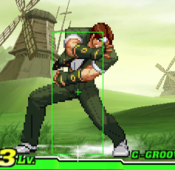
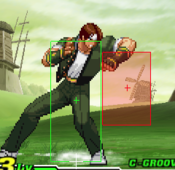
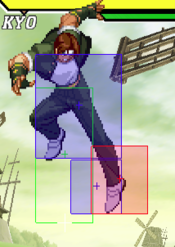
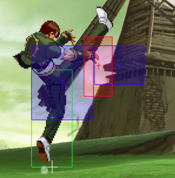
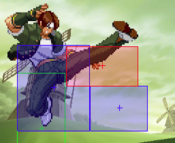
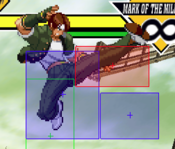
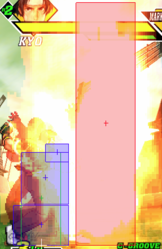
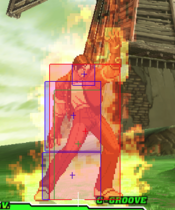
| description = Kyo's signature super where he charges up his fire and then throws out a cloud of flame. Can be held, but unlike in KOF this does not increase it's damage and the max hold version is still blockable. With the level 3 version, Kyo will be covered in an active flame hitbox that can be used to make juggles consistent. Holding it is just for mindgames and to ensure max damage in juggles. These are high damage, and what you usually want to end combos in, but they can be a bit situational to land in comparison to Final Showdown. Almost always you'll land these after a Kai in the corner. | |||
The level 1 and 2 versions will usually drop hits and do less damage, so you especially want to land the level 3 version. To land all hits of the level 3, you have to get a hit in the corner into 236HKK. Buffer the super to immediately do it as you land, and hold so they can bounce off of Kyo's body once. Then, release the super as they fall. | |||
* | |||
}} | |||
}} | |||
= The Basics = | = The Basics = | ||
Revision as of 18:14, 29 May 2022
Introduction
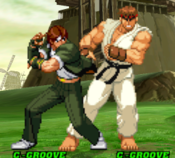
This is Kyo. He IS stylin.
In-game, the poster boy of KOF is a rushdown/mix-up oriented character whose main strength lies in opening opponents up at close range with his array of overheads and low confirms, then continuing his assault with all the tools at his disposal - overheads, variable rekkas, safe low pokes, great jump-ins, an amazing kick throw, multiple hard knockdowns, a launcher, he's got it all. Backing this up are ways to fish for and confirm off of counter hits, and some of the game's highest combo damage, especially with meter. What he lacks in neutral (aside from his anti-airs), he makes up for in being an offense powerhouse.
Getting in is easier said than done though, especially vs the top tiers. He lacks a reliable way without meter (or the right groove) to beat some of the better neutral options in the game, such as Sagat's stand fierce, without taking a big risk. Make no mistake though, these risks are very much worth taking, as the sheer damage he's capable of with meter can make him scarier than any top tier when he gets in the opponent's head.
Groove Selection
Kyo can be run well with almost any groove, but shines mostly in K groove. While rolls do help him, JD and rage turn the already high damage Kyo into a punish machine, dishing out damage from almost any starter. Rage also makes his already scary oki mixup even scarier, as it only takes a few good hits for Kyo to win, and he can easily combo into level 3 Orochinagi in the corner for massive damage. N-Kyo is also quite powerful, as while he doesn't get the obviously powerful benefit of rage, consistent access to level 1 supers and a powerful damage buff with Max Mode make him scary. N-Kyo also gets access to rolls, which are a great defensive and neutral option for Kyo.
The other grooves are all varying in usefulness but generally are good. C-Kyo gets access to damaging and flashy level 2 combos and can more easily end combos in his autocombo super, alongside airblock and Alpha Counters that aid his defense. A-Kyo gets access to the powerful Custom Combo mechanic, and in classic Kyo style his CC is highly damaging and puts your opponent in the corner where you want them. P-Kyo is shockingly good, as his meterless punishes are devastating and his level 3 punishes even more so. One good parry from P-Kyo puts your opponent deep in the corner.
Despite his usefulness in other grooves, S-Kyo has very little going for him. Kyo has decent but underwhelming and combo-oriented supers, so having infinite level 1s means nothing to him. S-Kyo also has to actively give up space to build meter, which harms his heavily aggro gameplan.
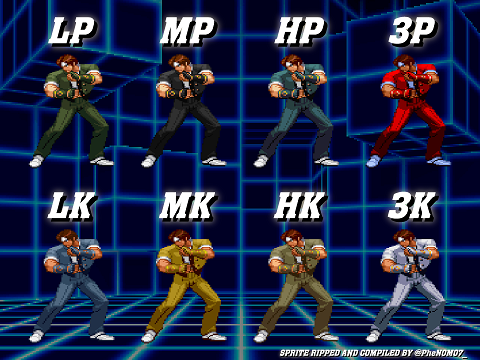
Colors
Normal Moves
Far Normals
5LP
5MP
5HP
5LK
5MK
5HK
Close Normals
clLP
clMP
clHP
clLK
clMK
clHK
Crouching Normals
2LP
2MP
2HP
2LK
2MK
2HK
Jumping Normals
8LP
8MP
8HP
8LK
8MK
8HK
Command Normals
6HP
3HK
6MK
j2HP
Throws
4/6HP
4/6HK
Special Moves
Aragami
Kyo's Rekka series can be intimidating at first, but the tree is fairly simple! Here is a quick rundown.
Aragami > Konokizu > Nanase/Yanosabi
Aragami > Yanosabi > Nanase/Migiri Ugachi
There are different reasons to use either of these two trees and the two possible enders for each, but memorizing the order is simple.
Konokizu
Yanosabi
Nanase
Migiri Ugachi
Dokugami
Tsumiyomi
Batsuyomi
Oniyaki
RED Kicks
Kai
Kai Followup
Oboroguruma
Kototsuki You
Supers
Final Showdown
Orochinagi
The Basics
Bread and Butter Combos
Three most basic combos done on reaction:
-d.LK, d.MP xx qcf+LP, qcf+P, K The standard low hitting combo into beatdown punches.
-jump in HP, d.MP xx qcf+LP, qcf+P, K The standard combo off a jump in attack.
-low jump HK, dp+HP The standard combo off a low jump attack.
d.MP gives you frame advantage to link combo after:
-d.MP, d.MP xx qcf+LP, qcf+P, K
-d.MP, d.LK xx qcf+LK, LK, super
Opponent dizzy or otherwise open for big punishment:
-(j.HK), close s.HK xx qcf+MK, K, dp+HK (three hits) The last hit slams the opponent down to the ground and he isn't allowed to tech roll or slow getup. If you hit with a dp+HK juggle from midscreen, your opponent will be brought all the way to the corner.
-(j.HK), close s.HK xx qcf+MK, K, f+HP xx qcf+LP (whiff), hcb+P (whiff), P (otg) A fancier version of the above combo that does more stun damage. Vega can tech roll the last OTG hit of the combo though, so stick with the first combo where you juggle with dp+HK instead.
-(j.HK), close s.HK xx qcf+MK, K, dp+HP Sometimes the opponent gets dizzy before the last hit of the three hit dp+HK move. To maximize the damage you do to your opponent, when you're sure the opponent will get dizzy, juggle him with the 2 hit dp+HP move instead.
Off a parry:
(These aren't guaranteed when your opponent uses anti-parry tactics like buffering a slow DP into whatever parry bait move he stuck out, or mashing on a command grab or super grab after the parry, but that rarely happens.)
-parry, close s.HK xx qcf+MK, K, dp+HK The number one reason P-Kyo is so deadly. Off just one parry opening from anywhere on the screen, he can bring you into the corner with a dp+HK juggle.
-parry, d.MP xx qcf+LP, qcf+P, K Do this when you see that you're out of range of your close s.HK. Also consider using d.MP xx qcf+MK, K too though.
Off a JD:
d.MP is a four frame startup attack and cancels into the beatdown punches or launching kicks perfectly. A lot of times you get a free combo when you JD certain laggy attacks your opponent throws out (like a Blanka d.HP for example). A super fast attack like d.MP is the perfect move to take advantage of that window for a free combo.
-JD a laggy ground move, d.MP xx combo
Openings
Super Combos
Using Level 3s
c.LK,c.LK xx qcf,qcf+P
low jump HP/HK xx qcf,qcf+P
c.LK,c.LK,c.LK xx qcf+LK,K -> qcb,hcf+P, release (in corner: hold, release)
c.LK,c.MP xx qcf+MK,K -> dp+MK -> qcb,hcf+P, hold, release
j.HK,close s.HK xx qcf+MK,K -> dp+MK -> qcb,hcf+P, hold, release
far s.HK xx qcb,hcf+P, release
trade dp+MP -> qcb,hcf+P, release
- After combos which involve all of the level 3 cloud super connecting optional whiff qcf+LP,hcb+LP,P can be added on for extra damage (only last hit connects). This isn't hard, but requires practice. Make the first part of the super hit once (so do it deep, after dp+MK,K is easiest), then release the button right afterwards. The super should hit for 4 hits, immediately when you recover start inputting the qcf+LP and finish.
Using C-Groove
c.LK,c.LK xx qcf,qcf+MP xx qcb,hcf+P
c.LK,c.LK xx qcf,qcf+MP xx qcf+MK, K -> jump forward d+HP
(corner) c.LK,c.LK xx qcf,qcf+MP xx qcf+HK,K -> [finishers]
(corner) c.LK,c.LK,c.LK xx qcf+LK,K -> qcb,hcf+MP, release xx qcf+HK,K -> [finishers]
far s.HK xx qcb,hcf+MP, release xx qcf+HK,K -> [finishers]
j.HK,close s.HK xx qcf+HK,K -> qcf,qcf+MP (1hit) xx qcf+HK,K -> dp+HK (dizzy combo -- 66 stun)
trade dp+MP -> qcb,hcf+MP, release xx qcf+HK,K -> [finishers]
- [finishers]
dp+HK (easiest)
f+HP, qcf+LP,hcb+P,P (only last hit connects) -- if this is done near the corner, you can usually mess it up pretty bad, and still hit your opponent if he techrolls.
I wouldn't worry about landing level1s at the end of these combos, the stun helps out Kyo more.
Custom Combos
Combos into CC
close s.HK xx qcf+MK,K, dp+LP/dp+MK, CC, juggle with dp+MP, df+HK whiff
- start your post-CC juggle with dp+HP, df+HK whiff for a fullscreen CC
c.LK/c.MP xx qcf+LK,K, CC, juggle with dp+MP, df+HK whiff (corner)
RC qcf+MK,K, (dp+LP/dp+MK optional), CC, juggle with dp+MP, df+HK whiff
meaty c.MP/close s.MP, CC, c.LK, continue (easy)
meaty c.MP/close s.MP, CC, c.HP, continue (hard)
meaty c.MP/close s.MP, CC, dp+MP, df+HK, continue (harder)
c.HK, CC, juggle with dp+MP/dp+HP, df+HK whiff
CC setups (random activates)
blocked close s.HK, CC
blocked c.HK, CC
blocked meaty rdp+LK, CC
blocked meaty c.MK, CC
blocked 2nd hit of qcf+LK,K, CC
combo into qcf+MK,K, close s.HK xx rdp+LK (whiffs), CC
CC, RC rekka
CC, f+MK overhead, continue
hit with qcf+HP, hcb+P, wait, CC
the other obvious random activates, like empty jump, walk forward, etc
Customs
CC, (c.LK), close s.HK x 2, far s.HK, df+HK (1-hit), [far s.HK x 2,
df+HK (1-hit)] x N to corner, df+HK xx qcfx2+P
- you can also switch up to mashed c.LK, df+HK (2-hit) at the end,
but i find it smarter to keep it simple.
CC, [dp+MP, df+HK whiff]x8 (or to 8 hits), c.HP, c.HP, qcb,hcf+P
- this is your combo for many things, like anti-air CC, comboing after
all sorts of juggles, or traded dp+LP/MP
- start with dp+HP (1-hit), df+HK whiff if you need the range, like
after a traded dp
j.HK, close s.HK xx qcf+MK,K, dp+MK, CC, [dp+MP, df+HK whiff] x 2,
dp+MP, s.LK whiff, [j.LP x 4] x N until no meter, close s.HK/c.HP xx
qcf+HK,K, dp+HK (opponent dizzy), j.HK, close s.HK xx qcf+MK,K, dp+HK
- this should dizzy all characters 70 stun and lower if you land the
qcf+HK,K correctly, without a jumpin it should dizzy 60 stun chars
- the final hits after the dizzy won't do good damage because the CC
scaling will still be in effect, this is only useful for flash
- it's smarter to end this combo with a super, then try to land
another combo afterwards to get some real dizzy damage
Special Custom enders
- combo to 8 hits, juggle with hcb+HK, qcf+LP, hcb+P, P (all 3 hits),
continue with mashed ground custom into qcfx2+P super or qcf+MK,K,
dp+HK for dizzy
- combo to 8 hits, juggle with c.HP x 2 (think rolento super at the
end of CC), qcf+LP, hcb+P, P (first 2 whiff), continue with mashed
ground custom into qcfx2+P super or qcf+MK,K, dp+HK for dizzy
- the execution of the connected rekka chains is pretty hard in CC mode, with kara cancels and shit, sometimes you do one rekka, juggle with a jab, then do another jab when you try for the hcb+P, it's hard, i would stick to setting up whiffed chains if you're gonna really practice this
- ground custom, end with qcf+MK,K, dp+HK for dizzy
Advanced Strategy
Kyo has possibly the most useful kick throw in the entire game.
The opponent is left right next to you, is unable to tech roll or slow getup, and the 52 pixel range of Kyo's kick throw even lets him do it after the pushback from a d.LK.
Wake-Up Pressure/Knockdown Mixups
Kyo has some of the nastiest mix-up in the game. The whole point of Kyo is correct meter management coupled with use of low shorts to get your opponent afraid of getting super'd or CC'd. You use his mix-up strategies to make your opponent defensive and afraid so that you can throw them when necessary or confuse them, opening up situations where you can combo into Serpent Wave or Final Showdown.
Tools Kyo has for mix-ups:
LP Aragami (safe on block, not jd)
Low short or wait and then low short (link to c.mp and then cancel to Aragami/Kai)
Counterhit c.mp
Whiff to Throw or just Walk-up throw
Counterhit s.rh to super (difficult)
Meaty S.Strong xx LP Aragami
LP Aragami => Yasabi (overhead that is unsafe on block and can be slightly delayed for confusion)
Low jump to low shorts (50/50 mix-up)
Low jump crossup shorts (hop over the grounded opponent and work in shorts)
D+FP command normal mix-up (Small Jump D+FP, Whiffed SJ D+FP to throw, Crossup SJ D+FP *tall characters only*)
Jump into corner to avoid DP (situational and only on cornered opponents)
Wakeup Super
Against players with a nasty DP such as Ken, Sagat or Iori, it's important to not start out reckless. You should try to recognize if your opponent is prone to throw out wake-up dp's. Free jump-ins combined with waiting/blocking should be used when necessary to bait out whiffed dp's that open up huge punishment combos (c.lk x 2, c.mp xx aragami, etc.). Once your opponent is afraid to wake-up dp, begin to throw out more low shorts and to fish for counterhits with c.mp. Do not be afraid to walk up and kick throw, tick throw, or whiff to kick throw.
Matchups
vs. Blanka
Make it one of your goals to get in and land a kick throw. Once you do, you put your self in a highly advantageous mixup situation. Remember that since Blanka is a charge character, it becomes extremely confusing for him on how to keep his charge if you play tricky and keep switching sides with him. After the kick throw...
-low jump forward, crossup j.LK
This is safe against RC electricity, and you actually have frame advantage when you land.
From there...
-wait, kick throw again
-wait, d.LK combo to counter Blanka trying to throw you
Although it's not necessary in this instance, you can take a complete guess and try to dp+HP after the crossup low jump LK also
After the kick throw...
-low jump forward, land, kick throw again This grabs Blanka right out of his wakeup RC electricity startup.
-low jump foward, land, meaty d.MP, d.MP xx combo
The d.MP hit perfectly meaty when you do it like this.
Whenever Blanka sticks out a d.HP, you can sweep his limb from far away if he whiffed. You can even try to do far s.HK xx super if you like.
Kyo far s.HK is a guaranteed counter to Blanka's d.MK.
One of Kyo's most often used moves is his df+HK. Blanka knows this and will be jumping up and down with his vertical j.HK to counter you. Use your Kyo dp+HP to take him out of the air whenever you're in range.
The counter to Blanka trying to do super jump MK to cross you up is to use your Kyo close s.MK anti-air.
Random Tricks/Notes
Discussion
http://www.shoryuken.com/forums/forumdisplay.php?f=51

