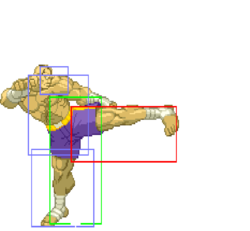
m (→Special Moves) |
|||
| Line 913: | Line 913: | ||
|description= *Soft knockdown when hit on an airborne opponent. | |description= *Soft knockdown when hit on an airborne opponent. | ||
*'''Punishable on hit.''' | *'''Punishable on hit.''' | ||
*Hits 1 times max and doesn't cause a | *Hits 1 times max and doesn't cause a knockdown up-close for most of the cast. | ||
*Hits 2 times and causes knockdown for the following characters: Adon, Guy, Zangief, Rose, Sodom, Sagat, Dictator | *Hits 2 times and causes a soft knockdown for the following characters: Adon, Guy, Zangief, Rose, Sodom, Sagat, Dictator | ||
Use to advance quickly, or combo into. | Use to advance quickly, or combo into. | ||
----- | ----- | ||
Revision as of 16:06, 31 March 2022
| Sagat | |
|---|---|

| |
| Health: | 144 |
| Defensive Rating: | 0 |
| Stun: | 40 |
| Walk Speed Forward: | 250 |
| Walk Speed Backward: | 300 |
| Jump Backward: | 48f (3+45+0) |
| Neutral Backward: | 47f (3+44+0) |
| Jump Forward: | 45f (3+42+0) |
| Wake-Up: | 49f |
| Quick Rise: | 20f |
| Throw Range: | 22 |
Feared throughout his homeland and beyond, Sagat reigned supreme until his narrow defeat at Ryu's hands. Humiliated and without honor, Sagat vows revenge against his new rival Ryu at any cost. Seeking much needed vengeance, he enters any tournament he can, and now stands on a new battlefield. Overall Sagat isn't easy to use, but is very good once you get him down. He's more for someone who likes to zone/turtle, as he doesn't really have much of a rush down ability. But when he hits you, it hurts.
Players to watch: MountainDewFKR
Normal Moves
| SFA2 Framedata Glossary | |
|---|---|
| Damage |
Units of base damage inflicted by the move (100% life bar = 144 units of health). Most moves have a damage range; the number inside the square brackets indicates which Random Damage Table the move uses to look up any additional damage and the % chance of doing so. |
| Stun |
Units of stun inflicted by the move. |
| Startup |
The frame the move hits on (1st active frame). Super moves with a screen freeze will separate pre- and post-screen freeze startup frames by a '+' (Ex: 5+0). |
| Active |
The portion of a move that can hit. How many frames a move remains active for. ()=Inactive frames in-between active frames. [xN]=Repeated sequences. |
| Frame Adv |
The frame advantage values when the attack is blocked. (Add +1 frame to all OnBlockAdv values for the move's OnHitAdv value; Ex: +2oB/+3oH, -4oB/-3oH) |
| Meter |
The units of meter gained on whiff/block/hit. (48, 96, and 144 units of meter are required for 1, 2, and 3 bars of meter respectively) |
| Block |
Low attacks must be blocked crouching. High attacks must be blocked standing. Mid attacks can be blocked either way. |
| Properties |
|
| Frames |
All framedata collected with the game speed set to normal, where the game tickrate and framerate are the same(60fps). |
| Speed |
All framedata collected with the game speed set to normal. |
| Hitboxes |
All hitbox images have the character standing/jumping in the exact same position, so hitbox distances can be easily compared.
|
| Credit | Damage, stun, framedata, meter, and updated hitboxes collected by |
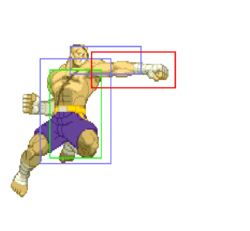
Standing
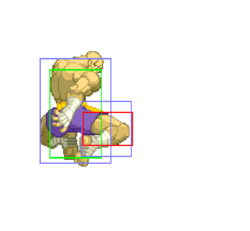
Crouching
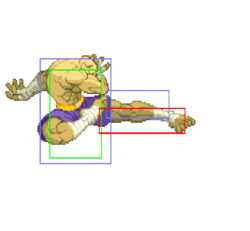
Neutral Jumping
Diagonal Jumping
Command Normals
| Damage | Stun | Startup | Active | Frame Adv | Meter | Block | Properties |
|---|---|---|---|---|---|---|---|
| N/A | N/A | N/A | N/A | N/A | 1/-/- | N/A | - |
Normal Throws
| Damage | Stun | Startup | Active | Frame Adv | Meter | Block | Properties |
|---|---|---|---|---|---|---|---|
| 11+1xN = 13-17 | 0 | 0 | N/A | N/A | -/-/3 | N/A |
- Mashable throw from both sides to add or reduce the number of hits. With a min of 2 and a max of 7 hits.
- Does not side switch.
- Deals 12 damage when opponent tech throws.
- Sagat has the best throw range in the game (Alpha2ThrowRanges).
Alpha Counters
Punch Alpha Counter
(while in blockstun)![]() +
+ ![]()
Kick Alpha Counter
(while in blockstun)![]() +
+ ![]()
Special Moves
High Tiger Shot
High Fireball![]() +
+ ![]()
| Version | Damage | Stun | Startup | Active | Frame Adv | Meter | Block | Properties |
|---|---|---|---|---|---|---|---|---|
| 11[5], 11[5] | 8, 8 | 16 | 3, inf | -4 | 4/5/7 | |||
| 12[6], 12[6] | 10, 10 | 16 | 3, inf | -5 | 4/5/7 | |||
| 14[9], 14[9] | 12, 12 | 16 | 3, inf | -6 | 4/5/7 |
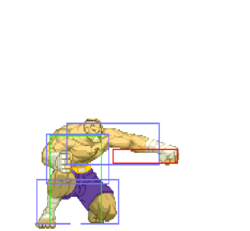
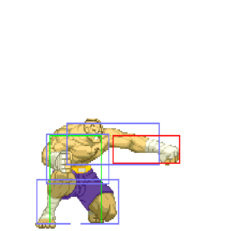
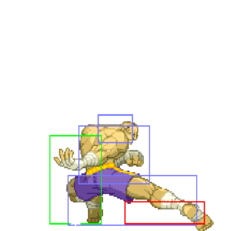
- Punishable on hit.
- Whiffs on crouching opponents.
- Goes over Sakura's fireball.
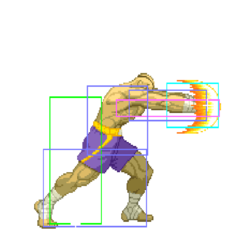
![]()
- Speed: 300 pixels per 100 frames; slowest fireball in the game (Alpha2Fireballs).
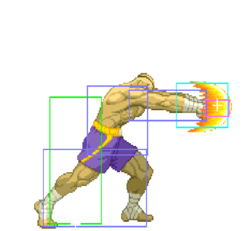
![]()
- Speed: 425 pixels per 100 frames (Alpha2Fireballs).
![]()
- Speed: 512.5 pixels per 100 frames; fastest fireball in the game (Alpha2Fireballs).
| Version | Damage | Stun | Startup | Active | Frame Adv | Meter | Block | Properties |
|---|---|---|---|---|---|---|---|---|
| 11[8], 11[8] | 8, 8 | 16 | 3, inf | -5 | 4/5/7 | |||
| 12[9], 12[9] | 10, 10 | 16 | 3, inf | -6 | 4/5/7 | |||
| 14[11], 14[11] | 12, 12 | 16 | 3, inf | -7 | 4/5/7 |
- Punishable on hit.
Kick version will be used the most, and is his main zoning tool from afar.
![]()
- Speed: 300 pixels per 100 frames; slowest fireball in the game (Alpha2Fireballs).
![]()
- Speed: 425 pixels per 100 frames (Alpha2Fireballs).
![]()
- Speed: 512.5 pixels per 100 frames; fastest fireball in the game (Alpha2Fireballs).
Tiger Blow
Tiger Uppercut, Dragon Punch![]() +
+ ![]()
![]()
- 9 frames of startup invul; 1 of which while active.
- Hits 1 time max.
![]()
- 8 frames of startup invul; 4 of which while active.
- Hits 3 times max.
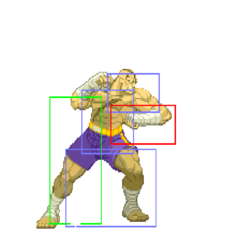
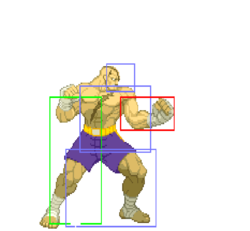
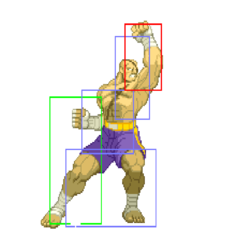
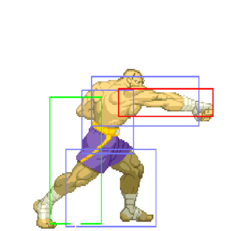
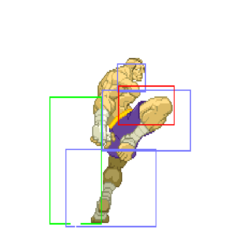
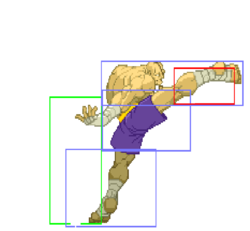
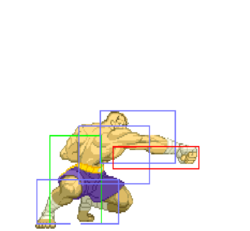
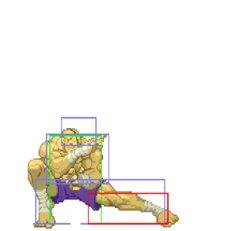
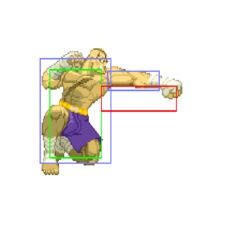
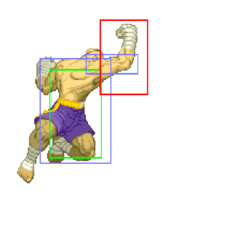
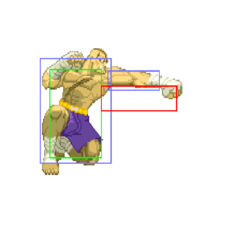
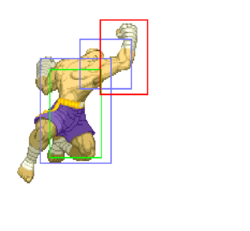
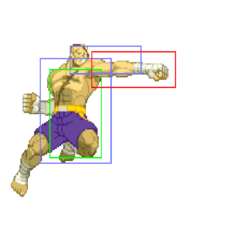
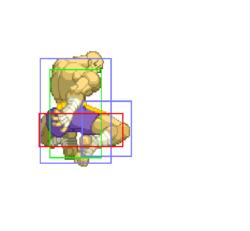
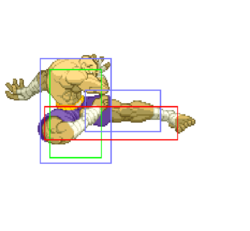
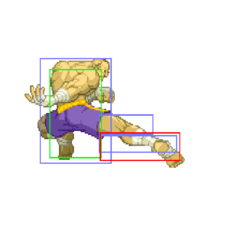
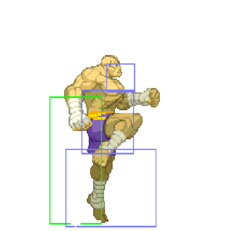
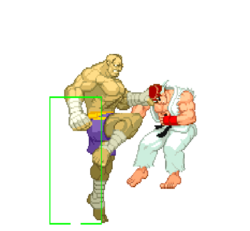
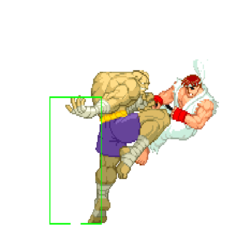
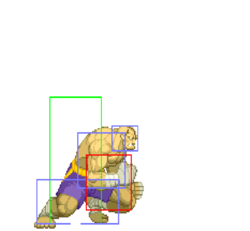
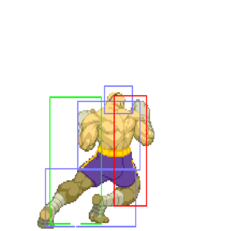
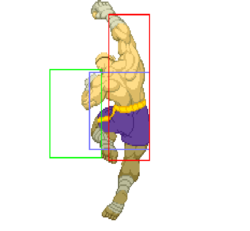
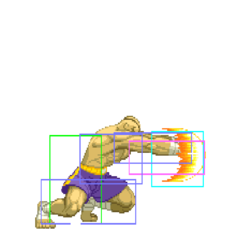
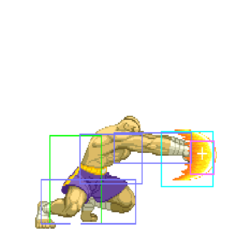
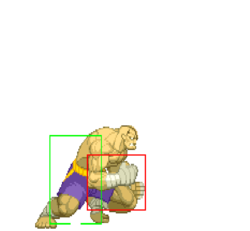
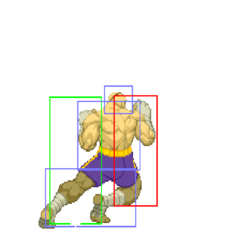
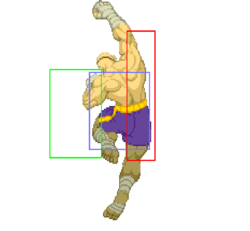
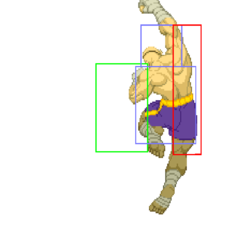
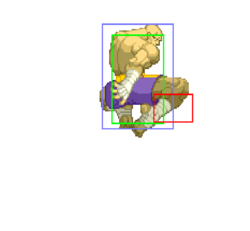
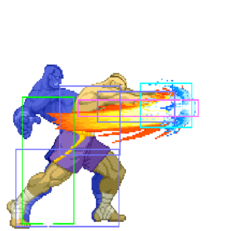
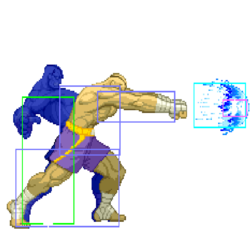
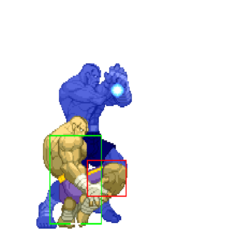
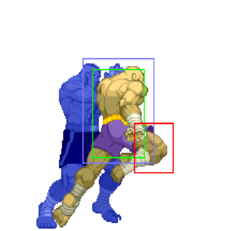
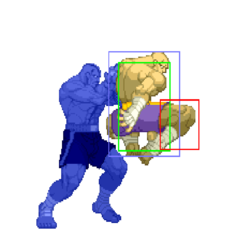
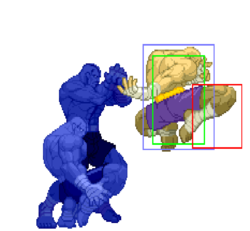
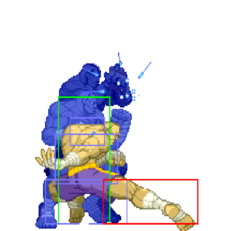
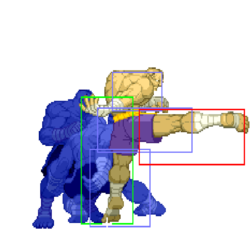
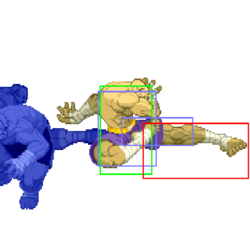
![]() - [Hitboxes pictured]
- [Hitboxes pictured]
- 8 frames of startup invul; 4 of which while active.
- Hits 7 times max.
Best overall version as a reversal and anti-air. Needs to be done as deep as possible to anti-air.
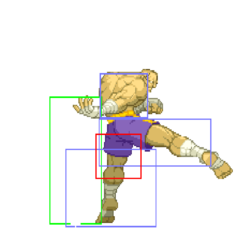
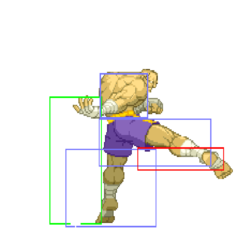
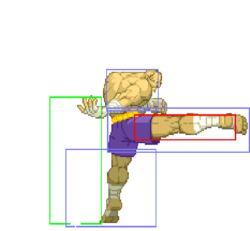
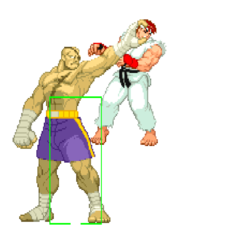
- Soft knockdown when hit on an airborne opponent.
- Punishable on hit.
- Hits 1 times max and doesn't cause a knockdown up-close for most of the cast.
- Hits 2 times and causes a soft knockdown for the following characters: Adon, Guy, Zangief, Rose, Sodom, Sagat, Dictator
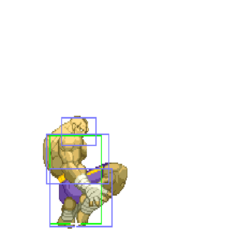
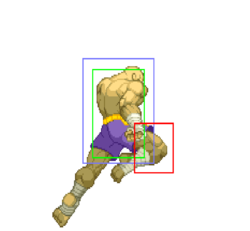
Use to advance quickly, or combo into.
![]()
![]()
![]()
Super Moves
Startup Invulnerability Notes:
- At the end of a super screen freeze, projectiles will start moving before the opponent's character is unfrozen, giving the supers more projectile invul. frames than hit invul. frames.
Awesome super to use in fireballs fights, not much use other than that.
Level 1
- 4 frames of startup hit invul.; 0 of which while active.
- 7 frames of startup projectile invul.
- Hits 4 times.
- Punishable on hit.
Level 2
- 4 frames of startup hit invul.; 0 of which while active.
- 7 frames of startup projectile invul.
- Hits 5 times.
- Punishable on hit.
Level 3
- 4 frames of startup hit invul.; 0 of which while active.
- 7 frames of startup projectile invul.
- Hits 6 times.
Tiger Genocide
Tiger Knee Super![]()
![]() +
+ ![]()
Only lvl 3 is worth it when comboed into, does massive damage.
Level 1
- 5 frames of startup hit invul.; 1 of which while active.
- 9 frames of startup projectile invul.
- Hits 5 times.
Level 2
- 5 frames of startup hit invul.; 1 of which while active.
- 10 frames of startup projectile invul.
- Hits 9 times.
Level 3
- 5 frames of startup hit invul.; 1 of which while active.
- 11 frames of startup projectile invul.
- Hits 12 times.
Level 1
- 4 frames of startup hit invul.; 0 of which while active.
- 7 frames of startup projectile invul.
- Hits 6 times.
Level 2
- 5 frames of startup hit invul.; 1 of which while active.
- 9 frames of startup projectile invul.
- Hits 7 times.
Level 3
- 5 frames of startup hit invul.; 1 of which while active.
- 10 frames of startup projectile invul.
- Hits 7 times.
The Basics
Sagats comfort zone is 3/4 to fullscreen away. From here you can anti air from afar and control the pace of the match. Punish all jump attempts hard. When the opponent does get close, AC them, or throw to get them away. His CC is very easy to land and is a round winner. Zone with slow fireballs, and punish far jump attempts with s.fp or s.mk, s.rh works too.
Tiger knee, then:
- CC
- throw
- block attack, AC
- You can also hp tiger uppercut at your own risk, but be careful because you are gonna get messed up if they block, cc is way safer. I would only cc at lvl 1, cause if they block its not too big a loss.
Advanced Strategy
Combos
- meaty c.lk, c.mp xx tiger shot
- point blank s,mp xx hp tiger uppercut
- c.lk x2 xx super
- c.lk xx hp dp
- Corner, combo into tiger raid, hp tiger uppercut juggle.
- j.rh, c.mp xx tiger genocide (lvl 3) OUCH!
cr. lk, cr. lk
cr. lk, cr. lk xx super
cr.lk xx uppercut
(meaty) cr. mp xx raid super
(meaty) cr. mp xx CC
Cr.MP, HK Groun Tiger Sshot
Cross up j.LK,s.MP,HP Tiger Blow
Croner j.HK,cr.MP,LVl 1 Raid,HP Blow
Custom Combos
If you ever don't knock them down (ex. you mess up a sweep, so they are still standing) the cc still works.
lvl 1- c.rh cc hk tiger knee, hp tiger uppercut c.rh xx hp tiger uppercut x2
if you have JUST A LITTLE more than a lvl 1, you can get 2 hk tiger knees in, then dp. lvl 2- hk tiger knee x3, hp tiger uppercut
lvl 3- tiger knee x5, hp tiger uppercut
^^ hard as hell to do, better off doing 4 knees. either way it hurts, even if you go for 5 knees into hp tiger uppercut.
Anti-air custom combo:
Oh so nice. Since Sagat has such a far reaching s,mk, you can AA from far away and get his full custom.
Close aa cc: s.lp xx hk tiger knees xN, hp tiger uppercut.
far aa cc: s.mk xx hk tiger knees xN, hp tiger uppercut.
Lv1:
[CC]c.HK,HK TKx2,HP TB[/CC]
[CC]HK TKx3[/CC]
Lv3:
[CC]c.HK,HP TBx3[/CC]
[CC]c.HK,HK TKx6[/CC]
[CC]c.HK,HK TKx5,HP TB[/CC]
Sagat:
lvl 1- c.rh xx hp tiger uppercut x2
lvl 1- c.rh xx hk tiger knee, hp tiger uppercut
lvl 2/3- c.rh xx hk tiger knee xN, hp tiger uppercut
Match-ups
He has a horrible matchup vs Ken\Akuma imo. If Sagat throws a high tiger shot, Ken\Akuma can roll under it and get in range. If Sagat throws a low one, Ken\Akuma can tatsu over it and get in range. Not to mention the fact that kens AC+k has huge range. So if Sagat wants to zone him, it has to be with normals instead of fireballs.
Keep him out at all times with Tigers and Buttons, be mindful when he has meter though (Supers/CC through fireball).
It's important to utilize the ground game as much as possible. Jumping in towards Charlie will do nothing but hurt you in the long run with his Flash Kick, normals, etc. You can throw out a slow tiger shot, and then bait another one and get Charlie to jump, which from there you have multiple options:
- If the Charlie player decides to do a jump in attack, use your Kick AC to push him further towards the corner which gives you a big advantage.
- If the opponent decides to empty jump to go for a throw or Activation, have your Uppercut on deck.
- If the opponent wants to walk forward towards you, have your St MK or Crouch normals ready.
Round 2/3 only : Most Charlie players like to start the round off with a Sonic Boom to start oppressing you, if you have meter and feel like that's their strat, use Tiger Cannon, ideally level 3 as it gives you the knockdown, further helping out with your aggressive play. From there use your HK Tiger Knee to push you forward.
You do NOT want Charlie to put you in the corner, as he'll make you do all the work to get out while pressuring you with the tools he has equipped.
If you've played Sagat (or to be precise Old Sagat) in Super Turbo, then there's alot of familiarity with this MU. You gain a big upper hand the moment you're stacked with meter, and the moment Chun gets cornered. Her floaty jump makes it easy for you to Tiger Uppercut her jump ins. However, don't get too Uppercut happy once she has meter, as she can use her jump in CC activation to her advantage either by attacking you the moment she lands, or just escaping entirely with her wall jump into activate. If you notice the Chun player is Activation happy, counter activate or do a very late Uppercut if you feeling ballsy. Otherwise, the moment she corners you, she'll make you do all the work like in the previous Charlie segment.
- Note* Due to her hurtbox when she throws out a Kikoken, it'll actually low profile your Tiger Cannon super unless you do it about a second later compared to the rest of the cast, only then will she get hit by it.
The only thing you have to worry about from Dan is his Cr HP if you jump often, his CC activation, his Kick AC, Jump LK, or cr MK. Otherwise, this MU is very straightforward and easy. Do NOT let Dan avenge his father!
He has a horrible matchup vs ken\akuma imo. If sagat throws a high tiger, ken\akuma can roll under it and get in range. If sagat throws a low one, ken\akuma can tatsu over it and get in range. Not to mention the fact that kens AC+k has huge range. So if sagat wants to zone him, it has to be with normals instead of fireballs.
Sagat's worst matchup in the game, you better hope that you don't get cornered as you're a big target. It's not a checkmate, but Rolento has the tools to bait you out of alot of moves. If the Rolento player is jump happy, use air to airs such as Jump LP or Jump MP. Low Tigers will be your go-to tool here, with the occasional High if you can get a read and knock Him down. You can't really turtle here because of Rolento's normals and overall arsenal. Stand MP, and a good spaced Stand HK will do wonders, same also applies for HP Uppercut. If you absolutely must get damage to secure a round, CC Activate into multiple HP Uppercuts or HK Knees depending on spacing. Most of your meter usage here will be to get some okay damage off a CC. You could also wake up Lvl 1 Genocide/Raid to escape or get some damage, but its risky. Play patient but never sit still, and for the love of god don't jump on Rolento, that Stand MP of his will stop Jump HK dead in its tracks.
This matchup is very space dependent and can go either way. It's best not to be full screen against Rose because she can easily absorb/reflect your Tiger Shots which is a core part of Sagat's game. A good button to use is your Stand MK, has a decent hitbox and pushback to further corner Rose. Once she's cornered, you can easily pin her down with Crouch HP, walk up throw if she doesn't have meter, and your fast walk back speed will help if she jumps in on you. There you can use St HP, St HK, or HP Uppercut. All three gives you great damage and stun potential. If Rose corners you, keep calm as some of your poke buttons will still come in handy, you can even whiff out some buttons to build meter. You can turn things around quickly the moment you have atleast one bar of meter in your arsenal. From there, you have Ground CCs, Anti-air CCs, buttons, and ACs.
Plays similar to the ST matchup (i.e. fireball war, mixing up High/Low, etc.) , the difference here is Sagat loses his anti air sweep, and its harder to AA Ryu in general. His normals are also slower making it alot harder to fake out by whiffing. It's important to time your Uppercuts deep at a consistent level for AAing. You wanna play at a good distance the moment you have meter so that you're ready for the opponent's offensive or defensive play. Whether its Ryu trying to over exert, mashing fireballs with CCs (you can do the same with Tiger Shots), etc. The key is to not blindly throw out mindless fireballs, otherwise the other player will capitalize and will be able to dish out alot of damage to you.
On Round Start, if the other Sagat attempts to jump at you, buttons on deck. If they fireball, you can jump in and get some damage out of it. For the most part, you just wanna control the space after throwing a slow Tiger to control additional space. The next round, chances are the other Sagat has atleast one bar of meter. If you can avoid it, do not jump at any costs due to the dangers of ACs or CC. Apply the idea from the previous round, slow Tiger -> walk -> buttons/throw/etc.
Your High Tiger Shots will always punish Sakura on her FB recovery at certain ranges, if she jumps you got your go-to normals. The moment she's stunned, you can go all out with your damage potential. The only way Sakura can win is if she takes the risk by jumping in with meter or you over exert yourself by trying to play close range and jumping in with a normal.
