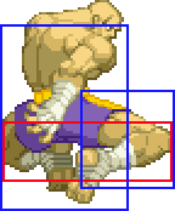
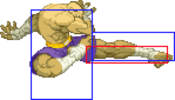
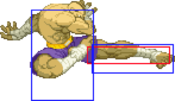
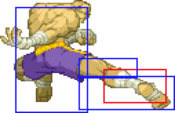
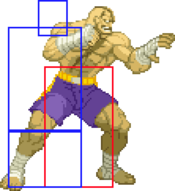
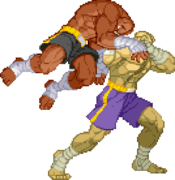
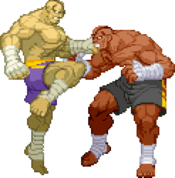
JtheSaltyy (talk | contribs) (started on the movelist page) |
JtheSaltyy (talk | contribs) (more work done on movelist and other parts) |
||
| Line 1: | Line 1: | ||
==''' | [[Image:Cvs2 sagat idle.gif|120px|right]] | ||
== Introduction == | |||
Sagat (サガット ''Sagatto'') is a Muai Thai practitioner from Thailand. He is considered the "Emperor of Muai Thai" because of how unstoppable he was when he fought. Nobody could defeat him, and soon became one of the strongest fighters in the world. He uses typical Muai Thai moves like fierce kicks, stiff knees and devastating punches, however he also has the ability to shoot projectiles (Tiger Shot), and uses a variation of Ryu's Shoryuken (Tiger Blow / Tiger Uppercut) as payback for Ryu scarring him. He dedicates his life to the martial arts, and works hard every day to make sure he retains his status as the best Muai Thai fighter to ever live, and that hard work payed off well as when he is at full strength, nothing can stop him. He is a proud and humble individual who knows and appreciates the work he and his opponents work into every fight. | |||
Sagat used to be one of the key antagonists of Street Fighter, first starting out as the final boss of the first Street Fighter. Once he lost to Ryu, he let his hate and anger lead him down to dark paths. He became one of the main members of the crime syndicate Shadaloo, becoming one of the 4 Heavenly Kings and Dictator's personal bodyguard. After Dictator brainwashed Ryu during the events of Street Fighter Alpha 3, he realized the moral wrongdoings of Shadaloo, so he left, and soon became one of the protagonists of the game. | |||
In a majority of Street Fighter games Sagat has made an appearance in, he was usually an incredibly strong character and remained near or at the very top of the tier lists. Old Sagat from Super Turbo and SFIV Vanilla Sagat are notable examples of really strong variants of Sagat. In each game he appears in, he's very strong for a different reason. O. Sagat was strong because of his zoning, SFIV Vanilla Sagat is strong because of his insane damage output, and you'll see why CvS2 Sagat is the strongest version of himself compared to all his other game appearances. | |||
<br> | |||
== Overview == | |||
Sagat is generally regarded as the king of CvS2. He is at the very, very top of every tierlist, usually listed as the best character in the whole game in multiple grooves. He's a great character in any groove you throw him on. He is all about playing neutral and using his big buttons to confirm into big damage. He has it all: high health, high damage output, good defensive options, great pressure, the best buttons in the game, you can't ask for anything more in a character. He's relatively easy to play if you know when to use each of his buttons, since they serve a variety of uses. | |||
Unfortunately, while a majority of this cast becomes incredibly better thanks to RCs (Roll Cancels), Sagat doesn't get too much from it, outside of RC Tiger Knee, there's no need to RC any of his specials. They won't offer much in the long run as they serve only a couple uses, but overall in neutral these specials don't serve much purpose at all. | |||
Most if not all top CvS2 players have Sagat on their main C and K groove team, usually as their R2 guy in the back. He should be there, since he is just too strong to be passed up on, and as said before, he's not that hard of a character to learn in any groove, outside of his own core gameplay design, he doesn't change much at all from the groove you have him in, so you're still getting relatively the same character no matter your preferred groove. Even in grooves like S and P, he's the best character available for those grooves. | |||
Generally the best spot you want to be in is either in neutral or pressuring up close. While Sagat's defensive options are great, it might get difficult to deal with rushdown heavy characters due to Sagat's sluggish speed, so it's best he's in a position where his speed isn't a part of the equation. You'll chip away at the opponent's health in neutral, but your main source of damage is from a confirm into super. It bags massive damage, as Sagat has the most reliable supers to give him that burst damage. | |||
{| class="wikitable" | |||
|- | |||
| Pros || Cons | |||
|- | |||
| + Best set of normals in the game || - Sluggish movement | |||
|- | |||
| + Really good supers || - Big hurtboxes, vulnerable to a lot of high placed normals | |||
|- | |||
| + Extremely high damage output and health || - Can't pressure well against short characters | |||
|- | |||
| + Viable in every groove || - Doesn't benefit much from roll cancel | |||
|} | |||
<br> | |||
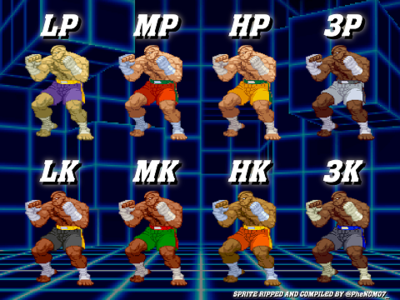
'''Palettes''' <br> | |||
[[File:Sagat_CvS2_colors.png|frameless|400px]] | |||
<br> | |||
== Groove Overviews == | |||
Sagat is an incredible character no matter what groove he's in. Of course some grooves are far better than others, and Sagat is only considered the best character in the game in 2 different grooves, but people have different tastes. Here are the pros and cons with each groove Sagat can be in, ranked from best to worst. <br><br> | |||
:- | [[image:Cvs2 K-Groove Label.png|frameless]] | ||
The strongest CvS2 character. K-Sagat is the scariest man in the whole game. He has access to a short hop, already making his pressure insanely good, and benefits the most from K-Groove's Rage and Just Defense. Once Sagat is raged, once good super turns the round in his favor, and thanks to the extremely convenient Just Defense (JD) it makes getting rage far easier that you think. | |||
{| class="wikitable" | |||
|- | |||
| Pros || Cons | |||
|- | |||
| + Rage Mode can easily deny the opponent the win || - No Alpha Counter, hard to escape good pressure | |||
|- | |||
| + Just Defense gives you a good amount of meter || - No control over your supers due to the nature of K-Groove's meterbuild | |||
|- | |||
| + Short hop makes your pressure very scary || - No air block forces you to make smart jumps | |||
|} | |||
<br> | |||
[[ | [[image:Cvs2 C-Groove Label.png|frameless]] | ||
C-Groove Sagat is scary. He almost always has at least half a bar of meter that confirms into fat damage, and the system mechanics in place really compliment the type of character he is, like air blocking, rolling, and the unique level 2 super cancel that gives him access to one of the most damaging optimal combos in the whole game. | |||
{| class="wikitable" | |||
|- | |||
| Pros || Cons | |||
|- | |||
| + Level 2 Super Cancel deals insane damage || - No short hop | |||
|- | |||
| + Air Blocking makes being in the air safer || - Somewhat difficult since you can't pressure | |||
|- | |||
|} | |||
<br> | |||
[[image:Cvs2 N-Groove Label.png|frameless]] | |||
N-Groove Sagat may be far less threatening compared to his optimal grooves but don't get it twisted. He's still very strong. He still has access supers frequently, and can "pop" to bag in some really big damage. Not to mention he still has a short hop. He's like a fusion of C and K but with the core parts of each groove taken out, you still end up with a very strong character. | |||
{| class="wikitable" | |||
|- | |||
| Pros || Cons | |||
|- | |||
| + Easy control of supers with traditional meter || - Needs to spend extra and "pop" for level 3 supers | |||
|- | |||
| + Short hop makes pressure scary || - No air blocking makes jumps less safe | |||
|- | |||
| + Retains a roll and a counter roll to escape pressure || - Fairly slow building meter, supers are not as frequent | |||
|} | |||
<br> | |||
[[image:Cvs2 A-Groove Label.png|frameless]] | |||
You might come to believe this variation of Sagat would be very strong. CCs in general do get big damage, however this version of Sagat is just redundant. In practice, he's merely a worse version of C Sagat. His CC also has little practicality, only working as either an anti air or up-close punish, however the CC itself is quite difficult to perform. Overall, there's way better A-groove characters out there and C Sagat is far stronger than this version. | |||
{| class="wikitable" | |||
|- | |||
| Pros || Cons | |||
|- | |||
| + Air blocking makes jumping safer || - No level 2 or 3 supers | |||
|- | |||
| + Fairly simple and linear meter to work with || - No short hop to make his pressure scary | |||
|- | |||
| + Has both a roll and alpha counter to get out of pressure || - CC is situational | |||
|} | |||
<br> | |||
[[image:Cvs2 S-Groove Label.png|frameless]] | |||
S Sagat is the best character you can possibly use in S-Groove. That's not saying much, since S-Groove in general sucks, but Sagat has some niche tools in S-Groove like using his dodge attack in neutral, or replacing his tigershot for his tiger cannon once he reaches low health. His damage output only really gets high when he gets those infinite level 1 supers, but again he can only get them if he's about to die, making it a very risky situation to be in. | |||
{| class="wikitable" | |||
|- | |||
| Pros || Cons | |||
|- | |||
| + Infinite supers make his damage good at low health || - Supers are scarce until you reach low health | |||
|- | |||
| + Short hop makes pressure scary || - No reliable source of meter outside power charge | |||
|} | |||
<br> | |||
[[image:Cvs2 P-Groove Label.png|frameless]] | |||
P-Groove sucks. Common knowledge, but even with P-Groove you can make Sagat work. This groove turns Sagat from a fairly simple character to learn to a hard challenge. He's still strong, but it's really hard to deal with good grooves as P Sagat. You need to make good use of parries and the rare times you can use a level 3 super. | |||
{| class="wikitable" | |||
|- | |||
| Pros || Cons | |||
|- | |||
| + Parrying gives free openings and approaches || - At most you'll get to use one super per round | |||
|- | |||
| + Short hop makes pressure scary || - Weak defensive options: No roll, alpha counter or air block | |||
|} | |||
== Normal Moves == | == Normal Moves == | ||
| Line 115: | Line 141: | ||
| subtitle = {{Icon-Capcom|LP}} | | subtitle = {{Icon-Capcom|LP}} | ||
| damage = 500 | | damage = 500 | ||
| stun = | | stun = 5 | ||
| cancel = SP/SU | | cancel = SP/SU | ||
| guard = H/L | | guard = H/L | ||
| Line 144: | Line 170: | ||
| subtitle = {{Icon-Capcom|MP}} | | subtitle = {{Icon-Capcom|MP}} | ||
| damage = 1100 | | damage = 1100 | ||
| stun = | | stun = 16 | ||
| cancel = SP/SU | | cancel = SP/SU | ||
| guard = H/L | | guard = H/L | ||
| Line 160: | Line 186: | ||
}} | }} | ||
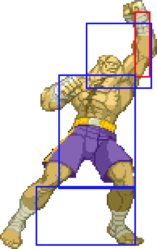
<span class="invisible-header"> | <span class="invisible-header">5HP</span> | ||
{{MoveData | {{MoveData | ||
| name = Stand Fierce | | name = Stand Fierce | ||
| Line 173: | Line 199: | ||
| subtitle = {{Icon-Capcom|HP}} | | subtitle = {{Icon-Capcom|HP}} | ||
| damage = 1600 | | damage = 1600 | ||
| stun = | | stun = 16 | ||
| cancel = SU | | cancel = SU | ||
| guard = H/L | | guard = H/L | ||
| Line 189: | Line 215: | ||
}} | }} | ||
<span class="invisible-header"> | <span class="invisible-header">cl5HP</span> | ||
{{MoveData | {{MoveData | ||
| name = Close Stand Fierce | | name = Close Stand Fierce | ||
| Line 204: | Line 230: | ||
| subtitle = {{Icon-Capcom|HP}} | | subtitle = {{Icon-Capcom|HP}} | ||
| damage = 1300 / 1100 | | damage = 1300 / 1100 | ||
| stun = 13/ | | stun = 13/11 | ||
| cancel = SP/SU (1st Hit Only) | | cancel = SP/SU (1st Hit Only) | ||
| guard = H/L | | guard = H/L | ||
| Line 220: | Line 246: | ||
}} | }} | ||
<span class="invisible-header"> | <span class="invisible-header">5LK</span> | ||
{{MoveData | {{MoveData | ||
| name = Stand Short | | name = Stand Short | ||
| Line 235: | Line 261: | ||
| subtitle = {{Icon-Capcom|LK}} | | subtitle = {{Icon-Capcom|LK}} | ||
| damage = 200/400 | | damage = 200/400 | ||
| stun = 2/ | | stun = 2/4 | ||
| cancel = SP/SU (1st Hit Only) | | cancel = SP/SU (1st Hit Only) | ||
| guard = H/L | | guard = H/L | ||
| Line 251: | Line 277: | ||
}} | }} | ||
<span class="invisible-header"> | <span class="invisible-header">5MK</span> | ||
{{MoveData | {{MoveData | ||
| name = Stand Forward | | name = Stand Forward | ||
| Line 266: | Line 292: | ||
| subtitle = {{Icon-Capcom|MK}} | | subtitle = {{Icon-Capcom|MK}} | ||
| damage = 400/900 | | damage = 400/900 | ||
| stun = 9 | | stun = 4/9 | ||
| cancel = SP/SU (1st Hit Only) | | cancel = SP/SU (1st Hit Only) | ||
| guard = H/L | | guard = H/L | ||
| Line 297: | Line 323: | ||
| subtitle = {{Icon-Capcom|HK}} | | subtitle = {{Icon-Capcom|HK}} | ||
| damage = 500/1300 | | damage = 500/1300 | ||
| stun = 13 | | stun = 5/13 | ||
| cancel = SP/SU (1st Hit Only) | | cancel = SP/SU (1st Hit Only) | ||
| guard = H/L | | guard = H/L | ||
| Line 313: | Line 339: | ||
}} | }} | ||
<span class="invisible-header"> | <span class="invisible-header">2LP</span> | ||
{{MoveData | {{MoveData | ||
| name = Crouch Jab | | name = Crouch Jab | ||
| Line 342: | Line 368: | ||
}} | }} | ||
<span class="invisible-header"> | <span class="invisible-header">2MP</span> | ||
{{MoveData | {{MoveData | ||
| name = Crouch Strong | | name = Crouch Strong | ||
| Line 355: | Line 381: | ||
| subtitle = {{Icon-Capcom|MP}} | | subtitle = {{Icon-Capcom|MP}} | ||
| damage = 1000 | | damage = 1000 | ||
| stun = | | stun = 14 | ||
| cancel = SP/SU | | cancel = SP/SU | ||
| guard = H/L | | guard = H/L | ||
| Line 371: | Line 397: | ||
}} | }} | ||
<span class="invisible-header"> | <span class="invisible-header">2HP</span> | ||
{{MoveData | {{MoveData | ||
| name = Crouch Fierce | | name = Crouch Fierce | ||
| Line 384: | Line 410: | ||
| subtitle = {{Icon-Capcom|HP}} | | subtitle = {{Icon-Capcom|HP}} | ||
| damage = 1500 | | damage = 1500 | ||
| stun = | | stun = 15 | ||
| cancel = SU | | cancel = SU | ||
| guard = H/L | | guard = H/L | ||
| Line 400: | Line 426: | ||
}} | }} | ||
== | <span class="invisible-header">2LK</span> | ||
{{MoveData | |||
| name = Crouch Short | |||
| input = 2LK | |||
| subtitle = {{Motion|d}}{{Icon-Capcom|LK}} | |||
| image = Cvs2 sagat 2lk.png | |||
| caption = Crouch Light Kick | |||
| linkname = 2LK | |||
| data = | |||
{{AttackData-CvS2 | |||
| version = | |||
| subtitle = {{Icon-Capcom|LK}} | |||
| damage = 400 | |||
| stun = 4 | |||
| cancel = SP/SU | |||
| guard = L | |||
| parry = L | |||
| startup = 3 | |||
| active = 4 | |||
| recovery = 6 | |||
| total = 13 | |||
| advHit = +5 | |||
| advBlock = +5 | |||
| invul = | |||
| description = | |||
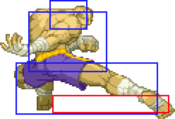
* Decent low kick. It comes out very fast, and it can link into itself twice. This is going to be your main combo starter, as it confirms into Tiger Knee fairly easily. It also works as a frame trap into normals like cr.MK and cr.HP to either catch the opponent pressing a button out of impatience or to get some extra guard damage, whatever option the opponent chooses to abide by. | |||
}} | |||
}} | |||
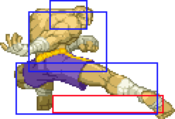
< | <span class="invisible-header">2MK</span> | ||
{{MoveData | |||
| name = Crouch Forward | |||
| input = 2MK | |||
| subtitle = {{Motion|d}}{{Icon-Capcom|MK}} | |||
| image = Cvs2 sagat 2mk.png | |||
| caption = Crouch Medium Kick | |||
| linkname = 2MK | |||
| data = | |||
{{AttackData-CvS2 | |||
| version = | |||
| subtitle = {{Icon-Capcom|MK}} | |||
| damage = 1000 | |||
| stun = 14 | |||
| cancel = SP/SU | |||
| guard = L | |||
| parry = L | |||
| startup = 4 | |||
| active = 5 | |||
| recovery = 17 | |||
| total = 24 | |||
| advHit = -2 | |||
| advBlock = -2 | |||
| invul = | |||
| description = | |||
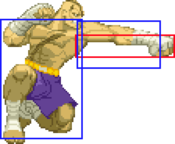
* Really fast long ranged poke. Really good in situations where cr.HP is too slow up close. It also links from st.LP and cr.LK. | |||
}} | |||
}} | |||
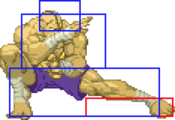
<span class="invisible-header">2HK</span> | |||
{{MoveData | |||
| name = Crouch Roundhouse | |||
| input = 2HK | |||
| subtitle = {{Motion|d}}{{Icon-Capcom|HK}} | |||
| image = Cvs2 sagat 2hk.png | |||
| caption = Crouch Heavy Kick | |||
| linkname = 2HK | |||
| data = | |||
{{AttackData-CvS2 | |||
| version = | |||
| subtitle = {{Icon-Capcom|HK}} | |||
| damage = 1500 | |||
| stun = 15 | |||
| cancel = SU | |||
| guard = L | |||
| parry = L | |||
| startup = 7 | |||
| active = 8 | |||
| recovery = 27 | |||
| total = 44 | |||
| advHit = KND | |||
| advBlock = -7 | |||
| invul = | |||
| description = | |||
* Very slow sweep. Not exactly the best one out there since it has mere pixels longer range than cr.MK and all you get out of it is oki instead of a good confirm. It's best to use cr.MK over this button since his throw is really good at giving him oki. | |||
}} | |||
}} | |||
- | <span class="invisible-header">8LP</span> | ||
{{MoveData | |||
| name = Jump Jab | |||
| input = 8LP | |||
| subtitle = {{Motion|ub}}/{{Motion|u}}/{{Motion|uf}} {{Icon-Capcom|LP}} | |||
| image = Cvs2 sagat 8lp.png | |||
| caption = Jump Light Punch | |||
| linkname = 8LP | |||
| data = | |||
{{AttackData-CvS2 | |||
| version = | |||
| subtitle = {{Icon-Capcom|LP}} | |||
| damage = 600 | |||
| stun = 11 | |||
| cancel = - | |||
| guard = H | |||
| parry = H | |||
| startup = 4 | |||
| active = 22 | |||
| recovery = - | |||
| total = - | |||
| advHit = - | |||
| advBlock = - | |||
| invul = | |||
| description = | |||
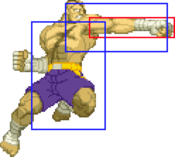
* Quick air-to-air. Has low priority so it will lose to good air to airs, however due to it's extremely high active frames it can still work if timed right. | |||
}} | |||
}} | |||
- | <span class="invisible-header">8MP</span> | ||
{{MoveData | |||
| name = Jump Strong | |||
| input = 8MP | |||
| subtitle = {{Motion|ub}}/{{Motion|u}}/{{Motion|uf}} {{Icon-Capcom|MP}} | |||
| image = Cvs2 sagat 8mp.png | |||
| caption = Jump Medium Punch | |||
| linkname = 8MP | |||
| data = | |||
{{AttackData-CvS2 | |||
| version = | |||
| subtitle = {{Icon-Capcom|LP}} | |||
| damage = 1100 | |||
| stun = 16 | |||
| cancel = - | |||
| guard = H | |||
| parry = H | |||
| startup = 4 | |||
| active = 10 | |||
| recovery = - | |||
| total = - | |||
| advHit = - | |||
| advBlock = - | |||
| invul = | |||
| description = | |||
* Odd air attack. The hitbox is extremely small but it does have high priority. It might be able to beat out some air attacks but most times it loses. | |||
}} | |||
}} | |||
- | <span class="invisible-header">8HP</span> | ||
{{MoveData | |||
| name = Jump Fierce | |||
| input = 8HP | |||
| subtitle = {{Motion|ub}}/{{Motion|u}}/{{Motion|uf}} {{Icon-Capcom|HP}} | |||
| image = Cvs2 sagat 8hp.png | |||
| caption = Jump Heavy Punch | |||
| linkname = 8HP | |||
| data = | |||
{{AttackData-CvS2 | |||
| version = | |||
| subtitle = {{Icon-Capcom|HP}} | |||
| damage = 1600 | |||
| stun = 13 | |||
| cancel = - | |||
| guard = H | |||
| parry = H | |||
| startup = 6 | |||
| active = 8 | |||
| recovery = - | |||
| total = - | |||
| advHit = - | |||
| advBlock = - | |||
| invul = | |||
| description = | |||
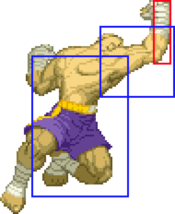
* Very high priority air to air. Works against most air attacks in the game, however it has a fairly slow startup and isn't active for long so it needs to be timed well to work. | |||
}} | |||
}} | |||
<span class="invisible-header">8LK</span> | |||
{{MoveData | |||
| name = Stand Short | |||
| input = 8LK | |||
| subtitle = {{Motion|ub}}/{{Motion|u}}/{{Motion|uf}} {{Icon-Capcom|LK}} | |||
| image = Cvs2 sagat 8lk.png | |||
| caption = Jump Light Kick | |||
| linkname = 8LK | |||
| data = | |||
{{AttackData-CvS2 | |||
| version = | |||
| subtitle = {{Icon-Capcom|LK}} | |||
| damage = 600 | |||
| stun = 6 | |||
| cancel = - | |||
| guard = H | |||
| parry = H | |||
| startup = 5 | |||
| active = 22 | |||
| recovery = - | |||
| total = - | |||
| advHit = - | |||
| advBlock = - | |||
| invul = | |||
| description = | |||
* Very useful button, works primarily as your cross-up button. It can cross-up everyone in the game, however it's weak to anti cross-up buttons. Use it wisely. | |||
}} | |||
}} | |||
<span class="invisible-header">8MK</span> | |||
{{MoveData | |||
| name = Jump Forward | |||
| input = 8MK | |||
| subtitle = {{Motion|u}} {{Icon-Capcom|MK}} | |||
| image = Cvs2 sagat 8mk.png | |||
| caption = Jump Medium Kick | |||
| linkname = 8MK | |||
| data = | |||
{{AttackData-CvS2 | |||
| version = | |||
| subtitle = {{Icon-Capcom|MK}} | |||
| damage = 1000 | |||
| stun = 10 | |||
| cancel = - | |||
| guard = H | |||
| parry = H | |||
| startup = 6 | |||
| active = 8 | |||
| recovery = - | |||
| total = - | |||
| advHit = - | |||
| advBlock = - | |||
| invul = | |||
| description = | |||
* Overlooked button. Has a big hitbox below Sagat's body that makes it very weak to anti airs, even bad ones. Ignore in favor of j.HP. | |||
}} | |||
}} | |||
<span class="invisible-header">7/9MK</span> | |||
{{MoveData | |||
| name = Jump Diag. Forward | |||
| input = 7/9MK | |||
| subtitle = {{Motion|ub}}/{{Motion|uf}} {{Icon-Capcom|MK}} | |||
| image = Cvs2 sagat79mk.png | |||
| caption = Jump Diag. Medium Kick | |||
| linkname = 7/9MK | |||
| data = | |||
{{AttackData-CvS2 | |||
| version = | |||
| subtitle = {{Icon-Capcom|MK}} | |||
| damage = 1000 | |||
| stun = 14 | |||
| cancel = - | |||
| guard = H | |||
| parry = H | |||
| startup = 6 | |||
| active = 8 | |||
| recovery = - | |||
| total = - | |||
| advHit = - | |||
| advBlock = - | |||
| invul = | |||
| description = | |||
* Exactly the same as j.MK except now the hitbox covering Sagat's leg is shifted downwards. Again, ignore in favor of j.HP. | |||
}} | |||
}} | |||
== | <span class="invisible-header">8HK</span> | ||
{{MoveData | |||
| name = Jump Roundhouse | |||
| input = 8HK | |||
| subtitle = {{Motion|ub}}/{{Motion|u}}/{{Motion|uf}} {{Icon-Capcom|HK}} | |||
| image = Cvs2 sagat 8hk.png | |||
| caption = Jump Heavy Kick | |||
| linkname = 8HK | |||
| data = | |||
{{AttackData-CvS2 | |||
| version = | |||
| subtitle = {{Icon-Capcom|HK}} | |||
| damage = 1400 | |||
| stun = 14 | |||
| cancel = - | |||
| guard = H | |||
| parry = H | |||
| startup = 5 | |||
| active = 8 | |||
| recovery = - | |||
| total = - | |||
| advHit = - | |||
| advBlock = - | |||
| invul = | |||
| description = | |||
* Scary button. This is your go-to jump in button. It has very high priority and starts up fast. It's also your primary short hop jump in button. You can confirm into just about anything after hitting j.HK, since it has a lot of hit stun. | |||
}} | |||
}} | |||
== Throws == | |||
* | <span class="invisible-header">4/6HP</span> | ||
{{MoveData | |||
'' | | name = Tiger Carry | ||
| input = cl 4/6HP | |||
| subtitle = (Up Close) {{Motion|b}}/{{Motion|f}} {{Icon-Capcom|HP}} | |||
| image = Cvs2 sagat throw range.png | |||
| caption = Throw Hitbox | |||
| image2 = Cvs2 sagat tiger carry.png | |||
| caption2 = Tiger Carry | |||
| linkname = 4/6HP | |||
| data = | |||
{{AttackData-CvS2 | |||
| version = | |||
| subtitle = {{Icon-Capcom|HP}} | |||
| damage = 1600 | |||
| stun = - | |||
| cancel = - | |||
| guard = H | |||
| parry = H | |||
| startup = 2 | |||
| active = 1 | |||
| recovery = 11 | |||
| total = 14 | |||
| advHit = KND | |||
| advBlock = - | |||
| invul = | |||
| description = | |||
* Go-to throw off of a throw setup. Deals great damage. | |||
}} | |||
}} | |||
<span class="invisible-header">4/6HK</span> | |||
{{MoveData | |||
| name = King's Clutch | |||
| input = cl 4/6HK | |||
| subtitle = (Up Close) {{Motion|b}}/{{Motion|f}} {{Icon-Capcom|HK}} | |||
| image = Cvs2 sagat throw range.png | |||
| caption = Throw Hitbox | |||
| image2 = Cvs2 sagat kings clutch.png | |||
| caption2 = King's Clutch | |||
| linkname = 4/6HK | |||
| data = | |||
{{AttackData-CvS2 | |||
| version = | |||
| subtitle = {{Icon-Capcom|HK}} | |||
| damage = Up to 2000 | |||
| stun = - | |||
| cancel = - | |||
| guard = H | |||
| parry = H | |||
| startup = 2 | |||
| active = 1 | |||
| recovery = 11 | |||
| total = 14 | |||
| advHit = KND | |||
| advBlock = - | |||
| invul = | |||
| description = | |||
* While admittedly way cooler than the Tiger Carry, the fact that this move is mashable makes this throw less worth it than Tiger Carry, as you might lose out on the good damage if the opponent mashes fast enough. | |||
}} | |||
}} | |||
=='''Special Moves'''== | =='''Special Moves'''== | ||
| Line 746: | Line 837: | ||
'''Tiger Genocide''' | '''Tiger Genocide''' | ||
*Double Quarter Circle Forward + Kick | *Double Quarter Circle Forward + Kick | ||
<br> | |||
== Combos == | |||
Sagat doesn't have that much of a combo game. It's mainly built of linking 2-3 normals into a special/super, with the latter being crucial in Sagat's damage output. Most of his combos feature 2f links, while that seems daunting it's way easier than you think. The good thing is you aren't required to learn all of Sagat's combos to play him properly, however it's good to know them anyways. Here are the best ones out there: | |||
<br> | |||
=== Meterless === | |||
st.LP, st.LP, st.MK xx Tiger Knee | |||
{{Icon-Capcom|lp}} , {{Icon-Capcom|lp}} , {{Motion|d}} {{Icon-Capcom|mk}} xx {{Motion|DP}}+{{Icon-Capcom|hk}} | |||
<br> | |||
cr.LK, cr.LK xx Tiger Knee | |||
{{Motion|d}} {{Icon-Capcom|lk}} , {{Motion|d}} {{Icon-Capcom|lk}} xx {{Motion|DP}}+{{Icon-Capcom|hk}} | |||
<br> | |||
cr.LK, st.LP, cr.MK xx Low Tiger Shot | |||
{{Motion|d}} {{Icon-Capcom|lk}} , {{Icon-Capcom|lp}} , {{Motion|d}} {{Icon-Capcom|mk}} xx {{Motion|QCF}}+{{Icon-Capcom|hk}} | |||
<br> | |||
crossup j.LK, cl.st.HP xx Tiger Uppercut | |||
{{Motion|uf}} {{Icon-Capcom|lk}} , (close) {{Icon-Capcom|hp}} xx {{Motion|DP}}+{{Icon-Capcom|hp}} | |||
<br> | |||
cr. | cr.LK, cl.st.HP xx Tiger Uppercut | ||
== | {{Motion|d}} {{Icon-Capcom|lk}} , (close) {{Icon-Capcom|hp}} xx {{Motion|DP}}+{{Icon-Capcom|hp}} | ||
<br> | |||
=== Super Combos === | |||
cr.LK, cl.st.HP xx Tiger Genocide | |||
{{Motion|d}} {{Icon-Capcom|lk}} , (close) {{Icon-Capcom|hp}} xx {{Motion|QCF}}{{Motion|QCF}}+{{Icon-Capcom|hk}} | |||
<br> | |||
st.LP, st.LP, st.MK xx Tiger Raid | |||
{{Icon-Capcom|lp}} , {{Icon-Capcom|lp}} , {{Motion|d}} {{Icon-Capcom|mk}} xx {{Motion|QCB}}{{Motion|QCB}}+{{Icon-Capcom|hk}} | |||
<br> | |||
cr.HP xx Low Tiger Cannon | |||
{{Motion|d}} {{Icon-Capcom|hp}} xx {{Motion|QCB}}{{Motion|QCB}}+{{Icon-Capcom|hp}} | |||
<br><br><br> | |||
'''Edited By:''' Haaris Abbasi & Markudea | '''Edited By:''' Haaris Abbasi & Markudea | ||
Revision as of 23:24, 18 October 2021
Introduction
Sagat (サガット Sagatto) is a Muai Thai practitioner from Thailand. He is considered the "Emperor of Muai Thai" because of how unstoppable he was when he fought. Nobody could defeat him, and soon became one of the strongest fighters in the world. He uses typical Muai Thai moves like fierce kicks, stiff knees and devastating punches, however he also has the ability to shoot projectiles (Tiger Shot), and uses a variation of Ryu's Shoryuken (Tiger Blow / Tiger Uppercut) as payback for Ryu scarring him. He dedicates his life to the martial arts, and works hard every day to make sure he retains his status as the best Muai Thai fighter to ever live, and that hard work payed off well as when he is at full strength, nothing can stop him. He is a proud and humble individual who knows and appreciates the work he and his opponents work into every fight.
Sagat used to be one of the key antagonists of Street Fighter, first starting out as the final boss of the first Street Fighter. Once he lost to Ryu, he let his hate and anger lead him down to dark paths. He became one of the main members of the crime syndicate Shadaloo, becoming one of the 4 Heavenly Kings and Dictator's personal bodyguard. After Dictator brainwashed Ryu during the events of Street Fighter Alpha 3, he realized the moral wrongdoings of Shadaloo, so he left, and soon became one of the protagonists of the game.
In a majority of Street Fighter games Sagat has made an appearance in, he was usually an incredibly strong character and remained near or at the very top of the tier lists. Old Sagat from Super Turbo and SFIV Vanilla Sagat are notable examples of really strong variants of Sagat. In each game he appears in, he's very strong for a different reason. O. Sagat was strong because of his zoning, SFIV Vanilla Sagat is strong because of his insane damage output, and you'll see why CvS2 Sagat is the strongest version of himself compared to all his other game appearances.
Overview
Sagat is generally regarded as the king of CvS2. He is at the very, very top of every tierlist, usually listed as the best character in the whole game in multiple grooves. He's a great character in any groove you throw him on. He is all about playing neutral and using his big buttons to confirm into big damage. He has it all: high health, high damage output, good defensive options, great pressure, the best buttons in the game, you can't ask for anything more in a character. He's relatively easy to play if you know when to use each of his buttons, since they serve a variety of uses.
Unfortunately, while a majority of this cast becomes incredibly better thanks to RCs (Roll Cancels), Sagat doesn't get too much from it, outside of RC Tiger Knee, there's no need to RC any of his specials. They won't offer much in the long run as they serve only a couple uses, but overall in neutral these specials don't serve much purpose at all.
Most if not all top CvS2 players have Sagat on their main C and K groove team, usually as their R2 guy in the back. He should be there, since he is just too strong to be passed up on, and as said before, he's not that hard of a character to learn in any groove, outside of his own core gameplay design, he doesn't change much at all from the groove you have him in, so you're still getting relatively the same character no matter your preferred groove. Even in grooves like S and P, he's the best character available for those grooves.
Generally the best spot you want to be in is either in neutral or pressuring up close. While Sagat's defensive options are great, it might get difficult to deal with rushdown heavy characters due to Sagat's sluggish speed, so it's best he's in a position where his speed isn't a part of the equation. You'll chip away at the opponent's health in neutral, but your main source of damage is from a confirm into super. It bags massive damage, as Sagat has the most reliable supers to give him that burst damage.
| Pros | Cons |
| + Best set of normals in the game | - Sluggish movement |
| + Really good supers | - Big hurtboxes, vulnerable to a lot of high placed normals |
| + Extremely high damage output and health | - Can't pressure well against short characters |
| + Viable in every groove | - Doesn't benefit much from roll cancel |
Groove Overviews
Sagat is an incredible character no matter what groove he's in. Of course some grooves are far better than others, and Sagat is only considered the best character in the game in 2 different grooves, but people have different tastes. Here are the pros and cons with each groove Sagat can be in, ranked from best to worst.
The strongest CvS2 character. K-Sagat is the scariest man in the whole game. He has access to a short hop, already making his pressure insanely good, and benefits the most from K-Groove's Rage and Just Defense. Once Sagat is raged, once good super turns the round in his favor, and thanks to the extremely convenient Just Defense (JD) it makes getting rage far easier that you think.
| Pros | Cons |
| + Rage Mode can easily deny the opponent the win | - No Alpha Counter, hard to escape good pressure |
| + Just Defense gives you a good amount of meter | - No control over your supers due to the nature of K-Groove's meterbuild |
| + Short hop makes your pressure very scary | - No air block forces you to make smart jumps |
C-Groove Sagat is scary. He almost always has at least half a bar of meter that confirms into fat damage, and the system mechanics in place really compliment the type of character he is, like air blocking, rolling, and the unique level 2 super cancel that gives him access to one of the most damaging optimal combos in the whole game.
| Pros | Cons |
| + Level 2 Super Cancel deals insane damage | - No short hop |
| + Air Blocking makes being in the air safer | - Somewhat difficult since you can't pressure |
N-Groove Sagat may be far less threatening compared to his optimal grooves but don't get it twisted. He's still very strong. He still has access supers frequently, and can "pop" to bag in some really big damage. Not to mention he still has a short hop. He's like a fusion of C and K but with the core parts of each groove taken out, you still end up with a very strong character.
| Pros | Cons |
| + Easy control of supers with traditional meter | - Needs to spend extra and "pop" for level 3 supers |
| + Short hop makes pressure scary | - No air blocking makes jumps less safe |
| + Retains a roll and a counter roll to escape pressure | - Fairly slow building meter, supers are not as frequent |
You might come to believe this variation of Sagat would be very strong. CCs in general do get big damage, however this version of Sagat is just redundant. In practice, he's merely a worse version of C Sagat. His CC also has little practicality, only working as either an anti air or up-close punish, however the CC itself is quite difficult to perform. Overall, there's way better A-groove characters out there and C Sagat is far stronger than this version.
| Pros | Cons |
| + Air blocking makes jumping safer | - No level 2 or 3 supers |
| + Fairly simple and linear meter to work with | - No short hop to make his pressure scary |
| + Has both a roll and alpha counter to get out of pressure | - CC is situational |
S Sagat is the best character you can possibly use in S-Groove. That's not saying much, since S-Groove in general sucks, but Sagat has some niche tools in S-Groove like using his dodge attack in neutral, or replacing his tigershot for his tiger cannon once he reaches low health. His damage output only really gets high when he gets those infinite level 1 supers, but again he can only get them if he's about to die, making it a very risky situation to be in.
| Pros | Cons |
| + Infinite supers make his damage good at low health | - Supers are scarce until you reach low health |
| + Short hop makes pressure scary | - No reliable source of meter outside power charge |
P-Groove sucks. Common knowledge, but even with P-Groove you can make Sagat work. This groove turns Sagat from a fairly simple character to learn to a hard challenge. He's still strong, but it's really hard to deal with good grooves as P Sagat. You need to make good use of parries and the rare times you can use a level 3 super.
| Pros | Cons |
| + Parrying gives free openings and approaches | - At most you'll get to use one super per round |
| + Short hop makes pressure scary | - Weak defensive options: No roll, alpha counter or air block |
Normal Moves
5LP
| Damage | Stun | Cancel | Guard | Parry | Startup | Active | Recovery | Total | Adv Hit | Adv Block | Invul |
|---|---|---|---|---|---|---|---|---|---|---|---|
| 500 | 5 | SP/SU | H/L | H/L | 2 | 3 | 6 | 11 | +6 | +6 | - |
| |||||||||||
5MP
| Damage | Stun | Cancel | Guard | Parry | Startup | Active | Recovery | Total | Adv Hit | Adv Block | Invul |
|---|---|---|---|---|---|---|---|---|---|---|---|
| 1100 | 16 | SP/SU | H/L | H/L | 4 | 3 | 24 | 31 | -7 | -7 | - |
| |||||||||||
5HP
| Damage | Stun | Cancel | Guard | Parry | Startup | Active | Recovery | Total | Adv Hit | Adv Block | Invul |
|---|---|---|---|---|---|---|---|---|---|---|---|
| 1600 | 16 | SU | H/L | H/L | 6 | 8 | 20 | 34 | -4 | -4 | - |
| |||||||||||
cl5HP
| Damage | Stun | Cancel | Guard | Parry | Startup | Active | Recovery | Total | Adv Hit | Adv Block | Invul |
|---|---|---|---|---|---|---|---|---|---|---|---|
| 1300 / 1100 | 13/11 | SP/SU (1st Hit Only) | H/L | H | 3 | 8 | 27 | 38 | -13 | -13 | - |
| |||||||||||
5LK
| Damage | Stun | Cancel | Guard | Parry | Startup | Active | Recovery | Total | Adv Hit | Adv Block | Invul |
|---|---|---|---|---|---|---|---|---|---|---|---|
| 200/400 | 2/4 | SP/SU (1st Hit Only) | H/L | H/L | 5 | 8 | 10 | 23 | -1 | -1 | - |
| |||||||||||
5MK
| Damage | Stun | Cancel | Guard | Parry | Startup | Active | Recovery | Total | Adv Hit | Adv Block | Invul |
|---|---|---|---|---|---|---|---|---|---|---|---|
| 400/900 | 4/9 | SP/SU (1st Hit Only) | H/L | H/L | 5 | 11 | 24 | 40 | -12 | -12 | - |
| |||||||||||
5LP
| Damage | Stun | Cancel | Guard | Parry | Startup | Active | Recovery | Total | Adv Hit | Adv Block | Invul |
|---|---|---|---|---|---|---|---|---|---|---|---|
| 500/1300 | 5/13 | SP/SU (1st Hit Only) | H/L | H/L | 6 | 10 | 24 | 40 | -7 | -7 | - |
| |||||||||||
2LP
| Damage | Stun | Cancel | Guard | Parry | Startup | Active | Recovery | Total | Adv Hit | Adv Block | Invul |
|---|---|---|---|---|---|---|---|---|---|---|---|
| 400 | 4 | SP/SU | H/L | H/L | 5 | 4 | 8 | 17 | +3 | +3 | - |
| |||||||||||
2MP
| Damage | Stun | Cancel | Guard | Parry | Startup | Active | Recovery | Total | Adv Hit | Adv Block | Invul |
|---|---|---|---|---|---|---|---|---|---|---|---|
| 1000 | 14 | SP/SU | H/L | H/L | 6 | 4 | 12 | 22 | +4 | +4 | - |
| |||||||||||
2HP
| Damage | Stun | Cancel | Guard | Parry | Startup | Active | Recovery | Total | Adv Hit | Adv Block | Invul |
|---|---|---|---|---|---|---|---|---|---|---|---|
| 1500 | 15 | SU | H/L | H/L | 7 | 8 | 14 | 17 | +2 | +2 | - |
| |||||||||||
2LK
| Damage | Stun | Cancel | Guard | Parry | Startup | Active | Recovery | Total | Adv Hit | Adv Block | Invul |
|---|---|---|---|---|---|---|---|---|---|---|---|
| 400 | 4 | SP/SU | L | L | 3 | 4 | 6 | 13 | +5 | +5 | - |
| |||||||||||
2MK
| Damage | Stun | Cancel | Guard | Parry | Startup | Active | Recovery | Total | Adv Hit | Adv Block | Invul |
|---|---|---|---|---|---|---|---|---|---|---|---|
| 1000 | 14 | SP/SU | L | L | 4 | 5 | 17 | 24 | -2 | -2 | - |
| |||||||||||
2HK
| Damage | Stun | Cancel | Guard | Parry | Startup | Active | Recovery | Total | Adv Hit | Adv Block | Invul |
|---|---|---|---|---|---|---|---|---|---|---|---|
| 1500 | 15 | SU | L | L | 7 | 8 | 27 | 44 | KND | -7 | - |
| |||||||||||
8LP
| Damage | Stun | Cancel | Guard | Parry | Startup | Active | Recovery | Total | Adv Hit | Adv Block | Invul |
|---|---|---|---|---|---|---|---|---|---|---|---|
| 600 | 11 | - | H | H | 4 | 22 | - | - | - | - | - |
| |||||||||||
8MP
| Damage | Stun | Cancel | Guard | Parry | Startup | Active | Recovery | Total | Adv Hit | Adv Block | Invul |
|---|---|---|---|---|---|---|---|---|---|---|---|
| 1100 | 16 | - | H | H | 4 | 10 | - | - | - | - | - |
| |||||||||||
8HP
| Damage | Stun | Cancel | Guard | Parry | Startup | Active | Recovery | Total | Adv Hit | Adv Block | Invul |
|---|---|---|---|---|---|---|---|---|---|---|---|
| 1600 | 13 | - | H | H | 6 | 8 | - | - | - | - | - |
| |||||||||||
8LK
| Damage | Stun | Cancel | Guard | Parry | Startup | Active | Recovery | Total | Adv Hit | Adv Block | Invul |
|---|---|---|---|---|---|---|---|---|---|---|---|
| 600 | 6 | - | H | H | 5 | 22 | - | - | - | - | - |
| |||||||||||
8MK
| Damage | Stun | Cancel | Guard | Parry | Startup | Active | Recovery | Total | Adv Hit | Adv Block | Invul |
|---|---|---|---|---|---|---|---|---|---|---|---|
| 1000 | 10 | - | H | H | 6 | 8 | - | - | - | - | - |
| |||||||||||
7/9MK
| Damage | Stun | Cancel | Guard | Parry | Startup | Active | Recovery | Total | Adv Hit | Adv Block | Invul |
|---|---|---|---|---|---|---|---|---|---|---|---|
| 1000 | 14 | - | H | H | 6 | 8 | - | - | - | - | - |
| |||||||||||
8HK
| Damage | Stun | Cancel | Guard | Parry | Startup | Active | Recovery | Total | Adv Hit | Adv Block | Invul |
|---|---|---|---|---|---|---|---|---|---|---|---|
| 1400 | 14 | - | H | H | 5 | 8 | - | - | - | - | - |
| |||||||||||
Throws
4/6HP
| Damage | Stun | Cancel | Guard | Parry | Startup | Active | Recovery | Total | Adv Hit | Adv Block | Invul |
|---|---|---|---|---|---|---|---|---|---|---|---|
| 1600 | - | - | H | H | 2 | 1 | 11 | 14 | KND | - | - |
| |||||||||||
4/6HK
| Damage | Stun | Cancel | Guard | Parry | Startup | Active | Recovery | Total | Adv Hit | Adv Block | Invul |
|---|---|---|---|---|---|---|---|---|---|---|---|
| Up to 2000 | - | - | H | H | 2 | 1 | 11 | 14 | KND | - | - |
| |||||||||||
Special Moves
Tiger Shot
- Quarter Circle Forward + Punch
- LP 800 -11/-11 10/44
- MP 900 -12/-12 10/45
- HP 1000 -13/-13 10/46
Ground Tiger Shot
- Quarter Circle Forward + Kick
- LK 700 -12/-12 12/45
- MK 800 -13/-13 12/46
- HK 900 -14/-14 12/47
Tiger Uppercut
- Forward, Down, Down-Forward + Punch
- LP 1800,900 down/-35 3/15/35
- 3 frames full body, 4 frames lower body
- MP 1900,900 down/-43 3/19/39
- 3 frames full body, 4 frames lower body
- HP 700+500+400+200x2 down/-35 3/[4]/[5]/[5]/[5]/[5]/42
- 7 frames full body
- LP 1800,900 down/-35 3/15/35
Tiger Crush
- Forward, Down, Down-Forward + Kick
- LK 400+1100 down/-10 6/[6]/[5]/23
- MK 500+1200 down/-12 5/[6]/[6]/24
- HK 600+1300 down/-15 4/[6]/[7]/26
Super Combos
High Tiger Cannon
- Double Quarter Circle Forward + Punch
- High Tiger Cannon super has one frame less startup before the super flash than Ground Tiger Cannon super. It makes a difference when punishing another Sagat's whiffed far s.HP with far s.HP xx High Tiger Cannon as opposed to far s.HP xx Ground Tiger Cannon.
Ground Tiger Cannon
- Double Quarter Circle Back + Punch
- LP down/-2
- MP down/+1
- HP down/+4
Tiger Raid
- Double Quarter Circle Back + Kick
Tiger Genocide
- Double Quarter Circle Forward + Kick
Combos
Sagat doesn't have that much of a combo game. It's mainly built of linking 2-3 normals into a special/super, with the latter being crucial in Sagat's damage output. Most of his combos feature 2f links, while that seems daunting it's way easier than you think. The good thing is you aren't required to learn all of Sagat's combos to play him properly, however it's good to know them anyways. Here are the best ones out there:
Meterless
st.LP, st.LP, st.MK xx Tiger Knee
cr.LK, cr.LK xx Tiger Knee
cr.LK, st.LP, cr.MK xx Low Tiger Shot
crossup j.LK, cl.st.HP xx Tiger Uppercut
cr.LK, cl.st.HP xx Tiger Uppercut
Super Combos
cr.LK, cl.st.HP xx Tiger Genocide
st.LP, st.LP, st.MK xx Tiger Raid
cr.HP xx Low Tiger Cannon
Edited By: Haaris Abbasi & Markudea

