m (→Super Moves) |
m (→Introduction) |
||
| Line 4: | Line 4: | ||
M. Bison ( | M. Bison (AKA Vega in Japan, and Dictator internationally), leader of the criminal organization known as Shadaloo, hears of a fighter named Ryu who defeated his new henchman, Sagat. Bison decides to recruit Ryu and begins the search for him. In the meantime, he is confronted by Rose, a mysterious woman who wields power that is in many ways similar to his own. Rose wins the ensuing battle but only to find out that Bison has left the battlefield completely unscathed and has possibly threw the fight. Reasons for this are disclosed during the events of SFA3. | ||
Afterwards, Bison encounters Chun-Li. They have a brief duel in which Bison toys around with the girl. He flees and lets Chun-Li know that he murdered her father. | Afterwards, Bison encounters Chun-Li. They have a brief duel in which Bison toys around with the girl. He flees and lets Chun-Li know that he murdered her father. | ||
Revision as of 23:54, 23 March 2021
Introduction
M. Bison (AKA Vega in Japan, and Dictator internationally), leader of the criminal organization known as Shadaloo, hears of a fighter named Ryu who defeated his new henchman, Sagat. Bison decides to recruit Ryu and begins the search for him. In the meantime, he is confronted by Rose, a mysterious woman who wields power that is in many ways similar to his own. Rose wins the ensuing battle but only to find out that Bison has left the battlefield completely unscathed and has possibly threw the fight. Reasons for this are disclosed during the events of SFA3.
Afterwards, Bison encounters Chun-Li. They have a brief duel in which Bison toys around with the girl. He flees and lets Chun-Li know that he murdered her father.
After this, Bison is finally able to track down Ryu. At first, Bison attempts to persuade Ryu to join him by promising that he would make him the greatest fighter ever. Ryu mocks him and the two engage in combat. Bison wins and takes Ryu's body to his scientists for a brainwashing via exposure to Psycho Power. It is debatable whether this ending is canon or not, however, the exact events which it depicts did take place during SFA3.
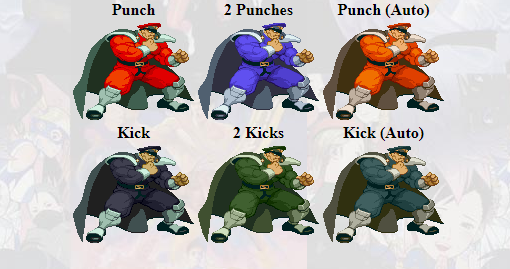
COLORS
Try and think of the character as Dictator with a Dee Jay-style fireball: powerful in the right situations but can be unsafe if you don't pay attention. Keep the opponent away with your safe pokes and fireball. MP is your go to button for all kinds of situations. You can kind of mash out counter hits but don't go overboard. Standing MK is a good poke at far range. The hitbox is very low so it is not an anti-air. Also very good for poking shotos that try and move around the screen unsafely with tatsus. As far as anti-airs go you have 3 options: HP, c.HP, and HK. Each is useful in different situations. For example c.HP is faster than HP even though they have similar hitboxes, while HK has a different range/hitbox altogether. Mess around with the character in training mode and get a good feel for your normals. Most of your playtime will be spent blocking and poking.
Pros:
- Really fast Punch Alpha Counter
- Great walk speed
- Decent normals that can be used for tick throws, anti-airs, etc.
Cons:
- CCs are very limited
- Supers have almost no use
- Doesn't really have combos
Normal Moves
STANDING
![]() - Quick jab, with slight frame advantage. Not great.
- Quick jab, with slight frame advantage. Not great.
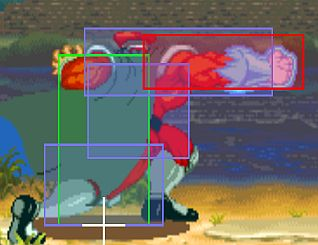
![]() - Glowing version of s.LP, with great priority and blockstun, similar to ST Chun’s s.MP. Can do multiple in a row to counter-hit and anti-jump characters up close. Serves as far anti-air in a lot of matches. This is his up-close bully move.
- Glowing version of s.LP, with great priority and blockstun, similar to ST Chun’s s.MP. Can do multiple in a row to counter-hit and anti-jump characters up close. Serves as far anti-air in a lot of matches. This is his up-close bully move.
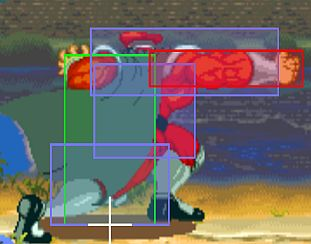
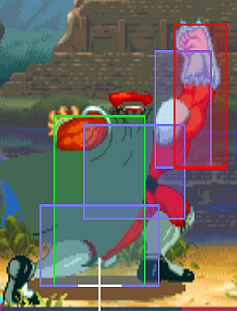
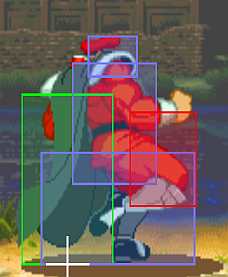
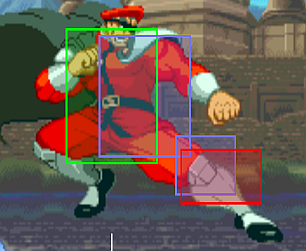
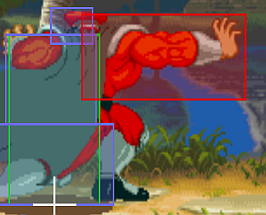
![]() - Upward-angled punch, which looks like it can be used to anti-air, but actually has pretty bad priority... Although it's OK to use sometimes, as it’s slower than c.HP, but does more damage and stun. Lots of meaty range.
- Upward-angled punch, which looks like it can be used to anti-air, but actually has pretty bad priority... Although it's OK to use sometimes, as it’s slower than c.HP, but does more damage and stun. Lots of meaty range.
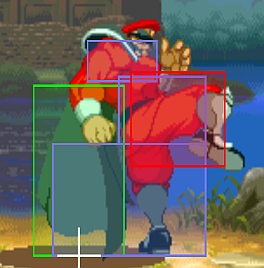
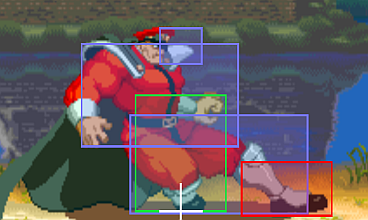
![]() - Quick knee kick to the chest. Special-cancelable, good priority.
- Quick knee kick to the chest. Special-cancelable, good priority.
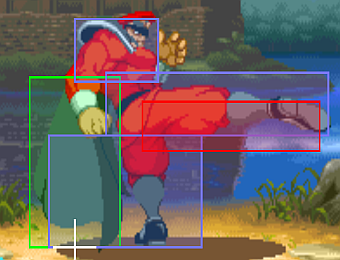
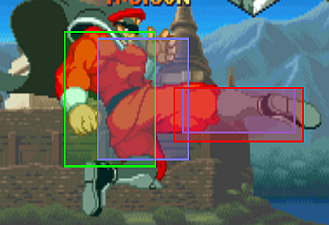
![]() - Straight kick with good range. Universal poke, not too fast, not too bad recovery. Very good for zoning.
- Straight kick with good range. Universal poke, not too fast, not too bad recovery. Very good for zoning.
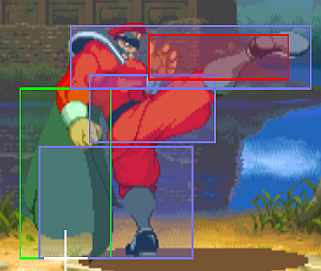
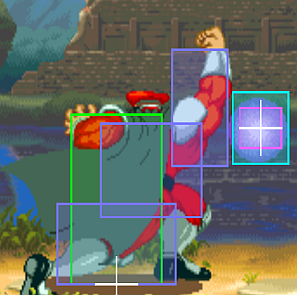
![]() - 2-hit anti-air angled kick. Good anti-air priority and first hit is special-cancelable. Use for AC reversal up close.
- 2-hit anti-air angled kick. Good anti-air priority and first hit is special-cancelable. Use for AC reversal up close.
CROUCHING
c.![]() - Little jab to the shin, not really all that good - though it has OK range for a jab.
- Little jab to the shin, not really all that good - though it has OK range for a jab.
c.![]() - A straight punch with good priority, special-cancelable.
- A straight punch with good priority, special-cancelable.
c.![]() - Very good anti-air once it's out, must input early for it to be effective. Lots of meaty frames.
- Very good anti-air once it's out, must input early for it to be effective. Lots of meaty frames.
c.![]() - Quick kick to the foot, can hit meaty, not chainable.
- Quick kick to the foot, can hit meaty, not chainable.
c.![]() - A low kick similar to c.LK, hits meaty and special-cancelable.
- A low kick similar to c.LK, hits meaty and special-cancelable.
c.![]() - Great surprise move and safe when spaced right, same applications as other games, can be kara-canceled to add reach to special moves.
- Great surprise move and safe when spaced right, same applications as other games, can be kara-canceled to add reach to special moves.
JUMPING
nj.![]() - Best air-to-air, quick, but low damage.
- Best air-to-air, quick, but low damage.
nj.![]() - Jumping version of s.MK, great neutral jump move.
- Jumping version of s.MK, great neutral jump move.
dj.![]() - Longer horizontal range than nj.MP. This air-to-air is more situational, j.LK is still the go-to button though.
- Longer horizontal range than nj.MP. This air-to-air is more situational, j.LK is still the go-to button though.
dj.![]() - Same hitbox data as nj.LK. Best air-to-air. Quick, but low damage.
- Same hitbox data as nj.LK. Best air-to-air. Quick, but low damage.
dj.![]() - Not as good as the neutral jump version.
- Not as good as the neutral jump version.
dj.![]() - Angled jump-in with good priority.
- Angled jump-in with good priority.
Normal Throws
Alpha Counters
![]() +
+![]() - Comes out ridiculously fast, and has great range. So much that you may use this to punish a shoto (Ryu, Ken, Akuma) stepping back for a fireball when they think you are going to s.MK. They extend their hands, which makes it easier.
- Comes out ridiculously fast, and has great range. So much that you may use this to punish a shoto (Ryu, Ken, Akuma) stepping back for a fireball when they think you are going to s.MK. They extend their hands, which makes it easier.
NOTE: From USA Revision 960430 onward, Bison's Punch AC does not cause a "guard" animation when activated for not having a "proximity block" box, and therefore is "unblockable". Special thanks to Raf for this finding!
Note: Adon's Punch AC also got this advantage.
![]() +
+![]() - Teleports behind the opponent, enabling good punish potential.
- Teleports behind the opponent, enabling good punish potential.
Special Moves
Psycho Shot (AKA Psycho Ball)
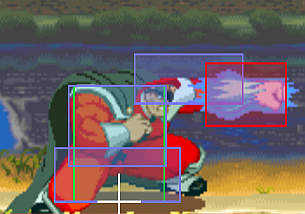
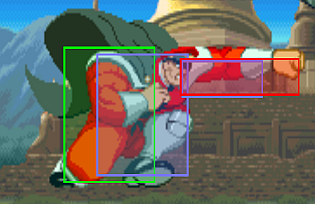
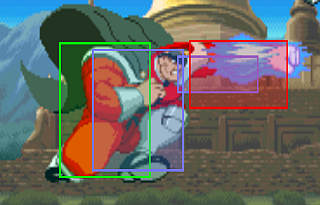
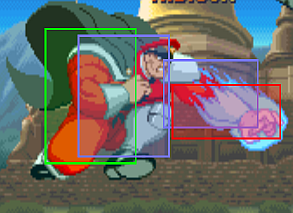
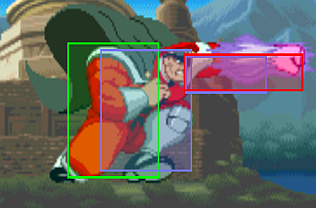
A straightforward fireball. Although it's a charge move, the recovery sucks. This move's big strength is its speed, and large hitbox. LP version is very hard to jump over because it is so slow. Anti-airs A LOT, can be super meaty and does a lot of hitstun. Can combo into c.HK from the right distance.
Double Knee Press (AKA Scissors Kick)
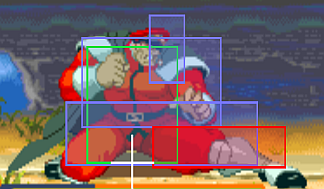
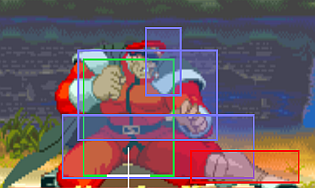
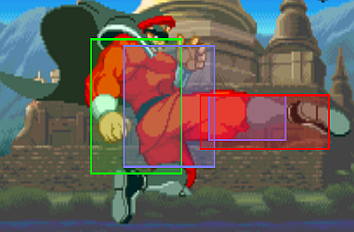
Terrible move. Created to evade and punish low moves. Think of it as Ryu's f+mk, but requiring charge. Easily punishable. Best used at max distance to avoid big punishes. From max sweep range it may work to punish extended limbs, but it is risky. At this distance, you'll get hit by a shoto fireball anyway. Only combos from the first hit of HK. If you come from Super Turbo, nope, it is nothing like the ST version. Can be kara-cancelled from c.HK for extra mobility.
Head Press (AKA Stomp/Headstomp)
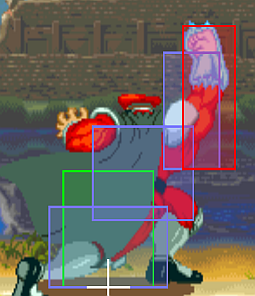
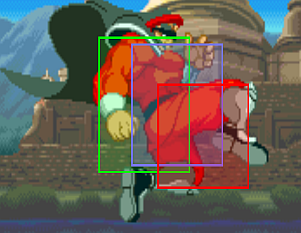
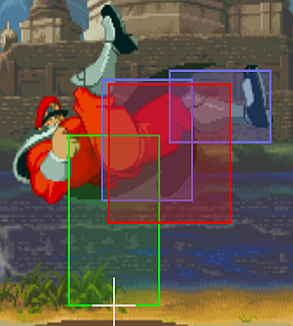
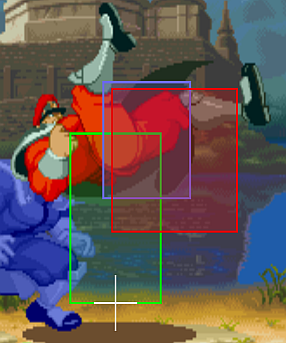
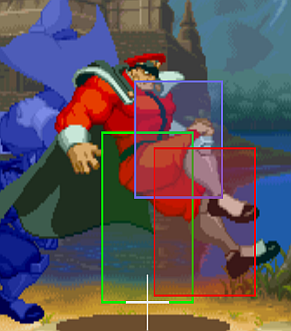
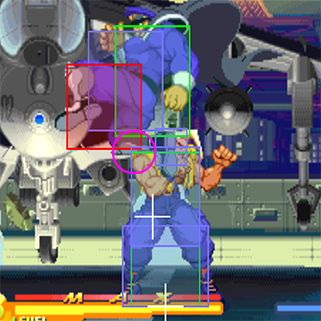
Fast, hard to anti-air and makes most ACs whiff. Safe as hell and annoying. Always whiffs on Evil Ryu due to a tracking glitch, and on Sakura sometimes because she is small and moves too fast. Hard to hit during the middle of a fireball animation, hits well at the very start or end of the animation. Kara-cancel c.HK into this, mix it with instant skull divers to keep your opponent guessing, and mix up the distance. Getting hit anywhere during the animation results in an air reset. Can be used to move around, and to punish false blockstrings - such as Ryu's c.LK into c.HK, kind like Chun's neck kick.
Somersault Skull Diver
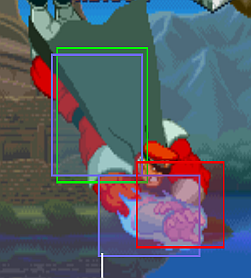
Slight frame advantage on block and good when whiffed and mixed with stomp. Can be used to move around. Easy to punish with AC or CC.
Somersault Skull Diver
CHARGE ![]() ,
, ![]() +
+ ![]() , THEN HOLD
, THEN HOLD ![]() /
/![]() AND PRESS
AND PRESS ![]()
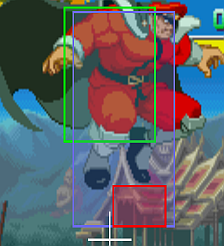
Known as Devil's Reverse in Super Turbo, but here, it simply goes by "Skull Diver". Same properties as the headstomp follow-up. Bison goe the air as if to headstomp, but does nothing unless you press Punch which causes him to dive. Cannot be done below the real stomp height. Slight frame advantage on block. Good when whiffed, but has huge recovery. Great if mixed with stomps.s in Can be used to move around and build meter. Ideal in situations where the opponent knows how to time their fireballs well and avoid stomps (Bison whiffs the stomp on them), so you loop and hit front or back. VS. Evil Ryu: It will act weird just like the stomp, making you go much higher when you press Punch, so you can go crazy and pretend you are Vega/Claw from ST. Can be useful, but hard to control.
Vega Warp
Very good teleport, great to take you away from your opponent. Fast recovery. Excellent if you need to escape chip damage after a knockdown.
Super Moves
Bison has mediocre supers, but since you cannot punch AC all day, you need to make do with the other tools you have. And boy, do you need them!
Psycho Crusher
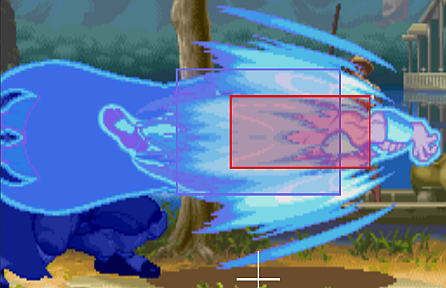
Meh. His CC is horrible, so this will have to do. Lv.1 doesn't have good priority, Lv.2 is ok, but Lv.3 is beast. Use Lv.3 as anti-air to make your opponent shit themselves. Horrible wake-up option, as it does not track opponent if it hit a limb, wasting the super. Will not be hit by lows, but the kick super fits this purpose better. Good when you've conditioned your opponent to jump over fireballs, so when they come at you with their air-to-air button, you can use a Lv.1. Good punish for whiffed moves or some moves on block, like Birdie's Bull Horn or Rose's drill. Cannot be thrown. Good VS. Zangief. Totally safe on block. Gives you some room to breathe if it hits. Good damage.
Knee Press Nightmare
Great Lv.1 for blowing through fireballs and for waking up with. Will not be hit by lows, the preferred moves on a downed opponent. If they stop hitting low and start hitting high, good for you; you can AC them. Hold back as soon as you start the move - if it's blocked, you'll have enough charge to do another Lv.1 almost immediately after. Its best use is for punishing blockstrings ending in fireball, e.g. c.MK xx hadouken. The timing isn't as hard as it seems - much easier than punishing with Chun's kick super. Pretty much neutral frame advantage on block.
Strategy/Game plan
Basic strategy
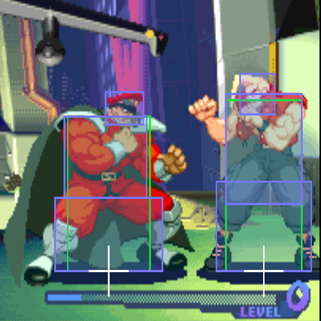
Like Rose, A2 Bison seems to be originally designed to kill shotos, but with more physical hits. Otherwise, he has lots of turtling tools.
Bison's strengths are in the BnB of street fighter. Footsies, conditioning your opponent, throws... Keeping it very basic is efficient. His throws are quite damaging, so walk speed and tick throws would do a lot of the job. But it doesn't win tournaments and Bison is not a high tier. Unlike Birdie, Bison with meter is not much better.
He is fast in this game. Stupid fast for his size. He can be in your face or turtle, depends how you roll. Walking mp is very effective versus mashers and will counter hit the hell out of them. Utilize his fast walk speed to get throws when close, and counter hit with various normals when you get in. Bison only real combo is off s.rh so you wont be doing combo vids. Harass from afar with slow fireballs, anti air with s.rh and c.fp. Mid range keep your distance with s.mk and from far screen you can sweep to close the gap.
Your main objective is to annoying your opponent into messing up. Constant barrages of headstomp, skull divers, and lp fireballs from a distance will frustrate your opponent into acting rash. Every blocked skull diver (beware of ac) is a guessing game for you opponent. You can go for a throw, ac their attack attempt, or activate a cc, or do another skull diver.
Bison can pressure well in the corner, example of a annoying pattern would be skull diver, [c.lp xx instant skull diver]x2-3. Mix in some walking lks, a throw, neutral jumps, empty jump throw and you can begin to see how annoying Bison can be.
Bison is very versatile with meter. You can blow through moves with knee press super, AC, or cc.
You can spend a lvl 1 CC to get closer if necessary. Examples:
Activate -
-lp psycho shot x3, teleport behind or in front
-lp psycho shot x3, headstomp -> skull diver follow up
-lp psycho shot x3, empty somersault skull diver or follow up
Punch AC is invincible and unblockable (version specific). Alpha counter reversals (AC reversal or AC denial) with dps wont work on him unless close. If you opponent does ac reversals use kick ac. Kick ac is very very good. Bison will teleport behind the opponent then you can CC or throw. Buff stuff. If they ac reversal his kick ac, Bison gets a free hit. Low combo possibility, though.
Try and think of the character as Dictator with a DeeJay-like fireball, powerful in the right situations but can be unsafe if you don't pay attention. Keep the opponent away with your safe pokes and fireball. MP is your go to button for all kinds of situations. You can kind of mash out counter hits but don't go overboard. Standing MK is a good poke at far range. The hitbox is very low so it is not an anti-air. Also very good for poking shotos that try and move around the screen unsafely with tatsus.
As far as anti-airs go, you have 3 options. Stand HP, Crouch HP, and Stand HK. All of these have their own situations. For example Crouching HP is faster than Standing HP even though they have similar hitboxes. While Stand HK has a different range/hitbox all together. Mess around with the character in training mode and get a good feel for your normals. Most of your play time will be blocking and using pokes.
You can play keep away with poking and throwing mixed in. One ideal situation for Bison is to constantly have your opponent at the edge of his standing MK. You’ll play ground footsies with standing MK, mix in some LP Psycho Balls (if safe). If the opponent backs away or looks like he’s about to jump then you throw a standing HK. If your opponent gets in close, you throw standing or ducking MPs or you throw. If your opponent is attempting a jump-in, then you throw a well timed LP psycho ball as an anti-air or a do a standing HK or ducking HP (both riskier at trade-ins of course). Sometimes a headstomp works as an anti-air also if the timing is right.
If you want to mix things up, you might want to jump-in with an early HK or a late LK.
Air-to-air with neutral jump MK also because of its horizontal reach and priority. Diagonal jump MK is not good, better use MP in that situation.
There are some small combos you can do if you get the opportunity. You can also sparingly do headstomps. Headstomps have low priority in A2, so you’ll end up trading or losing a lot if you get predictable with them.
Sometimes you can use HK Scissor kick to punish wiffed moves from a distance, but it will leave you seriously vulnerable if blocked. Use them only in combos (see advanced and combos section).
Advanced Strategy
There is not much of "advanced strategy" in Bison's game plan. As mentioned earlier, keep it SIMPLE.
These are just some options you can blend in on top of the basics to add some variation and unpredictability.
Crossups
Cross up may be a big part of Bison's game because it is really ambiguous, just like in ST. He doesn't have combos, so cross-up into HK doesn't require charge, you do not need to know where you landed, and it does good damage and stun (considering his limited options, not other characters).
Known working characters: Bison, Sodom, Charlie, Birdie, Zangief.
Hard to do on smaller characters, even Adon, Ryu, Ken, etc. You actually get cross ups on them by accident, so, even more ambiguous.
J.lk can also be used as instant overhead jumping forward.
Meaties
Meaties (moves with more than 1 frame active hitbox used on a knocked down enemy as they wake up) are important because if make it alot more difficult for your opponent to do wake-up reversals on you, and allow link not normally possible.
s.fp- Hits super meaty, but no real combo opportunity cause of push back. The timing is strict, but he can hit a standing large character like Zangief with s.HK.
c.fp- same as above
c.mk- Hits low and can link a s.lk (maybe HK, must confirm).
s.mp- More frame advantage. Same as above. S.mp is very good up close giving a hefty amount of frame advantage, you can link a s.lk after
c.mk- Your go-to low meaty. Combo into c.mk again, which is cancelable. After a hp throw, a teleport will cross up and allow for a meaty c.mk. Can be comboed into super, and is likely the best option.
You can combo s.HK into scissor kick before the second hit, but it is not confirmable, so, risky.
A headstomp used as meaty will not bounce Bison back into the air, and can be comboed into CC.
Headstomp/skull diver mix up is good, if bison gets hit in recovery he is counted as being in the air and can't be comboed (exception is jump ins into CC and juggles like Giy's, Chun). Punch follow up is prefect CC bait/set up, ac set up.
s.lk up close is good to poke with. Can be mashed against with some fast pokes, but if you throw them, you beat mashed due to Bison's long range throw. If it fails, you stuff them with s.mp.
c.fp and s.hk are good AA, as well as s.mp in alot of situations.
c.lk - Can be comboed into s.HK. Version specific. The first hit of s.HK can be comboed into scissors.
Meaty Setups
If you use the Kick Warp after throwing the opponent and hit crouching Forward, your attack will be a meaty. Credits to RagingStormX.
You can also set up the meaty crouching Forward with a kick Warp after a Level 1 Knee Press Nightmare.
After you hit with your meaty crouching Forward, with good timing it’s possible to link into another crouching Forward, which can then be cancelled into a Double Knee Press Nightmare super. From there you can go into he options discussed.
Since c.lk has the same animation as the crouching Forward, mix that up with a whiff and throw. Don't make it obvious.
Meaty Combo options starting from an unteched throw or a Level 1 Knee Press Nightmare:
Meaty crouching Forward-> crouching Forward-> Double Knee Press Nightmare
Meaty crouching Forward or Short-> standing Roundhouse (first hit)-> Knee Press Nightmare or Roundhouse Double Knee Press
Mix your meaties, whiffs and tick throws with some walk into CC instead of throws, or psycho balls for safe chip damage.
You can bait and trade your meaties into psycho ball with alpha counters.
Fireball and zoning
This was mentioned in the basics, but, again, slow fireball is good. Abuse it.
Be careful vs shotos because they can air hurricane and pass over you.
Try to bait air hurricane kicks or air-to-air and cpunish it with pyscho crusher, or a level 3 to make them shit their pants.
While keeping your distance to use LP psycho balls, and punish jumps with s.HK.
If they use CC to get past through HK, it may trade and you are good. If they hit you from max distance, depending on the jump arc, you are too far for most characters to continue the combo with the CC. Worst case scenario, they sacrifice a bit of the timer to keep the CC going. The CC damage output will be lowered considerably. Now they are meterless Try not to be cornered to lose this advantage.
If they hit your leg and can't combo, you can do a level 3 psycho crusher on characters like Sakura while the CC is active and they cannot block or use any invincible move. Plus, they won't expect that.
To keep zoning, do not rely only on s.HK and psycho balls only. Use air-to-air moves.
j.lk is his best air to air for diagonal jumps, as well as air grab. Diagonal jump MP is a good air-to-air, so you may air grab by accident. Neutral jump MK is good, but diagonal jump MK is not bad. Mix it all up.
Smart players know about the zoning potential and how the stomp trades with anti airs, and will not let your set the pace of the match, so you have to mix everything up and be patient with your low damage output and defensive options, and not throw a fireball unless when safe to do so.
Throw loops
Again, this would be basic strategy, but makes up a huge part of Bison's game, and there is a catch.
Remember - Throws are a huge part of this game (not in this section because it is basic strategy), but under pressure, the opponent cannot CC for 28 frames after a throw. If they have no reversals (Dhalsim, Rolento), or if you stuff their reversals with meaties, go for throw loops.
You can neutral jump/safe jump HK then throw a lot from the right distance. Mix empty or neutral jump lk as a safe jump, which will cause them to open the guard vs AC, or is really hard to AC as a light attack, and you throw them as they finish the motion.
This glitch adds more value to the basic strategy of characters like Bison and Sodom, and is often overlooked. Or worse: It is unknown to the opponent.
Now you are glad you did your homework and read this!
Combos
Basic combos
1) Jump HK > Stand/Crouch MP (2 hits, 26 dmg, 14 stun)
Good 2 hit BnB off a safe jump in. Leaves you at +20 to +22 frame advantage. Can be followed up with fireball for free if you have enough charge time, but it will not combo.
2) Jump HK > Stand HK (3 hits, 30 dmg, 16 stun)
Another good and simple BnB off a safe jump in. Better damage than combo 1 but leaves you at an unsafe range to get clipped by a custom combo. However if they do not have meter you are outside of sweep range for most characters.
3) s.rh xx hk knee press
4)s.rh or c.mk xx any super
'5) jump in anything, c. lp, s. lk ' May insert a psycho shot. It won't combo, but keep them at bay to keep the pressure going. Mix the s.lk into stomp (doesn't combo but hit really fast of they crouch). The s.lk into stomp is easy, timing is lenient and it confuses a lot since the standing lk will cause the impression you lost the charge. If they start blocking or preemptively using anti airs (since stomp priority is low), you can add a c. mk into fireball, or if they block high, add several c.lk before the stomp. If a crouch lk or mk is cancelled into the stomp, Bison may stomp when they are pushed back, hit and land standing, not bounce.
If they mash, you can ablock string them w/ c.lp, s.lk --> s.mp xx FB, or s.mp, s.mk, or s.mp xx FB, c.mk xx FB, s.mk... You got the picture.
Advanced Combos
1) Jump HK > Stand HK (1 hit) > Scissor Kicks (4 hits, 38 dmg, 16 stun)
This will end up being your go to big damage combo. The charge time you are given from the jump in is VERY strict. Input stand HK into is later than you think. It does the same amount of stun as Basic Combo #2, but +8 points of damage.
2) Crouch MP > Super Move
Level 1 Psycho Crusher (4 hits, 42 dmg, 6 stun)
Level 2 Psycho Crusher (5 hits, 58 dmg, 6 stun)
Level 3 Psycho Crusher (7 hits, 79 dmg, 6 stun)
Level 1 Scissor Kicks (5 hits, 51 dmg, 10 stun)
Level 2 Scissor Kicks (7 hits, 56 dmg, 9 stun)
Level 3 Scissor Kicks (9 hits, 74 dmg, 10 stun)
Easier to pull off than it looks at first glance. Usually happens the most with shotos who whiff a DP up close. Basically anytime you know you have a charge and can land a close/meaty crouch MP. My personal favorite is to hit the strong and enter the joystick input. Then negative edge for the level 1 Psycho Crusher. If you mess up the input or don't have charge you should be safe.
3) Jump LK (Cross up) > Stand HK (3 hits, 35 dmg, 14 stun)
Harder combo to pull off but can catch people off guard. The follow is easy but getting the spacing for the cross up can be tough. I recommend doing this if you notice the opponent is not really in the corner.
Example of a "soft corner" - https://www.youtube.com/watch?v=KBIhZvoneKQ
Combo into super - https://www.youtube.com/watch?v=YrhJyrZ_9LQ
34 dmg
Custom Combos (CC)
First of all: Bison's CCs are quite useless. There are definitely better uses for his meter.
To set up a CC, use the meaties or tick throw setups. You may finish a round after a Devil's reverse xx Skull diver baiting a throw or their CC, stuffing both with your CC. This is done taking advantage of the skull diver high block stun/frame advantage. They have to block the skull diver standing, so if they do not crouch immediately, you land your CC.
Just don't do this: Kick AC (teleport in the back) into CC!
Flashy, but you are not Rolento!
You will waste 2 to 3 meters. Unless you are going to finish the round, or better, the match, save the meter. You are much better off doing Punch AC. Compare the damage you can do with' 1) teleport AC followed by level 2 CC, 2) teleport AC vs. 3 throws + meter gain, 3) 3x Punch AC + added stun.
CCs (not optimized)
Lvl 1: HK double knee press, c.hp, stomp, dive immediately, c.HK (some people say it is unlockable, but it is not, you have to block high because Bison is considered airborne).
Lvl 2: Same, with three double knee press.
Lvl 3: Same, with 5 double knee presses. May do 4, c.HP into stomp, follow up with the unlockable.
Alternatives: Fireballs into teleport mix-up mentioned sooner.
CC punishes
As Guy does, Bison can use his long reaching kick (MK) to punish a whiffed move.
Ex.: Punishing a whiffed sweep.
You can also get past through a fireball with the invincibility, and do either slide >scissors, etc., or s.mk>slide>scissors, whatever.
However, Bison's jump are very good, and you don't need the CC get through a fireball.
Unblockable
If you do Skull Diver after the CC timer runs out and immediately do the Cr. HK slide, it will be unblockable. It also results in a high knock down (HKD) glitch.
The skull diver doesn't need to hit.
See more about the glitch:
http://wiki.shoryuken.com/Street_Fighter_Alpha_2#High_Knock_Down_Juggle_Glitch
It doesn't need to be a slide either. Any hit will do, but if the enemy doesn't roll, any button you press would hit, but if they don't roll, you waste the glitch.
Note for wiki editors and testers:
Need to double-check: A dip switches list implies that if a stomp is followed by a skull dive is done during CC or after the timer runs out, any move made immediately after Bison lands will be considered airborne. Therefore, the unlockable can be considered a high hit and be blocked standing.
Question remains all moves can retain the "high" property. If so, a double knee press or fireball can be "high," and if the FB is high, an FB into slide can be a true unblockable (high and low).
--Raf (talk) 22:43, 2 September 2020 (MSK)
Unblockable Setups
Activate, c.rh xx double knee press x1, 2 or 4 (lvl 1, 2, or 3 respectively, c. HP, headstomp, Punch follow up (skull diver). Land and unblockable sweep.
See the video for combos.
CC Video
Source: http://sfz2.wordpress.com/projects/sfz2-custom-combos-videos/m-bison-custom-combos/
Match-ups
Vs. Adon:
4-6
Vs. Akuma:
4-6
Vs. Birdie:
6-4
Vs. Charlie:
5-5
Vs. Chun-Li:
3-7
Vs. Dan:
6-4
Vs. Dhalsim:
4-6
Vs. Gen:
5-5
Vs. Guy:
4-6
Vs. Ken:
4-6
Vs. M. Bison (dictator-self): Dictator always wins the Dictator match-up.
5-5
Vs. Rolento: A nearly impossible match against a good Rolento. All your options are shut down.
3-7
Vs. Rose: use the kick AC against rose illusion super.
4-6
Vs. Ryu: Basics and neutral jumps mk/mp, and stomps vs. fireballs.
4-6
Vs. Sagat:
6-4
Vs. Sakura:
4-6
Vs. Sodom:
5-5 (Maybe 6-4)
Vs. Zangief:
7-3

