RenegadeVA (talk | contribs) |
RenegadeVA (talk | contribs) |
||
| Line 916: | Line 916: | ||
The fact that the fireball is so essential to Iori and that it's a ground fireball is really bad. Characters that can easily punish ground fireballs like Bison, Blanka or Honda all give Iori a really hard time. RCing the fireball doesn't really make a difference either, since you never want to do the fireball up close, and if you RC it from far away the invincibility is gone by the time your opponent reaches you with a Psycho Crusher or Blanka Ball or whatever. Bleh. | The fact that the fireball is so essential to Iori and that it's a ground fireball is really bad. Characters that can easily punish ground fireballs like Bison, Blanka or Honda all give Iori a really hard time. RCing the fireball doesn't really make a difference either, since you never want to do the fireball up close, and if you RC it from far away the invincibility is gone by the time your opponent reaches you with a Psycho Crusher or Blanka Ball or whatever. Bleh. | ||
}} | |||
}} | |||
===== <span class="invisible-header">Running Grab</span> ===== | |||
{{MoveData | |||
| name = 212 Shiki: Kototsuki In / "Nihyakujuunishiki Kototsuki In " | |||
| input = 236+P | |||
| subtitle = Running Grab | |||
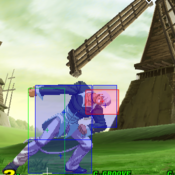
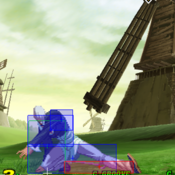
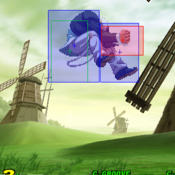
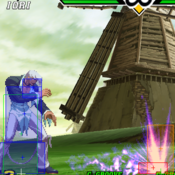
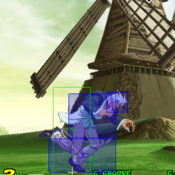
| image = CVS2 Iori running hit grab 1.png | |||
| caption = | |||
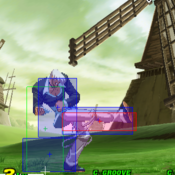
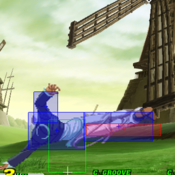
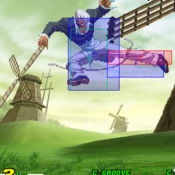
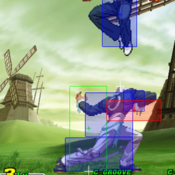
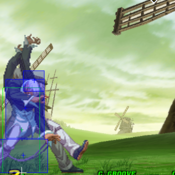
| image2 = CVS2 Iori running hit grab 2.png | |||
| caption2 = | |||
| linkname = RunGrab | |||
| data = | |||
{{AttackData-CvS2 | |||
| version = LP | |||
| subtitle = {{Motion|hcb}} + {{Icon-Capcom|LK}} | |||
| damage = 1800 | |||
| stun = 0 | |||
| cancel = None | |||
| guard = Mid | |||
| parry = Mid | |||
| startup = 5 | |||
| active = 32 | |||
| recovery = 12 | |||
| total = 49 | |||
| advHit = DWN | |||
| advBlock = -18 | |||
| invul = N/A | |||
| description = | |||
* | |||
}} | |||
{{AttackData-CvS2 | |||
| header = no | |||
| version = MP | |||
| subtitle = {{Motion|hcb}} + {{Icon-Capcom|MK}} | |||
| damage = 1900 | |||
| stun = 0 | |||
| cancel = None | |||
| guard = Mid | |||
| parry = Mid | |||
| startup = 5 | |||
| active = 48 | |||
| recovery = 12 | |||
| total = 65 | |||
| advHit = DWN | |||
| advBlock = -18 | |||
| invul = N/A | |||
| description = | |||
* | |||
}} | |||
{{AttackData-CvS2 | |||
| header = no | |||
| version = HK | |||
| subtitle = {{Motion|hcb}} + {{Icon-Capcom|HK}} | |||
| damage = 2000 | |||
| stun = 0 | |||
| cancel = None | |||
| guard = Mid | |||
| parry = Mid | |||
| startup = 5 | |||
| active = 64 | |||
| recovery = 12 | |||
| total = 81 | |||
| advHit = DWN | |||
| advBlock = -18 | |||
| invul = N/A | |||
| description = | |||
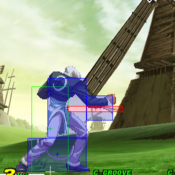
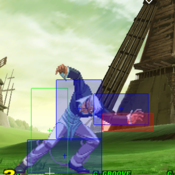
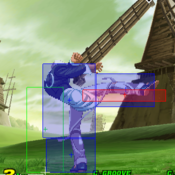
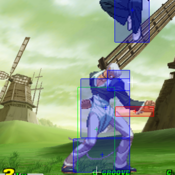
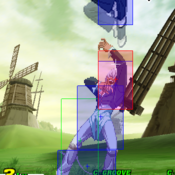
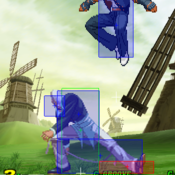
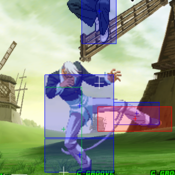
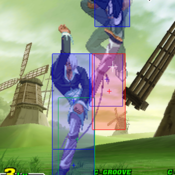
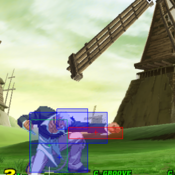
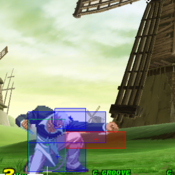
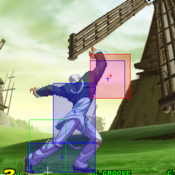
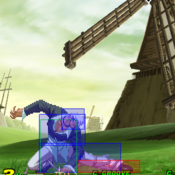
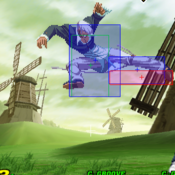
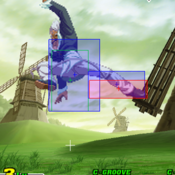
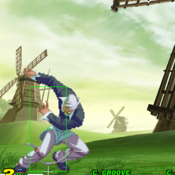
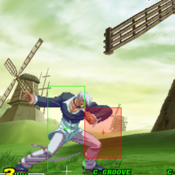
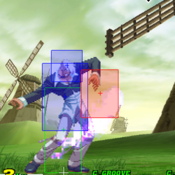
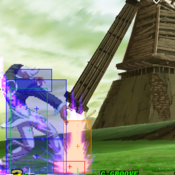
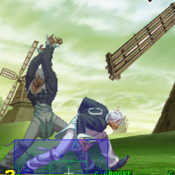
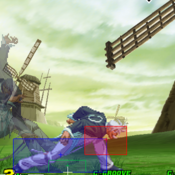
* The above frame data for the three button strengths represent what happens if Iori never makes contact with the enemy. For example, a roundhouse whiffed Running Grab has 5 frames start up, runs for 64 frames, then has 12 frame recovery. If at any time during those 64 frames of running Iori makes contact with his opponent, he then takes 4 frames for his arm to whip around, which has an active hitbox for 5 frames, and has a 29 frame recovery. Whew! Writing and explaining frame data isn't easy! | |||
Most of the time I wish this move simply didn't exist, since 90% of the times I use it is totally on accident screwing up the command for RC rekka kens. As the -18 frame disadvantage tells you, this move isn't anywhere near safe if blocked. It's also very vulnerable if the move whiffs completely also, unlike Kyo's. | |||
It does have its tactical uses, though. As stated above, the move does almost the exact same amount of guard bar damage as a jab uppercut (if you don't know, that's a lot), so if your opponent's guard bar is flashing and you can't get close enough to do a fierce into jab uppercut to guard break you can do f+strong into Running Grab instead. And again, guard breaking with a Running Grab just happens to leave you at the perfect distance to get a damaging far fierce into rekka kens. | |||
Another use for this move is to chip somebody to death. If you're not within fierce uppercut range to chip somebody (fierce uppercut does 325 points of chip damage), the next best option is to f+strong into Running Grab, as that does 300 chip damage. 2 Rekka kens only do 200 damage, and a fireball does 100. 300 damage from the running grab is enough to insure that you never fall victim to the "Magic Pixel" that has claimed many a player. | |||
RCing the move can be useful from time to time, like when you REALLY need that chip damage to kill the opponent but can't find a way to f+strong them, or to punish somebody buffering moves into a fireball. You could theoretically use an RC Running Grab as an anti-air from afar, but I wouldn't recommend it since the move comes out pretty slow. | |||
}} | }} | ||
Revision as of 17:10, 28 December 2020
Introduction
Iori is a very versatile character whose moveset lends him to a rush-down/mixup style with damage mainly coming from his Rekka combos. Coupled with that, he has very serviceable pokes, good anti air, and a good reversal DP for use in defense and neutral situations. He also has one of the best poke RCs in the game with his Rekka, is the shortest character in the game, and has the best roll in the game.
His drawbacks are getting in against dominant "big button" characters (Sagat, Blanka, Cammy, etc), a relatively low ceiling of one shot burst damage (his supers aren't very strong), and characters who duck and outpoke his Stand Roundhouse.
In CvS2, he is often considered a "high" tier character, just below the established top tiers. He is a staple on N groove teams, as well as one of the Best SNK characters in the game. Conventional wisdom is that he is one of the easiest characters to use, and recent Japanese tourney play features him on two of the best players' teams. In C and A grooves, even.
Data
| Health | 14000 | Just Below Average | |
| Stun | 70 | Average | |
| Stun Duration | +60f | Poor | |
| Guard Guage Recovery Rate | Fast Type | Best | |
| Dash Length | 102 pixels | ||
| Dash Duration | |||
| Dash Height | 0 | Grounded | |
| Run Speed | 7.4 | Average | |
| Roll Distance | 132 pixels | ||
| Roll Duration | 27f | ||
| Recovery Frames | 3f | Best | |
| Wakeup Speed compared to Ryu | 0f | Average |
Overview & General Gameplan
Normal Moves
Far Standing Normals
5LP
| Damage | Stun | Cancel | Guard | Parry | Startup | Active | Recovery | Total | Adv Hit | Adv Block | Invul |
|---|---|---|---|---|---|---|---|---|---|---|---|
| 300 | 4 | RF/SP/SU | H/L | H/L | 2 | 4 | 8 | 14 | +5 | +5 | - |
| |||||||||||
5MP
| Damage | Stun | Cancel | Guard | Parry | Startup | Active | Recovery | Total | Adv Hit | Adv Block | Invul |
|---|---|---|---|---|---|---|---|---|---|---|---|
| 800 | 8 | SP/SU | H/L | H | 7 | 3 | 25 | 35 | -5 | -5 | - |
| |||||||||||
5HP
| Damage | Stun | Cancel | Guard | Parry | Startup | Active | Recovery | Total | Adv Hit | Adv Block | Invul |
|---|---|---|---|---|---|---|---|---|---|---|---|
| 1300/1400 | 13/14 | SP/SU (1st part only) | H/L | H | 7 | 5 | 26 | 38 | -5 | -5 | - |
This move doesn't really have much tactical use since the distance to get the bufferable version of the fierce is really specific. However, the bufferable version happens to be Iori's most damaging bufferable move, and there's ONE useful set up to get it shown below (see Running Grab). | |||||||||||
5LK
| Damage | Stun | Cancel | Guard | Parry | Startup | Active | Recovery | Total | Adv Hit | Adv Block | Invul |
|---|---|---|---|---|---|---|---|---|---|---|---|
| 500 | 5 | SU | H/L | H/L | 6 | 6 | 8 | 20 | +3 | +3 | - |
| |||||||||||
5MK
| Damage | Stun | Cancel | Guard | Parry | Startup | Active | Recovery | Total | Adv Hit | Adv Block | Invul |
|---|---|---|---|---|---|---|---|---|---|---|---|
| 1000 | 10 | SU | H/L | H/L | 6 | 3 | 26 | 35 | -6 | -6 | - |
6/13/03 - Some Japanese players like to punish whiffs with s.forward into super, but I find that whenever I bait a whiff I'm too far away to hit with a s.forward. I just do a low/standing roundhouse instead. I also noticed that Japanese players have set-ups for COUNTER HIT s.forward and buffer the super on reaction, but to me that's in-humanly difficult (the window to buffer is 3 frames long, 1/20th of a second). That super isn't one that you want to have blocked. | |||||||||||
5HK
| Damage | Stun | Cancel | Guard | Parry | Startup | Active | Recovery | Total | Adv Hit | Adv Block | Invul |
|---|---|---|---|---|---|---|---|---|---|---|---|
| 1300 | 13 | X | H/L | H/L | 9 | 7 | 22 | 38 | -2 | -2 | - |
| |||||||||||
Close Standing Normals
cl5LP
| Damage | Stun | Cancel | Guard | Parry | Startup | Active | Recovery | Total | Adv Hit | Adv Block | Invul |
|---|---|---|---|---|---|---|---|---|---|---|---|
| 400 | 4 | RF,SP,SU | H/L | H/L | 2 | 4 | 6 | 12 | +7 | +7 | - |
Iori's close jab is very useful for many reasons:
| |||||||||||
cl5MP
| Damage | Stun | Cancel | Guard | Parry | Startup | Active | Recovery | Total | Adv Hit | Adv Block | Invul |
|---|---|---|---|---|---|---|---|---|---|---|---|
| - | - | - | - | - | - | - | - | - | - | - | - |
| |||||||||||
cl5HP
| Damage | Stun | Cancel | Guard | Parry | Startup | Active | Recovery | Total | Adv Hit | Adv Block | Invul |
|---|---|---|---|---|---|---|---|---|---|---|---|
| 1200, 1100 | 12, 11 | SP/SU, SU | H/L | H | 3 | 6 | 24 | 33 | 0 | 0 | - |
Outside of combos, the main use for this move is for anti-cross ups. Close roundhouse is your main anti-cross up, but you'll want to use close fierce against characters with bigger jumps like Blanka. | |||||||||||
cl5LK
| Damage | Stun | Cancel | Guard | Parry | Startup | Active | Recovery | Total | Adv Hit | Adv Block | Invul |
|---|---|---|---|---|---|---|---|---|---|---|---|
| - | - | - | - | - | - | - | - | - | - | - | - |
| |||||||||||
cl5MK
| Damage | Stun | Cancel | Guard | Parry | Startup | Active | Recovery | Total | Adv Hit | Adv Block | Invul |
|---|---|---|---|---|---|---|---|---|---|---|---|
| - | - | - | - | - | - | - | - | - | - | - | - |
| |||||||||||
cl5HK
| Damage | Stun | Cancel | Guard | Parry | Startup | Active | Recovery | Total | Adv Hit | Adv Block | Invul |
|---|---|---|---|---|---|---|---|---|---|---|---|
| 1400 | 14 | SU | H/L | H | 6 | 3 | 21 | 30 | 3 | 3 | N/A |
close jab is a one frame link though, meaning it's a little too difficult to do really consistently. How does Iori manage to kick so high with that funky little cord tying his legs together? | |||||||||||
Crouching Normals
2LP
| Damage | Stun | Cancel | Guard | Parry | Startup | Active | Recovery | Total | Adv Hit | Adv Block | Invul |
|---|---|---|---|---|---|---|---|---|---|---|---|
| - | - | - | - | - | - | - | - | - | - | - | - |
| |||||||||||
2MP
| Damage | Stun | Cancel | Guard | Parry | Startup | Active | Recovery | Total | Adv Hit | Adv Block | Invul |
|---|---|---|---|---|---|---|---|---|---|---|---|
| - | - | - | - | - | - | - | - | - | - | - | - |
| |||||||||||
2HP
| Damage | Stun | Cancel | Guard | Parry | Startup | Active | Recovery | Total | Adv Hit | Adv Block | Invul |
|---|---|---|---|---|---|---|---|---|---|---|---|
| 1100 | 11 | SP/SU | H/L | H/L | 4 | 5 | 20 | 29 | -1 | -1 | N/A |
Iori's other crouchable move. It doesn't really matter, though, since you'll probably never use this move as anything except as an anti-air at the 45 degree angle. It works fairly well as anti-air as long as you stick it out early enough, but it does tend to trade with the really high priority jump ins. When you use it as anti air you can buffer it into a fierce fireball to make your opponent land on it, but I would recommend throwing a jab fireball instead so that you can run after it and use it as cover to attempt to get in. | |||||||||||
2LK
| Damage | Stun | Cancel | Guard | Parry | Startup | Active | Recovery | Total | Adv Hit | Adv Block | Invul |
|---|---|---|---|---|---|---|---|---|---|---|---|
| 200 | 2 | RF/SP/SU | L | L | 4 | 4 | 8 | 16 | 5 | 5 | N/A |
| |||||||||||
2MK
| Damage | Stun | Cancel | Guard | Parry | Startup | Active | Recovery | Total | Adv Hit | Adv Block | Invul |
|---|---|---|---|---|---|---|---|---|---|---|---|
| 800 | 8 | SU | L | L | 5 | 4 | 20 | 29 | -2 | -2 | N/A |
I hardly ever use this move since low strong is just better all around. Also, the animation of this move is very misleading. Iori's entire foot doesn't have an active hitbox on it, making the move a lot shorter than it looks. Its actual range is nearly identical to Iori's low short, which is a lot better move to use in more situations. However, the move can only be canceled into supers, so if you're having a tough time landing B&B's into maiden masher due to accidental moves coming out, this could certainly help you out. You can also toss the move out and empty buffer the super behind it ala Chun in 3rd strike, but the hitbox on the move isn't THAT good. | |||||||||||
2HK
| Damage | Stun | Cancel | Guard | Parry | Startup | Active | Recovery | Total | Adv Hit | Adv Block | Invul |
|---|---|---|---|---|---|---|---|---|---|---|---|
| - | - | - | - | - | - | - | - | - | - | - | - |
| |||||||||||
Air Normals
8LP
| Damage | Stun | Cancel | Guard | Parry | Startup | Active | Recovery | Total | Adv Hit | Adv Block | Invul |
|---|---|---|---|---|---|---|---|---|---|---|---|
| - | - | - | - | - | - | - | - | - | - | - | - |
| |||||||||||
8MP
| Damage | Stun | Cancel | Guard | Parry | Startup | Active | Recovery | Total | Adv Hit | Adv Block | Invul |
|---|---|---|---|---|---|---|---|---|---|---|---|
| - | - | - | - | - | - | - | - | - | - | - | - |
| |||||||||||
8HP
| Damage | Stun | Cancel | Guard | Parry | Startup | Active | Recovery | Total | Adv Hit | Adv Block | Invul |
|---|---|---|---|---|---|---|---|---|---|---|---|
| - | - | - | - | - | - | - | - | - | - | - | - |
| |||||||||||
8LK
| Damage | Stun | Cancel | Guard | Parry | Startup | Active | Recovery | Total | Adv Hit | Adv Block | Invul |
|---|---|---|---|---|---|---|---|---|---|---|---|
| - | - | - | - | - | - | - | - | - | - | - | - |
| |||||||||||
8MK
| Damage | Stun | Cancel | Guard | Parry | Startup | Active | Recovery | Total | Adv Hit | Adv Block | Invul |
|---|---|---|---|---|---|---|---|---|---|---|---|
| - | - | - | - | - | - | - | - | - | - | - | - |
| |||||||||||
8HK
| Damage | Stun | Cancel | Guard | Parry | Startup | Active | Recovery | Total | Adv Hit | Adv Block | Invul |
|---|---|---|---|---|---|---|---|---|---|---|---|
| - | - | - | - | - | - | - | - | - | - | - | - |
| |||||||||||
Command Normals
Universal Mechanics
Throws
Roll
Counter Attack
Guard Cancel Movement
Dodge Attacks
Small Jump
Dash
Run
Special Moves
Dragon Punch
Fireball
Running Grab
Super Moves
Maiden Masher
Combos
No Meter combos:
Hit Confirms: cr.short x 3, qcb + fierce x 3 s.jab x 3, qcb + fierce x 3 s.jab, s.fierce, qcb + fierce x 3 s.short, s.jab, s.short, qcb + fierce x 3 cr.strong x 2, qcb + fierce x 3 cr.short x 2, cr.strong, qcb + fierce x 3
Non Hit Confirms (punish combos) s.fierce, qcb + fierce x 3 close s.fierce, hcb + roundhouse close s.fierce xx Fierce DP s.strong, twd.strong, qcb + fierce x 3
jump fierce, Cl. Fierce, DP+Fierce (optimal stun damage)
Low Jump strong/roundhouse-> DP+Jab
-cross-up-
b+short, s.jab, s.fierce, qcb + fierce x 3
Almost any Iori B&B combo can be started with hcb-twd + punch (Scum Gale).
Super Combos:
cr.short x 3, qcf-hcb + punch (any level)
s.strong, twd.strong, qcf-hcb + punch (any level)
S.jab, S.Fierce, qcf-hcb + punch (any level) (max damage)
C.forward kick xx qcf-hcb + punch (any level) (c.mk is super cancel only, easy to do)
Advanced Strategy
Grooves & Groove specific strategy
C Groove
C-Groove Level 2 Cancel Combos-
Iori uses level 2 cancels pretty well. After his maiden masher is complete, Iori can cancel into any of his specials. The foremost being his Dragon Punch. Since maiden masher at level 3 only does 5000 damage, The cancels give Iori a much better damage/meter ratio, and allows him to use a meter for defensive purposes or be ready for another level 2 in a very short time.
Since Maiden masher is so easy to combo into, you'll get a lot of opportunities to land this.
Level 2 Maiden Masher
Cancel into
-Level 1 Maiden Masher (most damage, no tech roll)
-Fierce DP (1000 less damage, saves a level and 20 more stun) -Jab/Strong DP (even less damage, more time to setup or punish tech roll) -Level 1 wine cups, then Jump HP, HP, HP DP (Full combo can instant stun characters, cancel maiden masher early if combo will stun for more damage on post dizzy combo)
A Groove
P Groove
S Groove
N Groove
K Groove
Matchups
Check here for matchup analysis, notes, and errata. Could be as simple as optimal punishes, safe jump setups, and effective counter pokes.
For example:
Blanka
Blanka ball punishes- Any level Maiden Masher, run a little and sweep (low HK), A groove activate sweep custom.
