(fixing the table of contents) |
|||
| Line 1,175: | Line 1,175: | ||
|Guard Crush Value=8 | |Guard Crush Value=8 | ||
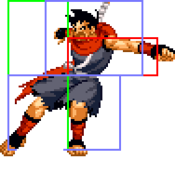
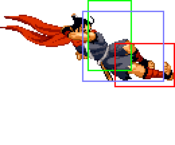
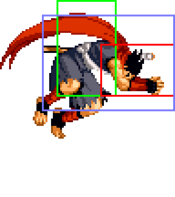
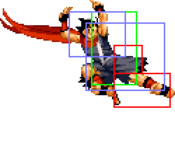
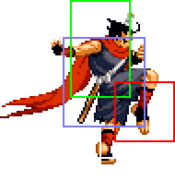
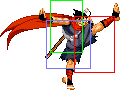
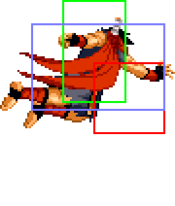
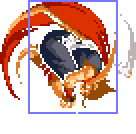
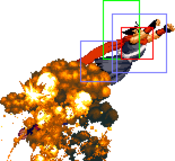
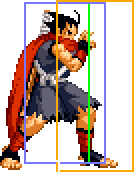
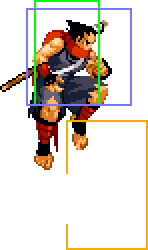
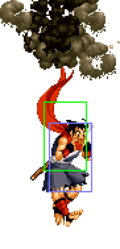
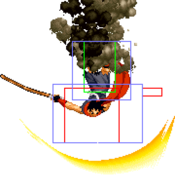
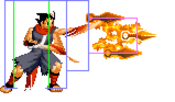
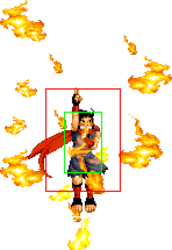
|description= Cheesy homing teleport overhead that carries enormous risk in exchange for just decent reward. <br> | |description= Cheesy homing teleport overhead that carries enormous risk in exchange for just decent reward. <br> | ||
Hokutomaru appears at a fixed height every time so if the opponent is in the air you will teleport directly into a jump normal, and the hitbox is a lot smaller than it seems (the | Hokutomaru appears at a fixed height every time so if the opponent is in the air you will teleport directly into a jump normal, and the hitbox is a lot smaller than it seems (the opposite can be said about the hurtbox). <br> | ||
When counterhitting a grounded opponent they will get spun instead of knocked down, leaving Hokutomaru only +1. <br> | When counterhitting a grounded opponent they will get spun instead of knocked down, leaving Hokutomaru only +1. <br> | ||
'''If the opponent blocks this move, you have thrown away the round,''' good luck on the next one. <br> | '''If the opponent blocks this move, you have thrown away the round,''' good luck on the next one. <br> | ||
On the bright side, this move is | On the bright side, this move is useful in combos, can be used after a double jump or air target combo (very slow triple overhead), and is able to punish predictable fireballs. Still gimmicky though. <br> | ||
7~8F full-body invincibility. | 7~8F full-body invincibility. | ||
}} | }} | ||
Revision as of 11:37, 30 April 2024
Introduction
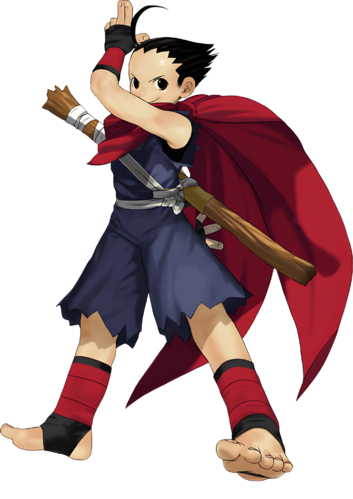
Hokutomaru
Gameplay
TBD
| Strengths | Weaknesses |
|---|---|
|
|
Character Colors
Move List
Frame Data Source: https://w.atwiki.jp/garoumow/pages/27.html and https://w.atwiki.jp/garoumow/pages/80.html
| Data Help | |
|---|---|
| Disclaimer: This is meant to teach basic terminology used when describing moves. | |
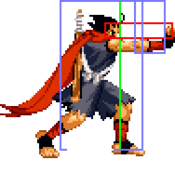
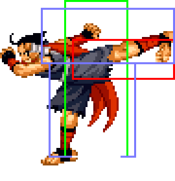
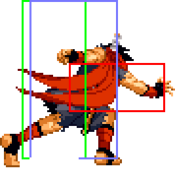
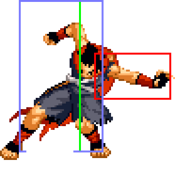
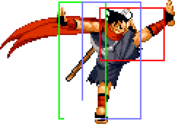
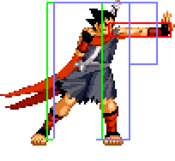
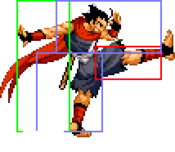
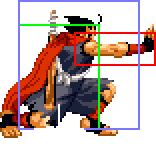
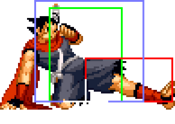
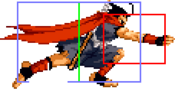
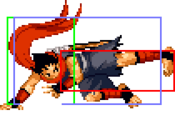
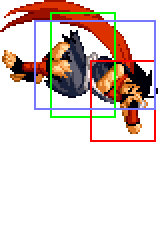
| Hitbox: | A predefined area (usually a rectangle or rectangles) that tells the game how any given attack can come in contact with a character. Hitboxes are invisible to the player when normally playing. |
| Hurtbox: | A predefined area (usually a group of rectangles) that tell the game how your character is allowed to get hit by any incoming attack. Specifically, you'll get hit by (or block) an attack if that attack's hitbox ever overlaps your hurtbox. |
| Throw Box/Range: | Active throw frames and range. Your opponent will be thrown in this field if not in block or hit stun. |
| Projectile Box: | Hitbox on a projectile attack. |
| Guard/Counter Box: | The Guard Box or Counter Box. This appears when blocking or using a counter move. |
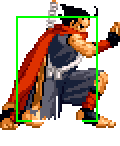
| Push Box: | Has no bearing on hit/hurt boxes. Just prevents characters to not pass through each other. (Also known as "Collision Box".) |
| Startup | The number of frames before an attack can hit the opponent. Does not include the first active frame. |
| Guard | The way this move must be blocked.
High or H or Overhead (especially when from the ground) -- must be blocked standing. |
| Damage | "Basic" damage -- Unmodified damage values
"Correct" damage -- Damage values accounting for damage scaling, TOP multiplier, and defense rate |
| Guard Crush Value | Decreases the defender's guard durability gauge by this value. |
| +X | Attacker has X number of advantage frames. |
| -X | Attacker has X number of disadvantage frames. |
| KD | Short for "knockdown", knocks down opponent on hit. |
| ◯ | Cancelable on both hit and block. |
| ∞ | Chain cancelable with the same button (renda cancel). |
| ※ | Cancelable on the first hit/part only. |
| 《X》OR «X» OR <<X>> OR (X) | X number of inactive frames between hits of multihit moves. |
| △ | Only cancelable on block. |
| ▽ | Only cancelable on hit. |
| × OR X | Not cancelable. |
Notes:
- Guard crush values within ( ) are when the move is used as the next hit of a target combo.
- From the 2nd hit and after of the target combo, the active frames and recovery frames will be the same as far moves and crouching moves
- Jump D, Jump A, and Jump B (Jump A and Jump B are usually diagonal jumps only) can beat out upper-body evasive attacks.
- Special/Super moves with "Guard" data in red text are impossible to just defend at 0-pixel health bar.
Close Standing Normals
Close 5A
Close 5B
Close 5C
| Damage | Guard | Startup | Active | Recovery | Total |
|---|---|---|---|---|---|
| 6, 6 | Mid | 5 | 2, 《5》, 3 | 16 | 31 |
| Hit Adv | Block Adv | Cancel on Hit | Cancel on Block | Guard Crush Value | |
| +2 | +2 | ※ | ※ | 3, 3 |
Close 5D
| Damage | Guard | Startup | Active | Recovery | Total |
|---|---|---|---|---|---|
| 9 | Mid | 3 | 3 | 19 | 25 |
| Hit Adv | Block Adv | Cancel on Hit | Cancel on Block | Guard Crush Value | |
| -1 | -1 | ◯ | ◯ | 5 | |
|
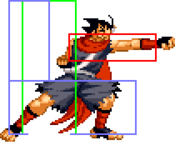
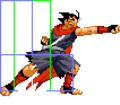
Tied with jB as Hokutomaru's fastest normal, easily combos into specials, has incredible frame advantage when feint cancelled letting it link into itself and can't be JD'd low despite being a mid. An incredible normal. | |||||
Far Standing Normals
Far 5A
Far 5B
Far 5C
| Damage | Guard | Startup | Active | Recovery | Total |
|---|---|---|---|---|---|
| 12 | Mid | 11 | 1 | 30 | 42 |
| Hit Adv | Block Adv | Cancel on Hit | Cancel on Block | Guard Crush Value | |
| -10 | -10 | X | X | 5(3) | |
|
Slow, can't be cancelled and is punishable on hit... not great traits to have. | |||||
Far 5D
| Damage | Guard | Startup | Active | Recovery | Total |
|---|---|---|---|---|---|
| 12 | Mid | 11 | 3 | 21 | 35 |
| Hit Adv | Block Adv | Cancel on Hit | Cancel on Block | Guard Crush Value | |
| -3 | -3 | X | X | 5(3) |
Crouching Normals
2A
2B
2C
| Damage | Guard | Startup | Active | Recovery | Total |
|---|---|---|---|---|---|
| 9 | Mid | 6 | 4 | 16 | 26 |
| Hit Adv | Block Adv | Cancel on Hit | Cancel on Block | Guard Crush Value | |
| +1 | +1 | X | X | 5(3) | |
| |||||
2D
| Damage | Guard | Startup | Active | Recovery | Total |
|---|---|---|---|---|---|
| 9 | Low | 10 | 5 | 19 | 34 |
| Hit Adv | Block Adv | Cancel on Hit | Cancel on Block | Guard Crush Value | |
| KD | -3 | X | X | 5(5) | |
| |||||
Jumping Normals
jA
| Damage | Guard | Startup | Active | Recovery | Total |
|---|---|---|---|---|---|
| 6 | High | 6 | 12 | - | - |
| Hit Adv | Block Adv | Cancel on Hit | Cancel on Block | Guard Crush Value | |
| - | - | ◯ | ◯ | 4 | |
|
Jump A (usually diagonal jump only) can beat out upper-body evasion attacks. | |||||
jB
| Damage | Guard | Startup | Active | Recovery | Total |
|---|---|---|---|---|---|
| 6 | High | 3 | 10 | - | - |
| Hit Adv | Block Adv | Cancel on Hit | Cancel on Block | Guard Crush Value | |
| - | - | ◯ | ◯ | 4 | |
|
Jump B (usually diagonal jump only) can beat out upper-body evasion attacks. | |||||
jC
| Damage | Guard | Startup | Active | Recovery | Total |
|---|---|---|---|---|---|
| 8 | High | 6 | 5 | - | - |
| Hit Adv | Block Adv | Cancel on Hit | Cancel on Block | Guard Crush Value | |
| - | - | ◯ | ◯ | 5 |
jD
| Damage | Guard | Startup | Active | Recovery | Total |
|---|---|---|---|---|---|
| 8 | High | 7 | 7 | - | - |
| Hit Adv | Block Adv | Cancel on Hit | Cancel on Block | Guard Crush Value | |
| - | - | ◯ | ◯ | 5 | |
|
Jump D can beat out upper-body evasion attacks. | |||||
Command Normals
3B
| Damage | Guard | Startup | Active | Recovery | Total |
|---|---|---|---|---|---|
| 10 | Low | 7 | 13 | 22 | 42 |
| Hit Adv | Block Adv | Cancel on Hit | Cancel on Block | Guard Crush Value | |
| KD | -13 | X | X | 9 | |
|
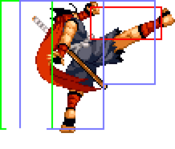
A sliding sweep that is excellent at catching landing frames, making this one of Hokutomaru's better anti-airs. Some characters are completely incapable of hitting Hokutomaru during the low profile. | |||||
3D
| Damage | Guard | Startup | Active | Recovery | Total |
|---|---|---|---|---|---|
| 6, 6 | Mid | 8 | 4, 4 | 30 | 46 |
| Hit Adv | Block Adv | Cancel on Hit | Cancel on Block | Guard Crush Value | |
| KD | -13 | X , ◯ | X , ◯ | 9, 9 | |
|
Block adv on 1st hit only = -17 Apart from kara canceling during the attack's startup, after the 2nd hit it's possible to special cancel anytime in the air, on hit or on whiff. | |||||
Universal Moves
Lower-body Evasion Attack
| Damage | Guard | Startup | Active | Recovery | Total |
|---|---|---|---|---|---|
| 6, 6 | Overhead | 18 | 3, 《4》, 3 | 17 | 45 |
| Hit Adv | Block Adv | Cancel on Hit | Cancel on Block | Guard Crush Value | |
| -1 | +5 | X | X | 3, 3 | |
|
The fastest universal overhead in the game. Unfortunately is split up into 2 hits which prevents Hokutomaru from comboing after a counterhit and can leave him punishable if the second hit whiffs.
18F hitstun and 24F blockstun. | |||||
Upper-body Evasion Attack
Upper-body Evasion Attack Follow-up
| Damage | Guard | Startup | Active | Recovery | Total |
|---|---|---|---|---|---|
| - | - | - | - | - | 30 |
| Hit Adv | Block Adv | Cancel on Hit | Cancel on Block | Guard Crush Value | |
| -12 | -6 | - | - | 6, 0 | |
|
Follow-up to 2AB where Hokutomaru jumps forward with no collision, meaning he can pass through the opponent. Can be used to reposition after a knockdown. Lower-body invincibility for 12F while in the air. Although he disappears briefly, Hokutomaru is NOT invincible at any point in this move. | |||||
T.O.P. Attack
| Damage | Guard | Startup | Active | Recovery | Total |
|---|---|---|---|---|---|
| 17 (base damage) | Mid | 14 | - | - | - |
| Hit Adv | Block Adv | Cancel on Hit | Cancel on Block | Guard Crush Value | |
| KD | -31 | - | - | 25 | |
|
This is a rising attack that is good for one hit and travels at a 45 degree angle. It has a slow start and can be used as an anti-air. Don't ever get this attack blocked! 12~14F full-body invincibility. | |||||
Throws
Ground Throw
| Damage | Guard | Startup | Active | Recovery | Total |
|---|---|---|---|---|---|
| 4, 4, 4, 4 | - | 1 | - | - | - |
| Hit Adv | Block Adv | Cancel on Hit | Cancel on Block | Guard Crush Value | |
| +59 | - | - | - | - | |
|
Hokutomaru climbs onto the opponent and scratches their face. Frame advantage varies depending on the height of the opponent as Hokutomaru needs to jump off of them and land before he can act. | |||||
Air Throw
| Damage | Guard | Startup | Active | Recovery | Total |
|---|---|---|---|---|---|
| - | - | 1 | - | - | - |
| Hit Adv | Block Adv | Cancel on Hit | Cancel on Block | Guard Crush Value | |
| - | - | - | - | - |
Feints
Forward Feint
| Damage | Guard | Startup | Active | Recovery | Total |
|---|---|---|---|---|---|
| - | - | - | - | - | 10 |
| Hit Adv | Block Adv | Cancel on Hit | Cancel on Block | Guard Crush Value | |
| - | - | - | - | - | |
|
Mimics the end recovery animation of Karakusa Giri. | |||||
Down Feint
| Damage | Guard | Startup | Active | Recovery | Total |
|---|---|---|---|---|---|
| - | - | - | - | - | 8 |
| Hit Adv | Block Adv | Cancel on Hit | Cancel on Block | Guard Crush Value | |
| - | - | - | - | - | |
|
Mimics the start of Shuriken. | |||||
Special Moves
Shuriken
| Damage | Guard | Startup | Active | Recovery | Total | |
|---|---|---|---|---|---|---|
| 10 | Mid | 12 | / | 35 | 47 | |
| Hit Adv | Block Adv | Cancel on Hit | Cancel on Block | Guard Crush Value | ||
| -2 ~ +32 | -2 ~ +32 | X | X | 7 | ||
|
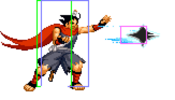
Single shuriken. Unlike all other projectiles, the shurikens can be destroyed by the opponent's melee attacks (without absorbing it, the same attack can still hit Hokutomaru) which makes them not as effective for deterring divekicks or... most things actually. This particular version is unlikely to be used as the air version is faster when TK'd or done from a backdash. | ||||||
| Damage | Guard | Startup | Active | Recovery | Total | |
| 6, 6, 6 | Mid | 18 | / | 40 | 58 | |
| Hit Adv | Block Adv | Cancel on Hit | Cancel on Block | Guard Crush Value | ||
| -2 | -2 | X | X | 5, 5, 5 | ||
|
Triple shuriken. | ||||||
| Air |
Damage | Guard | Startup | Active | Recovery | Total |
| 12 | Mid | 18 | / | Until landing + 10 | Can be as low as 38 | |
| Hit Adv | Block Adv | Cancel on Hit | Cancel on Block | Guard Crush Value | ||
| Up to +32 | Up to +32 | X | X | / | ||
|
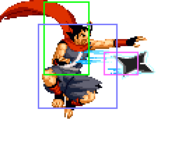
Slows your descent as opposed to a normal empty hop or air normal. Decent option to try and stuff someone who's gonna jump. | ||||||
Rakkazan
Karakusa Giri
Kuuha Dan
Super Moves
Chou Hissatsu Shuriken
Chou Bakuen Kunai
Ougi • Chou Hissatsu Tatsumaki
| Damage | Guard | Startup | Active | Recovery | Total | |
|---|---|---|---|---|---|---|
| 5×9 | Mid | 1 | - | - | - | |
| Hit Adv | Block Adv | Cancel on Hit | Cancel on Block | Guard Crush Value | ||
| KD | -60 | - | - | 2×9 | ||
|
Corner combo ender and Hokutomaru's only invincible reversal. Due to the hitbox being modest, the short length of the invincibility and the damage being spread between many weak hits, when used outside of combos it will often miss many hits and even trade/lose to attacks, limiting its use as a raw reversal or anti-air. It is pretty reliable after a GC, though you may still lose damage if the opponent is in the air.
| ||||||
Kyuukyoku Ougi • Chou Bakuen Tatsumaki
