JtheSaltyy (talk | contribs) No edit summary |
JtheSaltyy (talk | contribs) No edit summary |
||
| Line 629: | Line 629: | ||
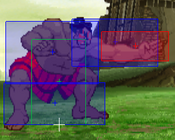
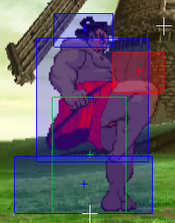
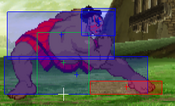
| input = Near Opponent, 4/6HP | | input = Near Opponent, 4/6HP | ||
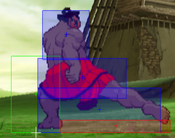
| subtitle = Punch Throw | | subtitle = Punch Throw | ||
| image = | | image = CVS2_Honda_Pthrow.png | ||
| caption = | | caption = | ||
| linkname = Tawara Nage | | linkname = Tawara Nage | ||
| Line 657: | Line 657: | ||
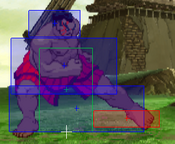
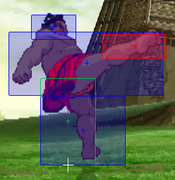
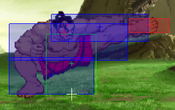
| input = Near Opponent, 4/6HK | | input = Near Opponent, 4/6HK | ||
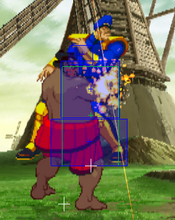
| subtitle = Kick Throw | | subtitle = Kick Throw | ||
| image = | | image = CVS2_Honda_Kthrow.png | ||
| caption = | | caption = | ||
| linkname = Saba Ori | | linkname = Saba Ori | ||
| Line 760: | Line 760: | ||
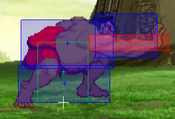
| input = [4]6{{Icon-Capcom|P}} | | input = [4]6{{Icon-Capcom|P}} | ||
| subtitle = | | subtitle = | ||
| image = | | image = CVS2_Honda_28K1.png | ||
| caption = Start up | | caption = Start up | ||
| image2 = CVS2_Honda_46P1.png | | image2 = CVS2_Honda_46P1.png | ||
| Line 828: | Line 828: | ||
* Roll Cancel {{Icon-Capcom|HP}} headbutt is a projectiles worst nightmare. Honda isn't invulnerable for the full travel duration, but he is for most of it. Keep in mind you are still -9 on block and opponents can punish you even if you successfully RC. | * Roll Cancel {{Icon-Capcom|HP}} headbutt is a projectiles worst nightmare. Honda isn't invulnerable for the full travel duration, but he is for most of it. Keep in mind you are still -9 on block and opponents can punish you even if you successfully RC. | ||
<br> | <br> | ||
}} | |||
}} | |||
===== <span class="invisible-header">Butt Slam</span> ===== | |||
{{MoveData | |||
| name = Butt Slam | |||
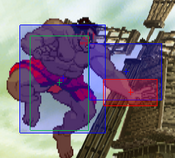
| input = [2]8{{Icon-Capcom|P}} | |||
| subtitle = | |||
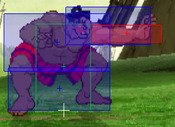
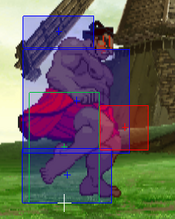
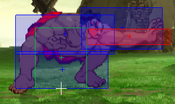
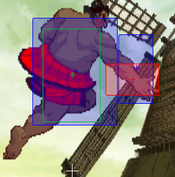
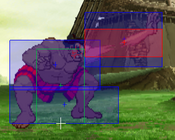
| image = CVS2_Honda_28K1.png | |||
| caption = Start up | |||
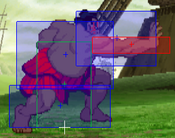
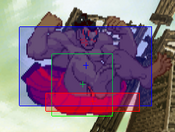
| image2 = CVS2_Honda_28K2.png | |||
| caption2 = Flying Up | |||
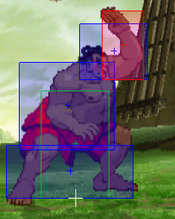
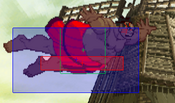
| image3 = CVS2_Honda_28K3.png | |||
| caption3 = Falling Down | |||
| linkname = Butt Slam | |||
| data = | |||
{{AttackData-CvS2 | |||
| version = LP | |||
| subtitle = [2]8{{Icon-Capcom|LP}} | |||
| damage = 1200,1300 | |||
| stun = 12,13 | |||
| cancel = None | |||
| guard = High | |||
| parry = High | |||
| startup = 21 | |||
| active = 7 [14] 8 | |||
| recovery = 14 | |||
| total = - | |||
| advHit = KND | |||
| advBlock = -2 | |||
| invul = 21f (Full) | |||
| description = Nice move for pressure and anti-airs. It can also be an okay mix-up tool, but due to the large amount of i-frames and because it hits on the way up, it works best as an anti-air. | |||
}} | |||
{{AttackData-CvS2 | |||
| header = no | |||
| version = MP | |||
| subtitle = [2]8{{Icon-Capcom|MP}} | |||
| damage = 1300,1400 | |||
| stun = 13,14 | |||
| cancel = None | |||
| guard = High | |||
| parry = High | |||
| startup = 19 | |||
| active = 7 [14] 10 | |||
| recovery = 14 | |||
| total = - | |||
| advHit = KND | |||
| advBlock = -4 | |||
| invul = 19f (Full) | |||
| description = Rarely used, but can go over some fireballs and can be a decent anti-air. | |||
}} | |||
{{AttackData-CvS2 | |||
| header = no | |||
| version = HP | |||
| subtitle = [2]8{{Icon-Capcom|HP}} | |||
| damage = 1500 | |||
| stun = 15 | |||
| cancel = None | |||
| guard = High | |||
| parry = High | |||
| startup = 42 | |||
| active = 13 | |||
| recovery = 14 | |||
| total = - | |||
| advHit = KND | |||
| advBlock = -7 | |||
| invul = 19f (Full) | |||
| description = Least used of the three, since it takes the longest and does not hit on the way up, and it more punishable at -7 compared to the other strengths. | |||
}} | |||
}} | |||
===== <span class="invisible-header">Oichio Nage</span> ===== | |||
{{MoveData | |||
| name = Oichio Nage | |||
| input = 360+{{Icon-Capcom|P}} | |||
| subtitle = | |||
| image = CVS2_Honda_360P1.png | |||
| caption = Whiff | |||
| image2 = CVS2_Honda_360P2.png | |||
| caption2 = Hit | |||
| linkname = Oichio | |||
| data = | |||
{{AttackData-CvS2 | |||
| version = LP | |||
| subtitle = 360{{Icon-Capcom|LP}} | |||
| damage = 2000 | |||
| stun = 0 | |||
| cancel = None | |||
| guard = - | |||
| parry = - | |||
| startup = 3 | |||
| active = 1 | |||
| recovery = 13 | |||
| total = - | |||
| advHit = KND | |||
| advBlock = - | |||
| invul = - | |||
| description = | |||
}} | |||
{{AttackData-CvS2 | |||
| header = no | |||
| version = MP | |||
| subtitle = 360{{Icon-Capcom|MP}} | |||
| damage = 2100 | |||
| stun = 0 | |||
| cancel = None | |||
| guard = - | |||
| parry = - | |||
| startup = 3 | |||
| active = 1 | |||
| recovery = 13 | |||
| total = - | |||
| advHit = KND | |||
| advBlock = - | |||
| invul = - | |||
| description = | |||
}} | |||
{{AttackData-CvS2 | |||
| header = no | |||
| version = HP | |||
| subtitle = 360{{Icon-Capcom|HP}} | |||
| damage = 2200 | |||
| stun = 0 | |||
| cancel = None | |||
| guard = - | |||
| parry = - | |||
| startup = 3 | |||
| active = 1 | |||
| recovery = 13 | |||
| total = - | |||
| advHit = KND | |||
| advBlock = - | |||
| invul = - | |||
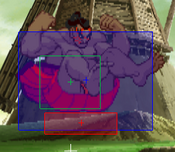
| description = Honda's command grab. It has the same frame data as a normal throw, and does pretty good damage. It can work as a way to stop opponents from blocking during pressure. It is not the best command grab, since it has pretty short range compared to other command grabs, but it is still nice to use. | |||
* LP has a 58 pixel throw range, MP has 57, and HP has 56 respectively. | |||
* You can get extra range on the grab by using Roll Cancels, but roll cancel 360s are very hard, so practice is needed to land them consistently. You will be invulnerable during the entire throw whiff animation however, so getting punished shouldn't be a thing unless it is a throw. | |||
}} | |||
}} | |||
== Super Moves == | |||
===== <span class="invisible-header">Onimusou</span> ===== | |||
{{MoveData | |||
| name = Onimusou | |||
| input = [4]646{{Icon-Capcom|P}} | |||
| subtitle = | |||
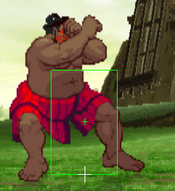
| image = CVS2_Honda_4646P.png | |||
| caption = | |||
| linkname = Onimusou | |||
| data = | |||
{{AttackData-CvS2 | |||
| version = LP | |||
| subtitle = [4]646{{Icon-Capcom|LP}} | |||
| damage = 3000 | |||
| stun = 0 | |||
| cancel = None | |||
| guard = Mid | |||
| parry = High | |||
| startup = 9 | |||
| active = 29 [13] 15 | |||
| recovery = 35 | |||
| total = - | |||
| advHit = KND | |||
| advBlock = +4 | |||
| invul = 9f (Full) | |||
| description = Decent super. It can be used as a safe reversal, an anti-air, and a combo ender (sometimes). Overall a good move to spend a bar on. | |||
}} | |||
{{AttackData-CvS2 | |||
| header = no | |||
| version = MP | |||
| subtitle = [4]646{{Icon-Capcom|MP}} | |||
| damage = 4300 | |||
| stun = 0 | |||
| cancel = None | |||
| guard = Mid | |||
| parry = High | |||
| startup = 9 | |||
| active = 47 [14] 15 [20] 15 | |||
| recovery = 33 | |||
| total = - | |||
| advHit = KND | |||
| advBlock = +6 | |||
| invul = 15f (Full) | |||
| description = A good super confirm for C-Groove. The optimal cancel is an HP Headbutt right after the last hit. It deals nice damage in that department. However, using it as an anti-air is a little less effective compared to Lvl.1 since it deals roughly the same damage, it is more wise to use Lvl.1 for metered anti-airs and Lvl.2 for combos. | |||
}} | |||
{{AttackData-CvS2 | |||
| header = no | |||
| version = HP | |||
| subtitle = [4]646{{Icon-Capcom|HP}} | |||
| damage = 5800 | |||
| stun = 0 | |||
| cancel = None | |||
| guard = Mid | |||
| parry = High | |||
| startup = 9 | |||
| active = 47 [14] 15 [23] 1 [1] 1 [1] 1 [1] 1 [1] 1 [1] 1 | |||
| recovery = 20 | |||
| total = - | |||
| advHit = KND | |||
| advBlock = +2 | |||
| invul = 23f (Full) | |||
| description = High damage super. Using this attack as an anti-air is now heavily discouraged instead of simply advised against, due to the fact that this super leaves Honda potentially unsafe as he performs an extra 100-Hand Slap at the end. On block it does pretty nice chip damage, and is safe on block. For what it's worth, it is your most reliable "big damage" move, whether it is a combo or a reversal. | |||
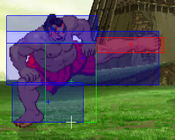
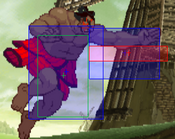
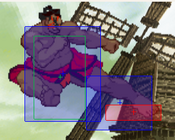
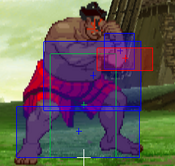
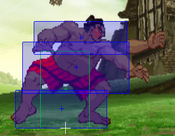
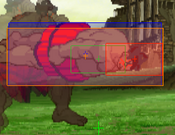
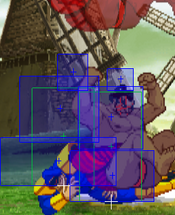
* As you can see by the hitbox, this move can destroy fireballs, even super fireballs of any level. However, this is only applied to the flying hitbox, and not the startup. Because of this, you will usually never see this move used as a fireball punish, but it something to note. | |||
}} | |||
}} | |||
===== <span class="invisible-header">Orochi Kudaki</span> ===== | |||
{{MoveData | |||
| name = Orochi Kudaki | |||
| input = 720+{{Icon-Capcom|P}} | |||
| subtitle = | |||
| image = CVS2_Honda_360P1.png | |||
| caption = Whiff | |||
| image2 = CVS2_Honda_720P.png | |||
| caption2 = Hit | |||
| linkname = Orochi Kudaki | |||
| data = | |||
{{AttackData-CvS2 | |||
| version = | |||
| subtitle = 720{{Icon-Capcom|P}} | |||
| damage = 6600 | |||
| stun = 0 | |||
| cancel = None | |||
| guard = - | |||
| parry = - | |||
| startup = 6 | |||
| active = 1 | |||
| recovery = 13 | |||
| total = - | |||
| advHit = KND | |||
| advBlock = - | |||
| invul = 19f (Full) | |||
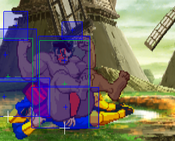
| description = Honda's most damaging attack, a 720 command grab. It has the same range as his LP Oichio, which unfortunately isn't the best. However, if the opponent was not already jumping before the freeze, they will get hit when in range. It is a great tool to use when you have a level 3 to use, especially in grooves like K. However, due to the difficult input and the lower range, it is more difficult to land compared to other 720 command grabs. | |||
}} | }} | ||
}} | }} | ||
Revision as of 17:04, 5 October 2023
Introduction
Story
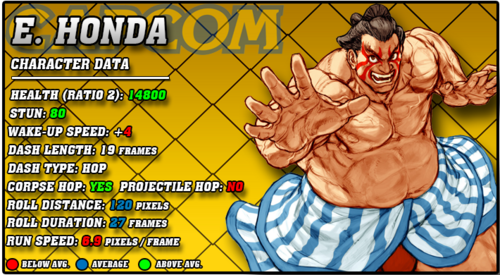
E. Honda, full name Edmond Honda, is a dedicated sumo wrestler from Japan. From a young age, Honda trained hard to become a sumo wrestler. He would eventually become incredibly well respected, reaching the high rank of Ozeki, the second highest rank. It's stated that he's skilled enough to be considered a Yokozuna, the highest rank possible, but his strange and outlandish techniques hold him back from qualifying. He began his journey in Street Fighter II: World Warrior, where he traveled the world spreading the art of sumo wrestling. He felt the rest of the world didn't appreciate it, and he would show them what it truly meant. Honda helps with destroying Shadaloo, mostly because of other sumo wrestlers getting biochemical drugs from Shadaloo's dealers. Together with the others, he assists in defeating M. Bison and destroying the Shadaloo base.
Gameplay
E. Honda is the epitome of a turtle character. He has the most immaculate defense, with a stellar anti-air and punish tool in his Headbutts, lots of great normals to stuff the opponent walking forward, and powerful roll cancels to reversal through gaps with. His high health lets him tank plenty of hits and keep going, and his command grab lets him punish opponents with a fast and damaging move. His Hand specials are annoying and powerful neutral tools that make Honda soar forward. They're very safe on block, hard to contest, and if roll cancelled, invincible. His Butt Slam specials are invincible rising specials that are great for punishing errant fireballs or movement, and can set up annoying ambiguous crossups on the opponents wakeup.
Honda doesn't come without weaknesses however. His slow movement makes it hard for him to approach vs characters that zone him out. While roll cancels aid in his normal weakness against projectiles, they aren't a guaranteed answer at all ranges. Being a charge character as well, approaching means sacrificing access to his Headbutts, which weakens his anti-air game significantly. Honda also lacks strong meterless damage, relying on supers to get meaningful damage overall. Honda is great if you want to sit back and annoy opponents into approaching you with his Hands, and then beat any approach option they pick.
Groove Selection
Best - C: C-Honda is a step above all the other Grooves. This gives him everything he needs, from rolls to solid damage output with meter. Honda almost always needs rolls, as they make many of his specials a lot scarier. His level 2 combo is also fairly damaging, allowing him to punish things more meaningfully. Airblock lets him approach from the air more safely, and Alpha Counters give him another powerful defensive tool to add to his arsenal. C-Honda is a great C-Groove pick, he fits the mechanics quite nicely.
Useful - A/N: Both of these Grooves are notably worse than C-Groove for Honda. A-Honda has a majority of the same things C-Honda does, but sacrifices airblock and level 2 supers for Custom Combos. While his CC isn't the worst, it's also not the best, and it is fairly difficult to perform. It does more than decent damage however, but you may find C-Grooves level 2 combos to be more frequent and give him better overall punishes rather than the rare high damage punish. N-Honda gets access to hop and run, which make him a bit more offensive, though he still has very little offensive pressure overall to work with. Namely, he can end a lot more combos in super, which is fairly worthwhile. He still gets access to rolls for RC specials as well.
Worst - S/K/P: These Grooves all have one thing in common: no rolls. Lack of roll means Honda can't do RC Hands, Headbutt, or Command Grab, all of which are powerful reversal and neutral options for him. S-Honda has very little access to meter, and while he doesn't mind charging, he would rather build meter normally through whiffing buttons or Hands pressure. Infinite level 1's doesn't aid him much either. K-Honda is a worse N-Honda. K-Groove is widely known to be offense oriented, and Honda just doesn't do well enough offensively to warrant that. A Raged punish into a level 3 super is scary, and K-Honda does get the benefit of a command grab super threat, but it isn't enough to justify the loss of rolls. P-Honda is essentially useless, as you have to give up charge to parry, which immediately makes you unable to punish whatever you parried in any meaningful way.
|
E. Honda is a powerful tank character, with some of the best defense in the game. His annoying roll cancelled Hands special forces the opponent to approach or eat a guard crush into a super. Honda's Headbutts can knock out almost any approach option they do in response to this. He just can't approach well at all in exchange. Honda is best in C-Groove. Difficulty: MediumTier: B+ |
|
| Pros | Cons |
|
|
Players to Watch
| Name | Country | Groove | Accounts | Notes |
|---|---|---|---|---|
| Min | USA | A-Groove | Twitter: @2Old2Furious Discord: mncmt#7939 |
One of the very few to give A-Honda a chance. Min primarily uses A-Honda's great defense and charge moves to build meter for his next character. Sample Match |
| Chari | Japan | C-Groove | Twitter: @TowelManX | Used a very weird team with Honda as his point character. Really strong defense. Sample Match |
| Tsuji | Japan | N-Groove | N/A | Known for his Joe, Tsuji plays N-Honda with aggression, using RC Hands to close in space safely and getting in their face. Sample Match |
Normal Moves
Standing Normals
5LP
5MP
5HP
5LK
5MK
5HK
Close Standing Normals
clMK
Crouching Normals
2LP
2MP
2HP
2LK
2MK
2HK
Jumping Normals
j.LP
j.MP
j.HP
j.LK
j.MK
j.HK
Command Normals
6HK
Throws
Tawara Nage
Saba Ori
Special Moves
Hundred Hand Slap
Sumo Headbutt
Butt Slam
Oichio Nage
Super Moves
Onimusou
Orochi Kudaki
| Damage | Stun | Cancel | Guard | Parry | Startup | Active | Recovery | Total | Adv Hit | Adv Block | Invul |
|---|---|---|---|---|---|---|---|---|---|---|---|
| 6600 | 0 | None | - | - | 6 | 1 | 13 | - | KND | - | 19f (Full) |
Honda's most damaging attack, a 720 command grab. It has the same range as his LP Oichio, which unfortunately isn't the best. However, if the opponent was not already jumping before the freeze, they will get hit when in range. It is a great tool to use when you have a level 3 to use, especially in grooves like K. However, due to the difficult input and the lower range, it is more difficult to land compared to other 720 command grabs. | |||||||||||
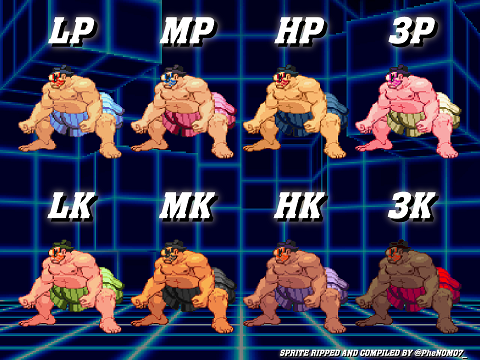
Colors
