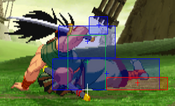
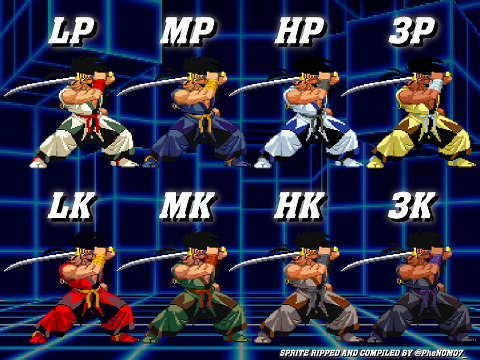
JtheSaltyy (talk | contribs) No edit summary |
JtheSaltyy (talk | contribs) No edit summary |
||
| Line 227: | Line 227: | ||
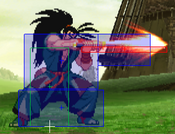
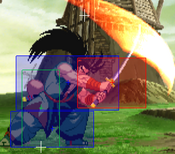
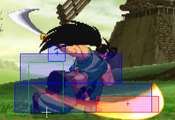
| input = cl.MP | | input = cl.MP | ||
| subtitle = | | subtitle = | ||
| image = | | image = CVS2_Haoh_clMP.png | ||
| caption = | | caption = | ||
| linkname = cl.MP | | linkname = cl.MP | ||
| Line 234: | Line 234: | ||
| version = Close {{Icon-Capcom|MP}} | | version = Close {{Icon-Capcom|MP}} | ||
| subtitle = | | subtitle = | ||
| damage = | | damage = 1100 | ||
| stun = | | stun = 11 | ||
| cancel = | | cancel = SU | ||
| guard = | | guard = Mid | ||
| parry = | | parry = High | ||
| startup = | | startup = 6 | ||
| active = | | active = 4 | ||
| recovery = | | recovery = 27 | ||
| total = | | total = 37 | ||
| advHit = - | | advHit = -1 | ||
| advBlock = - | | advBlock = -1 | ||
| invul = - | | invul = - | ||
| description = | | description = A decent confirm into your super from up close, but aside from that you won't be using this button much. | ||
}} | }} | ||
}} | }} | ||
| Line 255: | Line 255: | ||
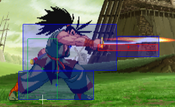
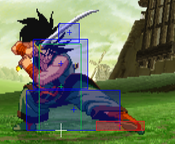
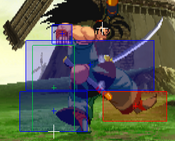
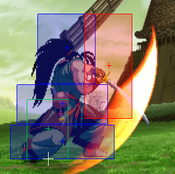
| input = cl.HP | | input = cl.HP | ||
| subtitle = Close Heavy Punch | | subtitle = Close Heavy Punch | ||
| image = | | image = CVS2_Haoh_clHP.png | ||
| caption = | | caption = | ||
| linkname = cl.HP | | linkname = cl.HP | ||
| Line 262: | Line 262: | ||
| version = Close {{Icon-Capcom|HP}} | | version = Close {{Icon-Capcom|HP}} | ||
| subtitle = | | subtitle = | ||
| damage = | | damage = 1800 | ||
| stun = | | stun = 18 | ||
| cancel = | | cancel = None | ||
| guard = | | guard = Mid | ||
| parry = | | parry = High | ||
| startup = | | startup = 11 | ||
| active = | | active = 4 | ||
| recovery = | | recovery = 42 | ||
| total = | | total = 57 | ||
| advHit = | | advHit = +2 | ||
| advBlock = -12 | |||
| advBlock = - | |||
| invul = - | | invul = - | ||
| description = | | description = A far less rewarding variant of Haoh's 5HP. Usually comes out when you attempt a punch throw and it doesn't connect. Due to this, it's imperative that you don't misinput this button when doing a throw, and if the uncertainty is there, go for the kick throw, as cl.HK is far safer and catches jumps. | ||
}} | }} | ||
}} | }} | ||
| Line 311: | Line 283: | ||
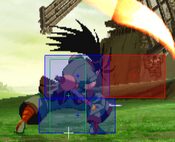
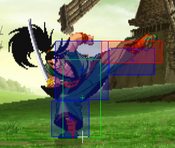
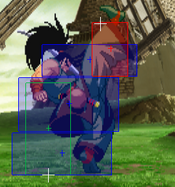
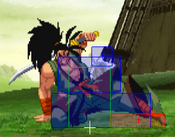
| input = cl.MK | | input = cl.MK | ||
| subtitle = Close Medium Kick | | subtitle = Close Medium Kick | ||
| image = | | image = CVS2_Haoh_clMK.png | ||
| caption = | | caption = | ||
| linkname = cl.MK | | linkname = cl.MK | ||
| Line 318: | Line 290: | ||
| version = Close {{Icon-Capcom|MK}} | | version = Close {{Icon-Capcom|MK}} | ||
| subtitle = | | subtitle = | ||
| damage = | | damage = 800 | ||
| stun = | | stun = 8 | ||
| cancel = | | cancel = SP/SU | ||
| guard = | | guard = Mid | ||
| parry = | | parry = High | ||
| startup = | | startup = 4 | ||
| active = | | active = 3 | ||
| recovery = | | recovery = 23 | ||
| total = | | total = 30 | ||
| advHit = - | | advHit = -6 | ||
| advBlock = - | | advBlock = -6 | ||
| invul = - | | invul = - | ||
| description = | | description = A decent confirm into DP, and the more reliable of the two DP confirms between this and cl.HK. | ||
}} | }} | ||
}} | }} | ||
| Line 339: | Line 311: | ||
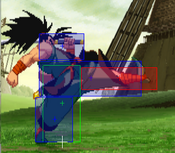
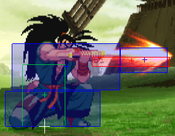
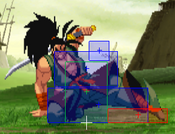
| input = cl.HK | | input = cl.HK | ||
| subtitle = Close Heavy Kick | | subtitle = Close Heavy Kick | ||
| image = | | image = CVS2_Haoh_clHK.png | ||
| caption = | | caption = | ||
| linkname = cl.MK | | linkname = cl.MK | ||
| Line 346: | Line 318: | ||
| version = Close {{Icon-Capcom|HK}} | | version = Close {{Icon-Capcom|HK}} | ||
| subtitle = | | subtitle = | ||
| damage = | | damage = 1300 | ||
| stun = | | stun = 13 | ||
| cancel = | | cancel = SP/SU | ||
| guard = | | guard = Mid | ||
| parry = | | parry = High | ||
| startup = | | startup = 6 | ||
| active = | | active = 7 | ||
| recovery = | | recovery = 21 | ||
| total = | | total = 34 | ||
| advHit = - | | advHit = -1 | ||
| advBlock = - | | advBlock = -1 | ||
| invul = - | | invul = - | ||
| description = | | description = The highest damage confirm into DP. Aside from that, it is one of Haoh's anti-airs (it is mostly used vs cross-ups) and it's a pretty active close button that can be used as a meaty, due to it only being -1 at worst. If used as a confirm into DP or super, make sure that it is at point blank range,e because the knockback caused from this normal usually leads to the first hit of the special/super to whiff. If you're unsure about the range, just use cl.MK instead. It's less damage, but more consistency. | ||
}} | }} | ||
}} | }} | ||
| Line 396: | Line 368: | ||
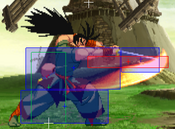
| input = 2MP / cr.MP | | input = 2MP / cr.MP | ||
| subtitle = Crouching Medium Punch | | subtitle = Crouching Medium Punch | ||
| image = | | image = CVS2_Haoh_2MP.png | ||
| caption = | | caption = | ||
| linkname = 2MP | | linkname = 2MP | ||
| Line 403: | Line 375: | ||
| version = {{Motion|d}}+{{Icon-Capcom|MP}} | | version = {{Motion|d}}+{{Icon-Capcom|MP}} | ||
| subtitle = | | subtitle = | ||
| damage = | | damage = 1000 | ||
| stun = | | stun = 10 | ||
| cancel = | | cancel = SU | ||
| guard = | | guard = Low | ||
| parry = | | parry = Low | ||
| startup = | | startup = 6 | ||
| active = | | active = 2 | ||
| recovery = | | recovery = 25 | ||
| total = | | total = 33 | ||
| advHit = - | | advHit = -1 | ||
| advBlock = - | | advBlock = -1 | ||
| invul = - | | invul = - | ||
| description = | | description = Generally worse compared to 5MP. It hits low, but still suffers from the same problems, and has even less range, so you can't poke the opponent from larger distances while maintaining a generally safe space. Due to it's slightly faster speed (6f compared to 5MP's 8f) it is used at times, but 5MP is usually used over this. | ||
}} | }} | ||
}} | }} | ||
| Line 424: | Line 396: | ||
| input = 2HP / cr.HP | | input = 2HP / cr.HP | ||
| subtitle = Crouching Heavy Punch | | subtitle = Crouching Heavy Punch | ||
| image = | | image = CVS2_Haoh_2HP.png | ||
| caption = | | caption = | ||
| linkname = 2HP | | linkname = 2HP | ||
| Line 431: | Line 403: | ||
| version = {{Motion|d}}+{{Icon-Capcom|HP}} | | version = {{Motion|d}}+{{Icon-Capcom|HP}} | ||
| subtitle = | | subtitle = | ||
| damage = | | damage = 1400,900 | ||
| stun = | | stun = 14,9 | ||
| cancel = | | cancel = SU, None | ||
| guard = | | guard = Mid | ||
| parry = | | parry = Low | ||
| startup = | | startup = 5 | ||
| active = | | active = 5 | ||
| recovery = | | recovery = 46 | ||
| total = | | total = 56 | ||
| advHit = - | | advHit = -12 | ||
| advBlock = - | | advBlock = -12 | ||
| invul = - | | invul = - | ||
| description = | | description = One of Haoh's few anti-airs. It hits directly above him, so up close jumps and crossups are weak to this move, however the main drawback is the ridiculously long 46f recovery. Due to it being a single hit, a parry punishes this very hard, JDs not so much but still leaves you disadvantaged. Unfortunately, it's one of your only anti-airs alongside st.MK and cl.HK. | ||
}} | }} | ||
}} | }} | ||
| Line 452: | Line 424: | ||
| input = 2LK / cr.LK | | input = 2LK / cr.LK | ||
| subtitle = Crouching Light Kick | | subtitle = Crouching Light Kick | ||
| image = | | image = CVS2_Haoh_2LK.png | ||
| caption = | | caption = | ||
| linkname = 2LK | | linkname = 2LK | ||
| Line 459: | Line 431: | ||
| version = {{Motion|d}}+{{Icon-Capcom|LK}} | | version = {{Motion|d}}+{{Icon-Capcom|LK}} | ||
| subtitle = | | subtitle = | ||
| damage = | | damage = 300 | ||
| stun = | | stun = 3 | ||
| cancel = | | cancel = RF/SP/SU | ||
| guard = | | guard = Low | ||
| parry = | | parry = Low | ||
| startup = | | startup = 3 | ||
| active = | | active = 4 | ||
| recovery = | | recovery = 8 | ||
| total = | | total = 15 | ||
| advHit = | | advHit = +5 | ||
| advBlock = | | advBlock = +5 | ||
| invul = - | | invul = - | ||
| description = | | description = Though the data is worse than cr.LP, the fact that this can be rapid fired makes it a good up close tool, and can be combined with cr.LP for good block strings. | ||
}} | }} | ||
}} | }} | ||
| Line 480: | Line 452: | ||
| input = 2MK / cr.MK | | input = 2MK / cr.MK | ||
| subtitle = Crouching Medium Kick | | subtitle = Crouching Medium Kick | ||
| image = | | image = CVS2_Haoh_2MK.png | ||
| caption = | | caption = | ||
| linkname = 2MK | | linkname = 2MK | ||
| Line 487: | Line 459: | ||
| version = {{Motion|d}}+{{Icon-Capcom|MK}} | | version = {{Motion|d}}+{{Icon-Capcom|MK}} | ||
| subtitle = | | subtitle = | ||
| damage = | | damage = 700 | ||
| stun = | | stun = 7 | ||
| cancel = | | cancel = SP/SU | ||
| guard = | | guard = Low | ||
| parry = | | parry = Low | ||
| startup = | | startup = 4 | ||
| active = | | active = 8 | ||
| recovery = | | recovery = 11 | ||
| total = | | total = 23 | ||
| advHit = | | advHit = +3 | ||
| advBlock = | | advBlock = +3 | ||
| invul = - | | invul = - | ||
| description = | | description = Great meaty button, and a decent melee poke, it fills nicely for the longer ranged buttons that might be a liability when the space begins to close in. | ||
}} | }} | ||
}} | }} | ||
| Line 508: | Line 480: | ||
| input = 2HK / cr.HK | | input = 2HK / cr.HK | ||
| subtitle = Crouching Heavy Kick | | subtitle = Crouching Heavy Kick | ||
| image = | | image = CVS2_Haoh_2HK.png | ||
| caption = | | caption = | ||
| linkname = 2HK | | linkname = 2HK | ||
| Line 515: | Line 487: | ||
| version = {{Motion|d}}+{{Icon-Capcom|HK}} | | version = {{Motion|d}}+{{Icon-Capcom|HK}} | ||
| subtitle = | | subtitle = | ||
| damage = | | damage = 1100 | ||
| stun = | | stun = 11 | ||
| cancel = | | cancel = None | ||
| guard = | | guard = Low | ||
| parry = | | parry = Low | ||
| startup = | | startup = 16 | ||
| active = | | active = 8 | ||
| recovery = | | recovery = 25 | ||
| total = | | total = 49 | ||
| advHit = | | advHit = HKD | ||
| advBlock = | | advBlock = -6 | ||
| invul = | | invul = - | ||
| description = | | description = A slow slide kick. It's not a button worth using that much. It can be spaced to be safe, but it is outranged by 5MP and is far more unsafe. The damage is not even that good to warrant the use. Overall, just don't use it. This sucks for Haoh since he struggles to find knockdowns in neutral but it is what it is. | ||
}} | }} | ||
}} | }} | ||
Revision as of 21:04, 4 October 2023
Introduction
Story
Haohmaru is a Ronin from Japan. He's a confident and highly skilled swordsman, and devoutly follows the path of the blade. It's assumed that he's always been like this, as one of the only things known about his early life is his challenge to the incredibly skilled Ronin Jubei Yagyu. Haohmaru lost of course, but Jubei sent him to train under Nicotine Caffeine, another powerful master. There, Haohmaru befriends Genjuro Kibagami, another orphan with a tragic and bloody past. Haohmaru and Genjuro train under Nicotine Caffeine for many years, and become very close friends and training partners. However, Genjuro is a power-hungry man, and Nicotine can see this. To put his students into one final test, Nicotine gives them a challenge to fight against a large group. The reward for whoever won was the legendary and powerful sword Fugudoku. Genjuro shows his true self, and brutally murders each of his opponents, calling them weak. Haohmaru simply fights until they all give up, ending no lives. Haohmaru wins clearly, and Genjuro leaves in a raging fuss, swearing to one day kill both Haohmaru and Nicotine.
Gameplay
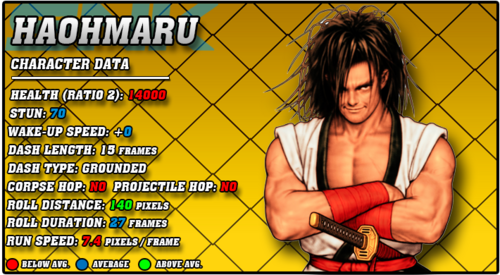
Haohmaru is a simple and straightforward character. In essence, he's just a guy with a sword. He has great normals for poking, solid pressure overall, and a useful fireball that knocks down at all ranges. He can even feint this fireball, a skill unique to him, which allows him to bait opponents jumping or mix how he does blockstrings. While he lacks mixups, he actually does fairly good when it comes to crushing guard bars thanks to his amazing LP normals and fireball feint mixups. While his 623P Kozetsuzan DP series aren't invincible, they still make solid anti-airs and combo enders.
What Haohmaru lacks is consistent defense and consistent damage output. His straightforward gameplan that revolves around simple neutral and fireball mindgames is about all he really has. His DP isn't invincible, he has decent but low reward buttons for mashing, and he has surprisingly low health overall, ranking in the same health tier as Dhalsim and Iori. His damage isn't the best either, as his only meterless combo ender is Kozetsuzan which likes to whiff at long range. He only has two supers as well, with one being a mediocre and level 3 only super, leaving him with a single way to viably spend meter. This too has a range issue, though not as bad, leaving Haohmaru struggling to get high damage from his pokes. If Haohmaru can garner respect from his opponent through solid neutral and smart usage of his fireball and feint, he can be very strong. He just has to get them to respect him first, and has no standout unbelievably strong tool to do so.
Groove Selection
Best - K/N/A: K-Groove is usually the most popular Groove for Haohmaru, and for good reason. JD lets him play a lot more offensively, and Rage ups the damage on his pokes by a huge margin. His level 3 Fujinzan super does notably good damage, which is a great buff for him in general. Hop and run let him play a lot more effective on the offensive as well. N-Haohmaru gets the more effective offense plus a roll on top of it, in exchange for no high damage peaks. Confirms into level 1 Fujinzan just aren't too damaging overall. Max Mode is an expensive but usually worthwhile buff however, as he gains a damage buff and a chance to do level 3 Fujinzan. A-Haohmaru is a popular beginner A-Groove pick, since his natural gameplan is very simple and rewarding in A-Groove. Alpha Counters give him a solid defensive tool, but the real juice is his simple and useful Custom Combo. Putting A-Haohmaru on the point of your A-Groove team isn't a bad idea if you don't want a difficult character on your point slot.
Useful - C: C-Haohmaru plays somewhat weaker than the other viable Grooves. While Haohmaru does have some fun level 2 cancels, they aren't very easy, and simply cancelling into his level 3 would do more damage overall making them less useful. Still, the ability to choose how much meter you spend is useful. C-Haohmaru can be seen as a more stable but less rewarding Groove overall.
Worst - P/S: P-Haohmaru lacks the scary meterless damage to make P-Groove good. A close range parry might get you a cl.HK > 623MP combo, but anything further out and your best punish tends to be just poking them. You'll rarely have a level 3, and even when you do, you likely won't get a chance to punish with it. S-Haohmaru is also fairly weak. Charging can put him in a bad spot, as good players will be looking for Haohmaru to whiff something big or throw a fireball, so leaving yourself open to a poke into super for big damage isn't worth the risk. His level 1 Fujinzan is underwhelming and only really useful for combos as well. S-Haohmaru gets very little overall.
|
Haohmaru is a swordsman with solid neutral buttons who uses an honest gameplan around his fireball mindgames to win. Relying on strong buttons and not much else, Haohmaru struggles in many other core areas of CvS2. Haohmaru is best in K-Groove, N-Groove, and A-Groove. Difficulty: MediumTier: C |
|
| Pros | Cons |
|
|
Players to Watch
| Name | Country | Groove | Accounts | Notes |
|---|---|---|---|---|
| Zenmai | Japan | K-Groove | N/A | Uses K-Haoh with a little more safety and likes to use smaller pokes before leading into large attacks. Sample Match |
| Yane | Japan | K-Groove | Twitter: @yanechudan | A strong pocket of Yane's, still uses him as good as anyone. Sample Match |
!!!THIS PAGE IS STILL A WIP. IF YOU NEED FRAME DATA NOW, REFER TO THE CVS2 BIBLE OR LOOK THROUGH EDIT HISTORY TO FIND THE LAST EDIT CONTAINING FRAME DATA IF THERE WAS ONE!!!
Normal Moves
Far Normals
5LP
5MP
5HP
5LK
5MK
5HK
clMP
clHP
clMK
clHK
Crouching Normals
2LP
2MP
2HP
2LK
2MK
2HK
Jumping Normals
j.LP
j.MP
j.HP
j.LK
j.MK
j.HK
Command Normals
X
| Version | Damage | Stun | Cancel | Guard | Parry | Startup | Active | Recovery | Total | Adv Hit | Adv Block | Invul |
|---|---|---|---|---|---|---|---|---|---|---|---|---|
| - | - | - | - | - | - | - | - | - | - | - | - | - |
Placeholder | ||||||||||||
Throws
X
X
Colors
