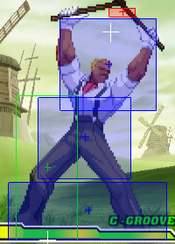
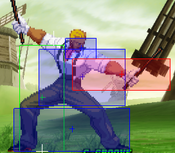
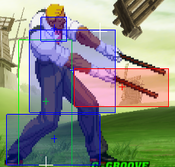
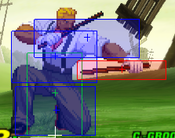
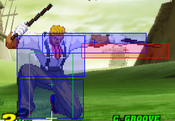
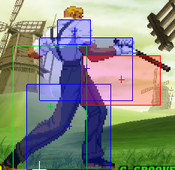
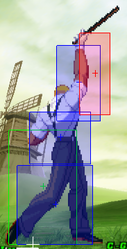
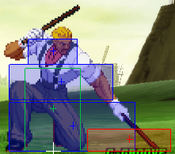
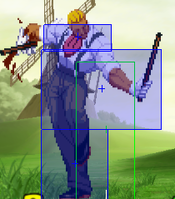
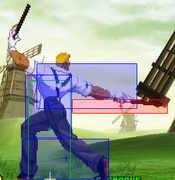
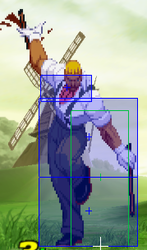
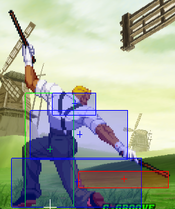
JtheSaltyy (talk | contribs) No edit summary |
JtheSaltyy (talk | contribs) No edit summary |
||
| Line 69: | Line 69: | ||
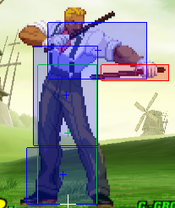
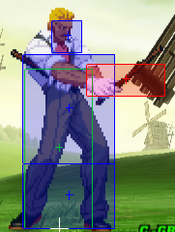
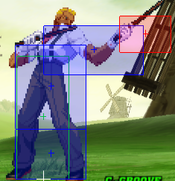
* '''5HP/2HK''': Eagle has some of the farthest reaching buttons in the game, but at the cost of being really punishable if not used correctly. If an opponent jumps or rolls past these normals, you will get punished hard. Using his 5HP and 2HK must be done with caution. Both buttons are also very vulnerable to parries and JDs | * '''5HP/2HK''': Eagle has some of the farthest reaching buttons in the game, but at the cost of being really punishable if not used correctly. If an opponent jumps or rolls past these normals, you will get punished hard. Using his 5HP and 2HK must be done with caution. Both buttons are also very vulnerable to parries and JDs | ||
}} | }} | ||
== Normal Moves == | == Normal Moves == | ||
| Line 196: | Line 194: | ||
| description = | | description = | ||
Eagle does a lower hitting swipe from his stick. | Eagle does a lower hitting swipe from his stick. | ||
* | * Can be used against P-Groove opponents on wake-up, but it really doesn't do anything exceptional by itself. | ||
}} | }} | ||
}} | }} | ||
| Line 226: | Line 224: | ||
| description = | | description = | ||
A quick midsection stab from the stick. | A quick midsection stab from the stick. | ||
* One of your main confirms into Union | * One of your main confirms into Union Jack Platinum and Oxford Red/Sticks (43216K). Good damage and a key element in Eagle's combo game. | ||
* Can be used in neutral to beat out certain anticipated pokes and counterpokes, due to it's relatively fast speed whiff punishing this normal is not really a situation you will find yourself in. | * Can be used in neutral to beat out certain anticipated pokes and counterpokes. It has great disjoint and priority, and due to it's relatively fast speed, whiff punishing this normal is not really a situation you will find yourself in. | ||
}} | }} | ||
}} | }} | ||
| Line 257: | Line 255: | ||
| description = | | description = | ||
A quick roundabout swing from the stick. | A quick roundabout swing from the stick. | ||
* | * Trades range for safety. 5HP has insane range but is very unsafe, and while 5HK is also unsafe, it's still a nice whiff punish and can cancel into super, while risking less. | ||
}} | }} | ||
}} | }} | ||
| Line 289: | Line 287: | ||
| description = | | description = | ||
Eagle does a downwards strike with the sticks. | Eagle does a downwards strike with the sticks. | ||
* Eagle's main anti-crossup | * One of Eagle's main anti-crossup tools and anti-airs. Due to the really small first hitbox (the one that will anti-air) it may be difficult to use it at first but timing will be key, and knowing when to use it when there are variable jump times between characters is key to not getting opened up by constant jump-ins and crossups. Usually one of Eagle's preferred options if RC Lariat is not available to him. | ||
* Vulnerable to jump-in parries and to a lesser extent JDs, due to Eagle's lack of a special cancel on this button he may just have to mash lights or hope to get a lariat out in time before the punish. | * Vulnerable to jump-in parries and to a lesser extent JDs, due to Eagle's lack of a special cancel on this button he may just have to mash lights or hope to get a lariat out in time before the punish. | ||
* Good and damaging confirm into Union Jack, but cannot confirm into specials. | * Good and damaging confirm into Union Jack, but cannot confirm into specials. | ||
| Line 321: | Line 319: | ||
| description = | | description = | ||
A quick double swing from the sticks. | A quick double swing from the sticks. | ||
* | * Great meaty normal. It is +2 but does have above average startup. | ||
* Good guard pressure filler. Since it is a heavy it does nice guard bar damage and isn't unsafe. | |||
}} | }} | ||
}} | }} | ||
| Line 449: | Line 448: | ||
| description = | | description = | ||
A quick low hitting swipe from the stick. | A quick low hitting swipe from the stick. | ||
* | * While 2LP is generally better in terms of pressuring and comboing, this is a good button to use for mixups, since 2LP is a mid. At 3 frames this is Eagle's fastest low, and can link into 2LP to combo off of said low. | ||
}} | }} | ||
}} | }} | ||
| Line 510: | Line 509: | ||
| invul = None | | invul = None | ||
| description = | | description = | ||
Eagle lunges forward and does a | Eagle lunges forward and does a two-handed sweep with the sticks. | ||
* Like 5HP, this is a button with many gives and takes. While the range is crazy and can check opponents from wonky distances, Eagle risks a lot by using this button in neutral. | * Like 5HP, this is a button with many gives and takes. While the range is crazy and can check opponents from wonky distances, Eagle risks a lot by using this button in neutral. | ||
* Rolls and jumps can beat this move hard if the opponent knows it's coming. Using sweep as a blockstring ender from 2MK isn't bad but it also leaves a big gap for a roll or a jump. If you know the opponent will try to psychic jump a 2HK, you can get a free anti-air in. | * Rolls and jumps can beat this move hard if the opponent knows it's coming. Using sweep as a blockstring ender from 2MK isn't bad but it also leaves a big gap for a roll or a jump. If you know the opponent will try to psychic jump a 2HK, you can get a free anti-air in. | ||
| Line 635: | Line 634: | ||
| description = | | description = | ||
A quick downward swipe from the stick. | A quick downward swipe from the stick. | ||
* | * Outclassed by j.MK. It has a smaller hitbox and does less damage. The large active frames is something but Eagle prefers to do these 3-frame air normals late anyways. Just use j.MK. | ||
}} | }} | ||
}} | }} | ||
| Line 696: | Line 695: | ||
| invul = None | | invul = None | ||
| description = | | description = | ||
Eagle does a downward | Eagle does a downward swing with the sticks. | ||
* Eagle's main jump-in by design. Does great damage and has tons of hitstun allowing easy jump-in confirms. While the 8-frame startup is the slowest of Eagle's air normals, it's still effective with good timing. Against big characters this button has cross-up potential but it very inconsistent in that department. | * Eagle's main jump-in by design. Does great damage and has tons of hitstun allowing easy jump-in confirms. While the 8-frame startup is the slowest of Eagle's air normals, it's still effective with good timing. Against big characters this button has cross-up potential but it very inconsistent in that department. | ||
* As a low-jump normal it can still be good, it deals more damage than j.MK but j.MK is much more difficult of a button to react to, so it just depends on the spacing. | * As a low-jump normal it can still be good, it deals more damage than j.MK but j.MK is much more difficult of a button to react to, so it just depends on the spacing. | ||
| Line 786: | Line 785: | ||
| image6 = CVS2_Eagle_236HPrelease.png | | image6 = CVS2_Eagle_236HPrelease.png | ||
| caption6 = HP version (release) | | caption6 = HP version (release) | ||
| linkname = | | linkname = 236P | ||
| data = | | data = | ||
{{AttackData-CvS2 | {{AttackData-CvS2 | ||
| Line 857: | Line 856: | ||
* Can absorb low projectiles like Reppukens, but due to it's slow speed it's not worth going for in neutral since Eagle has better anti-fireball tools. | * Can absorb low projectiles like Reppukens, but due to it's slow speed it's not worth going for in neutral since Eagle has better anti-fireball tools. | ||
* The autoguard box is at Eagle's legs, so most crouching moves will get caught but mid pokes and jump-ins still beat this counter. | * The autoguard box is at Eagle's legs, so most crouching moves will get caught but mid pokes and jump-ins still beat this counter. | ||
}} | |||
}} | |||
===== <span class="invisible-header">Saint Andrew's Green</span> ===== | |||
{{MoveData | |||
| name = Saint Andrew's Green | |||
| input = {{Motion|623}} + {{Icon-Capcom|P}} | |||
| subtitle = 623+P / DP+P | |||
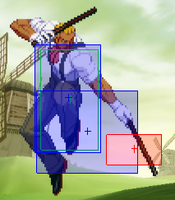
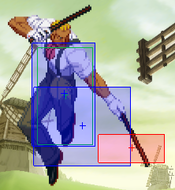
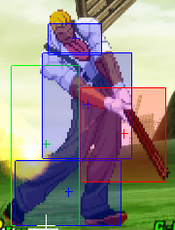
| image = CVS2_Eagle_623P1.png | |||
| caption = Stick Hitbox | |||
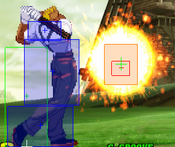
| image2 = CVS2_Eagle_623P2.png | |||
| caption2 = Fireball Hitbox | |||
| linkname = 623P | |||
| data = | |||
{{AttackData-CvS2 | |||
| version = LP | |||
| subtitle = {{Motion|623}} + {{Icon-Capcom|LP}} | |||
| damage = 1200 | |||
| stun = 12 | |||
| cancel = None | |||
| guard = Mid | |||
| parry = High | |||
| startup = 14 | |||
| active = 5 | |||
| recovery = 49 | |||
| total = 68 | |||
| advHit = HKND | |||
| advBlock = -30 | |||
| invul = None | |||
| description = | |||
Eagle does a golf swing with his sticks. | |||
* All versions have the same frame data and damage, but the main difference is where the reflected fireball goes. | |||
* Serves as a fireball reflector, as the hitbox will send the fireball right back to the opponent. Works on every special fireball in the game, however super fireballs will not work. | |||
* LP sends the fireball back horizontally. Travels really fast. | |||
* Knocks the opponent unusually high, however the large recovery means that Eagle cannot juggle off of it if he was in A-Groove and wanted to activate CC. | |||
* Very punishable on block, do not use any variant of this special as a raw hit. | |||
}} | |||
{{AttackData-CvS2 | |||
| header = no | |||
| version = MP | |||
| subtitle = {{Motion|623}} + {{Icon-Capcom|MP}} | |||
| damage = 1200 | |||
| stun = 12 | |||
| cancel = None | |||
| guard = Mid | |||
| parry = High | |||
| startup = 14 | |||
| active = 5 | |||
| recovery = 49 | |||
| total = 68 | |||
| advHit = HKND | |||
| advBlock = -30 | |||
| invul = None | |||
| description = | |||
Eagle does a golf swing with his sticks. | |||
* MP sends the fireball at around a 30 degree angle upwards. Not much use against grounded or aerial fireballs. | |||
}} | |||
{{AttackData-CvS2 | |||
| header = no | |||
| version = HP | |||
| subtitle = {{Motion|623}} + {{Icon-Capcom|HP}} | |||
| damage = 1200 | |||
| stun = 12 | |||
| cancel = None | |||
| guard = Mid | |||
| parry = High | |||
| startup = 14 | |||
| active = 5 | |||
| recovery = 49 | |||
| total = 68 | |||
| advHit = HKND | |||
| advBlock = -30 | |||
| invul = None | |||
| description = | |||
Eagle does a golf swing with his sticks. | |||
* Sends the fireball at around a 45 degree angle upwards. | |||
* Can work as a tool to counter Akuma's Zanku Hadoken and Geese's Shippuken, although the big startup means you are probably doing it anticipating the fireballs, and if they end up just doing a regular jump-in, you will get punished. | |||
}} | |||
}} | |||
===== <span class="invisible-header">Manchester Black</span> ===== | |||
{{MoveData | |||
| name = Manchester Black | |||
| input = {{Motion|214}} + {{Icon-Capcom|P}} | |||
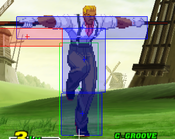
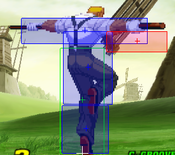
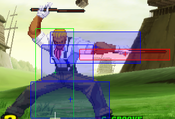
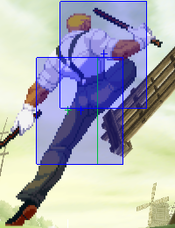
| subtitle = aka Lariat<br>214+P / QCB+P | |||
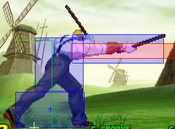
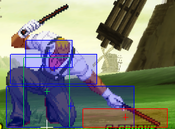
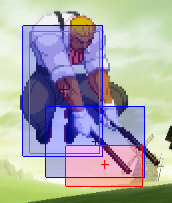
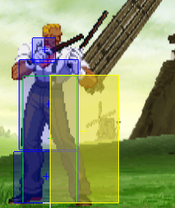
| image = CVS2_Eagle_214P1.png | |||
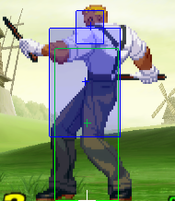
| caption = Startup (Lower Body Invul) | |||
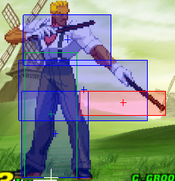
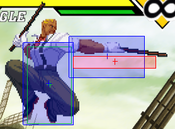
| image2 = CVS2_Eagle_214P2.png | |||
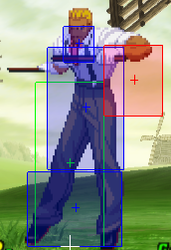
| caption2 = Startup Hitbox | |||
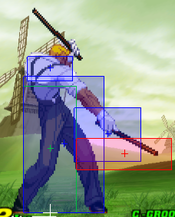
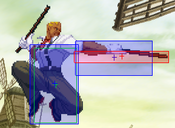
| image3 = CVS2_Eagle_214P3.png | |||
| caption3 = Back Hitbox | |||
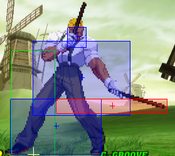
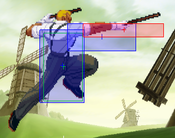
| image4 = CVS2_Eagle_214P4.png | |||
| caption4 = Front Hitbox | |||
| linkname = 214P | |||
| data = | |||
{{AttackData-CvS2 | |||
| version = LP | |||
| subtitle = {{Motion|214}} + {{Icon-Capcom|LP}} | |||
| damage = 1200 | |||
| stun = 12 | |||
| cancel = None | |||
| guard = Mid | |||
| parry = High | |||
| startup = 4 | |||
| active = 5 [6] 6 [6] 2 | |||
| recovery = 18 | |||
| total = 47 | |||
| advHit = HKND | |||
| advBlock = -28 | |||
| invul = 4 Frames (Lower Body) | |||
| description = | |||
Eagle holds his sticks out and spins rapidly. | |||
* Eagle's preferred anti-air of choice, however it's effectiveness lies in the roll cancel. If RC'd, lariat becomes a great consistent anti-air and anti-crossup. The multiple hits makes parrying and JDing the special difficult, so it's easier to beat out those empty jump options that Eagle's single hit anti-airs struggle against. | |||
* RC version can also blow through faster fireballs similar to Zangief, but Eagle has better options for anti-fireballs. | |||
* Besides anti-airing, this special can't do much. It can avoid lows, but it hits too high to punish those lows, so it can't do anything much outside of anti-airs. | |||
}} | |||
{{AttackData-CvS2 | |||
| header = no | |||
| version = MP | |||
| subtitle = {{Motion|214}} + {{Icon-Capcom|MP}} | |||
| damage = 1300 | |||
| stun = 13 | |||
| cancel = None | |||
| guard = Mid | |||
| parry = High | |||
| startup = 5 | |||
| active = 5 [6] 6 [6] 2 [1] 3 [5] 6 [6] 2 | |||
| recovery = 18 | |||
| total = 71 | |||
| advHit = HKND | |||
| advBlock = -52 | |||
| invul = 5 Frames (Lower Body) | |||
| description = | |||
Eagle holds his sticks out and spins rapidly. | |||
* Also a good anti-air if RC'd, however is punishable in the corner against safe-falling grooves. | |||
}} | |||
{{AttackData-CvS2 | |||
| header = no | |||
| version = HP | |||
| subtitle = {{Motion|214}} + {{Icon-Capcom|HP}} | |||
| damage = 1200 | |||
| stun = 12 | |||
| cancel = None | |||
| guard = Mid | |||
| parry = High | |||
| startup = 6 | |||
| active = 5 [6] 6 [6] 2 [1] 3 [5] 6 [6] 2 [1] 3 [6] 6 [5] 2 | |||
| recovery = 18 | |||
| total = 95 | |||
| advHit = HKND | |||
| advBlock = -76 | |||
| invul = 6 Frames (Lower Body) | |||
| description = | |||
Eagle holds his sticks out and spins rapidly. | |||
* If you want damage over safety, use this variant. It deals a nice 1200 damage as an RC anti-air, but due to the fact that it lasts for a long time, it's very punishable. Like MP, against safe falling grooves in the corner it can get punished on hit as well, so use this variant with caution. Sometimes it's better to just lose 200 damage to be completely safe with the anti-air. | |||
}} | |||
}} | |||
===== <span class="invisible-header">Oxford Red</span> ===== | |||
{{MoveData | |||
| name = Oxford Red | |||
| input = {{Motion|43216}} + {{Icon-Capcom|K}} | |||
| subtitle = aka Sticks/Rush<br>43216+K / HCF+K | |||
| image = CVS2_Eagle_43216K.png | |||
| caption = | |||
| linkname = 43216K | |||
| data = | |||
{{AttackData-CvS2 | |||
| version = LK | |||
| subtitle = {{Motion|43216}} + {{Icon-Capcom|LK}} | |||
| damage = 300+200x4 | |||
| stun = 11 | |||
| cancel = None | |||
| guard = Mid | |||
| parry = High | |||
| startup = 16 | |||
| active = 2 [18] 4 [4] 4 [4] 4 [4] 4 | |||
| recovery = 28 | |||
| total = 92 | |||
| advHit = -2 | |||
| advBlock = -2 | |||
| invul = None | |||
| description = | |||
Eagle dashes forward and performs a barrage of pokes from the sticks. | |||
* Not really useful compared to MK, but it is -2 on block so it is safe if something went wrong in Eagle's combos. | |||
* Distance is rather short and the damage is okay. | |||
}} | |||
{{AttackData-CvS2 | |||
| header = no | |||
| version = MK | |||
| subtitle = {{Motion|43216}} + {{Icon-Capcom|MK}} | |||
| damage = 300+200x6 | |||
| stun = 15 | |||
| cancel = None | |||
| guard = Mid | |||
| parry = High | |||
| startup = 17 | |||
| active = 2 [18] 4 [4] 4 [4] 4 [4] 4 [8] 4 [8] 4 | |||
| recovery = 28 | |||
| total = 117 | |||
| advHit = -2 | |||
| advBlock = -29 | |||
| invul = None | |||
| description = | |||
Eagle dashes forward and performs a barrage of pokes from the sticks. | |||
* Eagle's main BnB ender, usually cancelled into from 2MP or 5MK. | |||
* Terrible on block and filled with a big gap at the start. Do not end blockstrings with this special. | |||
* Good damage and meterbuild but the main weakness is the fact that it does not knockdown and is minus on hit. This means that Eagle's meterless combos don't give him oki or any additional pressure afterwards, but it's still the only real meterless combo option Eagle has. | |||
* Can be used as an RC to get past fireballs but HK is better at that. | |||
}} | |||
{{AttackData-CvS2 | |||
| header = no | |||
| version = HK | |||
| subtitle = {{Motion|43216}} + {{Icon-Capcom|HK}} | |||
| damage = 300+200x8 | |||
| stun = 19 | |||
| cancel = None | |||
| guard = Mid | |||
| parry = High | |||
| startup = 25 | |||
| active = 2 [18] 4 [4] 4 [4] 4 [4] 4 [4] 4 [4] 4 [4] 4 [4] 4 | |||
| recovery = 28 | |||
| total = 113 | |||
| advHit = -2 | |||
| advBlock = -41 | |||
| invul = None | |||
| description = | |||
Eagle dashes forward and performs a barrage of pokes from the sticks. | |||
* Mainly used as an RC to get past fireballs, making Eagle's anti-zoning game pretty good. It cannot land properly from fullscreen but at mid screen ranges it can work just fine. | |||
* Too slow to combo off of any cancellable normals, MK is the best option for that. | |||
* Not a good option to secure a chip kill because of the fact that there is a very big 18 frame gap between the initial strike and the followup sticks. This gap can get rolled past or get hit by an invincible reversal. | |||
}} | |||
}} | |||
===== <span class="invisible-header">Manchester Black</span> ===== | |||
{{MoveData | |||
| name = Manchester Black | |||
| input = {{Motion|214}} + {{Icon-Capcom|P}} | |||
| subtitle = aka Lariat<br>214+P / QCB+P | |||
| image = CVS2_Eagle_214P1.png | |||
| caption = Startup (Lower Body Invul) | |||
| image2 = CVS2_Eagle_214P2.png | |||
| caption2 = Startup Hitbox | |||
| image3 = CVS2_Eagle_214P3.png | |||
| caption3 = Back Hitbox | |||
| image4 = CVS2_Eagle_214P4.png | |||
| caption4 = Front Hitbox | |||
| linkname = 214P | |||
| data = | |||
{{AttackData-CvS2 | |||
| version = LP | |||
| subtitle = {{Motion|214}} + {{Icon-Capcom|LP}} | |||
| damage = 1200 | |||
| stun = 12 | |||
| cancel = None | |||
| guard = Mid | |||
| parry = High | |||
| startup = 4 | |||
| active = 5 [6] 6 [6] 2 | |||
| recovery = 18 | |||
| total = 47 | |||
| advHit = HKND | |||
| advBlock = -28 | |||
| invul = 4 Frames (Lower Body) | |||
| description = | |||
Eagle holds his sticks out and spins rapidly. | |||
* Eagle's preferred anti-air of choice, however it's effectiveness lies in the roll cancel. If RC'd, lariat becomes a great consistent anti-air and anti-crossup. The multiple hits makes parrying and JDing the special difficult, so it's easier to beat out those empty jump options that Eagle's single hit anti-airs struggle against. | |||
* RC version can also blow through faster fireballs similar to Zangief, but Eagle has better options for anti-fireballs. | |||
* Besides anti-airing, this special can't do much. It can avoid lows, but it hits too high to punish those lows, so it can't do anything much outside of anti-airs. | |||
}} | |||
{{AttackData-CvS2 | |||
| header = no | |||
| version = MP | |||
| subtitle = {{Motion|214}} + {{Icon-Capcom|MP}} | |||
| damage = 1300 | |||
| stun = 13 | |||
| cancel = None | |||
| guard = Mid | |||
| parry = High | |||
| startup = 5 | |||
| active = 5 [6] 6 [6] 2 [1] 3 [5] 6 [6] 2 | |||
| recovery = 18 | |||
| total = 71 | |||
| advHit = HKND | |||
| advBlock = -52 | |||
| invul = 5 Frames (Lower Body) | |||
| description = | |||
Eagle holds his sticks out and spins rapidly. | |||
* Also a good anti-air if RC'd, however is punishable in the corner against safe-falling grooves. | |||
}} | |||
{{AttackData-CvS2 | |||
| header = no | |||
| version = HP | |||
| subtitle = {{Motion|214}} + {{Icon-Capcom|HP}} | |||
| damage = 1200 | |||
| stun = 12 | |||
| cancel = None | |||
| guard = Mid | |||
| parry = High | |||
| startup = 6 | |||
| active = 5 [6] 6 [6] 2 [1] 3 [5] 6 [6] 2 [1] 3 [6] 6 [5] 2 | |||
| recovery = 18 | |||
| total = 95 | |||
| advHit = HKND | |||
| advBlock = -76 | |||
| invul = 6 Frames (Lower Body) | |||
| description = | |||
Eagle holds his sticks out and spins rapidly. | |||
* If you want damage over safety, use this variant. It deals a nice 1200 damage as an RC anti-air, but due to the fact that it lasts for a long time, it's very punishable. Like MP, against safe falling grooves in the corner it can get punished on hit as well, so use this variant with caution. Sometimes it's better to just lose 200 damage to be completely safe with the anti-air. | |||
}} | |||
}} | |||
===== <span class="invisible-header">Liverpool White</span> ===== | |||
{{MoveData | |||
| name = Liverpool White | |||
| input = {{Motion|214}} + {{Icon-Capcom|K}} | |||
| subtitle = 214+K / QCB+K | |||
| image = CVS2_Eagle_214K1.png | |||
| caption = Jump hitbox | |||
| image2 = CVS2_Eagle_214K2.png | |||
| caption2 = Land hitbox | |||
| linkname = 214K | |||
| data = | |||
{{AttackData-CvS2 | |||
| version = LK | |||
| subtitle = {{Motion|214}} + {{Icon-Capcom|LK}} | |||
| damage = 1300 | |||
| stun = 13 | |||
| cancel = None | |||
| guard = High | |||
| parry = High | |||
| startup = 36 | |||
| active = 4 | |||
| recovery = 34 | |||
| total = 74 | |||
| advHit = HKND | |||
| advBlock = -14 | |||
| invul = None | |||
| description = | |||
}} | |||
{{AttackData-CvS2 | |||
| header = no | |||
| version = MK | |||
| subtitle = {{Motion|214}} + {{Icon-Capcom|MK}} | |||
| damage = 1400 | |||
| stun = 14 | |||
| cancel = None | |||
| guard = High | |||
| parry = High | |||
| startup = 38 | |||
| active = 4 | |||
| recovery = 34 | |||
| total = 76 | |||
| advHit = HKND | |||
| advBlock = -14 | |||
| invul = None | |||
| description = | |||
}} | |||
{{AttackData-CvS2 | |||
| header = no | |||
| version = HK | |||
| subtitle = {{Motion|214}} + {{Icon-Capcom|HK}} | |||
| damage = 1500 | |||
| stun = 15 | |||
| cancel = None | |||
| guard = High | |||
| parry = High | |||
| startup = 41 | |||
| active = 4 | |||
| recovery = 34 | |||
| total = 79 | |||
| advHit = HKND | |||
| advBlock = -14 | |||
| invul = None | |||
| description = | |||
Eagle leaps forward and swings his stick downward. | |||
* Easily Eagle's worst special. It is an overhead, but it's really slow, really reactable, and also really minus. It knocks down but the fact that the opponent will most likely not get hit by this special makes it unusable in most situations. | |||
* Can hop over fireballs, but superjumping over them works just as well. Just don't use this special. | |||
}} | }} | ||
}} | }} | ||
| Line 879: | Line 1,251: | ||
| parry = High | | parry = High | ||
| startup = 8 | | startup = 8 | ||
| active = | | active = 3 [12] 5 [10] 1 [19] 2 [10] 4 [4] 4 [4] 4 [4] 12 [10] 20 | ||
| recovery = | | recovery = 28 | ||
| total = | | total = 164 | ||
| advHit = HKND | | advHit = HKND | ||
| advBlock = -22 | | advBlock = -22 | ||
| invul = 8 (Full) | | invul = 8 (Full) | ||
| description = | | description = | ||
Eagle does a short flurry of attacks ending in an Oxford Red. | |||
* | * Great combo ender, does really nice damage for little cost. In grooves like C with great meterbuild this combo ender is efficient and synergizes well with Eagle's generally good meterbuild in his combos. | ||
* Unsafe on block, not a good move to end strings with. The lack of a gap means it can chip pretty well but if it doesn't kill then expect a punish. | |||
* Unlike the other levels, this one usually never falls out at longer ranges, making it the most consistent of Eagle's super combo enders. | |||
}} | }} | ||
{{AttackData-CvS2 | {{AttackData-CvS2 | ||
| Line 899: | Line 1,273: | ||
| parry = High | | parry = High | ||
| startup = 8 | | startup = 8 | ||
| active = | | active = 3 [12] 5 [9] 2 [18] 1 [19] 2 [10] 4 [4] 4 [4] 4 [4] 4 [4] 4 [4] 12 [10] 20 | ||
| recovery = | | recovery = 28 | ||
| total = | | total = 199 | ||
| advHit = HKND | | advHit = HKND | ||
| advBlock = -22 | | advBlock = -22 | ||
| invul = 14 (Full) | | invul = 14 (Full) | ||
| description = | | description = | ||
Eagle does a flurry of attacks ending in an Oxford Red. | |||
* | * Eagle's main level 2. The most optimal confirm is into an MK Oxford Red on the last hit before Eagle knocks the opponent away. The cancel does not knockdown but does do great damage. | ||
* If you want the most damage from this super, then don't do a cancel at all and let it play out, although cancelling into MK Sticks gives good meter back and sacrificing the damage for the meter is a fair tradeoff. | |||
* The last hit still falls out at max range | |||
* If you want a close knockdown, some meter AND more damage you can cancel into Saint Andrews Green (the reflector move) after the last hit in the corner. It doesn't matter which version you cancel into, although the light version does give you the most time to do whatever on oki. | |||
}} | }} | ||
{{AttackData-CvS2 | {{AttackData-CvS2 | ||
| Line 919: | Line 1,296: | ||
| parry = High | | parry = High | ||
| startup = 8 | | startup = 8 | ||
| active = | | active = 3 [12] 5 [7] 1 [21] 2 [17] 1 [19] 2 [8] 3 [2] 3 [2] 3 [2] 3 [2] 3 [2] 3 [2] 3 [2] 3 [2] 3 [2] 12 [10] 20 | ||
| recovery = | | recovery = 28 | ||
| total = | | total = 221 | ||
| advHit = HKND | | advHit = HKND | ||
| advBlock = -22 | | advBlock = -22 | ||
| invul = 23 (Full) | | invul = 23 (Full) | ||
| description = | | description = | ||
Eagle does a long flurry of attacks ending in an Oxford Red. | |||
* | * A really damaging level 3. When confirmed into, this combo will hurt. It is still very unsafe on block, but it knocks the opponent far away, so don't expect max damage combos as punishes but they will most likely hit you with something afterwards. Still a really good option to spend all your resources on. | ||
* At max range the last hit of this move can whiff, causing Eagle to be left wide open to a free punish. This is mentioned in the other two levels but here it is very much emphasized since you are spending all of your meter on this combo ender. It's good to know when you are too far out to use this move or not. | |||
* Because of the lack of any noticeable or exploitable gaps, this move can be used to secure a round winning chip kill, as this move specifically has great chip damage. In grooves that have uncontrollable meter like K, this is definitely a good thing to spend that meter on, but for more meter conservative grooves it's best to not go all out on a level 3 to chip kill unless it wins the entire match. | |||
}} | |||
}} | |||
=== <span class="invisible-header">Manchester Gold</span> === | |||
{{MoveData | |||
| name = Manchester Gold | |||
| input = {{Motion|214}}{{Motion|214}}+{{Icon-Capcom|P}} | |||
| subtitle = aka Lariat Super<br>214214+P / QCB,QCB+P | |||
| image = CVS2_Eagle_214214P.png | |||
| caption = | |||
| linkname = Manchester Gold | |||
| data = | |||
{{AttackData-CvS2 | |||
| version = {{Motion|214}}{{Motion|214}}+{{Icon-Capcom|LP}} | |||
| subtitle = | |||
| damage = 2600 | |||
| stun = 0 | |||
| cancel = None | |||
| guard = Mid | |||
| parry = High | |||
| startup = 8 | |||
| active = 4 [4] 4 [4] 4 [4] 4 [4] 4 [4] 4 [2] 2 | |||
| recovery = 34 | |||
| total = 88 | |||
| advHit = HKND | |||
| advBlock = -12 | |||
| invul = 8 (Full) | |||
| description = | |||
Eagle holds his sticks out and spins rapidly. | |||
* Essentially RC Lariat but without the RC. It is a reversal and does have full startup invul, but as an anti air the damage is very weak, as it will most likely hit the opponent once since it doesn't juggle properly. | |||
* Far inferior to Union Jack in terms of usefulness and what to spend meter on. | |||
}} | |||
{{AttackData-CvS2 | |||
| header = no | |||
| version = {{Motion|214}}{{Motion|214}}+{{Icon-Capcom|MP}} | |||
| subtitle = | |||
| damage = 3900 | |||
| stun = 0 | |||
| cancel = SP/SU | |||
| guard = Mid | |||
| parry = High | |||
| startup = 8 | |||
| active = 4 [4] 4 [4] 4 [4] 4 [4] 4 [4] 4 [4] 4 [4] 4 [2] 2 | |||
| recovery = 34 | |||
| total = 106 | |||
| advHit = HKND | |||
| advBlock = -12 | |||
| invul = 14 (Full) | |||
| description = | |||
Eagle holds his sticks out and spins rapidly. | |||
* Still far inferior to Union Jack, can't be comboed into and doesn't do much damage as an anti-air. | |||
* Level 2 cancels can sometimes leave Eagle facing the wrong direction. Just don't use this level. | |||
}} | |||
{{AttackData-CvS2 | |||
| header = no | |||
| version = {{Motion|214}}{{Motion|214}}+{{Icon-Capcom|HP}} | |||
| subtitle = | |||
| damage = 5500 | |||
| stun = 0 | |||
| cancel = None | |||
| guard = Mid | |||
| parry = High | |||
| startup = 8 | |||
| active = 4 [4] 4 [4] 4 [4] 4 [4] 4 [4] 4 [4] 4 [4] 4 [4] 4 [4] 4 [4] 3 [8] 4 | |||
| recovery = 21 | |||
| total = 120 | |||
| advHit = HKND | |||
| advBlock = -1 | |||
| invul = 22 (Full) | |||
| description = | |||
Eagle holds his sticks out and spins rapidly, then ends with an uppercut. | |||
* Unlike the previous two levels, this one has a use. It's one of the strongest wake-up reversals in the game, as it is only -1 if it gets blocked. Combined with the fact that it pushes the opponent far away it means that Eagle is left completely safe. Sure, it is an expensive option, but you won't get killed for doing it. | |||
* Also has the unblockable startup frames property. If the opponent was not blocking during the startup freeze they will get hit, even if they hold back during the super freeze when they weren't before the freeze. This can catch the opponent off guard and since it is -1 it's not that bad of an bad idea to try but if you want to save meter then this is something you do very infrequently. | |||
}} | }} | ||
}} | }} | ||
Revision as of 03:45, 8 August 2022
Introduction
Story
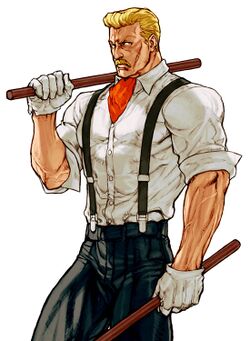
Eagle is a British Bojutsu fighter who works as a bouncer at a bar. He was one of the original enemies Ryu fought in Street Fighter 1, and was one of the most powerful of them. He was hired as a hitman to kill Sagat, thought he sadly failed. He returned home a living legend for his fighting however. Alpha 3 and its stories are questionably canon, but during the events of Alpha 3, Eagle started travelling to perfect his Bojutsu martial art style. He challenged anyone he thought was strong, most notably Guile, who Eagle beats. Guile shares that he's on a mission to stop Shadaloo and fight M. Bison, and also sharing that Sagat is there as well. Eagle follows, eager to fight his previous rival. Upon seeing Sagat, Eagle is disappointed that he's just become a lackey of Shadaloo. They fight, and Eagle wins. M. Bison is impressed, and fights Eagle himself, also being defeated by the Bojutsu master. They rescue Charlie and destroy the Psycho Driver, and Eagle thanks Guile for one last romp on the battlefield.
Gameplay
Eagle is mostly a poking character with solid anti-airs, simple combos, good roll cancels, and effective supers. He can be quite simple to play, relying mostly on using his sticks to beat out opponents buttons on the ground and comboing into his Oxford Red stick rush special. Hitconfirming into his supers is fairly easy as well, and he has a versatile combo ending super in Union Jack Platinum. While his best anti-air special requires a roll cancel to be effective, roll cancelling does make it VERY effective. Overall, Eagle is just a simple poking and hitconfirming character.
He does have his weaknesses however. His main meterless combo ender, while it does good damage, doesn't give any knockdown. His anti-air special also requires roll cancelling to make it effective, and RC Sticks is a powerful fireball punish, limiting his use in non-roll Grooves heavily. He lacks any sort of zoning tools outside of his normals, and his mixups aren't the best without run/hop Grooves. Not having a reliable reversal (his lariet trades or loses quite a bit) also hurts, since it means he has to commit to something like a super to wake up with something invincible. If you want a poking character with good and fun hitconfirms, Eagle is your guy.
Groove Selection
Best - C/A/K: C-Eagle is a powerful defensive character that can hitconfirm into a level 2 Union Jack Platinum for solid damage. While his Alpha Counter isn't the greatest, it's a useful defensive tool, and one that Eagle heavily appreciates. He can roll cancel Lariats for a more reliable anti-air, and his mobility with dash isn't too bad, as it can hop over lows and low fireballs. He also has great oki after a punch throw as he can dash over the opponent and meaty for a left-right mix and use instant overhead j.MK (one of the best IOHs in the game) for a surprisingly effective high low mix, essentially giving him a 4-way mix, albeit slightly reactable but still really strong. Overall, C-Eagle is a reliable and footsies-based Eagle playstyle, great for fundamentally sound players. A-Eagle is similar to C-Eagle, but sacrifices any threat of a hitconfirmed super in exchange for Custom Combos. Eagle's CC is fairly damaging and overall good, though usually not as scary as a level 2 or 3 Union Jack Platinum. What Eagle loses in damage he gains as versatility. Eagle is able to combo into CC off light confirms or 2MK or build meter post CC. Raw custom does big damage and he gains a true anti-air custom, comboing into CC off lights does roughly the same as a level 2 C-cancel. On the SNK side, K-Eagle is the antithesis to the footsies based Eagle in C and A. He makes an immediate major sacrifice by losing RC Lariat and RC Sticks, but gains a few big things in return. Run and hop make his rushdown a lot scarier, and he can be surprisingly good at it too. Rage lets him hitconfirm into a level 3 Union Jack Platinum for great damage, and since he has great range, JD is a reliable defensive tool for him. K-Eagle is a more rushdown focused Eagle with a decent comeback factor. Although his mixup game isn't nearly as strong as in dash grooves, he still has access to things like IOH j.MK and a short hop to create a crossover hop.
Useful - N/P: N-Eagle is a bit of a mix between C-Eagle and K-Eagle. You get the mobility of K and the reliable supers and rolls of C, but you sacrifice a lot of potential damage (lvl.2 Union Jack and multiple lvl.3 Union Jacks), making him a bit less scary overall. N-Eagle is good for a more simple style. P-Eagle gets parries, which are alright for him as he has decent ranged punishes and damage. While it is rare, a parry from P-Eagle into 5MK > Level 3 Union Jack Platinum does massive damage and is very scary.
Worst - S: S-Eagle doesn't have much going for him. While Eagle doesn't exactly need meter, he really likes having it, so without low health being forced to charge is very demanding. At low health, you can confirm into level 1 Union Jack Platinum over and over again. This gives you more consistent knockdowns and damage, but the damage isn't as high as other Grooves are capable of. You lose out on rolls for RC Lariat/Sticks in exchange for a dodge, which doesn't help much. Run and hop are strong, but are also present in K-Groove and N-Groove which are better for Eagle overall.
|
Eagle is a poking and punishing character with lots of good normals and hitconfirms. He doesn't get consistent knockdowns without meter, and his best anti-air requires you to roll cancel it, but otherwise he's a very solid neutral-oriented character. Eagle is best in C-Groove, A-Groove, and K-Groove. |
|
| Pros | Cons |
|
|
Normal Moves
Far Normals
5LP
5MP
5HP
5LK
5MK
5HK
clHP
clHK
Crouching Normals
2LP
2MP
2HP
2LK
2MK
2HK
Jumping Normals
j.LP
j.MP
j.HP
j.LK
j.MK
j.HK
Throws
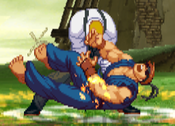
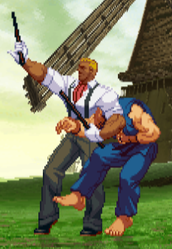
Pile of Fools
Fool Percussion
Special Moves
Canterbury Blue
Saint Andrew's Green
Manchester Black
Oxford Red
Manchester Black
Liverpool White
Super Moves
Union Jack Platinum
Manchester Gold
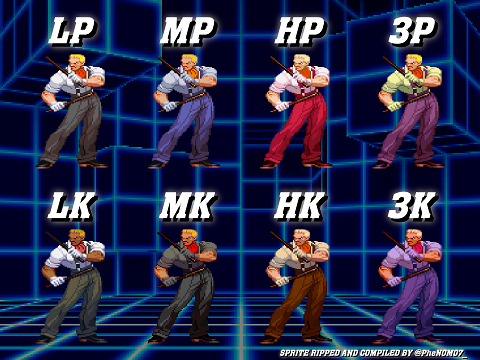
Colors
