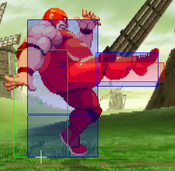
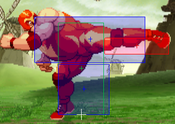
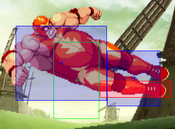
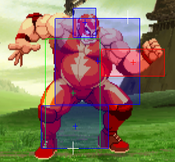
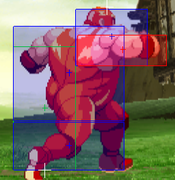
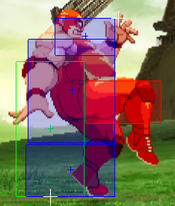
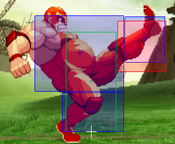
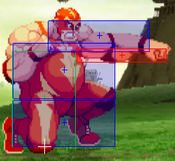
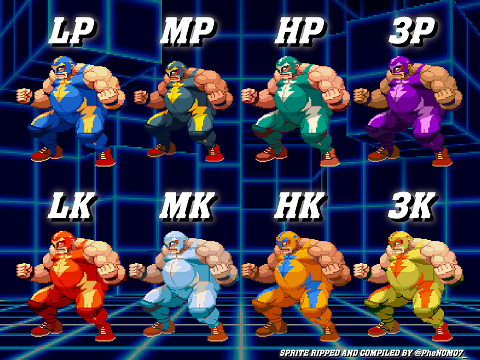
Callie Rose (talk | contribs) No edit summary |
JtheSaltyy (talk | contribs) No edit summary |
||
| Line 81: | Line 81: | ||
| input = 5LP / Far LP | | input = 5LP / Far LP | ||
| subtitle = Far Light Punch | | subtitle = Far Light Punch | ||
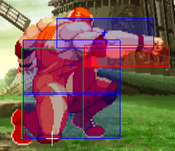
| image = | | image = CVS2_Raiden_5LP.png | ||
| caption = | | caption = | ||
| linkname = 5LP | | linkname = 5LP | ||
| Line 88: | Line 88: | ||
| version = Far {{Icon-Capcom|LP}} | | version = Far {{Icon-Capcom|LP}} | ||
| subtitle = | | subtitle = | ||
| damage = | | damage = 500 | ||
| stun = | | stun = 5 | ||
| cancel = | | cancel = SP/SU | ||
| guard = | | guard = Mid | ||
| parry = | | parry = High | ||
| startup = | | startup = 4 | ||
| active = | | active = 4 | ||
| recovery = | | recovery = 10 | ||
| total = | | total = 18 | ||
| advHit = | | advHit = +1 | ||
| advBlock = | | advBlock = +1 | ||
| invul = | | invul = None | ||
| description = | | description = | ||
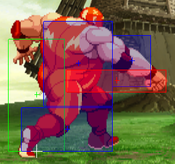
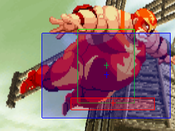
A quick upward chop. | |||
* Slow, but can work as a very short but useable anti-air. | |||
}} | }} | ||
}} | }} | ||
| Line 109: | Line 111: | ||
| input = 5MP / Far MP | | input = 5MP / Far MP | ||
| subtitle = Far Medium Punch | | subtitle = Far Medium Punch | ||
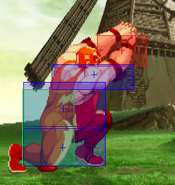
| image = | | image = CVS2_Raiden_5MP.png | ||
| caption = | | caption = | ||
| linkname = 5MP | | linkname = 5MP | ||
| Line 116: | Line 118: | ||
| version = Far {{Icon-Capcom|MP}} | | version = Far {{Icon-Capcom|MP}} | ||
| subtitle = | | subtitle = | ||
| damage = | | damage = 1100 | ||
| stun = | | stun = 11 | ||
| cancel = | | cancel = None | ||
| guard = | | guard = Mid | ||
| parry = | | parry = High | ||
| startup = | | startup = 9 | ||
| active = | | active = 10 | ||
| recovery = | | recovery = 13 | ||
| total = | | total = 32 | ||
| advHit = - | | advHit = -1 | ||
| advBlock = - | | advBlock = -1 | ||
| invul = | | invul = None | ||
| description = | | description = | ||
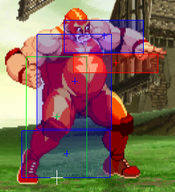
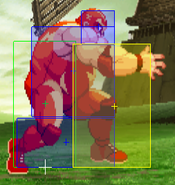
A big palm strike. | |||
* Most times you may get this normal because you're trying to get close 5MP, but it still has uses. | |||
* Works as an anti-air, but the vertical range on the hitbox is short, so you can't press it too early. | |||
* Useable poke. | |||
}} | }} | ||
}} | }} | ||
| Line 137: | Line 143: | ||
| input = 5HP / Far HP | | input = 5HP / Far HP | ||
| subtitle = Far Heavy Punch | | subtitle = Far Heavy Punch | ||
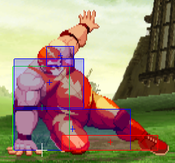
| image = | | image = CVS2_Raiden_5HP.png | ||
| caption = | | caption = | ||
| linkname = 5HP | | linkname = 5HP | ||
| Line 144: | Line 150: | ||
| version = Far {{Icon-Capcom|HP}} | | version = Far {{Icon-Capcom|HP}} | ||
| subtitle = | | subtitle = | ||
| damage = | | damage = 1600 | ||
| stun = | | stun = 16 | ||
| cancel = | | cancel = None | ||
| guard = | | guard = Mid | ||
| parry = | | parry = High | ||
| startup = | | startup = 10 | ||
| active = | | active = 6 | ||
| recovery = | | recovery = 15 | ||
| total = | | total = 31 | ||
| advHit = | | advHit = +5 | ||
| advBlock = | | advBlock = +5 | ||
| invul = | | invul = None | ||
| description = | | description = | ||
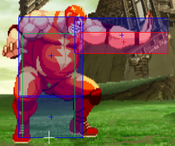
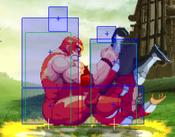
A big gut punch. | |||
* No cancels, so as a whiff punish you only get the 1600 damage from the punch. | |||
* Really slow as a poke, but if landed you are +5. | |||
}} | }} | ||
}} | }} | ||
| Line 165: | Line 174: | ||
| input = 5LK / Far LK | | input = 5LK / Far LK | ||
| subtitle = Far Light Kick | | subtitle = Far Light Kick | ||
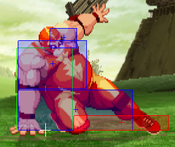
| image = | | image = CVS2_Raiden_5LK.png | ||
| caption = | | caption = | ||
| linkname = 5LK | | linkname = 5LK | ||
| Line 172: | Line 181: | ||
| version = Far {{Icon-Capcom|LK}} | | version = Far {{Icon-Capcom|LK}} | ||
| subtitle = | | subtitle = | ||
| damage = | | damage = 500 | ||
| stun = | | stun = 5 | ||
| cancel = | | cancel = SU | ||
| guard = | | guard = Mid | ||
| parry = | | parry = High | ||
| startup = | | startup = 6 | ||
| active = | | active = 6 | ||
| recovery = | | recovery = 7 | ||
| total = | | total = 19 | ||
| advHit = | | advHit = +4 | ||
| advBlock = | | advBlock = +4 | ||
| invul = | | invul = None | ||
| description = | | description = | ||
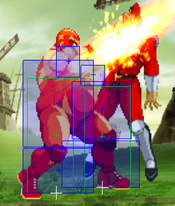
A quick midsection kick. | |||
* Really good button to pressure with while threating a strike/throw mixup. | |||
* Great poke, decent range and pretty fast, you can throw it out and risk nothing. | |||
* Has good active frames for a light normal. | |||
}} | }} | ||
}} | }} | ||
| Line 193: | Line 206: | ||
| input = 5MK / Far MK | | input = 5MK / Far MK | ||
| subtitle = Far Medium Kick | | subtitle = Far Medium Kick | ||
| image = | | image = CVS2_Raiden_5MK.png | ||
| caption = | | caption = | ||
| linkname = 5MK | | linkname = 5MK | ||
| Line 200: | Line 213: | ||
| version = Far {{Icon-Capcom|MK}} | | version = Far {{Icon-Capcom|MK}} | ||
| subtitle = | | subtitle = | ||
| damage = | | damage = 1000 | ||
| stun = | | stun = 10 | ||
| cancel = | | cancel = None | ||
| guard = | | guard = Mid | ||
| parry = | | parry = High | ||
| startup = | | startup = 9 | ||
| active = | | active = 10 | ||
| recovery = | | recovery = 14 | ||
| total = | | total = 33 | ||
| advHit = - | | advHit = -2 | ||
| advBlock = - | | advBlock = -2 | ||
| invul = | | invul = None | ||
| description = | | description = | ||
A long ranged toe kick. | |||
* Has good range, but as a poke it's slow and not rewarding at all. | |||
* Not that useful. | |||
}} | }} | ||
}} | }} | ||
| Line 221: | Line 237: | ||
| input = 5HK / Far HK | | input = 5HK / Far HK | ||
| subtitle = Far Heavy Kick | | subtitle = Far Heavy Kick | ||
| image = | | image = CVS2_Raiden_5HK.png | ||
| caption = | | caption = | ||
| linkname = 5HK | | linkname = 5HK | ||
| Line 228: | Line 244: | ||
| version = Far {{Icon-Capcom|HK}} | | version = Far {{Icon-Capcom|HK}} | ||
| subtitle = | | subtitle = | ||
| damage = | | damage = 1400 | ||
| stun = | | stun = 14 | ||
| cancel = | | cancel = None | ||
| guard = | | guard = Mid | ||
| parry = | | parry = High | ||
| startup = | | startup = 14 | ||
| active = | | active = 8 | ||
| recovery = | | recovery = 18 | ||
| total = | | total = 40 | ||
| advHit = - | | advHit = -9 | ||
| advBlock = | | advBlock = 0 | ||
| invul = | | invul = None | ||
| description = | | description = | ||
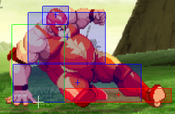
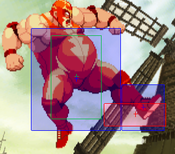
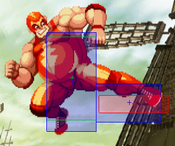
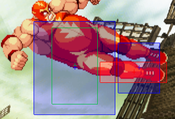
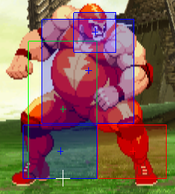
Raiden does a standing dropkick. | |||
* A very unique normal. While it can go over lows that is pretty much it's only good use. | |||
* The reason why this normal is -9 on hit and 0 on block is because the movehit data for air normals is used for this button. On block it causes a lot of pushback and is 0. This was most likely customized data specifically for this button. On hit, it causes very little pushback and is -9, which was the result of air normal hitstun and pushback being used here. In terms of practicality, this button kinda sucks, it's punishable on hit, but it's still unique and unlike any other normal in the game. | |||
}} | }} | ||
}} | }} | ||
=== Close Standing Normals === | === Close Standing Normals === | ||
=== <span class="invisible-header">clMP</span> === | === <span class="invisible-header">clMP</span> === | ||
{{MoveData | {{MoveData | ||
| Line 278: | Line 269: | ||
| input = cl.MP | | input = cl.MP | ||
| subtitle = | | subtitle = | ||
| image = | | image = CVS2_Raiden_cl5MP.png | ||
| caption = | | caption = | ||
| linkname = cl.MP | | linkname = cl.MP | ||
| Line 285: | Line 276: | ||
| version = Close {{Icon-Capcom|MP}} | | version = Close {{Icon-Capcom|MP}} | ||
| subtitle = | | subtitle = | ||
| damage = | | damage = 1100 | ||
| stun = | | stun = 11 | ||
| cancel = | | cancel = SP/SU | ||
| guard = | | guard = Mid | ||
| parry = | | parry = High | ||
| startup = | | startup = 7 | ||
| active = | | active = 7 | ||
| recovery = | | recovery = 11 | ||
| total = | | total = 25 | ||
| advHit = | | advHit = +4 | ||
| advBlock = | | advBlock = +4 | ||
| invul = | | invul = None | ||
| description = | | description = | ||
A downward elbow strike. | |||
* Your go-to confirm into HP Combination Body Blow and Crazy Train. | |||
* Decent meaty and up close button. | |||
* Has a very short proximity range, your best confirm into it is from a crossup j.2HP but you can get it from a typical jump-in but it has to be deep. | |||
}} | }} | ||
}} | }} | ||
| Line 306: | Line 301: | ||
| input = cl.HP | | input = cl.HP | ||
| subtitle = Close Heavy Punch | | subtitle = Close Heavy Punch | ||
| image = | | image = CVS2_Raiden_cl5HP.png | ||
| caption = | | caption = | ||
| linkname = cl.HP | | linkname = cl.HP | ||
| Line 313: | Line 308: | ||
| version = Close {{Icon-Capcom|HP}} | | version = Close {{Icon-Capcom|HP}} | ||
| subtitle = | | subtitle = | ||
| damage = | | damage = 1600 | ||
| stun = | | stun = 16 | ||
| cancel = | | cancel = SU | ||
| guard = | | guard = Mid | ||
| parry = | | parry = High | ||
| startup = | | startup = 6 | ||
| active = | | active = 8 | ||
| recovery = | | recovery = 26 | ||
| total = | | total = 40 | ||
| advHit = - | | advHit = -8 | ||
| advBlock = - | | advBlock = -8 | ||
| invul = | | invul = None | ||
| description = | | description = | ||
A slow, powerful clothesline. | |||
* Nothing really that special with this button, it's unsafe but does have a cancel to super. | |||
* Most likely seen when Raiden fails to get his punch throw. | |||
}} | }} | ||
}} | }} | ||
| Line 334: | Line 332: | ||
| input = cl.LK | | input = cl.LK | ||
| subtitle = Close Light Kick | | subtitle = Close Light Kick | ||
| image = | | image = CVS2_Raiden_cl5LK.png | ||
| caption = | | caption = | ||
| linkname = cl.LK | | linkname = cl.LK | ||
| Line 341: | Line 339: | ||
| version = Close {{Icon-Capcom|LK}} | | version = Close {{Icon-Capcom|LK}} | ||
| subtitle = | | subtitle = | ||
| damage = | | damage = 600 | ||
| stun = | | stun = 6 | ||
| cancel = | | cancel = SP/SU | ||
| guard = | | guard = Mid | ||
| parry = | | parry = High | ||
| startup = | | startup = 3 | ||
| active = | | active = 6 | ||
| recovery = | | recovery = 7 | ||
| total = | | total = 16 | ||
| advHit = | | advHit = +4 | ||
| advBlock = | | advBlock = +4 | ||
| invul = | | invul = None | ||
| description = | | description = | ||
A quick midsection knee. | |||
* Pretty much the same as 5LK, you can pressure with this button and continuously threaten a punch throw. | |||
* Has a really, really short activation range but the data is pretty much unchanged from 5LK outside of 100 extra damage so it doesn't change too much. | |||
* Has a special cancel unlike 5LK, but the only special it combos into is LP Combination Body Blow, but since the activation range is near nonexistent you cannot combo into it from chains like 2LP. | |||
}} | }} | ||
}} | }} | ||
| Line 362: | Line 364: | ||
| input = cl.MK | | input = cl.MK | ||
| subtitle = Close Medium Kick | | subtitle = Close Medium Kick | ||
| image = | | image = CVS2_Raiden_cl5MK.png | ||
| caption = | | caption = | ||
| linkname = cl.MK | | linkname = cl.MK | ||
| Line 369: | Line 371: | ||
| version = Close {{Icon-Capcom|MK}} | | version = Close {{Icon-Capcom|MK}} | ||
| subtitle = | | subtitle = | ||
| damage = | | damage = 1100 | ||
| stun = | | stun = 11 | ||
| cancel = | | cancel = SU | ||
| guard = | | guard = Mid | ||
| parry = | | parry = High | ||
| startup = | | startup = 6 | ||
| active = | | active = 8 | ||
| recovery = | | recovery = 14 | ||
| total = | | total = 28 | ||
| advHit = | | advHit = 0 | ||
| advBlock = | | advBlock = 0 | ||
| invul = | | invul = None | ||
| description = | | description = | ||
A goofy looking upkick. | |||
* Can be an up close anti-air for short hops, but much like Raiden's other close normals the activation range is really short. | |||
* Can't be used for anything else, the super cancel and relatively weak damage makes it not worth using in most situations. | |||
}} | }} | ||
}} | }} | ||
| Line 419: | Line 396: | ||
| input = 2LP / cr.LP | | input = 2LP / cr.LP | ||
| subtitle = Crouching Light Punch | | subtitle = Crouching Light Punch | ||
| image = | | image = CVS2_Raiden_2LP.png | ||
| caption = | | caption = | ||
| linkname = 2LP | | linkname = 2LP | ||
| Line 426: | Line 403: | ||
| version = {{Motion|d}}+{{Icon-Capcom|LP}} | | version = {{Motion|d}}+{{Icon-Capcom|LP}} | ||
| subtitle = | | subtitle = | ||
| damage = | | damage = 300 | ||
| stun = | | stun = 3 | ||
| cancel = | | cancel = SP/SU | ||
| guard = | | guard = Mid | ||
| parry = | | parry = Low | ||
| startup = | | startup = 4 | ||
| active = | | active = 4 | ||
| recovery = | | recovery = 6 | ||
| total = | | total = 14 | ||
| advHit = | | advHit = +5 | ||
| advBlock = | | advBlock = +5 | ||
| invul = | | invul = None | ||
| description = | | description = | ||
A fast crouching jab. | |||
* A good jab as they come, it doesn't hit low but it's really fast and plus. | |||
* Great button for ticking/pressuring, and is Raiden's go-to jab starter. | |||
}} | }} | ||
}} | }} | ||
| Line 447: | Line 427: | ||
| input = 2MP / cr.MP | | input = 2MP / cr.MP | ||
| subtitle = Crouching Medium Punch | | subtitle = Crouching Medium Punch | ||
| image = | | image = CVS2_Raiden_2MP.png | ||
| caption = | | caption = | ||
| linkname = 2MP | | linkname = 2MP | ||
| Line 454: | Line 434: | ||
| version = {{Motion|d}}+{{Icon-Capcom|MP}} | | version = {{Motion|d}}+{{Icon-Capcom|MP}} | ||
| subtitle = | | subtitle = | ||
| damage = | | damage = 1000 | ||
| stun = | | stun = 10 | ||
| cancel = | | cancel = None | ||
| guard = | | guard = Mid | ||
| parry = | | parry = Low | ||
| startup = | | startup = 8 | ||
| active = | | active = 4 | ||
| recovery = | | recovery = 19 | ||
| total = | | total = 31 | ||
| advHit = - | | advHit = -1 | ||
| advBlock = - | | advBlock = -1 | ||
| invul = | | invul = None | ||
| description = | | description = | ||
A quick low punch. | |||
* While a serviceable poke, the fact that this button has no cancels makes it very unrewarding in his combos and neutral game. | |||
* Pretty short ranged and slow in recovery. | |||
}} | }} | ||
}} | }} | ||
| Line 475: | Line 458: | ||
| input = 2HP / cr.HP | | input = 2HP / cr.HP | ||
| subtitle = Crouching Heavy Punch | | subtitle = Crouching Heavy Punch | ||
| image = | | image = CVS2_Raiden_2HP1.png | ||
| caption = | | caption = First Hitbox | ||
| linkname = 2HP | | linkname = 2HP | ||
| data = | | data = | ||
| Line 482: | Line 465: | ||
| version = {{Motion|d}}+{{Icon-Capcom|HP}} | | version = {{Motion|d}}+{{Icon-Capcom|HP}} | ||
| subtitle = | | subtitle = | ||
| damage = | | damage = 900+600 | ||
| stun = | | stun = 9+6 | ||
| cancel = | | cancel = None | ||
| guard = | | guard = Mid | ||
| parry = | | parry = High | ||
| startup = | | startup = 11 | ||
| active = | | active = 2+3 | ||
| recovery = | | recovery = 29 | ||
| total = | | total = 45 | ||
| advHit = - | | advHit = -8 | ||
| advBlock = - | | advBlock = -8 | ||
| invul = | | invul = None | ||
| description = | | description = | ||
An upward axe handle swing. | |||
* While it's supposed to be one of Raiden's anti-airs, it's painfully slow. The second hitbox (the one that is meant to anti-air) starts up in 13 frames, and considering the massive 29 frame recovery, throwing it out there expecting a jump is not going to lead to good results. | |||
* Cannot cancel the first hit for combo purposes, it should only be used as a very early anti-air. | |||
}} | }} | ||
}} | }} | ||
| Line 503: | Line 489: | ||
| input = 2LK / cr.LK | | input = 2LK / cr.LK | ||
| subtitle = Crouching Light Kick | | subtitle = Crouching Light Kick | ||
| image = | | image = CVS2_Raiden_2LK.png | ||
| caption = | | caption = | ||
| linkname = 2LK | | linkname = 2LK | ||
| Line 510: | Line 496: | ||
| version = {{Motion|d}}+{{Icon-Capcom|LK}} | | version = {{Motion|d}}+{{Icon-Capcom|LK}} | ||
| subtitle = | | subtitle = | ||
| damage = | | damage = 400 | ||
| stun = | | stun = 4 | ||
| cancel = | | cancel = SP/SU | ||
| guard = | | guard = Low | ||
| parry = | | parry = Low | ||
| startup = | | startup = 4 | ||
| active = | | active = 5 | ||
| recovery = | | recovery = 11 | ||
| total = | | total = 20 | ||
| advHit = - | | advHit = -2 | ||
| advBlock = - | | advBlock = -2 | ||
| invul = | | invul = None | ||
| description = | | description = | ||
A quick low toe tap. | |||
* Unlike 2LP, 2LK can combo into HP Combination Body Blow, so it should be used for light confirms into it. | |||
* Good poke, but due to the big 11 frame recovery and being minus it's not the best pressure option. | |||
}} | }} | ||
}} | }} | ||
| Line 531: | Line 520: | ||
| input = 2MK / cr.MK | | input = 2MK / cr.MK | ||
| subtitle = Crouching Medium Kick | | subtitle = Crouching Medium Kick | ||
| image = | | image = CVS2_Raiden_2MK.png | ||
| caption = | | caption = | ||
| linkname = 2MK | | linkname = 2MK | ||
| Line 538: | Line 527: | ||
| version = {{Motion|d}}+{{Icon-Capcom|MK}} | | version = {{Motion|d}}+{{Icon-Capcom|MK}} | ||
| subtitle = | | subtitle = | ||
| damage = | | damage = 1000 | ||
| stun = | | stun = 10 | ||
| cancel = | | cancel = SP/SU | ||
| guard = | | guard = Low | ||
| parry = | | parry = Low | ||
| startup = | | startup = 6 | ||
| active = | | active = 7 | ||
| recovery = | | recovery = 14 | ||
| total = | | total = 27 | ||
| advHit = - | | advHit = -2 | ||
| advBlock = - | | advBlock = -2 | ||
| invul = | | invul = None | ||
| description = | | description = | ||
A slower toe tap. | |||
* Essentially a slower 2LK, but cannot be confirmed into from any ground normal. | |||
* Has enough hitstun to combo into LP Poison Breath for guard break strings. | |||
* If you're too far out to get close 5MP, use this normal to confirm into HP Combination Body Blow from a jump-in. | |||
}} | }} | ||
}} | }} | ||
| Line 559: | Line 552: | ||
| input = 2HK / cr.HK | | input = 2HK / cr.HK | ||
| subtitle = Crouching Heavy Kick | | subtitle = Crouching Heavy Kick | ||
| image = | | image = CVS2_Raiden_2HK.png | ||
| caption = | | caption = | ||
| linkname = 2HK | | linkname = 2HK | ||
| Line 566: | Line 559: | ||
| version = {{Motion|d}}+{{Icon-Capcom|HK}} | | version = {{Motion|d}}+{{Icon-Capcom|HK}} | ||
| subtitle = | | subtitle = | ||
| damage = | | damage = 1300 | ||
| stun = | | stun = 13 | ||
| cancel = | | cancel = None | ||
| guard = | | guard = Low | ||
| parry = | | parry = Low | ||
| startup = | | startup = 9 | ||
| active = | | active = 8 | ||
| recovery = | | recovery = 24 | ||
| total = | | total = 41 | ||
| advHit = | | advHit = HKND | ||
| advBlock = | | advBlock = -8 | ||
| invul = | | invul = None | ||
| description = | | description = | ||
A sweeping heel kick. | |||
* Pretty good startup for a sweep, and being -8 means it's pretty safe with good spacing. | |||
* While being pretty committing without a cancel, landing this sweep awards Raiden a knockdown and can begin his strong pressure. | |||
}} | }} | ||
}} | }} | ||
| Line 588: | Line 584: | ||
| input = j.LP | | input = j.LP | ||
| subtitle = Jumping Light Punch | | subtitle = Jumping Light Punch | ||
| image = | | image = CVS2_Raiden_jLP.png | ||
| caption = | | caption = | ||
| linkname = j.LP | | linkname = j.LP | ||
| Line 595: | Line 591: | ||
| version = {{Motion|ub}}/{{Motion|u}}/{{Motion|uf}}+{{Icon-Capcom|LP}} | | version = {{Motion|ub}}/{{Motion|u}}/{{Motion|uf}}+{{Icon-Capcom|LP}} | ||
| subtitle = | | subtitle = | ||
| damage = | | damage = 600 | ||
| stun = | | stun = 6 | ||
| cancel = | | cancel = None | ||
| guard = | | guard = High | ||
| parry = | | parry = High | ||
| startup = | | startup = 8 | ||
| active = | | active = 22 | ||
| recovery = - | | recovery = - | ||
| total = - | | total = - | ||
| advHit = - | | advHit = - | ||
| advBlock = - | | advBlock = - | ||
| invul = | | invul = None | ||
| description = | | description = | ||
A quick aerial palm strike. | |||
* One of your many air-to-airs. Small damage with okay startup. | |||
* Pretty outclassed by j.LK unless the opponent in the air-to-air situation is above you. | |||
}} | }} | ||
}} | }} | ||
| Line 616: | Line 615: | ||
| input = j.MP | | input = j.MP | ||
| subtitle = Jumping Medium Punch | | subtitle = Jumping Medium Punch | ||
| image = | | image = CVS2_Raiden_jMP.png | ||
| caption = | | caption = | ||
| linkname = j.MP | | linkname = j.MP | ||
| Line 623: | Line 622: | ||
| version = {{Motion|ub}}/{{Motion|u}}/{{Motion|uf}}+{{Icon-Capcom|MP}} | | version = {{Motion|ub}}/{{Motion|u}}/{{Motion|uf}}+{{Icon-Capcom|MP}} | ||
| subtitle = | | subtitle = | ||
| damage = | | damage = 1200 | ||
| stun = | | stun = 12 | ||
| cancel = | | cancel = None | ||
| guard = | | guard = High | ||
| parry = | | parry = High | ||
| startup = | | startup = 10 | ||
| active = | | active = 11 | ||
| recovery = - | | recovery = - | ||
| total = - | | total = - | ||
| Line 635: | Line 634: | ||
| advBlock = - | | advBlock = - | ||
| invul = - | | invul = - | ||
| description = | | description = | ||
A slower aerial palm strike. | |||
* If you want damage from your air-to-air you can use this button, but it is very slow in startup so you need to read the jump most times. | |||
}} | }} | ||
}} | }} | ||
| Line 644: | Line 645: | ||
| input = j.HP | | input = j.HP | ||
| subtitle = Jumping Heavy Punch | | subtitle = Jumping Heavy Punch | ||
| image = | | image = CVS2_Raiden_jHP.png | ||
| caption = | | caption = | ||
| linkname = j.HP | | linkname = j.HP | ||
| Line 651: | Line 652: | ||
| version = {{Motion|ub}}/{{Motion|u}}/{{Motion|uf}}+{{Icon-Capcom|HP}} | | version = {{Motion|ub}}/{{Motion|u}}/{{Motion|uf}}+{{Icon-Capcom|HP}} | ||
| subtitle = | | subtitle = | ||
| damage = | | damage = 1400 | ||
| stun = | | stun = 14 | ||
| cancel = | | cancel = None | ||
| guard = | | guard = High | ||
| parry = | | parry = High | ||
| startup = | | startup = 11 | ||
| active = | | active = 8 | ||
| recovery = - | | recovery = - | ||
| total = - | | total = - | ||
| advHit = - | | advHit = - | ||
| advBlock = - | | advBlock = - | ||
| invul = | | invul = None | ||
| description = | | description = | ||
A double palm chop. | |||
* One of Raiden's main jump-in attacks, it is the most damaging air normal Raiden has. | |||
* As an air-to-air the small disjoint makes it useable but it's even slow than j.MP so the reads are still necessary. | |||
}} | }} | ||
}} | }} | ||
| Line 672: | Line 676: | ||
| input = j.LK | | input = j.LK | ||
| subtitle = Jumping Light Kick | | subtitle = Jumping Light Kick | ||
| image = | | image = CVS2_Raiden_jLK.png | ||
| caption = | | caption = | ||
| linkname = j.LK | | linkname = j.LK | ||
| Line 679: | Line 683: | ||
| version = {{Motion|ub}}/{{Motion|u}}/{{Motion|uf}}+{{Icon-Capcom|LK}} | | version = {{Motion|ub}}/{{Motion|u}}/{{Motion|uf}}+{{Icon-Capcom|LK}} | ||
| subtitle = | | subtitle = | ||
| damage = | | damage = 600 | ||
| stun = | | stun = 6 | ||
| cancel = | | cancel = None | ||
| guard = | | guard = High | ||
| parry = | | parry = High | ||
| startup = | | startup = 4 | ||
| active = | | active = 22 | ||
| recovery = - | | recovery = - | ||
| total = - | | total = - | ||
| advHit = - | | advHit = - | ||
| advBlock = - | | advBlock = - | ||
| invul = | | invul = None | ||
| description = | | description = | ||
A quick outward leg kick. | |||
* One of Raiden's best normals. Has really good range, and is especially scary in hop grooves where he can use a 4-frame high in tandem with his lows and threaten a punch throw afterwards, and he then gets in for more pressure. | |||
* Great air-to-air and jump-in. It's really fast and has the range to land from most air-to-air positions, but due to the low hitbox those situations are not beneficial to use this normal for. | |||
}} | }} | ||
}} | }} | ||
| Line 700: | Line 707: | ||
| input = j.MK | | input = j.MK | ||
| subtitle = Jumping Medium Kick | | subtitle = Jumping Medium Kick | ||
| image = | | image = CVS2_Raiden_jMK.png | ||
| caption = | | caption = | ||
| linkname = j.MK | | linkname = j.MK | ||
| Line 707: | Line 714: | ||
| version = {{Motion|ub}}/{{Motion|u}}/{{Motion|uf}}+{{Icon-Capcom|MK}} | | version = {{Motion|ub}}/{{Motion|u}}/{{Motion|uf}}+{{Icon-Capcom|MK}} | ||
| subtitle = | | subtitle = | ||
| damage = | | damage = 1100 | ||
| stun = | | stun = 11 | ||
| cancel = | | cancel = None | ||
| guard = | | guard = High | ||
| parry = | | parry = High | ||
| startup = | | startup = 7 | ||
| active = | | active = 11 | ||
| recovery = - | | recovery = - | ||
| total = | | total = 18 | ||
| advHit = - | | advHit = - | ||
| advBlock = - | | advBlock = - | ||
| invul = | | invul = None | ||
| description = | | description = | ||
Raiden sticks his leg out. | |||
* Good air to air and a very long ranged move overall. If j.LK lacks the hitstun for jump-ins or setups, j.MK can be used as an alternative | |||
* Very okay jump-in, not the best one Raiden has. | |||
}} | }} | ||
}} | }} | ||
| Line 728: | Line 738: | ||
| input = j.HK | | input = j.HK | ||
| subtitle = Jumping Heavy Kick | | subtitle = Jumping Heavy Kick | ||
| image = | | image = CVS2_Raiden_jHK.png | ||
| caption = | | caption = | ||
| linkname = j.HK | | linkname = j.HK | ||
| Line 735: | Line 745: | ||
| version = {{Motion|ub}}/{{Motion|u}}/{{Motion|uf}}+{{Icon-Capcom|HK}} | | version = {{Motion|ub}}/{{Motion|u}}/{{Motion|uf}}+{{Icon-Capcom|HK}} | ||
| subtitle = | | subtitle = | ||
| damage = | | damage = 1300 | ||
| stun = | | stun = 13 | ||
| cancel = | | cancel = None | ||
| guard = | | guard = High | ||
| parry = | | parry = High | ||
| startup = | | startup = 9 | ||
| active = | | active = 8 | ||
| recovery = - | | recovery = - | ||
| total = | | total = 17 | ||
| advHit = - | | advHit = - | ||
| advBlock = - | | advBlock = - | ||
| invul = | | invul = None | ||
| description = | | description = | ||
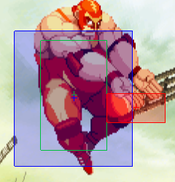
Raiden does an aerial dropkick. | |||
* Decent air-to-air if done early, but the lack of active frames compared to startup frames can make it a little difficult to use. | |||
* Can be a jump-in, but Raiden has better options. | |||
}} | }} | ||
}} | }} | ||
== Command Normals == | == Command Normals == | ||
=== <span class="invisible-header"> | === <span class="invisible-header">Body Press</span> === | ||
{{MoveData | {{MoveData | ||
| name = | | name = Bear Stomp | ||
| input = | | input = 3HK | ||
| subtitle = | | subtitle = | ||
| image = | | image = CVS2_Raiden_3HK.png | ||
| caption = | | caption = | ||
| linkname = | | linkname = Bear Stomp | ||
| data = | | data = | ||
{{AttackData-CvS2 | {{AttackData-CvS2 | ||
| version = - | | version = {{Motion|df}}+{{Icon-Capcom|HK}} | ||
| subtitle = | | subtitle = | ||
| damage = - | | damage = 1400 | ||
| stun = | | stun = 14 | ||
| cancel = | | cancel = None | ||
| guard = | | guard = Mid | ||
| parry = | | parry = High | ||
| startup = | | startup = 13 | ||
| active = | | active = 6 | ||
| recovery = 19 | |||
| total = 38 | |||
| advHit = +2 | |||
| advBlock = +2 | |||
| invul = None | |||
| description = | |||
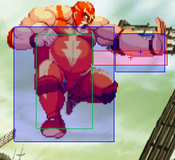
Raiden does a goofy looking stomp in front of him. | |||
* While looking useless on the surface, as the range is nonexistent and has no visible threat in neutral, this command normal has some specific but very helpful uses due to it's big disjoint on the ground. | |||
* The main purpose of this normal is to punish low hitting attacks on the ground. While there are many cases where this normal can work, the most noteworthy examples of this are [https://youtu.be/10QxGjZI_KI Blanka's Slide/Rolling Ball], and [https://youtu.be/X-MUTnFxyEs Cammy's Spiral Arrow], which are moves that you will see a lot of if you face those characters. Keep in mind the startup for this move is 13 frames so you may have to preemptively stick it out in neutral, which might lead to it getting beat out during it's recovery. It's a risk that Raiden can take though, as his high health can spare him of some mistakes he makes in neutral. | |||
}} | |||
}} | |||
=== <span class="invisible-header">Body Press</span> === | |||
{{MoveData | |||
| name = Body Press | |||
| input = j.2HP | |||
| subtitle = | |||
| image = CVS2_Raiden_dj2HP.png | |||
| caption = | |||
| linkname = Body Press | |||
| data = | |||
{{AttackData-CvS2 | |||
| version = {{Motion|d}}+{{Icon-Capcom|HP}} | |||
| subtitle = | |||
| damage = 1300 | |||
| stun = 13 | |||
| cancel = None | |||
| guard = High | |||
| parry = High | |||
| startup = 5 | |||
| active = 22 | |||
| recovery = - | | recovery = - | ||
| total = | | total = 27 | ||
| advHit = - | | advHit = - | ||
| advBlock = - | | advBlock = - | ||
| invul = | | invul = None | ||
| description = | | description = | ||
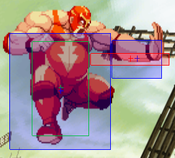
Raiden stretches his arms outward as he does a flying crossbody. | |||
* This is Raiden's main cross-up tool. It just adds on to his mix-up game. | |||
* The main move to confirm into close 5MP, can land at close and farther range. | |||
}} | }} | ||
}} | }} | ||
== Throws == | == Throws == | ||
=== <span class="invisible-header"> | === <span class="invisible-header">Piledriver</span> === | ||
{{MoveData | {{MoveData | ||
| name = | | name = Piledriver | ||
| input = Near Opponent, 4/6HP | | input = Near Opponent, 4/6HP | ||
| subtitle = Punch Throw | | subtitle = Punch Throw | ||
| image = | | image = CVS2_Raiden_Rangethrow.png | ||
| caption = | | caption = Throw Range | ||
| linkname = | | image2 = CVS2_Raiden_Pthrow.png | ||
| caption2 = Piledriver | |||
| linkname = Piledriver | |||
| data = | | data = | ||
{{AttackData-CvS2 | {{AttackData-CvS2 | ||
| Line 794: | Line 843: | ||
| subtitle = | | subtitle = | ||
| damage = - | | damage = - | ||
| stun = | | stun = 22 | ||
| cancel = | | cancel = None | ||
| guard = - | | guard = - | ||
| parry = - | | parry = - | ||
| startup = | | startup = 3 | ||
| active = | | active = 1 | ||
| recovery = | | recovery = 13 | ||
| total = | | total = 17 | ||
| advHit = - | | advHit = - | ||
| advBlock = - | | advBlock = - | ||
| invul = | | invul = None | ||
| description = | | description = | ||
Raiden grabs and piledrives his opponent. | |||
* An absolutely scary throw. At a huge range of 85 pixels, it boasts the longest normal throw range in the game. It also does great damage, especially when raged. Raiden prefers this throw in a vacuum over his 360 and 720 as he can activate it instantly and it gives him great pressure afterwards. This is also his go-to throw over his kick throw as the damage is absolute. | |||
}} | }} | ||
}} | }} | ||
=== <span class="invisible-header"> | === <span class="invisible-header">Bear Hug</span> === | ||
{{MoveData | {{MoveData | ||
| name = | | name = Bear Hug | ||
| input = Near Opponent, 4/6HK | | input = Near Opponent, 4/6HK | ||
| subtitle = Kick Throw | | subtitle = Kick Throw | ||
| image = | | image = CVS2_Raiden_Rangethrow.png | ||
| caption = | | caption = Throw Range | ||
| linkname = | | image2 = CVS2_Raiden_Kthrow.png | ||
| caption2 = Bear Hug | |||
| linkname = Bear Hug | |||
| data = | | data = | ||
{{AttackData-CvS2 | {{AttackData-CvS2 | ||
| Line 834: | Line 888: | ||
| invul = - | | invul = - | ||
| description = Placeholder | | description = Placeholder | ||
}} | |||
}} | |||
== Special Moves == | |||
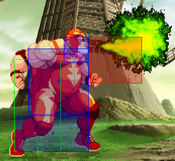
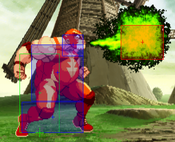
===== <span class="invisible-header">Poison Breath</span> ===== | |||
{{MoveData | |||
| name = Poison Breath | |||
| subtitle = 63214+P / hcb+P | |||
| input = {{Motion|63214}} + {{Icon-Capcom|P}} | |||
| image = CVS2_Raiden_63214P1.png | |||
| caption = Startup Hitbox | |||
| image2 = CVS2_Raiden_63214P2.png | |||
| caption2 = Active Hitbox | |||
| linkname = Poison Breath | |||
| data = | |||
{{AttackData-CvS2 | |||
| version = LP | |||
| subtitle = {{Motion|63214}} + {{Icon-Capcom|LP}} | |||
| damage = 800 | |||
| stun = 8 | |||
| cancel = None | |||
| guard = Mid | |||
| parry = Mid | |||
| startup = 11 | |||
| active = - | |||
| recovery = 43 | |||
| total = 54 | |||
| advHit = -10 | |||
| advBlock = -10 | |||
| invul = None | |||
| description = | |||
}} | |||
{{AttackData-CvS2 | |||
| header = no | |||
| version = MP | |||
| subtitle = {{Motion|63214}} + {{Icon-Capcom|MP}} | |||
| damage = 900 | |||
| stun = 9 | |||
| cancel = None | |||
| guard = Mid | |||
| parry = Mid | |||
| startup = 11 | |||
| active = - | |||
| recovery = 44 | |||
| total = 55 | |||
| advHit = -11 | |||
| advBlock = -11 | |||
| invul = None | |||
| description = | |||
}} | |||
{{AttackData-CvS2 | |||
| header = no | |||
| version = HP | |||
| subtitle = {{Motion|63214}} + {{Icon-Capcom|HP}} | |||
| damage = 1000 | |||
| stun = 10 | |||
| cancel = None | |||
| guard = Mid | |||
| parry = Mid | |||
| startup = 11 | |||
| active = - | |||
| recovery = 45 | |||
| total = 56 | |||
| advHit = -12 | |||
| advBlock = -12 | |||
| invul = None | |||
| description = | |||
}} | |||
}} | |||
== Super Moves == | |||
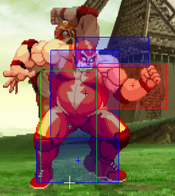
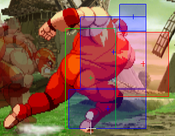
=== <span class="invisible-header">Crazy Train</span> === | |||
{{MoveData | |||
| name = Crazy Train | |||
| input = {{Motion|236}}{{Motion|236}}+{{Icon-Capcom|P}} | |||
| subtitle = 236236P / qcf,qcf+P | |||
| image = CVS2_Raiden_236236P1.png | |||
| caption = First Hit | |||
| image2 = CVS2_Raiden_236236P2.png | |||
| caption2 = Tackle Ender | |||
| linkname = Crazy Train | |||
| data = | |||
{{AttackData-CvS2 | |||
| version = {{Motion|236}}{{Motion|236}}+{{Icon-Capcom|LP}} | |||
| subtitle = | |||
| damage = 2200 | |||
| stun = 0 | |||
| cancel = None | |||
| guard = Mid | |||
| parry = High | |||
| startup = 12 | |||
| active = - | |||
| recovery = 44 | |||
| total = 56 | |||
| advHit = HKND | |||
| advBlock = -5 | |||
| invul = 6 (Full) | |||
| description = | |||
}} | |||
{{AttackData-CvS2 | |||
| header = no | |||
| version = {{Motion|236}}{{Motion|236}}+{{Icon-Capcom|MP}} | |||
| subtitle = | |||
| damage = 3200 | |||
| stun = 0 | |||
| cancel = SP/SU | |||
| guard = Mid | |||
| parry = High | |||
| startup = 12 | |||
| active = - | |||
| recovery = 44 | |||
| total = 56 | |||
| advHit = HKND | |||
| advBlock = -2 | |||
| invul = 13 (Full) | |||
| description = | |||
}} | |||
{{AttackData-CvS2 | |||
| header = no | |||
| version = {{Motion|236}}{{Motion|236}}+{{Icon-Capcom|HP}} | |||
| subtitle = | |||
| damage = 4700 | |||
| stun = 0 | |||
| cancel = None | |||
| guard = Mid | |||
| parry = High | |||
| startup = 12 | |||
| active = - | |||
| recovery = 44 | |||
| total = 56 | |||
| advHit = HKND | |||
| advBlock = +1 | |||
| invul = 20 (Full) | |||
| description = | |||
}} | }} | ||
}} | }} | ||
Revision as of 19:58, 24 July 2022
Introduction
Story
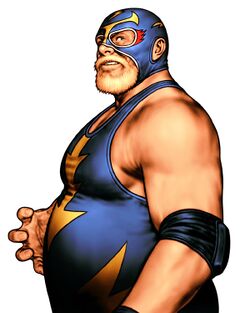
Raiden is an Australian professional wrestler. He was known for violence, often maiming his opponents and injuring them heavily. Geese Howard noticed this, and hired him on as a henchman. He excelled at this, mostly due to his violent nature. When Geese started The King of Fighters, Raiden entered to find strong fighters to hurt. While he did well in the beginning, he eventually fought against Andy Bogard, who swiftly dispatched him. Humiliated by his defeat, he changed his ways. He went from a heel wrestler (a violent, villain persona wrestler) to a face wrestler (a heroic and fan favorite wrestler), renaming himself to Big Bear. Nowadays, he hangs out with the Bogard brothers and Joe, and enters tournaments under either of his characters to relive his glory days mostly.
Gameplay
Raiden is a very unique character. He's a large, big-body style character mainly, with the highest health value possible in the game. He has a few solid buttons, neat pressure strings, a 421P Rekka in Combination Body Blow for knockdowns, and a strange but useful invincible special with [4]6P Giant Bomb. His useful neutral tools allow him to get a knockdown with his Rekkas and run his notably useful guard crush strings, especially in K-Groove. While he does have a command grab, he doesn't use it often. Instead, he uses his abnormally long range and high damage punch throw to threaten a tick throw from very far away. This has powerful conjunction with his guard crush strings, as the opponent essentially has to guess between a tick throw or a rekka, and then even after the rekka, they have to guess between the 214P followup which is a strike and the 214K followup command grab. Even better, Raiden can use his 63214P Poison Breath for an extremely plus on block special, allowing him to reset this situation constantly.
Raiden does have to struggle around some big weaknesses however. The biggest ones being his size and speed. Raiden wants to get close, but can't crouch under much of anything, and isn't fast enough to evade any pokes either. His poor jump arc doesn't help, forcing him to often just walk and block or risk a gimmick option to get in. Raiden comes equipped with plenty of gimmick options, like Giant Bomb which will blow through opponents mashing buttons or throwing poor fireballs. Still, if the opponent knows how to beat these tools, Raiden isn't left with much that isn't notably high risk. Raiden is an interesting big body character with hints of both the grappler and the guard crush style in him, who has to struggle through neutral and especially on defense to win.
Groove Selection
Best - K: K-Raiden is easily his best Groove. While his run isn't the greatest, it's much better than his dash, and run is always better for approaching. Having hop helps him evade things, and hop j.2HP Flying Body Press lets him threaten a very useful crossup. Rage sends his damage up high, and especially sends his guard crush high, allowing Raiden to realistically guard crush with a few moves. Blocking vs. a Raged Raiden is scary, and if he does land a hit, he hits like a truck. Just Defend is useful to call out pokes aggressively, make jumps a bit less risky, and to beat pressure strings where the opponent doesn't change their timings. His level 3 6321463214P Fire Breath super is also incredibly useful, being able to confirm from his rekka ender easily. This lets him do MASSIVE damage from clean hits, and gives him very realistic 2-touch potential. K-Raiden has everything he needs and more, and is solidly his best Groove.
Useful - N/P/C: N-Raiden is essentially a lesser K-Raiden. He maintains the mobility, but gains a roll, which can be very useful for roll cancels. RC Rekkas and RC Poison Breath especially can be very useful. He sacrifices K-Raiden's guard crush ability and massive damage output, as only the level 3 version of Fire Breath juggles, meaning N-Raiden has to activate Max Mode. Though this isn't a huge weakness, as Raiden has decent dizzy potential, and one dizzy with two bars will likely end the round. P-Raiden gets very consistent parry punishes, and still has hop to use for better mixup potential. His punishes up close are great, but even a far parry can at least get him a throw thanks to his amazing punch throw. P-Raiden won't have meter often, but when he does, he can do massive damage. C-Raiden gets more access to supers overall, upping his damage, and airblock somewhat makes up for losing hop. His level 2 combo does decent damage when using his 236236P Crazy Train super, and while it isn't quite as damaging as a level 3 Fire Breath, he has access to it more often.
Worst - A/S: A-Raiden has one massive weakness, and that's lacking any synergy with Custom Combo. While Raiden's CC is simple and does good damage, he lacks any utility with it in the same way the best A-Groove characters have. His only real anti-air CC being in the corner, no good blocked CC, and all of the utility it has like being able to confirm a CC after a Rekka being done better by level 3 Fire Breath holds him back a lot. Otherwise, all of what A-Raiden has, C-Raiden also has. S-Raiden similarly struggles, as he loses any high damage potential until very low health. Raiden can charge and not be too scared of getting hit thanks to his high health, but it's still not a great thing to deal with, and S-Groove has very little strength otherwise.
|
Raiden is a big body character who dishes out damage and crushes guard with the best of them when he gets in. He has to struggle to get the opponent sitting still, but if he can, he shines with powerful blockstrings and massive damage, especially in his best Groove. Raiden is best in K-Groove. |
|
| Pros | Cons |
|
|
!!!THIS PAGE IS STILL A WIP. IF YOU NEED FRAME DATA NOW, REFER TO THE CVS2 BIBLE OR LOOK THROUGH EDIT HISTORY TO FIND THE LAST EDIT CONTAINING FRAME DATA IF THERE WAS ONE!!!
Normal Moves
Far Normals
5LP
5MP
5HP
5LK
5MK
5HK
Close Standing Normals
clMP
clHP
clLK
clMK
Crouching Normals
2LP
2MP
2HP
2LK
2MK
2HK
Jumping Normals
j.LP
j.MP
j.HP
j.LK
j.MK
j.HK
Command Normals
Body Press
| Version | Damage | Stun | Cancel | Guard | Parry | Startup | Active | Recovery | Total | Adv Hit | Adv Block | Invul |
|---|---|---|---|---|---|---|---|---|---|---|---|---|
| 1400 | 14 | None | Mid | High | 13 | 6 | 19 | 38 | +2 | +2 | None | |
Raiden does a goofy looking stomp in front of him.
| ||||||||||||
Body Press
Throws
Piledriver
Bear Hug
Special Moves
Poison Breath
Super Moves
Crazy Train
Colors
