Capcom vs SNK 2/Benimaru: Difference between revisions

From SuperCombo Wiki
(→‎Special Moves: Finishing his special moves)
Line 1,180: Line 1,180:


== Super Moves ==
== Super Moves ==
=== <span class="invisible-header">Rai-Kou Ken</span> ===
{{MoveData
| name    = Rai-Kou Ken
| input    = 236236P
| subtitle = Lightning Fist Super
| image    = CVS2_Benimaru_236236P.PNG
| caption  =
| linkname = Raikou Ken
| data  =
{{AttackData-CvS2
  | version    = {{Motion|236}}{{Motion|236}}+{{Icon-Capcom|LP}}
  | subtitle    =
  | damage      = 2000
  | stun        = 0
  | cancel      = None
  | guard      = Mid
  | parry      = High
  | startup    = 5, 10
  | active      = 10~95
  | recovery    = 95
  | total      = 100
  | advHit      = -DWN
  | advBlock    = -2
  | invul      = 9 (Full)
*
}}
{{AttackData-CvS2
  | header      = no
  | version    = {{Motion|236}}{{Motion|236}}+{{Icon-Capcom|MP}}
  | subtitle    =
  | damage      = 3500
  | stun        = 0
  | cancel      = SP/SU
  | guard      = Mid
  | parry      = High
  | startup    = 5, 10
  | active      = 10~95
  | recovery    = 95
  | total      = 100
  | advHit      = -DWN
  | advBlock    = -2
  | invul      = 15 (Full)
*
}}
{{AttackData-CvS2
  | header      = no
  | version    = {{Motion|236}}{{Motion|236}}+{{Icon-Capcom|HP}}
  | subtitle    =
  | damage      = 5000
  | stun        = 0
  | cancel      = None
  | guard      = Mid
  | parry      = High
  | startup    = 5, 10
  | active      = 10~95
  | recovery    = 95
  | total      = 100
  | advHit      = -DWN
  | advBlock    = -2
  | invul      = 23 (Full)
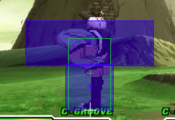
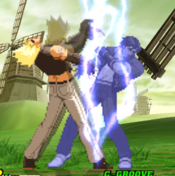
  | description = Beni's electric fist super. Easy to juggle into, and a decent reversal. You can loop these in the corner to rack up damage even outside of C groove. Even sweep will juggle into this. On all that it's also safe on block! Not as useful after long links however.
*
}}
}}
=== <span class="invisible-header">Benimaru Rising Shot</span> ===
{{MoveData
| name    = Benimaru Rising Shot
| input    = 236236K
| subtitle = Rush Super
| image    = CVS2_Benimaru_236236K.PNG
| caption  =
| linkname = Rising Shot
| data  =
{{AttackData-CvS2
  | version    = {{Motion|236}}{{Motion|236}}+{{Icon-Capcom|LK}}
  | subtitle    =
  | damage      = 2000
  | stun        = 0
  | cancel      = None
  | guard      = Mid
  | parry      = High
  | startup    = 4, 4
  | active      = 24
  | recovery    = 59
  | total      = 91
  | advHit      = -DWN
  | advBlock    = -48
  | invul      = 8 (Full)
*
}}
{{AttackData-CvS2
  | header      = no
  | version    = {{Motion|236}}{{Motion|236}}+{{Icon-Capcom|MK}}
  | subtitle    =
  | damage      = 3100
  | stun        = 0
  | cancel      = SP/SU
  | guard      = Mid
  | parry      = High
  | startup    = 4, 4
  | active      = 28
  | recovery    = 59
  | total      = 95
  | advHit      = -DWN
  | advBlock    = -48
  | invul      = 14 (Full)
*
}}
{{AttackData-CvS2
  | header      = no
  | version    = {{Motion|236}}{{Motion|236}}+{{Icon-Capcom|HK}}
  | subtitle    =
  | damage      = 4700
  | stun        = 0
  | cancel      = None
  | guard      = Mid
  | parry      = High
  | startup    = 4, 4
  | active      = 32
  | recovery    = 69
  | total      = 109
  | advHit      = -DWN
  | advBlock    = -48
  | invul      = 22 (Full)
  | description = A forward moving rush super. Lots of invuln and decent damage makes it seem like a fireball punish, but it travels very slow meaning it only works for this in very close range. Normally you'll mostly just use the level 1 version for long hitconfirms into super, as you cannot combo off the level 2 version and it's usually better for Beni to save meter than spend on the level 3 version of this.
*
}}
}}
=== <span class="invisible-header">Electrigger</span> ===
{{MoveData
| name    = Benimaru Collider
| input    = 6321463214P
| subtitle = Super Command Grab
| image    = CVS2_Benimaru_6321463214P.PNG
| caption  =
| linkname = Collider
| data  =
{{AttackData-CvS2
  | version    = {{Motion|63214}}{{Motion|63214}}+{{Icon-Capcom|LP}}
  | subtitle    =
  | damage      = 2500
  | stun        = 0
  | cancel      = None
  | guard      = Grab
  | parry      = Grab
  | startup    = 4
  | active      = 1
  | recovery    = 27
  | total      = 32
  | advHit      = -DWN
  | advBlock    = Grab
  | invul      = 6 (Full)
*
}}
{{AttackData-CvS2
  | header      = no
  | version    = {{Motion|63214}}{{Motion|63214}}+{{Icon-Capcom|MP}}
  | subtitle    =
  | damage      = 3800
  | stun        = 0
  | cancel      = SP/SU
  | guard      = Grab
  | parry      = Grab
  | startup    = 4
  | active      = 1
  | recovery    = 27
  | total      = 32
  | advHit      = -DWN
  | advBlock    = Grab
  | invul      = 14 (Full)
*
}}
{{AttackData-CvS2
  | header      = no
  | version    = {{Motion|63214}}{{Motion|63214}}+{{Icon-Capcom|HP}}
  | subtitle    =
  | damage      = 5500
  | stun        = 0
  | cancel      = None
  | guard      = Grab
  | parry      = Grab
  | startup    = 4
  | active      = 1
  | recovery    = 27
  | total      = 32
  | advHit      = -DWN
  | advBlock    = Grab
  | invul      = 22 (Full)
  | description = A fast command grab super. Activates on the first frame after superflash, so if they aren't jumping or doing something throw invuln it will grab them. Does decent damage and the fear of it can make opponents scared to block which can be abused. Gives a stellar knockdown as well, allowing you to push another mixup after. Similar to rush super, the level 2 version combos into nothing and the level 3 version is highly damaging but questionably worth the meter.
*
}}
}}


= The Basics =
= The Basics =

Revision as of 21:59, 27 May 2022

Introduction

Benimaru Nikaido is many things. He's the son of a rich family, with a Japanese father and American mother. He's a star of the fashion world. He's Kyo Kusanagi's friend and rival. He's an electric wielding martial artist with powerful kicks. Most importantly, though: he's gorgeous. He keeps his hair styled and straight using his electric abilities.

Benimaru in CvS2 is widely regarded as one of the worst characters for a variety of reasons. His health is very low, and his damage output without meter isn't much better either. His longest range options pose no threat to most characters while not even really having that much range. His anti-airs are only strong when you add roll cancels behind them as well. On top of all that, he has one of the absolute floatiest jumps, making anti-airing him a breeze even with his divekick. If you plan on using him, have one or two top tiers on your team to help out, cuz he won't be doing much.

Benimaru's best grooves are A, N, and K. A groove gives him access to rolls, which he needs to be able to approach well, alongside the ability to Custom Combo, though it does make his admittedly good supers less accessible. N groove gives him rolls, Max Mode, and run/hop which aids in his issues with jumping. K groove has no rolls, but JD gives him a much needed defensive tool and rage makes his lackluster pokes more threatening. S groove Benimaru is surprisingly not bad, dodge works well for him and he gets easy access to his level 1 command grab super and damaging level 1 juggles, though he has to play at low health to be a threat and he barely has enough health to risk that. C groove gives him access to more supers as well, and air blocking helps a little with his floaty jump, but he has very little use for level 2 supers as he can only combo from level 2 Rai-Kou Ken which already allows combos with the level 1 version. P groove is essentially useless for Beni.

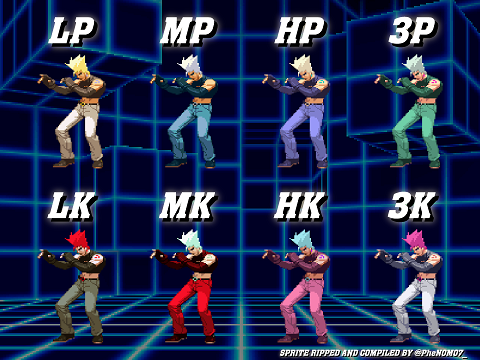
Benimaru CvS2 colors.png

Normal Moves

Far Standing Normals

5LP

Far Jab
Stand Jab / Light Punch
5LP / Far LP
Version Damage Stun Cancel Guard Parry Startup Active Recovery Total Adv Hit Adv Block Invul
Far Lp.png 200 2 RF/SP/SU Mid High 3 4 6 13 +7 +7 -

A fast and plus jab. Crouchable but has decent range and fast startup, not a bad check or anti-air

5MP

Far Strong
Stand Strong / Medium Punch
5MP / Far MP
Version Damage Stun Cancel Guard Parry Startup Active Recovery Total Adv Hit Adv Block Invul
Far Mp.png 800 8 SU Mid High 5 6 12 23 +4 +4 -

Has decent reach, but is the least useful of Beni's otherwise very nice MP buttons, mainly because it can be crouched.

5HP

Far Fierce
Stand Fierce / Heavy Punch
5HP / Far HP
Version Damage Stun Cancel Guard Parry Startup Active Recovery Total Adv Hit Adv Block Invul
Far Hp.png 1200 12 SU Mid High 7 6 28 41 -8 -8 -

A forward moving backhand. Not much use for this move, unless you need the forward movement, but Beni has better moves for almost every situation.

5LK

Far Short
Stand Short / Light Kick
5LK / Far LK
Version Damage Stun Cancel Guard Parry Startup Active Recovery Total Adv Hit Adv Block Invul
Far Lk.png 400 4 SP/SU Mid Low 4 4 9 17 +2 +2 -

Noticeably very good poke and hitconfirm tool. Has a great hitbox for beating out things like Blanka slide and other forward moving tools. Not a standing low but doesn't need to be.

5MK

Far Forward
Stand Forward / Medium Kick
5MK / Far MK
Version Damage Stun Cancel Guard Parry Startup Active Recovery Total Adv Hit Adv Block Invul
Far Mk.png 900 9 SU Mid High 6 4 17 27 +1 +1 -

A fast kick to the head. A good anti-air from far away, and not a bad check against hops, but otherwise doesn't see much use.

5HK

Far Roundhouse
Stand Roundhouse / Heavy Kick
5HK / Far HK
Version Damage Stun Cancel Guard Parry Startup Active Recovery Total Adv Hit Adv Block Invul
Far Hk.png 1100 11 None Mid High 10 4 21 35 -1 -1 Low

A leaping kick with solid range. Has some low invuln letting you avoid crouching moves, and is a decent punish for eager opponents trying to approach you. Can hold back and forth to either leap forward or backward during the move.

Close Normals

Benimaru does not have a difference between the close and far versions of 5LK, 5HP and 5HK.

cl5LP

Close Jab
Close Light Punch
cl5LP / cl.LP
Version Damage Stun Cancel Guard Parry Startup Active Recovery Total Adv Hit Adv Block Invul
Close Lp.png 300 3 RF/SP/SU Mid High 2 4 5 11 +8 +8 -

A very plus and fast jab. Like many jabs, it's sadly crouchable, making it much worse for pressure and combos.

cl5MP

Close Strong
Close Medium Punch
cl5MP / cl.MP
Version Damage Stun Cancel Guard Parry Startup Active Recovery Total Adv Hit Adv Block Invul
Close Mp.png 700 7 SP/SU Mid High 3 4 14 21 +2 +2 -

One of Beni's main close normals. The fast startup makes it fairly forgiving to link into after a light, and it cancels into any special or super for a combo. Not a bad meaty option either, and can't be crouched unlike his far strong.

cl5MK

Close Forward
Close Medium Kick
cl5MK / cl.MK
Version Damage Stun Cancel Guard Parry Startup Active Recovery Total Adv Hit Adv Block Invul
Close Mk.png 800 8 SP/SU Mid High 4 5 16 25 0 0 -

A knee at about chest height. Similar in usage to close strong, but does 100 more damage in exchange for being a bit slower. Your highest damage special cancel tool.

Crouching Normals

2LP

Crouching Jab
Crouching Light Punch
2LP / cr.LP
Version Damage Stun Cancel Guard Parry Startup Active Recovery Total Adv Hit Adv Block Invul
D.pngLp.png 200 2 RF/SP/SU Mid Mid 2 4 6 12 +7 +7 -

A good crouching jab. Still tied for his fastest normal at two frames, and links into other strong options on hit and especially on counterhit.

2MP

Crouching Strong
Crouching Medium Punch
2MP / cr.MP
Version Damage Stun Cancel Guard Parry Startup Active Recovery Total Adv Hit Adv Block Invul
D.pngMp.png 700 7 SP/SU Mid Mid 4 6 11 21 +5 +5 -

A stellar button in Beni's arsenal. Good reach, low hitbox, very plus, and cancels into specials and supers on hit. Nice to try and catch people in their startup frames, or to just poke at an opponent safely.

2HP

Crouch Fierce
Crouching Heavy Punch
2HP / cr.HP
Version Damage Stun Cancel Guard Parry Startup Active Recovery Total Adv Hit Adv Block Invul
D.pngHp.png 1100 11 SU Mid Mid 6 6 17 29 +3 +3 -

A quick low elbow. Not much purpose in neutral as other buttons do what it does better, but this is your highest damage super cancel so it sees a lot of use in optimized combos.

2LK

Crouch Short
Crouching Light Kick
2LK / cr.LK
Version Damage Stun Cancel Guard Parry Startup Active Recovery Total Adv Hit Adv Block Invul
D.pngLk.png 200 2 RF/SP/SU Low Low 3 4 6 13 +7 +7 -

One of your most used moves. A fast low kick that cancels into specials, and links into a lot of stronger moves for higher damage. Walking opponents down using this is strong, and you can easily confirm out of it since it can cancel into itself.

2MK

Crouch Forward
Crouching Medium Kick
2MK / cr.MK
Version Damage Stun Cancel Guard Parry Startup Active Recovery Total Adv Hit Adv Block Invul
D.pngMk.png 700 7 SU Low Low 5 7 17 29 -2 -2 -

A long reaching low poke. Useful in long link combos because of the reach, where the super cancel allows you very long confirms into super. Not special cancellable so it isn't as useful as a shoto low forward, but still is a very good ground button to control space.

2HK

Crouch Roundhouse
Crouching Heavy Kick / Sweep
2HK / cr.HK
Version Damage Stun Cancel Guard Parry Startup Active Recovery Total Adv Hit Adv Block Invul
D.pngHk.png 1000 10 SU Low Low 7 4 27 38 -DWN -7 -

A standard enough sweep. Reaches a bit farther than his other normals, but is much more committal. Beni can link into this sweep from most of his lights, but this almost always requires a one frame link or a counterhit. Because of Beni's 236236P supers having very good juggle properties, this will actually combo into them, but usually the combo afterwards is weaker.

Jumping Normals

8LP

Jump Jab
Jump Light Punch
8LP / j.LP
Version Damage Stun Cancel Guard Parry Startup Active Recovery Total Adv Hit Adv Block Invul
Ub.png, U.png, Uf.pngLp.png 500 5 None High High 3 22 0 25 - - -

A jumping elbow. Sorta useful as a fast rising anti-air as it's tied for his fastest air normal and has a ton of active frames, but no other use really.

8MP

Jump Strong
Jump Medium Punch
8MP / j.MP
Version Damage Stun Cancel Guard Parry Startup Active Recovery Total Adv Hit Adv Block Invul
Ub.png, U.png, Uf.pngMp.png 700 7 None High High 5 13 0 18 - - -

Same animation as j.LP but with slower startup and more damage. Basically the same use cases.

8HP

Jump Fierce
Jump Heavy Punch
8HP / j.HP
Version Damage Stun Cancel Guard Parry Startup Active Recovery Total Adv Hit Adv Block Invul
Ub.png, U.png, Uf.pngHp.png 1200, 900 12 None High High 3 7 0 10 - - -

A rising punch above Beni's head. Because of Beni's super high jump arc, it's hard to ever get your opponent above you. The first hitbox, which is the higher damage, is a fast and alright air-to-air alongside his highest damage air normal.

8LK

Jump Short
Jump Light Kick
8LK / j.LK
Version Damage Stun Cancel Guard Parry Startup Active Recovery Total Adv Hit Adv Block Invul
Ub.png, U.png, Uf.pngLk.png 500 5 None High High 3 22 0 25 - - -

A weak knee. Benimaru's only crossup, and a decent one at that.

8MK

Jump Forward
Jump Medium Kick
8MK / j.MK
Version Damage Stun Cancel Guard Parry Startup Active Recovery Total Adv Hit Adv Block Invul
Ub.png, U.png, Uf.pngMk.png 800 8 None High High 6 7 0 13 - - -

An outwards kick. Seemingly not much use for this, as it's outranged by j.HK.

8HK

Jump Roundhouse
Jump Heavy Kick
8HK / j.HK
Version Damage Stun Cancel Guard Parry Startup Active Recovery Total Adv Hit Adv Block Invul
Ub.png, U.png, Uf.pngHk.png 1000 10 None High High 7 9 0 16 - - -

A swinging heavy kick, and the jump button you'll use the most more than likely. While it doesn't do as much damage as his j.HP, the superior range makes it a much more reliable tool overall.

Command Normals

Jackknife Kick

Jackknife Kick
Stepkick
6MK / Forward Medium Kick
CVS2 Benimaru 6MK First.PNG
Running Up
CVS2 Benimaru 6MK Second.PNG
First Active Frames
CVS2 Benimaru 6MK Third.PNG
Final Active Frames
Version Damage Stun Cancel Guard Parry Startup Active Recovery Total Adv Hit Adv Block Invul
F.png Mk.png 700 7 None Mid High 16 6 17 39 -1 -1 -

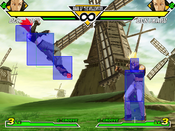
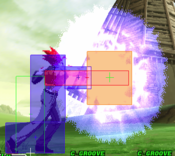
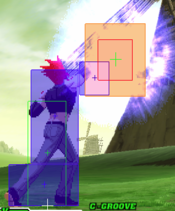
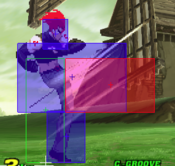
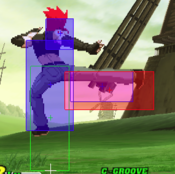
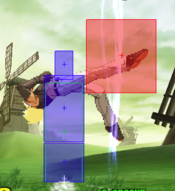
Benimaru steps a long distance before kicking upwards. Useful in niche situations, like when you need a fast and far punish or to get underneath the opponent and sideswap. Can also be useful to get in from neutral but any poke will beat it out, be careful.

Flying Drill

Flying Drill
Divekick, Drill
j.2HK
CVS2 Benimaru j2HK.png
Version Damage Stun Cancel Guard Parry Startup Active Recovery Total Adv Hit Adv Block Invul
In Air, D.png + Hk.png 300xHit 3xHit None Mid High 9 Till Landing 11 - +3 +12 -

A multihitting divekick. A useful tool for Benimaru, as his jump is very floaty so any way to make anti-airing him harder is valuable. Cranks guard bar and is plus, but you can't combo from it. Unlike other divekicks, the frame data is fairly consistent since it hits so many times.

Special Moves

Raijinken

Raijinken
Electric Ball, Lightning Fist
236P
CVS2 Benimaru 236P.PNG
Version Damage Stun Cancel Guard Parry Startup Active Recovery Total Adv Hit Adv Block Invul
LP
Qcf.png + Lp.png
800 8 None Mid High 14 15~50 50 64 +1 +1 None
MP
Qcf.png + Mp.png
600+300 6+3 None Mid High 18 19~52 52 70 +1 +1 None
HP
Qcf.png + Hp.png
600+200x2 6+2+2 None Mid High 22 23~54 54 76 +1 +1 None

Close range electric punches. At first glance these look like zoning and poking tools, but moreso they're good for pressure and safely ending combos, as Beni is left very vulnerable for a long time if they whiff. If they connect or get blocked, they stop immediately, making them safe and decent chip tools.

Anti-Air Raijinken

Anti-Air Raijinken
AA Lighting Fist
623P
CVS2 Benimaru 623P.PNG
Version Damage Stun Cancel Guard Parry Startup Active Recovery Total Adv Hit Adv Block Invul
Dp.png + Lp.png 1000 10 None Mid High 10 11~42 42 52 - - None
Dp.png + Mp.png 1100 11 None Mid High 10 11~48 48 58 - - None
Dp.png + Hp.png 1200 12 None - - 10 11~54 54 64 - - None

A Raijinken aimed above Benimaru's head. The hitbox is large but at ten frames it's a bit slow to be a proper anti-air, especially with no invuln. By roll cancelling this move, it becomes a bit better as an anti-air but is still slow. Horrible on whiff as well so if you do it too late prepare to eat a massive punish. If this ever hits an air opponent, you can easily confirm into either 236236P or a Custom Combo.

Iai Geri

Iai Geri
Knee
236K
CVS2 Benimaru 236K.PNG
Version Damage Stun Cancel Guard Parry Startup Active Recovery Total Adv Hit Adv Block Invul
Qcf.png+Lk.png 800 8 Into D.pngU.png+K.png Mid High 6 2 37 45 -1 -1 None
Qcf.png+Mk.png 900 9 Into D.pngU.png+K.png Mid High 9 3 33 45 +2 +2 None
Qcf.png+Hk.png 1000 10 Into D.pngU.png+K.png Mid High 12 4 29 45 +5 +5 None

A knee to the chest. Despite not giving a knockdown, this is your most consistent and safest combo ender. Since the heavy version will combo from lights and does the most damage/is the most plus, stick to the heavy version in combos. The followup Inazuma Sandan-Geri gives a knockdown but requires Iai Geri to hit very close.

Iai Geri

Inazuma Sandan-Geri
Followup Kick
After 236K, 28K
CVS2 Benimaru 5HK.PNG
Kick Bridge
CVS2 Benimaru 623K Second.PNG
Final hit
Version Damage Stun Cancel Guard Parry Startup Active Recovery Total Adv Hit Adv Block Invul
D.pngU.png+Lk.png
Roundhouse Kick
300 3 None Mid High 10 4 15 19 - - None

The first hit of the 2 part followup. Does not change depending on button strength used, but the followup DP does change, so this is listed as it's own version!

Version Damage Stun Cancel Guard Parry Startup Active Recovery Total Adv Hit Adv Block Invul
Lk.png
Light Finisher
400 4 None Mid High 19 7 39 65 -DWN -22 4 (Full)
Mk.png
Medium Finisher
500 5 None Mid High 19 12 44 75 -DWN -32 4 (Full)
Hk.png
Heavy Finisher
600 6 None Mid High 19 12 51 72 -DWN -39 4 (Full)

The final part of the followup. Knocks down and is generally what you want to end combos with, but you won't always be able to as 236K needs to hit close for it to reach. Very unsafe on both block and whiff, so if you do it from too far or don't confirm the hit you will get punished. Since every version is heavily unsafe, use the heavy version always.

Jinrai Kick

Super Jinrai Kick
Dragon Kick, DP
623K
CVS2 Benimaru 623K First.PNG
Startup
CVS2 Benimaru 623K Second.PNG
First Hitbox
CVS2 Benimaru 623K Third.PNG
Last Hitbox
Version Damage Stun Cancel Guard Parry Startup Active Recovery Total Adv Hit Adv Block Invul
Dp.png+Lk.png 1300, 700 13, 7 None Mid High 6 8 39 53 -DWN -23 6 (Full)
Dp.png+Mk.png 1400, 800 14, 8 None Mid High 6 12 44 62 -DWN -39 6 (Full)
Dp.png+Hk.png 1500, 900 15, 9 None Mid High 6 12 51 69 -DWN -39 6 (Full)

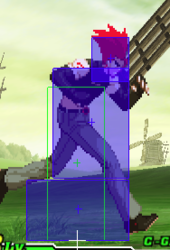
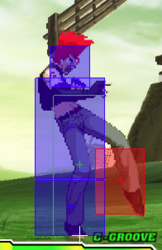
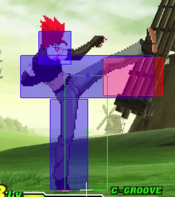
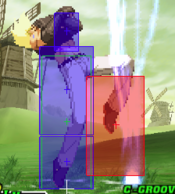
Beni's kick DPs. Not great as anti-airs, despite being faster than 623P, since the first hitbox is low to the ground meaning it's very prone to trading. Just like 623P, roll cancelling can help with that, which is nice since the second hitbox does reach quite high and anti-air well when it can. Just like 623P, a successful anti-air connect can confirm to 236236P or Custom Combo.

Shinku Katate Koma

Shinku Katate Koma
Breakdance
63214K (3K to cancel)
CVS2 Benimaru 63214K First.PNG
Forward Hitbox
CVS2 Benimaru 63214K Second.PNG
Turnaround
CVS2 Benimaru 63214K Third.PNG
Backward Hitbox
Version Damage Stun Cancel Guard Parry Startup Active Recovery Total Adv Hit Adv Block Invul
Hcb.png+Lk.png 1000 10 3K to Cancel Mid Mid 16 15 39 (4) 68 -DWN -13 None
Hcb.png+Mk.png 1100 11 3K to Cancel Mid Mid 16 31 37 (4) 84 -DWN -13 None
Hcb.png+Hk.png 1200 12 3K to Cancel Mid Mid 16 47 37 (4) 100 -DWN -13 None

Benimaru gets on one hand and spins around quickly. An odd move with little purpose. The hurtbox is low enough to avoid some fireballs but the huge lag makes it hard to use in those situations. It can be used to end combos in a consistent knockdown, but the knockdown sideswaps and sends them very far away, so this is questionably useful for Beni who usually likes to be close. Always cancel this using 3K, as it makes getting oki from it slightly better and makes it a bit harder to punish.

Benimaru Collider

Benimaru Collider
Command Grab
632146
CVS2 Benimaru 632146P.PNG
Version Damage Stun Cancel Guard Parry Startup Active Recovery Total Adv Hit Adv Block Invul
Hcb.pngF.png+Lp.png 1800 0 None Grab Grab 6 1 21 28 -DWN Grab None
Hcb.pngF.png+Mp.png 1900 0 None Grab Grab 6 1 21 28 -DWN Grab None
Hcb.pngF.png+Hp.png 2000 0 None Grab Grab 6 1 21 28 -DWN Grab None

Beni's command grab series. The light version does the least damage but has the most reach, and the heavy version does the most damage but has the least reach. Is a bit slower than his normal throws but can't be teched. If your opponent respects Beni's strike too much this can be useful.

Super Moves

Rai-Kou Ken

Rai-Kou Ken
Lightning Fist Super
236236P
CVS2 Benimaru 236236P.PNG
Version Damage Stun Cancel Guard Parry Startup Active Recovery Total Adv Hit Adv Block Invul
Qcf.pngQcf.png+Lp.png 2000 0 None Mid High 5, 10 10~95 95 100 -DWN -2 9 (Full)
Qcf.pngQcf.png+Mp.png 3500 0 SP/SU Mid High 5, 10 10~95 95 100 -DWN -2 15 (Full)
Qcf.pngQcf.png+Hp.png 5000 0 None Mid High 5, 10 10~95 95 100 -DWN -2 23 (Full)

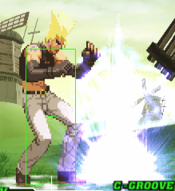
Beni's electric fist super. Easy to juggle into, and a decent reversal. You can loop these in the corner to rack up damage even outside of C groove. Even sweep will juggle into this. On all that it's also safe on block! Not as useful after long links however.

Benimaru Rising Shot

Benimaru Rising Shot
Rush Super
236236K
CVS2 Benimaru 236236K.PNG
Version Damage Stun Cancel Guard Parry Startup Active Recovery Total Adv Hit Adv Block Invul
Qcf.pngQcf.png+Lk.png 2000 0 None Mid High 4, 4 24 59 91 -DWN -48 8 (Full)
Qcf.pngQcf.png+Mk.png 3100 0 SP/SU Mid High 4, 4 28 59 95 -DWN -48 14 (Full)
Qcf.pngQcf.png+Hk.png 4700 0 None Mid High 4, 4 32 69 109 -DWN -48 22 (Full)

A forward moving rush super. Lots of invuln and decent damage makes it seem like a fireball punish, but it travels very slow meaning it only works for this in very close range. Normally you'll mostly just use the level 1 version for long hitconfirms into super, as you cannot combo off the level 2 version and it's usually better for Beni to save meter than spend on the level 3 version of this.

Electrigger

Benimaru Collider
Super Command Grab
6321463214P
CVS2 Benimaru 6321463214P.PNG
Version Damage Stun Cancel Guard Parry Startup Active Recovery Total Adv Hit Adv Block Invul
Hcb.pngHcb.png+Lp.png 2500 0 None Grab Grab 4 1 27 32 -DWN Grab 6 (Full)
Hcb.pngHcb.png+Mp.png 3800 0 SP/SU Grab Grab 4 1 27 32 -DWN Grab 14 (Full)
Hcb.pngHcb.png+Hp.png 5500 0 None Grab Grab 4 1 27 32 -DWN Grab 22 (Full)

A fast command grab super. Activates on the first frame after superflash, so if they aren't jumping or doing something throw invuln it will grab them. Does decent damage and the fear of it can make opponents scared to block which can be abused. Gives a stellar knockdown as well, allowing you to push another mixup after. Similar to rush super, the level 2 version combos into nothing and the level 3 version is highly damaging but questionably worth the meter.

The Basics

Advanced Strategy

Match-ups

CvS2 Wiki Navigation

General
Controls
Notation
HUD
Glossary
System
Roll Cancel
Combo
CvS2 Versions
Netplay/ Training
FAQ
Grooves
Groove Overview
Groove Subsystems
C-Groove
A-Groove
P-Groove
S-Groove
N-Groove
K-Groove
Capcom Characters
Akuma (Gouki)
Balrog (Boxer)
Blanka
Cammy
Chun-Li
Dan
Dhalsim
Eagle
E.Honda
Guile
Ken
Kyosuke
Maki
M. Bison (Dictator)
Morrigan
Rolento
Ryu
Sagat
Sakura
Vega (Claw)
Yun
Zangief
SNK Characters
Athena
Benimaru
Chang
Geese
Haohmaru
Hibiki
Iori
Joe
Kim
King
Kyo
Mai
Nakoruru
Raiden
Rock
Rugal
Ryo
Terry
Todo
Vice
Yamazaki
Yuri
Boss Characters
Shin Akuma
Ultimate Rugal
Evil Ryu
Orochi Iori