| Line 592: | Line 592: | ||
| description = | | description = | ||
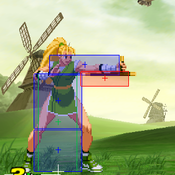
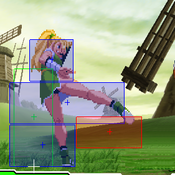
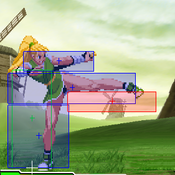
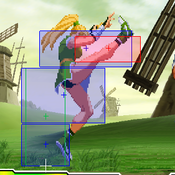
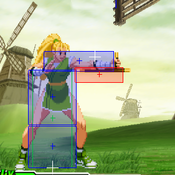
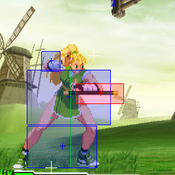
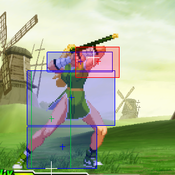
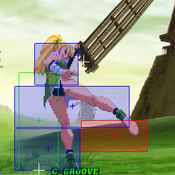
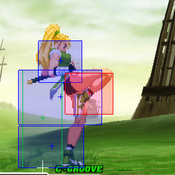
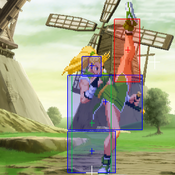
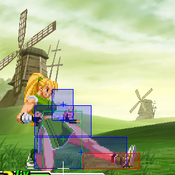
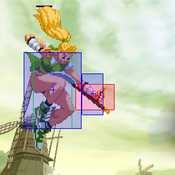
Maki fully sweeps out her leg low to the ground. | Maki fully sweeps out her leg low to the ground. | ||
* TBA | |||
}} | |||
}} | |||
=== Command Normals === | |||
<span class="invisible-header">BushinK</span> | |||
{{MoveData | |||
| name = Bushin Chain | |||
| subtitle = | |||
| input = {{Icon-Capcom|LP}},{{Icon-Capcom|MP}},{{Icon-Capcom|HP}},{{Icon-Capcom|HK}} | |||
| image = CvS2_Maki_BushinK.png | |||
| caption = The Classic Bushin Chain Combo | |||
| linkname = BushinK | |||
| data = | |||
{{AttackData-CvS2 | |||
| version = | |||
| subtitle = | |||
| damage = 300+500+600+700 (2100) | |||
| stun = 21 | |||
| cancel = - | |||
| guard = H/L* | |||
| parry = H/L* | |||
| startup = 4* | |||
| active = 4* | |||
| recovery = 16* | |||
| total = N/A | |||
| advHit = +4/-7/-3 | |||
| advBlock = +4/-7/-3 | |||
| invul = | |||
| description = | |||
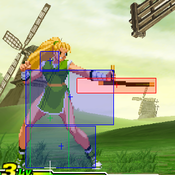
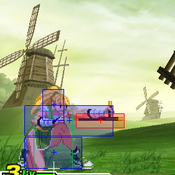
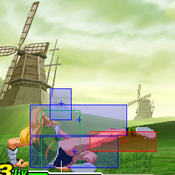
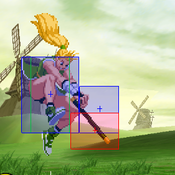
Maki attacks with a series of chained hits, unique to members of the Bushin-ryu clan. | |||
* TBA | |||
}} | |||
}} | |||
<span class="invisible-header">BushinT</span> | |||
{{MoveData | |||
| name = Bushin Chain Throw | |||
| subtitle = | |||
| input = {{Icon-Capcom|LP}},{{Icon-Capcom|MP}},{{Icon-Capcom|HP}},<br>{{Motion|2}}+ {{Icon-Capcom|HP}} | |||
| image = CvS2_Maki_BushinT.png | |||
| caption = You can also end it with a throw! | |||
| linkname = BushinT | |||
| data = | |||
{{AttackData-CvS2 | |||
| version = | |||
| subtitle = | |||
| damage = 300+500+600+1000 (2400) | |||
| stun = N/A | |||
| cancel = - | |||
| guard = H/L* | |||
| parry = H/L* | |||
| startup = 4* | |||
| active = 4* | |||
| recovery = 16* | |||
| total = N/A | |||
| advHit = +4/-7/Down | |||
| advBlock = +4/-7 | |||
| invul = | |||
| description = | |||
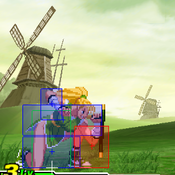
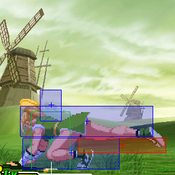
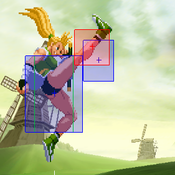
Maki attacks with a series of chained hits, ending with a the opponent being tossed up into the air and to the ground. | |||
* TBA | |||
}} | |||
}} | |||
<span class="invisible-header">Airbrake</span> | |||
{{MoveData | |||
| name = Elbow Drop | |||
| subtitle = aka The Airbrake | |||
| input = In air, {{Motion|2}}+ {{Icon-Capcom|MP}} | |||
| image = CvS2_Maki_Airbrake.png | |||
| caption = | |||
| linkname = Airbrake | |||
| data = | |||
{{AttackData-CvS2 | |||
| version = | |||
| subtitle = | |||
| damage = 800 | |||
| stun = 8 | |||
| cancel = - | |||
| guard = H | |||
| parry = H | |||
| startup = 9 | |||
| active = Until landing | |||
| recovery = | |||
| total = | |||
| advHit = | |||
| advBlock = | |||
| invul = | |||
| description = | |||
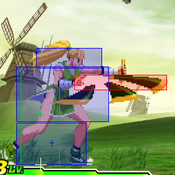
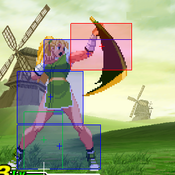
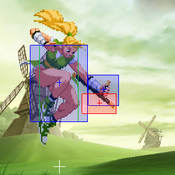
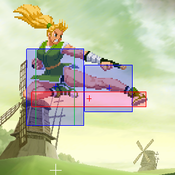
Maki raises her tonfa in front of her while in the air, slowing her forward momentum. | |||
* TBA | * TBA | ||
}} | }} | ||
Revision as of 02:51, 23 November 2021
Introduction
Character Profile
Maki Genryusai is a character from Capcom's Final Fight series, first appearing in 1993's Final Fight 2.
Maki is a ninja trained in Bushinryu, the same style as the 37th Bushinryu Master Genryusai and Guy, her childhood friend. Genryusai and Maki's sister/Guy's fiancée Rena were kidnapped by Metro City's Mad Gear gang and their leader Retu. Maki teamed up with Haggar and Carlos and searched the world. After defeating Rolento in Italy, he told them that the kidnapped pair were held in Japan. After kicking Retu out a window, seemingly to his death, Genryusai and Rena were rescued. Guy and Rena soon married, turning Guy into Maki's brother-in-law.
Later, after Genryusai's death, Zeku ascended to become the 38th Bushinryu Master. He continued to train Guy, eventually making Guy strong enough to defeat him and watch him become the 39th Bushinryu Master.
This turn of events annoyed Maki, who believed she was stronger than Guy. For several years, Maki searched for Guy to try to take the title of Bushinryu master. When she found him, he was in the middle of dealing with Shadaloo. Seeing her opportunity, the two started to fight. However, the fight was interrupted by the appearance of Shadaloo leader M.Bison. Maki rushed off to fight Bison, but was soon overwhelmed by the full might of Bison's Psycho Power. As he was about to deliver the final blow, Guy intervened and caused to Bison to retreat. Irritated, Maki thanked Guy for saving her and admitted she's not strong enough to become master yet, but says she will defeat Guy the next time they meet.
Gameplay Overview & Strategy Summary
Maki is a specialist mid-tier character that relies on Bushin-style speed and deception to set up most of her attacks. Her array of movement and jumping options on the ground and against the wall can control spacing like few other characters, making it easy to keep away from opponents. Her anti-air attacks are outstanding, including her 3K Suicide Spin special move; it is instantly invincible at what is effectively the press of a button, though it costs a bit of Maki's health to perform.
In close quarters, Maki primarily uses mixups and confuses opponents with frame traps, throws, and the threat of a quick overhead. Maki's punch throw has the second largest range in the game (60px instead of the normal 54px), allowing her to do more with her block strings but still get a tick throw in. Cancelling attacks into her forward (or backward) command run can reset block string pressure, launch Maki into her leaping overhead attack, or even allow you to buffer into her 720 command grab super—on the ground or in the air.
Maki's kick super is ridiculously damaging, especially in K-Groove. However, it can be very difficult to confirm into, requiring either a delicate buffer or extremely tight links. In general, this super is used to punish a mistake or bad guess by the opponent, generated by your mixups. Being able to recognize these punish opportunities and then land a quick super cancel off of crouching MK or close/far standing HP is very important to maximize damage potential with Maki.
Though a mid-tier character, Maki matches up well against many high-tier characters in CvS2. She usually wins the positioning game in neutral due to her movement options, and can shutdown most top-tier nonsense and even A-Groove activations with selective use of Suicide Spin. Despite this, Maki struggles on account of having a difficult time converting meter into big damage, especially against experienced players who can react to mixups. Most of the damage she inflicts against opponents will be accumulated from light pokes, heavy single-hit strikes, and throws. Without an easy and reliable super confirm, all the work you do can be undone by an easy and reliable super confirm by your opponent.
Maki is most effective in C, N, and K-Grooves, though each have pros and cons. In K-Groove, the offensive bonus gained from rage can really add up, though it's giving up roll cancel Reach Punch, which Maki benefits greatly from. That becomes an option in N-Groove, as does the extra damage gained from popping a stock; however, Maki's level 1 720 command grab super is rather useless, as it can be jumped out of after the super flash. This is mitigated in C-Groove, where Level 2 supers and a dead-body hop become available, though at the cost of her regular run which can aid in her deception/mixup game.
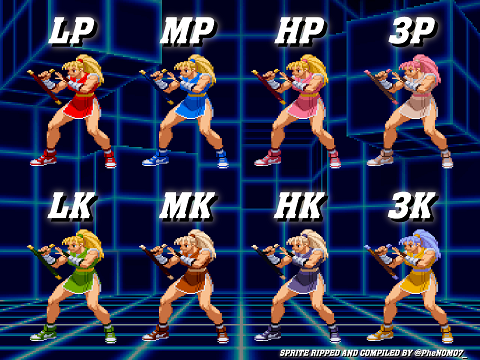
Character Color Selection
Character Data
| Health (at Ratio 2) | 14000 | Just Below Average |
| Stun | 70 | Average |
| Stun Duration | +0f | Normal |
| Guard Guage Recovery Rate | Fast Type | Best |
| Dash Length | 113 pixels | |
| Dash Duration | ||
| Dash Height | 22.5 | Dead Body & Ground Fireball Hop |
| Run Speed | 9.0 | Very Fast |
| Roll Distance | 120 pixels | Average |
| Roll Duration | 27f | Standard/Universal |
| Roll Recovery Frames | 2u+4f | Average |
| Wakeup Speed compared to Ryu | 0f | Normal |
Moves List
System & Subsystem Mechanics
Dashes & Run
Roll
Dodge & Dodge Attacks
Guard Cancel Counter Attack & Movement
Throws
Normal Moves
Far Standing Normals
5LP
| Damage | Stun | Cancel | Guard | Parry | Startup | Active | Recovery | Total | Adv Hit | Adv Block | Invul |
|---|---|---|---|---|---|---|---|---|---|---|---|
| 300 | 3 | RF/SP/SU | H/L | H/L | 3 | 4 | 8 | 15 | +3 | +3 | - |
A quick, high poke with Maki's tonfa.
| |||||||||||
5MP
| Damage | Stun | Cancel | Guard | Parry | Startup | Active | Recovery | Total | Adv Hit | Adv Block | Invul |
|---|---|---|---|---|---|---|---|---|---|---|---|
| 900 | 9 | SU | H/L | H | 6 | 6 | 20 | 32 | -4 | -4 | - |
Maki extends her arm and pokes out with the tip of her tonfa at hip level.
| |||||||||||
5HP
| Damage | Stun | Cancel | Guard | Parry | Startup | Active | Recovery | Total | Adv Hit | Adv Block | Invul |
|---|---|---|---|---|---|---|---|---|---|---|---|
| 1200 | 12 | SU | H/L | H | 6 | 4 | 38 | 48 | -14 | -14 | - |
Maki takes a full swing with her tonfa across her body at hip level, reaching a far distance out in front of her.
| |||||||||||
5LK
| Damage | Stun | Cancel | Guard | Parry | Startup | Active | Recovery | Total | Adv Hit | Adv Block | Invul |
|---|---|---|---|---|---|---|---|---|---|---|---|
| 400 | 4 | SU | H/L | H/L | 5 | 6 | 8 | 19 | +3 | +3 | - |
Maki kicks her foot out low and to the side.
| |||||||||||
5MK
| Damage | Stun | Cancel | Guard | Parry | Startup | Active | Recovery | Total | Adv Hit | Adv Block | Invul |
|---|---|---|---|---|---|---|---|---|---|---|---|
| 800 | 8 | SU | H/L | H | 6 | 6 | 16 | 28 | ±0 | ±0 | - |
Maki leans back and extends her leg out horizontally, hitting with her foot.
| |||||||||||
5HK
| Damage | Stun | Cancel | Guard | Parry | Startup | Active | Recovery | Total | Adv Hit | Adv Block | Invul |
|---|---|---|---|---|---|---|---|---|---|---|---|
| 1100 | 11 | SU | H/L | H | 6 | 6 | 21 | 37 | -3 | -3 | - |
Maki rotates a leg high into the air, kicking the space in front of her head.
| |||||||||||
Close Standing Normals
cl5LP
| Damage | Stun | Cancel | Guard | Parry | Startup | Active | Recovery | Total | Adv Hit | Adv Block | Invul |
|---|---|---|---|---|---|---|---|---|---|---|---|
| 300 | 3 | RF/SP/SU | H/L | H/L | 3 | 4 | 8 | 15 | +3 | +3 | - |
A quick, high poke with Maki's tonfa.
| |||||||||||
cl5MP
| Damage | Stun | Cancel | Guard | Parry | Startup | Active | Recovery | Total | Adv Hit | Adv Block | Invul |
|---|---|---|---|---|---|---|---|---|---|---|---|
| 800 | 8 | SP/SU | H/L | H | 5 | 6 | 11 | 22 | +5 | +5 | - |
Maki thrusts her elbow and butt of her tonfa out from her hip.
| |||||||||||
cl5HP
| Damage | Stun | Cancel | Guard | Parry | Startup | Active | Recovery | Total | Adv Hit | Adv Block | Invul |
|---|---|---|---|---|---|---|---|---|---|---|---|
| 1100 | 11 | SP/SU | H/L | H | 6 | 4 | 28 | 38 | -8 | -8 | - |
Maki swings upward with her elbow and butt of her tonfa, hitting above the shoulders.
| |||||||||||
cl5LK
| Damage | Stun | Cancel | Guard | Parry | Startup | Active | Recovery | Total | Adv Hit | Adv Block | Invul |
|---|---|---|---|---|---|---|---|---|---|---|---|
| 400 | 4 | SU | H/L | H/L | 5 | 6 | 8 | 19 | +3 | +3 | - |
Maki kicks her foot out low and to the side.
| |||||||||||
cl5MK
| Damage | Stun | Cancel | Guard | Parry | Startup | Active | Recovery | Total | Adv Hit | Adv Block | Invul |
|---|---|---|---|---|---|---|---|---|---|---|---|
| 700 | 7 | SP/SU | H/L | H | 5 | 4 | 17 | 26 | -1 | -1 | - |
Maki delivers a rising knee to the mid-section.
| |||||||||||
cl5HK
| Damage | Stun | Cancel | Guard | Parry | Startup | Active | Recovery | Total | Adv Hit | Adv Block | Invul |
|---|---|---|---|---|---|---|---|---|---|---|---|
| 1200 | 12 | SU | H/L | H | 5 | 4 | 31 | 40 | -11 | -11 | - |
Maki kicks straight up and HIGH into the air, well above her head.
| |||||||||||
Crouching Normals
2LP
| Damage | Stun | Cancel | Guard | Parry | Startup | Active | Recovery | Total | Adv Hit | Adv Block | Invul |
|---|---|---|---|---|---|---|---|---|---|---|---|
| 300 | 3 | RF/SP/SU | H/L | H/L | 3 | 4 | 8 | 15 | +3 | +3 | - |
A quick poke with the tip of Maki's tonfa at knee level.
| |||||||||||
2MP
| Damage | Stun | Cancel | Guard | Parry | Startup | Active | Recovery | Total | Adv Hit | Adv Block | Invul |
|---|---|---|---|---|---|---|---|---|---|---|---|
| 900 | 9 | SP/SU | H/L | L | 6 | 4 | 13 | 23 | +7 | +7 | - |
Maki thrusts the butt of her tonfa straight down into the ground in front of her, hitting low.
| |||||||||||
2HP
| Damage | Stun | Cancel | Guard | Parry | Startup | Active | Recovery | Total | Adv Hit | Adv Block | Invul |
|---|---|---|---|---|---|---|---|---|---|---|---|
| 1000 | 10 | SU | H/L | H/L | 6 | 8 | 19 | 33 | -1 | -1 | - |
Maki stands up and spins her tonfa around her hand into the air, hitting above and in front of her.
| |||||||||||
2LK
| Damage | Stun | Cancel | Guard | Parry | Startup | Active | Recovery | Total | Adv Hit | Adv Block | Invul |
|---|---|---|---|---|---|---|---|---|---|---|---|
| 300 | 3 | SP/SU | L | L | 3 | 4 | 9 | 16 | +4 | +4 | - |
Maki extends her leg and thrusts her foot out against the ground, kicking low.
| |||||||||||
2MK
| Damage | Stun | Cancel | Guard | Parry | Startup | Active | Recovery | Total | Adv Hit | Adv Block | Invul |
|---|---|---|---|---|---|---|---|---|---|---|---|
| 800 | 8 | SU | L | L | 6 | 6 | 17 | 29 | ±0 | ±0 | - |
Maki half-swings her leg out low against the ground, hitting at distance.
| |||||||||||
2HK
| Damage | Stun | Cancel | Guard | Parry | Startup | Active | Recovery | Total | Adv Hit | Adv Block | Invul |
|---|---|---|---|---|---|---|---|---|---|---|---|
| 1100 | 11 | SU | L | L | 7 | 4 | 27 | 38 | Down | -7 | - |
Maki fully sweeps out her leg low to the ground.
| |||||||||||
Command Normals
BushinK
| Damage | Stun | Cancel | Guard | Parry | Startup | Active | Recovery | Total | Adv Hit | Adv Block | Invul |
|---|---|---|---|---|---|---|---|---|---|---|---|
| 300+500+600+700 (2100) | 21 | - | H/L* | H/L* | 4* | 4* | 16* | N/A | +4/-7/-3 | +4/-7/-3 | - |
Maki attacks with a series of chained hits, unique to members of the Bushin-ryu clan.
| |||||||||||
BushinT
| Damage | Stun | Cancel | Guard | Parry | Startup | Active | Recovery | Total | Adv Hit | Adv Block | Invul |
|---|---|---|---|---|---|---|---|---|---|---|---|
| 300+500+600+1000 (2400) | N/A | - | H/L* | H/L* | 4* | 4* | 16* | N/A | +4/-7/Down | +4/-7 | - |
Maki attacks with a series of chained hits, ending with a the opponent being tossed up into the air and to the ground.
| |||||||||||
Airbrake
| Damage | Stun | Cancel | Guard | Parry | Startup | Active | Recovery | Total | Adv Hit | Adv Block | Invul |
|---|---|---|---|---|---|---|---|---|---|---|---|
| 800 | 8 | - | H | H | 9 | Until landing | - | - | - | - | - |
Maki raises her tonfa in front of her while in the air, slowing her forward momentum.
| |||||||||||
Air Normals
8LP
| Damage | Stun | Cancel | Guard | Parry | Startup | Active | Recovery | Total | Adv Hit | Adv Block | Invul |
|---|---|---|---|---|---|---|---|---|---|---|---|
| 600 | 6 | SP/SU | H | H | 4 | 22 | - | - | - | - | - |
A downward, angled poke with the tip of Maki's tonfa.
| |||||||||||
8MP
| Damage | Stun | Cancel | Guard | Parry | Startup | Active | Recovery | Total | Adv Hit | Adv Block | Invul |
|---|---|---|---|---|---|---|---|---|---|---|---|
| 900 | 9 | SP/SU | H | H | 3 | 8 | - | - | - | - | - |
A downward, angled poke with the tip of Maki's tonfa.
| |||||||||||
8HP
| Damage | Stun | Cancel | Guard | Parry | Startup | Active | Recovery | Total | Adv Hit | Adv Block | Invul |
|---|---|---|---|---|---|---|---|---|---|---|---|
| 1200 | 12 | SU | H | H | 7 | 6 | - | - | - | - | - |
Maki swings her tonfa hard and straight down, hitting with the tip end.
| |||||||||||
8LK
| Damage | Stun | Cancel | Guard | Parry | Startup | Active | Recovery | Total | Adv Hit | Adv Block | Invul |
|---|---|---|---|---|---|---|---|---|---|---|---|
| 500 | 5 | SP/SU | H | H | 4 | 22 | - | - | - | - | - |
Maki kicks her leg up at a high angle, hitting above her head.
| |||||||||||
8MK
| Damage | Stun | Cancel | Guard | Parry | Startup | Active | Recovery | Total | Adv Hit | Adv Block | Invul |
|---|---|---|---|---|---|---|---|---|---|---|---|
| 800 | 8 | SU | H | H | 5 | 8 | - | - | - | - | - |
Maki kicks out her leg in front of her for a classic jump-in attack
| |||||||||||
8HK
| Damage | Stun | Cancel | Guard | Parry | Startup | Active | Recovery | Total | Adv Hit | Adv Block | Invul |
|---|---|---|---|---|---|---|---|---|---|---|---|
| 1000/*1100 | 10/*11 | SU | H | H | 6 | 6 | - | - | - | - | - |
Maki swings her leg hard, kicking below and in front of her.
| |||||||||||
Special Moves
| Distance Punch | (Genko) | |
| QCF + P | Maki swings a downward haymaker. Knocks down. Ths move has pretty bad recovery for all strengths, so make sure you do this at max range to make your life a little easier. | |
| Suicide Spin | (Reppukyaku) | |
| KKK* | *Drains 600 Vitality | |
| Maki spins around on the tip of her tonfa.A lot of times this is your go to anti-air. It can't be air blocked and has a large, abusable amount of invincibility. If you can sense a wake up/reversal super form your opponent, do this right before their super freeze and they'll go right through you (you might even get a hit depending on what the super is). Important to know that while this move hits once, it can be blocked twice. | ||
| Wall Jumps | (Hassou Kyaku) | |
| Against wall, in Air: | ||
| QCB + LP or MP | Leaping Grab | |
| QCB + LK or MK | Diving Kick | |
| QCB + HP | Wall Jump | |
| QCB + HK | Wall Stall | |
| Command Air Throw | (Tengu Daoshi) | |
| In Air, HCF + P | ||
| Command Run Forward | (Hayagake) | |
| QCF + K | ||
| During Hayagake: | ||
| LK | Stop Running | |
| MK | Sliding Kick | |
| HK | Jumping Overhead | |
| Command Run Backward | (Saka Hayagake) | |
| QCB + K | ||
| During Saka Hayagake: | ||
| LK | Stop Running | |
| MK | Super Jump Forward | |
| HK | Super Jump Backward |
Supers
| Punch Super | (Bushin Gouraiha) | |
| QCFx2 + P | ||
| Kick Super | (Tesshinhou) | |
| QCFx2 + K, K | ||
| Maki runs forward exactly like she does for her command run. When you press kick the second time, Maki does a flying kick (ends with an overhead punch if it's the level 3 version). This move can be used to punish moves with long recovery, but you must learn to perform the kick as soon as the super freeze ends!!!
Ways to combo into this are : 1. st mk/st fierce xx (canceled into) kick super. Damage is very good. You'll want to make sure you can do this consistantly. If you can punish whiffs with this, your Maki is a threat. 2. cruoching mp xx kick super. This can also be used as a way to combo into her punch super. 3. standing lp, (x2 if close enough) stancing/crouching lk xx kick super. |
||
| Grab Super | (Ajaratengu) | |
| (In Air) 720 + P |
The Basics
s.lp, s.mp, s.hp, s.hk is her Final Fight chain.
s. lp s. mp s. hp xx d+fierce is an alternate chain that ends with a throw. The timing on the d+fierce is tricky and will probably be inconsistant the first several times you try it.
She isn't really a character with bnb's. The main ones you'll want to know.
(close) st fierce/st mp/st mk xx qcf+p or the slide/overhead off of her run will combo. Should you somehow mess up the previous option is safer.
cr lp lp xx KKK. Easy. It does have its disadvantages. If done in the corner the opponent can punish if they are in a safe fall groove. Also drains some of Maki's life.
Thats really all she has going for generic combos. She does have some super combos though.
Advanced Strategy
Throw super on opponent wake up
This is a nasty little trick tha can vastly improve your Maki game and have your opponent very fearful of getting knoched down. The setup is simple, knock your opponent down via a throw, sweep, or special punch. Afrer that you can do either two things.
1. Hesitate for a brief moment then jump to where the opponent is while inputting the command for the throw super in air. You should time this so that you land as soon as they get up and you perform the super as soon as you land. This can be a real bitch for your opponent to deal with on wakeup. Remember that Maki's throw super is invincible up until the acutal grab part if you're using a level 1 against people with good wakwup dp's.
2. Perform a command run and command stop (lk) just in front of the opponent. You should start the 720 as soon as you start the command stop so that so can instantly grab them as they wake up. This is usually your better option because it isn't as predictable as jumping and it just looks trickier.
Just Defend tips, mixups, and strategies
If you plan on playing Maki you absolutely need to be able to Just Defend like no other. Reasons being:
1. People will try to beat the shit out of you just because you're playing Maki.
2. Just Defending slowly gains back vitality, which Maki loses every time she does KKK. More vitality=more anti-air rape you can dish out.
With that being said, people will catch on to JD~KKK and start empty jumping into air parrying or JD's of their own. You should learn to mix things up after JD'ing a jump in attack. Here are some ideas:
1. JD~throw. Gives a free knock down and it that was the JD to set off your meter, you can command run and 720 as soon as they wake up or apply pressure until you break their guard and then s.hp->kick super.
2. JD~720. This one is pretty damn hard to do but do it once, just once and your opponent will think twice before they jump in again. As soon as you JD, start doing the 720 motion and grab them as soon as you leave the ground. Again, very hard, but scares your opponent into jumping less, leading to more ground trickery.
3. JD~command run and immediate stop. Honestly you dont even need to JD to do this, it's just to add to your flowchart of things to do. Depending on how close/deep the jump in was, you may or may not cross them up. You can influence this by walking backwards or forwards before you JD.
Dealing with air Just Defended DP gayness (sorta) Once you just defend an attack in air, you get sent upwards. So after JD'ing DP in the air your opponent is most likely going to be lame and keep DP'ing you until you fail at Just Defending. My only remedy to this that I know of is down+mp. Worst case scenario, you will trade hits.
