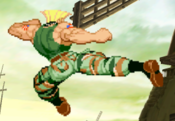
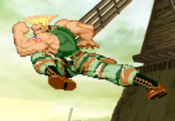
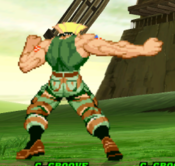
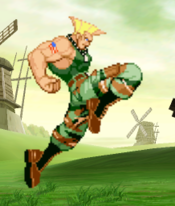
RenegadeVA (talk | contribs) |
Callie Rose (talk | contribs) No edit summary |
||
| Line 1: | Line 1: | ||
= Introduction = | = Introduction = | ||
{| class="wikitable" style="float:right; margin-left: 10px;" | |||
|- | |||
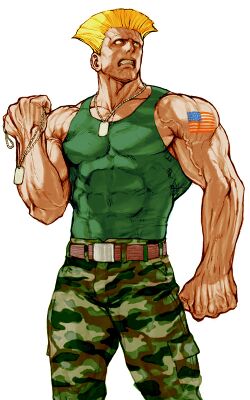
| colspan="2" | [[File:CVS2_Guile_CAPCOM_Art.jpg|frameless|250px]] | |||
|- | |||
| colspan="2" | Health (at Ratio 2) | |||
|- | |||
| 14400 || Above Average | |||
|- | |||
| colspan="2" | Stun | |||
|- | |||
| 70 || Average | |||
|- | |||
| colspan="2" | Dash Length | |||
|- | |||
| 16 Frames || Average | |||
|- | |||
| colspan="2" | Dash Type | |||
|- | |||
| Hop || Corpse Hop=Yes, Proj. Hop=No | |||
|- | |||
| colspan="2" | Run Speed | |||
|- | |||
| 8 || Average | |||
|- | |||
| colspan="2" | Roll Distance | |||
|- | |||
| 140 pixels || Far | |||
|- | |||
| colspan="2" | Roll Duration | |||
|- | |||
| 28f || Long | |||
|- | |||
| colspan="2" | Wakeup Speed compared to Ryu | |||
|- | |||
| 0f || Average | |||
|} | |||
== Story == | |||
Guile was a United States Air Force lieutenant, and one of the original World Warriors. One day, his best friend and commanding officer Charlie Nash went missing after going on a secret solo mission to destroy Shadaloo and M. Bison/Dictator. Guile was ordered to locate Charlie, and on his quest he finds and befriends Chun-Li. Chun-Li tells him of Shadaloo, and warns Guile that it would be very dangerous. Guile continues on regardless, and the two go to Thailand, where they find Charlie and the Shadaloo base. Guile and Charlie fight M. Bison as Chun-Li sets explosives inside of Shadaloo's base. Charlie gets shot by a Psycho Shot, and M. Bison almost hits Guile with a Psycho Crusher but Charlie saves him. The explosives detonate, and Guile and Chun-Li make it to safety. Guile mourns the death of Charlie. M. Bison survives, and later on Guile fights him again to get revenge. Guile wins, and is ready to kill him, but suddenly his wife and child appear. They tell him not to kill M. Bison, and Guile listens, going home to be a family man. | |||
Guile | == Gameplay == | ||
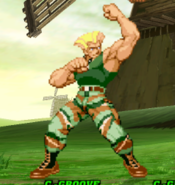
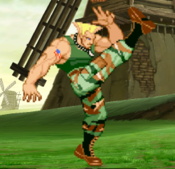
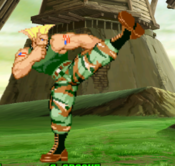
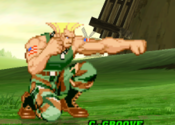
Guile is the classic charge character, and one of the most popular fighting game characters in history. He's very simple to learn, having only two special moves and a suite of command normals to make up for it. His two specials, Sonic Boom and Flash Kick, are very obvious in usage and give Guile an easy gameplan. Booms are amazing projectiles that can be hard to fight against, and Flash Kicks are amazing anti-airs that will snipe anyone trying to jump over a Boom. Combining usage of these two specials and properly utilizing his extensive list of normals is key to mastering Guile. | |||
Guile doesn't come without weaknesses however. Likely his biggest weakness is something intrinsic to his character: all of his specials require charge. This means that, unlike a fireball, Guile has to pre-emptively start charging for his fireball. By charging, Guile has to give up approaching, making it so he has to play a very patient and turtle-style game. You have to actively choose between approaching or keeping your powerful fireball and anti-air stored, you can't have both without taking massive risks like whiffing his forward moving normals or jumping. The player has to learn to keep or give up charge depending on the situation. This also hurts his combo game quite a bit, as he doesn't always have access to a consistent knockdown or even really consistent damage. | |||
All in all, Guile is a patient zoner-style character who uses his extensive list of useful normals, powerful fireballs, and strong anti-airs to control the pace of the match. He has amazing neutral and defense, but his offense is limited and requires smart charge management, with very little mixup possibility. | |||
== Groove Selection == | |||
C-Groove is the most popular for Guile, and for good reason. Easy access to plenty of meter means Guile can more easily end in super, and he can have his powerful level 3 super more often. Air blocking allows him to jump forward while maintaining charge and remain relatively safe. Alpha Counters give him a good defensive option, and his level 2 combo is actually quite good. Plus, roll gives him RC Sonic Booms, which is one of the best and probably most annoying Roll Cancels in the game. Rolls are also a useful, if gimmicky, way to approach while keeping charge. C-Guile has everything he needs to succeed, where other Grooves make him sacrifice something. | |||
N-Groove and K-Groove are right behind C-Groove in terms of viability. N-Groove is the most versatile Groove, making N-Guile a great fit. He keeps the roll like in C-Groove but gains a run and shorthop, which legitimizes his pressure and mobility a lot more. Easy access to level 1 supers lets him end in knockdowns more, guard cancel rolls, safe fall, N-Groove has a bit of everything. The main weakness is that Guile can't access his level 3, which is an amazing super, and doesn't have his great level 2 combo. K-Guile gets access to Rage and JD, both very powerful mechanics, and gets roll and hop just like N-Guile. Rage makes Guile's poke and projectile gameplan a lot more damaging, and JD is a very solid defensive tool that benefits Guile who can easily start charging after a JD. The lack of rolls and loss of level 1 supers hurts however. | |||
A-Guile is questionable. His CC isn't great, and Guile would rather use the meter for a level 3, which you would never pick over a CC in A-Groove. He isn't useless, as A-Groove is simply powerful on a base level, but it's definitely weak for him. S-Groove is even worse for him, as charging meter leaves him wide open. He basically doesn't benefit at all from infinite level 1s, as the power of his level 1s is that they give him a consistent knockdown, and he only gets his level 3 when at low health. P-Groove is likely the worst one, as Guile has to give up charging to parry, and even then his punishes aren't strong without full meter. Having only level 3s means Guile rarely has a super in the first place, and can basically never parry into a knockdown. | |||
{{ProConTable | |||
|pros= | |||
* Great normals and likely the best fireball in the game | |||
* Powerful anti-airs to keep people out | |||
* A fast, high damage level 3 that's great for punishing or chipping | |||
* Plenty of command normals for a variety of situations | |||
* Easy to understand basic gameplan | |||
|cons= | |||
* Charge management makes him finicky, as you have to actively decide between charge or approach | |||
* Punishes without charge are weak, and he's often forced to spend meter on level 1s or not get knockdowns when he needs them | |||
* Weak mixups, and his offense in general is weaker as he needs charge for Booms in order to maintain pressure | |||
}} | |||
= Normal Moves = | |||
== Far Normals == | |||
=== <span class="invisible-header">5LP</span> === | |||
{{MoveData | |||
| name = Far Jab | |||
| input = 5LP / Far LP | |||
| subtitle = Far Light Punch | |||
| image = CVS2_Guile_5LP.PNG | |||
| caption = | |||
| linkname = 5LP | |||
| data = | |||
{{AttackData-CvS2 | |||
| version = Far {{Icon-Capcom|LP}} | |||
| subtitle = | |||
| damage = 200 | |||
| stun = 2 | |||
| cancel = RF/SP/SU | |||
| guard = Mid | |||
| parry = High | |||
| startup = 3 | |||
| active = 4 | |||
| recovery = 6 | |||
| total = 13 | |||
| advHit = +5 | |||
| advBlock = +5 | |||
| invul = None | |||
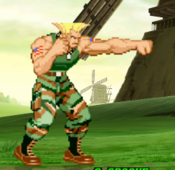
| description = A very standard jab. Good as a last minute anti-air and as a check, but outshined mostly by 2LP. | |||
}} | |||
}} | |||
=== <span class="invisible-header">5MP</span> === | |||
{{MoveData | |||
| name = Far Strong | |||
| input = 5MP / Far MP | |||
| subtitle = Far Medium Punch | |||
| image = CVS2_Guile_5MP.PNG | |||
| caption = | |||
| linkname = 5MP | |||
| data = | |||
{{AttackData-CvS2 | |||
| version = Far {{Icon-Capcom|MP}} | |||
| subtitle = | |||
| damage = 800/600 | |||
| stun = 8/6 | |||
| cancel = SP/SU | |||
| guard = Mid | |||
| parry = High | |||
| startup = 4 | |||
| active = 5 | |||
| recovery = 18 | |||
| total = 27 | |||
| advHit = +2 | |||
| advBlock = +2 | |||
| invul = None | |||
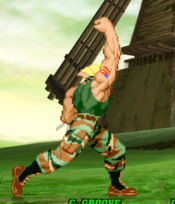
| description = A fast uppercut, and the first of Guile's many anti-airs. Has decent range and speed, and while it is mostly a functional anti-air it isn't a bad tool for cancels either. Won't special cancel on anti-air connect and does less damage as well. | |||
}} | |||
}} | |||
=== <span class="invisible-header">5HP</span> === | |||
{{MoveData | |||
| name = Far Fierce | |||
| input = 5HP / Far HP | |||
| subtitle = Far Heavy Punch | |||
| image = CVS2_Guile_5HP.PNG | |||
| caption = | |||
| linkname = 5HP | |||
| data = | |||
{{AttackData-CvS2 | |||
| version = Far {{Icon-Capcom|HP}} | |||
| subtitle = | |||
| damage = 1200 | |||
| stun = 12 | |||
| cancel = SU | |||
| guard = Mid | |||
| parry = High | |||
| startup = 6 | |||
| active = 6 | |||
| recovery = 18 | |||
| total = 30 | |||
| advHit = +4 | |||
| advBlock = +4 | |||
| invul = None | |||
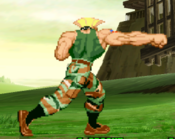
| description = A beefy straight punch with good range. Useful for punishing whiffs or blocked specials, and cancels into super for some big damage. Faster than you might expect and leaves him plus on block, very nice normal overall. | |||
}} | |||
}} | |||
=== <span class="invisible-header">5LK</span> === | |||
{{MoveData | |||
| name = Far Short | |||
| input = 5LK / Far LK | |||
| subtitle = Far Light Kick | |||
| image = CVS2_Guile_5LK.PNG | |||
| caption = | |||
| linkname = 5LK | |||
| data = | |||
{{AttackData-CvS2 | |||
| version = Far {{Icon-Capcom|LK}} | |||
| subtitle = | |||
| damage = 300 | |||
| stun = 3 | |||
| cancel = RF/SP/SU | |||
| guard = Mid | |||
| parry = Mid | |||
| startup = 4 | |||
| active = 4 | |||
| recovery = 7 | |||
| total = 14 | |||
| advHit = +4 | |||
| advBlock = +4 | |||
| invul = None | |||
| description = A shin kick. Not a low despite looks. Useful for checking approaches or buttons, as it's pretty fast, and can be cancelled into Booms for some extended pressure and plus frames. | |||
}} | |||
}} | |||
=== <span class="invisible-header">5MK</span> === | |||
{{MoveData | |||
| name = Far Forward | |||
| input = 5MK / Far MK | |||
| subtitle = Far Medium Kick | |||
| image = CVS2_Guile_5MK.PNG | |||
| caption = Sobat | |||
| linkname = 5MK | |||
| data = | |||
{{AttackData-CvS2 | |||
| version = Far {{Icon-Capcom|MK}} | |||
| subtitle = | |||
| damage = 700 | |||
| stun = 7 | |||
| cancel = None | |||
| guard = Mid | |||
| parry = High | |||
| startup = 11 | |||
| active = 5 | |||
| recovery = 14 | |||
| total = 20 | |||
| advHit = +1 | |||
| advBlock = +1 | |||
| invul = Lower Body | |||
| description = A sobat done in place. Very very slight forward movement. This is useful for hopping over lower moves like crouching normals or ground fireballs. Also a solid poke in it's own right, but isn't cancellable at all so very low reward. | |||
}} | |||
}} | |||
=== <span class="invisible-header">5HK</span> === | |||
{{MoveData | |||
| name = Far Roundhouse | |||
| input = 5HK / Far HK | |||
| subtitle = Far Heavy Kick | |||
| image = CVS2_Guile_5HK.PNG | |||
| caption = | |||
| linkname = 5HK | |||
| data = | |||
{{AttackData-CvS2 | |||
| version = Far {{Icon-Capcom|HK}} | |||
| subtitle = | |||
| damage = 1100 | |||
| stun = 11 | |||
| cancel = None | |||
| guard = Mid | |||
| parry = High | |||
| startup = 15 | |||
| active = 6 | |||
| recovery = 14 | |||
| total = 35 | |||
| advHit = +4 | |||
| advBlock = +4 | |||
| invul = None | |||
| description = A fast forward-moving stepkick. At first glance, this is a solid normal for resetting pressure and approaching since Guile is left safe on block, though it's low reward. While these are still true, this move has a great use in being a way for Guile to move forward while still holding back charge for a Boom. | |||
}} | |||
}} | |||
== Close Normals == | |||
=== <span class="invisible-header">clLP</span> === | |||
{{MoveData | |||
| name = Close Jab | |||
| input = cl.LP / cl5LP | |||
| subtitle = Close Light Punch | |||
| image = CVS2_Guile_5LP.PNG | |||
| caption = | |||
| linkname = cl.LP | |||
| data = | |||
{{AttackData-CvS2 | |||
| version = Close {{Icon-Capcom|LP}} | |||
| subtitle = | |||
| damage = 200 | |||
| stun = 2 | |||
| cancel = RF/SP/SU | |||
| guard = Mid | |||
| parry = High | |||
| startup = 3 | |||
| active = 4 | |||
| recovery = 6 | |||
| total = 13 | |||
| advHit = +5 | |||
| advBlock = +5 | |||
| invul = None | |||
| description = Identical to far jab. Basically the same usage. | |||
}} | |||
}} | |||
=== <span class="invisible-header">clMP</span> === | |||
{{MoveData | |||
| name = Close Strong | |||
| input = cl.MP / cl5MP | |||
| subtitle = Close Medium Punch | |||
| image = CVS2_Guile_clMP.PNG | |||
| caption = | |||
| linkname = cl.MP | |||
| data = | |||
{{AttackData-CvS2 | |||
| version = Close {{Icon-Capcom|MP}} | |||
| subtitle = | |||
| damage = 700 | |||
| stun = 7 | |||
| cancel = SP/SU | |||
| guard = Mid | |||
| parry = High | |||
| startup = 3 | |||
| active = 3 | |||
| recovery = 16 | |||
| total = 22 | |||
| advHit = +2 | |||
| advBlock = +2 | |||
| invul = None | |||
| description = A quick hook punch. Useful for fast punishes and not much else, though even if you misinput this you'll still get 5MP which is fine. If they're this close and -3 you would probably rather use throw to punish for the knockdown rather than a cl.MP > Boom. | |||
}} | |||
}} | |||
=== <span class="invisible-header">clHP</span> === | |||
{{MoveData | |||
| name = Close Fierce | |||
| input = cl.HP / cl5HP | |||
| subtitle = Close Heavy Punch | |||
| image = CVS2_Guile_clHP.PNG | |||
| caption = | |||
| linkname = cl.HP | |||
| data = | |||
{{AttackData-CvS2 | |||
| version = Close {{Icon-Capcom|HP}} | |||
| subtitle = | |||
| damage = 1100 | |||
| stun = 11 | |||
| cancel = SP/SU | |||
| guard = Mid | |||
| parry = High | |||
| startup = 4 | |||
| active = 3 | |||
| recovery = 30 | |||
| total = 37 | |||
| advHit = -9 | |||
| advBlock = -9 | |||
| invul = None | |||
| description = A fast uppercut at a higher angle than 5MP. Useful as an anti-air, but is mainly used as your highest damage cancel normal. | |||
}} | |||
}} | |||
=== <span class="invisible-header">clLK</span> === | |||
{{MoveData | |||
| name = Close Short | |||
| input = cl.LK / cl5LK | |||
| subtitle = Close Light Kick | |||
| image = CVS2_Guile_5LK.PNG | |||
| caption = | |||
| linkname = cl.LK | |||
| data = | |||
{{AttackData-CvS2 | |||
| version = Close {{Icon-Capcom|LK}} | |||
| subtitle = | |||
| damage = 300 | |||
| stun = 3 | |||
| cancel = RF/SP/SU | |||
| guard = Mid | |||
| parry = Mid | |||
| startup = 4 | |||
| active = 4 | |||
| recovery = 7 | |||
| total = 14 | |||
| advHit = +4 | |||
| advBlock = +4 | |||
| invul = None | |||
| description = Identical to the far version. | |||
}} | |||
}} | |||
=== <span class="invisible-header">clMK</span> === | |||
{{MoveData | |||
| name = Close Forward | |||
| input = cl.MK / cl5MK | |||
| subtitle = Close Medium Kick | |||
| image = CVS2_Guile_clMK.PNG | |||
| caption = | |||
| linkname = cl.MK | |||
| data = | |||
{{AttackData-CvS2 | |||
| version = Close {{Icon-Capcom|MK}} | |||
| subtitle = | |||
| damage = 800 | |||
| stun = 8 | |||
| cancel = SP/SU | |||
| guard = Mid | |||
| parry = High | |||
| startup = 4 | |||
| active = 6 | |||
| recovery = 14 | |||
| total = 24 | |||
| advHit = 0 | |||
| advBlock = 0 | |||
| invul = None | |||
| description = A big upwards kick. Higher damage medium normal when compared to cl.MP, but has less use since you can't do this while holding Boom charge. The command normal Sobats will come out instead, making it very hard to use this in combos and not really worth it. | |||
}} | |||
}} | |||
=== <span class="invisible-header">clHK</span> === | |||
{{MoveData | |||
| name = Close Roundhouse | |||
| input = cl.HK / cl5HK | |||
| subtitle = Close Heavy Kick | |||
| image = CVS2_Guile_clHK.PNG | |||
| caption = | |||
| linkname = cl.HK | |||
| data = | |||
{{AttackData-CvS2 | |||
| version = Close {{Icon-Capcom|HK}} | |||
| subtitle = | |||
| damage = 1300 | |||
| stun = 13 | |||
| cancel = None | |||
| guard = Mid | |||
| parry = High | |||
| startup = 8 | |||
| active = 8 | |||
| recovery = 16 | |||
| total = 28 | |||
| advHit = 0 | |||
| advBlock = 0 | |||
| invul = None | |||
| description = A high angled kick. Likely one of your least useful normals, as while it does have a decent angle for anti-air, it has short activation range and is slower than all your other anti-airs. Technically your highest damage normal but a cancel into Boom will always beat it. | |||
}} | |||
}} | |||
== Crouching Normals == | |||
=== <span class="invisible-header">2LP</span> === | |||
{{MoveData | |||
| name = Crouch Jab | |||
| input = 2LP / cr.LP | |||
| subtitle = Crouching Light Punch | |||
| image = CVS2_Guile_2LP.PNG | |||
| caption = | |||
| linkname = 2LP | |||
| data = | |||
{{AttackData-CvS2 | |||
| version = {{Motion|d}}+{{Icon-Capcom|LP}} | |||
| subtitle = | |||
| damage = 200 | |||
| stun = 2 | |||
| cancel = RF/SP/SU | |||
| guard = Mid | |||
| parry = Mid | |||
| startup = 3 | |||
| active = 4 | |||
| recovery = 5 | |||
| total = 12 | |||
| advHit = +5 | |||
| advBlock = +5 | |||
| invul = None | |||
| description = A quick 2LP. Useful for mashing, confirms, and pressure. You can mash these to build charge in a combo, but usually you'll get pushed too far out, so you'll generally use them after you already have charge built to do a knockdown punish like 2LP > 2LP > Flash Kick. | |||
}} | |||
}} | |||
=== <span class="invisible-header">2MP</span> === | |||
{{MoveData | |||
| name = Crouch Strong | |||
| input = 2MP / cr.MP | |||
| subtitle = Crouching Medium Punch | |||
| image = CVS2_Guile_2MP.PNG | |||
| caption = | |||
| linkname = 2MP | |||
| data = | |||
{{AttackData-CvS2 | |||
| version = {{Motion|d}}+{{Icon-Capcom|MP}} | |||
| subtitle = | |||
| damage = 700 | |||
| stun = 7 | |||
| cancel = SP/SU | |||
| guard = Mid | |||
| parry = Mid | |||
| startup = 4 | |||
| active = 5 | |||
| recovery = 10 | |||
| total = 19 | |||
| advHit = +5 | |||
| advBlock = +5 | |||
| invul = None | |||
| description = One of your most used normals. A fast, far reaching punch that cancels and is very plus. Useful as a poke, pressure tool, for cancelling into Booms, punishing into Flash Kick, etc. | |||
}} | |||
}} | |||
=== <span class="invisible-header">2HP</span> === | |||
{{MoveData | |||
| name = Crouch Fierce | |||
| input = 2HP / cr.HP | |||
| subtitle = Crouching Heavy Punch | |||
| image = CVS2_Guile_2HP.PNG | |||
| caption = | |||
| linkname = 2HP | |||
| data = | |||
{{AttackData-CvS2 | |||
| version = {{Motion|d}}+{{Icon-Capcom|HP}} | |||
| subtitle = | |||
| damage = 1200/700 | |||
| stun = 12/7 | |||
| cancel = SU | |||
| guard = Mid | |||
| parry = High | |||
| startup = 5 | |||
| active = 16 | |||
| recovery = 11 | |||
| total = 32 | |||
| advHit = -3 | |||
| advBlock = -3 | |||
| invul = None | |||
| description = An uppercut reminiscent of the shoto crouch fierce. Very useful anti-air with tons of active frames, usually if you don't have a Flash Kick charged this is your go-to anti-air move. Doesn't have much use otherwise, though it is a higher damage super cancel than cl.HP. | |||
}} | |||
}} | |||
=== <span class="invisible-header">2LK</span> === | |||
{{MoveData | |||
| name = Crouch Short | |||
| input = 2LK / cr.LK | |||
| subtitle = Crouching Light Kick | |||
| image = CVS2_Guile_2LK.PNG | |||
| caption = | |||
| linkname = 2LK | |||
| data = | |||
{{AttackData-CvS2 | |||
| version = {{Motion|d}}+{{Icon-Capcom|LK}} | |||
| subtitle = | |||
| damage = 300 | |||
| stun = 3 | |||
| cancel = RF/SU | |||
| guard = Low | |||
| parry = Low | |||
| startup = 6 | |||
| active = 4 | |||
| recovery = 9 | |||
| total = 19 | |||
| advHit = +2 | |||
| advBlock = +2 | |||
| invul = None | |||
| description = A short low kick. Guile's main low mixup, but not exactly a good one. As far as low shorts go, this falls flat in a lot of categories. It isn't special cancellable, it's slower than a lot of other 2LKs, and it has no link options afterwards. The animation is also very deceptive, the hitbox is very small. You can basically hit with all of Guile's boot and still whiff this. | |||
}} | |||
}} | |||
=== <span class="invisible-header">2MK</span> === | |||
{{MoveData | |||
| name = Crouch Forward | |||
| input = 2MK / cr.MK | |||
| subtitle = Crouching Medium Kick | |||
| image = CVS2_Guile_2MK.PNG | |||
| caption = | |||
| linkname = 2MK | |||
| data = | |||
{{AttackData-CvS2 | |||
| version = {{Motion|d}}+{{Icon-Capcom|MK}} | |||
| subtitle = | |||
| damage = 700 | |||
| stun = 7 | |||
| cancel = SU | |||
| guard = Low | |||
| parry = Low | |||
| startup = 7 | |||
| active = 5 | |||
| recovery = 9 | |||
| total = 31 | |||
| advHit = +6 | |||
| advBlock = +6 | |||
| invul = None | |||
| description = A fairly useful ranged low poke. Not much reward, but not much risk either, and this is actually your most plus normal too. With a level 3 stored you can hitconfirm this into a level 3 at any range for great damage. | |||
}} | |||
}} | |||
=== <span class="invisible-header">2HK</span> === | |||
{{MoveData | |||
| name = Crouch Roundhouse | |||
| input = 2HK / cr.HK | |||
| subtitle = Crouching Heavy Kick | |||
| image = CVS2_Guile_2HK.PNG | |||
| caption = | |||
| linkname = 2HK | |||
| data = | |||
{{AttackData-CvS2 | |||
| version = {{Motion|d}}+{{Icon-Capcom|HK}} | |||
| subtitle = | |||
| damage = 1300,1200 | |||
| stun = 13,12 | |||
| cancel = SU | |||
| guard = Low | |||
| parry = Low | |||
| startup = 7 | |||
| active = 5(28)5 | |||
| recovery = 11 | |||
| total = 48 | |||
| advHit = -DWN | |||
| advBlock = +8 | |||
| invul = None | |||
| description = A unique two-hit sweep. This normal is one of highs and lows, as while it's a consistent chargeless knockdown from range, it's also a massive risk. If they block the first hit, they can usually punish you before the second hit comes out. However if they block the 2nd hit you are actually very plus. | |||
}} | |||
}} | |||
== Jumping Normals == | |||
=== <span class="invisible-header">8LP</span> === | |||
{{MoveData | |||
| name = Jump Jab | |||
| input = j.LP / 8LP | |||
| subtitle = Jumping Light Punch | |||
| image = CVS2_Guile_jLP.PNG | |||
| caption = | |||
| linkname = j.LP | |||
| data = | |||
{{AttackData-CvS2 | |||
| version = {{Motion|ub}},{{Motion|u}},{{Motion|uf}}+{{Icon-Capcom|LP}} | |||
| subtitle = | |||
| damage = 500 | |||
| stun = 5 | |||
| cancel = None | |||
| guard = High | |||
| parry = High | |||
| startup = 8 | |||
| active = 22 | |||
| recovery = 0 | |||
| total = 30 | |||
| advHit = Varies | |||
| advBlock = Varies | |||
| invul = None | |||
| description = A very basic j.LP. High active frame count makes it alright for aerial interrupts but unusually high startup frames makes it not as consistent at this as others. | |||
}} | |||
}} | |||
=== <span class="invisible-header">8MP</span> === | |||
{{MoveData | |||
| name = Jump Strong | |||
| input = j.MP / 8MP | |||
| subtitle = Jumping Medium Punch | |||
| image = CVS2_Guile_jLP.PNG | |||
| caption = Neutral Jump | |||
| image2 = CVS2_Guile_jMP.PNG | |||
| caption2 = Diagonal Jump | |||
| linkname = j.MP | |||
| data = | |||
{{AttackData-CvS2 | |||
| version = {{Motion|ub}},{{Motion|u}},{{Motion|uf}}+{{Icon-Capcom|MP}} | |||
| subtitle = | |||
| damage = 700 | |||
| stun = 7 | |||
| cancel = None | |||
| guard = High | |||
| parry = High | |||
| startup = 8 | |||
| active = 16 | |||
| recovery = 0 | |||
| total = 24 | |||
| advHit = Varies | |||
| advBlock = Varies | |||
| invul = None | |||
| description = A jumping strong punch. Despite having a different animation for neutral jump, both versions are functionally the same with minor hitbox differences. Not much use for this generally, can be a niche air-to-air because of the large active period but you usually want to anti-air from the ground with Guile. | |||
}} | |||
}} | |||
=== <span class="invisible-header">8HP</span> === | |||
{{MoveData | |||
| name = Jump Fierce | |||
| input = j.HP / 8HP | |||
| subtitle = Jumping Heavy Punch | |||
| image = CVS2_Guile_jLP.PNG | |||
| caption = Neutral Jump | |||
| image2 = CVS2_Guile_jMP.PNG | |||
| caption2 = Diagonal Jump | |||
| linkname = j.HP | |||
| data = | |||
{{AttackData-CvS2 | |||
| version = {{Motion|ub}},{{Motion|u}},{{Motion|uf}}+{{Icon-Capcom|HP}} | |||
| subtitle = | |||
| damage = 1200 | |||
| stun = 12 | |||
| cancel = None | |||
| guard = High | |||
| parry = High | |||
| startup = 8 | |||
| active = 8 | |||
| recovery = 0 | |||
| total = 16 | |||
| advHit = Varies | |||
| advBlock = Varies | |||
| invul = None | |||
| description = A good jump-in with identical animations to j.MP. Just like j.MP, there is functionally no difference between the two versions besides minor hitbox changes. These act as your high damage jump-ins, though Guile in general won't be jumping much. Use them to start a combo if you get a stun. | |||
}} | |||
}} | |||
=== <span class="invisible-header">8LK</span> === | |||
{{MoveData | |||
| name = Jump Short | |||
| input = j.LK / 8LK | |||
| subtitle = Jumping Light Kick | |||
| image = CVS2_Guile_njLK.PNG | |||
| caption = Neutral Jump | |||
| image2 = CVS2_Guile_jLK.PNG | |||
| caption2 = Diagonal Jump | |||
| linkname = j.LK | |||
| data = | |||
{{AttackData-CvS2 | |||
| version = {{Motion|u}}+{{Icon-Capcom|LK}} | |||
| subtitle = | |||
| damage = 500 | |||
| stun = 5 | |||
| cancel = None | |||
| guard = High | |||
| parry = High | |||
| startup = 8 | |||
| active = 22 | |||
| recovery = 0 | |||
| total = 30 | |||
| advHit = Varies | |||
| advBlock = Varies | |||
| invul = None | |||
}} | |||
{{AttackData-CvS2 | |||
| version = {{Motion|ub}}/{{Motion|uf}}+{{Icon-Capcom|LK}} | |||
| subtitle = | |||
| damage = 400 | |||
| stun = 4 | |||
| cancel = None | |||
| guard = High | |||
| parry = High | |||
| startup = 8 | |||
| active = 22 | |||
| recovery = 0 | |||
| total = 30 | |||
| advHit = Varies | |||
| advBlock = Varies | |||
| invul = None | |||
| description = Jump LK is Guile's main crossup jump-in, making it very useful as it's one of the few real mixups he has. Since it's a light, it has to hit fairly deep for him to be able to combo from it. Neutral j.LK is a kick hitbox right above Guile, but is essentially worthless in comparison to Guile's grounded anti-airs. | |||
}} | |||
}} | |||
=== <span class="invisible-header">8MK</span> === | |||
{{MoveData | |||
| name = Jump Forward | |||
| input = j.MK / 8MK | |||
| subtitle = Jumping Medium Kick | |||
| image = CVS2_Guile_njMK.PNG | |||
| caption = Neutral Jump | |||
| image2 = CVS2_Guile_jMK.PNG | |||
| caption2 = Diagonal Jump | |||
| linkname = j.MK | |||
| data = | |||
{{AttackData-CvS2 | |||
| version = {{Motion|u}}+{{Icon-Capcom|MK}} | |||
| subtitle = | |||
| damage = 800 | |||
| stun = 8 | |||
| cancel = None | |||
| guard = High | |||
| parry = High | |||
| startup = 9 | |||
| active = 5 | |||
| recovery = 0 | |||
| total = 14 | |||
| advHit = Varies | |||
| advBlock = Varies | |||
| invul = None | |||
}} | |||
{{AttackData-CvS2 | |||
| version = {{Motion|ub}}/{{Motion|uf}}+{{Icon-Capcom|MK}} | |||
| subtitle = | |||
| damage = 700 | |||
| stun = 7 | |||
| cancel = None | |||
| guard = High | |||
| parry = High | |||
| startup = 8 | |||
| active = 16 | |||
| recovery = 0 | |||
| total = 24 | |||
| advHit = Varies | |||
| advBlock = Varies | |||
| invul = None | |||
| description = Guile sticks his foot out and lets it linger for a while. Both jump versions are mostly used as air-to-airs, with the neutral jump version used for reach and the diagonal jump version for active frames. While they do well at this, you would still rather just do a grounded anti-air. Diagonal j.MK does make an alright jump-in, but it's outclassed by both of Guile's heavy jump normals. | |||
}} | |||
}} | |||
=== <span class="invisible-header">8HK</span> === | |||
{{MoveData | |||
| name = Jump Roundhouse | |||
| input = j.HK / 8HK | |||
| subtitle = Jumping Heavy Kick | |||
| image = CVS2_Guile_jHK.PNG | |||
| caption = | |||
| linkname = j.HK | |||
| data = | |||
{{AttackData-CvS2 | |||
| version = {{Motion|ub}},{{Motion|u}},{{Motion|uf}}+{{Icon-Capcom|HK}} | |||
| subtitle = | |||
| damage = 1200/1100 | |||
| stun = 12/11 | |||
| cancel = None | |||
| guard = High | |||
| parry = High | |||
| startup = 7 | |||
| active = 5 | |||
| recovery = 0 | |||
| total = 12 | |||
| advHit = Varies | |||
| advBlock = Varies | |||
| invul = None | |||
| description = Guile kicks his foot out in front of him. Does more damage and stun on a neutral jump, but it's tied with j.HP so that has little use. This is generally your preferred jump normal for range and damage, and it combos easily into sweep for a knockdown. | |||
}} | |||
}} | |||
== Command Normals == | |||
=== <span class="invisible-header">Spinning Back Knuckle</span> === | |||
{{MoveData | |||
| name = Spinning Back Knuckle | |||
| input = 6HP | |||
| subtitle = Backhand Fist | |||
| image = CVS2_Guile_6HP.PNG | |||
| caption = | |||
| linkname = 6HP | |||
| data = | |||
{{AttackData-CvS2 | |||
| version = {{Motion|f}}+{{Icon-Capcom|HP}} | |||
| subtitle = | |||
| damage = 1300 | |||
| stun = 13 | |||
| cancel = None | |||
| guard = Mid | |||
| parry = High | |||
| startup = 8 | |||
| active = 5 | |||
| recovery = 19 | |||
| total = 32 | |||
| advHit = 0 | |||
| advBlock = 0 | |||
| invul = None | |||
| description = A very fast backhanded punch. Has the farthest reach of Guile's normals by a wide margin, making it one of his most used whiff punishes and pokes. It also is a good combo ender, as it can be linked after a Boom very reliably. Overall very useful normal. | |||
}} | |||
}} | |||
=== <span class="invisible-header">Bazooka Knee</span> === | |||
{{MoveData | |||
| name = Bazooka Knee | |||
| input = 4/6LK | |||
| subtitle = Knee | |||
| image = CVS2_Guile_46LK.PNG | |||
| caption = | |||
| linkname = 4/6LK | |||
| data = | |||
{{AttackData-CvS2 | |||
| version = {{Motion|b}}/{{Motion|f}}+{{Icon-Capcom|LK}} | |||
| subtitle = | |||
| damage = 600 | |||
| stun = 6 | |||
| cancel = None | |||
| guard = Mid | |||
| parry = High | |||
| startup = 6 | |||
| active = 5 | |||
| recovery = 20 | |||
| total = 31 | |||
| advHit = -12 | |||
| advBlock = -5 | |||
| invul = Throw (Airborne) | |||
| description = A forward moving knee. When done with 6 you move slightly farther forward. This has two main uses: resetting pressure on block and moving forward with charge. Since this is relatively safe to whiff, you can use 4LK to move forward without sacrificing your Boom charge. As a pressure reset, these can be sorta risky. You can space them out a bit to be relatively safe, but if they hit you're always unsafe. | |||
}} | |||
}} | |||
=== <span class="invisible-header">Rolling Sobat</span> === | |||
{{MoveData | |||
| name = Rolling Sobat | |||
| input = 4/6MK | |||
| subtitle = Sobat Kicks | |||
| image = CVS2_Guile_5MK.PNG | |||
| caption = | |||
| linkname = 4/6MK | |||
| data = | |||
{{AttackData-CvS2 | |||
| version = {{Motion|b}}/{{Motion|f}}+{{Icon-Capcom|MK}} | |||
| subtitle = | |||
| damage = 700 | |||
| stun = 7 | |||
| cancel = None | |||
| guard = Mid | |||
| parry = High | |||
| startup = 11 | |||
| active = 5 | |||
| recovery = 14 | |||
| total = 20 | |||
| advHit = +1 | |||
| advBlock = +1 | |||
| invul = Lower Body | |||
| description = A 5MK Sobat kick, but you leap forwards or backwards depending on whether you pressed 4 or 6. Useful normals for neutral and pressure. 4MK acts as a safe disengage and a way to beat out low pokes and slides, while 6MK allows you to reset pressure while beating out low mashes or throws. Both versions are +1, making them unpunishable, and act as useful pokes. | |||
}} | |||
}} | |||
= | === <span class="invisible-header">Reverse Spin Kick</span> === | ||
{{MoveData | |||
< | | name = Reverse Spin Kick | ||
| input = Near Opponent, 4/6HK | |||
| subtitle = Upside Down Kick | |||
| image = CVS2_Guile_46HK.PNG | |||
| caption = | |||
| linkname = 4/6HK | |||
| data = | |||
{{AttackData-CvS2 | |||
| version = Close {{Motion|b}}/{{Motion|f}}+{{Icon-Capcom|HK}} | |||
| subtitle = | |||
| damage = 1300 | |||
| stun = 13 | |||
| cancel = None | |||
| guard = Mid | |||
| parry = High | |||
| startup = 15 | |||
| active = 6 | |||
| recovery = 17 | |||
| total = 38 | |||
| advHit = +1 | |||
| advBlock = +1 | |||
| invul = Throw (Airborne) | |||
| description = A very strange command normal. You may notice that this has a direct overlap with your punch throw. This means you have to do this normal in situations where the opponent can't be thrown, namely as a meaty. Mostly, this is just to beat wakeup throws/techs, as it has very little use otherwise. | |||
}} | |||
}} | |||
== Special Moves == | == Special Moves == | ||
' | === <span class="invisible-header">Sonic Boom</span> === | ||
{{MoveData | |||
| name = Sonic Boom | |||
| input = [4]6P | |||
| subtitle = Booms | |||
| image = CVS2_Guile_46P.PNG | |||
| caption = The reason you play him | |||
| linkname = [4]6P | |||
| data = | |||
{{AttackData-CvS2 | |||
| version = Charge {{Motion|b}},{{Motion|f}}+{{Icon-Capcom|LP}} | |||
| subtitle = | |||
| damage = 600 | |||
| stun = 6 | |||
| cancel = None | |||
| guard = Mid | |||
| parry = High | |||
| startup = 13 | |||
| active = Traveling | |||
| recovery = 33 | |||
| total = 46 | |||
| advHit = +5 | |||
| advBlock = 0 | |||
| invul = None | |||
}} | |||
{{AttackData-CvS2 | |||
| header = no | |||
| version = Charge {{Motion|b}},{{Motion|f}}+{{Icon-Capcom|MP}} | |||
| subtitle = | |||
| damage = 700 | |||
| stun = 7 | |||
| cancel = None | |||
| guard = Mid | |||
| parry = High | |||
| startup = 13 | |||
| active = Traveling | |||
| recovery = 30 | |||
| total = 43 | |||
| advHit = +5 | |||
| advBlock = 0 | |||
| invul = None | |||
}} | |||
{{AttackData-CvS2 | |||
| header = no | |||
| version = Charge {{Motion|b}},{{Motion|f}}+{{Icon-Capcom|HP}} | |||
| subtitle = | |||
| damage = 700 | |||
| stun = 7 | |||
| cancel = None | |||
| guard = Mid | |||
| parry = High | |||
| startup = 13 | |||
| active = Traveling | |||
| recovery = 30 | |||
| total = 43 | |||
| advHit = +5 | |||
| advBlock = 0 | |||
| invul = None | |||
| description = Guile's signature fireball, the Sonic Boom. Likely the best projectile in the game. It recovers very fast, leaves Guile plus at point blank and plus enough to link after from farther out, and each version has a wildly different travel time. These are incredible general utility tools for zoning, pressure, poking, and they make for a VERY annoying roll cancel. If the opponent jumps a little late, you usually recover in time to still anti-air them with 2HP, making it so opponents will want to do something pre-emptive to beat Booms. Whether that's jumping, using a roll cancel special, or going underneath them all depends on the matchup, and Guile has tools to deal with each of those options. The only weakness of this move is that it's a charge input. You have to hold backwards for almost a full second, meaning you can't use these on command like other characters can with their fireballs. Smart thinking and patience are what make Booms strong. | |||
}} | |||
}} | |||
'' | === <span class="invisible-header">Somersault Kick</span> === | ||
{{MoveData | |||
| name = Somersault Kick | |||
| input = [2]8K | |||
| subtitle = Flash Kicks | |||
| image = CVS2_Guile_28K.PNG | |||
| caption = Wait, they aren't actually called Flash Kicks? | |||
| linkname = [2]8K | |||
| data = | |||
{{AttackData-CvS2 | |||
| version = Charge {{Motion|d}},{{Motion|u}}+{{Icon-Capcom|LK}} | |||
| subtitle = | |||
| damage = 1500/800 | |||
| stun = 15/8 | |||
| cancel = None | |||
| guard = Mid | |||
| parry = High | |||
| startup = 6 | |||
| active = 7 | |||
| recovery = 44 | |||
| total = 55 | |||
| advHit = -DWN | |||
| advBlock = -26 | |||
| invul = 11 (Full) | |||
}} | |||
{{AttackData-CvS2 | |||
| header = no | |||
| version = Charge {{Motion|d}},{{Motion|u}}+{{Icon-Capcom|MK}} | |||
| subtitle = | |||
| damage = 1700/800 | |||
| stun = 17/8 | |||
| cancel = None | |||
| guard = Mid | |||
| parry = High | |||
| startup = 6 | |||
| active = 6 | |||
| recovery = 52 | |||
| total = 64 | |||
| advHit = -DWN | |||
| advBlock = -33 | |||
| invul = 9 (Full) | |||
}} | |||
{{AttackData-CvS2 | |||
| header = no | |||
| version = Charge {{Motion|d}},{{Motion|u}}+{{Icon-Capcom|HK}} | |||
| subtitle = | |||
| damage = 1800/800 | |||
| stun = 18/8 | |||
| cancel = None | |||
| guard = Mid | |||
| parry = High | |||
| startup = 6 | |||
| active = 5 | |||
| recovery = 59 | |||
| total = 70 | |||
| advHit = -DWN | |||
| advBlock = -39 | |||
| invul = 8 (Full) | |||
| description = The peanut butter to Sonic Boom's jelly. Flash Kicks are powerful anti-airs, reversals, and combo enders. They're incredibly consistent as anti-airs, beating crossups and most normal jumps easily, though they're a lot slower than most DPs making them mediocre reversals. A very core part of Guile's strategy is holding downback or 1, which allows him to charge both for a Sonic Boom and a Flash Kick without giving up any ground. These are also your preferred combo enders for knockdowns, but are sadly much more difficult to combo into than Booms, making Guile's meterless combos very weak. | |||
}} | |||
}} | |||
==Supers== | ==Supers== | ||
=== <span class="invisible-header">Total Wipeout</span> === | |||
{{MoveData | |||
| name = Total Wipeout | |||
| input = [4]646K | |||
| subtitle = Combo Super | |||
| image = CVS2_Guile_4646K.PNG | |||
| caption = | |||
| linkname = [4]646K | |||
| data = | |||
{{AttackData-CvS2 | |||
| version = Charge {{Motion|b}},{{Motion|f}}{{Motion|b}}{{Motion|f}}+{{Icon-Capcom|LK}} | |||
| subtitle = | |||
| damage = 2200 | |||
| stun = 0 | |||
| cancel = None | |||
| guard = Mid | |||
| parry = High | |||
| startup = 4:4 | |||
| active = 2(14)3(16)7 | |||
| recovery = 21 | |||
| total = 71 | |||
| advHit = -DWN | |||
| advBlock = -4 | |||
| invul = 8 (Full) | |||
}} | |||
{{AttackData-CvS2 | |||
| header = no | |||
| version = Charge {{Motion|b}},{{Motion|f}}{{Motion|b}}{{Motion|f}}+{{Icon-Capcom|MK}} | |||
| subtitle = | |||
| damage = 3500 | |||
| stun = 0 | |||
| cancel = SP/SU | |||
| guard = Mid | |||
| parry = High | |||
| startup = 4:4 | |||
| active = 2(8)6(11)3(16)7 | |||
| recovery = 19 | |||
| total = 80 | |||
| advHit = -DWN | |||
| advBlock = -2 | |||
| invul = 14 (Full) | |||
}} | |||
{{AttackData-CvS2 | |||
| header = no | |||
| version = Charge {{Motion|b}},{{Motion|f}}{{Motion|b}}{{Motion|f}}+{{Icon-Capcom|HK}} | |||
| subtitle = | |||
| damage = 5200 | |||
| stun = 0 | |||
| cancel = None | |||
| guard = Mid | |||
| parry = High | |||
| startup = 4:4 | |||
| active = 2(8)6(6)3(14)3(16)5 | |||
| recovery = 19 | |||
| total = 90 | |||
| advHit = -DWN | |||
| advBlock = 0 | |||
| invul = 22 (Full) | |||
| description = Guile hits the opponent with a bunch of his normals in a row. Useful supers for combos and punishes, and the level 3 version is an unpunishable reversal. These also have relatively fast startup, allowing you to punish some things up close. Generally only used in combos however. | |||
}} | |||
}} | |||
=== <span class="invisible-header">Somersault Justice</span> === | |||
{{MoveData | |||
| name = Somersault Justice | |||
| input = [1]319K | |||
| subtitle = Flash Kick Super | |||
| image = CVS2_Guile_1319K.PNG | |||
| caption = | |||
| linkname = [1]319K | |||
| data = | |||
{{AttackData-CvS2 | |||
| version = Charge {{Motion|db}},{{Motion|df}}{{Motion|db}}{{Motion|uf}}+{{Icon-Capcom|LK}} | |||
| subtitle = | |||
| damage = 2700 | |||
| stun = 0 | |||
| cancel = None | |||
| guard = Mid | |||
| parry = High | |||
| startup = 5:4 | |||
| active = 6(17)11 | |||
| recovery = 32 | |||
| total = 65 | |||
| advHit = -DWN | |||
| advBlock = -16 | |||
| invul = 9 (Full) | |||
}} | |||
{{AttackData-CvS2 | |||
| header = no | |||
| version = Charge {{Motion|db}},{{Motion|df}}{{Motion|db}}{{Motion|uf}}+{{Icon-Capcom|MK}} | |||
| subtitle = | |||
| damage = 4000 | |||
| stun = 0 | |||
| cancel = SP/SU | |||
| guard = Mid | |||
| parry = High | |||
| startup = 5:4 | |||
| active = 8(17)11 | |||
| recovery = 32 | |||
| total = 77 | |||
| advHit = -DWN | |||
| advBlock = -16 | |||
| invul = 15 (Full) | |||
}} | |||
{{AttackData-CvS2 | |||
| header = no | |||
| version = Charge {{Motion|db}},{{Motion|df}}{{Motion|db}}{{Motion|uf}}+{{Icon-Capcom|HK}} | |||
| subtitle = | |||
| damage = 5800 | |||
| stun = 0 | |||
| cancel = None | |||
| guard = Mid | |||
| parry = High | |||
| startup = 5:4 | |||
| active = 8(11)11(14)11 | |||
| recovery = 32 | |||
| total = 96 | |||
| advHit = -DWN | |||
| advBlock = -16 | |||
| invul = 23 (Full) | |||
| description = Flash Kick supers. Not much use, can be sorta useful as anti-air supers but you would rather just use Flash Kick if you have the charge. Not as useful as reversal supers either, you basically just use these to end C/A-Groove combos. | |||
}} | |||
}} | |||
=== <span class="invisible-header">Sonic Hurricane</span> === | |||
{{MoveData | |||
| name = Sonic Hurricane | |||
| input = [4]646P | |||
| subtitle = Sonic Boom Super, Level 3 Super | |||
| image = CVS2_Guile_4646P.PNG | |||
| caption = | |||
| linkname = [4]646P | |||
| data = | |||
{{AttackData-CvS2 | |||
| version = Charge {{Motion|b}},{{Motion|f}}{{Motion|b}}{{Motion|f}}+{{Icon-Capcom|P}} | |||
| subtitle = | |||
| damage = 5400 | |||
| stun = 0 | |||
| cancel = None | |||
| guard = Mid | |||
| parry = High | |||
| startup = 5:4 | |||
| active = 1~93 | |||
| recovery = 93 | |||
| total = 102 | |||
| advHit = -DWN | |||
| advBlock = -4 | |||
| invul = 23 (Full) | |||
| description = An amazing super. Very fast with massive reach, you can punish a ridiculous amount of things with this. Because of the range this is also a very consistent combo ender. It's also a safe reversal that does a TON of chip and has a bunch of hits so parrying/JDing the full thing is difficult. You'll generally save meter with Guile for this, if you spend it at all. | |||
}} | |||
}} | |||
==The Basics== | ==The Basics== | ||
| Line 620: | Line 1,348: | ||
-he can charge for a Flash Kick during his run, though it hasn't got any valuable use in competitive play | -he can charge for a Flash Kick during his run, though it hasn't got any valuable use in competitive play | ||
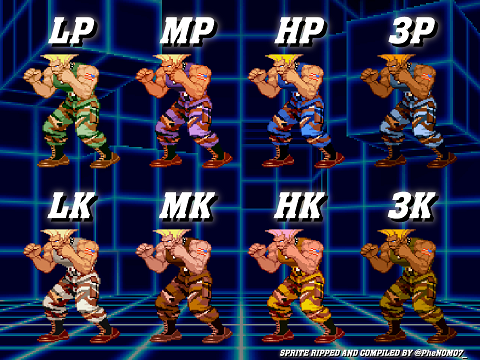
== Colors == | |||
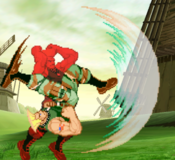
[[File:Guile_CvS2_colors.png]] | |||
{{Navbox-CvS2}} | {{Navbox-CvS2}} | ||
[[Category:Capcom vs SNK 2]] | [[Category:Capcom vs SNK 2]] | ||
Revision as of 22:19, 9 June 2022
Introduction
Story
Guile was a United States Air Force lieutenant, and one of the original World Warriors. One day, his best friend and commanding officer Charlie Nash went missing after going on a secret solo mission to destroy Shadaloo and M. Bison/Dictator. Guile was ordered to locate Charlie, and on his quest he finds and befriends Chun-Li. Chun-Li tells him of Shadaloo, and warns Guile that it would be very dangerous. Guile continues on regardless, and the two go to Thailand, where they find Charlie and the Shadaloo base. Guile and Charlie fight M. Bison as Chun-Li sets explosives inside of Shadaloo's base. Charlie gets shot by a Psycho Shot, and M. Bison almost hits Guile with a Psycho Crusher but Charlie saves him. The explosives detonate, and Guile and Chun-Li make it to safety. Guile mourns the death of Charlie. M. Bison survives, and later on Guile fights him again to get revenge. Guile wins, and is ready to kill him, but suddenly his wife and child appear. They tell him not to kill M. Bison, and Guile listens, going home to be a family man.
Gameplay
Guile is the classic charge character, and one of the most popular fighting game characters in history. He's very simple to learn, having only two special moves and a suite of command normals to make up for it. His two specials, Sonic Boom and Flash Kick, are very obvious in usage and give Guile an easy gameplan. Booms are amazing projectiles that can be hard to fight against, and Flash Kicks are amazing anti-airs that will snipe anyone trying to jump over a Boom. Combining usage of these two specials and properly utilizing his extensive list of normals is key to mastering Guile.
Guile doesn't come without weaknesses however. Likely his biggest weakness is something intrinsic to his character: all of his specials require charge. This means that, unlike a fireball, Guile has to pre-emptively start charging for his fireball. By charging, Guile has to give up approaching, making it so he has to play a very patient and turtle-style game. You have to actively choose between approaching or keeping your powerful fireball and anti-air stored, you can't have both without taking massive risks like whiffing his forward moving normals or jumping. The player has to learn to keep or give up charge depending on the situation. This also hurts his combo game quite a bit, as he doesn't always have access to a consistent knockdown or even really consistent damage.
All in all, Guile is a patient zoner-style character who uses his extensive list of useful normals, powerful fireballs, and strong anti-airs to control the pace of the match. He has amazing neutral and defense, but his offense is limited and requires smart charge management, with very little mixup possibility.
Groove Selection
C-Groove is the most popular for Guile, and for good reason. Easy access to plenty of meter means Guile can more easily end in super, and he can have his powerful level 3 super more often. Air blocking allows him to jump forward while maintaining charge and remain relatively safe. Alpha Counters give him a good defensive option, and his level 2 combo is actually quite good. Plus, roll gives him RC Sonic Booms, which is one of the best and probably most annoying Roll Cancels in the game. Rolls are also a useful, if gimmicky, way to approach while keeping charge. C-Guile has everything he needs to succeed, where other Grooves make him sacrifice something.
N-Groove and K-Groove are right behind C-Groove in terms of viability. N-Groove is the most versatile Groove, making N-Guile a great fit. He keeps the roll like in C-Groove but gains a run and shorthop, which legitimizes his pressure and mobility a lot more. Easy access to level 1 supers lets him end in knockdowns more, guard cancel rolls, safe fall, N-Groove has a bit of everything. The main weakness is that Guile can't access his level 3, which is an amazing super, and doesn't have his great level 2 combo. K-Guile gets access to Rage and JD, both very powerful mechanics, and gets roll and hop just like N-Guile. Rage makes Guile's poke and projectile gameplan a lot more damaging, and JD is a very solid defensive tool that benefits Guile who can easily start charging after a JD. The lack of rolls and loss of level 1 supers hurts however.
A-Guile is questionable. His CC isn't great, and Guile would rather use the meter for a level 3, which you would never pick over a CC in A-Groove. He isn't useless, as A-Groove is simply powerful on a base level, but it's definitely weak for him. S-Groove is even worse for him, as charging meter leaves him wide open. He basically doesn't benefit at all from infinite level 1s, as the power of his level 1s is that they give him a consistent knockdown, and he only gets his level 3 when at low health. P-Groove is likely the worst one, as Guile has to give up charging to parry, and even then his punishes aren't strong without full meter. Having only level 3s means Guile rarely has a super in the first place, and can basically never parry into a knockdown.
| Strengths | Weaknesses |
|---|---|
|
|
Normal Moves
Far Normals
5LP
5MP
5HP
5LK
5MK
5HK
Close Normals
clLP
clMP
clHP
clLK
clMK
clHK
Crouching Normals
2LP
2MP
2HP
2LK
2MK
2HK
Jumping Normals
8LP
8MP
8HP
8LK
8MK
8HK
Command Normals
Spinning Back Knuckle
Bazooka Knee
Rolling Sobat
Reverse Spin Kick
Special Moves
Sonic Boom
Somersault Kick
Supers
Total Wipeout
Somersault Justice
Sonic Hurricane
The Basics
Guile is a charge character. You will have to be patient if you want to become a (true) Guile player. Patient means: Charge.
Start charging right after you have done a special move. Having charge will prepare you for the unexpected, i.e. mix-ups, sometimes throws and even cross-ups. Of course, just charging won't prevent all these things but it seizes your reaction window by far; you'll just have to tap forward/up and the corresponding button to get the special move. This makes mindgames less risky and dangerous... at least for you...
In many situations Guile has to rely on his special moves. THERE ARE ONLY TWO!! But they're very useful and can save your butt in many situations. Especially the Sonic Boom is of great importance. It limits your opponent's mobility and it gives you time enough for jump-ins; never do a jump-in without a Sonic Boom in front of you. The Sonic Boom is useful in (little) mindgames, for example you're throwing one at your opponent. He's blocking and thinks that you would go for a 2-in-1...Now throw him. Then do a cross-up or something else.
The Sonic Boom is not only a combo-ender, it can also lead into combos. Guile's impeccable recovery after he has thrown a Sonic Boom keeps him in safe distance (helpful when fighting one of the wrestler dudes).
Guile's second special move is the Flash Kick. It's a good anti-air attack with pretty decent damage. The Flash Kick is a great move with the ability to prevent cross-up attempts by your opponent and its reversal version hits very fast. The priority is pretty good, too. But it's possible that you could trade hits when executing the Flash Kick too late (doesn't happen always, just sometimes). In such a situation you should use one of Guile's normal anti-air attacks instead of his Flash Kick. His c.Fierce is always a good option. It comes out fast and the damage is good. His s.Strong is faster but weaker. Your choice. However, these are normals, so they won't floor your opponent but you can throw a Sonic Boom to slow him down.
Guile is one of few characters (if not the only one) without an overhead attack, not even an instant overhead. This is, if you think about, a big minus to Guile's mix-up game. I'll explain it:
Lacking mixup game (in this case overheads) means less effective offensive gameplay/rushdown and as we all know Guile needs all the offense he can get. This means you can't be as devastating as you'd like to be. Why? Simple. The only way to force your opponent to block high is to jump at them. A good opponent will always be prepared for a jump-in, be it normal or even low. This severely decreases your openings, I mean, a successful overhead gives you great opportunities and is a great tool for mind games. Guile misses this important mindgame; this doesn't mean that he can't have any good mindgames-he's good at ticking, so don't worry-but he has only little mindgames. You have to make up for this by using cross-ups followed up by his low attacks. The best option in such a case would be his c.Short. It's combo-able into his c.Jab and another c.Short. Now you've got several choices. Flash Kick, Sonic Hurricane led into by his c.Short... or you can go for a tick throw. Do as you like, just keep it fresh.
There's another problem that I'd like to talk about. As a Guile player you might develop a habit that every Guile player has: to block attacks low... often, very often...It's understandable and seems logic if you look at Guile's commands you have to input to get a special move. This habit can turn out to be a real pain in the butt and can end the match very early if your opponent notices this habit and takes advantage of it. The only advice I can give you is: Don't let him fool you!! If you get mad and lose your patience then you'll lose anyway. Be patient if you want to get good with Guile.
Strategy
I'll try to be as precise as possible concerning his gameplay. I find it very important to note every movement of Guile and its properties during a match as this guide is dedicated to the ones who are new to Guile and would like to pick him up as a character. I've found out that it can be very difficult and sometimes even frustrating for beginners to understand this. That's why I also consider to post some match videos of Guile because its very important to get a visualization of this lengthy guide I'm about to write.
(On its way...)
Groove selection
C-Groove:
This is the Groove that suites Guile the best but it's not his only good Groove.
Due to the fact that Guile players always keep charging they benefit a lot from air-guarding, making jump-ins less risky. Guile's combo-ability is great and he can take more advantage of his low punches and low kicks as they can lead into quick but yet damaging combos. His level 2 cancels aren't difficult to execute and the additional damage is good, too. The counter-attack/-movement option (maximal 3 in a row) is nice but in C-Groove it's not as advanced as in other Grooves and Guile's super combos are 100 times more useful when playing him in C-Groove than his counters.
A-Groove:
Well, I don't like this Groove for Guile.
His real damaging Custom Combos can only be done in the corner and even when you perfectly Custom-Combo your opponent the overall damage is bad, considering that Any-other-Groove Guile has more damaging level 3 super combos that can be combo'ed into (not possible in competitive play with A-Guile). There isn't anything worth mentioning about A-groove that could make up for the missing air-guard option except that Guile is good for building quickly meter but this advantage should be exploited in Grooves where GUILE is the damaging one, not Bison or Sakura...
P-Groove:
Master parrying... That's the first and most important step in order to play P-Groove successfully.
And even after having mastered parrying there are many negative aspects that make this Groove a bad choice for Guile. Guile's offensive gameplay is pretty bad in P-Groove simply because of the fact that you will lose charge when parrying. This decreases Guile's combo-ability a lot, for example you would like to punish your opponent pretty badly but because you parried his attack you can't do a c.Jab, c.Jab, Flash Kick combo. Another big limitation of Guile's combo-ability is the only level 3 available super combo. His mobility suffers from the missing roll. You can't escape if your cornered (bad, if your fighting Zangief) and you won't be able to move forward while charging (rolling makes this possible).
S-Groove:
In general, S-Groove is bad because it's just too risky and it does take lots of devotion until it can be exploited to its extent. This counts for P- and K-Groove as well. Only if you're willing to take this huge step use S-Groove.
You only benefit from S-Groove when you are about to die... Additionally, you can only get meter when you are charging up Roundhouse and Fierce. This will leave you wide open. Level 3 super combos are only possible when your stamina is low AND when your meter is full. Dodging is useless in the corner. Compared to rolling, which can also be used to avoid getting hit by the opponent, dodging has only defensive use (though Guile can set up a juggle with his "dodge" kick).
N-Groove:
This Groove is the most versatile one and therefore great for Guile.
Guile gains a lot of mobility from running and counter movements, making him even more offensive. Cross-ups are easier to set up. When you've got meter you can power-up any time you want to strengthen Guile's quick pokes.
Guile can combo his level 3 Total Wipeout into a level 1 Somersault Justice for great damage.
K-Groove:
Guile's 3rd best Groove.
Although the Groove doesn't feature rolling it makes up this deficit with offense, power and just defense. Guile's pokes will get more dangerous, thanks to the rage mode and the quick recovery of his normal attacks. Quick standing (Safe Fall) is a great tool in K-Groove. But don't do it too often. Just defending is easier to accomplish than parrying despite the fact that you won't gain much meter/stamina when just defending. The run option also adds more offense to Guile's gameplay.
Bread and Butter Combos
These are Guile's main combos:
with meter (you can substitute the c.Jab for a c.Short for some high-low mix-ups):
- J.Fierce, c.Jab, c.short, Sonic Hurricane
- J.Fierce, c.Jab, c.Short, level 2 Total Wipeout, Flash Kick
- cross-up j.Short ,c.Jab ,c.Jab ,c.short ,Sonic Hurricane
- counter far s.Roundhouse, Sonic Hurricane
Non-meter combos:
- J.Fierce, s.Fierce, Sonic Boom, forward Fierce
- J.Fierce, c.Jab (not possible in corner), c.Strong, Flash Kick
- c.Jab, c.Strong, Sonic Boom
Corner Pressure
The Sonic Boom is very important in the corner. It avoids wake-up attempts by your opponent, making Dragon Punches useless, and the quick recovery gives you enough time to do a jump-in so that you can follow up with some strings.
Corner Mix-ups:
Guile's main mixups start with a Jab Sonic Boom. Here's what you can do afterwards:
- jump at your opponent.
This is the best option for Guile because it's safe and offers the largest options of setups for Guile, such as throws and especially 2-in-1s for guard crush strings. End his strings with a far s.Roundhouse if you're sure you'll get your opponent's guard crushed.
- walk up to your opponent and throw him
- If your opponent rolls out try to hit him with c.Jab, c.Jab, c.Short(don't do it too fast, you have to gain charge), Sonic Hurricane or throw him.
Guard crushing, mainly used when in corner
Here are some Guard crush strings I've come up with in matches. These strings are quick and pretty safe according to the situation you're in and can also be used as normal attack patterns.
These aren't 100% strings. That would be too difficult to accomplish with Guile anyway. Guile mainly guard-crushes at long intervals that happen throughout the entire match. So, don't expect to guard-crush your opponent all the time. This occurs rarely when using Guile but I'll list some strings because they can apply to normal gameplay as well. The second reason for listing these strings is that such a situation is yet possible and I want you to be prepared for this situation.
- Jab Sonic Boom, j.Fierce, c.Strong, c.Forward, s.Strong, Sonic Boom, c.Forward, s.Roundhouse,Jab Sonic Boom
- Jab Sonic Boom, j.Fierce, c.Short, tick throw (opponent floored), Jab Sonic Boom, j.Short, c.Strong, c.Forward, Sonic Boom
- Jab Sonic Boom, j.Fierce, up-close s.Fierce, Sonic Boom, forward s.Fierce, s.Roundhouse,Fierce Sonic Boom
There are lots of variations... after the last Sonic Boom you can either repeat your attack or walk up and attempt a throw. You'll be able to know whether your movements are safe or not if you play Guile long enough. Don't worry.
Please DON'T stick to these strings, there are many ways for your opponent to get out of them, either by Alpha-Counters or reversals. These strings should give you a general impression of how fast Guile can be played and that he can put some pressure on your opponent. Controlling your Character is very important. Know what you're about to do, i.e. be concentrated throughout the whole match and don't be controlled by your bad habits. Guile has got many moves, use them depending on the situation. You'll get a grasp of this when playing him long enough.
Openings
Custom Combos
First off all, I would like to note that Guile shouldn't be played in A-Groove simply because he'd lack juggle opportunities in mid-stage if the Custom Combo mode was activated. But since he's a good battery you can use him in A-Groove (as lead character, of course).
The only time he has A-groove activated should be in the corner:
c.Roundhouse (to set up the juggle), s.Roundhouse,
c.Fierce, Short Flash Kick, c.Fierce, Short Flash Kick, c.Fierce, Short Flash
Kick,...
... when meter depletes, Somersault Justice
NOTE:
Be sure to use CROUCHING Fierce, not STANDING Fierce because the c.version does more damage.
close s.Roundhouse, Sonic Boom, Sonic Boom, Sonic Boom,...
...when meter depletes, Somersault Justice
You can also start with a Jab Sonic Boom (on the other side of the stage), high-jump towards the opponent, activate CC mode in mid-air, followed by a j.Roundhouse, s.Roundhouse, Sonic Boom over and over, finished by a Somersault Justice.
The damage is a lot higher but this setup is too unreliable (and too hard to pull off) in competitive play.
Advanced Strategy
Random Tricks/Notes
-Guile hasn't got any overheads
-he can charge for a Flash Kick during his run, though it hasn't got any valuable use in competitive play
