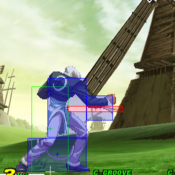
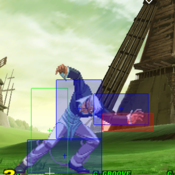
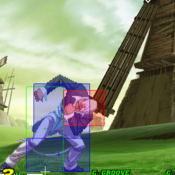
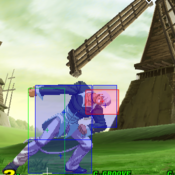
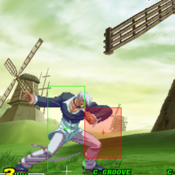
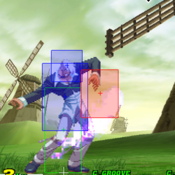
m (Scanman moved page Iori (CvS2) to Capcom vs SNK 2/Iori: moving CvS2 Iori page to be a subpage) |
RenegadeVA (talk | contribs) No edit summary |
||
| Line 1: | Line 1: | ||
== Introduction == | |||
= Introduction = | |||
== Data == | |||
{| class="wikitable" | |||
|- | |||
| Health || 14000|| || Just Below Average | |||
|- | |||
| Stun || 70|| || Average | |||
|- | |||
| Stun Duration || +60f || || Poor | |||
|- | |||
| Guard Guage Recovery Rate || Fast Type || || Best | |||
|- | |||
| Dash Length || 102 pixels|| || | |||
|- | |||
| Dash Duration|| || || | |||
|- | |||
| Dash Height|| 0|| || Grounded | |||
|- | |||
| Run Speed || 7.4|| || Average | |||
|- | |||
| Roll Distance || 132 pixels || || | |||
|- | |||
| Roll Duration || 27f || || | |||
|- | |||
| Recovery Frames || 3f || || Best | |||
|- | |||
| Wakeup Speed compared to Ryu || 0f || || Average | |||
|} | |||
== Overview & General Gameplan == | |||
== Normal Moves == | |||
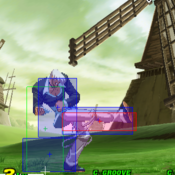
=== | === Far Standing Normals === | ||
===== <span class="invisible-header">5LP</span> ===== | |||
{{MoveData | |||
| name = Stand Jab | |||
| input = 5LP | |||
| subtitle = {{NotationIcon-Capcom|LP}} | |||
| image = CVS2_Iori_5lp.png | |||
| caption = Light Punch | |||
| linkname = 5LP | |||
| data = | |||
{{AttackData-CvS2 | |||
| version = | |||
| subtitle = {{NotationIcon-Capcom|LP}} | |||
| damage = 300 | |||
| stun = 4 | |||
| cancel = RF/SP/SU | |||
| guard = H/L | |||
| parry = H/L | |||
| startup = 2 | |||
| active = 4 | |||
| recovery = 8 | |||
| total = 14 | |||
| advHit = +5 | |||
| advBlock = +5 | |||
| invul = | |||
| description = | |||
* While sharing almost the exact same traits as the close jab, the standing jab doesn't have that many tactical uses; You're too far away to tick into throws, and Iori's walking speed is too slow for repeated walk up jabs to set up anything threatening. If you're at this range hit low strong instead. | |||
}} | |||
}} | |||
* | ===== <span class="invisible-header">5LP</span> ===== | ||
{{MoveData | |||
| name = Stand Strong | |||
| input = 5MP | |||
| subtitle = {{NotationIcon-Capcom|MP}} | |||
| image = CVS2_Iori_5mp.png | |||
| caption = Medium Punch | |||
| linkname = 5MP | |||
| data = | |||
{{AttackData-CvS2 | |||
| version = | |||
| subtitle = {{NotationIcon-Capcom|MP}} | |||
| damage = 800 | |||
| stun = 8 | |||
| cancel = SP/SU | |||
| guard = H/L | |||
| parry = H | |||
| startup = 7 | |||
| active = 3 | |||
| recovery = 25 | |||
| total = 35 | |||
| advHit = -5 | |||
| advBlock = -5 | |||
| invul = | |||
| description = | |||
*This move has the special property of being able to chain into Iori's f+strong. There's only one instance in which I use this move, and that's to combo after a connected Scum Gale. Even though it's a far reaching bufferable move, buffering into fireballs is not safe, and the move itself leaves much to be desired in terms of priority and speed. It reaches farther than the f+strong, but at that distance a fierce rekka ken will completely miss. Needless to say, a whiffed rekka ken will lead to a lot of hurt. | |||
}} | |||
}} | |||
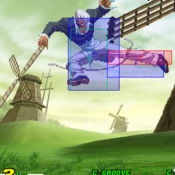
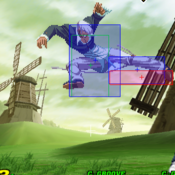
===== <span class="invisible-header">5HP</span> ===== | |||
{{MoveData | |||
| name = Stand Fierce | |||
| input = 5HP | |||
| subtitle = {{NotationIcon-Capcom|HP}} | |||
| image = CVS2_Iori_5hp.png | |||
| caption = Heavy Punch | |||
| image2 = CVS2_Iori_5hp_1.png | |||
| caption = Heavy Punch | |||
| linkname = 5HP | |||
| data = | |||
{{AttackData-CvS2 | |||
| version = | |||
| subtitle = {{NotationIcon-Capcom|HP}} | |||
| damage = 1300/1400 | |||
| stun = 13/14 | |||
| cancel = SP/SU (1st part only) | |||
| guard = H/L | |||
| parry = H | |||
| startup = 7 | |||
| active = 5 | |||
| recovery = 26 | |||
| total = 38 | |||
| advHit = -5 | |||
| advBlock = -5 | |||
| invul = | |||
| description = | |||
* Reading on the left of the commas refer to when Iori's head is going OUT. Reading on the right refers to when Iori's head is going UP. | |||
This move doesn't really have much tactical use since the distance to get the bufferable version of the fierce is really specific. However, the bufferable version happens to be Iori's most damaging bufferable move, and there's ONE useful set up to get it shown below (see Running Grab). | |||
}} | |||
}} | |||
===== <span class="invisible-header">5LK</span> ===== | |||
{{MoveData | |||
| name = Stand Short | |||
| input = 5LK | |||
| subtitle = {{NotationIcon-Capcom|LK}} | |||
| image = CVS2_Iori_5lk.png | |||
| caption = Light Kick | |||
| linkname = 5LK | |||
| data = | |||
{{AttackData-CvS2 | |||
| version = | |||
| subtitle = {{NotationIcon-Capcom|LK}} | |||
| damage = 500 | |||
| stun = 5 | |||
| cancel = SU | |||
| guard = H/L | |||
| parry = H/L | |||
| startup = 6 | |||
| active = 6 | |||
| recovery = 8 | |||
| total = 20 | |||
| advHit = +3 | |||
| advBlock = +3 | |||
| invul = | |||
| description = | |||
* AKA "kickin 'em to da curb". Other than randomly whiffing it every now and then as a fake fireball, the only use for this move I have is for combos. See combo section. | |||
}} | |||
}} | |||
* | ===== <span class="invisible-header">5MK</span> ===== | ||
{{MoveData | |||
| name = Stand Forward | |||
| input = 5MK | |||
| subtitle = {{NotationIcon-Capcom|MK}} | |||
| image = CVS2_Iori_5mk.png | |||
| caption = Medium Kick | |||
| linkname = 5MK | |||
| data = | |||
{{AttackData-CvS2 | |||
| version = | |||
| subtitle = {{NotationIcon-Capcom|MK}} | |||
| damage = 1000 | |||
| stun = 10 | |||
| cancel = SU | |||
| guard = H/L | |||
| parry = H/L | |||
| startup = 6 | |||
| active = 3 | |||
| recovery = 26 | |||
| total = 35 | |||
| advHit = -6 | |||
| advBlock = -6 | |||
| invul = | |||
| description = | |||
* I probably don't use this move as much as I should. It's quick, has surprising range, and even more surprising priority. I'd use it against characters that can crouch the standing roundhouse if you can get into the range to use it. | |||
6/13/03 - Some Japanese players like to punish whiffs with s.forward into super, but I find that whenever I bait a whiff I'm too far away to hit with a s.forward. I just do a low/standing roundhouse instead. I also noticed that Japanese players have set-ups for COUNTER HIT s.forward and buffer the super on reaction, but to me that's in-humanly difficult (the window to buffer is 3 frames long, 1/20th of a second). That super isn't one that you want to have blocked. }} | |||
}} | |||
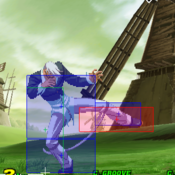
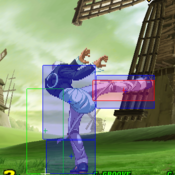
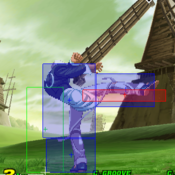
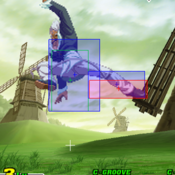
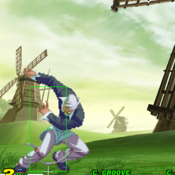
* | ===== <span class="invisible-header">5HK</span> ===== | ||
{{MoveData | |||
| name = Stand Roundhouse | |||
| input = 5HK | |||
| subtitle = {{NotationIcon-Capcom|HK}} | |||
| image = CVS2_Iori_5hk_1.png | |||
| caption = Heavy Kick | |||
| image2 = CVS2_Iori_5hk_2.png | |||
| caption = Heavy Kick | |||
| linkname = 5HK | |||
| data = | |||
{{AttackData-CvS2 | |||
| version = | |||
| subtitle = {{NotationIcon-Capcom|HK}} | |||
| damage = 1300 | |||
| stun = 13 | |||
| cancel = X | |||
| guard = H/L | |||
| parry = H/L | |||
| startup = 9 | |||
| active = 7 | |||
| recovery = 22 | |||
| total = 38 | |||
| advHit = -2 | |||
| advBlock = -2 | |||
| invul = | |||
| description = | |||
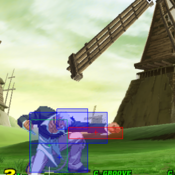
* Iori's best poke by far, despite having the distinction of being one of Iori's two crouchable moves. Any character bigger than a shoto is fair game, however. You can use it fairly liberally against the characters that cannot crouch it to slowly drain their guard meter and entice them into making a mistake that will get you the all-important knockdown Iori needs to get in. Be aware, though, that the move is not safe against a fast roll and that Sagat can punish you hard with a standing fierce into super if you whiff it. | |||
* Crouchable by half the cast (every female character, Ryo, shotos, Rolento, Haohmaru, Vega, Yun, Kim, Rock, Iori) | |||
* Treat this move like a budget Sakura or Yamazaki stand RH (yama speed/damage, but -2 instead of +2 on block) | |||
}} | |||
}} | |||
* | === Close Standing Normals === | ||
===== <span class="invisible-header">cl5LP</span> ===== | |||
{{MoveData | |||
| name = Close Stand Jab | |||
| input = cl5LP | |||
| subtitle = Close {{NotationIcon-Capcom|LP}} | |||
| image = CVS2_Iori_CL_5lp.png | |||
| caption = Close Light Punch | |||
| linkname = cl5LP | |||
| data = | |||
{{AttackData-CvS2 | |||
| version = | |||
| subtitle = Close{{NotationIcon-Capcom|LP}} | |||
| damage = 400 | |||
| stun = 4 | |||
| cancel = RF,SP,SU | |||
| guard = H/L | |||
| parry = H/L | |||
| startup = 2 | |||
| active = 4 | |||
| recovery = 6 | |||
| total = 12 | |||
| advHit = +7 | |||
| advBlock = +7 | |||
| invul = | |||
| description = | |||
* | |||
Iori's close jab is very useful for many reasons: | |||
#) Comes out in 2 frames, making it Iori's fastest move. 2 frames are as fast as moves get in CvS2 with the exception of Zangief's SPD, which is the only 1 frame move in the game. So what does this mean? Whenever you're in a situation where you have to mash a move, such as trying to avoid a throw, this is the move to mash. | |||
#) +7 advantage, also the most out of any of Iori's moves. 7 frames is a fairly huge advantage as far as CvS2 goes, meaning most links afterwards are brain-dead easy if the jab hits, and if blocked you have ample time to set up stuff safely like walk up to your opponent again and get another close jab. A perfectly timed close jab tick into Scum Gale (8 frames) is very difficult to reverse by jabs or throws. All tick throws can be escaped by jumps, however. | |||
#) At 400 damage, it's the most damaging out of all of Iori's weak attacks that can be chained together. | |||
}} | |||
}} | |||
==== | ===== <span class="invisible-header">cl5MP</span> ===== | ||
{{MoveData | |||
| name = Close Stand Strong | |||
| input = cl5MP | |||
| subtitle = Close {{NotationIcon-Capcom|MP}} | |||
| image = CVS2_Iori_CL_5mp.png | |||
| caption = Medium Punch | |||
| linkname = cl5MP | |||
| data = | |||
{{AttackData-CvS2 | |||
| version = | |||
| subtitle = Close{{NotationIcon-Capcom|MP}} | |||
| damage = | |||
| stun = | |||
| cancel = | |||
| guard = | |||
| parry = | |||
| startup = | |||
| active = | |||
| recovery = | |||
| total = | |||
| advHit = | |||
| advBlock = | |||
| invul = | |||
| description = | |||
* Lorem ipsum dolor sit amet, consectetur adipiscing elit, sed do eiusmod tempor incididunt ut labore et dolore magna aliqua. | |||
}} | |||
}} | |||
===== <span class="invisible-header">cl5HP</span> ===== | |||
{{MoveData | |||
| name = Close Stand Fierce | |||
| input = cl5HP | |||
| subtitle = Close {{NotationIcon-Capcom|HP}} | |||
| image = CVS2_Iori_CL_5hp_1.png | |||
| caption = Heavy Punch | |||
| image2 = CVS2_Iori_CL_5hp_2.png | |||
| caption = Heavy Punch | |||
| linkname = cl5HP | |||
| data = | |||
{{AttackData-CvS2 | |||
| version = | |||
| subtitle = Close{{NotationIcon-Capcom|HP}} | |||
| damage = 1200, 1100 | |||
| stun = 12, 11 | |||
| cancel = SP/SU, SU | |||
| guard = H/L | |||
| parry = H | |||
| startup = 3 | |||
| active = 6 | |||
| recovery = 24 | |||
| total = 33 | |||
| advHit = 0 | |||
| advBlock = 0 | |||
| invul = | |||
| description = | |||
* For the commas above, the reading on the left refers to the first portion of the fierce, where Iori's fist is around his waist level. The second reading refers to when Iori's fist is over his head. | |||
Outside of combos, the main use for this move is for anti-cross ups. Close roundhouse is your main anti-cross up, but you'll want to use close fierce against characters with bigger jumps like Blanka. | |||
}} | |||
}} | |||
* | ===== <span class="invisible-header">cl5LK</span> ===== | ||
{{MoveData | |||
| name = Close Stand Short | |||
| input = cl5LK | |||
| subtitle = Close {{NotationIcon-Capcom|LK}} | |||
| image = CVS2_Iori_CL_5lk.png | |||
| caption = Light Kick | |||
| linkname = cl5LK | |||
| data = | |||
{{AttackData-CvS2 | |||
| version = | |||
| subtitle = Close{{NotationIcon-Capcom|LK}} | |||
| damage = | |||
| stun = | |||
| cancel = | |||
| guard = | |||
| parry = | |||
| startup = | |||
| active = | |||
| recovery = | |||
| total = | |||
| advHit = | |||
| advBlock = | |||
| invul = | |||
| description = | |||
* Lorem ipsum dolor sit amet, consectetur adipiscing elit, sed do eiusmod tempor incididunt ut labore et dolore magna aliqua. | |||
}} | |||
}} | |||
===== <span class="invisible-header">cl5MK</span> ===== | |||
{{MoveData | |||
| name = Close Stand Forward | |||
| input = cl5MK | |||
| subtitle = Close{{NotationIcon-Capcom|MK}} | |||
| image = CVS2_Iori_CL_5mk.png | |||
| caption = Medium Kick | |||
| linkname = cl5MK | |||
| data = | |||
{{AttackData-CvS2 | |||
| version = | |||
| subtitle = Close{{NotationIcon-Capcom|MK}} | |||
| damage = | |||
| stun = | |||
| cancel = | |||
| guard = | |||
| parry = | |||
| startup = | |||
| active = | |||
| recovery = | |||
| total = | |||
| advHit = | |||
| advBlock = | |||
| invul = | |||
| description = | |||
* Lorem ipsum dolor sit amet, consectetur adipiscing elit, sed do eiusmod tempor incididunt ut labore et dolore magna aliqua. }} | |||
}} | |||
===== <span class="invisible-header">cl5HK</span> ===== | |||
{{MoveData | |||
| name = Close Stand Roundhouse | |||
| input = cl5HK | |||
| subtitle = Close{{NotationIcon-Capcom|HK}} | |||
| image = CVS2_Iori_CL_5hk.png | |||
| caption = Heavy Kick | |||
| linkname = cl5HK | |||
| data = | |||
{{AttackData-CvS2 | |||
| version = | |||
| subtitle = Close{{NotationIcon-Capcom|HK}} | |||
| damage = | |||
| stun = | |||
| cancel = | |||
| guard = | |||
| parry = | |||
| startup = | |||
| active = | |||
| recovery = | |||
| total = | |||
| advHit = | |||
| advBlock = | |||
| invul = | |||
| description = | |||
* Lorem ipsum dolor sit amet, consectetur adipiscing elit, sed do eiusmod tempor incididunt ut labore et dolore magna aliqua. | |||
}} | |||
}} | |||
=== Crouching Normals === | |||
* | ===== <span class="invisible-header">2LP</span> ===== | ||
{{MoveData | |||
| name = Crouching Jab | |||
| input = 2LP | |||
| subtitle = [[File:2.gif]]{{NotationIcon-Capcom|LP}} | |||
| image = CVS2_Iori_2lp.png | |||
| caption = Crouching Light Punch | |||
| linkname = 2LP | |||
| data = | |||
{{AttackData-CvS2 | |||
| version = | |||
| subtitle = | |||
| damage = | |||
| stun = | |||
| cancel = | |||
| guard = | |||
| parry = | |||
| startup = | |||
| active = | |||
| recovery = | |||
| total = | |||
| advHit = | |||
| advBlock = | |||
| invul = | |||
| description = | |||
* Because this version is 1 hit and has a lot of lower invincibility (not to mention lower recovery), it's best used in the neutral game or when the opponent is far from Iori. | |||
}} | |||
}} | |||
==== | ===== <span class="invisible-header">2MP</span> ===== | ||
{{MoveData | |||
| name = Crouching Strong | |||
| input = 2MP | |||
| subtitle = [[File:2.gif]]{{NotationIcon-Capcom|MP}} | |||
| image = CVS2_Iori_2mp.png | |||
| caption = Medium Punch | |||
| linkname = 2MP | |||
| data = | |||
{{AttackData-CvS2 | |||
| version = | |||
| subtitle = | |||
| damage = | |||
| stun = | |||
| cancel = | |||
| guard = | |||
| parry = | |||
| startup = | |||
| active = | |||
| recovery = | |||
| total = | |||
| advHit = | |||
| advBlock = | |||
| invul = | |||
| description = | |||
* Lorem ipsum dolor sit amet, consectetur adipiscing elit, sed do eiusmod tempor incididunt ut labore et dolore magna aliqua. | |||
}} | |||
}} | |||
===== <span class="invisible-header">2HP</span> ===== | |||
{{MoveData | |||
| name = Crouching Fierce | |||
| input = 2HP | |||
| subtitle = [[File:2.gif]]{{NotationIcon-Capcom|HP}} | |||
| image = CVS2_Iori_2hp.png | |||
| caption = Heavy Punch | |||
| linkname = 2HP | |||
| data = | |||
{{AttackData-CvS2 | |||
| version = | |||
| subtitle = | |||
| damage = | |||
| stun = | |||
| cancel = | |||
| guard = | |||
| parry = | |||
| startup = | |||
| active = | |||
| recovery = | |||
| total = | |||
| advHit = | |||
| advBlock = | |||
| invul = | |||
| description = | |||
* Lorem ipsum dolor sit amet, consectetur adipiscing elit, sed do eiusmod tempor incididunt ut labore et dolore magna aliqua. | |||
}} | |||
}} | |||
* | ===== <span class="invisible-header">2LK</span> ===== | ||
{{MoveData | |||
| name = Crouching Short | |||
| input = 2LK | |||
| subtitle = [[File:2.gif]]{{NotationIcon-Capcom|LK}} | |||
| image = CVS2_Iori_2lk.png | |||
| caption = Crouching Light Kick | |||
| linkname = 2LK | |||
| data = | |||
{{AttackData-CvS2 | |||
| version = | |||
| subtitle = | |||
| damage = | |||
| stun = | |||
| cancel = | |||
| guard = | |||
| parry = | |||
| startup = | |||
| active = | |||
| recovery = | |||
| total = | |||
| advHit = | |||
| advBlock = | |||
| invul = | |||
| description = | |||
* Lorem ipsum dolor sit amet, consectetur adipiscing elit, sed do eiusmod tempor incididunt ut labore et dolore magna aliqua. | |||
}} | |||
}} | |||
* | ===== <span class="invisible-header">2MK</span> ===== | ||
{{MoveData | |||
| name = Crouching Forward | |||
| input = 2MK | |||
| subtitle = [[File:2.gif]]{{NotationIcon-Capcom|MK}} | |||
| image = CVS2_Iori_2mk.png | |||
| caption = Crouching Medium Kick | |||
| linkname = 2MK | |||
| data = | |||
{{AttackData-CvS2 | |||
| version = | |||
| subtitle = | |||
| damage = | |||
| stun = | |||
| cancel = | |||
| guard = | |||
| parry = | |||
| startup = | |||
| active = | |||
| recovery = | |||
| total = | |||
| advHit = | |||
| advBlock = | |||
| invul = | |||
| description = | |||
* Lorem ipsum dolor sit amet, consectetur adipiscing elit, sed do eiusmod tempor incididunt ut labore et dolore magna aliqua. }} | |||
}} | |||
* | ===== <span class="invisible-header">2HK</span> ===== | ||
{{MoveData | |||
| name = Crouching Roundhouse | |||
| input = 2HK | |||
| subtitle = [[File:2.gif]]{{NotationIcon-Capcom|HK}} | |||
| image = CVS2_Iori_2hk.png | |||
| caption = Crouching Heavy Kick | |||
| linkname = 2HK | |||
| data = | |||
{{AttackData-CvS2 | |||
| version = | |||
| subtitle = | |||
| damage = | |||
| stun = | |||
| cancel = | |||
| guard = | |||
| parry = | |||
| startup = | |||
| active = | |||
| recovery = | |||
| total = | |||
| advHit = | |||
| advBlock = | |||
| invul = | |||
| description = | |||
* Lorem ipsum dolor sit amet, consectetur adipiscing elit, sed do eiusmod tempor incididunt ut labore et dolore magna aliqua. | |||
}} | |||
}} | |||
=== Air Normals === | |||
* | ===== <span class="invisible-header">8LP</span> ===== | ||
{{MoveData | |||
| name = Jumping Jab | |||
| input = 8LP | |||
| subtitle = [[File:7.gif]],[[File:8.gif]],or [[File:9.gif]]+{{NotationIcon-Capcom|LP}} | |||
| image = CVS2_Iori_8lp.png | |||
| caption = Jumping Light Punch | |||
| linkname = 8LP | |||
| data = | |||
{{AttackData-CvS2 | |||
| version = | |||
| subtitle = | |||
| damage = | |||
| stun = | |||
| cancel = | |||
| guard = | |||
| parry = | |||
| startup = | |||
| active = | |||
| recovery = | |||
| total = | |||
| advHit = | |||
| advBlock = | |||
| invul = | |||
| description = | |||
* Because this version is 1 hit and has a lot of lower invincibility (not to mention lower recovery), it's best used in the neutral game or when the opponent is far from Iori. | |||
}} | |||
}} | |||
===== <span class="invisible-header">8MP</span> ===== | |||
{{MoveData | |||
| name = Jumping Strong | |||
| input = 8MP | |||
| subtitle = [[File:7.gif]],[[File:8.gif]],or [[File:9.gif]]+{{NotationIcon-Capcom|MP}} | |||
| image = CVS2_Iori_8mp.png | |||
| caption = Medium Punch | |||
| linkname = 8MP | |||
| data = | |||
{{AttackData-CvS2 | |||
| version = | |||
| subtitle = [[File:7.gif]],[[File:8.gif]],or [[File:9.gif]]+{{NotationIcon-Capcom|MP}} | |||
| damage = | |||
| stun = | |||
| cancel = | |||
| guard = | |||
| parry = | |||
| startup = | |||
| active = | |||
| recovery = | |||
| total = | |||
| advHit = | |||
| advBlock = | |||
| invul = | |||
| description = | |||
* Lorem ipsum dolor sit amet, consectetur adipiscing elit, sed do eiusmod tempor incididunt ut labore et dolore magna aliqua. | |||
}} | |||
}} | |||
==== | ===== <span class="invisible-header">8HP</span> ===== | ||
{{MoveData | |||
| name = Jumping Fierce | |||
| input = 8HP | |||
| subtitle = [[File:7.gif]],[[File:8.gif]],or [[File:9.gif]]+{{NotationIcon-Capcom|HP}} | |||
| image = CVS2_Iori_8hp.png | |||
| caption = Heavy Punch | |||
| linkname = 8HP | |||
| data = | |||
{{AttackData-CvS2 | |||
| version = | |||
| subtitle = | |||
| damage = | |||
| stun = | |||
| cancel = | |||
| guard = | |||
| parry = | |||
| startup = | |||
| active = | |||
| recovery = | |||
| total = | |||
| advHit = | |||
| advBlock = | |||
| invul = | |||
| description = | |||
* Lorem ipsum dolor sit amet, consectetur adipiscing elit, sed do eiusmod tempor incididunt ut labore et dolore magna aliqua. | |||
}} | |||
}} | |||
===== <span class="invisible-header">8LK</span> ===== | |||
{{MoveData | |||
| name = Jumping Short | |||
| input = 8LK | |||
* | | subtitle = [[File:7.gif]],[[File:8.gif]],or [[File:9.gif]]+{{NotationIcon-Capcom|LK}} | ||
| image = CVS2_Iori_8lk.png | |||
| caption = Light Kick | |||
| linkname = 8LK | |||
| data = | |||
{{AttackData-CvS2 | |||
| version = | |||
| subtitle = | |||
| damage = | |||
| stun = | |||
| cancel = | |||
| guard = | |||
| parry = | |||
| startup = | |||
| active = | |||
| recovery = | |||
| total = | |||
| advHit = | |||
| advBlock = | |||
| invul = | |||
| description = | |||
* Lorem ipsum dolor sit amet, consectetur adipiscing elit, sed do eiusmod tempor incididunt ut labore et dolore magna aliqua. | |||
}} | |||
}} | |||
===== <span class="invisible-header">8MK</span> ===== | |||
* | {{MoveData | ||
| name = Jumping Forward | |||
| input = 8MK | |||
| subtitle = [[File:7.gif]],[[File:8.gif]],or [[File:9.gif]]+{{NotationIcon-Capcom|LK}} | |||
| image = CVS2_Iori_8mk.png | |||
| caption = Medium Kick | |||
| linkname = 8MK | |||
| data = | |||
{{AttackData-CvS2 | |||
| version = | |||
| subtitle = | |||
| damage = | |||
| stun = | |||
| cancel = | |||
| guard = | |||
| parry = | |||
| startup = | |||
| active = | |||
| recovery = | |||
| total = | |||
| advHit = | |||
| advBlock = | |||
| invul = | |||
| description = | |||
* Lorem ipsum dolor sit amet, consectetur adipiscing elit, sed do eiusmod tempor incididunt ut labore et dolore magna aliqua. }} | |||
}} | |||
=== | ===== <span class="invisible-header">8HK</span> ===== | ||
{{MoveData | |||
| name = Jumping Roundhouse | |||
| input = 8HK | |||
| subtitle = [[File:7.gif]],[[File:8.gif]],or [[File:9.gif]]+{{NotationIcon-Capcom|LK}} | |||
| image = CVS2_Iori_8hk.png | |||
| caption = Jumping Heavy Kick | |||
| linkname = 8HK | |||
| data = | |||
{{AttackData-CvS2 | |||
| version = | |||
| subtitle = | |||
| damage = | |||
| stun = | |||
| cancel = | |||
| guard = | |||
| parry = | |||
| startup = | |||
| active = | |||
| recovery = | |||
| total = | |||
| advHit = | |||
| advBlock = | |||
| invul = | |||
| description = | |||
* Lorem ipsum dolor sit amet, consectetur adipiscing elit, sed do eiusmod tempor incididunt ut labore et dolore magna aliqua. | |||
}} | |||
}} | |||
=== Command Normals === | |||
== Universal Mechanics == | |||
=== Throws === | |||
= | === Roll === | ||
== | === Counter Attack === | ||
=== Guard Cancel Movement=== | |||
=== Dodge Attacks === | |||
=== Small Jump === | |||
=== Dash === | |||
=== Run === | |||
== Special Moves == | == Special Moves == | ||
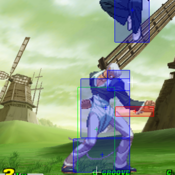
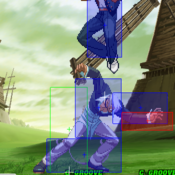
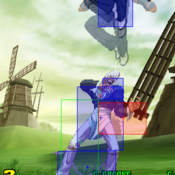
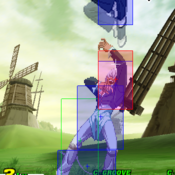
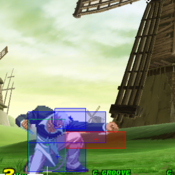
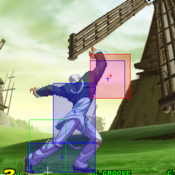
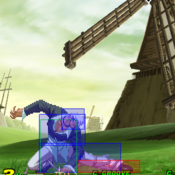
===== <span class="invisible-header">DP</span> ===== | |||
{{MoveData | |||
| name = Fire Ball / "Hyakushiki Oniyaki" | |||
| input = 623+P | |||
| subtitle = Uppercut | |||
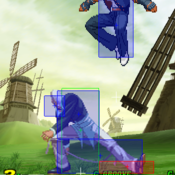
| image = CVS2_Iori_hp_dp_1.png | |||
| caption = HP version | |||
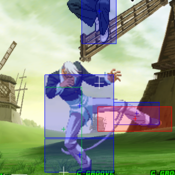
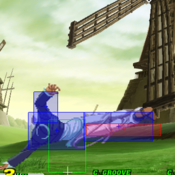
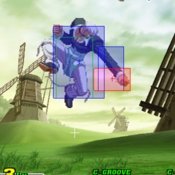
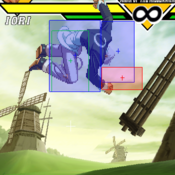
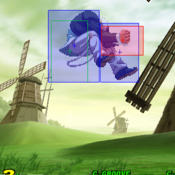
| image2 = CVS2_Iori_hp_dp_2.png | |||
| caption2 = HP Version | |||
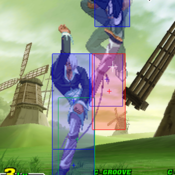
| image3 = CVS2_Iori_hp_dp_3.png | |||
| caption3 = HP Version | |||
| linkname = DP | |||
| data = | |||
{{AttackData-CvS2 | |||
| version = LP | |||
| subtitle = {{NotationIcon-Capcom|623}} + {{NotationIcon-Capcom|LP}} | |||
| damage = 1700 | |||
| stun = 17 | |||
| cancel = None | |||
| guard = Mid | |||
| parry = Mid | |||
| startup = 4 | |||
| active = 10 | |||
| recovery = 38 | |||
| total = 52 | |||
| advHit = DWN | |||
| advBlock = -33 | |||
| invul = 4 (full), 10(lower) | |||
| description = Footsies DP | |||
* Because this version is 1 hit and has a lot of lower invincibility (not to mention lower recovery), it's best used in the neutral game or when the opponent is far from Iori. | |||
}} | |||
{{AttackData-CvS2 | |||
| header = no | |||
| version = MP | |||
| subtitle = {{NotationIcon-Capcom|623}} + {{NotationIcon-Capcom|MP}} | |||
| damage = 700+1100 | |||
| stun = 7+11 | |||
| cancel = None | |||
| guard = Mid | |||
| parry = Mid | |||
| startup = 4 | |||
| active = [3/9] | |||
| recovery = 48 | |||
| total = 64 | |||
| advHit = DWN | |||
| advBlock = -42 | |||
| invul = 7 full/ 9 lower | |||
| description = Best DP | |||
* This version has the highest amount of total invulnerability, so it's the best wakeup reversal and anti air. Make sure to hit the opponent deep to get both hits, otherwise you're missing out on damage compared to LP. | |||
}} | |||
{{AttackData-CvS2 | |||
| header = no | |||
| version = HP | |||
| subtitle = {{NotationIcon-Capcom|623}} + {{NotationIcon-Capcom|HP}} | |||
| damage = 400+600+1000 | |||
| stun = 4+6+10 | |||
| cancel = None | |||
| guard = Mid | |||
| parry = Mid | |||
| startup = 4 | |||
| active = [2/2/5] | |||
| recovery = 59 | |||
| total = 72 | |||
| advHit = DWN | |||
| advBlock = -51 | |||
| invul = 6 full/ 7 lower | |||
| description = Most Damage DP | |||
* This is the damage DP. Perfectly usable as anti air or reversals, but only when the opponent is point blank. Also the recovery is so bad, Iori loses okizeme opportunities by using it. | |||
}} | |||
}} | |||
== Super Moves == | |||
== Super | |||
== Combos == | |||
== Advanced Strategy == | |||
== Grooves & Groove specific strategy == | |||
=== C Groove === | |||
=== A Groove=== | |||
=== P Groove === | |||
=== S Groove=== | |||
=== N Groove === | |||
=== K Groove === | |||
== | == Matchups == | ||
Check here for matchup analysis, notes, and errata. | |||
Could be as simple as optimal punishes, safe jump setups, and effective counter pokes. | |||
For example: | |||
== | === Blanka === | ||
== | Blanka ball punishes- Any level Maiden Masher, run a little and sweep (low HK), A groove activate sweep custom. | ||
== Videos == | |||
== Colors == | |||
[[File:CvS2 Iori color selections.png|frame|Iori Color Selections]] | |||
[[Category:Capcom vs SNK 2]] | == External Links == | ||
{{Navbox-CvS2}} | |||
[[Category:Capcom vs. SNK 2]] | |||
Revision as of 14:51, 23 December 2020
Introduction
Data
| Health | 14000 | Just Below Average | |
| Stun | 70 | Average | |
| Stun Duration | +60f | Poor | |
| Guard Guage Recovery Rate | Fast Type | Best | |
| Dash Length | 102 pixels | ||
| Dash Duration | |||
| Dash Height | 0 | Grounded | |
| Run Speed | 7.4 | Average | |
| Roll Distance | 132 pixels | ||
| Roll Duration | 27f | ||
| Recovery Frames | 3f | Best | |
| Wakeup Speed compared to Ryu | 0f | Average |
Overview & General Gameplan
Normal Moves
Far Standing Normals
5LP
| Damage | Stun | Cancel | Guard | Parry | Startup | Active | Recovery | Total | Adv Hit | Adv Block | Invul |
|---|---|---|---|---|---|---|---|---|---|---|---|
| 300 | 4 | RF/SP/SU | H/L | H/L | 2 | 4 | 8 | 14 | +5 | +5 | - |
| |||||||||||
5LP
| Damage | Stun | Cancel | Guard | Parry | Startup | Active | Recovery | Total | Adv Hit | Adv Block | Invul |
|---|---|---|---|---|---|---|---|---|---|---|---|
| 800 | 8 | SP/SU | H/L | H | 7 | 3 | 25 | 35 | -5 | -5 | - |
| |||||||||||
5HP
| Damage | Stun | Cancel | Guard | Parry | Startup | Active | Recovery | Total | Adv Hit | Adv Block | Invul |
|---|---|---|---|---|---|---|---|---|---|---|---|
| 1300/1400 | 13/14 | SP/SU (1st part only) | H/L | H | 7 | 5 | 26 | 38 | -5 | -5 | - |
This move doesn't really have much tactical use since the distance to get the bufferable version of the fierce is really specific. However, the bufferable version happens to be Iori's most damaging bufferable move, and there's ONE useful set up to get it shown below (see Running Grab). | |||||||||||
5LK
| Damage | Stun | Cancel | Guard | Parry | Startup | Active | Recovery | Total | Adv Hit | Adv Block | Invul |
|---|---|---|---|---|---|---|---|---|---|---|---|
| 500 | 5 | SU | H/L | H/L | 6 | 6 | 8 | 20 | +3 | +3 | - |
| |||||||||||
5MK
| Damage | Stun | Cancel | Guard | Parry | Startup | Active | Recovery | Total | Adv Hit | Adv Block | Invul |
|---|---|---|---|---|---|---|---|---|---|---|---|
| 1000 | 10 | SU | H/L | H/L | 6 | 3 | 26 | 35 | -6 | -6 | - |
6/13/03 - Some Japanese players like to punish whiffs with s.forward into super, but I find that whenever I bait a whiff I'm too far away to hit with a s.forward. I just do a low/standing roundhouse instead. I also noticed that Japanese players have set-ups for COUNTER HIT s.forward and buffer the super on reaction, but to me that's in-humanly difficult (the window to buffer is 3 frames long, 1/20th of a second). That super isn't one that you want to have blocked. | |||||||||||
5HK
| Damage | Stun | Cancel | Guard | Parry | Startup | Active | Recovery | Total | Adv Hit | Adv Block | Invul |
|---|---|---|---|---|---|---|---|---|---|---|---|
| 1300 | 13 | X | H/L | H/L | 9 | 7 | 22 | 38 | -2 | -2 | - |
| |||||||||||
Close Standing Normals
cl5LP
| Damage | Stun | Cancel | Guard | Parry | Startup | Active | Recovery | Total | Adv Hit | Adv Block | Invul |
|---|---|---|---|---|---|---|---|---|---|---|---|
| 400 | 4 | RF,SP,SU | H/L | H/L | 2 | 4 | 6 | 12 | +7 | +7 | - |
Iori's close jab is very useful for many reasons:
| |||||||||||
cl5MP
| Damage | Stun | Cancel | Guard | Parry | Startup | Active | Recovery | Total | Adv Hit | Adv Block | Invul |
|---|---|---|---|---|---|---|---|---|---|---|---|
| - | - | - | - | - | - | - | - | - | - | - | - |
| |||||||||||
cl5HP
| Damage | Stun | Cancel | Guard | Parry | Startup | Active | Recovery | Total | Adv Hit | Adv Block | Invul |
|---|---|---|---|---|---|---|---|---|---|---|---|
| 1200, 1100 | 12, 11 | SP/SU, SU | H/L | H | 3 | 6 | 24 | 33 | 0 | 0 | - |
Outside of combos, the main use for this move is for anti-cross ups. Close roundhouse is your main anti-cross up, but you'll want to use close fierce against characters with bigger jumps like Blanka. | |||||||||||
cl5LK
| Damage | Stun | Cancel | Guard | Parry | Startup | Active | Recovery | Total | Adv Hit | Adv Block | Invul |
|---|---|---|---|---|---|---|---|---|---|---|---|
| - | - | - | - | - | - | - | - | - | - | - | - |
| |||||||||||
cl5MK
| Damage | Stun | Cancel | Guard | Parry | Startup | Active | Recovery | Total | Adv Hit | Adv Block | Invul |
|---|---|---|---|---|---|---|---|---|---|---|---|
| - | - | - | - | - | - | - | - | - | - | - | - |
| |||||||||||
cl5HK
| Damage | Stun | Cancel | Guard | Parry | Startup | Active | Recovery | Total | Adv Hit | Adv Block | Invul |
|---|---|---|---|---|---|---|---|---|---|---|---|
| - | - | - | - | - | - | - | - | - | - | - | - |
| |||||||||||
Crouching Normals
2LP
| Damage | Stun | Cancel | Guard | Parry | Startup | Active | Recovery | Total | Adv Hit | Adv Block | Invul |
|---|---|---|---|---|---|---|---|---|---|---|---|
| - | - | - | - | - | - | - | - | - | - | - | - |
| |||||||||||
2MP
| Damage | Stun | Cancel | Guard | Parry | Startup | Active | Recovery | Total | Adv Hit | Adv Block | Invul |
|---|---|---|---|---|---|---|---|---|---|---|---|
| - | - | - | - | - | - | - | - | - | - | - | - |
| |||||||||||
2HP
| Damage | Stun | Cancel | Guard | Parry | Startup | Active | Recovery | Total | Adv Hit | Adv Block | Invul |
|---|---|---|---|---|---|---|---|---|---|---|---|
| - | - | - | - | - | - | - | - | - | - | - | - |
| |||||||||||
2LK
| Damage | Stun | Cancel | Guard | Parry | Startup | Active | Recovery | Total | Adv Hit | Adv Block | Invul |
|---|---|---|---|---|---|---|---|---|---|---|---|
| - | - | - | - | - | - | - | - | - | - | - | - |
| |||||||||||
2MK
| Damage | Stun | Cancel | Guard | Parry | Startup | Active | Recovery | Total | Adv Hit | Adv Block | Invul |
|---|---|---|---|---|---|---|---|---|---|---|---|
| - | - | - | - | - | - | - | - | - | - | - | - |
| |||||||||||
2HK
| Damage | Stun | Cancel | Guard | Parry | Startup | Active | Recovery | Total | Adv Hit | Adv Block | Invul |
|---|---|---|---|---|---|---|---|---|---|---|---|
| - | - | - | - | - | - | - | - | - | - | - | - |
| |||||||||||
Air Normals
8LP
| Damage | Stun | Cancel | Guard | Parry | Startup | Active | Recovery | Total | Adv Hit | Adv Block | Invul |
|---|---|---|---|---|---|---|---|---|---|---|---|
| - | - | - | - | - | - | - | - | - | - | - | - |
| |||||||||||
8MP
| Damage | Stun | Cancel | Guard | Parry | Startup | Active | Recovery | Total | Adv Hit | Adv Block | Invul |
|---|---|---|---|---|---|---|---|---|---|---|---|
| - | - | - | - | - | - | - | - | - | - | - | - |
| |||||||||||
8HP
| Damage | Stun | Cancel | Guard | Parry | Startup | Active | Recovery | Total | Adv Hit | Adv Block | Invul |
|---|---|---|---|---|---|---|---|---|---|---|---|
| - | - | - | - | - | - | - | - | - | - | - | - |
| |||||||||||
8LK
| Damage | Stun | Cancel | Guard | Parry | Startup | Active | Recovery | Total | Adv Hit | Adv Block | Invul |
|---|---|---|---|---|---|---|---|---|---|---|---|
| - | - | - | - | - | - | - | - | - | - | - | - |
| |||||||||||
8MK
| Damage | Stun | Cancel | Guard | Parry | Startup | Active | Recovery | Total | Adv Hit | Adv Block | Invul |
|---|---|---|---|---|---|---|---|---|---|---|---|
| - | - | - | - | - | - | - | - | - | - | - | - |
| |||||||||||
8HK
| Damage | Stun | Cancel | Guard | Parry | Startup | Active | Recovery | Total | Adv Hit | Adv Block | Invul |
|---|---|---|---|---|---|---|---|---|---|---|---|
| - | - | - | - | - | - | - | - | - | - | - | - |
| |||||||||||
Command Normals
Universal Mechanics
Throws
Roll
Counter Attack
Guard Cancel Movement
Dodge Attacks
Small Jump
Dash
Run
Special Moves
DP
Super Moves
Combos
Advanced Strategy
Grooves & Groove specific strategy
C Groove
A Groove
P Groove
S Groove
N Groove
K Groove
Matchups
Check here for matchup analysis, notes, and errata. Could be as simple as optimal punishes, safe jump setups, and effective counter pokes.
For example:
Blanka
Blanka ball punishes- Any level Maiden Masher, run a little and sweep (low HK), A groove activate sweep custom.
