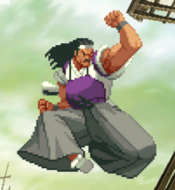
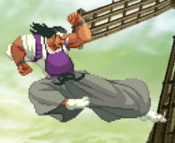
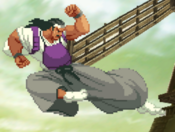
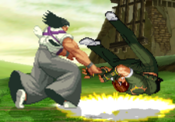
No edit summary |
Lichmassacre (talk | contribs) m (→Groove Selection: Small wording fix, said "all 3 of these grooves" under Groove Selection when there's only K and P under "Worst" grooves. I assume S used to be here at some point.) |
||
| (54 intermediate revisions by 10 users not shown) | |||
| Line 1: | Line 1: | ||
= Introduction = | == Introduction == | ||
{{CvS2 Character Subnav|char=Todo|short=Todo}} | |||
<div> | |||
[[File:CVS2_Todo_Data.png|right|500px]] | |||
== Story == | |||
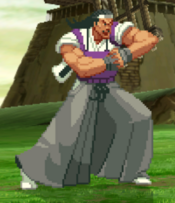
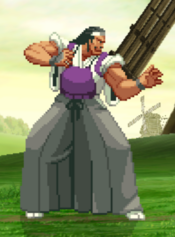
'''Ryuhaku Todoh''', stylized as just '''Todo''' in this game, is the inventor and primary teacher of Todoh style Kobudo, a style derivative of Aiki-jujutsu and Kendo. He has a long standing dojo in South Town, and a heavily developed rivalry with the nearby Kyokugenryu dojo. This rivalry is for various reasons: the Kyokugenryu dojo is more successful and takes a lot of profit from his dojo, and the Kyokugenryu style is just a lot more popular. Likely the biggest reason however is his rivalry with Takuma Sakazaki, the head of the dojo, dating back to their younger days. | |||
= | When Yuri Sakazaki is kidnapped, Ryo immediately sets his sights on Todo, believing him to do it because of his animosity towards the dojo and fighting style. Todo had nothing to do with it in reality, but an enraged Ryo still beat him up badly. This was the final blow to both Todo's ego and the dojo as a whole. Students stopped enrolling, his funds plummeted, and his own humiliation hurt more than anything. Todo decided to disappear one day, with the only hint to where he was being his wife, who claimed he was training far away for a rematch with Ryo. His daughter, Kasumi Todoh, loved her father dearly. She refused to sit and wait, and mastered the Todoh style Kobudo, embarking on a quest to find him and to take revenge on every Kyokugenryu fighter she could find. | ||
== Gameplay == | |||
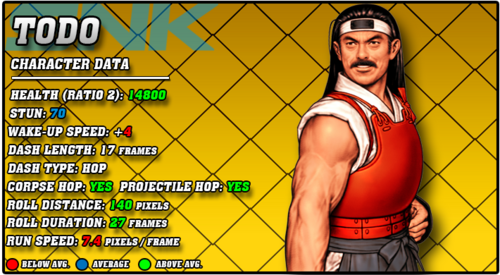
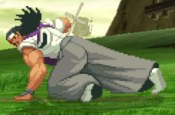
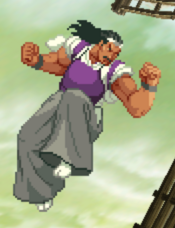
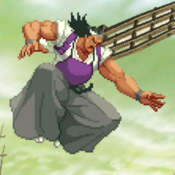
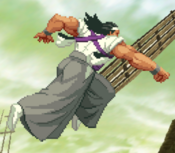
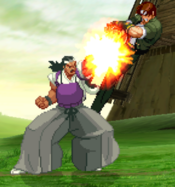
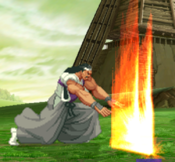
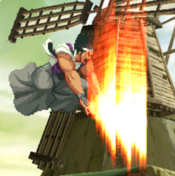
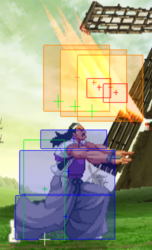
Todo is a seemingly simple character with some surprising execution required to master him. He is most effective vs non roll groove due to RC waves being so strong as a poke and anit air, while doing great guard damage. He only has 4 special moves, with 3 of those specials just being variations on the same move. His various Kasane Ate wave specials allow him to control space and are very plus in most situations, making for oppressive projectiles. 236P simply sends out the wave in front of him, with the different strengths determining the distance. These are +6, meaning you can realistically link from them if close enough. 623P is Aogi Kasane Ate, or Scrape. While these look like anti-airs, they are a bit too slow for that, but still work well if done preemptively enough. j.236P is Tobi Kasane Ate, or air wave. These are amazing air-to-airs and pressure tools, especially when done with a tiger knee input (doing the input as 2369P in order to do it as soon as you jump). These also leave you incredibly plus, especially on block. His final special is 63214P Taikuzushi, or Command Grab. This is an amazing command grab that allows him to combo from it, making for very high damage combos. When roll cancelled it's especially strong, as it can go through mashing and even be used as a realistic anti-air! This is his best poke and extremely strong vs non roll grooves. Keep in mind even if just defended that it requires 3 JDs otherwise they will still take chip. Versus P-groove it only requires 1 parry to negate all three hits. | |||
Todo has various useful normals and links as well, solidifying him as a neutral and pressure character. Todo can create a mix up off of command grab sweep to corpse hop, allowing for another RC grab or strike mix. While his health is high, he lacks a reversal, leaving him struggling on defense or forced to spend meter. He only really has one useful super as well, 236236P Cho Kasane Ate. His other super, 2363214P Shingan Kazura Otoshi, is a counter with startup super flash. This basically screams "I'm doing my counter move!" and makes your opponent very unlikely to press a button if they're paying attention. He lacks a reversal, leaving him very weak on defense without roll cancels, though roll cancels make him a lot scarier overall. Todo is a straightforward neutral/pressure character with a difficult but damaging Custom Combo, and if you like some difficult execution on a seemingly simple character, you might have a lot of fun with him. | |||
=== Groove Selection === | |||
'''Best - A/C:''' It's hard to justify playing Todo in any Groove besides A-Groove. A-Todo gets a very powerful Custom Combo, and a lot of ways to utilize it. Links after Kasane Ate in the corner, activating after a command grab for 10k+ damage, great guard crush potential with repeated Kasane Ate's, Todo has it all. He also gets roll, which he absolutely needs for RC command grab. RC command grab becomes much scarier in general because of the Custom Combo from it. A-Todo is a clear optimal Groove for him. C groove is his second best having the same control with RCs while being extremely strong vs non roll grooves. Similiar to his custom, Todo becomes very dangerous with a level 2. Landing it as an anti air or from a command grab and canceling into whiffed command grab give the super more juggle points causing it to do massive damage. | |||
'''Useful - N/S:''' N-Groove gives Todo much better movement, mainly having hop, which helps his mixups a lot. Having consistent level 1 supers isn't bad, but Todo can also activate Max Mode, which gives him a decent and useful damage increase. He maintains roll for RC command grab and RC Scrape, and cheaper access to guard cancels for better defense. His supers are fairly useful. S-Todo similarly gets to spam level 1 Cho Kasane Ate, and can do it infinitely at low health, making for much scarier pressure. Charging is a chore however, but since Todo has decent neutral and offensive presence, people might not be as quick to press against you. Run and hop, similar to N-Todo, give him better mixup ability to go with his ridiculous safety on block. | |||
'''Worst - K/P:''' Both of these Grooves sacrifice roll, which Todo really likes having for Roll Cancels. K-Todo gets Rage, which does up his damage, and Just Defend is a useful tool both offensively and defensively. Hop and run aid his mixups as well, but level 3 Cho Kasane Ate does pitiful damage for the cost, making his damage much less worthwhile. P-Todo similarly has very little, as his meterless punishes aren't bad but aren't amazing either. Having a level 3 stored doesn't do much to give him more damage either. S-Todo gets to end combos in level 1 | |||
{{StrengthsAndWeaknesses | |||
|intro= | |||
--------------------------- | |||
'''Todo''' is a neutral and pressure based character who uses his powerful Kasane Ate specials to generate plus frames and crush guard, or mixing in his Taikuzushi command grab that he can combo from for big damage. Todo is best in '''A-Groove'''. | |||
'''Difficulty''': Pretty Hard'''<br>'''Tier''': B- | |||
|pros= | |||
* '''Plus Frames:''' Todo can easily get himself very plus on block, and go through guard bars very quickly. While normal Kasane Ate is good at this, doing a tiger knee Tobi Kasane Ate is even better, and allows you to be immensely safe | |||
* '''Meter Spend:''' His Cho Kasane Ate is a great super for resetting pressure, cranking guard bar, and ending combos. The level 1 version alone is +15, allowing him to very safely continue his guard crush string afterwards, and in S-Groove is incredibly annoying to deal with. Also note that it can not be stopped and the super will always come out on wake up at level 1. | |||
* '''Command Grab:''' 63214P Taikuzushi is a great command grab that can be followed up with a combo for great damage. When roll cancelled, it's even harder to beat, and will eat through buttons and even anti-air for big damage | |||
* '''Simple CC:''' While the optimized versions are difficult, his easiest Custom Combos still do good damage, and in the corner he can just do repeated Kasane Ate both on hit and block for great damage | |||
|cons= | |||
* '''Bad Defense:''' Despite his decent health value, having no reversal leaves Todo very stuck on defense, though roll cancel helps this a lot | |||
* '''Execution:''' Being able to consistently roll cancel, hit links after Kasane Ate, and tiger knee Tobi Kasane Ate are all execution pitfalls a Todo player has to learn, not to mention his optimized Custom Combo | |||
* '''Limited Moveset:''' Todo only has 4 specials and 2 supers to work with, and the counter super is very situatonal. This leaves him with very few answers to a lot of things, and while what he does have is fine, it's still a limit to play around. Jab wave can struggle vs good rolls. | |||
* '''Mixup:''' While he can guard crush with the best of them, Todo relies on mixing up with his command grab, which requires pretty close range. He lacks a high/low mixup otherwise, | |||
}} | |||
=== Players to Watch === | |||
{| class="wikitable" | |||
|- | |||
! Name !! Country !! Groove !! Accounts !! Notes | |||
|- | |||
| kaoruda || Japan || C-Groove || Twitter: @kaoruda || Fundamental heavy but also makes great use of TK Air Wave in pressure if need be. <br> [https://www.youtube.com/watch?v=InKmyM25ASs&t=886s&ab_channel=D44Bas Sample Match] | |||
|- | |||
| Aojiru || Japan || A-Groove || N/A || Makes great use of Todo's versatile custom combo links. <br> [https://www.youtube.com/watch?v=ymABdQg72JQ&ab_channel=psychorarity Sample Match] | |||
|- | |||
| Izumi || Japan || C-Groove || Twitter: @IzumiSgroove || Though he used Todo briefly, he has been shown to be a very strong Todo player. <br> [https://youtu.be/-ftBJWx7ZtU Sample Match] | |||
|- | |||
|} | |||
<br><br> | |||
'''!!!THIS PAGE IS STILL A WIP. IF YOU NEED FRAME DATA NOW, REFER TO THE CVS2 BIBLE OR LOOK THROUGH EDIT HISTORY TO FIND THE LAST EDIT CONTAINING FRAME DATA IF THERE WAS ONE!!!''' | |||
== Normal Moves == | == Normal Moves == | ||
=== Far Normals === | |||
=== <span class="invisible-header">5LP</span> === | |||
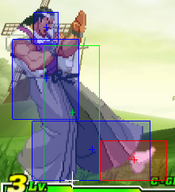
{{MoveData | |||
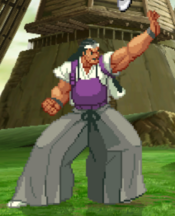
| name = Far Jab | |||
| input = 5LP / Far LP | |||
| subtitle = Far Light Punch | |||
| image = CVS2 Todo 5LP.png | |||
| caption = | |||
| linkname = 5LP | |||
| data = | |||
{{AttackData-CvS2 | |||
| version = Far {{Icon-Capcom|LP}} | |||
| subtitle = | |||
| damage = 315 | |||
| stun = 3 | |||
| cancel = RF/SP/SU | |||
| guard = Mid | |||
| parry = High | |||
| startup = 4 | |||
| active = 4 | |||
| recovery = 10 | |||
| total = 18 | |||
| advHit = +3 | |||
| advBlock = +3 | |||
| invul = None | |||
| description = Not used for much other than emergency anti-airs. | |||
}} | |||
}} | |||
=== <span class="invisible-header">5MP</span> === | |||
{{MoveData | |||
| name = Far Strong | |||
| input = 5MP / Far MP | |||
| subtitle = Far Medium Punch | |||
| image = CVS2 Todo 5MP.png | |||
| caption = | |||
| linkname = 5MP | |||
| data = | |||
{{AttackData-CvS2 | |||
| version = Far {{Icon-Capcom|MP}} | |||
| subtitle = | |||
| damage = 1000 | |||
| stun = 64 | |||
| cancel = SP/SU | |||
| guard = Mid | |||
| parry = High | |||
| startup = 5 | |||
| active = 4 | |||
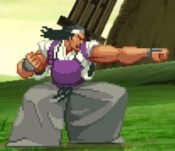
| recovery = 17 | |||
| total = 26 | |||
| advHit = +3 | |||
| advBlock = +3 | |||
| invul = None | |||
| description = Decent poke with a cancel built in (LP Wave usually) for combos and blockstrings. Note that characters below a height of 62 pixels duck this. | |||
}} | |||
}} | |||
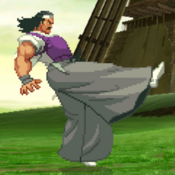
=== <span class="invisible-header">5HP</span> === | |||
{{MoveData | |||
| name = Far Fierce | |||
| input = 5HP / Far HP | |||
| subtitle = Far Heavy Punch | |||
| image = CVS2 Todo 5HP.png | |||
| caption = | |||
| linkname = 5HP | |||
| data = | |||
{{AttackData-CvS2 | |||
| version = Far {{Icon-Capcom|HP}} | |||
| subtitle = | |||
| damage = 1400 | |||
| stun = 14 | |||
| cancel = None | |||
| guard = Mid | |||
| parry = High | |||
| startup = 10 | |||
| active = 4 | |||
| recovery = 30 | |||
| total = 44 | |||
| advHit = -10 | |||
| advBlock = -10 | |||
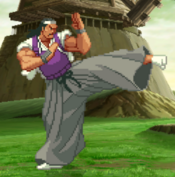
| invul = - | |||
| description = An integral part of Todo's CCs due to its forward momentum. Aside from that, it is not used much outside of certain poke and whiff punish scenarios. | |||
}} | |||
}} | |||
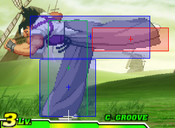
=== <span class="invisible-header">5LK</span> === | |||
{{MoveData | |||
| name = Far Short | |||
| input = 5LK / Far LK | |||
| subtitle = Far Light Kick | |||
| image = CVS2 Todo 5LK.png | |||
| caption = | |||
| linkname = 5LK | |||
| data = | |||
{{AttackData-CvS2 | |||
| version = Far {{Icon-Capcom|LK}} | |||
| subtitle = | |||
| damage = 500 | |||
| stun = 5 | |||
| cancel = SU | |||
| guard = Low | |||
| parry = Low | |||
| startup = 5 | |||
| active = 4 | |||
| recovery = 15 | |||
| total = 24 | |||
| advHit = -4 | |||
| advBlock = -4 | |||
| invul = - | |||
| description = Useless button. | |||
}} | |||
}} | |||
=== <span class="invisible-header">5MK</span> === | |||
{{MoveData | |||
| name = Far Forward | |||
| input = 5MK / Far MK | |||
| subtitle = Far Medium Kick | |||
| image = CVS2 Todo 5MK.png | |||
| caption = | |||
| linkname = 5MK | |||
| data = | |||
{{AttackData-CvS2 | |||
| version = Far {{Icon-Capcom|MK}} | |||
| subtitle = | |||
| damage = 800 | |||
| stun = 8 | |||
| cancel = None | |||
| guard = Mid | |||
| parry = High | |||
| startup = 8 | |||
| active = 6 | |||
| recovery = 16 | |||
| total = 30 | |||
| advHit = -2 | |||
| advBlock = -2 | |||
| invul = None | |||
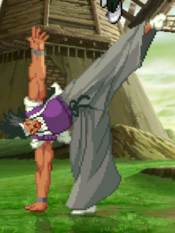
| description = Looks decent on paper but is also never used. | |||
}} | |||
}} | |||
=== <span class="invisible-header">5HK</span> === | |||
{{MoveData | |||
| name = Far Roundhouse | |||
| input = 5HK / Far HK | |||
| subtitle = Far Heavy Kick | |||
| image = CVS2 Todo 5HK.png | |||
| caption = | |||
| linkname = 5HK | |||
| data = | |||
{{AttackData-CvS2 | |||
| version = Far {{Icon-Capcom|HK}} | |||
| subtitle = | |||
| damage = 1300 | |||
| stun = 13 | |||
| cancel = None | |||
| guard = Mid | |||
| parry = High | |||
| startup = 15 | |||
| active = 4 | |||
| recovery = 22 | |||
| total = 41 | |||
| advHit = -2 | |||
| advBlock = -2 | |||
| invul = None | |||
| description = Sometimes used as a counterpoke or at the tip in certain pressure scenarios. | |||
}} | |||
}} | |||
=== Close Standing Normals === | |||
=== <span class="invisible-header">clLP</span> === | |||
{{MoveData | |||
| name = Close Jab | |||
| input = cl.LP | |||
| subtitle = Close Light Punch | |||
| image = CVS2 Todo 5LP.png | |||
| caption = | |||
| linkname = cl.LP | |||
| data = | |||
{{AttackData-CvS2 | |||
| version = Close {{Icon-Capcom|LP}} | |||
| subtitle = | |||
| damage = 300 | |||
| stun = 3 | |||
| cancel = RF/SP/SU | |||
| guard = Mid | |||
| parry = High | |||
| startup = 4 | |||
| active = 4 | |||
| recovery = 10 | |||
| total = 18 | |||
| advHit = +3 | |||
| advBlock = +3 | |||
| invul = None | |||
| description = Same as 5LP. | |||
}} | |||
}} | |||
=== <span class="invisible-header">clMP</span> === | |||
{{MoveData | |||
| name = Close Strong | |||
| input = cl.MP | |||
| subtitle = | |||
| image = CVS2 Todo cMP.png | |||
| caption = | |||
| linkname = cl.MP | |||
| data = | |||
{{AttackData-CvS2 | |||
| version = Close {{Icon-Capcom|MP}} | |||
| subtitle = | |||
| damage = 900 | |||
| stun = 9 | |||
| cancel = SP/SU | |||
| guard = Mid | |||
| parry = High | |||
| startup = 6 | |||
| active = 4 | |||
| recovery = 10 | |||
| total = 20 | |||
| advHit = +8 | |||
| advBlock = +8 | |||
| invul = - | |||
| description = Really nice for combos given it is Todo's most plus grounded button. You can get some unique links using this, though keep in mind it can be ducked under by short characters. It is usually performed after a Tiger Knee Wave which forces stand, but against characters that can't duck this normal it is great for pressure and combos. | |||
}} | |||
}} | |||
=== <span class="invisible-header">clHP</span> === | |||
{{MoveData | |||
| name = Close Fierce | |||
| input = cl.HP | |||
| subtitle = Close Heavy Punch | |||
| image = CVS2 Todo cHP.png | |||
| caption = | |||
| linkname = cl.HP | |||
| data = | |||
{{AttackData-CvS2 | |||
| version = Close {{Icon-Capcom|HP}} | |||
| subtitle = | |||
| damage = 1400 | |||
| stun = 14 | |||
| cancel = None | |||
| guard = Mid | |||
| parry = High | |||
| startup = 8 | |||
| active = 4 | |||
| recovery = 26 | |||
| total = 38 | |||
| advHit = - | |||
| advBlock = - | |||
| invul = None | |||
| description = Sometimes used as an anti air. Great as a throw whiff OS. | |||
}} | |||
}} | |||
=== <span class="invisible-header">clLK</span> === | |||
{{MoveData | |||
| name = Close Short | |||
| input = cl.LK | |||
| subtitle = Close Light Kick | |||
| image = CVS2 Todo 5LK.png | |||
| caption = | |||
| linkname = cl.LK | |||
| data = | |||
{{AttackData-CvS2 | |||
| version = Close {{Icon-Capcom|LK}} | |||
| subtitle = | |||
| damage = 500 | |||
| stun = 5 | |||
| cancel = SU | |||
| guard = Low | |||
| parry = Low | |||
| startup = 5 | |||
| active = 4 | |||
| recovery = 15 | |||
| total = 24 | |||
| advHit = -4 | |||
| advBlock = -4 | |||
| invul = None | |||
| description = Useless button. | |||
}} | |||
}} | |||
=== <span class="invisible-header">clMK</span> === | |||
{{MoveData | |||
| name = Close Forward | |||
| input = cl.MK | |||
| subtitle = Close Medium Kick | |||
| image = CVS2 Todo cMK.png | |||
| caption = | |||
| linkname = cl.MK | |||
| data = | |||
{{AttackData-CvS2 | |||
| version = Close {{Icon-Capcom|MK}} | |||
| subtitle = | |||
| damage = 800 | |||
| stun = 8 | |||
| cancel = SU | |||
| guard = Mid | |||
| parry = High | |||
| startup = 5 | |||
| active = 4 | |||
| recovery = 22 | |||
| total = 31 | |||
| advHit = -6 | |||
| advBlock = -6 | |||
| invul = None | |||
| description = Useless button. | |||
}} | |||
}} | |||
=== <span class="invisible-header">clHK</span> === | |||
{{MoveData | |||
| name = Close Roundhouse | |||
| input = cl.HK | |||
| subtitle = Close Heavy Kick | |||
| image = CVS2 Todo cHK.png | |||
| caption = | |||
| linkname = cl.MK | |||
| data = | |||
{{AttackData-CvS2 | |||
| version = Close {{Icon-Capcom|HK}} | |||
| subtitle = | |||
| damage = 1300 | |||
| stun = 13 | |||
| cancel = None | |||
| guard = Mid | |||
| parry = High | |||
| startup = 12 | |||
| active = 4 | |||
| recovery = 14 | |||
| total = 50 | |||
| advHit = -14 | |||
| advBlock = -14 | |||
| invul = None | |||
| description = Similar to cl.HP, but outclassed for the most part. | |||
}} | |||
}} | |||
=== Crouching Normals === | |||
=== <span class="invisible-header">2LP</span> === | |||
{{MoveData | |||
| name = Crouch Jab | |||
| input = 2LP / cr.LP | |||
| subtitle = Crouching Light Punch | |||
| image = CVS2 Todo 2LP.png | |||
| caption = | |||
| linkname = 2LP | |||
| data = | |||
{{AttackData-CvS2 | |||
| version = {{Motion|d}}+{{Icon-Capcom|LP}} | |||
| subtitle = | |||
| damage = 300 | |||
| stun = 3 | |||
| cancel = RF/SP/SU | |||
| guard = Mid | |||
| parry = Mid | |||
| startup = 3 | |||
| active = 4 | |||
| recovery = 6 | |||
| total = 13 | |||
| advHit = +7 | |||
| advBlock = +7 | |||
| invul = None | |||
| description = Your go-to pressure and combo starter. Ticks into command grab nicely. | |||
}} | |||
}} | |||
=== <span class="invisible-header">2MP</span> === | |||
{{MoveData | |||
| name = Crouch Strong | |||
| input = 2MP / cr.MP | |||
| subtitle = Crouching Medium Punch | |||
| image = CVS2 Todo 2MP.png | |||
| caption = | |||
| linkname = 2MP | |||
| data = | |||
{{AttackData-CvS2 | |||
| version = {{Motion|d}}+{{Icon-Capcom|MP}} | |||
| subtitle = | |||
| damage = 900 | |||
| stun = 9 | |||
| cancel = SP/SU | |||
| guard = Mid | |||
| parry = Mid | |||
| startup = 5 | |||
| active = 4 | |||
| recovery = 20 | |||
| total = 29 | |||
| advHit = 0 | |||
| advBlock = 0 | |||
| invul = None | |||
| description = Good for blockstrings and as a link option from 2LP. Pretty okay poke. | |||
}} | |||
}} | |||
=== <span class="invisible-header">2HP</span> === | |||
{{MoveData | |||
| name = Crouch Fierce | |||
| input = 2HP / cr.HP | |||
| subtitle = Crouching Heavy Punch | |||
| image = CVS2 Todo 2HP.png | |||
| caption = | |||
| linkname = 2HP | |||
| data = | |||
{{AttackData-CvS2 | |||
| version = {{Motion|d}}+{{Icon-Capcom|HP}} | |||
| subtitle = | |||
| damage = 1300 | |||
| stun = 13 | |||
| cancel = SU | |||
| guard = Mid | |||
| parry = High | |||
| startup = 7 | |||
| active = 6 | |||
| recovery = 25 | |||
| total = 38 | |||
| advHit = -5 | |||
| advBlock = -5 | |||
| invul = None | |||
| description = Your primary normal anti-air, for jumps that are around 45 degrees, can be closer to Todo. Not exactly the most consistent, but you make do with what you have. | |||
It is also integral in some combos. It cancels into super making it your primary cancel into super off of command grab, and the forward movement also makes it good in CCs. | |||
}} | |||
}} | |||
=== <span class="invisible-header">2LK</span> === | |||
{{MoveData | |||
| name = Crouch Short | |||
| input = 2LK / cr.LK | |||
| subtitle = Crouching Light Kick | |||
| image = CVS2 Todo 2LK.png | |||
| caption = | |||
| linkname = 2LK | |||
| data = | |||
{{AttackData-CvS2 | |||
| version = {{Motion|d}}+{{Icon-Capcom|LK}} | |||
| subtitle = | |||
| damage = 300 | |||
| stun = 3 | |||
| cancel = SP/SU | |||
| guard = Low | |||
| parry = Low | |||
| startup = 4 | |||
| active = 4 | |||
| recovery = 11 | |||
| total = 19 | |||
| advHit = +4 | |||
| advBlock = +4 | |||
| invul = None | |||
| description = Good tick throw option, not typically used in combos. | |||
}} | |||
}} | |||
=== <span class="invisible-header">2MK</span> === | |||
{{MoveData | |||
| name = Crouch Forward | |||
| input = 2MK / cr.MK | |||
| subtitle = Crouching Medium Kick | |||
| image = CVS2 Todo 2MK.png | |||
| caption = | |||
| linkname = 2MK | |||
| data = | |||
{{AttackData-CvS2 | |||
| version = {{Motion|d}}+{{Icon-Capcom|MK}} | |||
| subtitle = | |||
| damage = 800 | |||
| stun = 8 | |||
| cancel = SP/SU | |||
| guard = Low | |||
| parry = Low | |||
| startup = 5 | |||
| active = 6 | |||
| recovery = 14 | |||
| total = 25 | |||
| advHit = +6 | |||
| advBlock = +6 | |||
| invul = None | |||
| description = A great all-in-one button for offense. It is one of your go-to pokes, pressure options, blockstring tools, tick options, etc. It is a great button that is very effective when used properly. | |||
}} | |||
}} | |||
=== <span class="invisible-header">2HK</span> === | |||
{{MoveData | |||
| name = Crouch Roundhouse | |||
| input = 2HK / cr.HK | |||
| subtitle = Crouching Heavy Kick | |||
| image = CVS2 Todo 2HK.png | |||
| caption = | |||
| linkname = 2HK | |||
| data = | |||
{{AttackData-CvS2 | |||
| version = {{Motion|d}}+{{Icon-Capcom|HK}} | |||
| subtitle = | |||
| damage = 1200 | |||
| stun = 12 | |||
| cancel = None | |||
| guard = Low | |||
| parry = Low | |||
| startup = 8 | |||
| active = 4 | |||
| recovery = 32 | |||
| total = 44 | |||
| advHit = DWN | |||
| advBlock = -12 | |||
| invul = None | |||
| description = Not the best sweep, but it is an easy knockdown option after command grab. Not really good as as poke or just as a general offensive tool, he has better ones. | |||
}} | |||
}} | |||
=== Jumping Normals === | |||
=== <span class="invisible-header">j.LP</span> === | |||
{{MoveData | |||
| name = Jump Jab | |||
| input = j.LP | |||
| subtitle = Jumping Light Punch | |||
| image = CVS2 Todo jLP.png | |||
| caption = | |||
| linkname = j.LP | |||
| data = | |||
{{AttackData-CvS2 | |||
| version = {{Motion|ub}}/{{Motion|u}}/{{Motion|uf}}+{{Icon-Capcom|LP}} | |||
| subtitle = | |||
| damage = 600 | |||
| stun = 6 | |||
| cancel = SP | |||
| guard = High | |||
| parry = High | |||
| startup = 3 | |||
| active = 28 | |||
| recovery = - | |||
| total = 31 | |||
| advHit = - | |||
| advBlock = - | |||
| invul = None | |||
| description = Okay air-to-air, sometimes a niche cancel into Air Wave on standing bigs. | |||
}} | |||
}} | |||
=== <span class="invisible-header">j.MP</span> === | |||
{{MoveData | |||
| name = Jump Strong | |||
| input = j.MP | |||
| subtitle = Jumping Medium Punch | |||
| image = CVS2 Todo jMP.png | |||
| caption = | |||
| linkname = j.MP | |||
| data = | |||
{{AttackData-CvS2 | |||
| version = {{Motion|ub}}/{{Motion|u}}/{{Motion|uf}}+{{Icon-Capcom|MP}} | |||
| subtitle = | |||
| damage = 900 | |||
| stun = 9 | |||
| cancel = None | |||
| guard = High | |||
| parry = High | |||
| startup = 7 | |||
| active = 8 | |||
| recovery = - | |||
| total = 15 | |||
| advHit = - | |||
| advBlock = - | |||
| invul = None | |||
| description = Another okay air-to-air. Slower than other j.MPs so adjust timing accordingly. | |||
}} | |||
}} | |||
=== <span class="invisible-header">j.HP</span> === | |||
{{MoveData | |||
| name = Jump Fierce | |||
| input = j.HP | |||
| subtitle = Jumping Heavy Punch | |||
| image = CVS2 Todo jHP.png | |||
| caption = | |||
| linkname = j.HP | |||
| data = | |||
{{AttackData-CvS2 | |||
| version = {{Motion|ub}}/{{Motion|u}}/{{Motion|uf}}+{{Icon-Capcom|HP}} | |||
| subtitle = | |||
| damage = 1200 | |||
| stun = 12 | |||
| cancel = None | |||
| guard = High | |||
| parry = High | |||
| startup = 8 | |||
| active = 6 | |||
| recovery = - | |||
| total = 14 | |||
| advHit = - | |||
| advBlock = - | |||
| invul = None | |||
| description = Decent jump-in and your highest damage jump normal. Good in stun combos and short hops. | |||
}} | |||
}} | |||
=== <span class="invisible-header">j.LK</span> === | |||
{{MoveData | |||
| name = Jump Short | |||
| input = j.LK | |||
| subtitle = Jumping Light Kick | |||
| image = CVS2 Todo jLK.png | |||
| caption = | |||
| linkname = j.LK | |||
| data = | |||
{{AttackData-CvS2 | |||
| version = {{Motion|ub}}/{{Motion|u}}/{{Motion|uf}}+{{Icon-Capcom|LK}} | |||
| subtitle = | |||
| damage = 500 | |||
| stun = 5 | |||
| cancel = SP | |||
| guard = High | |||
| parry = High | |||
| startup = 4 | |||
| active = 28 | |||
| recovery = - | |||
| total = 32 | |||
| advHit = - | |||
| advBlock = - | |||
| invul = None | |||
| description = Sometimes used as a tick throw into command grab. | |||
}} | |||
}} | |||
=== <span class="invisible-header">j.MK</span> === | |||
{{MoveData | |||
| name = Jump Forward | |||
| input = j.MK | |||
| subtitle = Jumping Medium Kick | |||
| image = CVS2 Todo jMK.png | |||
| caption = | |||
| linkname = j.MK | |||
| data = | |||
{{AttackData-CvS2 | |||
| version = {{Motion|ub}}/{{Motion|u}}/{{Motion|uf}}+{{Icon-Capcom|MK}} | |||
| subtitle = | |||
| damage = 800 | |||
| stun = 8 | |||
| cancel = None | |||
| guard = High | |||
| parry = High | |||
| startup = 6 | |||
| active = 6 | |||
| recovery = - | |||
| total = 12 | |||
| advHit = - | |||
| advBlock = - | |||
| invul = None | |||
| description = Your go-to crossup. | |||
}} | |||
}} | |||
=== <span class="invisible-header">j.HK</span> === | |||
{{MoveData | |||
| name = Jump Roundhouse | |||
| input = j.HK | |||
| subtitle = Jumping Heavy Kick | |||
| image = CVS2 Todo jHK.png | |||
| caption = | |||
| linkname = j.HK | |||
| data = | |||
{{AttackData-CvS2 | |||
| version = {{Motion|ub}}/{{Motion|u}}/{{Motion|uf}}+{{Icon-Capcom|HK}} | |||
| subtitle = | |||
| damage = 1100 | |||
| stun = 11 | |||
| cancel = None | |||
| guard = High | |||
| parry = High | |||
| startup = 5 | |||
| active = 4 | |||
| recovery = - | |||
| total = 9 | |||
| advHit = - | |||
| advBlock = - | |||
| invul = None | |||
| description = Nice jump-in with disjoint on the bottom. Usually your primary jump-in. | |||
}} | |||
}} | |||
== Command Normals == | |||
=== <span class="invisible-header">X</span> === | |||
{{MoveData | |||
| name = Kurubushi Kudaki | |||
| input = 6MK | |||
| subtitle = Low Kick | |||
| image = CVS2 Todo 6MK.png | |||
| caption = | |||
| linkname = 6MK | |||
| data = | |||
{{AttackData-CvS2 | |||
| version = {{Motion|f}}+{{Icon-Capcom|MK}} | |||
| subtitle = | |||
| damage = 900 | |||
| stun = 9 | |||
| cancel = None | |||
| guard = Low | |||
| parry = Low | |||
| startup = 16 | |||
| active = 4 | |||
| recovery = 36 | |||
| total = 56 | |||
| advHit = Knockdown | |||
| advBlock = -15 | |||
| invul = None | |||
| description = Todo does a low kick while advancing forward. Can be used to counter Sagat's High Tiger Shot and 5HP if timed/spaced correctly, knocks the opponent down. Decent poke when spaced. | |||
}} | |||
}} | |||
== Throws == | |||
=== <span class="invisible-header">X</span> === | |||
{{MoveData | |||
| name = Mubyōshi | |||
| input = Near Opponent, 4/6HP | |||
| subtitle = Punch Throw | |||
| image = CVS2 Todo punchthrow.png | |||
| caption = | |||
| linkname = Punch Throw Name | |||
| data = | |||
{{AttackData-CvS2 | |||
| version = Close {{Motion|b}}/{{Motion|f}}+{{Icon-Capcom|HP}} | |||
| subtitle = | |||
| damage = 2000 | |||
| stun = - | |||
| cancel = - | |||
| guard = - | |||
| parry = - | |||
| startup = 3 | |||
| active = 1 | |||
| recovery = 17 | |||
| total = 21 | |||
| advHit = - | |||
| advBlock = - | |||
| invul = None | |||
| description = | |||
Todo grabs the opponent and slams them on the ground. Your go-to throw. | |||
}} | |||
}} | |||
=== <span class="invisible-header">X</span> === | |||
{{MoveData | |||
| name = Agowari | |||
| input = Near Opponent, 4/6HK | |||
| subtitle = Kick Throw | |||
| image = CVS2 Todo kickthrow.png | |||
| caption = | |||
| linkname = Kick Throw Name | |||
| data = | |||
{{AttackData-CvS2 | |||
| version = Close {{Motion|b}}/{{Motion|f}}+{{Icon-Capcom|HK}} | |||
| subtitle = | |||
| damage = 2100 | |||
| stun = - | |||
| cancel = - | |||
| guard = - | |||
| parry = - | |||
| startup = 5 | |||
| active = 1 | |||
| recovery = 17 | |||
| total = 23 | |||
| advHit = - | |||
| advBlock = - | |||
| invul = - | |||
| description = Todo punches the opponent upwards. Not done much, unless you want damage and a harder tech. | |||
}} | |||
}} | |||
== Special Moves == | == Special Moves == | ||
=== <span class="invisible-header">X</span> === | |||
{{MoveData | |||
| name = Kasane Ate | |||
| input = 236P | |||
| subtitle = Wave | |||
| image = CVS2 Todo 236P.png | |||
| caption = | |||
| linkname = | |||
| data = | |||
{{AttackData-CvS2 | |||
| version = {{Motion|236}} + {{Icon-Capcom|LP}} | |||
| subtitle = | |||
| damage = 400x3 | |||
| stun = 4x3 | |||
| cancel = None | |||
| guard = Mid | |||
| parry = High | |||
| startup = 15 | |||
| active = | |||
| recovery = 35 | |||
| total = 50 | |||
| advHit = +6 | |||
| advBlock = +6 | |||
| invul = None | |||
}} | |||
{{AttackData-CvS2 | |||
| header = no | |||
| version = {{Motion|236}} + {{Icon-Capcom|MP}} | |||
| subtitle = | |||
| damage = 400x3 | |||
| stun = 4x3 | |||
| cancel = None | |||
| guard = Mid | |||
| parry = High | |||
| startup = 18 | |||
| active = | |||
| recovery = 35 | |||
| total = 53 | |||
| advHit = +6 | |||
| advBlock = +6 | |||
| invul = None | |||
}} | |||
{{AttackData-CvS2 | |||
| header = no | |||
| version = {{Motion|236}} + {{Icon-Capcom|HP}} | |||
| subtitle = | |||
| damage = 400x3 | |||
| stun = 4x3 | |||
| cancel = None | |||
| guard = Mid | |||
| parry = High | |||
| startup = 21 | |||
| active = | |||
| recovery = 35 | |||
| total = 56 | |||
| advHit = +6 | |||
| advBlock = +6 | |||
| invul = None | |||
| description = One of the best pokes in the game when roll canceled. This is the main reason Todo is so strong vs P and K groove. Without roll it can be hard to deal with and does great chip and guard damage. It requires 2 just defenses to not take chip, as the move hits 3 times very fast. It only requires 1 parry, the game will parry the next 2 automatically. Use as both a poke and anti-air. | |||
}} | |||
}} | |||
=== <span class="invisible-header">X</span> === | |||
{{MoveData | |||
| name = Tobi Kasane Ate | |||
| input = j.236P | |||
| subtitle = Air Wave | |||
| image = CVS2 Todo j236P.png | |||
| caption = | |||
| linkname = | |||
| data = | |||
{{AttackData-CvS2 | |||
| version = In Air, {{Motion|236}} + {{Icon-Capcom|LP}} | |||
| subtitle = | |||
| damage = 400x3 | |||
| stun = 4x3 | |||
| cancel = None | |||
| guard = High | |||
| parry = High | |||
| startup = 12 | |||
| active = | |||
| recovery = 6 | |||
| total = | |||
| advHit = +6 | |||
| advBlock = +11 | |||
| invul = None | |||
}} | |||
{{AttackData-CvS2 | |||
| header = no | |||
| version = In Air, {{Motion|236}} + {{Icon-Capcom|MP}} | |||
| subtitle = | |||
| damage = 400x3 | |||
| stun = 4x3 | |||
| cancel = None | |||
| guard = High | |||
| parry = High | |||
| startup = 14 | |||
| active = | |||
| recovery = 6 | |||
| total = | |||
| advHit = +6 | |||
| advBlock = +10 | |||
| invul = None | |||
}} | |||
{{AttackData-CvS2 | |||
| header = no | |||
| version = In Air, {{Motion|236}} + {{Icon-Capcom|HP}} | |||
| subtitle = | |||
| damage = 400x3 | |||
| stun = 4x3 | |||
| cancel = None | |||
| guard = High | |||
| parry = High | |||
| startup = 12 | |||
| active = | |||
| recovery = 6 | |||
| total = | |||
| advHit = +6 | |||
| advBlock = +9 | |||
| invul = None | |||
| description = A great move to tiger knee with heavy frame advantage that is great in the corner, safe with just defended. Great as a meaty and anti jump when done in neutral. Does massive amounts of chip damage in the corner during a custom combo. | |||
}} | |||
}} | |||
=== <span class="invisible-header">X</span> === | |||
{{MoveData | |||
| name = Aogi Kasane Ate | |||
| input = 623P | |||
| subtitle = Scrape | |||
| image = CVS2 Todo 623P.png | |||
| caption = | |||
| linkname = | |||
| data = | |||
{{AttackData-CvS2 | |||
| version = {{Motion|623}} + {{Icon-Capcom|LP}} | |||
| subtitle = | |||
| damage = 400x3 | |||
| stun = 4x3 | |||
| cancel = None | |||
| guard = Mid | |||
| parry = High | |||
| startup = 21 | |||
| active = | |||
| recovery = 28 | |||
| total = 49 | |||
| advHit = +10 | |||
| advBlock = | |||
| invul = None | |||
}} | |||
{{AttackData-CvS2 | |||
| header = no | |||
| version = {{Motion|623}} + {{Icon-Capcom|MP}} | |||
| subtitle = | |||
| damage = 400x3 | |||
| stun = 4x3 | |||
| cancel = None | |||
| guard = Mid | |||
| parry = High | |||
| startup = 25 | |||
| active = | |||
| recovery = 24 | |||
| total = 49 | |||
| advHit = +15 | |||
| advBlock = | |||
| invul = None | |||
}} | |||
{{AttackData-CvS2 | |||
| header = no | |||
| version = {{Motion|623}} + {{Icon-Capcom|HP}} | |||
| subtitle = | |||
| damage = 400x3 | |||
| stun = 4x3 | |||
| cancel = None | |||
| guard = Mid | |||
| parry = High | |||
| startup = 29 | |||
| active = | |||
| recovery = 20 | |||
| total = 49 | |||
| advHit = +19 | |||
| advBlock = | |||
| invul = None | |||
| description = No practical use, can be used as a combo starter on tall characters (Sagat) into tiger knee wave. | |||
}} | |||
}} | |||
=== <span class="invisible-header">X</span> === | |||
{{MoveData | |||
| name = Taikuzushi | |||
| input = 63214P | |||
| subtitle = Command Grab | |||
| image = CVS2 Todo 63214P.png | |||
| caption = Whiff | |||
| image2 = CVS2 Todo 63214P 2.png | |||
| caption2 = Hit | |||
| linkname = | |||
| data = | |||
{{AttackData-CvS2 | |||
| version = {{Motion|63214}} + {{Icon-Capcom|P}} | |||
| subtitle = | |||
| damage = 1200 | |||
| stun = 0 | |||
| cancel = None | |||
| guard = Grab | |||
| parry = - | |||
| startup = 6 | |||
| active = 1 | |||
| recovery = 28 | |||
| total = 35 | |||
| advHit = | |||
| advBlock = | |||
| invul = None | |||
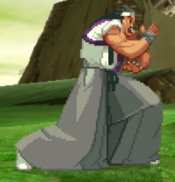
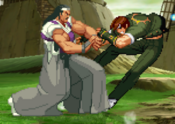
| description = One of the best RC grabs in the game, leading to massive damage in C and A (10k!). Can combo anything after or go for sweep into corpse hop. Useable as anti-air when done late vs jumps. | |||
}} | |||
}} | |||
== Super Moves == | == Super Moves == | ||
= The | === <span class="invisible-header">X</span> === | ||
{{MoveData | |||
| name = Chou Kasane Ate | |||
| input = 236236P | |||
| subtitle = Wave Super | |||
| image = CVS2 Todo 236236P.png | |||
| caption = | |||
| linkname = | |||
| data = | |||
{{AttackData-CvS2 | |||
| version = {{Motion|236}} {{Motion|236}} + {{Icon-Capcom|LP}} | |||
| subtitle = | |||
| damage = 2000 | |||
| stun = 0 | |||
| cancel = None | |||
| guard = Mid | |||
| parry = High | |||
| startup = 4:6 | |||
| active = | |||
| recovery = 46 | |||
| total = 56 | |||
| advHit = DWN | |||
| advBlock = +15 | |||
| invul = 8 (Full) | |||
}} | |||
{{AttackData-CvS2 | |||
| header = no | |||
| version = {{Motion|236}} {{Motion|236}} + {{Icon-Capcom|MP}} | |||
| subtitle = | |||
| damage = 3500 | |||
| stun = 0 | |||
| cancel = SP/SU | |||
| guard = Mid | |||
| parry = High | |||
| startup = 4:6 | |||
| active = | |||
| recovery = 46 | |||
| total = 56 | |||
| advHit = DWN | |||
| advBlock = +36 | |||
| invul = 14 (Full) | |||
}} | |||
{{AttackData-CvS2 | |||
| header = no | |||
| version = {{Motion|236}} {{Motion|236}} + {{Icon-Capcom|HP}} | |||
| subtitle = | |||
| damage = 5400 | |||
| stun = 0 | |||
| cancel = None | |||
| guard = Mid | |||
| parry = High | |||
| startup = 4:6 | |||
| active = | |||
| recovery = 46 | |||
| total = 56 | |||
| advHit = DWN | |||
| advBlock = +36 | |||
| invul = 22 (Full) | |||
| description = One of the best anti-air and wake up supers in the game at level 1. The super always comes out no matter what, even against trades and meaties, while being 100% safe on block midscreen and difficult to parry or jest defend. | |||
}} | |||
}} | |||
=== <span class="invisible-header">X</span> === | |||
{{MoveData | |||
| name = Shingan Kazura Otoshi | |||
| input = 2363214P | |||
| subtitle = | |||
| image = CVS2 Todo 2363214P.png | |||
| caption = Counter | |||
| image2 = CVS2 Todo 2363214P 2.png | |||
| caption2 = Hit | |||
| linkname = | |||
| data = | |||
{{AttackData-CvS2 | |||
| version = {{Motion|236}} {{Motion|63214}} + {{Icon-Capcom|LP}} | |||
| subtitle = | |||
| damage = 2300 | |||
| stun = 0 | |||
| cancel = None | |||
| guard = | |||
| parry = | |||
| startup = 4:0 | |||
| active = 20 | |||
| recovery = 6 | |||
| total = 30 | |||
| advHit = DWN | |||
| advBlock = | |||
| invul = 4 (Full) 5-24 (Counter) | |||
}} | |||
{{AttackData-CvS2 | |||
| header = no | |||
| version = {{Motion|236}} {{Motion|63214}} + {{Icon-Capcom|MP}} | |||
| subtitle = | |||
| damage = 3900 | |||
| stun = 0 | |||
| cancel = SP/SU | |||
| guard = | |||
| parry = | |||
| startup = 4:0 | |||
| active = 30 | |||
| recovery = 6 | |||
| total = 40 | |||
| advHit = DWN | |||
| advBlock = | |||
| invul = 4 (Full) 5-34 (Counter) | |||
}} | |||
{{AttackData-CvS2 | |||
| header = no | |||
| version = {{Motion|236}} {{Motion|63214}} + {{Icon-Capcom|HP}} | |||
| subtitle = | |||
| damage = 5200 | |||
| stun = 0 | |||
| cancel = None | |||
| guard = | |||
| parry = | |||
| startup = 4:0 | |||
| active = 40 | |||
| recovery = 6 | |||
| total = 50 | |||
| advHit = DWN | |||
| advBlock = | |||
| invul = 4 (Full) 5-44 (Counter) | |||
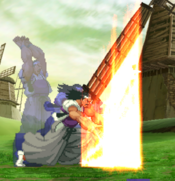
| description = The only other "instant" (4 frame invincible start up before super flash) counter besides Geese. As most counters, its a risk to use as a reversal, and due to the super flash it can be hard to land than other non-super counters. Allows for a corpse hop if it lands. Best used vs 2 in 1s and obvious specials (dark smash, crack shoot, dive kicks, etc). | |||
}} | |||
}} | |||
=== Bread and Butter Combos === | |||
*Midscreen | |||
- Command grab, c.mk xx lp wave | |||
- Command grab, sweep (gives corpse hop strike/throw vs non quick get up) | |||
Vs quick get up you can punish with another sweep, and if they quick get up again you can punish with HP Wave, doing about 40% damage for them trying to roll away | |||
- Command grab, walk up s.mp, c.fp xx Level 1 or 2 Super (Whiff grab on lvl 2) | |||
- c.lp, c.mk xx jab wave | |||
*Corner | |||
- Command grab, jab wave, s.mp xx jab wave | |||
- Standing Sagat only, never seen this landed in 20 +years - DP+HP, TK lp wave, s.mp xx lp wave, s.mp xx lp wave | |||
=== A-Groove === | |||
Todo best groove is by far A groove. Having a command grab give him an unblockable CC that can also be used as anti-air, of he can grab then activate CC. Todo is one of the few characters in the game who can practically do 10k damage. | |||
*Midscreen CC/Anti-air CC midscreen | |||
Command grab or Activate command grab (start CC with command grab to force stand is using as crouching punishing or s.fp will whiff) | |||
C.fpx3, s.fp, c.fp, s.fp, c.fp, [s.fp xx jab wave]xN, s.fp xx super when meter is about to run out | |||
This is Todo's bread and butter CC and the go to outside the corner. | |||
*Corner CC | |||
Command grab or Activate command grab (start CC with command grab to force stand is using as crouching punishing or s.fp will whiff) | |||
C.fpx3, s.fp, c.fp, s.fp, c.fp, s.fp xx jab wave xN, s.fp xx command grab as meter runs out, post CC jab wave, s.mp xx jab wave | |||
The above CC allows you to combo outside of CC while doing good damage and building meter, you use this route due to lvl 1 super missing hits in the corner | |||
*Guard CC midscreen | |||
c.mp xx jab wave, f+mk, c.mp xx jab wave xN, super as meter is about to end | |||
A decent midscreen CC on block that will guardcrush K/P grooves | |||
*Anti-jump CC | |||
Since people don't want to get grabbed, you can still land a CC by landing a point blank c.mk confirm | |||
- c.mk, activate CC, c.lk, c.mk xx jab wave, [s.fp xx jab wave]xN, Lvl 1 super or corner combo when meter is about to end | |||
*Corner guard crush | |||
EASY - jab wave xN | |||
Intermediate - TK jab wave, land prior to meter running out, c.lp xx command grab, jab wave, s.mp xx jab wave | |||
The tiger knee jab wave does insane guard damage and chip, if you have trouble doing it you can go for the easier grounded version. This destroys P and K grooves. The tiger knee version is fast paced, but if you have trouble it tends to be easier with mp version. | |||
=== C-Groove === | |||
C Todo plays exactly like A, but wanting to land lvl 2 instead of CC. RC jab wave is your best poke and anti air. Land a RC command grab and you get over 50% damage. Level 2 wave super gains additional damage and hits when canceled into whiffed grab. Another advantage of C-Todo is his level one is one of the best wake up supers, not only is it 100% safe on block (it's actually plus), but the super will always trade at worst getting full damage. Todo also can use his counter super to punish certain block strings or reacting to high priority physical attack specials, some common examples: | |||
- Terry canceling into crack shoot | |||
- Yamazaki canceling into knife | |||
- Cammy canceling into lk drill | |||
- Rugal Dark Smash | |||
- Rock canceling into lp elbow | |||
Note that the super isn't very strong at level one, but the level 3 version does pretty decent damage. | |||
*Command grab | |||
- walk up s.mp, c.fp xx Lvl 2 wave, whiff grab | |||
Massive damage off a command grab, though the link can be a bit tough, alternatively you can do an easier version that is much easier | |||
- walk up s.mp, c.mk xx Lvl 2 wave, whiff grab | |||
Most people are terrified of Todo's grab, so landing a s.mp or c.lp, c.mk xx super is very realistic and does a lot of damage still. | |||
= | == Colors == | ||
[[File:Todo_CvS2_colors.png]] | |||
{{Navbox-CvS2}} | |||
[[Category:Capcom vs SNK 2]] | |||
[[Category:Todo]] | |||
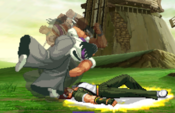
Latest revision as of 19:21, 3 June 2025
Introduction
Story
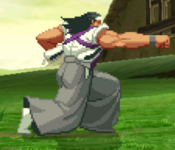
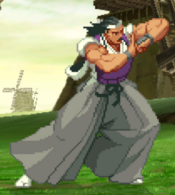
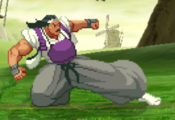
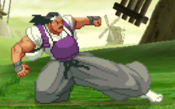
Ryuhaku Todoh, stylized as just Todo in this game, is the inventor and primary teacher of Todoh style Kobudo, a style derivative of Aiki-jujutsu and Kendo. He has a long standing dojo in South Town, and a heavily developed rivalry with the nearby Kyokugenryu dojo. This rivalry is for various reasons: the Kyokugenryu dojo is more successful and takes a lot of profit from his dojo, and the Kyokugenryu style is just a lot more popular. Likely the biggest reason however is his rivalry with Takuma Sakazaki, the head of the dojo, dating back to their younger days.
When Yuri Sakazaki is kidnapped, Ryo immediately sets his sights on Todo, believing him to do it because of his animosity towards the dojo and fighting style. Todo had nothing to do with it in reality, but an enraged Ryo still beat him up badly. This was the final blow to both Todo's ego and the dojo as a whole. Students stopped enrolling, his funds plummeted, and his own humiliation hurt more than anything. Todo decided to disappear one day, with the only hint to where he was being his wife, who claimed he was training far away for a rematch with Ryo. His daughter, Kasumi Todoh, loved her father dearly. She refused to sit and wait, and mastered the Todoh style Kobudo, embarking on a quest to find him and to take revenge on every Kyokugenryu fighter she could find.
Gameplay
Todo is a seemingly simple character with some surprising execution required to master him. He is most effective vs non roll groove due to RC waves being so strong as a poke and anit air, while doing great guard damage. He only has 4 special moves, with 3 of those specials just being variations on the same move. His various Kasane Ate wave specials allow him to control space and are very plus in most situations, making for oppressive projectiles. 236P simply sends out the wave in front of him, with the different strengths determining the distance. These are +6, meaning you can realistically link from them if close enough. 623P is Aogi Kasane Ate, or Scrape. While these look like anti-airs, they are a bit too slow for that, but still work well if done preemptively enough. j.236P is Tobi Kasane Ate, or air wave. These are amazing air-to-airs and pressure tools, especially when done with a tiger knee input (doing the input as 2369P in order to do it as soon as you jump). These also leave you incredibly plus, especially on block. His final special is 63214P Taikuzushi, or Command Grab. This is an amazing command grab that allows him to combo from it, making for very high damage combos. When roll cancelled it's especially strong, as it can go through mashing and even be used as a realistic anti-air! This is his best poke and extremely strong vs non roll grooves. Keep in mind even if just defended that it requires 3 JDs otherwise they will still take chip. Versus P-groove it only requires 1 parry to negate all three hits.
Todo has various useful normals and links as well, solidifying him as a neutral and pressure character. Todo can create a mix up off of command grab sweep to corpse hop, allowing for another RC grab or strike mix. While his health is high, he lacks a reversal, leaving him struggling on defense or forced to spend meter. He only really has one useful super as well, 236236P Cho Kasane Ate. His other super, 2363214P Shingan Kazura Otoshi, is a counter with startup super flash. This basically screams "I'm doing my counter move!" and makes your opponent very unlikely to press a button if they're paying attention. He lacks a reversal, leaving him very weak on defense without roll cancels, though roll cancels make him a lot scarier overall. Todo is a straightforward neutral/pressure character with a difficult but damaging Custom Combo, and if you like some difficult execution on a seemingly simple character, you might have a lot of fun with him.
Groove Selection
Best - A/C: It's hard to justify playing Todo in any Groove besides A-Groove. A-Todo gets a very powerful Custom Combo, and a lot of ways to utilize it. Links after Kasane Ate in the corner, activating after a command grab for 10k+ damage, great guard crush potential with repeated Kasane Ate's, Todo has it all. He also gets roll, which he absolutely needs for RC command grab. RC command grab becomes much scarier in general because of the Custom Combo from it. A-Todo is a clear optimal Groove for him. C groove is his second best having the same control with RCs while being extremely strong vs non roll grooves. Similiar to his custom, Todo becomes very dangerous with a level 2. Landing it as an anti air or from a command grab and canceling into whiffed command grab give the super more juggle points causing it to do massive damage.
Useful - N/S: N-Groove gives Todo much better movement, mainly having hop, which helps his mixups a lot. Having consistent level 1 supers isn't bad, but Todo can also activate Max Mode, which gives him a decent and useful damage increase. He maintains roll for RC command grab and RC Scrape, and cheaper access to guard cancels for better defense. His supers are fairly useful. S-Todo similarly gets to spam level 1 Cho Kasane Ate, and can do it infinitely at low health, making for much scarier pressure. Charging is a chore however, but since Todo has decent neutral and offensive presence, people might not be as quick to press against you. Run and hop, similar to N-Todo, give him better mixup ability to go with his ridiculous safety on block.
Worst - K/P: Both of these Grooves sacrifice roll, which Todo really likes having for Roll Cancels. K-Todo gets Rage, which does up his damage, and Just Defend is a useful tool both offensively and defensively. Hop and run aid his mixups as well, but level 3 Cho Kasane Ate does pitiful damage for the cost, making his damage much less worthwhile. P-Todo similarly has very little, as his meterless punishes aren't bad but aren't amazing either. Having a level 3 stored doesn't do much to give him more damage either. S-Todo gets to end combos in level 1
|
Todo is a neutral and pressure based character who uses his powerful Kasane Ate specials to generate plus frames and crush guard, or mixing in his Taikuzushi command grab that he can combo from for big damage. Todo is best in A-Groove. Difficulty: Pretty HardTier: B- |
|
| Pros | Cons |
|
|
Players to Watch
| Name | Country | Groove | Accounts | Notes |
|---|---|---|---|---|
| kaoruda | Japan | C-Groove | Twitter: @kaoruda | Fundamental heavy but also makes great use of TK Air Wave in pressure if need be. Sample Match |
| Aojiru | Japan | A-Groove | N/A | Makes great use of Todo's versatile custom combo links. Sample Match |
| Izumi | Japan | C-Groove | Twitter: @IzumiSgroove | Though he used Todo briefly, he has been shown to be a very strong Todo player. Sample Match |
!!!THIS PAGE IS STILL A WIP. IF YOU NEED FRAME DATA NOW, REFER TO THE CVS2 BIBLE OR LOOK THROUGH EDIT HISTORY TO FIND THE LAST EDIT CONTAINING FRAME DATA IF THERE WAS ONE!!!
Normal Moves
Far Normals
5LP
5MP
5HP
5LK
5MK
5HK
Close Standing Normals
clLP
clMP
clHP
clLK
clMK
clHK
Crouching Normals
2LP
2MP
2HP
2LK
2MK
2HK
Jumping Normals
j.LP
j.MP
j.HP
j.LK
j.MK
j.HK
Command Normals
X
Throws
X
X
Special Moves
X
X
X
X
Super Moves
X
X
Bread and Butter Combos
- Midscreen
- Command grab, c.mk xx lp wave
- Command grab, sweep (gives corpse hop strike/throw vs non quick get up) Vs quick get up you can punish with another sweep, and if they quick get up again you can punish with HP Wave, doing about 40% damage for them trying to roll away
- Command grab, walk up s.mp, c.fp xx Level 1 or 2 Super (Whiff grab on lvl 2)
- c.lp, c.mk xx jab wave
- Corner
- Command grab, jab wave, s.mp xx jab wave
- Standing Sagat only, never seen this landed in 20 +years - DP+HP, TK lp wave, s.mp xx lp wave, s.mp xx lp wave
A-Groove
Todo best groove is by far A groove. Having a command grab give him an unblockable CC that can also be used as anti-air, of he can grab then activate CC. Todo is one of the few characters in the game who can practically do 10k damage.
- Midscreen CC/Anti-air CC midscreen
Command grab or Activate command grab (start CC with command grab to force stand is using as crouching punishing or s.fp will whiff)
C.fpx3, s.fp, c.fp, s.fp, c.fp, [s.fp xx jab wave]xN, s.fp xx super when meter is about to run out
This is Todo's bread and butter CC and the go to outside the corner.
- Corner CC
Command grab or Activate command grab (start CC with command grab to force stand is using as crouching punishing or s.fp will whiff)
C.fpx3, s.fp, c.fp, s.fp, c.fp, s.fp xx jab wave xN, s.fp xx command grab as meter runs out, post CC jab wave, s.mp xx jab wave
The above CC allows you to combo outside of CC while doing good damage and building meter, you use this route due to lvl 1 super missing hits in the corner
- Guard CC midscreen
c.mp xx jab wave, f+mk, c.mp xx jab wave xN, super as meter is about to end
A decent midscreen CC on block that will guardcrush K/P grooves
- Anti-jump CC
Since people don't want to get grabbed, you can still land a CC by landing a point blank c.mk confirm
- c.mk, activate CC, c.lk, c.mk xx jab wave, [s.fp xx jab wave]xN, Lvl 1 super or corner combo when meter is about to end
- Corner guard crush
EASY - jab wave xN Intermediate - TK jab wave, land prior to meter running out, c.lp xx command grab, jab wave, s.mp xx jab wave
The tiger knee jab wave does insane guard damage and chip, if you have trouble doing it you can go for the easier grounded version. This destroys P and K grooves. The tiger knee version is fast paced, but if you have trouble it tends to be easier with mp version.
C-Groove
C Todo plays exactly like A, but wanting to land lvl 2 instead of CC. RC jab wave is your best poke and anti air. Land a RC command grab and you get over 50% damage. Level 2 wave super gains additional damage and hits when canceled into whiffed grab. Another advantage of C-Todo is his level one is one of the best wake up supers, not only is it 100% safe on block (it's actually plus), but the super will always trade at worst getting full damage. Todo also can use his counter super to punish certain block strings or reacting to high priority physical attack specials, some common examples:
- Terry canceling into crack shoot
- Yamazaki canceling into knife
- Cammy canceling into lk drill
- Rugal Dark Smash
- Rock canceling into lp elbow
Note that the super isn't very strong at level one, but the level 3 version does pretty decent damage.
- Command grab
- walk up s.mp, c.fp xx Lvl 2 wave, whiff grab
Massive damage off a command grab, though the link can be a bit tough, alternatively you can do an easier version that is much easier
- walk up s.mp, c.mk xx Lvl 2 wave, whiff grab
Most people are terrified of Todo's grab, so landing a s.mp or c.lp, c.mk xx super is very realistic and does a lot of damage still.
