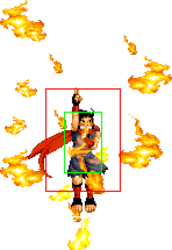
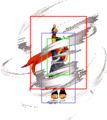
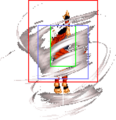
No edit summary |
|||
| (143 intermediate revisions by 22 users not shown) | |||
| Line 1: | Line 1: | ||
= | {{MOTW Character Intro|char=Hokutomaru |content= | ||
= | ==Introduction== | ||
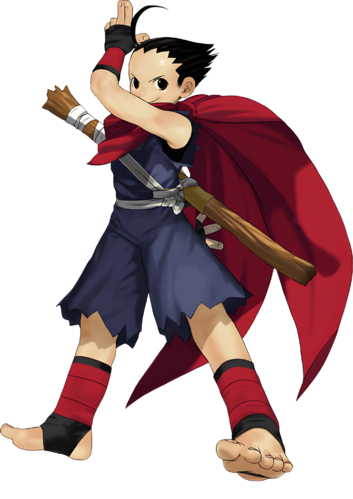
'''Hokutomaru''' is the young disciple of Andy Bogard, who practices Shiranui-style ninjutsu. By the instruction of his master, he left his home in the remote mountains of Japan to participate in the Maximum Mayhem tournament and demonstrate his skills. | |||
= | == Gameplay == | ||
{{Content Box|content= | |||
TBD | |||
= | {{ProConTable | ||
|pros= | |||
* '''Many target combos for hit confirming and pressuring''' | |||
* '''Good air-to-air capabilities''' | |||
* '''The only character with a double jump''' | |||
* '''Has an air throw''' | |||
|cons= | |||
* '''Normals are fairly stubby and have mediocre range''' | |||
* '''Somewhat poor damage and conversions off of lows''' | |||
* '''Struggles to build meter''' | |||
* '''Lower defense and guard crush gauge than average''' | |||
}} | |||
}} | |||
}} | |||
'''Character Colors''' | |||
[[File:Hokucolors.JPG]] | |||
= | ==Move List== | ||
Frame Data Source: https://w.atwiki.jp/garoumow/pages/27.html and https://w.atwiki.jp/garoumow/pages/80.html | |||
{{MOTW Legend}} | |||
Notes: | |||
* Guard crush values within ( ) are when the move is used as the next hit of a target combo. | |||
* From the 2nd hit and after of the target combo, the active frames and recovery frames will be the same as far moves and crouching moves | |||
* Jump D, Jump A, and Jump B (Jump A and Jump B are usually diagonal jumps only) can beat out upper-body evasive attacks. | |||
* Special/Super moves with <span style="color:#ff0000;">"Guard" data in red text</span> are impossible to just defend at 0-pixel health bar. | |||
{| border="1em" cellspacing="0" style="border: 1px solid #999;" | |||
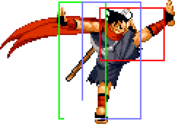
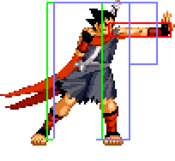
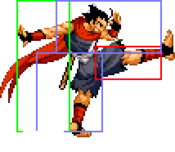
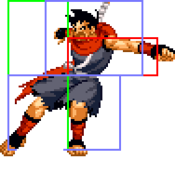
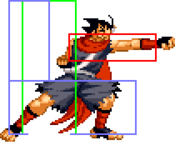
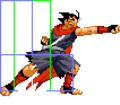
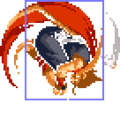
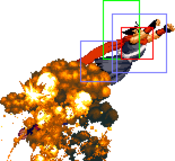
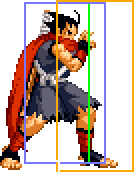
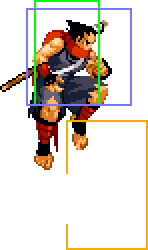
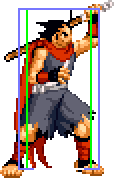
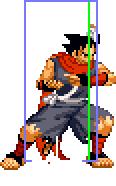
| align="center" | Standing/Taunting || align="center" | Crouching || align="center" | Running || align="center" | Jumping | |||
|- | |||
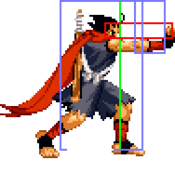
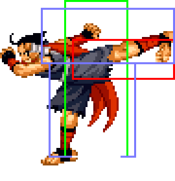
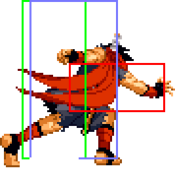
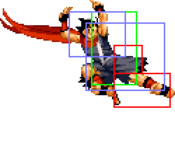
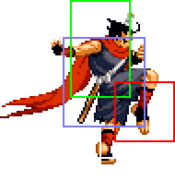
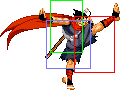
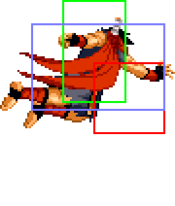
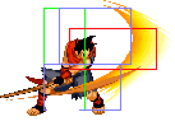
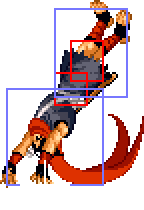
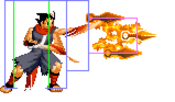
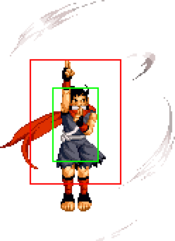
| align="center"; valign="bottom" | [[File:Garou Hokutomaru Stand.png|bottom]] || align="center"; valign="bottom" | [[File:Garou Hokutomaru Crouch.png|bottom]] || align="center"; valign="bottom" | [[File:Garou Hokutomaru Run.png|bottom]] || align="center"; valign="bottom" | [[File:Garou Hokutomaru Jump.png|bottom]] | |||
|- | |||
| align="center" | || align="center" | || align="center" | Can low profile certain moves. || align="center" | 36F (35F for backward jump). Can double jump. | |||
|} | |||
===Close Standing Normals=== | |||
===== <span class="invisible-header">Close 5A</span> ===== | |||
<font style="visibility:hidden" size="0"></font> | |||
{{MoveData | |||
|image=Garou_Hokutomaru_c5A.png | |||
|name=c5A | |||
|subtitle= | |||
|caption= | |||
|data= | |||
{{AttackData-Garou | |||
|version=c5A | |||
|Damage=4 | |||
|Guard=Mid | |||
|Startup=4 | |||
|Active=4 | |||
|Recovery=5 | |||
|Total=13 | |||
|Hit Adv=+6 | |||
|Block Adv=+6 | |||
|Feint Cancel=◯ | |||
|Cancel on Hit=◯ / ∞ | |||
|Cancel on Block=◯ / ∞ | |||
|Guard Crush Value=4 | |||
|description=Standing jab. | |||
}} | |||
{{AttackData-Garou | |||
|version=c5A>B | |||
|Damage= | |||
|Guard=Mid | |||
|Startup= | |||
|Active= | |||
|Recovery= | |||
|Total= | |||
|Hit Adv=+1 | |||
|Block Adv=+1 | |||
|Feint Cancel=◯ | |||
|Cancel on Hit=◯ | |||
|Cancel on Block=◯ | |||
|Guard Crush Value=4, 3 | |||
|description= Target combo from c5A. | |||
}} | |||
{{AttackData-Garou | |||
|version=c5A>C | |||
|Damage= | |||
|Guard=Mid | |||
|Startup= | |||
|Active= | |||
|Recovery= | |||
|Total= | |||
|Hit Adv=-10 | |||
|Block Adv=-10 | |||
|Feint Cancel=◯ | |||
|Cancel on Hit=◯ | |||
|Cancel on Block=◯ | |||
|Guard Crush Value=4, 3 | |||
|description= Target combo from c5A. | |||
}} | |||
{{AttackData-Garou | |||
|version=c5A>C>C | |||
|Damage= | |||
|Guard= | |||
|Startup= | |||
|Active= | |||
|Recovery= | |||
|Total= | |||
|Hit Adv=-2 | |||
|Block Adv=-2 | |||
|Feint Cancel= | |||
|Cancel on Hit= | |||
|Cancel on Block= | |||
|Guard Crush Value=4, 3, 0 | |||
|description= Target combo from c5A. Ends in a cancel. | |||
<gallery class="mw-collapsible"> | |||
Garou_Hokutomaru Target Pose.png | |||
</gallery> | |||
}} | |||
}} | |||
===== <span class="invisible-header">Close 5B</span> ===== | |||
<font style="visibility:hidden" size="0"></font> | |||
{{MoveData | |||
|image=Garou_Hokutomaru_c5B.png | |||
|name=c5B | |||
|subtitle= | |||
|caption= | |||
|data= | |||
{{AttackData-Garou | |||
|version=c5B | |||
|Damage=6 | |||
|Guard=Mid | |||
|Startup=4 | |||
|Active=3 | |||
|Recovery=9 | |||
|Total=16 | |||
|Hit Adv=+3 | |||
|Block Adv=+3 | |||
|Feint Cancel=◯ | |||
|Cancel on Hit=◯ | |||
|Cancel on Block=◯ | |||
|Guard Crush Value=4 | |||
|description= | |||
}} | |||
{{AttackData-Garou | |||
|version=c5B>D | |||
|Damage= | |||
|Guard=Mid | |||
|Startup= | |||
|Active= | |||
|Recovery= | |||
|Total= | |||
|Hit Adv=-3 | |||
|Block Adv=-3 | |||
|Feint Cancel=◯ | |||
|Cancel on Hit=◯ | |||
|Cancel on Block=◯ | |||
|Guard Crush Value=4, 3 | |||
|description= Target combo from c5B. | |||
}} | |||
{{AttackData-Garou | |||
|version=c5B>D>C | |||
|Damage= | |||
|Guard= | |||
|Startup= | |||
|Active= | |||
|Recovery= | |||
|Total= | |||
|Hit Adv=-1 | |||
|Block Adv=-1 | |||
|Feint Cancel= | |||
|Cancel on Hit= | |||
|Cancel on Block= | |||
|Guard Crush Value=4, 3, 0 | |||
|description= Target combo from c5B. Ends in a cancel. | |||
<gallery class="mw-collapsible"> | |||
Garou_Hokutomaru Target Pose.png | |||
</gallery> | |||
}} | |||
}} | |||
===== <span class="invisible-header">Close 5C</span> ===== | |||
<font style="visibility:hidden" size="0"></font> | |||
{{MoveData | |||
|image=Garou_Hokutomaru_c5C.png | |||
|name=c5C | |||
|subtitle= | |||
|caption= | |||
|data= | |||
{{AttackData-Garou | |||
|Damage=6, 6 | |||
|Guard=Mid | |||
|Startup=5 | |||
|Active=2, 《5》, 3 | |||
|Recovery=16 | |||
|Total=31 | |||
|Hit Adv=+2 | |||
|Block Adv=+2 | |||
|Feint Cancel=※ | |||
|Cancel on Hit=※ | |||
|Cancel on Block=※ | |||
|Guard Crush Value=3, 3 | |||
|description= | |||
<gallery class="mw-collapsible"> | |||
Garou_Hokutomaru_c5C.png| | |||
Garou_Hokutomaru_c5C_1.png| | |||
</gallery> | |||
}} | |||
}} | |||
===== <span class="invisible-header">Close 5D</span> ===== | |||
<font style="visibility:hidden" size="0"></font> | |||
{{MoveData | |||
|image=Garou_Hokutomaru_c5D.png | |||
|name=c5D | |||
|subtitle= | |||
|caption= | |||
|data= | |||
{{AttackData-Garou | |||
|Damage=9 | |||
|Guard=Mid | |||
|Startup=3 | |||
|Active=3 | |||
|Recovery=19 | |||
|Total=25 | |||
|Hit Adv=-1 | |||
|Block Adv=-1 | |||
|Feint Cancel=◯ | |||
|Cancel on Hit=◯ | |||
|Cancel on Block=◯ | |||
|Guard Crush Value=5 | |||
|description=Hokutomaru's fastest normal on the ground, easily combos into specials, has incredible frame advantage when feint cancelled letting it link into itself and can't be JD'd low despite being a mid. An incredible normal. | |||
}} | |||
}} | |||
===Far Standing Normals=== | |||
===== <span class="invisible-header">Far 5A</span> ===== | |||
<font style="visibility:hidden" size="0"></font> | |||
{{MoveData | |||
|image=Garou_Hokutomaru_f5A.png | |||
|name=f5A | |||
|subtitle= | |||
|caption= | |||
|data= | |||
{{AttackData-Garou | |||
|version=f5A | |||
|Damage=5 | |||
|Guard=Mid | |||
|Startup=4 | |||
|Active=3 | |||
|Recovery=7 | |||
|Total=14 | |||
|Hit Adv=+5 | |||
|Block Adv=+5 | |||
|Feint Cancel=◯ | |||
|Cancel on Hit=◯ / ∞ | |||
|Cancel on Block=◯ / ∞ | |||
|Guard Crush Value=4 | |||
|description= | |||
}} | |||
{{AttackData-Garou | |||
|version=f5A>B | |||
|Damage= | |||
|Guard=Mid | |||
|Startup= | |||
|Active= | |||
|Recovery= | |||
|Total= | |||
|Hit Adv=+1 | |||
|Block Adv=+1 | |||
|Feint Cancel=◯ | |||
|Cancel on Hit=◯ | |||
|Cancel on Block=◯ | |||
|Guard Crush Value=4, 3 | |||
|description= Target combo from f5A. | |||
}} | |||
{{AttackData-Garou | |||
|version=f5A>C | |||
|Damage= | |||
|Guard=Mid | |||
|Startup= | |||
|Active= | |||
|Recovery= | |||
|Total= | |||
|Hit Adv=-10 | |||
|Block Adv=-10 | |||
|Feint Cancel=◯ | |||
|Cancel on Hit=◯ | |||
|Cancel on Block=◯ | |||
|Guard Crush Value=4, 3 | |||
|description= Target combo from f5A. | |||
}} | |||
{{AttackData-Garou | |||
|version=f5A>C>C | |||
|Damage= | |||
|Guard= | |||
|Startup= | |||
|Active= | |||
|Recovery= | |||
|Total= | |||
|Hit Adv=-2 | |||
|Block Adv=-2 | |||
|Feint Cancel= | |||
|Cancel on Hit= | |||
|Cancel on Block= | |||
|Guard Crush Value=4, 3, 0 | |||
|description= Target combo from f5A. Ends in a cancel. | |||
<gallery class="mw-collapsible"> | |||
Garou_Hokutomaru Target Pose.png | |||
</gallery> | |||
}} | |||
}} | |||
===== <span class="invisible-header">Far 5B</span> ===== | |||
<font style="visibility:hidden" size="0"></font> | |||
{{MoveData | |||
|image=Garou_Hokutomaru_f5B.png | |||
|name=f5B | |||
|subtitle= | |||
|caption= | |||
|data= | |||
{{AttackData-Garou | |||
|version=f5B | |||
|Damage=7 | |||
|Guard=Mid | |||
|Startup=6 | |||
|Active=3 | |||
|Recovery=11 | |||
|Total=20 | |||
|Hit Adv=+1 | |||
|Block Adv=+1 | |||
|Feint Cancel=◯ | |||
|Cancel on Hit=◯ | |||
|Cancel on Block=◯ | |||
|Guard Crush Value=4(3) | |||
|description= | |||
}} | |||
{{AttackData-Garou | |||
|version=f5B>D | |||
|Damage= | |||
|Guard=Mid | |||
|Startup= | |||
|Active= | |||
|Recovery= | |||
|Total= | |||
|Hit Adv=-3 | |||
|Block Adv=-3 | |||
|Feint Cancel=◯ | |||
|Cancel on Hit=◯ | |||
|Cancel on Block=◯ | |||
|Guard Crush Value=4, 3 | |||
|description= Target combo from f5B. | |||
}} | |||
{{AttackData-Garou | |||
|version=f5B>D>C | |||
|Damage= | |||
|Guard= | |||
|Startup= | |||
|Active= | |||
|Recovery= | |||
|Total= | |||
|Hit Adv=-1 | |||
|Block Adv=-1 | |||
|Feint Cancel= | |||
|Cancel on Hit= | |||
|Cancel on Block= | |||
|Guard Crush Value=4, 3, 0 | |||
|description= Target combo from f5B. Ends in a cancel. | |||
<gallery class="mw-collapsible"> | |||
Garou_Hokutomaru Target Pose.png | |||
</gallery> | |||
}} | |||
}} | |||
===== <span class="invisible-header">Far 5C</span> ===== | |||
<font style="visibility:hidden" size="0"></font> | |||
{{MoveData | |||
|image=Garou_Hokutomaru_f5C.png | |||
|name=f5C | |||
|subtitle= | |||
|caption= | |||
|data= | |||
{{AttackData-Garou | |||
|Damage=12 | |||
|Guard=Mid | |||
|Startup=11 | |||
|Active=1 | |||
|Recovery=30 | |||
|Total=42 | |||
|Hit Adv=-10 | |||
|Block Adv=-10 | |||
|Feint Cancel=X | |||
|Cancel on Hit=X | |||
|Cancel on Block=X | |||
|Guard Crush Value=5(3) | |||
|description=Slow, can't be cancelled and is punishable on hit... not great traits to have. | |||
}} | |||
}} | |||
===== <span class="invisible-header">Far 5D</span> ===== | |||
<font style="visibility:hidden" size="0"></font> | |||
{{MoveData | |||
|image=Garou_Hokutomaru_f5D.png | |||
|name=f5D | |||
|subtitle= | |||
|caption= | |||
|data= | |||
{{AttackData-Garou | |||
|Damage=12 | |||
|Guard=Mid | |||
|Startup=11 | |||
|Active=3 | |||
|Recovery=21 | |||
|Total=35 | |||
|Hit Adv=-3 | |||
|Block Adv=-3 | |||
|Feint Cancel=X | |||
|Cancel on Hit=X | |||
|Cancel on Block=X | |||
|Guard Crush Value=5(3) | |||
|description= | |||
}} | |||
}} | |||
===Crouching Normals=== | |||
===== <span class="invisible-header">2A</span> ===== | |||
<font style="visibility:hidden" size="0"></font> | |||
{{MoveData | |||
|image=Garou_Hokutomaru_2A.png | |||
|name=2A | |||
|subtitle= | |||
|caption= | |||
|data= | |||
{{AttackData-Garou | |||
|version=2A | |||
|Damage=4 | |||
|Guard=Mid | |||
|Startup=4 | |||
|Active=4 | |||
|Recovery=5 | |||
|Total=13 | |||
|Hit Adv=+6 | |||
|Block Adv=+6 | |||
|Feint Cancel=◯ | |||
|Cancel on Hit=◯ / ∞ | |||
|Cancel on Block=◯ / ∞ | |||
|Guard Crush Value=4 | |||
|description= 2A's last 3F of recovery has full-body invincibility. | |||
*Chains into 2A, 2B, and 2C. | |||
*You can confirm into 236236P by doing 2A 36 2B+C/B+D 3 then confirming if it hit or not. | |||
<gallery class="mw-collapsible"> | |||
Garou Hokutomaru 2A.png| | |||
Garou Hokutomaru 2A_1.png|Invincible recovery frames | |||
</gallery> | |||
}} | |||
{{AttackData-Garou | |||
|version=2A>B | |||
|Damage= | |||
|Guard=Mid, Low | |||
|Startup= | |||
|Active= | |||
|Recovery= | |||
|Total= | |||
|Hit Adv=+4 | |||
|Block Adv=+4 | |||
|Feint Cancel=◯ | |||
|Cancel on Hit=◯ | |||
|Cancel on Block=◯ | |||
|Guard Crush Value=4, 3 | |||
|description= Target combo from 2A. | |||
}} | |||
{{AttackData-Garou | |||
|version=2A>C>C | |||
|Damage= | |||
|Guard=Mid, Mid | |||
|Startup= | |||
|Active= | |||
|Recovery= | |||
|Total= | |||
|Hit Adv=-1 | |||
|Block Adv=-1 | |||
|Feint Cancel= | |||
|Cancel on Hit= | |||
|Cancel on Block= | |||
|Guard Crush Value=4, 3, 0 | |||
|description= Target combo from 2A. Ends in a cancel. | |||
<gallery class="mw-collapsible"> | |||
Garou_Hokutomaru 2AB 1.png| | |||
</gallery> | |||
}} | |||
}} | |||
===== <span class="invisible-header">2B</span> ===== | |||
<font style="visibility:hidden" size="0"></font> | |||
{{MoveData | |||
|image=Garou_Hokutomaru_2B.png | |||
|name=2B | |||
|subtitle= | |||
|caption= | |||
|data= | |||
{{AttackData-Garou | |||
|version=2B | |||
|Damage=5 | |||
|Guard=Low | |||
|Startup=5 | |||
|Active=4 | |||
|Recovery=7 | |||
|Total=16 | |||
|Hit Adv=+4 | |||
|Block Adv=+4 | |||
|Feint Cancel=◯ | |||
|Cancel on Hit=◯ / ∞ | |||
|Cancel on Block=◯ / ∞ | |||
|Guard Crush Value=4(3) | |||
|description=*Your go-to low poke and confirm. You can confirm 236236P by doing 2B 36 2B+C/B+D 3 then confirming if it hit or not. | |||
*Without meter, chain into 2D then do the C feint to recover faster. | |||
}} | |||
{{AttackData-Garou | |||
|version=2B>C>C | |||
|Damage= | |||
|Guard=Low, Mid | |||
|Startup= | |||
|Active= | |||
|Recovery= | |||
|Total= | |||
|Hit Adv=-1 | |||
|Block Adv=-1 | |||
|Feint Cancel= | |||
|Cancel on Hit= | |||
|Cancel on Block= | |||
|Guard Crush Value=4, 3, 0 | |||
|description= Target combo from 2B. Ends in a cancel. | |||
<gallery class="mw-collapsible"> | |||
Garou_Hokutomaru 2AB 1.png| | |||
</gallery> | |||
}} | |||
{{AttackData-Garou | |||
|version=2B>D>C | |||
|Damage= | |||
|Guard=Low, Low | |||
|Startup= | |||
|Active= | |||
|Recovery= | |||
|Total= | |||
|Hit Adv=-1 | |||
|Block Adv=-1 | |||
|Feint Cancel= | |||
|Cancel on Hit= | |||
|Cancel on Block= | |||
|Guard Crush Value=4, 5, 0 | |||
|description= Target combo from f5B. Ends in the same cancel. | |||
You can kara cancel the 2D with the follow-up C cancel. | |||
}} | |||
}} | |||
===== <span class="invisible-header">2C</span> ===== | |||
<font style="visibility:hidden" size="0"></font> | |||
{{MoveData | |||
|image=Garou_Hokutomaru_2C.png | |||
|name=2C | |||
|subtitle= | |||
|caption= | |||
|data= | |||
{{AttackData-Garou | |||
|Damage=9 | |||
|Guard=Mid | |||
|Startup=6 | |||
|Active=4 | |||
|Recovery=16 | |||
|Total=26 | |||
|Hit Adv=+1 | |||
|Block Adv=+1 | |||
|Feint Cancel=X | |||
|Cancel on Hit=X | |||
|Cancel on Block=X | |||
|Guard Crush Value=5(3) | |||
|description=*A quick poke that reaches far and recovers quickly. It's +1 too, making it very useful to just throw out in neutral since you aren't risking much. | |||
}} | |||
}} | |||
===== <span class="invisible-header">2D</span> ===== | |||
<font style="visibility:hidden" size="0"></font> | |||
{{MoveData | |||
|image=Garou_Hokutomaru_2D.png | |||
|name=2D | |||
|subtitle= | |||
|caption= | |||
|data= | |||
{{AttackData-Garou | |||
|Damage=9 | |||
|Guard=Low | |||
|Startup=10 | |||
|Active=5 | |||
|Recovery=19 | |||
|Total=34 | |||
|Hit Adv=KD | |||
|Block Adv=-3 | |||
|Feint Cancel=X | |||
|Cancel on Hit=X | |||
|Cancel on Block=X | |||
|Guard Crush Value=5(5) | |||
|description=*Sweep. Can be used as an anti-air by low profiling some moves and hitting the landing frames. | |||
}} | |||
}} | |||
===Jumping Normals=== | |||
===== <span class="invisible-header">jA</span> ===== | |||
<font style="visibility:hidden" size="0"></font> | |||
{{MoveData | |||
|image=Garou_Hokutomaru_jA.png | |||
|name=jA | |||
|subtitle= | |||
|caption= | |||
|data= | |||
{{AttackData-Garou | |||
|Damage=6 | |||
|Guard=High | |||
|Startup=6 | |||
|Active=12 | |||
|Recovery= | |||
|Total= | |||
|Hit Adv= | |||
|Block Adv= | |||
|Feint Cancel= | |||
|Cancel on Hit=◯ | |||
|Cancel on Block=◯ | |||
|Guard Crush Value=4 | |||
|description= * Can beat out upper-body evasion attacks (usually from a diagonal jump). | |||
}} | |||
}} | |||
===== <span class="invisible-header">jB</span> ===== | |||
<font style="visibility:hidden" size="0"></font> | |||
{{MoveData | |||
|image=Garou_Hokutomaru_jB.png | |||
|name=jB | |||
|subtitle= | |||
|caption= | |||
|data= | |||
{{AttackData-Garou | |||
|Damage=6 | |||
|Guard=High | |||
|Startup=3 | |||
|Active=10 | |||
|Recovery= | |||
|Total= | |||
|Hit Adv= | |||
|Block Adv= | |||
|Feint Cancel= | |||
|Cancel on Hit=◯ | |||
|Cancel on Block=◯ | |||
|Guard Crush Value=4 | |||
|description= * Can beat out upper-body evasion attacks (usually from a diagonal jump). | |||
}} | |||
}} | |||
===== <span class="invisible-header">jC</span> ===== | |||
<font style="visibility:hidden" size="0"></font> | |||
{{MoveData | |||
|image=Garou_Hokutomaru_jC.png | |||
|name=jC | |||
|subtitle= | |||
|caption= | |||
|data= | |||
{{AttackData-Garou | |||
|Damage=8 | |||
|Guard=High | |||
|Startup=6 | |||
|Active=5 | |||
|Recovery= | |||
|Total= | |||
|Hit Adv= | |||
|Block Adv= | |||
|Feint Cancel= | |||
|Cancel on Hit=◯ | |||
|Cancel on Block=◯ | |||
|Guard Crush Value=5 | |||
|description= | |||
}} | |||
}} | |||
===== <span class="invisible-header">jD</span> ===== | |||
<font style="visibility:hidden" size="0"></font> | |||
{{MoveData | |||
|image=Garou_Hokutomaru_jD.png | |||
|name=jD | |||
|subtitle= | |||
|caption= | |||
|data= | |||
{{AttackData-Garou | |||
|Damage=8 | |||
|Guard=High | |||
|Startup=7 | |||
|Active=7 | |||
|Recovery= | |||
|Total= | |||
|Hit Adv= | |||
|Block Adv= | |||
|Feint Cancel= | |||
|Cancel on Hit=◯ | |||
|Cancel on Block=◯ | |||
|Guard Crush Value=5 | |||
|description= | |||
* Can beat out upper-body evasion attacks. | |||
}} | |||
}} | |||
===Command Normals=== | |||
===== <span class="invisible-header">Sliding (3B)</span> ===== | |||
<font style="visibility:hidden" size="0"></font> | |||
{{MoveData | |||
|image=Garou_Hokutomaru_3B.png | |||
|name=Sliding | |||
|input=3B | |||
|subtitle= | |||
|caption= | |||
|data= | |||
{{AttackData-Garou | |||
|Damage=10 | |||
|Guard=Low | |||
|Startup=7 | |||
|Active=13 | |||
|Recovery=22 | |||
|Total=42 | |||
|Hit Adv=KD | |||
|Block Adv=-13 | |||
|Feint Cancel=X | |||
|Cancel on Hit=X | |||
|Cancel on Block=X | |||
|Guard Crush Value=9 | |||
|description= A sliding sweep that is excellent at catching landing frames, making this one of Hokutomaru's better anti-airs. | |||
* Some characters are completely incapable of hitting Hokutomaru during the low profile. | |||
* On hit/block, unless it hit on the last active frame, 1 active frame is skipped during recovery. For example, hitting on the first frame has 20F blockstun - (11 remaining active frames + 22F recovery) = -13 adv. Max advantage is -2. | |||
}} | |||
}} | |||
===== <span class="invisible-header">Kuuten Kyaku (3D)</span> ===== | |||
<font style="visibility:hidden" size="0"></font> | |||
{{MoveData | |||
|image=Garou_Hokutomaru_3D.png | |||
|name=Kuuten Kyaku | |||
|input=3D | |||
|subtitle= | |||
|caption= | |||
|data= | |||
{{AttackData-Garou | |||
|Damage=6, 6 | |||
|Guard=Mid | |||
|Startup=8 | |||
|Active=4, 4 | |||
|Recovery=30 | |||
|Total=46 | |||
|Hit Adv=KD | |||
|Block Adv=-13 | |||
|Feint Cancel= | |||
|Cancel on Hit=X , ◯ | |||
|Cancel on Block=X , ◯ | |||
|Guard Crush Value=9, 9 | |||
|description= * Startup is kara cancellable and recovery is whiff cancellable into air specials. | |||
* Block adv on 1st hit only = -17 | |||
<gallery class="mw-collapsible"> | |||
Garou_Hokutomaru_3D.png| | |||
Garou_Hokutomaru_3D_1.png| | |||
</gallery> | |||
}} | |||
}} | |||
===== <span class="invisible-header">Double Jump</span> ===== | |||
<font style="visibility:hidden" size="0"></font> | |||
{{MoveData | |||
|image=Garou Hokutomaru Jump.png | |||
|name=Double Jump | |||
|input=j7/8/9 | |||
|subtitle= | |||
|caption= | |||
|data= | |||
{{AttackData-Garou | |||
|Damage=/ | |||
|Guard=/ | |||
|Startup= | |||
|Active=/ | |||
|Recovery=/ | |||
|Total=/ | |||
|Hit Adv=/ | |||
|Block Adv=/ | |||
|Feint Cancel=/ | |||
|Cancel on Hit=/ | |||
|Cancel on Block=/ | |||
|Guard Crush Value=/ | |||
|description= Hokutomaru is the only character who can double jump (without the help of a wall) which opens up many options for him in the air. | |||
* The double jump must be input near the peak of Hokutomaru's jump, and it cannot be cancelled into from a jumping normal. | |||
* Hokutomaru '''cannot Just Defend after double jumping!''' | |||
}} | |||
}} | |||
===Universal Moves=== | |||
===== <span class="invisible-header">Lower-body Evasion Attack (5AB)</span> ===== | |||
<font style="visibility:hidden" size="0"></font> | |||
{{MoveData | |||
|image=Garou_Hokutomaru_5AB.png | |||
|name=5A+B | |||
|subtitle=Lower-body evasion attack | |||
|caption= | |||
|data= | |||
{{AttackData-Garou | |||
|Damage=6, 6 | |||
|Guard=Overhead | |||
|Startup=18 | |||
|Active=3, 《4》, 3 | |||
|Recovery=17 | |||
|Total=45 | |||
|Hit Adv=-1 | |||
|Block Adv=+5 | |||
|Feint Cancel= | |||
|Cancel on Hit=X | |||
|Cancel on Block=X | |||
|Guard Crush Value=3, 3 | |||
|description= The fastest universal overhead in the game. Unfortunately is split up into 2 hits which prevents Hokutomaru from comboing after a counterhit and can leave him punishable if the second hit whiffs. | |||
* If the second hit whiffs it is -8 on hit, -2 on block. | |||
* 18F hitstun and 24F blockstun. | |||
<gallery class="mw-collapsible"> | |||
Garou_Hokutomaru_5AB_2.png|Frame 1 Lower-Body invincibility | |||
Garou_Hokutomaru_5AB.png| | |||
Garou_Hokutomaru_5AB_1.png| | |||
</gallery> | |||
}} | |||
}} | |||
===== <span class="invisible-header">Upper-body Evasion Attack (2AB)</span> ===== | |||
<font style="visibility:hidden" size="0"></font> | |||
{{MoveData | |||
|image=Garou_Hokutomaru_2AB.png | |||
|name=2A+B | |||
|subtitle=Upper-body evasion attack | |||
|caption= | |||
|data= | |||
{{AttackData-Garou | |||
|version=2AB | |||
|Damage=10 | |||
|Guard=Mid | |||
|Startup=10 | |||
|Active=2 | |||
|Recovery=16 | |||
|Total=28 | |||
|Hit Adv=+1 | |||
|Block Adv=+7 | |||
|Feint Cancel=▽ | |||
|Cancel on Hit=◯ | |||
|Cancel on Block=X | |||
|Guard Crush Value=6 | |||
|description= * A poke that is plus on block and easily combos to 236236P on hit. As it cannot be cancelled on block, no confirm is needed. | |||
* 1~5F upper-body invincibility. | |||
* 18F hitstun and 24F blockstun. | |||
<gallery class="mw-collapsible"> | |||
Garou_Hokutomaru_2AB 1.png|Upper-Body Invincible Frames | |||
Garou_Hokutomaru_2AB 2.png|Vulnerable Startup | |||
Garou_Hokutomaru_2AB.png| | |||
Garou_Hokutomaru_2AB 3.png|Recovery | |||
</gallery> | |||
}} | |||
{{AttackData-Garou | |||
|version=2AB~BC | |||
|Damage= | |||
|Guard= | |||
|Startup= | |||
|Active= | |||
|Recovery= | |||
|Total=30 | |||
|Hit Adv=-12 | |||
|Block Adv=-6 | |||
|Feint Cancel= | |||
|Cancel on Hit= | |||
|Cancel on Block= | |||
|Guard Crush Value=6, 0 | |||
|description= Follow-up to 2AB where Hokutomaru jumps forward with no collision, meaning he can pass through the opponent. Can be used to reposition after a knockdown. | |||
* Lower-body invincibility for 12F while in the air. Although he disappears briefly, Hokutomaru is NOT fully invincible at any point in this move. | |||
<gallery class="mw-collapsible"> | |||
Garou_Hokutomaru_2AB BC.png| | |||
</gallery> | |||
}} | |||
}} | |||
===== <span class="invisible-header">T.O.P. Attack (CD)</span> ===== | |||
<font style="visibility:hidden" size="0"></font> | |||
{{MoveData | |||
|image=Garou_Hokutomaru_CD.png | |||
|name=Ninpou Bakuho (T.O.P. Attack) | |||
|input=C+D (T.O.P. only) | |||
|subtitle= | |||
|caption= | |||
|data= | |||
{{AttackData-Garou | |||
|Damage=17 (base damage) | |||
|Guard=Mid | |||
|Startup=14 | |||
|Active= | |||
|Recovery= | |||
|Total= | |||
|Hit Adv=KD | |||
|Block Adv=-31 | |||
|Feint Cancel= | |||
|Cancel on Hit= | |||
|Cancel on Block= | |||
|Guard Crush Value=25 | |||
|description=A slow anti-air. Has bad priority and is very unsafe on block, so it is not recommended. | |||
* 12~14F full-body invincibility. | |||
<gallery class="mw-collapsible"> | |||
Garou_Hokutomaru_CD 1.png| | |||
Garou_Hokutomaru_CD 2.png|Invincible Frames | |||
Garou_Hokutomaru_CD.png| | |||
</gallery> | |||
}} | |||
}} | |||
===Throws=== | |||
===== <span class="invisible-header">Hikkakimanesu (4/6C)</span> ===== | |||
<font style="visibility:hidden" size="0"></font> | |||
{{MoveData | |||
|image=Garou_Hokutomaru_Grab.png | |||
|name=Hikkakimanesu | |||
|input=Close 4/6C | |||
|subtitle=Scratch | |||
|caption= | |||
|data= | |||
{{AttackData-Garou | |||
|Damage=4, 4, 4, 4 | |||
|Guard= | |||
|Startup=0 | |||
|Active= | |||
|Recovery= | |||
|Total= | |||
|Hit Adv=KD (+59) | |||
|Block Adv= | |||
|Feint Cancel= | |||
|Cancel on Hit= | |||
|Cancel on Block= | |||
|Guard Crush Value= | |||
|description= A typical throw. Sets up for oki mixups very well. | |||
* Frame advantage varies depending on the height of the opponent as Hokutomaru needs to jump off of them and land before he can act. | |||
}} | |||
}} | |||
===== <span class="invisible-header">Nomen Tsukuri (j4/2/6C)</span> ===== | |||
<font style="visibility:hidden" size="0"></font> | |||
{{MoveData | |||
|image=Garou Hokutomaru Air Grab.png | |||
|name=Noumen Tsukuri | |||
|input=Close j4/2/6C | |||
|subtitle=Noh mask making | |||
|caption= | |||
|data= | |||
{{AttackData-Garou | |||
|Damage=13 | |||
|Guard= | |||
|Startup=0 | |||
|Active= | |||
|Recovery= | |||
|Total= | |||
|Hit Adv= | |||
|Block Adv= | |||
|Feint Cancel= | |||
|Cancel on Hit= | |||
|Cancel on Block= | |||
|Guard Crush Value= | |||
|description= | |||
}} | |||
}} | |||
===Feints=== | |||
===== <span class="invisible-header">Forward Feint (6AC)</span> ===== | |||
<font style="visibility:hidden" size="0"></font> | |||
{{MoveData | |||
|image=Garou_Hokutomaru_6AC.png | |||
|name=6A+C | |||
|subtitle=Forward Feint | |||
|caption= | |||
|data= | |||
{{AttackData-Garou | |||
|Damage= | |||
|Guard= | |||
|Startup= | |||
|Active= | |||
|Recovery= | |||
|Total=10 | |||
|Hit Adv= | |||
|Block Adv= | |||
|Feint Cancel= | |||
|Cancel on Hit= | |||
|Cancel on Block= | |||
|Guard Crush Value= | |||
|description=Mimics the end recovery animation of [[#Karakusa Giri (214P) | Karakusa Giri]]. | |||
}} | |||
}} | |||
===== <span class="invisible-header">Down Feint (2AC)</span> ===== | |||
<font style="visibility:hidden" size="0"></font> | |||
{{MoveData | |||
|image=Garou_Hokutomaru_2AC.png | |||
|name=2A+C | |||
|subtitle=Down Feint | |||
|caption= | |||
|data= | |||
{{AttackData-Garou | |||
|Damage= | |||
|Guard= | |||
|Startup= | |||
|Active= | |||
|Recovery= | |||
|Total=8 | |||
|Hit Adv= | |||
|Block Adv= | |||
|Feint Cancel= | |||
|Cancel on Hit= | |||
|Cancel on Block= | |||
|Guard Crush Value= | |||
|description=Mimics the start of [[#Shuriken (236P) | Shuriken]]. | |||
* The faster of the two feints. Always use this one. | |||
}} | |||
}} | |||
===Special Moves=== | |||
===== <span class="invisible-header">Shuriken (236P)</span> ===== | |||
<font style="visibility:hidden" size="0"></font> | |||
{{MoveData | |||
|image=Garou Hokutomaru 236A.png | |||
|caption=A | |||
|image2=Garou Hokutomaru 236C.png | |||
|caption2=C | |||
|image3=Garou Hokutomaru j236P.png | |||
|caption3=jA/C | |||
|name=Shuriken | |||
|input=(j)236A/C | |||
|subtitle= | |||
|data=Unlike all other projectiles, Hokutomaru's shurikens can be destroyed by the opponent's melee attacks (without absorbing it, the same attack can still hit Hokutomaru) which makes them relatively ineffective for deterring divekicks or other advancing moves. | |||
{{AttackData-Garou | |||
|version=A | |||
|Damage=10 | |||
|Guard=<span style="color:#ff0000;">Mid</span> | |||
|Startup=12 | |||
|Active=/ | |||
|Recovery=35 | |||
|Total=47 | |||
|Hit Adv=-2 ~ +32 | |||
|Block Adv=-2 ~ +32 | |||
|Feint Cancel=X | |||
|Cancel on Hit=X | |||
|Cancel on Block=X | |||
|Guard Crush Value=7 | |||
|description=Single shuriken. Not used often as the air version is faster when [https://glossary.infil.net/?t=Tiger%20Knee TK'd] or done from a backdash. | |||
}} | |||
{{AttackData-Garou | |||
|version=C | |||
|Damage=6, 6, 6 | |||
|Guard=<span style="color:#ff0000;">Mid</span> | |||
|Startup=18, 22, 27 | |||
|Active=/ | |||
|Recovery=40 | |||
|Total=58 | |||
|Hit Adv=-2 ~ +37 | |||
|Block Adv=-2 ~ +37 | |||
|Feint Cancel=X | |||
|Cancel on Hit=X | |||
|Cancel on Block=X | |||
|Guard Crush Value=5, 5, 5 | |||
|description= Triple shuriken. Much longer recovery. | |||
}} | |||
{{AttackData-Garou | |||
|version=jA/C | |||
|Damage=12 | |||
|Guard=<span style="color:#ff0000;">Mid</span> | |||
|Startup=18 | |||
|Active=/ | |||
|Recovery=6 + falling + 10 | |||
|Total=Minimum 38 | |||
|Hit Adv=Up to +32 | |||
|Block Adv=Up to +32 | |||
|Feint Cancel=X | |||
|Cancel on Hit=X | |||
|Cancel on Block=X | |||
|Guard Crush Value=/ | |||
|description=Completely stops Hokutomaru's air momentum and has him slowly fall straight down after. Decent option to try and stuff someone who's gonna jump. | |||
}} | |||
}} | |||
===== <span class="invisible-header">Rakkazan (214K)</span> ===== | |||
<font style="visibility:hidden" size="0"></font> | |||
{{MoveData | |||
|image=Garou Hokutomaru 214B.png | |||
|caption=B | |||
|image2=Garou Hokutomaru 214D.png | |||
|caption2=D | |||
|name=Rakkazan | |||
|input=(j)214B/D | |||
|subtitle= | |||
|data= | |||
{{AttackData-Garou | |||
|version=B | |||
|subtitle=Kyo (Void) | |||
|Damage=/ | |||
|Guard=/ | |||
|Startup=/ | |||
|Active=/ | |||
|Recovery=43 | |||
|Total=43 | |||
|Hit Adv=/ | |||
|Block Adv=/ | |||
|Feint Cancel=X | |||
|Cancel on Hit=X | |||
|Cancel on Block=X | |||
|Guard Crush Value=/ | |||
|description= Fake-out. Hokutomaru is counterhit punishable. | |||
* 7~12F full-body invincibility. | |||
}} | |||
{{AttackData-Garou | |||
|version=D | |||
|subtitle=Jitsu (Real) | |||
|Damage=20 | |||
|Guard=<span style="color:#ff0000;">High</span> | |||
|Startup=28 | |||
|Active=3 | |||
|Recovery=31(hit/whiff) / 46(block) | |||
|Total=62(hit/whiff) / 77(block) | |||
|Hit Adv=KD | |||
|Block Adv=-22 | |||
|Feint Cancel=X | |||
|Cancel on Hit=X | |||
|Cancel on Block=X | |||
|Guard Crush Value=8 | |||
|description= Cheesy homing teleport overhead that carries enormous risk in exchange for just decent reward. | |||
* The main use of this move is in combos. Using it in neutral is almost entirely a gimmick and requires hard reads. | |||
* Hokutomaru appears at a fixed height every time so if the opponent is in the air you will teleport directly into a jump normal, and the hitbox is a lot smaller than it seems (the opposite can be said about the hurtbox). | |||
* Counterhitting a grounded opponent (spinning hitstun) will reduce frame advantage, leaving Hokutomaru only +1. | |||
* If the opponent blocks this, Hokutomaru will eat a huge combo. | |||
* 7~8F full-body invincibility. | |||
}} | |||
}} | |||
===== <span class="invisible-header">Karakusa Giri (214P)</span> ===== | |||
<font style="visibility:hidden" size="0"></font> | |||
{{MoveData | |||
|image=Garou Hokutomaru 214A.png | |||
|caption= | |||
|name=Karakusa Giri | |||
|input=214A/C | |||
|subtitle= | |||
|data= | |||
{{AttackData-Garou | |||
|version=A | |||
|Damage=20 | |||
|Guard=<span style="color:#ff0000;">Mid</span> | |||
|Startup=19 | |||
|Active= | |||
|Recovery= | |||
|Total= | |||
|Hit Adv=KD | |||
|Block Adv=-10 | |||
|Feint Cancel= | |||
|Cancel on Hit= | |||
|Cancel on Block= | |||
|Guard Crush Value=7 | |||
|description= Used in meterless combos. Can GC into this to punish a fireball at footsies range. | |||
}} | |||
{{AttackData-Garou | |||
|version=A (Hold) | |||
|subtitle= | |||
|Damage=/ | |||
|Guard=/ | |||
|Startup=/ | |||
|Active=/ | |||
|Recovery=33 | |||
|Total=33 | |||
|Hit Adv=/ | |||
|Block Adv=/ | |||
|Feint Cancel=X | |||
|Cancel on Hit=/ | |||
|Cancel on Block=/ | |||
|Guard Crush Value=/ | |||
|description= Hold the button input to stop/cancel the attack. Trying to make use of this after a blocked normal still leaves Hokutomaru very minus, but it can be useful to approach a downed opponent while building a bit of meter. | |||
}} | |||
{{AttackData-Garou | |||
|version=C | |||
|Damage=14, 16 | |||
|Guard=<span style="color:#ff0000;">Mid</span> | |||
|Startup=30 | |||
|Active= | |||
|Recovery= | |||
|Total= | |||
|Hit Adv=KD | |||
|Block Adv=-18 | |||
|Feint Cancel= | |||
|Cancel on Hit= | |||
|Cancel on Block= | |||
|Guard Crush Value=4, 4 | |||
|description=Far too slow to be comboed into practically and is extremely unsafe. | |||
<gallery class="mw-collapsible"> | |||
Garou Hokutomaru 214A.png| | |||
Garou Hokutomaru 214C_1.png| | |||
</gallery> | |||
}} | |||
{{AttackData-Garou | |||
|version=C (Hold) | |||
|subtitle= | |||
|Damage=/ | |||
|Guard=/ | |||
|Startup=/ | |||
|Active=/ | |||
|Recovery=40 | |||
|Total=40 | |||
|Hit Adv=/ | |||
|Block Adv=/ | |||
|Feint Cancel=X | |||
|Cancel on Hit=/ | |||
|Cancel on Block=/ | |||
|Guard Crush Value=/ | |||
|description= Hold the button input to stop/cancel the attack. | |||
}} | |||
}} | |||
===== <span class="invisible-header">Kuuha Dan (236K)</span> ===== | |||
<font style="visibility:hidden" size="0"></font> | |||
{{MoveData | |||
|image=Garou Hokutomaru 236B.png | |||
|name=Kuuha Dan | |||
|input=236B/D (Brake OK) | |||
|subtitle= | |||
|caption= | |||
|data=Very rare for all hits to connect. | |||
<gallery class="mw-collapsible"> | |||
Garou Hokutomaru 236B.png| | |||
Garou_Hokutomaru_236B 1.png| | |||
Garou_Hokutomaru_236B 2.png| | |||
Garou_Hokutomaru_236B 3.png| | |||
Garou_Hokutomaru_236B 4.png| | |||
Garou_Hokutomaru_236B 5.png| | |||
</gallery> | |||
{{AttackData-Garou | |||
|version=B | |||
|Damage=6, 6, 6 | |||
|Guard=<span style="color:#ff0000;">Mid</span> | |||
|Startup=11 | |||
|Active= | |||
|Recovery= | |||
|Total= | |||
|Hit Adv=KD | |||
|Block Adv=-12 | |||
|Feint Cancel=X | |||
|Cancel on Hit=X | |||
|Cancel on Block=X | |||
|Guard Crush Value=3, 3, 3 | |||
|description= Andy Bogard's signature multihit arcing kick that is very unsafe and not very rewarding. | |||
* Can be comboed into from lights. | |||
}} | |||
{{AttackData-Garou | |||
|version=B Break | |||
|Damage=6 | |||
|Guard=<span style="color:#ff0000;">Mid</span> | |||
|Startup=11 | |||
|Active=2~4 | |||
|Recovery=18~20 | |||
|Total=31~35 | |||
|Hit Adv=KD | |||
|Block Adv=+5 | |||
|Feint Cancel=X | |||
|Cancel on Hit= | |||
|Cancel on Block= | |||
|Guard Crush Value=3 | |||
|description= When braked, this move becomes a plus on block launcher which is very nice, although this version has little range which restricts its use in combos/pressure. | |||
* Hokutomaru's fastest meterless guard cancel and this brake is his fastest way to build meter. | |||
}} | |||
{{AttackData-Garou | |||
|version=D | |||
|Damage=7, 7, 7, 7 | |||
|Guard=<span style="color:#ff0000;">Mid</span> | |||
|Startup=16 | |||
|Active= | |||
|Recovery= | |||
|Total= | |||
|Hit Adv=KD | |||
|Block Adv=-9 | |||
|Feint Cancel=X | |||
|Cancel on Hit=X | |||
|Cancel on Block=X | |||
|Guard Crush Value=3, 3, 3, 3 | |||
|description= Travels in a larger arc than the B version and hits an additional time. Each individual hit also does slightly more damage. | |||
}} | |||
{{AttackData-Garou | |||
|version=D Break | |||
|Damage=7 | |||
|Guard=<span style="color:#ff0000;">Mid</span> | |||
|Startup=16 | |||
|Active=2~4 | |||
|Recovery=18~21 | |||
|Total=36~41 | |||
|Hit Adv=KD | |||
|Block Adv=+5 | |||
|Feint Cancel=X | |||
|Cancel on Hit= | |||
|Cancel on Block= | |||
|Guard Crush Value=3 | |||
|description= While slower than the B version, this brake has more damage and range, so it's better for combos when available. | |||
}} | |||
}} | |||
===Super Moves=== | |||
===== <span class="invisible-header">Chou Hissatsu Shuriken / Chou Bakuen Kunai (236236A/C)</span> ===== | |||
<font style="visibility:hidden" size="0"></font> | |||
{{MoveData | |||
|image=Garou Hokutomaru 236236A.png | |||
|image2=Garou Hokutomaru 236236A 1.png | |||
|caption2=A | |||
|image3=Garou Hokutomaru 236236C.png | |||
|image4=Garou Hokutomaru 236236C 1.png | |||
|caption4=C | |||
|name=Chou Hissatsu Shuriken / Chou Bakuen Kunai | |||
|input=236236A/C (S/P Power, Brake OK) | |||
|data= | |||
{{AttackData-Garou | |||
|version =A | |||
|Damage=7, 7, 7, (7,) 15 | |||
|Guard=<span style="color:#ff0000;">Mid</span> | |||
|Startup=9 | |||
|Active= | |||
|Recovery= | |||
|Total= | |||
|Hit Adv=HKD (+37 ~ +49) | |||
|Block Adv=-34 | |||
|Feint Cancel= | |||
|Cancel on Hit= | |||
|Cancel on Block= | |||
|Guard Crush Value=2×4, 5 | |||
|description=Midscreen combo ender. | |||
* 1~6F full-body invincibility. | |||
* When far away from the opponent, this move will only hit 4 times (lose 7 damage). | |||
}} | |||
{{AttackData-Garou | |||
|version = A Break | |||
|Damage= | |||
|Guard= | |||
|Startup= | |||
|Active= | |||
|Recovery= | |||
|Total= | |||
|Hit Adv= | |||
|Block Adv=-34 | |||
|Feint Cancel= | |||
|Cancel on Hit= | |||
|Cancel on Block= | |||
|Guard Crush Value= | |||
|description=Pressing A+B will throw the large shuriken earlier. This can be useful to make it hit OTG after an aerial counterhit. | |||
}} | |||
{{AttackData-Garou | |||
| header = | |||
|version =C | |||
|Damage=7, 7, 7, 7, 32 | |||
|Guard=<span style="color:#ff0000;">Mid</span> | |||
|Startup=9 | |||
|Active= | |||
|Recovery= | |||
|Total= | |||
|Hit Adv=HKD (+37 ~ +49) | |||
|Block Adv=-34 | |||
|Feint Cancel= | |||
|Cancel on Hit= | |||
|Cancel on Block= | |||
|Guard Crush Value=3×5 | |||
|description=* 1~9F full-body invincibility. | |||
}} | |||
{{AttackData-Garou | |||
|version =C Break | |||
|Damage= | |||
|Guard= | |||
|Startup= | |||
|Active= | |||
|Recovery= | |||
|Total= | |||
|Hit Adv= | |||
|Block Adv=-34 | |||
|Feint Cancel= | |||
|Cancel on Hit= | |||
|Cancel on Block= | |||
|Guard Crush Value= | |||
|description=Pressing A+B will throw the large kunai earlier. | |||
}} | |||
}} | |||
===== <span class="invisible-header">Ougi • Chou Hissatsu Tatsumaki / Kyuukyoku Ougi • Chou Bakuen Tatsumaki (236236B/D)</span> ===== | |||
<font style="visibility:hidden" size="0"></font> | |||
{{MoveData | |||
|image=Garou Hokutomaru 236236B.png | |||
|caption=B | |||
|image2=Garou_Hokutomaru_236236D.png | |||
|caption2=D | |||
|name=Ougi • Chou Hissatsu Tatsumaki / Kyuukyoku Ougi • Chou Bakuen Tatsumaki | |||
|input=236236B/D (S/P Power) | |||
|data= | |||
{{AttackData-Garou | |||
|version =B | |||
|Damage=5×9 | |||
|Guard=Mid | |||
|Startup=1 | |||
|Active= | |||
|Recovery= | |||
|Total= | |||
|Hit Adv=HKD (+38) | |||
|Block Adv=-60 | |||
|Feint Cancel= | |||
|Cancel on Hit= | |||
|Cancel on Block= | |||
|Guard Crush Value=2×9 | |||
|description=Corner combo ender and Hokutomaru's only invincible reversal. Due to the hitbox being modest, the short length of the invincibility and the damage being spread between many weak hits, when used outside of combos it will often miss many hits and even trade/lose to attacks, limiting its use as a raw reversal or anti-air. It is pretty reliable as a GC, though you may still lose damage. | |||
* As it is 1F startup, Hokutomaru can [https://wiki.supercombo.gg/w/Garou:_Mark_of_the_Wolves/Advanced_Techniques#Regarding_1F_Startup_Supers juggle into this super when the opponent is meant to be invincible (air reset)]. This is difficult to time and does not apply to the P-Power version which is 0F startup. | |||
* 1~2F full-body invincibility. | |||
<gallery class="mw-collapsible"> | |||
Garou Hokutomaru 236236B.png| | |||
Garou_Hokutomaru_236236B 1.png| | |||
Garou_Hokutomaru_236236B 2.png| | |||
Garou_Hokutomaru_236236B 3.png| | |||
</gallery> | |||
}} | |||
{{AttackData-Garou | |||
|header= | |||
|version=D | |||
|Damage=7×10 | |||
|Guard=Mid | |||
|Startup=0 | |||
|Active= | |||
|Recovery= | |||
|Total= | |||
|Hit Adv=KD | |||
|Block Adv=-54 | |||
|Feint Cancel= | |||
|Cancel on Hit= | |||
|Cancel on Block= | |||
|Guard Crush Value=3×10 | |||
|description= | |||
* Full-body invincibility on frame 1 only. | |||
* Causes Soft Knockdown, unlike 236236B. | |||
<gallery class="mw-collapsible"> | |||
Garou_Hokutomaru_236236D.png| | |||
Garou_Hokutomaru_236236D 1.png| | |||
Garou_Hokutomaru_236236D 2.png| | |||
Garou_Hokutomaru_236236D 3.png| | |||
</gallery> | |||
}} | |||
}} | |||
{{Navbox-MOTW}} | |||
[[Category:Garou: Mark of the Wolves]] | |||
Latest revision as of 08:31, 15 April 2025
Introduction
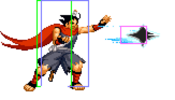
Hokutomaru is the young disciple of Andy Bogard, who practices Shiranui-style ninjutsu. By the instruction of his master, he left his home in the remote mountains of Japan to participate in the Maximum Mayhem tournament and demonstrate his skills.
Gameplay
TBD
| Strengths | Weaknesses |
|---|---|
|
|
Character Colors
Move List
Frame Data Source: https://w.atwiki.jp/garoumow/pages/27.html and https://w.atwiki.jp/garoumow/pages/80.html
| Data Help | |
|---|---|
| Disclaimer: This is meant to teach basic terminology used when describing moves. | |
| Hitbox: | A predefined area (usually a rectangle or rectangles) that tells the game how any given attack can come in contact with a character. Hitboxes are invisible to the player when normally playing. |
| Hurtbox: | A predefined area (usually a group of rectangles) that tell the game how your character is allowed to get hit by any incoming attack. Specifically, you'll get hit by (or block) an attack if that attack's hitbox ever overlaps your hurtbox. |
| Throw Box/Range: | Active throw frames and range. Your opponent will be thrown in this field if not in block or hit stun. |
| Projectile Box: | Hitbox on a projectile attack. |
| Guard/Counter Box: | The Guard Box or Counter Box. This appears when blocking or using a counter move. |
| Push Box: | Has no bearing on hit/hurt boxes. Just prevents characters to not pass through each other. (Also known as "Collision Box".) |
| Startup | The number of frames before an attack can hit the opponent. Does not include the first active frame. |
| Guard | The way this move must be blocked.
High or H or Overhead (especially when from the ground) -- must be blocked standing. |
| Damage | "Basic" damage -- Unmodified damage values
"Correct" damage -- Damage values accounting for damage scaling, TOP multiplier, and defense rate |
| Guard Crush Value | Decreases the defender's guard durability gauge by this value. |
| +X | Attacker has X number of advantage frames. |
| -X | Attacker has X number of disadvantage frames. |
| KD | Short for "knockdown", knocks down opponent on hit. |
| ◯ | Cancelable on both hit and block. |
| ∞ | Chain cancelable with the same button (renda cancel). |
| ※ | Cancelable on the first hit/part only. |
| 《X》OR «X» OR <<X>> OR (X) | X number of inactive frames between hits of multihit moves. |
| △ | Only cancelable on block. |
| ▽ | Only cancelable on hit. |
| × OR X | Not cancelable. |
Notes:
- Guard crush values within ( ) are when the move is used as the next hit of a target combo.
- From the 2nd hit and after of the target combo, the active frames and recovery frames will be the same as far moves and crouching moves
- Jump D, Jump A, and Jump B (Jump A and Jump B are usually diagonal jumps only) can beat out upper-body evasive attacks.
- Special/Super moves with "Guard" data in red text are impossible to just defend at 0-pixel health bar.
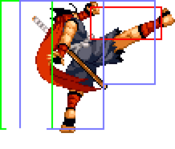
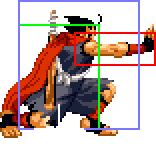
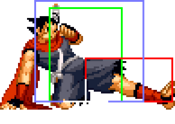
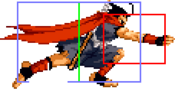
| Standing/Taunting | Crouching | Running | Jumping |
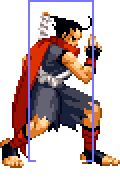 |
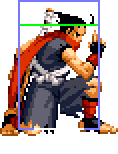 |
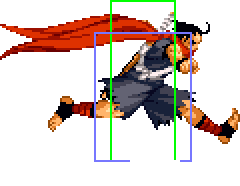 |
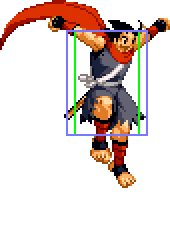
|
| Can low profile certain moves. | 36F (35F for backward jump). Can double jump. |
Close Standing Normals
Close 5A
| c5A | Damage | Guard | Startup | Active | Recovery | Total |
|---|---|---|---|---|---|---|
| 4 | Mid | 4 | 4 | 5 | 13 | |
| Hit Adv | Block Adv | Cancel on Hit | Cancel on Block | Guard Crush Value | ||
| +6 | +6 | ◯ / ∞ | ◯ / ∞ | 4 | ||
|
Standing jab. | ||||||
| c5A>B | Damage | Guard | Startup | Active | Recovery | Total |
| - | Mid | - | - | - | - | |
| Hit Adv | Block Adv | Cancel on Hit | Cancel on Block | Guard Crush Value | ||
| +1 | +1 | ◯ | ◯ | 4, 3 | ||
|
Target combo from c5A. | ||||||
| c5A>C | Damage | Guard | Startup | Active | Recovery | Total |
| - | Mid | - | - | - | - | |
| Hit Adv | Block Adv | Cancel on Hit | Cancel on Block | Guard Crush Value | ||
| -10 | -10 | ◯ | ◯ | 4, 3 | ||
|
Target combo from c5A. | ||||||
| c5A>C>C | Damage | Guard | Startup | Active | Recovery | Total |
| - | - | - | - | - | - | |
| Hit Adv | Block Adv | Cancel on Hit | Cancel on Block | Guard Crush Value | ||
| -2 | -2 | - | - | 4, 3, 0 | ||
|
Target combo from c5A. Ends in a cancel. | ||||||
Close 5B
| c5B | Damage | Guard | Startup | Active | Recovery | Total |
|---|---|---|---|---|---|---|
| 6 | Mid | 4 | 3 | 9 | 16 | |
| Hit Adv | Block Adv | Cancel on Hit | Cancel on Block | Guard Crush Value | ||
| +3 | +3 | ◯ | ◯ | 4 | ||
| c5B>D | Damage | Guard | Startup | Active | Recovery | Total |
| - | Mid | - | - | - | - | |
| Hit Adv | Block Adv | Cancel on Hit | Cancel on Block | Guard Crush Value | ||
| -3 | -3 | ◯ | ◯ | 4, 3 | ||
|
Target combo from c5B. | ||||||
| c5B>D>C | Damage | Guard | Startup | Active | Recovery | Total |
| - | - | - | - | - | - | |
| Hit Adv | Block Adv | Cancel on Hit | Cancel on Block | Guard Crush Value | ||
| -1 | -1 | - | - | 4, 3, 0 | ||
|
Target combo from c5B. Ends in a cancel. | ||||||
Close 5C
Close 5D
| Damage | Guard | Startup | Active | Recovery | Total |
|---|---|---|---|---|---|
| 9 | Mid | 3 | 3 | 19 | 25 |
| Hit Adv | Block Adv | Cancel on Hit | Cancel on Block | Guard Crush Value | |
| -1 | -1 | ◯ | ◯ | 5 | |
|
Hokutomaru's fastest normal on the ground, easily combos into specials, has incredible frame advantage when feint cancelled letting it link into itself and can't be JD'd low despite being a mid. An incredible normal. | |||||
Far Standing Normals
Far 5A
| f5A | Damage | Guard | Startup | Active | Recovery | Total |
|---|---|---|---|---|---|---|
| 5 | Mid | 4 | 3 | 7 | 14 | |
| Hit Adv | Block Adv | Cancel on Hit | Cancel on Block | Guard Crush Value | ||
| +5 | +5 | ◯ / ∞ | ◯ / ∞ | 4 | ||
| f5A>B | Damage | Guard | Startup | Active | Recovery | Total |
| - | Mid | - | - | - | - | |
| Hit Adv | Block Adv | Cancel on Hit | Cancel on Block | Guard Crush Value | ||
| +1 | +1 | ◯ | ◯ | 4, 3 | ||
|
Target combo from f5A. | ||||||
| f5A>C | Damage | Guard | Startup | Active | Recovery | Total |
| - | Mid | - | - | - | - | |
| Hit Adv | Block Adv | Cancel on Hit | Cancel on Block | Guard Crush Value | ||
| -10 | -10 | ◯ | ◯ | 4, 3 | ||
|
Target combo from f5A. | ||||||
| f5A>C>C | Damage | Guard | Startup | Active | Recovery | Total |
| - | - | - | - | - | - | |
| Hit Adv | Block Adv | Cancel on Hit | Cancel on Block | Guard Crush Value | ||
| -2 | -2 | - | - | 4, 3, 0 | ||
|
Target combo from f5A. Ends in a cancel. | ||||||
Far 5B
| f5B | Damage | Guard | Startup | Active | Recovery | Total |
|---|---|---|---|---|---|---|
| 7 | Mid | 6 | 3 | 11 | 20 | |
| Hit Adv | Block Adv | Cancel on Hit | Cancel on Block | Guard Crush Value | ||
| +1 | +1 | ◯ | ◯ | 4(3) | ||
| f5B>D | Damage | Guard | Startup | Active | Recovery | Total |
| - | Mid | - | - | - | - | |
| Hit Adv | Block Adv | Cancel on Hit | Cancel on Block | Guard Crush Value | ||
| -3 | -3 | ◯ | ◯ | 4, 3 | ||
|
Target combo from f5B. | ||||||
| f5B>D>C | Damage | Guard | Startup | Active | Recovery | Total |
| - | - | - | - | - | - | |
| Hit Adv | Block Adv | Cancel on Hit | Cancel on Block | Guard Crush Value | ||
| -1 | -1 | - | - | 4, 3, 0 | ||
|
Target combo from f5B. Ends in a cancel. | ||||||
Far 5C
| Damage | Guard | Startup | Active | Recovery | Total |
|---|---|---|---|---|---|
| 12 | Mid | 11 | 1 | 30 | 42 |
| Hit Adv | Block Adv | Cancel on Hit | Cancel on Block | Guard Crush Value | |
| -10 | -10 | X | X | 5(3) | |
|
Slow, can't be cancelled and is punishable on hit... not great traits to have. | |||||
Far 5D
| Damage | Guard | Startup | Active | Recovery | Total |
|---|---|---|---|---|---|
| 12 | Mid | 11 | 3 | 21 | 35 |
| Hit Adv | Block Adv | Cancel on Hit | Cancel on Block | Guard Crush Value | |
| -3 | -3 | X | X | 5(3) |
Crouching Normals
2A
| 2A | Damage | Guard | Startup | Active | Recovery | Total |
|---|---|---|---|---|---|---|
| 4 | Mid | 4 | 4 | 5 | 13 | |
| Hit Adv | Block Adv | Cancel on Hit | Cancel on Block | Guard Crush Value | ||
| +6 | +6 | ◯ / ∞ | ◯ / ∞ | 4 | ||
|
2A's last 3F of recovery has full-body invincibility.
| ||||||
| 2A>B | Damage | Guard | Startup | Active | Recovery | Total |
| - | Mid, Low | - | - | - | - | |
| Hit Adv | Block Adv | Cancel on Hit | Cancel on Block | Guard Crush Value | ||
| +4 | +4 | ◯ | ◯ | 4, 3 | ||
|
Target combo from 2A. | ||||||
| 2A>C>C | Damage | Guard | Startup | Active | Recovery | Total |
| - | Mid, Mid | - | - | - | - | |
| Hit Adv | Block Adv | Cancel on Hit | Cancel on Block | Guard Crush Value | ||
| -1 | -1 | - | - | 4, 3, 0 | ||
|
Target combo from 2A. Ends in a cancel. | ||||||
2B
| 2B | Damage | Guard | Startup | Active | Recovery | Total |
|---|---|---|---|---|---|---|
| 5 | Low | 5 | 4 | 7 | 16 | |
| Hit Adv | Block Adv | Cancel on Hit | Cancel on Block | Guard Crush Value | ||
| +4 | +4 | ◯ / ∞ | ◯ / ∞ | 4(3) | ||
| ||||||
| 2B>C>C | Damage | Guard | Startup | Active | Recovery | Total |
| - | Low, Mid | - | - | - | - | |
| Hit Adv | Block Adv | Cancel on Hit | Cancel on Block | Guard Crush Value | ||
| -1 | -1 | - | - | 4, 3, 0 | ||
|
Target combo from 2B. Ends in a cancel. | ||||||
| 2B>D>C | Damage | Guard | Startup | Active | Recovery | Total |
| - | Low, Low | - | - | - | - | |
| Hit Adv | Block Adv | Cancel on Hit | Cancel on Block | Guard Crush Value | ||
| -1 | -1 | - | - | 4, 5, 0 | ||
|
Target combo from f5B. Ends in the same cancel. You can kara cancel the 2D with the follow-up C cancel. | ||||||
2C
| Damage | Guard | Startup | Active | Recovery | Total |
|---|---|---|---|---|---|
| 9 | Mid | 6 | 4 | 16 | 26 |
| Hit Adv | Block Adv | Cancel on Hit | Cancel on Block | Guard Crush Value | |
| +1 | +1 | X | X | 5(3) | |
| |||||
2D
| Damage | Guard | Startup | Active | Recovery | Total |
|---|---|---|---|---|---|
| 9 | Low | 10 | 5 | 19 | 34 |
| Hit Adv | Block Adv | Cancel on Hit | Cancel on Block | Guard Crush Value | |
| KD | -3 | X | X | 5(5) | |
| |||||
Jumping Normals
jA
| Damage | Guard | Startup | Active | Recovery | Total |
|---|---|---|---|---|---|
| 6 | High | 6 | 12 | - | - |
| Hit Adv | Block Adv | Cancel on Hit | Cancel on Block | Guard Crush Value | |
| - | - | ◯ | ◯ | 4 | |
| |||||
jB
| Damage | Guard | Startup | Active | Recovery | Total |
|---|---|---|---|---|---|
| 6 | High | 3 | 10 | - | - |
| Hit Adv | Block Adv | Cancel on Hit | Cancel on Block | Guard Crush Value | |
| - | - | ◯ | ◯ | 4 | |
| |||||
jC
| Damage | Guard | Startup | Active | Recovery | Total |
|---|---|---|---|---|---|
| 8 | High | 6 | 5 | - | - |
| Hit Adv | Block Adv | Cancel on Hit | Cancel on Block | Guard Crush Value | |
| - | - | ◯ | ◯ | 5 |
jD
| Damage | Guard | Startup | Active | Recovery | Total |
|---|---|---|---|---|---|
| 8 | High | 7 | 7 | - | - |
| Hit Adv | Block Adv | Cancel on Hit | Cancel on Block | Guard Crush Value | |
| - | - | ◯ | ◯ | 5 | |
| |||||
Command Normals
Sliding (3B)
| Damage | Guard | Startup | Active | Recovery | Total |
|---|---|---|---|---|---|
| 10 | Low | 7 | 13 | 22 | 42 |
| Hit Adv | Block Adv | Cancel on Hit | Cancel on Block | Guard Crush Value | |
| KD | -13 | X | X | 9 | |
|
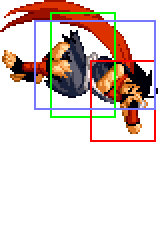
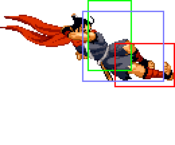
A sliding sweep that is excellent at catching landing frames, making this one of Hokutomaru's better anti-airs.
| |||||
Kuuten Kyaku (3D)
Double Jump
| Damage | Guard | Startup | Active | Recovery | Total |
|---|---|---|---|---|---|
| / | / | - | / | / | / |
| Hit Adv | Block Adv | Cancel on Hit | Cancel on Block | Guard Crush Value | |
| / | / | / | / | / | |
|
Hokutomaru is the only character who can double jump (without the help of a wall) which opens up many options for him in the air.
| |||||
Universal Moves
Lower-body Evasion Attack (5AB)
| Damage | Guard | Startup | Active | Recovery | Total |
|---|---|---|---|---|---|
| 6, 6 | Overhead | 18 | 3, 《4》, 3 | 17 | 45 |
| Hit Adv | Block Adv | Cancel on Hit | Cancel on Block | Guard Crush Value | |
| -1 | +5 | X | X | 3, 3 | |
|
The fastest universal overhead in the game. Unfortunately is split up into 2 hits which prevents Hokutomaru from comboing after a counterhit and can leave him punishable if the second hit whiffs.
| |||||
Upper-body Evasion Attack (2AB)
| 2AB | Damage | Guard | Startup | Active | Recovery | Total |
|---|---|---|---|---|---|---|
| 10 | Mid | 10 | 2 | 16 | 28 | |
| Hit Adv | Block Adv | Cancel on Hit | Cancel on Block | Guard Crush Value | ||
| +1 | +7 | ◯ | X | 6 | ||
| ||||||
| 2AB~BC | Damage | Guard | Startup | Active | Recovery | Total |
| - | - | - | - | - | 30 | |
| Hit Adv | Block Adv | Cancel on Hit | Cancel on Block | Guard Crush Value | ||
| -12 | -6 | - | - | 6, 0 | ||
|
Follow-up to 2AB where Hokutomaru jumps forward with no collision, meaning he can pass through the opponent. Can be used to reposition after a knockdown.
| ||||||
T.O.P. Attack (CD)
Throws
Hikkakimanesu (4/6C)
| Damage | Guard | Startup | Active | Recovery | Total |
|---|---|---|---|---|---|
| 4, 4, 4, 4 | - | 0 | - | - | - |
| Hit Adv | Block Adv | Cancel on Hit | Cancel on Block | Guard Crush Value | |
| KD (+59) | - | - | - | - | |
|
A typical throw. Sets up for oki mixups very well.
| |||||
Nomen Tsukuri (j4/2/6C)
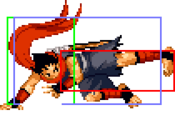
| Damage | Guard | Startup | Active | Recovery | Total |
|---|---|---|---|---|---|
| 13 | - | 0 | - | - | - |
| Hit Adv | Block Adv | Cancel on Hit | Cancel on Block | Guard Crush Value | |
| - | - | - | - | - |
Feints
Forward Feint (6AC)
| Damage | Guard | Startup | Active | Recovery | Total |
|---|---|---|---|---|---|
| - | - | - | - | - | 10 |
| Hit Adv | Block Adv | Cancel on Hit | Cancel on Block | Guard Crush Value | |
| - | - | - | - | - | |
|
Mimics the end recovery animation of Karakusa Giri. | |||||
Down Feint (2AC)
| Damage | Guard | Startup | Active | Recovery | Total |
|---|---|---|---|---|---|
| - | - | - | - | - | 8 |
| Hit Adv | Block Adv | Cancel on Hit | Cancel on Block | Guard Crush Value | |
| - | - | - | - | - | |
|
Mimics the start of Shuriken.
| |||||
Special Moves
Shuriken (236P)
| A | Damage | Guard | Startup | Active | Recovery | Total |
|---|---|---|---|---|---|---|
| 10 | Mid | 12 | / | 35 | 47 | |
| Hit Adv | Block Adv | Cancel on Hit | Cancel on Block | Guard Crush Value | ||
| -2 ~ +32 | -2 ~ +32 | X | X | 7 | ||
|
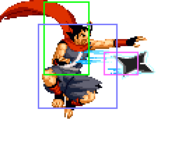
Single shuriken. Not used often as the air version is faster when TK'd or done from a backdash. | ||||||
| C | Damage | Guard | Startup | Active | Recovery | Total |
| 6, 6, 6 | Mid | 18, 22, 27 | / | 40 | 58 | |
| Hit Adv | Block Adv | Cancel on Hit | Cancel on Block | Guard Crush Value | ||
| -2 ~ +37 | -2 ~ +37 | X | X | 5, 5, 5 | ||
|
Triple shuriken. Much longer recovery. | ||||||
| jA/C | Damage | Guard | Startup | Active | Recovery | Total |
| 12 | Mid | 18 | / | 6 + falling + 10 | Minimum 38 | |
| Hit Adv | Block Adv | Cancel on Hit | Cancel on Block | Guard Crush Value | ||
| Up to +32 | Up to +32 | X | X | / | ||
|
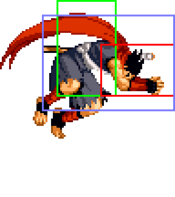
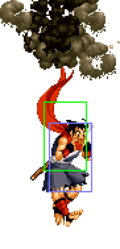
Completely stops Hokutomaru's air momentum and has him slowly fall straight down after. Decent option to try and stuff someone who's gonna jump. | ||||||
Rakkazan (214K)
| B Kyo (Void) |
Damage | Guard | Startup | Active | Recovery | Total |
|---|---|---|---|---|---|---|
| / | / | / | / | 43 | 43 | |
| Hit Adv | Block Adv | Cancel on Hit | Cancel on Block | Guard Crush Value | ||
| / | / | X | X | / | ||
|
Fake-out. Hokutomaru is counterhit punishable.
| ||||||
| D Jitsu (Real) |
Damage | Guard | Startup | Active | Recovery | Total |
| 20 | High | 28 | 3 | 31(hit/whiff) / 46(block) | 62(hit/whiff) / 77(block) | |
| Hit Adv | Block Adv | Cancel on Hit | Cancel on Block | Guard Crush Value | ||
| KD | -22 | X | X | 8 | ||
|
Cheesy homing teleport overhead that carries enormous risk in exchange for just decent reward.
| ||||||
Karakusa Giri (214P)
| A | Damage | Guard | Startup | Active | Recovery | Total |
|---|---|---|---|---|---|---|
| 20 | Mid | 19 | - | - | - | |
| Hit Adv | Block Adv | Cancel on Hit | Cancel on Block | Guard Crush Value | ||
| KD | -10 | - | - | 7 | ||
|
Used in meterless combos. Can GC into this to punish a fireball at footsies range. | ||||||
| A (Hold) | Damage | Guard | Startup | Active | Recovery | Total |
| / | / | / | / | 33 | 33 | |
| Hit Adv | Block Adv | Cancel on Hit | Cancel on Block | Guard Crush Value | ||
| / | / | / | / | / | ||
|
Hold the button input to stop/cancel the attack. Trying to make use of this after a blocked normal still leaves Hokutomaru very minus, but it can be useful to approach a downed opponent while building a bit of meter. | ||||||
| C | Damage | Guard | Startup | Active | Recovery | Total |
| 14, 16 | Mid | 30 | - | - | - | |
| Hit Adv | Block Adv | Cancel on Hit | Cancel on Block | Guard Crush Value | ||
| KD | -18 | - | - | 4, 4 | ||
|
Far too slow to be comboed into practically and is extremely unsafe. | ||||||
| C (Hold) | Damage | Guard | Startup | Active | Recovery | Total |
| / | / | / | / | 40 | 40 | |
| Hit Adv | Block Adv | Cancel on Hit | Cancel on Block | Guard Crush Value | ||
| / | / | / | / | / | ||
|
Hold the button input to stop/cancel the attack. | ||||||
Kuuha Dan (236K)
| B | Damage | Guard | Startup | Active | Recovery | Total |
|---|---|---|---|---|---|---|
| 6, 6, 6 | Mid | 11 | - | - | - | |
| Hit Adv | Block Adv | Cancel on Hit | Cancel on Block | Guard Crush Value | ||
| KD | -12 | X | X | 3, 3, 3 | ||
|
Andy Bogard's signature multihit arcing kick that is very unsafe and not very rewarding.
| ||||||
| B Break | Damage | Guard | Startup | Active | Recovery | Total |
| 6 | Mid | 11 | 2~4 | 18~20 | 31~35 | |
| Hit Adv | Block Adv | Cancel on Hit | Cancel on Block | Guard Crush Value | ||
| KD | +5 | - | - | 3 | ||
|
When braked, this move becomes a plus on block launcher which is very nice, although this version has little range which restricts its use in combos/pressure.
| ||||||
| D | Damage | Guard | Startup | Active | Recovery | Total |
| 7, 7, 7, 7 | Mid | 16 | - | - | - | |
| Hit Adv | Block Adv | Cancel on Hit | Cancel on Block | Guard Crush Value | ||
| KD | -9 | X | X | 3, 3, 3, 3 | ||
|
Travels in a larger arc than the B version and hits an additional time. Each individual hit also does slightly more damage. | ||||||
| D Break | Damage | Guard | Startup | Active | Recovery | Total |
| 7 | Mid | 16 | 2~4 | 18~21 | 36~41 | |
| Hit Adv | Block Adv | Cancel on Hit | Cancel on Block | Guard Crush Value | ||
| KD | +5 | - | - | 3 | ||
|
While slower than the B version, this brake has more damage and range, so it's better for combos when available. | ||||||
Super Moves
Chou Hissatsu Shuriken / Chou Bakuen Kunai (236236A/C)
| A | Damage | Guard | Startup | Active | Recovery | Total |
|---|---|---|---|---|---|---|
| 7, 7, 7, (7,) 15 | Mid | 9 | - | - | - | |
| Hit Adv | Block Adv | Cancel on Hit | Cancel on Block | Guard Crush Value | ||
| HKD (+37 ~ +49) | -34 | - | - | 2×4, 5 | ||
|
Midscreen combo ender.
| ||||||
| A Break | Damage | Guard | Startup | Active | Recovery | Total |
| - | - | - | - | - | - | |
| Hit Adv | Block Adv | Cancel on Hit | Cancel on Block | Guard Crush Value | ||
| - | -34 | - | - | - | ||
|
Pressing A+B will throw the large shuriken earlier. This can be useful to make it hit OTG after an aerial counterhit. | ||||||
| C | Damage | Guard | Startup | Active | Recovery | Total |
| 7, 7, 7, 7, 32 | Mid | 9 | - | - | - | |
| Hit Adv | Block Adv | Cancel on Hit | Cancel on Block | Guard Crush Value | ||
| HKD (+37 ~ +49) | -34 | - | - | 3×5 | ||
| ||||||
| C Break | Damage | Guard | Startup | Active | Recovery | Total |
| - | - | - | - | - | - | |
| Hit Adv | Block Adv | Cancel on Hit | Cancel on Block | Guard Crush Value | ||
| - | -34 | - | - | - | ||
|
Pressing A+B will throw the large kunai earlier. | ||||||
Ougi • Chou Hissatsu Tatsumaki / Kyuukyoku Ougi • Chou Bakuen Tatsumaki (236236B/D)
| B | Damage | Guard | Startup | Active | Recovery | Total |
|---|---|---|---|---|---|---|
| 5×9 | Mid | 1 | - | - | - | |
| Hit Adv | Block Adv | Cancel on Hit | Cancel on Block | Guard Crush Value | ||
| HKD (+38) | -60 | - | - | 2×9 | ||
|
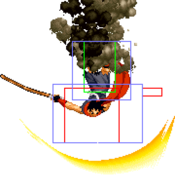
Corner combo ender and Hokutomaru's only invincible reversal. Due to the hitbox being modest, the short length of the invincibility and the damage being spread between many weak hits, when used outside of combos it will often miss many hits and even trade/lose to attacks, limiting its use as a raw reversal or anti-air. It is pretty reliable as a GC, though you may still lose damage.
| ||||||
| D | Damage | Guard | Startup | Active | Recovery | Total |
| 7×10 | Mid | 0 | - | - | - | |
| Hit Adv | Block Adv | Cancel on Hit | Cancel on Block | Guard Crush Value | ||
| KD | -54 | - | - | 3×10 | ||
| ||||||
