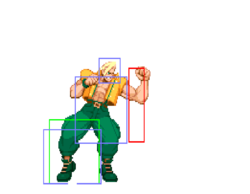
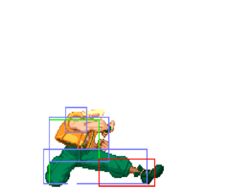
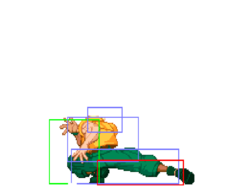
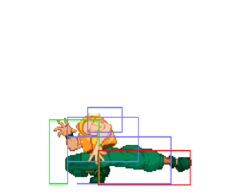
| (71 intermediate revisions by 10 users not shown) | |||
| Line 1: | Line 1: | ||
== | <templatestyles src="CharacterPage-SFA2/styles.css"/> | ||
{{TOClimit}} | |||
{{HiddenTOCHeader | |||
|header= =Overview=}} | |||
{{CharacterOverview-SFA2 | |||
|overview=A member of a secret elite military team, Charlie co-piloted a special mission into Thailand along with his long-time friend Guile. The mission backfired, and Charlie and Guile were captured. After escaping the jungle prison, Charlie now seeks the force behind the unrest in Thailand. | |||
Charlie has an | '''Players to watch:''' [https://www.fightcade.com/id/blazeu25 Blaze], [https://www.fightcade.com/id/OCXRIDAH OCXRIDAH], SketchNYC | ||
<br><br> | |||
<center>'''Moveset'''</center> | |||
<center><div style="width:100%;max-width:450px;"><youtube>blu6EOq1Bv0</youtube></div></center> | |||
<br> | |||
|playstyle=[[File:A2_Icon_Charlie.png|30px]] Charlie, is strong, and can be played aggressively or defensively. 99% of the players you see will be the latter. Though Charlie can be very effective on defense, a well rounded player will learn how to use his entire kit, thus making it harder to adjust to your playstyle. If you can't play him both ways you're bound to run into some problems. So best to try to balance both! | |||
Charlie has an average set of normals, but the best of his buttons are enough to make his character. 2MK is disjointed, fast, and safe. Both of his lights can cancel to Sonic Booms, and make for an excellent option when he's being pressured. Charlie is a 4-Frame character, so he isn't outright immune to frame traps, but you'd be surprised how often he can "mash" his way out of a bad spot.'' | |||
|pros=*Great anti-airs, including AA CC | |||
*Great fireball & zoning | |||
*Good normals with far range | |||
*Great cross-up | |||
*Good supers, especially Sonic Break | |||
*Good CC utillity and range | |||
*Air throw | |||
*Kick AC and air throw lead to an ambiguous mixup | |||
|cons=*Has trouble against jump-in CC | |||
*Slower normals | |||
*Punch AC is one of the worst ACs in the game, both ACs are slow | |||
*Low damage CC | |||
*Slow and punishable overhead, even on hit | |||
*No meterless fully invincible reversals | |||
|name=Charlie | |||
|image=SFA2_Charlie_Portrait.png | |||
|health=144 | |||
|rating=0 | |||
|stun=40 | |||
|fSpeed=337.5 | |||
|bSpeed=250 | |||
|bJump=49f (3+46+0) | |||
|nJump=49f (3+46+0) | |||
|fJump=49f (3+46+0) | |||
|wakeupNormal=47f | |||
|wakeupQuick=20f | |||
|throw=16 | |||
|colorsName=Charlie | |||
|old=no | |||
}} | |||
{{HiddenTOCHeader | |||
|header= =Move List=}} | |||
== Normal Moves == | |||
<center>{{FrameDataKey-SFA2 | |||
|credit=Damage, stun, framedata, meter, and updated hitboxes collected by [[File:A2_Icon_ChunLi.png]][[User:Veri7as|Veri7as]], August 2022 | |||
}}</center> | |||
===Standing=== | |||
{{MoveData-SFA2 | |||
|image=A2_Charlie_st.lp.png | |||
|imageSize=250px | |||
|caption= | |||
|name= | |||
|subtitle= | |||
|input=st.[[File:Lp.png]] | |||
|data= | |||
{{AttackData-SFA2 | |||
|Damage= 5<sup>[0]</sup> | |||
|Stun= 3 | |||
|Startup= 4 | |||
|Active= 4 | |||
|Frame Adv= +4 | |||
|Meter= 0/1/2 | |||
|Block=[[File:Mid.png]] | |||
|Properties=[[File:Rpdfire.png]][[File:Chaincancel.png]]<br>[[File:Specialcancel.png]][[File:Supercancel.png]] | |||
}} | |||
|description=*Can rapid fire into itself or chain cancelled into: st.{{lk}}, cr.{{lp}} & cr.{{lk}}. | |||
Nothing too special about this, can AA sometimes and you can st.lp walking pressure on whoever can't duck this. | |||
}} | |||
{{MoveData-SFA2 | |||
|image=A2_Charlie_st.mp_1.png | |||
|imageSize=250px | |||
|image2=A2_Charlie_st.mp_2.png | |||
|imageSize2=250px | |||
|caption= | |||
|name= | |||
|subtitle= | |||
|input=st.[[File:Mp.png]] | |||
|data= | |||
{{AttackData-SFA2 | |||
|Damage= 9<sup>[1]</sup>, 7<sup>[1]</sup> | |||
|Stun= 6, 6 | |||
|Startup= 5 | |||
|Active= 2(0)6 | |||
|Frame Adv= -5 | |||
|Meter= 1/3/6 | |||
|Block=[[File:Mid.png]] | |||
|Properties=[[File:Specialcancel.png]]<br>[[File:Supercancel.png]] | |||
}} | |||
|description=*Hits 1 time. | |||
*Both hits are cancellable. | |||
A really good anti-air, he does a quick uppercut. Cancel this into a Sonic Boom to keep up pressure. I usually cancel into a {{lp}} Boom if I AA with this. | |||
Can be linked from either st.lp or cr.lp.}} | |||
{{MoveData-SFA2 | |||
|image=A2_Charlie_st.hp.png | |||
|imageSize=250px | |||
|caption= | |||
|name= | |||
|subtitle= | |||
|input=st.[[File:Hp.png]] | |||
|data= | |||
{{AttackData-SFA2 | |||
|Damage= 14<sup>[2]</sup> | |||
|Stun= 8 | |||
|Startup= 8 | |||
|Active= 4 | |||
|Frame Adv= -2 | |||
|Meter= 2/5/9 | |||
|Block=[[File:Mid.png]] | |||
|Properties= - | |||
}} | |||
|description= | |||
}} | |||
{{MoveData-SFA2 | |||
|image=A2_Charlie_st.lk.png | |||
|imageSize=250px | |||
|caption= | |||
|name= | |||
|subtitle= | |||
|input=st.[[File:Lk.png]] | |||
|data= | |||
{{AttackData-SFA2 | |||
|Damage= 6<sup>[0]</sup> | |||
|Stun= 3 | |||
|Startup= 7 | |||
|Active= 4 | |||
|Frame Adv= -4 | |||
|Meter= 0/1/2 | |||
|Block=[[File:Mid.png]] | |||
|Properties=[[File:Specialcancel.png]]<br>[[File:Supercancel.png]] | |||
}} | |||
|description= A quick kick to the shin. Use this rarely, seems to have decent priority but no range. | |||
}} | |||
{{MoveData-SFA2 | |||
|image=A2_Charlie_st.mk.png | |||
|imageSize=250px | |||
|caption= | |||
|name= | |||
|subtitle= | |||
|input=st.[[File:Mk.png]] | |||
|data= | |||
{{AttackData-SFA2 | |||
|Damage= 10<sup>[1]</sup> | |||
|Stun= 6 | |||
|Startup= 7 | |||
|Active= 5 | |||
|Frame Adv= -13 | |||
|Meter= 1/3/6 | |||
|Block=[[File:Mid.png]] | |||
|Properties=[[File:Specialcancel.png]]<br>[[File:Supercancel.png]] | |||
}} | |||
|description= Another great anti-air when your opponent jumps in fram afar. | |||
}} | |||
{{MoveData-SFA2 | |||
|image=A2_Charlie_st.hk_1.png | |||
|imageSize=250px | |||
|image2=A2_Charlie_st.hk_2.png | |||
|imageSize2=250px | |||
|caption= | |||
|name= | |||
|subtitle= | |||
|input=st.[[File:Hk.png]] | |||
|data= | |||
{{AttackData-SFA2 | |||
|Damage= 14<sup>[2]</sup>, 13<sup>[2]</sup> | |||
|Stun= 8, 8 | |||
|Startup= 9 | |||
|Active= 5(0)3 | |||
|Frame Adv= -1 | |||
|Meter= 2/5/9 | |||
|Block=[[File:Mid.png]] | |||
|Properties= [[File:Supercancel.png]] | |||
}} | |||
|description= *First hit is super cancellable. | |||
*Hits 1 time. | |||
Angled kick which is good as an anti-air, same uses as st.mk with a little more power behind it. | |||
}} | |||
===Crouching=== | |||
{{MoveData-SFA2 | |||
|image=A2_Charlie_cr.lp.png | |||
|imageSize=250px | |||
|caption= | |||
|name= | |||
|subtitle= | |||
|input=cr.[[File:Lp.png]] | |||
|data= | |||
{{AttackData-SFA2 | |||
|Damage= 5<sup>[0]</sup> | |||
|Stun= 3 | |||
|Startup= 4 | |||
|Active= 4 | |||
|Frame Adv= +4 | |||
|Meter= 0/1/2 | |||
|Block=[[File:Mid.png]] | |||
|Properties=[[File:Rpdfire.png]][[File:Chaincancel.png]]<br>[[File:Specialcancel.png]][[File:Supercancel.png]] | |||
}} | |||
|description=*Can rapid fire into itself or chain cancelled into: st.{{lp}}, st.{{lk}} & cr.{{lk}}. | |||
This is your combo starter. Combo's easily into Sonic Booms, flash kicks, supers. | |||
}} | |||
{{MoveData-SFA2 | |||
|image=A2_Charlie_cr.mp.png | |||
|imageSize=250px | |||
|caption= | |||
|name= | |||
|subtitle= | |||
|input=cr.[[File:Mp.png]] | |||
|data= | |||
{{AttackData-SFA2 | |||
|Damage= 9<sup>[1]</sup> | |||
|Stun= 6 | |||
|Startup= 7 | |||
|Active= 6 | |||
|Frame Adv= +1 | |||
|Meter= 1/3/6 | |||
|Block=[[File:Mid.png]] | |||
|Properties=[[File:Specialcancel.png]]<br>[[File:Supercancel.png]] | |||
}} | |||
|description= Limited anti-air ability, better to stick with your other choices. Good to cancel into Sonic Boom for pressure or use in combos. Seems to have ok priority, slower compared to other character's cr.mp. | |||
}} | |||
{{MoveData-SFA2 | |||
|image=A2_Charlie_cr.hp.png | |||
|imageSize=250px | |||
|caption= | |||
|name= | |||
|subtitle= | |||
|input=cr.[[File:Hp.png]] | |||
|data= | |||
{{AttackData-SFA2 | |||
|Damage= 13<sup>[2]</sup> | |||
|Stun= 8 | |||
|Startup= 6 | |||
|Active= 1 | |||
|Frame Adv= -10 | |||
|Meter= 2/5/9 | |||
|Block=[[File:Mid.png]] | |||
|Properties= - | |||
}} | |||
|description= Probably top ten useless normals in A2. It has ONE active frame. Looks like Guile's godly cr.fp from other games but gets beat by everything. | |||
}} | |||
{{MoveData-SFA2 | |||
<br> | |image=A2_Charlie_cr.lk.png | ||
|imageSize=250px | |||
|caption= | |||
|name= | |||
|subtitle= | |||
|input=cr.[[File:Lk.png]] | |||
|data= | |||
{{AttackData-SFA2 | |||
|Damage= 5<sup>[0]</sup> | |||
|Stun= 3 | |||
|Startup= 4 | |||
|Active= 4 | |||
|Frame Adv= 0 | |||
|Meter= 0/1/2 | |||
|Block=[[File:Low.png]] | |||
|Properties=[[File:Specialcancel.png]]<br>[[File:Supercancel.png]] | |||
}} | |||
|description= Cancels easily into booms and supers. Decent range, good to walk up and poke with this. | |||
}} | |||
{{MoveData-SFA2 | |||
|image=A2_Charlie_cr.mk.png | |||
|imageSize=250px | |||
|caption= | |||
|name= | |||
|subtitle= | |||
|input=cr.[[File:Mk.png]] | |||
|data= | |||
{{AttackData-SFA2 | |||
|Damage= 9<sup>[1]</sup> | |||
|Stun= 1 | |||
|Startup= 6 | |||
|Active= 5 | |||
|Frame Adv= -3 | |||
|Meter= 1/3/6 | |||
|Block=[[File:Low.png]] | |||
|Properties= - | |||
}} | |||
|description= His best ground all-purpose poke. Great range, speed, and hits low. Quite annoying when playing a Charlie player because this move can very effectively keep you out due to its range. | |||
}} | |||
{{MoveData-SFA2 | |||
|image=A2_Charlie_cr.hk.png | |||
|imageSize=250px | |||
|caption= | |||
|name= | |||
|subtitle= | |||
|input=cr.[[File:Hk.png]] | |||
|data= | |||
{{AttackData-SFA2 | |||
|Damage= 12<sup>[2]</sup> | |||
|Stun= 8 | |||
|Startup= 10 | |||
|Active= 4 | |||
|Frame Adv= -9 | |||
|Meter= 2/5/9 | |||
|Block=[[File:Low.png]] | |||
|Properties=[[File:Softknockdown.png]] | |||
}} | |||
|description= Slow start and long recovery. Mainly for long range punishes. | |||
}} | |||
===Neutral Jumping=== | |||
{{MoveData-SFA2 | |||
< | |image=A2_Charlie_nj.lp.png | ||
== | |imageSize=250px | ||
|caption= | |||
|name= | |||
|subtitle= | |||
|input=nj.[[File:Lp.png]] | |||
|data= | |||
{{AttackData-SFA2 | |||
|Damage= 7<sup>[0]</sup> | |||
|Stun= 3 | |||
|Startup= 4 | |||
|Active= 10 | |||
|Frame Adv= | |||
|Meter= 0/1/2 | |||
|Block=[[File:High.png]] | |||
|Properties= | |||
}} | |||
|description= | |||
}} | |||
=== | {{MoveData-SFA2 | ||
< | |image=A2_Charlie_nj.mp.png | ||
|imageSize=250px | |||
|caption= | |||
|name= | |||
|subtitle= | |||
|input=nj.[[File:Mp.png]] | |||
|data= | |||
{{AttackData-SFA2 | |||
|Damage= 10<sup>[1]</sup> | |||
|Stun= 6 | |||
|Startup= 10 | |||
|Active= 8 | |||
|Frame Adv= | |||
|Meter= 1/3/6 | |||
|Block=[[File:High.png]] | |||
|Properties= | |||
}} | |||
|description= | |||
}} | |||
{{MoveData-SFA2 | |||
|image=A2_Charlie_nj.hp.png | |||
|imageSize=250px | |||
|caption= | |||
|name= | |||
|subtitle= | |||
|input=nj.[[File:Hp.png]] | |||
|data= | |||
{{AttackData-SFA2 | |||
|Damage= 11<sup>[2]</sup> | |||
|Stun= 8 | |||
|Startup= 7 | |||
|Active= 6 | |||
|Frame Adv= | |||
|Meter= 2/5/9 | |||
|Block=[[File:High.png]] | |||
|Properties= | |||
}} | |||
|description= | |||
}} | |||
{{MoveData-SFA2 | |||
|image=A2_Charlie_nj.lk.png | |||
|imageSize=250px | |||
|caption= | |||
|name= | |||
|subtitle= | |||
|input=nj.[[File:Lk.png]] | |||
|data= | |||
{{AttackData-SFA2 | |||
|Damage= 7<sup>[0]</sup> | |||
|Stun= 3 | |||
|Startup= 5 | |||
|Active= 10 | |||
|Frame Adv= | |||
|Meter= 0/1/2 | |||
|Block=[[File:High.png]] | |||
|Properties= | |||
}} | |||
|description= | |||
}} | |||
{{MoveData-SFA2 | |||
|image=A2_Charlie_nj.mk.png | |||
|imageSize=250px | |||
|caption= | |||
|name= | |||
|subtitle= | |||
|input=nj.[[File:Mk.png]] | |||
|data= | |||
{{AttackData-SFA2 | |||
|Damage= 10<sup>[1]</sup> | |||
|Stun= 6 | |||
|Startup= 9 | |||
|Active= 8 | |||
|Frame Adv= | |||
|Meter= 1/3/6 | |||
|Block=[[File:High.png]] | |||
|Properties= | |||
}} | |||
|description= | |||
}} | |||
{{MoveData-SFA2 | |||
|image=A2_Charlie_nj.hk.png | |||
|imageSize=250px | |||
|caption= | |||
|name= | |||
|subtitle= | |||
|input=nj.[[File:Hk.png]] | |||
|data= | |||
{{AttackData-SFA2 | |||
|Damage= 11<sup>[2]</sup> | |||
|Stun= 8 | |||
|Startup= 7 | |||
|Active= 6 | |||
|Frame Adv= | |||
|Meter= 2/5/9 | |||
|Block=[[File:High.png]] | |||
|Properties= | |||
}} | |||
|description= | |||
}} | |||
===Diagonal Jumping=== | |||
{{MoveData-SFA2 | |||
|image=A2_Charlie_dj.lp.png | |||
|imageSize=250px | |||
|caption= | |||
|name= | |||
|subtitle= | |||
|input=dj.[[File:Lp.png]] | |||
|data= | |||
{{AttackData-SFA2 | |||
|Damage= 7<sup>[0]</sup> | |||
|Stun= 3 | |||
|Startup= 4 | |||
|Active= 10 | |||
|Frame Adv= | |||
|Meter= 0/1/2 | |||
|Block=[[File:High.png]] | |||
|Properties= | |||
}} | |||
|description= | |||
}} | |||
{{MoveData-SFA2 | |||
|image=A2_Charlie_dj.mp.png | |||
|imageSize=250px | |||
|caption= | |||
|name= | |||
|subtitle= | |||
|input=dj.[[File:Mp.png]] | |||
|data= | |||
{{AttackData-SFA2 | |||
|Damage= 10<sup>[1]</sup> | |||
|Stun= 6 | |||
|Startup= 10 | |||
|Active= 8 | |||
|Frame Adv= | |||
|Meter= 1/3/6 | |||
|Block=[[File:High.png]] | |||
|Properties= | |||
}} | |||
|description= | |||
}} | |||
{{MoveData-SFA2 | |||
|image=A2_Charlie_dj.hp.png | |||
|imageSize=250px | |||
|caption= | |||
|name= | |||
|subtitle= | |||
|input=dj.[[File:Hp.png]] | |||
|data= | |||
{{AttackData-SFA2 | |||
|Damage= 11<sup>[2]</sup> | |||
|Stun= 8 | |||
|Startup= 7 | |||
|Active= 6 | |||
|Frame Adv= | |||
|Meter= 2/5/9 | |||
|Block=[[File:High.png]] | |||
|Properties= | |||
}} | |||
|description= His best air-to-air, this move is great, good priority, speed, and if done close as an air-to-air you get a throw. | |||
}} | |||
{{MoveData-SFA2 | |||
|image=A2_Charlie_dj.lk.png | |||
|imageSize=250px | |||
|caption= | |||
|name= | |||
|subtitle= | |||
|input=dj.[[File:Lk.png]] | |||
|data= | |||
{{AttackData-SFA2 | |||
|Damage= 7<sup>[0]</sup> | |||
|Stun= 3 | |||
|Startup= 4 | |||
|Active= 10 | |||
|Frame Adv= | |||
|Meter= 0/1/2 | |||
|Block=[[File:High.png]] | |||
|Properties= | |||
}} | |||
|description= | |||
}} | |||
{{MoveData-SFA2 | |||
< | |image=A2_Charlie_dj.mk.png | ||
|imageSize=250px | |||
|caption= | |||
|name= | |||
|subtitle= | |||
|input=dj.[[File:Mk.png]] | |||
|data= | |||
{{AttackData-SFA2 | |||
|Damage= 10<sup>[1]</sup> | |||
|Stun= 6 | |||
|Startup= 9 | |||
|Active= 8 | |||
|Frame Adv= | |||
|Meter= 1/3/6 | |||
|Block=[[File:High.png]] | |||
|Properties= Cross-up | |||
}} | |||
|description= Great range on this jump-in and an amazing cross-up. | |||
}} | |||
{{MoveData-SFA2 | |||
|image=A2_Charlie_dj.hk.png | |||
|imageSize=250px | |||
|caption= | |||
|name= | |||
|subtitle= | |||
|input=dj.[[File:Hk.png]] | |||
|data= | |||
{{AttackData-SFA2 | |||
|Damage= 11<sup>[2]</sup> | |||
|Stun= 1 | |||
|Startup= 7 | |||
|Active= 6 | |||
|Frame Adv= | |||
|Meter= 2/5/9 | |||
|Block=[[File:High.png]] | |||
|Properties= | |||
}} | |||
|description= Great jump-in, good priority, awesome angle and amazing range. | |||
}} | |||
== Command Normals == | |||
{{MoveData-SFA2 | |||
|image=A2_Charlie_f.hp.png | |||
|imageSize=250px | |||
|caption= | |||
|name= Spin Back Knuckle | |||
|subtitle= | |||
|input=[[File:F.png]] + [[File:Hp.png]] | |||
|data= | |||
{{AttackData-SFA2 | |||
|Damage= 12<sup>[1]</sup> | |||
|Stun= 10 | |||
|Startup= 13 | |||
|Active= 6 | |||
|Frame Adv= -5 | |||
|Meter= 2/5/8 | |||
|Block=[[File:Mid.png]] | |||
|Properties= | |||
}} | |||
|description= This normal is best used as a anti-jump. Good in the corner when doing Sonic Boom pressure, toss it out if you think they will try to jump out of the corner. | |||
}} | |||
''' | {{MoveData-SFA2 | ||
|image=A2_Charlie_f.mk.png | |||
|imageSize=250px | |||
|caption= | |||
|name= Jump Sobat | |||
|subtitle= Overhead | |||
|input=[[File:B.png]]/[[File:F.png]] + [[File:Mk.png]] | |||
|data= | |||
{{AttackData-SFA2 | |||
|Damage= 9<sup>[1]</sup> | |||
|Stun= 6 | |||
|Startup= 29 | |||
|Active= 4 | |||
|Frame Adv= -7 | |||
|Meter= 1/3/6 | |||
|Block=[[File:High.png]] | |||
|Properties= [[File:Lowerbodyinv.png]] | |||
}} | |||
|description=*'''Punishable on hit.''' | |||
Slow overhead that's unsafe even on hit. Use at max range to be left at a safer distance. | |||
}} | |||
{{MoveData-SFA2 | |||
|image=A2_Charlie_f.hk.png | |||
|imageSize=250px | |||
|caption= | |||
|name= Step Kick | |||
|subtitle= | |||
|input=[[File:B.png]]/[[File:F.png]] + [[File:Hk.png]] | |||
|data= | |||
{{AttackData-SFA2 | |||
|Damage= 10<sup>[1]</sup> | |||
|Stun= 8 | |||
|Startup= 14 | |||
|Active= 4 | |||
|Frame Adv= -4 | |||
|Meter= 2/5/9 | |||
|Block=[[File:Mid.png]] | |||
|Properties= | |||
}} | |||
|description= This is his forward moving hop kick. Good range, but slow in this game. Very useful for moving forward after a sonic boom. | |||
}} | |||
== | == Normal Throws == | ||
{{MoveData-SFA2 | |||
* | |image=A2_Charlie_ThrowRange.png | ||
|imageSize=250px | |||
|image2=A2_Charlie_PThrow_1.png | |||
|imageSize2=250px | |||
|image3=A2_Charlie_PThrow_2.png | |||
|imageSize3=250px | |||
|caption= | |||
|name=Dragon Suplex | |||
|subtitle=Punch Throw | |||
|input=[[File:B.png]]/[[File:F.png]] + [[File:Mp.png]]/[[File:Hp.png]] | |||
|data= | |||
{{AttackData-SFA2 | |||
|Damage= 18<sup>[0]</sup> | |||
|Stun= 0 | |||
|Startup= 1 | |||
|Active= N/A | |||
|Frame Adv= N/A | |||
|Meter= -/-/3 | |||
|Block= N/A | |||
|Properties= [[File:Throw.png]]<br>[[File:Hardknockdown.png]] | |||
}} | |||
|description= *Deals full damage even when opponent tech throws. | |||
*Charlie has below average throw range ([[Street_Fighter_Alpha_2/System#Regular_Throw_Ranges|Alpha2ThrowRanges]]). | |||
}} | |||
{{MoveData-SFA2 | |||
* | |image=A2_Charlie_ThrowRange.png | ||
** | |imageSize=250px | ||
|image2=A2_Charlie_KThrow_1.png | |||
|imageSize2=250px | |||
|image3=A2_Charlie_KThrow_2.png | |||
|imageSize3=250px | |||
|caption= | |||
|name=Knee Gatling | |||
|subtitle=Kick Throw | |||
|input=[[File:B.png]]/[[File:F.png]] + [[File:Mk.png]]/[[File:Hk.png]] | |||
|data= | |||
{{AttackData-SFA2 | |||
|Damage= 10<sup>[0]</sup>+1<sup>[0]</sup>xN = 12-16 | |||
|Stun= 0 | |||
|Startup= 1 | |||
|Active= N/A | |||
|Frame Adv= N/A | |||
|Meter= -/-/3 | |||
|Block= N/A | |||
|Properties= [[File:Throw.png]][[File:Mash.png]]<br>[[File:Hardknockdown.png]] | |||
}} | |||
|description= *Mashable throw from both sides to add or reduce the number of hits. With a min of 2 and a max of 6 hits. | |||
*Does not side switch. | |||
*Deals 11 damage when opponent tech throws. | |||
*Charlie has below average throw range ([[Street_Fighter_Alpha_2/System#Regular_Throw_Ranges|Alpha2ThrowRanges]]). | |||
}} | |||
{{MoveData-SFA2 | |||
|image=A2_Charlie_AirThrowRange.png | |||
|imageSize=250px | |||
|image2=A2_Charlie_AirThrow_1.png | |||
|imageSize2=250px | |||
|image3=A2_Charlie_AirThrow_2.png | |||
|imageSize3=250px | |||
|caption= | |||
|name=Flying Buster Drop | |||
|subtitle=Air Throw | |||
|input=(in air)[[File:B.png]]/[[File:F.png]] + [[File:Mk.png]]/[[File:Hk.png]] | |||
|data= | |||
{{AttackData-SFA2 | |||
|Damage= 18<sup>[0]</sup> | |||
|Stun= 0 | |||
|Startup= 1 | |||
|Active= N/A | |||
|Frame Adv= N/A | |||
|Meter= -/-/5 | |||
|Block= N/A | |||
|Properties= [[File:Airthrow.png]]<br>[[File:Hardknockdown.png]] | |||
}} | |||
|description= *Does not side switch. | |||
*Deals full damage even when opponent tech throws. | |||
}} | |||
== | == Alpha Counters == | ||
{{MoveData-SFA2 | |||
|image=A2_Charlie_PAC.png | |||
* | |imageSize=250px | ||
|caption= | |||
|name=Punch Alpha Counter | |||
|subtitle= | |||
|input=(while in blockstun)[[File:Qcd.png]]+ [[File:P.png]] | |||
|data= | |||
{{AttackData-SFA2 | |||
|Damage= 14<sup>[1]</sup> | |||
|Stun= 8 | |||
|Startup= 19 | |||
|Active= 6 | |||
|Frame Adv= +3 | |||
|Meter= 0/0/0 | |||
|Block=[[File:Mid.png]] | |||
|Properties= [[File:Startupinv.png]]<br>[[File:Hardknockdown.png]] | |||
}} | |||
|description= *Sends the opponent flying 3/4ths screen. | |||
The slowest AC in the game. Can't think of a time when it should ever be used over Kick AC. | |||
}} | |||
{{MoveData-SFA2 | |||
|image=A2_Charlie_KAC.png | |||
|imageSize=250px | |||
|caption= | |||
|name=Kick Alpha Counter | |||
|subtitle= | |||
|input=(while in blockstun)[[File:Qcd.png]]+ [[File:K.png]] | |||
|data= | |||
{{AttackData-SFA2 | |||
|Damage= 11<sup>[2]</sup> | |||
|Stun= 8 | |||
|Startup= 9 | |||
|Active= 4 | |||
|Frame Adv= -9 | |||
|Meter= 0/0/0 | |||
|Block=[[File:Mid.png]] | |||
|Properties= [[File:Startupinv.png]]<br>[[File:Hardknockdown.png]] | |||
}} | |||
|description= Slower than most ACs in the game, but still better in every way to his Punch AC. It's good for ground attacks and can act as an anti-air. It's hard-knockdown sets up for a great ambiguous cross-up {{mk}}. | |||
}} | |||
== | == Special Moves == | ||
{{MoveData-SFA2 | |||
|image=A2_Charlie_Boom_1.png | |||
|imageSize=250px | |||
|image2=A2_Charlie_Boom_2.png | |||
|imageSize2=250px | |||
|caption= | |||
|name=Sonic Boom | |||
|subtitle=Fireball | |||
|input=[[File:Cb.png]][[File:F.png]] + [[File:P.png]] | |||
|data= | |||
{{AttackData-SFA2 | |||
|version=[[File:Lp.png]] | |||
|Damage= 11<sup>[6]</sup>, 9<sup>[6]</sup> | |||
|Stun= 1, 1 | |||
|Startup= 9 | |||
|Active= 3(0)inf | |||
|Frame Adv= -1 | |||
|Meter= 5/6/8 | |||
|Block=[[File:Mid.png]] | |||
|Properties=[[File:Proj.png]] | |||
}} | |||
{{AttackData-SFA2 | |||
|header= no | |||
|version=[[File:Mp.png]] | |||
|Damage= 12<sup>[7]</sup>, 10<sup>[7]</sup> | |||
|Stun= 1, 1 | |||
|Startup= 9 | |||
|Active= 3(0)inf | |||
|Frame Adv= -1 | |||
|Meter= 5/6/8 | |||
|Block=[[File:Mid.png]] | |||
|Properties=[[File:Proj.png]] | |||
}} | |||
{{AttackData-SFA2 | |||
|header= no | |||
|version=[[File:Hp.png]] | |||
|Damage= 13<sup>[9]</sup>, 11<sup>[9]</sup> | |||
|Stun= 1, 1 | |||
|Startup= 9 | |||
|Active= 3(0)inf | |||
|Frame Adv= -1 | |||
|Meter= 5/6/8 | |||
|Block=[[File:Mid.png]] | |||
|Properties=[[File:Proj.png]] | |||
}} | |||
|description=The best fireball in terms of start up and recovery, and a key part of zoning and pressure with Charlie. This is very hard to punish and with good charging techniques you can keep up a while in a fireball war vs. Shotos. This isn't as good as later games since at point blank it doesn't leave you with frame advantage, but still allows for combos from certain ranges. | |||
*Requires a charge time of 60 frames. | |||
----- | |||
{{lp}} | |||
*Speed: 300 pixels per 100 frames; slowest fireball in the game ([https://srk.shib.live/w/Street_Fighter_Alpha_2/System#Fireballs Alpha2Fireballs]). | |||
----- | |||
{{mp}} | |||
*Speed: 375 pixels per 100 frames ([https://srk.shib.live/w/Street_Fighter_Alpha_2/System#Fireballs Alpha2Fireballs]). | |||
----- | |||
{{hp}} | |||
*Speed: 450 pixels per 100 frames; 4th fastest fireball in the game ([https://srk.shib.live/w/Street_Fighter_Alpha_2/System#Fireballs Alpha2Fireballs]). | |||
}} | |||
{{MoveData-SFA2 | |||
|image=A2_Charlie_FlashKick_1.png | |||
|imageSize=250px | |||
|image2=A2_Charlie_FlashKick_2.png | |||
|imageSize2=250px | |||
|caption= | |||
|name=Somersault Shell | |||
|subtitle=Flash Kick | |||
|input=[[File:Cd.png]][[File:U.png]] + [[File:K.png]] | |||
|data= | |||
{{AttackData-SFA2 | |||
|version=[[File:Lk.png]] | |||
|Damage= 17<sup>[7]</sup>, 17<sup>[7]</sup> | |||
|Stun= 8, 8 | |||
|Startup= 5 | |||
|Active= 5(0)1 | |||
|Frame Adv= -31 | |||
|Meter= 9/12/16 | |||
|Block=[[File:Mid.png]] | |||
|Properties=[[File:Startupinv.png]][[File:Upperbodyinv.png]]<br>[[File:Lowerbodyinv.png]][[File:Softknockdown.png]] | |||
}} | |||
{{AttackData-SFA2 | |||
|header= no | |||
|version=[[File:Mk.png]] | |||
|Damage= 18<sup>[8]</sup> | |||
|Stun= 10 | |||
|Startup= 5 | |||
|Active= 9 | |||
|Frame Adv= -36 | |||
|Meter= 9/12/16 | |||
|Block=[[File:Mid.png]] | |||
|Properties=[[File:Startupinv.png]][[File:Lowerbodyinv.png]]<br>[[File:Softknockdown.png]] | |||
}} | |||
{{AttackData-SFA2 | |||
|header= no | |||
|version=[[File:Hk.png]] | |||
|Damage= 17<sup>[10]</sup>, 5<sup>[10]</sup>, 5<sup>[10]</sup> | |||
|Stun= 6, 6, 6 | |||
|Startup= 5 | |||
|Active= 4(0)4(2)2 | |||
|Frame Adv= -31 | |||
|Meter= 9/9+3 per hit/9+7 per hit | |||
|Block=[[File:Mid.png]] | |||
|Properties=[[File:Startupinv.png]][[File:Lowerbodyinv.png]]<br>[[File:Softknockdown.png]] | |||
}} | |||
|description= *Requires a charge time of 60 frames. | |||
*'''Unscaled damage in CC.''' | |||
----- | |||
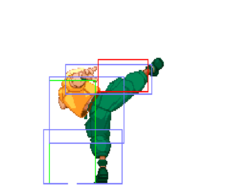
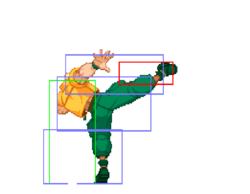
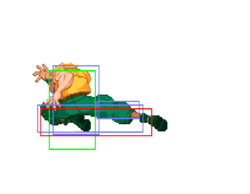
{{lk}} - ''[Hitboxes pictured]'' | |||
*4 frames of startup invul; 0 of which while active; followed by 2 frames of upper invul.; followed by lower invul. | |||
* Can't be air-blocked until frame 6. | |||
*Hits 1 time max. | |||
One of the best anit-airs in the game, easily beating jump-ins. But can be CC'd through and punished. | |||
----- | |||
{{mk}} | |||
*4 frames of startup invul; 0 of which while active; followed by low invul. | |||
* Can't be air-blocked until frame 6. | |||
*'''Punishable on hit.''' | |||
Best used against grounded opponents at mid range or up close, otherwise the second hit will miss and not knock down the opponent. Can be punished on hit with quick rise CC by characters that have CC starters that can reach. | |||
----- | |||
{{hk}} | |||
*4 frames of startup invul; 0 of which while active; followed by low invul. | |||
* Can't be air-blocked until frame 6. | |||
*Hits 2 times max. | |||
*'''Punishable on hit.''' | |||
Best used against grounded opponents up close. Can be punished on hit with quick rise CC by characters that have CC starters that can reach. | |||
}} | |||
=== | == Super Moves == | ||
Startup Invulnerability Notes: | |||
*At the end of a super screen freeze, projectiles will start moving before the opponent's character is unfrozen, giving the supers more projectile invul. frames than hit invul. frames. | |||
{{MoveData-SFA2 | |||
|image=A2_Charlie_BoomSuper_1.png | |||
|imageSize=250px | |||
|image2=A2_Charlie_BoomSuper_2.png | |||
|imageSize2=250px | |||
|image3=A2_Charlie_BoomSuper_3.png | |||
|imageSize3=250px | |||
|caption= | |||
|name=Sonic Break | |||
|subtitle=Sonic Boom Super | |||
|input=[[File:Cb.png]][[File:F.png]] [[File:B.png]][[File:F.png]] + [[File:P.png]], [[File:P.png]] | |||
|data= | |||
{{AttackData-SFA2 | |||
|version= Level 1 | |||
|subtitle= [[File:P.png]] | |||
|Damage= [17<sup>[12]</sup>, 17<sup>[12]</sup>] per boom | |||
|Stun= [1, 1] per boom | |||
|Startup= 5+0 | |||
|Active= [3(0)inf] per boom | |||
|Frame Adv= -35, -1 | |||
|Meter= 0/0/0 | |||
|Block=[[File:Mid.png]] | |||
|Properties=[[File:Startupinv.png]]<br>[[File:Proj.png]] | |||
}} | |||
{{AttackData-SFA2 | |||
|header= no | |||
|version= Level 2 | |||
|subtitle= [[File:P.png]][[File:P.png]] | |||
|Damage= [15<sup>[12]</sup>, 15<sup>[12]</sup>] per boom | |||
|Stun= [1, 1] per boom | |||
|Startup= 5+0 | |||
|Active= [3(0)inf] per boom | |||
|Frame Adv= -35, -31, +3 | |||
|Meter= 0/0/0 | |||
|Block=[[File:Mid.png]] | |||
|Properties=[[File:Startupinv.png]]<br>[[File:Proj.png]] | |||
}} | |||
{{AttackData-SFA2 | |||
|header= no | |||
|version= Level 3 | |||
|subtitle= [[File:3p.png]] | |||
|Damage= [16<sup>[12]</sup>, 16<sup>[12]</sup>] per boom | |||
|Stun= [1, 1] per boom | |||
|Startup= 5+0 | |||
|Active= [3(0)inf] per boom | |||
|Frame Adv= -35, -31, -21, -2 | |||
|Meter= 0/0/0 | |||
|Block=[[File:Mid.png]] | |||
|Properties=[[File:Startupinv.png]]<br>[[File:Proj.png]] | |||
}} | |||
|description= Very useful super since it seems the first sonic boom comes out no matter what, which means at worst it will trade making it a very reliable AA. As far as chip goes, I would just CC. Good to push opponents back, you can delay booms by spacing the punch input. | |||
*Requires a charge time of 60 frames. | |||
*Press any punch to throw additional booms. | |||
*'''Cannot be air blocked.''' | |||
----- | |||
{{AttackColor-SF | |||
|strength=light | |||
|content=Level 1}} - ''[Hitboxes pictured]'' | |||
*4 frames of startup hit invul.; 0 of which while active. | |||
*8 frames of startup projectile invul. | |||
*Throw up to 2 booms. | |||
----- | |||
{{AttackColor-SF | |||
|strength=medium | |||
|content=Level 2}} | |||
*5 frames of startup hit invul.; 1 of which while active. | |||
*11 frames of startup projectile invul. | |||
*Throw up to 3 booms. | |||
----- | |||
{{AttackColor-SF | |||
|strength=heavy | |||
|content=Level 3}} | |||
*5 frames of startup hit invul.; 1 of which while active. | |||
*14 frames of startup projectile invul. | |||
*Throw up to 4 booms. | |||
}} | |||
{{MoveData-SFA2 | |||
|image=A2_Charlie_KickSuper_1.png | |||
|imageSize=250px | |||
|image2=A2_Charlie_KickSuper_2.png | |||
|imageSize2=250px | |||
|image3=A2_Charlie_KickSuper_3.png | |||
|imageSize3=250px | |||
|image4=A2_Charlie_KickSuper_4.png | |||
|imageSize4=250px | |||
|caption= | |||
|name=Crossfire Blitz | |||
|subtitle=Kick Super | |||
|input=[[File:Cb.png]][[File:F.png]] [[File:B.png]][[File:F.png]] + [[File:K.png]] | |||
|data= | |||
{{AttackData-SFA2 | |||
|version= Level 1 | |||
|subtitle= [[File:K.png]] | |||
|Damage= 10<sup>[13]</sup>, 8<sup>[13]</sup>, 6<sup>[13]</sup>, 6<sup>[0]</sup> | |||
|Stun= 0x4 | |||
|Startup= 6+0 | |||
|Active= 3(4)4(16)2(10)3 | |||
|Frame Adv= +4 | |||
|Meter= 0/0/0 | |||
|Block=[[File:Mid.png]] | |||
|Properties=[[File:Startupinv.png]]<br>[[File:Hardknockdown.png]] | |||
}} | |||
{{AttackData-SFA2 | |||
|header= no | |||
|version= Level 2 | |||
|subtitle= [[File:K.png]][[File:K.png]] | |||
|Damage= 10<sup>[13]</sup>, 8<sup>[13]</sup>, 6<sup>[13]</sup>, 6<sup>[13]</sup>, 9<sup>[13]</sup> | |||
|Stun= 0, 0, 1x3 | |||
|Startup= 6+0 | |||
|Active= 3(4)4(16)2(6)6(14)4 | |||
|Frame Adv= -3 | |||
|Meter= 0/0/0 | |||
|Block=[[File:Mid.png]] | |||
|Properties=[[File:Startupinv.png]] | |||
}} | |||
{{AttackData-SFA2 | |||
|header= no | |||
|version= Level 3 | |||
|subtitle= [[File:3k.png]] | |||
|Damage= 15<sup>[13]</sup>, 12<sup>[13]</sup>, 7<sup>[13]</sup>, 7<sup>[13]</sup>, 9<sup>[13]</sup>, 12<sup>[13]</sup> | |||
|Stun= 0x4, 1, 1 | |||
|Startup= 6+0 | |||
|Active= 3(4)4(16)2(6)6(12)4(10)8 | |||
|Frame Adv= -11 | |||
|Meter= 0/0/0 | |||
|Block=[[File:Mid.png]] | |||
|Properties=[[File:Startupinv.png]]<br>[[File:Hardknockdown.png]] | |||
}} | |||
|description= This is the super you want to combo into, decent damage and combos off of light attacks at any level. | |||
*Requires a charge time of 60 frames. | |||
----- | |||
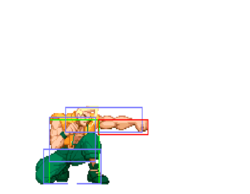
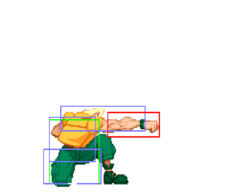
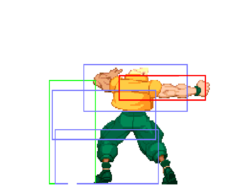
{{AttackColor-SF | |||
|strength=light | |||
|content=Level 1}} - ''[Hitboxes pictured]'' | |||
*5 frames of startup hit invul.; 0 of which while active. | |||
*5 frames of startup projectile invul. | |||
*Hits 4 times. | |||
If done in the corner, can be followed up with Somersault Justice. | |||
----- | |||
{{AttackColor-SF | |||
|strength=medium | |||
|content=Level 2}} | |||
*5 frames of startup hit invul.; 0 of which while active. | |||
*5 frames of startup projectile invul. | |||
*Hits 5 times. | |||
----- | |||
{{AttackColor-SF | |||
|strength=heavy | |||
|content=Level 3}} | |||
*5 frames of startup hit invul.; 0 of which while active. | |||
*5 frames of startup projectile invul. | |||
*Hits 6 times. | |||
}} | |||
=== | {{MoveData-SFA2 | ||
|image=A2_Charlie_FlashKickSuper_1.png | |||
|imageSize=250px | |||
|image2=A2_Charlie_FlashKickSuper_2.png | |||
|imageSize2=250px | |||
|caption= | |||
|name=Somersault Justice | |||
|subtitle=Flash Kick Super | |||
|input=[[File:Cdb.png]][[File:Df.png]] [[File:Db.png]][[File:Uf.png]] + [[File:K.png]] | |||
|data= | |||
{{AttackData-SFA2 | |||
|version= Level 1 | |||
|subtitle= [[File:K.png]] | |||
|Damage= 8<sup>[14]</sup>, 5<sup>[14]</sup>, 3<sup>[14]</sup>, 7<sup>[14]</sup>, 3<sup>[14]</sup>, 3<sup>[14]</sup> | |||
|Stun= 0x3, 1x3 | |||
|Startup= 6+0 | |||
|Active= 14(16)14 | |||
|Frame Adv= -24 | |||
|Meter= 0/0/0 | |||
|Block=[[File:Mid.png]] | |||
|Properties=[[File:Startupinv.png]][[File:Lowerbodyinv.png]]<br>[[File:Hardknockdown.png]] | |||
}} | |||
{{AttackData-SFA2 | |||
|header= no | |||
|version= Level 2 | |||
|subtitle= [[File:K.png]][[File:K.png]] | |||
|Damage= 11<sup>[14]</sup>, 8<sup>[14]</sup>, 4<sup>[14]</sup>, 10<sup>[14]</sup>, 4<sup>[14]</sup>, 4<sup>[14]</sup> | |||
|Stun= 0x3, 1x3 | |||
|Startup= 6+0 | |||
|Active= 14(16)14 | |||
|Frame Adv= -39 | |||
|Meter= 0/0/0 | |||
|Block=[[File:Mid.png]] | |||
|Properties=[[File:Startupinv.png]]<br>[[File:Hardknockdown.png]] | |||
}} | |||
{{AttackData-SFA2 | |||
|header= no | |||
|version= Level 3 | |||
|subtitle= [[File:3k.png]] | |||
|Damage= 13<sup>[14]</sup>, 8<sup>[14]</sup>, 8<sup>[14]</sup>, 12<sup>[14]</sup>, 7<sup>[14]</sup>, 4<sup>[14]</sup>, 10<sup>[14]</sup>, 3<sup>[14]</sup>, 3<sup>[14]</sup> | |||
|Stun= 0x6, 1x3 | |||
|Startup= 6+0 | |||
|Active= 14(16)14(16)14 | |||
|Frame Adv= -39 | |||
|Meter= 0/0/0 | |||
|Block=[[File:Mid.png]] | |||
|Properties=[[File:Startupinv.png]]<br>[[File:Hardknockdown.png]] | |||
}} | |||
|description= The motion gives a lot of people trouble though. I find the best way to do super Flash Kick type motions is to charge {{db}}, then do a {{tkb}} + {{k}}. When comboed you usually miss hits making it weaker to combo into than Blitz after a cross-up, but looks better. Unless going for chip or style points, stay away from this super unless comboing from a jump in (which gets all the hits). | |||
*Requires a charge time of 60 frames. | |||
*The last input can be any up direction ({{ub}}, {{u}}, or {{uf}}). | |||
----- | |||
{{AttackColor-SF | |||
|strength=light | |||
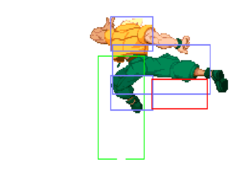
|content=Level 1}} - ''[Hitboxes pictured]'' | |||
*5 frames of startup hit invul.; 0 of which while active. | |||
*9 frames of startup projectile invul. | |||
*Hits 6 times. | |||
----- | |||
{{AttackColor-SF | |||
|strength=medium | |||
|content=Level 2}} | |||
*6 frames of startup hit invul.; 1 of which while active. | |||
*13 frames of startup projectile invul. | |||
*Hits 6 times. | |||
----- | |||
{{AttackColor-SF | |||
|strength=heavy | |||
|content=Level 3}} | |||
*7 frames of startup hit invul.; 2 of which while active. | |||
*17 frames of startup projectile invul. | |||
*Hits 9 times. | |||
}} | |||
=The Basics= | |||
----- | |||
===== What does Charlie want? ===== | |||
Shades of Guile, Charlie Nash wants to set the pace. | |||
In a vacuum, Alpha 2's zoning shouldn't be that good. Chip is relatively low, projectiles are nerfed, and Custom Combos counter typical keep away strategies. Charlie, like Rolento, is a dangerous outlier. | |||
Charlie has fast disjointed normals, an incredible projectile, [https://wiki.supercombo.gg/w/Street_Fighter_Alpha_2/Charlie#Super_Moves Sonic Break], and among the best anti-airs in the game. While Sonic Boom can keep up with fireballs, Charlie shines when he's poking and baiting his opponent into mistakes at midscreen. Exclusively using Flash Kick as an Anti-Air isn't just inefficient, it's unrealistic. Opponents have other methods of approach, and every jump with meter can be a deadly CC activation. 5MP xx Meaty Sonic Boom, 5MK or 5HK are all great options. | |||
=== | Charlie absolutely crushes impatient opponents. Your job is to get them there. | ||
{{Content Box-SFA2 | |||
|padding=yes | |||
|header= | |||
|content= === Charge Techniques === | |||
This | This section is important to learn fo any SF game, if you use a charge character. This is quick charging, the most effective way to maximie your charge time. Perform every sonic boom in this way: | ||
charge b-f-b | charge b-f-b+p | ||
Instead of the normal motion you execute the sonic boom ending in back+punch. This allows you to start harging for the next boom immeadiately after throwing he next one. | |||
===Sonic Boom, Sonic Boom, *pause* Sonic boom...=== | === Sonic Boom, Sonic Boom, *pause* Sonic boom... === | ||
Using the quick charge technique explained earlier, this can be very effective versus some characters. As soon as they block a boom throw another one, use different speeds. Just keep booming as fast as possible, you are doing it right if as soon as a Sonic Boom is blocked, one is coming out. this builds meter very quickly and can force your opponent to jump, eating a CC. When they get jump happy, ocassionally pause, if they jump, CC, normal AA, or Flash kick. Rinse repeat. | Using the quick charge technique explained earlier, this can be very effective versus some characters. As soon as they block a boom throw another one, use different speeds. Just keep booming as fast as possible, you are doing it right if as soon as a Sonic Boom is blocked, one is coming out. this builds meter very quickly and can force your opponent to jump, eating a CC. When they get jump happy, ocassionally pause, if they jump, CC, normal AA, or Flash kick. Rinse repeat. | ||
===Patternizing: A no-no=== | === Patternizing: A no-no === | ||
Alot of Charlie players I noticed will patternize a hell of a lot more than with other characters. 80-90% of them will boom after a c.mk. Don't do that shit. Mix up your poke string as well as you can, otherwise you are gonna get countered easily. Ever play someone and kick their ass, but about 3-4 matches down the road you are having a hard time or losing? You are probably doing a lot of patterns they caught on to. Like in the corner, you throw a sonic boom, most people follow up with a c.MK or c.RH. They almost always do. They other options they had were: | Alot of Charlie players I noticed will patternize a hell of a lot more than with other characters. 80-90% of them will boom after a c.mk. Don't do that shit. Mix up your poke string as well as you can, otherwise you are gonna get countered easily. Ever play someone and kick their ass, but about 3-4 matches down the road you are having a hard time or losing? You are probably doing a lot of patterns they caught on to. Like in the corner, you throw a sonic boom, most people follow up with a c.MK or c.RH. They almost always do. They other options they had were: | ||
| Line 143: | Line 1,162: | ||
Now the situation is gonna dictate the action, but its better than just c.MK or c.RH. You are just gonna get AC'd. Mix it up. | Now the situation is gonna dictate the action, but its better than just c.MK or c.RH. You are just gonna get AC'd. Mix it up. | ||
}} | |||
=== | =Advanced Strategy= | ||
----- | |||
{{Content Box-SFA2 | |||
|padding=yes | |||
|header= | |||
|content= === Sonic boom, SOMERSAULT!!! === | |||
This way of performing a sonic boom allows for the execution of a flash kick about a tenth of a second later after throwing the boom. You can actually flash kick while the boom is on screen. Perform it in this way: | |||
charge b-f-b-db-d-df+lp | |||
So after charging you go foward, back, then roll to down foward+lp. Hit up and kick a tenth of a second later and a flash kick will come out. neat huh? | |||
}} | |||
All these can be done after a cross up MK: | =Combos= | ||
----- | |||
{{Content Box-SFA2 | |||
|padding=yes | |||
|header= | |||
|content=All these can be done after a cross up MK: | |||
*cr.LP x2, cr.LK xx Sonic Soom | *cr.LP x2, cr.LK xx Sonic Soom | ||
| Line 158: | Line 1,189: | ||
*cr.LP x2, cr.LK xx any level Sonic Blitz (or Somersualt Justice) | *cr.LP x2, cr.LK xx any level Sonic Blitz (or Somersualt Justice) | ||
== | <div style="width:100%;max-width:450px;"><youtube>LdJu65wNKSE</youtube></div> | ||
<div style="width:100%;max-width:450px;"><youtube>xY7YlLUvGFY</youtube></div> | |||
}} | |||
===Level 1 | =Custom Combos= | ||
----- | |||
{{Content Box-SFA2 | |||
|padding=yes | |||
|header= | |||
|content='''Level 1''' | |||
*cr.HK xx LK Flash Kick, HP Sonic Boom xx HK Flash Kick | *cr.HK xx LK Flash Kick, HP Sonic Boom xx HK Flash Kick | ||
*cr.HK xx HK Flash Kick x2 | *cr.HK xx HK Flash Kick x2 | ||
For chip and/or block: | |||
This CC is really good because you can walk behind these unlike other chip ccs. Walk behind these and go for a counter hit, overhead, or throw. Make sure to start out with c.rh, cause if they do get hit they get juggled. | This CC is really good because you can walk behind these unlike other chip ccs. Walk behind these and go for a counter hit, overhead, or throw. Make sure to start out with c.rh, cause if they do get hit they get juggled. | ||
| Line 171: | Line 1,209: | ||
*cr.HK xx lp sonic boom x4 | *cr.HK xx lp sonic boom x4 | ||
'''Level 2''' | |||
cr.HK xx hk flash kick x 3 | cr.HK xx hk flash kick x 3 | ||
'''Level 3''' | |||
*cr.HK xx LK Flash Kick x3, MK Flash Kick, HK Flash Kick | *cr.HK xx LK Flash Kick x3, MK Flash Kick, HK Flash Kick | ||
*cr.HK xx LK Flash Kick, HK Flash Kick x3 | *cr.HK xx LK Flash Kick, HK Flash Kick x3 | ||
'''Anti-Air Custom Combos''' | |||
Now these are very important, specifically to punish people who look to jump after a sonic boom, also allow you to walk after a boom and punish hard, since they arent worried about a charged flash kick. Now in most cases they can jump to where if you try to AA you will get beat, mainly wen theyare looking to jump immediately after a boom. That when you hit'em with AA CC. | Now these are very important, specifically to punish people who look to jump after a sonic boom, also allow you to walk after a boom and punish hard, since they arent worried about a charged flash kick. Now in most cases they can jump to where if you try to AA you will get beat, mainly wen theyare looking to jump immediately after a boom. That when you hit'em with AA CC. | ||
| Line 191: | Line 1,229: | ||
Now hit them with this a couple times and Im sure they will think twice about jumping | Now hit them with this a couple times and Im sure they will think twice about jumping | ||
Charlie: | |||
lvl 1- c.rh xx lk fk, hp sb, hk fk | |||
lvl 1- c.rh xx hk fk x2 | |||
lvl 2- c.rh xx hk fk x3 | |||
lvl 3- c.rh xx hk fk x2, lk fk, hk fk | |||
lvl 3- c.rh xx lk fk x3, mk fk, hk fk | |||
= | <div style="width:100%;max-width:450px;"><youtube>wCc0v2NaZYQ</youtube></div> | ||
}} | |||
=== | = Match-ups = | ||
----- | |||
{{MatchUp-SFA2 | |||
|padding=yes | |||
|header=[[File:A2_Icon_Adon.png]] '''Vs. Adon:''' | |||
|content=[Loading match-up info...] | |||
}} | |||
{{MatchUp-SFA2 | |||
|padding=yes | |||
|header=[[File:A2_Icon_Akuma.png]] '''Vs. Akuma:''' | |||
|content=For akuma’s air fireball, try jumping straight up and hitting akuma with forward or fierce. you should be able to s. shell his jump in fierce. if you want to do more damage, try doing cc that goes something like s. strong, repeated short s. shells. it does good damage. you can also custom through his air fireball(also ground fireball if you have at least lv. 2). charlie has lots of anti airs like standing strong, standing forward, standing roundhouse, or jump up fierce. if you try to punch alpha counter with charlie, make sure the jump in isn’t really deep. otherwise, the alpha counter will whiff. i like to use standing forwards and roundhouse as anti air. and another thing, watch out for smart opponent who like to jump in custom. they will try to mistime their jump to tempt into s. shell so they can custom through and hurt you. if you smell a custom, let them waste their whole meter. | |||
}} | |||
=== | {{MatchUp-SFA2 | ||
|padding=yes | |||
|header=[[File:A2_Icon_Birdie.png]] '''Vs. Birdie:''' | |||
|content=[Loading match-up info...] | |||
}} | |||
=== | {{MatchUp-SFA2 | ||
|padding=yes | |||
|header=[[File:A2_Icon_Charlie.png]] '''Vs. Charlie-Nash (mirror):''' | |||
|content=[Loading match-up info...] | |||
}} | |||
=== | {{MatchUp-SFA2 | ||
|padding=yes | |||
|header=[[File:A2_Icon_ChunLi.png]] '''Vs. Chun-Li:''' | |||
|content=Chun-Li vs. Charlie is what you call a total mismatch. Charlie can’t jump against Chun, he gets out projectiled, don’t even compare CCs, and Chun li can jump in on Charlie when he sonic booms from fair distance without being punished. You can try forward shell kick to beat her ground moves and never jump on her. Against Chun, you should try to build up to level 3 so you can CC through her Kikoken. I cannot stress enough not to jump against Chun. She will keep you away with kikokens and if you do jump, just jump straight up or just block. You are going to lose if you keep jumping against her because she can and will counter you cleanly everytime by low roundhouse. | |||
}} | |||
=== | {{MatchUp-SFA2 | ||
|padding=yes | |||
|header=[[File:A2_Icon_Dan.png]] '''Vs. Dan:''' | |||
|content=[Loading match-up info...] | |||
}} | |||
=== | {{MatchUp-SFA2 | ||
|padding=yes | |||
|header=[[File:A2_Icon_Dhalsim.png]] '''Vs. Dhalsim:''' | |||
|content=[Loading match-up info...] | |||
}} | |||
=== | {{MatchUp-SFA2 | ||
|padding=yes | |||
|header=[[File:A2_Icon_Akuma.png]] '''Vs. Evil Ryu:''' | |||
|content=Against shotos, just sit back and throw sonic booms all day and try to hit them with sonic break super when they fireball. If they do close fireball, just block and alpha counter it to push them back. If you manage to kick AC, always follow up with jump forward cross-up into a combo/throw attempt. Sometimes if you see a fireball coming from long range, jump in with roundhouse. It has a long reach, charlie loses when either he starts jumping carelessly or if you let shotos cross you up all over. So just keep them out! | |||
}} | |||
=== | {{MatchUp-SFA2 | ||
|padding=yes | |||
|header=[[File:A2_Icon_Gen.png]] '''Vs. Gen:''' | |||
|content=[Loading match-up info...] | |||
}} | |||
=== | {{MatchUp-SFA2 | ||
|padding=yes | |||
|header=[[File:A2_Icon_Guy.png]] '''Vs. Guy:''' | |||
|content=[Loading match-up info...] | |||
}} | |||
=== | {{MatchUp-SFA2 | ||
|padding=yes | |||
|header=[[File:A2_Icon_Ken.png]] '''Vs. Ken:''' | |||
|content=Against shotos, just sit back and throw sonic booms all day and try to hit them with sonic break super when they fireball. If they do close fireball, just block and alpha counter it to push them back. If you manage to kick AC, always follow up with jump forward cross-up into a combo/throw attempt. Sometimes if you see a fireball coming from long range, jump in with roundhouse. It has a long reach, charlie loses when either he starts jumping carelessly or if you let shotos cross you up all over. So just keep them out! | |||
}} | |||
=== | {{MatchUp-SFA2 | ||
|padding=yes | |||
|header=[[File:A2_Icon_Bison.png]] '''Vs. M. Bison (dictator):''' | |||
|content=[Loading match-up info...] | |||
}} | |||
=== | {{MatchUp-SFA2 | ||
|padding=yes | |||
|header=[[File:A2_Icon_Rolento.png]] '''Vs. Rolento:''' | |||
|content=[Loading match-up info...] | |||
}} | |||
=== | {{MatchUp-SFA2 | ||
|padding=yes | |||
|header=[[File:A2_Icon_Rose.png]] '''Vs. Rose:''' | |||
|content=The way Charlie can counter Rose’s low strong is either kick AC or push CC after Rose misses. I think CCing her whiffed low strong is the key. Rose doesn’t have too many ways to reverse AC except her soul spark super. Her standing forward is resilient towards a lot of ground based kick ACs such as Ryu’s and Charlie’s because when she does her standing forward, she is off the ground (similiar to Birdie’s low forward). | |||
Rose can basically stand at Charlie’s face and absord sonic booms or punch AC when Charlie sticks out something. Or she can just low strong when she wants to play conservative. If charlie jumps in, Rose can low fierce xx lv. 1 aura soul throw. Or push illusion and as Charlie jump in, do her slide so that Charlie lands on it then low fierce into roundhouse drill. Ouch? | |||
{{ | Obviously, this is a fight where Rose is clearly at an advantage. There are some thing that Charlie can do. | ||
CC her whiffed low strong. This is hard but this will greatly increase your chances. Or simply walk within her range and try to kick AC her. If Rose just sits there, Rose is probably waiting for a chance to punch AC…a throw attempt might be useful at close range. You must try to beat the low strong which is difficult for Charlie. | |||
Jump in with CC through her low fierce. | |||
Sonic break super when you think Rose will try reflect so that she gets hit by 2nd sonic boom. If she ever misses a reflect in close range, CC her immediately. | |||
kick AC her illusion powered drill on the last hit. then try for a cross up combo/cheap. if you do it too early, you will trade hits. | |||
}} | |||
{{MatchUp-SFA2 | |||
|padding=yes | |||
|header=[[File:A2_Icon_Ryu.png]] '''Vs. Ryu:''' | |||
|content=Against shotos, just sit back and throw sonic booms all day and try to hit them with sonic break super when they fireball. If they do close fireball, just block and alpha counter it to push them back. If you manage to kick AC, always follow up with jump forward cross-up into a combo/throw attempt. Sometimes if you see a fireball coming from long range, jump in with roundhouse. It has a long reach, charlie loses when either he starts jumping carelessly or if you let shotos cross you up all over. So just keep them out! | |||
}} | |||
{{MatchUp-SFA2 | |||
|padding=yes | |||
|header=[[File:A2_Icon_Sagat.png]] '''Vs. Sagat:''' | |||
|content=[Loading match-up info...] | |||
}} | |||
{{MatchUp-SFA2 | |||
|padding=yes | |||
|header=[[File:A2_Icon_Sakura.png]] '''Vs. Sakura:''' | |||
|content=[Loading match-up info...] | |||
}} | |||
{{MatchUp-SFA2 | |||
|padding=yes | |||
|header=[[File:A2_Icon_Sodom.png]] '''Vs. Sodom:''' | |||
|content=[Loading match-up info...] | |||
}} | |||
{{MatchUp-SFA2 | |||
|padding=yes | |||
|header=[[File:A2_Icon_Zangief.png]] '''Vs. Zangief:''' | |||
|content=[Loading match-up info...] | |||
}} | |||
{{Navbox-SFA2}} | |||
[[Category:Charlie]] | |||
[[Category:Street Fighter Alpha Series]] | [[Category:Street Fighter Alpha Series]] | ||
[[Category:Street Fighter Alpha 2]] | [[Category:Street Fighter Alpha 2]] | ||
Latest revision as of 19:00, 13 June 2025
| Charlie | |
|---|---|

| |
| Health: | 144 |
| Defensive Rating: | 0 |
| Stun: | 40 |
| Walk Speed Forward: | 337.5 |
| Walk Speed Backward: | 250 |
| Jump Backward: | 49f (3+46+0) |
| Neutral Backward: | 49f (3+46+0) |
| Jump Forward: | 49f (3+46+0) |
| Wake-Up: | 47f |
| Quick Rise: | 20f |
| Throw Range: | 16 |
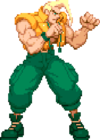
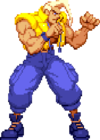
A member of a secret elite military team, Charlie co-piloted a special mission into Thailand along with his long-time friend Guile. The mission backfired, and Charlie and Guile were captured. After escaping the jungle prison, Charlie now seeks the force behind the unrest in Thailand.
Players to watch: Blaze, OCXRIDAH, SketchNYC
Normal Moves
| SFA2 Framedata Glossary | |
|---|---|
| Damage |
Units of base damage inflicted by the move (100% life bar = 144 units of health). Most moves have a damage range; the number inside the square brackets indicates which Random Damage Table the move uses to look up any additional damage and the % chance of doing so. |
| Stun |
Units of stun inflicted by the move. |
| Startup |
The frame the move hits on (1st active frame). Super moves with a screen freeze will separate pre- and post-screen freeze startup frames by a '+' (Ex: 5+0). |
| Active |
The portion of a move that can hit. How many frames a move remains active for. ()=Inactive frames in-between active frames. [xN]=Repeated sequences. |
| Frame Adv |
The frame advantage values when the attack is blocked. (Add +1 frame to all OnBlockAdv values for the move's OnHitAdv value; Ex: +2oB/+3oH, -4oB/-3oH) |
| Meter |
The units of meter gained on whiff/block/hit. (48, 96, and 144 units of meter are required for 1, 2, and 3 bars of meter respectively) |
| Block |
Low attacks must be blocked crouching. High attacks must be blocked standing. Mid attacks can be blocked either way. |
| Properties |
|
| Frames |
All framedata collected with the game speed set to normal, where the game tickrate and framerate are the same(60fps). |
| Speed |
All framedata collected with the game speed set to normal. |
| Hitboxes |
All hitbox images have the character standing/jumping in the exact same position, so hitbox distances can be easily compared.
|
| Credit | Damage, stun, framedata, meter, and updated hitboxes collected by |
Standing
| Damage | Stun | Startup | Active | Frame Adv | Meter | Block | Properties |
|---|---|---|---|---|---|---|---|
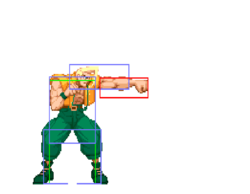
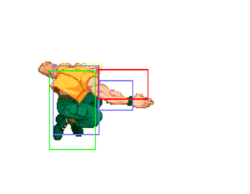
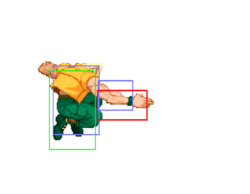
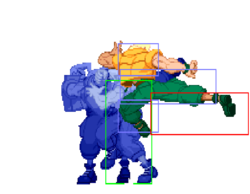
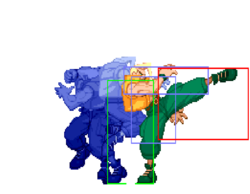
| 9[1], 7[1] | 6, 6 | 5 | 2(0)6 | -5 | 1/3/6 |
- Hits 1 time.
- Both hits are cancellable.
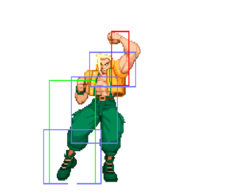
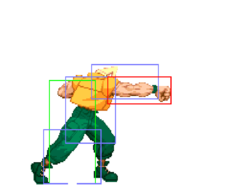
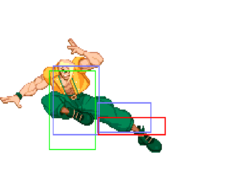
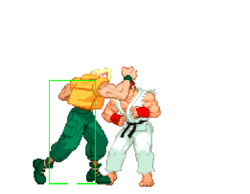
A really good anti-air, he does a quick uppercut. Cancel this into a Sonic Boom to keep up pressure. I usually cancel into a ![]() Boom if I AA with this.
Can be linked from either st.lp or cr.lp.
Boom if I AA with this.
Can be linked from either st.lp or cr.lp.
Crouching
Neutral Jumping
Diagonal Jumping
Command Normals
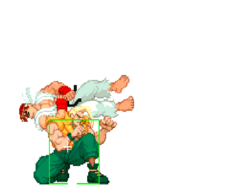
Normal Throws
| Damage | Stun | Startup | Active | Frame Adv | Meter | Block | Properties |
|---|---|---|---|---|---|---|---|
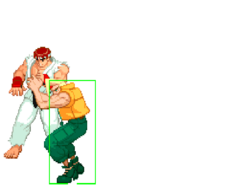
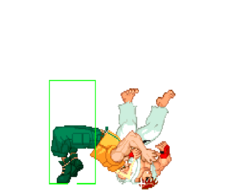
| 18[0] | 0 | 1 | N/A | N/A | -/-/3 | N/A |
- Deals full damage even when opponent tech throws.
- Charlie has below average throw range (Alpha2ThrowRanges).
| Damage | Stun | Startup | Active | Frame Adv | Meter | Block | Properties |
|---|---|---|---|---|---|---|---|
| 10[0]+1[0]xN = 12-16 | 0 | 1 | N/A | N/A | -/-/3 | N/A |
- Mashable throw from both sides to add or reduce the number of hits. With a min of 2 and a max of 6 hits.
- Does not side switch.
- Deals 11 damage when opponent tech throws.
- Charlie has below average throw range (Alpha2ThrowRanges).
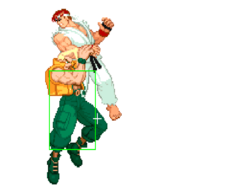
Flying Buster Drop
Air Throw
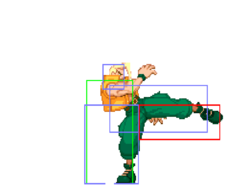
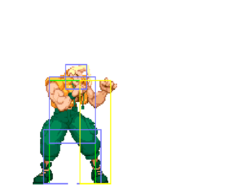
(in air)![]() /
/![]() +
+ ![]() /
/![]()
Alpha Counters
Punch Alpha Counter
(while in blockstun)![]() +
+ ![]()
Kick Alpha Counter
(while in blockstun)![]() +
+ ![]()
Special Moves
| Version | Damage | Stun | Startup | Active | Frame Adv | Meter | Block | Properties |
|---|---|---|---|---|---|---|---|---|
| 11[6], 9[6] | 1, 1 | 9 | 3(0)inf | -1 | 5/6/8 | |||
| 12[7], 10[7] | 1, 1 | 9 | 3(0)inf | -1 | 5/6/8 | |||
| 13[9], 11[9] | 1, 1 | 9 | 3(0)inf | -1 | 5/6/8 |
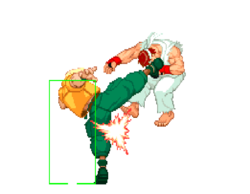
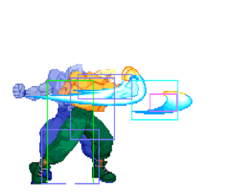
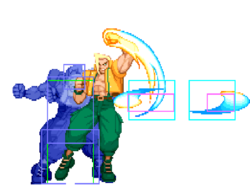
The best fireball in terms of start up and recovery, and a key part of zoning and pressure with Charlie. This is very hard to punish and with good charging techniques you can keep up a while in a fireball war vs. Shotos. This isn't as good as later games since at point blank it doesn't leave you with frame advantage, but still allows for combos from certain ranges.
- Requires a charge time of 60 frames.
![]()
- Speed: 300 pixels per 100 frames; slowest fireball in the game (Alpha2Fireballs).
![]()
- Speed: 375 pixels per 100 frames (Alpha2Fireballs).
![]()
- Speed: 450 pixels per 100 frames; 4th fastest fireball in the game (Alpha2Fireballs).
- Requires a charge time of 60 frames.
- Unscaled damage in CC.
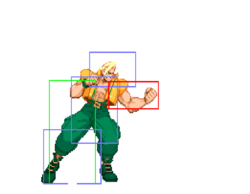
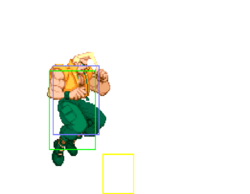
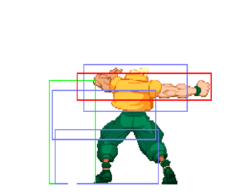
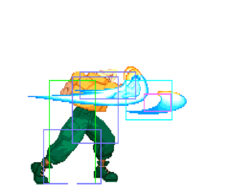
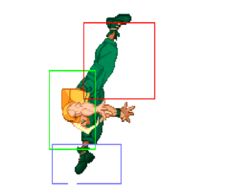
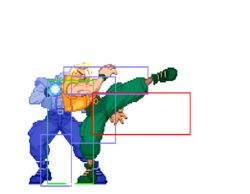
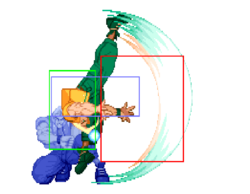
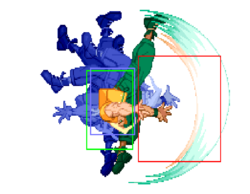
![]() - [Hitboxes pictured]
- [Hitboxes pictured]
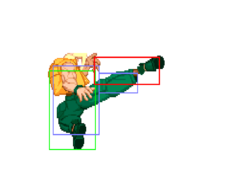
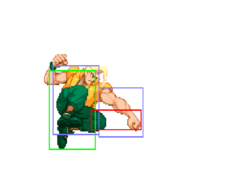
- 4 frames of startup invul; 0 of which while active; followed by 2 frames of upper invul.; followed by lower invul.
- Can't be air-blocked until frame 6.
- Hits 1 time max.
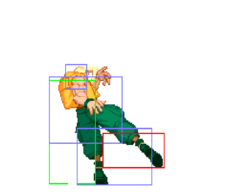
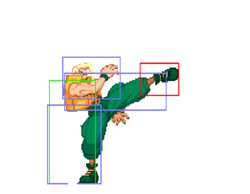
One of the best anit-airs in the game, easily beating jump-ins. But can be CC'd through and punished.
![]()
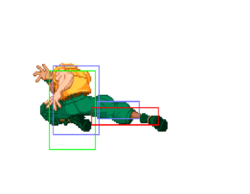
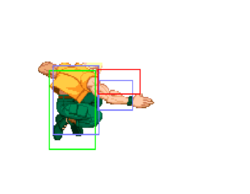
- 4 frames of startup invul; 0 of which while active; followed by low invul.
- Can't be air-blocked until frame 6.
- Punishable on hit.
Best used against grounded opponents at mid range or up close, otherwise the second hit will miss and not knock down the opponent. Can be punished on hit with quick rise CC by characters that have CC starters that can reach.
![]()
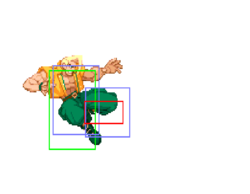
- 4 frames of startup invul; 0 of which while active; followed by low invul.
- Can't be air-blocked until frame 6.
- Hits 2 times max.
- Punishable on hit.
Best used against grounded opponents up close. Can be punished on hit with quick rise CC by characters that have CC starters that can reach.
Super Moves
Startup Invulnerability Notes:
- At the end of a super screen freeze, projectiles will start moving before the opponent's character is unfrozen, giving the supers more projectile invul. frames than hit invul. frames.
Sonic Break
Sonic Boom Super![]()
![]()
![]()
![]() +
+ ![]() ,
, ![]()
Very useful super since it seems the first sonic boom comes out no matter what, which means at worst it will trade making it a very reliable AA. As far as chip goes, I would just CC. Good to push opponents back, you can delay booms by spacing the punch input.
- Requires a charge time of 60 frames.
- Press any punch to throw additional booms.
- Cannot be air blocked.
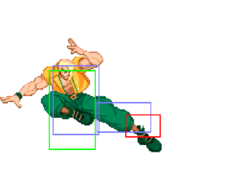
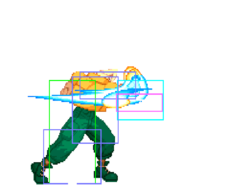
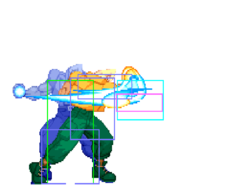
Level 1 - [Hitboxes pictured]
- 4 frames of startup hit invul.; 0 of which while active.
- 8 frames of startup projectile invul.
- Throw up to 2 booms.
Level 2
- 5 frames of startup hit invul.; 1 of which while active.
- 11 frames of startup projectile invul.
- Throw up to 3 booms.
Level 3
- 5 frames of startup hit invul.; 1 of which while active.
- 14 frames of startup projectile invul.
- Throw up to 4 booms.
This is the super you want to combo into, decent damage and combos off of light attacks at any level.
- Requires a charge time of 60 frames.
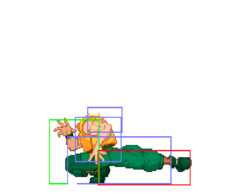
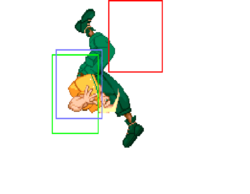
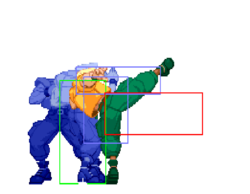
Level 1 - [Hitboxes pictured]
- 5 frames of startup hit invul.; 0 of which while active.
- 5 frames of startup projectile invul.
- Hits 4 times.
If done in the corner, can be followed up with Somersault Justice.
Level 2
- 5 frames of startup hit invul.; 0 of which while active.
- 5 frames of startup projectile invul.
- Hits 5 times.
Level 3
- 5 frames of startup hit invul.; 0 of which while active.
- 5 frames of startup projectile invul.
- Hits 6 times.
Somersault Justice
Flash Kick Super![]()
![]()
![]()
![]() +
+ ![]()
The motion gives a lot of people trouble though. I find the best way to do super Flash Kick type motions is to charge ![]() , then do a
, then do a ![]() +
+ ![]() . When comboed you usually miss hits making it weaker to combo into than Blitz after a cross-up, but looks better. Unless going for chip or style points, stay away from this super unless comboing from a jump in (which gets all the hits).
. When comboed you usually miss hits making it weaker to combo into than Blitz after a cross-up, but looks better. Unless going for chip or style points, stay away from this super unless comboing from a jump in (which gets all the hits).
- Requires a charge time of 60 frames.
- The last input can be any up direction (
 ,
,  , or
, or  ).
).
Level 1 - [Hitboxes pictured]
- 5 frames of startup hit invul.; 0 of which while active.
- 9 frames of startup projectile invul.
- Hits 6 times.
Level 2
- 6 frames of startup hit invul.; 1 of which while active.
- 13 frames of startup projectile invul.
- Hits 6 times.
Level 3
- 7 frames of startup hit invul.; 2 of which while active.
- 17 frames of startup projectile invul.
- Hits 9 times.
The Basics
What does Charlie want?
Shades of Guile, Charlie Nash wants to set the pace.
In a vacuum, Alpha 2's zoning shouldn't be that good. Chip is relatively low, projectiles are nerfed, and Custom Combos counter typical keep away strategies. Charlie, like Rolento, is a dangerous outlier.
Charlie has fast disjointed normals, an incredible projectile, Sonic Break, and among the best anti-airs in the game. While Sonic Boom can keep up with fireballs, Charlie shines when he's poking and baiting his opponent into mistakes at midscreen. Exclusively using Flash Kick as an Anti-Air isn't just inefficient, it's unrealistic. Opponents have other methods of approach, and every jump with meter can be a deadly CC activation. 5MP xx Meaty Sonic Boom, 5MK or 5HK are all great options.
Charlie absolutely crushes impatient opponents. Your job is to get them there.
Charge Techniques
This section is important to learn fo any SF game, if you use a charge character. This is quick charging, the most effective way to maximie your charge time. Perform every sonic boom in this way:
charge b-f-b+p
Instead of the normal motion you execute the sonic boom ending in back+punch. This allows you to start harging for the next boom immeadiately after throwing he next one.
Sonic Boom, Sonic Boom, *pause* Sonic boom...
Using the quick charge technique explained earlier, this can be very effective versus some characters. As soon as they block a boom throw another one, use different speeds. Just keep booming as fast as possible, you are doing it right if as soon as a Sonic Boom is blocked, one is coming out. this builds meter very quickly and can force your opponent to jump, eating a CC. When they get jump happy, ocassionally pause, if they jump, CC, normal AA, or Flash kick. Rinse repeat.
Patternizing: A no-no
Alot of Charlie players I noticed will patternize a hell of a lot more than with other characters. 80-90% of them will boom after a c.mk. Don't do that shit. Mix up your poke string as well as you can, otherwise you are gonna get countered easily. Ever play someone and kick their ass, but about 3-4 matches down the road you are having a hard time or losing? You are probably doing a lot of patterns they caught on to. Like in the corner, you throw a sonic boom, most people follow up with a c.MK or c.RH. They almost always do. They other options they had were:
- Throw another sonic boom
- nothing, punish jump attempt or cc a dp atempt
- walk up throw
- f+fp to punish jumpers
- Jump-in and start another poke string.
- f+rh to punish mashers
Now the situation is gonna dictate the action, but its better than just c.MK or c.RH. You are just gonna get AC'd. Mix it up.
Advanced Strategy
Sonic boom, SOMERSAULT!!!
This way of performing a sonic boom allows for the execution of a flash kick about a tenth of a second later after throwing the boom. You can actually flash kick while the boom is on screen. Perform it in this way:
charge b-f-b-db-d-df+lp
So after charging you go foward, back, then roll to down foward+lp. Hit up and kick a tenth of a second later and a flash kick will come out. neat huh?
Combos
All these can be done after a cross up MK:
- cr.LP x2, cr.LK xx Sonic Soom
- cr.LP, cr.LK xx MK Flash Kick
- cr.LP x2, cr.LK xx any level Sonic Blitz (or Somersualt Justice)
Custom Combos
Level 1
- cr.HK xx LK Flash Kick, HP Sonic Boom xx HK Flash Kick
- cr.HK xx HK Flash Kick x2
For chip and/or block:
This CC is really good because you can walk behind these unlike other chip ccs. Walk behind these and go for a counter hit, overhead, or throw. Make sure to start out with c.rh, cause if they do get hit they get juggled.
- cr.HK xx lp sonic boom x4
Level 2
cr.HK xx hk flash kick x 3
Level 3
- cr.HK xx LK Flash Kick x3, MK Flash Kick, HK Flash Kick
- cr.HK xx LK Flash Kick, HK Flash Kick x3
Anti-Air Custom Combos
Now these are very important, specifically to punish people who look to jump after a sonic boom, also allow you to walk after a boom and punish hard, since they arent worried about a charged flash kick. Now in most cases they can jump to where if you try to AA you will get beat, mainly wen theyare looking to jump immediately after a boom. That when you hit'em with AA CC.
Activate:
- s.MP if they are higher up (into any level ground CC)
- cr.LP if they are lower to the ground (into any ground CC)
Now hit them with this a couple times and Im sure they will think twice about jumping
Charlie: lvl 1- c.rh xx lk fk, hp sb, hk fk
lvl 1- c.rh xx hk fk x2
lvl 2- c.rh xx hk fk x3
lvl 3- c.rh xx hk fk x2, lk fk, hk fk
lvl 3- c.rh xx lk fk x3, mk fk, hk fk
Match-ups
For akuma’s air fireball, try jumping straight up and hitting akuma with forward or fierce. you should be able to s. shell his jump in fierce. if you want to do more damage, try doing cc that goes something like s. strong, repeated short s. shells. it does good damage. you can also custom through his air fireball(also ground fireball if you have at least lv. 2). charlie has lots of anti airs like standing strong, standing forward, standing roundhouse, or jump up fierce. if you try to punch alpha counter with charlie, make sure the jump in isn’t really deep. otherwise, the alpha counter will whiff. i like to use standing forwards and roundhouse as anti air. and another thing, watch out for smart opponent who like to jump in custom. they will try to mistime their jump to tempt into s. shell so they can custom through and hurt you. if you smell a custom, let them waste their whole meter.
Chun-Li vs. Charlie is what you call a total mismatch. Charlie can’t jump against Chun, he gets out projectiled, don’t even compare CCs, and Chun li can jump in on Charlie when he sonic booms from fair distance without being punished. You can try forward shell kick to beat her ground moves and never jump on her. Against Chun, you should try to build up to level 3 so you can CC through her Kikoken. I cannot stress enough not to jump against Chun. She will keep you away with kikokens and if you do jump, just jump straight up or just block. You are going to lose if you keep jumping against her because she can and will counter you cleanly everytime by low roundhouse.
Against shotos, just sit back and throw sonic booms all day and try to hit them with sonic break super when they fireball. If they do close fireball, just block and alpha counter it to push them back. If you manage to kick AC, always follow up with jump forward cross-up into a combo/throw attempt. Sometimes if you see a fireball coming from long range, jump in with roundhouse. It has a long reach, charlie loses when either he starts jumping carelessly or if you let shotos cross you up all over. So just keep them out!
Against shotos, just sit back and throw sonic booms all day and try to hit them with sonic break super when they fireball. If they do close fireball, just block and alpha counter it to push them back. If you manage to kick AC, always follow up with jump forward cross-up into a combo/throw attempt. Sometimes if you see a fireball coming from long range, jump in with roundhouse. It has a long reach, charlie loses when either he starts jumping carelessly or if you let shotos cross you up all over. So just keep them out!
The way Charlie can counter Rose’s low strong is either kick AC or push CC after Rose misses. I think CCing her whiffed low strong is the key. Rose doesn’t have too many ways to reverse AC except her soul spark super. Her standing forward is resilient towards a lot of ground based kick ACs such as Ryu’s and Charlie’s because when she does her standing forward, she is off the ground (similiar to Birdie’s low forward).
Rose can basically stand at Charlie’s face and absord sonic booms or punch AC when Charlie sticks out something. Or she can just low strong when she wants to play conservative. If charlie jumps in, Rose can low fierce xx lv. 1 aura soul throw. Or push illusion and as Charlie jump in, do her slide so that Charlie lands on it then low fierce into roundhouse drill. Ouch?
Obviously, this is a fight where Rose is clearly at an advantage. There are some thing that Charlie can do.
CC her whiffed low strong. This is hard but this will greatly increase your chances. Or simply walk within her range and try to kick AC her. If Rose just sits there, Rose is probably waiting for a chance to punch AC…a throw attempt might be useful at close range. You must try to beat the low strong which is difficult for Charlie.
Jump in with CC through her low fierce.
Sonic break super when you think Rose will try reflect so that she gets hit by 2nd sonic boom. If she ever misses a reflect in close range, CC her immediately.
kick AC her illusion powered drill on the last hit. then try for a cross up combo/cheap. if you do it too early, you will trade hits.
Against shotos, just sit back and throw sonic booms all day and try to hit them with sonic break super when they fireball. If they do close fireball, just block and alpha counter it to push them back. If you manage to kick AC, always follow up with jump forward cross-up into a combo/throw attempt. Sometimes if you see a fireball coming from long range, jump in with roundhouse. It has a long reach, charlie loses when either he starts jumping carelessly or if you let shotos cross you up all over. So just keep them out!
