(added grabs/throws section) |
CartoonFan18 (talk | contribs) No edit summary |
||
| (8 intermediate revisions by 5 users not shown) | |||
| Line 21: | Line 21: | ||
== Playstyle == | == Playstyle == | ||
As the last Airbender himself, it should be no surprise that Aang's biggest strength is his air game. He's a very floaty all-rounder who excels in movement and edgeguarding. | |||
If you like flying around the stage and being a menace in the air, Aang is for you! | |||
== Metagame == | |||
Aang is ranked 6th out of 29 on the current [[Nickelodeon All-Star Brawl 2/FAQ|tier list]], in the S tier. This is a slight improvement over his 9th out of 25 placement in the first [[Nickelodeon All-Star Brawl]]. | |||
Aang possesses some of the best air mobility out of the entire cast, being able to maneuver around the stage in the air at ease. This allows him to excel in both his combo game and his edgeguarding, being able to carry most characters to the blastzone in a matter of one neutral win. The ground is also not a huge problem for Aang, as his down special allows him to wheel around fairly casually, being able to jump when it's time to strike. | |||
Aang is not without weaknesses, however. Being an Airbender, he's a lightweight, which means he can't be too reckless. Aang also tends to have a problem with disjoints, tending to lose trades to more ranged attacks than his own. | |||
Previously, Aang was a very dominant character in the metagame, with dedicated players consistently getting top placements online and offline. However, despite still being viewed positively in the current metagame, Aang is a surprisingly unpopular character in tournament play, with many of his dedicated players leaving or otherwise sticking to friendlies. As such, he is rare if ever seen in a tournament setting in the present day. In spite of this, he is still viewed very favorably at all levels of play, with many even believing there is more to him than meets the eye. | |||
|content2= | |content2= | ||
{{Content Box|content= | {{Content Box|content= | ||
| Line 34: | Line 48: | ||
{{ProConTable | {{ProConTable | ||
|pros= | |pros= | ||
* ''' | * '''Air mobility:''' Aang has some of the most versatile air movement in the game. His base stats are already great, but Airball makes it even better. | ||
* ''' | * '''Edgeguarding:''' Aang can carry the opponent to the blastzone in seconds if they're not careful. This is in large part due to his... | ||
* ''' | * '''Combo Game:''' With great offensive juggles and aerials, Aang is a powerhouse of a combo character. | ||
* ''' | * '''Anti-Airs:''' Trying to contest Aang in the air is not a wise decision. | ||
|cons= | |cons= | ||
* ''' | * '''Light:''' Aang is a lightweight and can be taken out rather early if not careful. | ||
* ''' | * '''Loses to other disjoints:''' Aang's attacks have a tendency to get outspaced by other characters with stronger or more reliable disjoints. | ||
}} | }} | ||
| Line 57: | Line 69: | ||
{{MoveData | {{MoveData | ||
|image= NASB2_Aang_LightNeutral-CirclePivot.png | |image= NASB2_Aang_LightNeutral-CirclePivot.png | ||
|caption= | |caption= | ||
|name= Circle Pivot | |name= Circle Pivot | ||
|input= Light | |input= Light | ||
| Line 75: | Line 87: | ||
{{MoveData | {{MoveData | ||
|image= NASB2_Aang_LightForward-WindHighKick.png | |image= NASB2_Aang_LightForward-WindHighKick.png | ||
|caption= | |caption= | ||
|name= Wind High Kick | |name= Wind High Kick | ||
|input= Forward+Light | |input= Forward+Light | ||
| Line 93: | Line 105: | ||
{{MoveData | {{MoveData | ||
|image= NASB2_Aang_LightUp-CrescentWindSlash.png | |image= NASB2_Aang_LightUp-CrescentWindSlash.png | ||
|caption= | |caption= | ||
|name= Crescent Wind Slash | |name= Crescent Wind Slash | ||
|input= Up+Light | |input= Up+Light | ||
| Line 111: | Line 123: | ||
{{MoveData | {{MoveData | ||
|image= NASB2_Aang_LightDown-AirSweep.png | |image= NASB2_Aang_LightDown-AirSweep.png | ||
|caption= | |caption= | ||
|name= Air Sweep | |name= Air Sweep | ||
|input= Down+Light | |input= Down+Light | ||
| Line 129: | Line 141: | ||
{{MoveData | {{MoveData | ||
|image= NASB2_Aang_DashAttack-AirTackle.png | |image= NASB2_Aang_DashAttack-AirTackle.png | ||
|caption= | |caption= | ||
|name= Air Tackle | |name= Air Tackle | ||
|input= Light (Running) | |input= Light (Running) | ||
| Line 151: | Line 163: | ||
{{MoveData | {{MoveData | ||
|image= NASB2_Aang_LightNeutralAir-WaterCurrent.png | |image= NASB2_Aang_LightNeutralAir-WaterCurrent.png | ||
|caption= | |caption= | ||
|name= Water Current | |name= Water Current | ||
|input= Light (Airborne) | |input= Light (Airborne) | ||
| Line 169: | Line 181: | ||
{{MoveData | {{MoveData | ||
|image= NASB2_Aang_LightForwardAir-AirDiveKick.png | |image= NASB2_Aang_LightForwardAir-AirDiveKick.png | ||
|caption= | |caption= | ||
|name= Air Dive Kick | |name= Air Dive Kick | ||
|input= Forward+Light (Airborne) | |input= Forward+Light (Airborne) | ||
| Line 187: | Line 199: | ||
{{MoveData | {{MoveData | ||
|image= NASB2_Aang_LightBackAir-WindThrustKick.png | |image= NASB2_Aang_LightBackAir-WindThrustKick.png | ||
|caption= | |caption= | ||
|name= Wind Thrust Kick | |name= Wind Thrust Kick | ||
|input= Back+Light (Airborne) | |input= Back+Light (Airborne) | ||
| Line 205: | Line 217: | ||
{{MoveData | {{MoveData | ||
|image= NASB2_Aang_LightUpAir-SwipingWindKick.png | |image= NASB2_Aang_LightUpAir-SwipingWindKick.png | ||
|caption= | |caption= | ||
|name= Swiping Wind Kick | |name= Swiping Wind Kick | ||
|input= Up+Light (Airborne) | |input= Up+Light (Airborne) | ||
| Line 223: | Line 235: | ||
{{MoveData | {{MoveData | ||
|image= NASB2_Aang_LightDownAir-AirSphereBounce.png | |image= NASB2_Aang_LightDownAir-AirSphereBounce.png | ||
|caption= | |caption= | ||
|name= Air Sphere Bounce | |name= Air Sphere Bounce | ||
|input= Down+Light (Airborne) | |input= Down+Light (Airborne) | ||
| Line 245: | Line 257: | ||
{{MoveData | {{MoveData | ||
|image= NASB2_Aang_ChargeForward-FirebendArc.png | |image= NASB2_Aang_ChargeForward-FirebendArc.png | ||
|caption= | |caption= | ||
|name= Firebend Arc | |name= Firebend Arc | ||
|input= Strong | |input= Strong | ||
| Line 263: | Line 275: | ||
{{MoveData | {{MoveData | ||
|image= NASB2_Aang_ChargeUp-StaffSpin.png | |image= NASB2_Aang_ChargeUp-StaffSpin.png | ||
|caption= | |caption= | ||
|name= Staff Spin | |name= Staff Spin | ||
|input= Up+Strong | |input= Up+Strong | ||
| Line 281: | Line 293: | ||
{{MoveData | {{MoveData | ||
|image= NASB2_Aang_ChargeDown-EarthStumps.png | |image= NASB2_Aang_ChargeDown-EarthStumps.png | ||
|caption= | |caption= | ||
|name= Earth Stumps | |name= Earth Stumps | ||
|input= Down+Strong | |input= Down+Strong | ||
| Line 303: | Line 315: | ||
{{MoveData | {{MoveData | ||
|image= NASB2_Aang_ChargeForwardAir-BlazingFireKick.png | |image= NASB2_Aang_ChargeForwardAir-BlazingFireKick.png | ||
|caption= | |caption= | ||
|name= Blazing Fire Kick | |name= Blazing Fire Kick | ||
|input= Strong (Airborne) | |input= Strong (Airborne) | ||
| Line 321: | Line 333: | ||
{{MoveData | {{MoveData | ||
|image= NASB2_Aang_ChargeUpAir-WaterOrb.png | |image= NASB2_Aang_ChargeUpAir-WaterOrb.png | ||
|caption= | |caption= "He won't freeze himself in this one" | ||
|name= Water Orb | |name= Water Orb | ||
|input= Up+Strong (Airborne) | |input= Up+Strong (Airborne) | ||
| Line 339: | Line 351: | ||
{{MoveData | {{MoveData | ||
|image= NASB2_Aang_ChargeDownAir-GroundPlummet.png | |image= NASB2_Aang_ChargeDownAir-GroundPlummet.png | ||
|caption= | |caption= | ||
|name= Ground Plummet | |name= Ground Plummet | ||
|input= Down+Strong (Airborne) | |input= Down+Strong (Airborne) | ||
| Line 361: | Line 373: | ||
{{MoveData | {{MoveData | ||
|image= NASB2_Aang_SpecialNeutral-IceShards.png | |image= NASB2_Aang_SpecialNeutral-IceShards.png | ||
|caption= | |caption= | ||
|name= Ice Shards | |name= Ice Shards | ||
|input= Special | |input= Special | ||
| Line 379: | Line 391: | ||
{{MoveData | {{MoveData | ||
|image= NASB2_Aang_SpecialForward-FireSpin.png | |image= NASB2_Aang_SpecialForward-FireSpin.png | ||
|caption= Katara knows | |caption= "Katara knows about this move's burn effect" | ||
|name= Fire Spin | |name= Fire Spin | ||
|input= Forward+Special | |input= Forward+Special | ||
| Line 397: | Line 409: | ||
{{MoveData | {{MoveData | ||
|image= NASB2_Aang_SpecialDown-AirBall.png | |image= NASB2_Aang_SpecialDown-AirBall.png | ||
|caption= "Where did you learn that trick Aang? | |caption= "Where did you learn that trick Aang?" | ||
|name= Air Ball | |name= Air Ball | ||
|input= Down+Special | |input= Down+Special | ||
| Line 415: | Line 427: | ||
{{MoveData | {{MoveData | ||
|image= NASB2_Aang_SpecialUp-AirGlide.png | |image= NASB2_Aang_SpecialUp-AirGlide.png | ||
|caption= | |caption= | ||
|name= Air Glide | |name= Air Glide | ||
|input= Up+Special | |input= Up+Special | ||
| Line 438: | Line 450: | ||
|image= NASB2_Aang_Grab.png | |image= NASB2_Aang_Grab.png | ||
|caption= | |caption= | ||
|name= | |name= Grab | ||
|input= Grab | |input= Grab | ||
|data= | |||
{{AttackData-NickBrawl2 | |||
|Damage=00% | |||
|Startup=0 | |||
|Active=0-0 | |||
|Total Frames=0 | |||
|Safety=-0 | |||
|description= | |||
* DESCRIPTION PLACEHOLDER | |||
* DESCRIPTION PLACEHOLDER | |||
}} | |||
}}<br> | |||
{{MoveData | |||
|image= NASB2_Aang_DashGrab.png | |||
|caption= | |||
|name= Dash Grab | |||
|input= Grab (Running) | |||
|data= | |data= | ||
{{AttackData-NickBrawl2 | {{AttackData-NickBrawl2 | ||
| Line 456: | Line 486: | ||
|image= NASB2_Aang_Pummel.png | |image= NASB2_Aang_Pummel.png | ||
|caption= | |caption= | ||
|name= | |name= Grab Pummel | ||
|input= Light (Grabbing) | |input= Light (Grabbing) | ||
|data= | |data= | ||
| Line 474: | Line 504: | ||
|image= NASB2_Aang_UpThrow.png | |image= NASB2_Aang_UpThrow.png | ||
|caption= | |caption= | ||
|name= | |name= Up Throw | ||
|input= Up (Grabbing) | |input= Up (Grabbing) | ||
|data= | |data= | ||
| Line 492: | Line 522: | ||
|image= NASB2_Aang_ForwardThrow.png | |image= NASB2_Aang_ForwardThrow.png | ||
|caption= | |caption= | ||
|name= | |name= Forward Throw | ||
|input= Forward (Grabbing) | |input= Forward (Grabbing) | ||
|data= | |data= | ||
| Line 510: | Line 540: | ||
|image= NASB2_Aang_DownThrow.png | |image= NASB2_Aang_DownThrow.png | ||
|caption= | |caption= | ||
|name= | |name= Down Throw | ||
|input= Down (Grabbing) | |input= Down (Grabbing) | ||
|data= | |data= | ||
| Line 528: | Line 558: | ||
|image= NASB2_Aang_BackThrow.png | |image= NASB2_Aang_BackThrow.png | ||
|caption= | |caption= | ||
|name= | |name= Back Throw | ||
|input= Back (Grabbing) | |input= Back (Grabbing) | ||
|data= | |data= | ||
| Line 549: | Line 579: | ||
{{MoveData | {{MoveData | ||
|image= NASB2_Aang_Super.png | |image= NASB2_Aang_Super.png | ||
|caption= | |caption= "You and your forefathers have devastated the balance of this world! And now, you shall pay the ultimate price!" | ||
|name= | |name= Super | ||
|input= Slime+Light | |input= Slime+Light | ||
|data= | |data= | ||
| Line 572: | Line 602: | ||
|image= NASB2_Aang_TauntNeutral.png | |image= NASB2_Aang_TauntNeutral.png | ||
|caption= "Now, check this out!" | |caption= "Now, check this out!" | ||
|name= | |name= Taunt | ||
|input= Taunt | |input= Taunt | ||
|data= | |data= | ||
| Line 589: | Line 619: | ||
{{MoveData | {{MoveData | ||
|image= NASB2_Aang_TauntDown.png | |image= NASB2_Aang_TauntDown.png | ||
|caption= | |caption= "How about some quiet!" | ||
|name= | |name= Down Taunt | ||
|input= Down+Taunt | |input= Down+Taunt | ||
|data= | |data= | ||
| Line 607: | Line 637: | ||
{{MoveData | {{MoveData | ||
|image= NASB2_Aang_TauntUp.png | |image= NASB2_Aang_TauntUp.png | ||
|caption= | |caption= "Bender dance! Bender dance!" | ||
|name= | |name= Up Taunt | ||
|input= Up+Taunt | |input= Up+Taunt | ||
|data= | |data= | ||
| Line 662: | Line 692: | ||
| '''+1''' || | | '''+1''' || | ||
|- | |- | ||
| '''0''' || [[File:NASB2_Sponge_Icon.png|x80px]] [[File:NASB2_Patrick_Icon.png|x80px]] [[File:NASB2_Squidward_Icon.png|x80px]] [[File:NASB2_Plankton_Icon.png|x80px]] [[File:NASB2_ElTigre_Icon.png|x80px]] [[File:NASB2_Rocko_Icon.png|x80px]] [[File:NASB2_Jimmy_Icon.png|x80px]] [[File:NASB2_Lucy_Icon.png|x80px]] [[File:NASB2_Beavers-Daggett_Icon.png|x80px]] [[File:NASB2_Beavers-Norbert_Icon.png|x80px]] [[File:NASB2_Garfield_Icon.png|x80px]] [[File:NASB2_Aang_Icon.png|x80px]] [[File:NASB2_Korra_Icon.png|x80px]] [[File:NASB2_Azula_Icon.png|x80px]] [[File:NASB2_Raphael_Icon.png|x80px]] [[File:NASB2_Donatello_Icon.png|x80px]] [[File:NASB2_April_Icon.png|x80px]] [[File:NASB2_Danny_Icon.png|x80px]] [[File:NASB2_Ember_Icon.png|x80px]] [[File:NASB2_Gertie_Icon.png|x80px]] [[File:NASB2_Gerald_Icon.png|x80px]] [[File:NASB2_Nigel_Icon.png|x80px]] [[File:NASB2_Zim_Icon.png|x80px]] [[File:NASB2_Jenny_Icon.png|x80px]] [[File:NASB2_Reptar_Icon.png|x80px]] [[File:NASB2_RenStimpy_Icon.png|x80px]] [[File:NASB2_Krabs_Icon.png|x80px]] [[File:NASB2_Zuko_Icon.png|x80px]] | | '''0''' || [[File:NASB2_Sponge_Icon.png|x80px]] [[File:NASB2_Patrick_Icon.png|x80px]] [[File:NASB2_Squidward_Icon.png|x80px]] [[File:NASB2_Plankton_Icon.png|x80px]] [[File:NASB2_ElTigre_Icon.png|x80px]] [[File:NASB2_Rocko_Icon.png|x80px]] [[File:NASB2_Jimmy_Icon.png|x80px]] [[File:NASB2_Lucy_Icon.png|x80px]] [[File:NASB2_Beavers-Daggett_Icon.png|x80px]] [[File:NASB2_Beavers-Norbert_Icon.png|x80px]] [[File:NASB2_Garfield_Icon.png|x80px]] [[File:NASB2_Aang_Icon.png|x80px]] [[File:NASB2_Korra_Icon.png|x80px]] [[File:NASB2_Azula_Icon.png|x80px]] [[File:NASB2_Raphael_Icon.png|x80px]] [[File:NASB2_Donatello_Icon.png|x80px]] [[File:NASB2_April_Icon.png|x80px]] [[File:NASB2_Danny_Icon.png|x80px]] [[File:NASB2_Ember_Icon.png|x80px]] [[File:NASB2_Gertie_Icon.png|x80px]] [[File:NASB2_Gerald_Icon.png|x80px]] [[File:NASB2_Nigel_Icon.png|x80px]] [[File:NASB2_Zim_Icon.png|x80px]] [[File:NASB2_Jenny_Icon.png|x80px]] [[File:NASB2_Reptar_Icon.png|x80px]] [[File:NASB2_RenStimpy_Icon.png|x80px]] [[File:NASB2_Krabs_Icon.png|x80px]] [[File:NASB2_Zuko_Icon.png|x80px]] [[File:NASB2_Rocksteady_Icon.png|x80px]] | ||
|- | |- | ||
| '''1''' || | | '''1''' || | ||
| Line 686: | Line 716: | ||
== Costumes == | == Costumes == | ||
<gallery> | |||
File:NASB2 Aang Costume00.png| Aang's Default Outfit. | |||
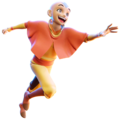
File:NASB2 Aang Costume01.png| Aang's normal outfit worn throughout Book 3: Fire. First seen in the episode "The Day of Black Sun: Part One" (Unlocked by having the Ultimate edition of NASB 2). | |||
File:NASB2 Aang Costume02.png| A shirtless version of Aang's Book 3: Fire outfit from the episode "The Ember Island Players". | |||
File:NASB2 Aang Costume03.png| Aang's Book 3: Fire outfit with the color scheme seen on the cover of Team Avatar Tales. | |||
File:NASB2 Aang Costume04.png| Mind controlled Aang (unlocked by defeating Aang twice in campaign mode). | |||
File:NASB2 Aang Costume05.png| Aang's Ghost Clone (unlocked by defeating Aang thrice in campaign mode). | |||
</gallery> | |||
{{Navbox-NickBrawl2}} | {{Navbox-NickBrawl2}} | ||
[[Category:Nickelodeon All-Star Brawl 2]] | [[Category:Nickelodeon All-Star Brawl 2]] | ||
Latest revision as of 03:53, 12 March 2025
About
The last Airbender and the Avatar, charged with keeping balance in the Four Nations.
Playstyle
As the last Airbender himself, it should be no surprise that Aang's biggest strength is his air game. He's a very floaty all-rounder who excels in movement and edgeguarding.
If you like flying around the stage and being a menace in the air, Aang is for you!
Metagame
Aang is ranked 6th out of 29 on the current tier list, in the S tier. This is a slight improvement over his 9th out of 25 placement in the first Nickelodeon All-Star Brawl.
Aang possesses some of the best air mobility out of the entire cast, being able to maneuver around the stage in the air at ease. This allows him to excel in both his combo game and his edgeguarding, being able to carry most characters to the blastzone in a matter of one neutral win. The ground is also not a huge problem for Aang, as his down special allows him to wheel around fairly casually, being able to jump when it's time to strike.
Aang is not without weaknesses, however. Being an Airbender, he's a lightweight, which means he can't be too reckless. Aang also tends to have a problem with disjoints, tending to lose trades to more ranged attacks than his own.
Previously, Aang was a very dominant character in the metagame, with dedicated players consistently getting top placements online and offline. However, despite still being viewed positively in the current metagame, Aang is a surprisingly unpopular character in tournament play, with many of his dedicated players leaving or otherwise sticking to friendlies. As such, he is rare if ever seen in a tournament setting in the present day. In spite of this, he is still viewed very favorably at all levels of play, with many even believing there is more to him than meets the eye.
 | |
| Franchise |
Avatar: The Last Airbender |
|---|---|
| Home Stage |
Western Air Temple |
| Weight |
0.82 |
| Fall Speed |
0.95 |
| Gravity |
0.76 |
| Run Speed |
1.2 |
| Air Speed |
1.4 |
| Strengths | Weaknesses |
|---|---|
|
|
Moveset
Ground Light Attacks
Light

| Damage | Startup | Active Frames | Total Frames | Safety | |
|---|---|---|---|---|---|
| 00% | 0 | 0-0 | 0 | -0 | |
| |||||
Forward+Light

| Damage | Startup | Active Frames | Total Frames | Safety | |
|---|---|---|---|---|---|
| 00% | 0 | 0-0 | 0 | -0 | |
| |||||
Up+Light

| Damage | Startup | Active Frames | Total Frames | Safety | |
|---|---|---|---|---|---|
| 00% | 0 | 0-0 | 0 | -0 | |
| |||||
Down+Light

| Damage | Startup | Active Frames | Total Frames | Safety | |
|---|---|---|---|---|---|
| 00% | 0 | 0-0 | 0 | -0 | |
| |||||
Light (Running)

| Damage | Startup | Active Frames | Total Frames | Safety | |
|---|---|---|---|---|---|
| 00% | 0 | 0-0 | 0 | -0 | |
| |||||
Air Light Attacks
Light (Airborne)

| Damage | Startup | Active Frames | Total Frames | Safety | |
|---|---|---|---|---|---|
| 00% | 0 | 0-0 | 0 | -0 | |
| |||||
Forward+Light (Airborne)

| Damage | Startup | Active Frames | Total Frames | Safety | |
|---|---|---|---|---|---|
| 00% | 0 | 0-0 | 0 | -0 | |
| |||||
Back+Light (Airborne)

| Damage | Startup | Active Frames | Total Frames | Safety | |
|---|---|---|---|---|---|
| 00% | 0 | 0-0 | 0 | -0 | |
| |||||
Up+Light (Airborne)

| Damage | Startup | Active Frames | Total Frames | Safety | |
|---|---|---|---|---|---|
| 00% | 0 | 0-0 | 0 | -0 | |
| |||||
Down+Light (Airborne)

| Damage | Startup | Active Frames | Total Frames | Safety | |
|---|---|---|---|---|---|
| 00% | 0 | 0-0 | 0 | -0 | |
| |||||
Ground Strong Attacks
Strong

| Damage | Startup | Active Frames | Total Frames | Safety | |
|---|---|---|---|---|---|
| 00% | 0 | 0-0 | 0 | -0 | |
| |||||
Up+Strong

| Damage | Startup | Active Frames | Total Frames | Safety | |
|---|---|---|---|---|---|
| 00% | 0 | 0-0 | 0 | -0 | |
| |||||
Down+Strong

| Damage | Startup | Active Frames | Total Frames | Safety | |
|---|---|---|---|---|---|
| 00% | 0 | 0-0 | 0 | -0 | |
| |||||
Air Strong Attacks
Strong (Airborne)

| Damage | Startup | Active Frames | Total Frames | Safety | |
|---|---|---|---|---|---|
| 00% | 0 | 0-0 | 0 | -0 | |
| |||||
Up+Strong (Airborne)

| Damage | Startup | Active Frames | Total Frames | Safety | |
|---|---|---|---|---|---|
| 00% | 0 | 0-0 | 0 | -0 | |
| |||||
Down+Strong (Airborne)

| Damage | Startup | Active Frames | Total Frames | Safety | |
|---|---|---|---|---|---|
| 00% | 0 | 0-0 | 0 | -0 | |
| |||||
Special Attacks
Special

| Damage | Startup | Active Frames | Total Frames | Safety | |
|---|---|---|---|---|---|
| 00% | 0 | 0-0 | 0 | -0 | |
| |||||
Forward+Special

| Damage | Startup | Active Frames | Total Frames | Safety | |
|---|---|---|---|---|---|
| 00% | 0 | 0-0 | 0 | -0 | |
| |||||
Down+Special

| Damage | Startup | Active Frames | Total Frames | Safety | |
|---|---|---|---|---|---|
| 00% | 0 | 0-0 | 0 | -0 | |
| |||||
Up+Special

| Damage | Startup | Active Frames | Total Frames | Safety | |
|---|---|---|---|---|---|
| 00% | 0 | 0-0 | 0 | -0 | |
| |||||
Grab/Throws
Grab

| Damage | Startup | Active Frames | Total Frames | Safety | |
|---|---|---|---|---|---|
| 00% | 0 | 0-0 | 0 | -0 | |
| |||||
Grab (Running)

| Damage | Startup | Active Frames | Total Frames | Safety | |
|---|---|---|---|---|---|
| 00% | 0 | 0-0 | 0 | -0 | |
| |||||
Light (Grabbing)

| Damage | Startup | Active Frames | Total Frames | Safety | |
|---|---|---|---|---|---|
| 00% | 0 | 0-0 | 0 | -0 | |
| |||||
Up (Grabbing)

| Damage | Startup | Active Frames | Total Frames | Safety | |
|---|---|---|---|---|---|
| 00% | 0 | 0-0 | 0 | -0 | |
| |||||
Forward (Grabbing)

| Damage | Startup | Active Frames | Total Frames | Safety | |
|---|---|---|---|---|---|
| 00% | 0 | 0-0 | 0 | -0 | |
| |||||
Down (Grabbing)

| Damage | Startup | Active Frames | Total Frames | Safety | |
|---|---|---|---|---|---|
| 00% | 0 | 0-0 | 0 | -0 | |
| |||||
Back (Grabbing)

| Damage | Startup | Active Frames | Total Frames | Safety | |
|---|---|---|---|---|---|
| 00% | 0 | 0-0 | 0 | -0 | |
| |||||
Super
Slime+Light

| Damage | Startup | Active Frames | Total Frames | Safety | |
|---|---|---|---|---|---|
| 00% | 0 | 0-0 | 0 | -0 | |
| |||||
Taunts
Taunt

| Damage | Startup | Active Frames | Total Frames | Safety | |
|---|---|---|---|---|---|
| 00% | 0 | 0-0 | 0 | -0 | |
| |||||
Down+Taunt

| Damage | Startup | Active Frames | Total Frames | Safety | |
|---|---|---|---|---|---|
| 00% | 0 | 0-0 | 0 | -0 | |
| |||||
Up+Taunt

| Damage | Startup | Active Frames | Total Frames | Safety | |
|---|---|---|---|---|---|
| 00% | 0 | 0-0 | 0 | -0 | |
| |||||
Strategy
- PLACEHOLDER
- PLACEHOLDER
- PLACEHOLDER
Techniques
- PLACEHOLDER
- PLACEHOLDER
- PLACEHOLDER
Combos
- PLACEHOLDER
- PLACEHOLDER
- PLACEHOLDER
Matchups
| +2 | |
| +1 | |
| 0 | |
| 1 | |
| 2 |
Other Resources
- PLACEHOLDER
- PLACEHOLDER
- PLACEHOLDER
Videos
PLACEHOLDER
Costumes
Aang's Default Outfit.

Aang's normal outfit worn throughout Book 3: Fire. First seen in the episode "The Day of Black Sun: Part One" (Unlocked by having the Ultimate edition of NASB 2).
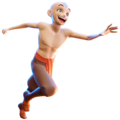
A shirtless version of Aang's Book 3: Fire outfit from the episode "The Ember Island Players".

Aang's Book 3: Fire outfit with the color scheme seen on the cover of Team Avatar Tales.
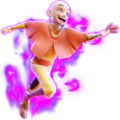
Mind controlled Aang (unlocked by defeating Aang twice in campaign mode).
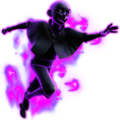
Aang's Ghost Clone (unlocked by defeating Aang thrice in campaign mode).


