(Lore.jpg) |
|||
| (52 intermediate revisions by 5 users not shown) | |||
| Line 18: | Line 18: | ||
== About == | == About == | ||
A smashing nature narrator with an appetite for adventure! | '''''A smashing nature narrator with an appetite for adventure!''''' | ||
== | Sir Nigel Archibald Thornberry, KBE is the patriarch of the Thornberry family. Born to an aristocratic British couple, Nigel has devoted his life to studying animals and other forms of wildlife, and is the host of his own nature show, ''Nigel Thornberry's Wild World.'' An expert zoologist, experienced pilot, and general upstanding guy, Nigel travels the world with his family in their RV to see what exciting creatures it has to offer. | ||
== Playstyle == | |||
Due to his lightweight yet high damage potential, Nigel falls under the glass cannon archetype (particularly in bursting). He excels at hitting opponents in the air while at the same time being good at moving in it. | Due to his lightweight yet high damage potential, Nigel falls under the glass cannon archetype (particularly in bursting). He excels at hitting opponents in the air while at the same time being good at moving in it. | ||
Nigel also has a lot of moves that can either be spammed (Nair, Bair, etc.) or kill opponents early with the proper setups (Supair, Down special, etc). | Nigel also has a lot of moves that can either be spammed (Nair, Bair, etc.) or kill opponents early with the proper setups (Supair, Down special, etc). | ||
== Metagame == | |||
Nigel is ranked 25th out of 29 on the current [[Nickelodeon All-Star Brawl 2/FAQ|tier list]], in the C tier. This is a critical drop over his 3rd out of 25 placement in the first [[Nickelodeon All-Star Brawl]] and is the biggest drop of any veteran in the game. | |||
Nigel is a floaty character that's most threatening in the air. His air mobility is very noteworthy, having 4 jumps and being able to glide around with both his Air Down Strong and his Light Back Air. This, in tandem, gives him a very good recovery, allowing him to mixup his direction depending on how many jumps he uses. Nigel also has a good combo game, being able to juggle his opponent high in the air due to his large amount of jumps. However, this all pales in comparison to his signature move: Smashing! Comboing into this move for an early kill is the M.O of Nigel's gameplan. | |||
Nigel is burdened with a large list of flaws, however. One of his more notable ones is his weight: he is among the lightest in the cast, narrowly being beat out by Zim in terms of base stats. This makes him ''very'' easy to KO, and ensures he can't take too many risks. Not helping matters is his large frame, which makes him easy to hit if the opponent has a fair amount of range. Nigel also has bad approach options, with Back Air arguably being his best one, and this is coupled with awful shield pressure as well, with most of his moves being unsafe on shield. These weaknesses make Nigel a very risky character to play, making disadvantage an uphill battle if he ever has the misfortune of being in it. | |||
Nigel has largely been considered a low-tier character for most of the metagame, even being considered the worst character in the game for a large portion of it. In spite of this, however, he has achieved respectable and even strong results in tournament play, notably offline. Perhaps because of this, Nigel has been seen slightly more positively in the present day, no longer considered to be the worst character in the game by many of the playerbase. In spite of this, though, Nigel has yet to escape the bottom 5 characters, and remains a low-tier, albeit a polarizing one. | |||
|content2= | |content2= | ||
| Line 31: | Line 43: | ||
}} | }} | ||
}} | }} | ||
---- | ---- | ||
{{ProConTable | {{ProConTable | ||
| Line 40: | Line 50: | ||
* '''GOOD COMBO GAME:''' Nigel can chain moves easily. | * '''GOOD COMBO GAME:''' Nigel can chain moves easily. | ||
* '''AIR MOBILITY:''' Nigel | * '''GOOD AIR MOBILITY:''' Nigel glides through the air with his 4 air jumps, high air movement stat and some moves that provide him with mobility. | ||
* '''GOOD RECOVERY:''' Correlates with the point above. | |||
* '''GOOD EDGE-GUARDING:''' His air mobility allows for a lot of options to edge-guard opponents. | * '''GOOD EDGE-GUARDING:''' His air mobility allows for a lot of options to edge-guard opponents. | ||
| Line 51: | Line 63: | ||
* '''BIG HITBOX:''' Nigel's hitbox body is fairly big, which makes him easier to hit with disjoints. | * '''BIG HITBOX:''' Nigel's hitbox body is fairly big, which makes him easier to hit with disjoints. | ||
* ''' | * '''MEDIOCRE APPROACH:''' Nigel doesn't have the best approaching tools compared to the rest of the cast. | ||
* '''SHIELD PRESSURE:''' Nigel lacks shield pressuring moves. | * '''SHIELD PRESSURE:''' Nigel lacks shield pressuring moves. | ||
}} | }} | ||
---- | ---- | ||
== Moveset == | == Moveset == | ||
| Line 69: | Line 79: | ||
{{MoveData | {{MoveData | ||
|image= NASB2_Nigel_LightNeutral-Astonishing.png | |image= NASB2_Nigel_LightNeutral-Astonishing.png | ||
|caption= | |caption= | ||
|name= Astonishing! | |name= Astonishing! | ||
|input= Light | |input= Light | ||
| Line 88: | Line 98: | ||
{{MoveData | {{MoveData | ||
|image= NASB2_Nigel_LightForward-WhatsOverThere.png | |image= NASB2_Nigel_LightForward-WhatsOverThere.png | ||
|caption= | |caption= "Hello!" | ||
|name= What's over there? | |name= What's over there? | ||
|input= Forward+Light | |input= Forward+Light | ||
| Line 105: | Line 115: | ||
{{MoveData | {{MoveData | ||
|image= NASB2_Nigel_LightUp-FlyClap.png | |image= NASB2_Nigel_LightUp-FlyClap.png | ||
|caption= | |caption= "Got it" | ||
|name= Fly Clap | |name= Fly Clap | ||
|input= Up+Light | |input= Up+Light | ||
| Line 122: | Line 132: | ||
{{MoveData | {{MoveData | ||
|image= NASB2_Nigel_LightDown-ScorpionSting.png | |image= NASB2_Nigel_LightDown-ScorpionSting.png | ||
|caption= | |caption= "Thrash!" | ||
|name= Scorpion Sting | |name= Scorpion Sting | ||
|input= Down+Light | |input= Down+Light | ||
| Line 135: | Line 145: | ||
* Nigel takes the stance of the scorpion to sting any opponents approaching him. | * Nigel takes the stance of the scorpion to sting any opponents approaching him. | ||
* On Frame 10-12, the sweet spot appears a little behind Nigel's stinging foot. Landing it will instead cause the opponent to take | * On Frame 10-12, the sweet spot appears a little behind Nigel's stinging foot. Landing it will instead cause the opponent to take 10% damage and obtain [[File:NASB2_status-effect_poison.png|20px]] '''poison effect''' that deals 10% damage overtime. | ||
}} | }} | ||
}}<br> | }}<br> | ||
| Line 141: | Line 151: | ||
{{MoveData | {{MoveData | ||
|image= NASB2_Nigel_DashAttack-CrocodileWrangling.png | |image= NASB2_Nigel_DashAttack-CrocodileWrangling.png | ||
|caption= | |caption= "Make way!" | ||
|name= Crocodile Wrangling | |name= Crocodile Wrangling | ||
|input= Light (Running) | |input= Light (Running) | ||
| Line 156: | Line 166: | ||
}} | }} | ||
}}<br> | }}<br> | ||
=== Air Light Attacks === | === Air Light Attacks === | ||
| Line 163: | Line 172: | ||
{{MoveData | {{MoveData | ||
|image= NASB2_Nigel_LightNeutralAir-FlyingSquirrelSlam.png | |image= NASB2_Nigel_LightNeutralAir-FlyingSquirrelSlam.png | ||
|caption= | |caption= "Haiyah!" | ||
|name= Flying Squirrel Slam | |name= Flying Squirrel Slam | ||
|input= Light (Airborne) | |input= Light (Airborne) | ||
| Line 184: | Line 193: | ||
{{MoveData | {{MoveData | ||
|image= NASB2_Nigel_LightForwardAir-WoodpeckerRage.png | |image= NASB2_Nigel_LightForwardAir-WoodpeckerRage.png | ||
|caption= | |caption= | ||
|name= Woodpecker Rage | |name= Woodpecker Rage | ||
|input= Forward+Light (Airborne) | |input= Forward+Light (Airborne) | ||
| Line 205: | Line 214: | ||
{{MoveData | {{MoveData | ||
|image= NASB2_Nigel_LightBackAir-FrogBackKick.png | |image= NASB2_Nigel_LightBackAir-FrogBackKick.png | ||
|caption= | |caption= | ||
|name= Frog Back Kick | |name= Frog Back Kick | ||
|input= Back+Light (Airborne) | |input= Back+Light (Airborne) | ||
| Line 228: | Line 237: | ||
{{MoveData | {{MoveData | ||
|image= NASB2_Nigel_LightUpAir-ElephantTrunk.png | |image= NASB2_Nigel_LightUpAir-ElephantTrunk.png | ||
|caption= | |caption= | ||
|name= Elephant Trunk | |name= Elephant Trunk | ||
|input= Up+Light (Airborne) | |input= Up+Light (Airborne) | ||
| Line 249: | Line 258: | ||
{{MoveData | {{MoveData | ||
|image= NASB2_Nigel_LightDownAir-WolfClaw.png | |image= NASB2_Nigel_LightDownAir-WolfClaw.png | ||
|caption= | |caption= | ||
|name= Wolf Claw | |name= Wolf Claw | ||
|input= Down+Light (Airborne) | |input= Down+Light (Airborne) | ||
| Line 297: | Line 306: | ||
{{MoveData | {{MoveData | ||
|image= NASB2_Nigel_ChargeUp-TeaTime.png | |image= NASB2_Nigel_ChargeUp-TeaTime.png | ||
|caption= | |caption= | ||
|name= Tea time! | |name= Tea time! | ||
|input= Up+Strong | |input= Up+Strong | ||
| Line 314: | Line 323: | ||
{{MoveData | {{MoveData | ||
|image= NASB2_Nigel_ChargeDown-OstrichBury.png | |image= NASB2_Nigel_ChargeDown-OstrichBury.png | ||
|caption= | |caption= "Hmph!" | ||
|name= Ostrich Bury | |name= Ostrich Bury | ||
|input= Down+Strong | |input= Down+Strong | ||
| Line 339: | Line 348: | ||
{{MoveData | {{MoveData | ||
|image= NASB2_Nigel_ChargeForwardAir-SnakeBite.png | |image= NASB2_Nigel_ChargeForwardAir-SnakeBite.png | ||
|caption= | |caption= | ||
|name= Snake bite | |name= Snake bite | ||
|input= Strong (Airborne) | |input= Strong (Airborne) | ||
| Line 351: | Line 360: | ||
|description= | |description= | ||
* Nigel turns his arm into a poisonous snake, which attempts to bite opponents. | * Nigel turns his arm into a poisonous snake, which attempts to bite opponents. | ||
* Theres a sweet spot located on top of Nigel's hand, if landed it will apply a poison effect to the opponent that deals 10 damage overtime and greatly increases the knock-back of the move | * Theres a sweet spot located on top of Nigel's hand, if landed it will apply a [[File:NASB2_status-effect_poison.png|20px]] '''poison effect''' to the opponent that deals 10% damage overtime and greatly increases the knock-back of the move | ||
}} | }} | ||
}}<br> | }}<br> | ||
| Line 357: | Line 366: | ||
{{MoveData | {{MoveData | ||
|image= NASB2_Nigel_ChargeUpAir-GiraffeNeck.png | |image= NASB2_Nigel_ChargeUpAir-GiraffeNeck.png | ||
|caption= | |caption= | ||
|name= Giraffe Neck | |name= Giraffe Neck | ||
|input= Up+Strong (Airborne) | |input= Up+Strong (Airborne) | ||
| Line 372: | Line 381: | ||
* Nigel stalls in the air while he is swinging his head. | * Nigel stalls in the air while he is swinging his head. | ||
* The first hitbox sends opponents upwards | * The first hitbox sends opponents upwards with a weak knock-back, the second has great knock-back but send opponents horizontally in the direction Nigel is facing | ||
* If you position yourself correctly, you can hit both | * If you position yourself correctly, you can hit both hit boxes to double the damage and increase the knock-back overall. | ||
}} | }} | ||
}}<br> | }}<br> | ||
| Line 380: | Line 389: | ||
{{MoveData | {{MoveData | ||
|image= NASB2_Nigel_ChargeDownAir-FalconDive.png | |image= NASB2_Nigel_ChargeDownAir-FalconDive.png | ||
|caption= | |caption= | ||
|name= Falcon Dive | |name= Falcon Dive | ||
|input= Down+Strong (Airborne) | |input= Down+Strong (Airborne) | ||
| Line 397: | Line 406: | ||
* Nigel stalls in the air while charging this move. | * Nigel stalls in the air while charging this move. | ||
* If Nigel touches the ground while this move is active, he will cancel it and get 26 frames of end-lag while moving | * If Nigel touches the ground while this move is active, he will cancel it and get 26 frames of end-lag while moving forwards due to the momentum. | ||
}} | }} | ||
}}<br> | }}<br> | ||
=== Special Attacks === | === Special Attacks === | ||
| Line 407: | Line 415: | ||
{{MoveData | {{MoveData | ||
|image= NASB2_Nigel_SpecialNeutral-BullStampede.png | |image= NASB2_Nigel_SpecialNeutral-BullStampede.png | ||
|caption= | |caption= | ||
|name= Bull Stampede | |name= Bull Stampede | ||
|input= Special | |input= Special | ||
| Line 421: | Line 429: | ||
* Charge this move to make it stronger and faster. | * Charge this move to make it stronger and faster. | ||
* Takes about | * Takes about 5 seconds to fully charge the move. | ||
* Nigel can begin charging the move in the air. | * Nigel can begin charging the move in the air. | ||
* Nigel can move while charging if he is in the air. | * Nigel can move while charging if he is in the air. | ||
| Line 431: | Line 439: | ||
'''EX VERSION''' | [[File:NASB2_status-effect_super-slime.png|25px]] '''EX VERSION''' | ||
* '''Time to fully charge the move gets halved''' | * '''Time to fully charge the move gets halved''' | ||
| Line 441: | Line 449: | ||
{{MoveData | {{MoveData | ||
|image= NASB2_Nigel_SpecialForward-GorillaDoublePunch.png | |image= NASB2_Nigel_SpecialForward-GorillaDoublePunch.png | ||
|caption= | |caption= "Oog, Oog!" | ||
|name= Gorilla Double Punch | |name= Gorilla Double Punch | ||
|input= Forward+Special | |input= Forward+Special | ||
| Line 459: | Line 467: | ||
'''EX VERSION''' | [[File:NASB2_status-effect_super-slime.png|25px]] '''EX VERSION''' | ||
* '''Knock-back and distance is increased''' | * '''Knock-back and distance is increased''' | ||
| Line 469: | Line 477: | ||
{{MoveData | {{MoveData | ||
|image= NASB2_Nigel_SpecialDown-Smashing.png | |image= NASB2_Nigel_SpecialDown-Smashing.png | ||
|caption= | |caption= "That was smashing!" | ||
|name= Smashing! | |name= Smashing! | ||
|input= Down+Special | |input= Down+Special | ||
| Line 487: | Line 495: | ||
'''EX VERSION''' | [[File:NASB2_status-effect_super-slime.png|25px]] '''EX VERSION''' | ||
* '''Damage is increased to 27%''' | |||
* ''' | * '''Knock-back is greatly reduced''' | ||
* ''' | * ''' An additional massive Hitbox is created, covering Nigel's body and more which deals 16% damage''' | ||
* ''' | * '''Nigel's laugh is shortened to 8 frames when you miss''' | ||
* '''Nigel's laugh | |||
}} | }} | ||
}}<br> | }}<br> | ||
| Line 515: | Line 522: | ||
'''EX VERSION''' | [[File:NASB2_status-effect_super-slime.png|25px]] '''EX VERSION''' | ||
* '''Nigel gains more height but comes down crashing faster''' | * '''Nigel gains more height but comes down crashing faster''' | ||
| Line 522: | Line 529: | ||
}}<br> | }}<br> | ||
=== | === Grab/Throws === | ||
{{MoveData | {{MoveData | ||
|image= | |image= NASB2_Nigel_Grab.png | ||
|caption= | |caption= | ||
|name= | |name= Grab | ||
|input= | |input= Grab | ||
|data= | |data= | ||
{{AttackData-NickBrawl2 | {{AttackData-NickBrawl2 | ||
|Damage= | |Damage=0% | ||
|Startup=0 | |Startup=0 | ||
|Active=0-0 | |Active=0-0 | ||
| Line 538: | Line 545: | ||
|Safety=-0 | |Safety=-0 | ||
|description= | |description= | ||
* | * Nigel swings his arms to grab the opponent . | ||
}} | }} | ||
}}<br> | }}<br> | ||
{{MoveData | |||
|image= NASB2_Nigel_DashGrab.png | |||
|caption= | |||
|name= Dash Grab | |||
|input= Grab (Running) | |||
|data= | |||
{{AttackData-NickBrawl2 | |||
|Damage=0% | |||
|Startup=0 | |||
|Active=0-0 | |||
|Total Frames=0 | |||
|Safety=-0 | |||
|description= | |||
* Nigel lunges forward before trying to grab the opponent | |||
}} | |||
}}<br> | |||
=== | {{MoveData | ||
|image= NASB2_Nigel_Pummel.png | |||
|caption= | |||
|name= Pummel | |||
|input= Light (Grabbing) | |||
|data= | |||
{{AttackData-NickBrawl2 | |||
|Damage=1% | |||
|Startup=0 | |||
|Active=0-0 | |||
|Total Frames=0 | |||
|Safety=-0 | |||
|description= | |||
* Nigel peck's the opponent with his pointy nose | |||
}} | |||
}}<br> | |||
{{MoveData | |||
|image= NASB2_Nigel_UpThrow.png | |||
|caption= | |||
|name= Up Throw | |||
|input= Up (Grabbing) | |||
|data= | |||
{{AttackData-NickBrawl2 | |||
|Damage=10% | |||
|Startup=0 | |||
|Active=0-0 | |||
|Total Frames=0 | |||
|Safety=-0 | |||
|description= | |||
* Nigel launches the opponent upwards with his arms | |||
}} | |||
}}<br> | |||
{{MoveData | {{MoveData | ||
|image= | |image= NASB2_Nigel_ForwardThrow.png | ||
|caption= | |caption= | ||
|name= | |name= Foward Throw | ||
|input= | |input= Forward (Grabbing) | ||
|data= | |data= | ||
{{AttackData-NickBrawl2 | {{AttackData-NickBrawl2 | ||
|Damage= | |Damage=9% | ||
|Startup=0 | |Startup=0 | ||
|Active=0-0 | |Active=0-0 | ||
| Line 560: | Line 613: | ||
|Safety=-0 | |Safety=-0 | ||
|description= | |description= | ||
* | * Nigel throws the opponent in a downward angle | ||
}} | }} | ||
}}<br> | }}<br> | ||
{{MoveData | {{MoveData | ||
|image= | |image= NASB2_Nigel_DownThrow.png | ||
|caption= | |caption= | ||
|name= | |name= Down Throw | ||
|input= Down | |input= Down (Grabbing) | ||
|data= | |data= | ||
{{AttackData-NickBrawl2 | {{AttackData-NickBrawl2 | ||
|Damage= | |Damage=11% | ||
|Startup=0 | |Startup=0 | ||
|Active=0-0 | |Active=0-0 | ||
| Line 578: | Line 630: | ||
|Safety=-0 | |Safety=-0 | ||
|description= | |description= | ||
* | * Nigel slams his body on top of the opponent. | ||
* | * Kills at high percents. | ||
}} | }} | ||
}}<br> | }}<br> | ||
{{MoveData | {{MoveData | ||
|image= | |image= NASB2_Nigel_BackThrow.png | ||
|caption= | |caption= | ||
|name= | |name= Back Throw | ||
|input= | |input= Back (Grabbing) | ||
|data= | |data= | ||
{{AttackData-NickBrawl2 | {{AttackData-NickBrawl2 | ||
|Damage= | |Damage=18% | ||
|Startup=0 | |Startup=0 | ||
|Active=0-0 | |Active=0-0 | ||
| Line 596: | Line 648: | ||
|Safety=-0 | |Safety=-0 | ||
|description= | |description= | ||
* | * Nigel knocks the opponent away with a powerful kick. | ||
* | * Kills at high percents. | ||
* This throw deals the most damage out of any throw in the entire game. | |||
}} | }} | ||
}}<br> | }}<br> | ||
=== Super === | |||
{{MoveData | |||
|image= NASB2_Nigel_Super.png | |||
|caption= "Marvelous... The great giant elephant!" | |||
|name= Super | |||
|input= Slime+Light | |||
|data= | |||
{{AttackData-NickBrawl2 | |||
|Damage=40% | |||
|Startup=23 | |||
|Active=24-25 | |||
|Total Frames=124 | |||
|Safety=-0 | |||
|description= | |||
* Nigel observes the great giant elephant squishing the opponents. | |||
* The end-lag stalls Nigel in the air. | |||
}} | |||
}}<br> | |||
=== Taunts === | |||
{{MoveData | |||
|image= NASB2_Nigel_TauntNeutral.png | |||
|caption= "I'll do this with my hands!" | |||
|name= Nigel's thing with his hands | |||
|input= Taunt | |||
|data= | |||
{{AttackData-NickBrawl2 | |||
|Damage=- | |||
|Startup=- | |||
|Active=- | |||
|Total Frames=64 | |||
|Safety=-0 | |||
|description= | |||
* Nigel does his thing with his hands. | |||
}} | |||
}}<br> | |||
{{MoveData | |||
|image= NASB2_Nigel_TauntDown.png | |||
|caption= "Buahaha!" | |||
|name= Nigel's Laugh | |||
|input= Down+Taunt | |||
|data= | |||
{{AttackData-NickBrawl2 | |||
|Damage=- | |||
|Startup=- | |||
|Active=- | |||
|Total Frames=98 | |||
|Safety=-0 | |||
|description= | |||
* Nigel laughs at the opponent. | |||
}} | |||
}}<br> | |||
{{MoveData | |||
|image= NASB2_Nigel_TauntUp.png | |||
|caption= | |||
|name= Defense stance. | |||
|input= Up+Taunt | |||
|data= | |||
{{AttackData-NickBrawl2 | |||
|Damage=- | |||
|Startup=- | |||
|Active=- | |||
|Total Frames=54 | |||
|Safety=-0 | |||
|description= | |||
* Nigel strikes his menacing pose. | |||
}} | |||
}}<br> | |||
---- | ---- | ||
== | == Strategy == | ||
=== Air game === | |||
As previously stated, this is Nigel's bread and butter. Your goal here is taking advantage of your air mobility being as slippery as you can, while also hitting your opponent to rack up damage for the finishing blow. There's plenty of ways to do this with Nigel's kit that we need to analyze on more detail: | |||
:* '''''Neutral Air and Forward Air''''' | |||
::: Both moves have the main purpose of catching opponents on the air while being able to chain with other moves. | |||
:* '''''Back Air, SUp Air and SNeutral Air''''' | |||
::: These are all valid options to end combos or to catch opponents but do have some differences; like Back Air being the more spammable move, SUp Air being more of a kill move and SNeutral air dealing the most damage | |||
:* '''''SDown Air, Neutral Special and Side Special''''' | |||
::: They are your main mobility moves as Nigel, they all fulfill a different purpose though: | |||
::::** '''SDown Air''' has takes the same path with the same speed regardless of how much you charge it, plus it being somewhat quick makes it a good mix up to go into your opponents. | |||
::::** '''Neutral Special''' might not be great to use when you are trying to attack the opponent, but when you are away from them in the air, it becomes a very good and safe horizontal recovery tool as it gives you enough time to fully charge it and glide through the stage (bonus points if you hit the opponent). However, if the opponent catches on and tries to shield it, you can always cancel it early by pressing Special button again and land safely onto the stage. '''''(Its worth noting that the EX VERSION OF THIS MOVE should not be used, the charge time is really not an issue with the normal version and the other attributes just straight up nerf the move)'''' | |||
::::** '''Side Special''' works similarly to SDown Air on it having a fixed path and same speed always, but its a lot slower and covers less distance. This however is compensated by the fact that its one the major combo tools Nigel has, making it a High risk high reward move. '''''EX VERSION ''''' makes the move less risky because it gains more speed and covers more range. | |||
:* '''''Up Air''''' | |||
::: Arguably Nigel's best move, '''Up Air''' is a spammable juggle that chains into itself or other attacks while covering a huge arc above Nigel's head. AND on top of that it can also take stocks. | |||
:* '''''Down Air''''' | |||
::: On the flip side, '''Down Air''' is without a doubt Nigel's worst move, but that's not to say it doesn't have it's uses. It can be a combo extension move but the timing and positioning is precise and the sweet spot that spikes is there (keep in mind that there has never been a documented ranked/tournament game of this hitbox hitting someone due to how hard it is to actually land it.) | |||
:* '''''Slime Dash''''' | |||
::: Another universal NASB 2 mechanic but its worth saying that if you ever need the extra distance to catch someone, do not be afraid to use this. | |||
=== Ground game === | |||
Just because Nigel has an incredibly good air game doesn't mean he don't got tools on the ground. When you are grounded, you are mainly looking to either start a combo or use one his explosive ground moves to kill opponents. | |||
:* '''''Nigel's light grounded moves:''''' | |||
::: These attacks either start combos or serve as get off me tools. | |||
::::** '''''Jab (Neutral Light)''''' sends opponents upwards and in front of Nigel with great amount of hit-stun, making it a very good move to start a combo (keep in mind that it doesn't have the best range though). | |||
::::** '''''Ftilt (Light Foward ground) ''''' creates a big hit box in front of Nigel that knocks away opponents and is spammable, while also being a good out of shield (OOS) option. | |||
::::** '''''Uptilt (Light Up ground) ''''' sends opponent's upwards making it a good combo starter, can also be used to catch rolls. | |||
::::** '''''Dtilt (Light Down ground) ''''' almost same purpose as Ftilt, but the sweet spot makes it a potential burst of damage (has less range and is slightly slower than Ftilt though). | |||
:* '''''Nigel's Strong grounded moves:''''' | |||
::: All of them server the purpose as finishers, but they do it in different directions: | |||
::::** '''''SFtilt (Strong Foward ground) ''''' deals high damage and knocks-back enemies to the side blast zones. | |||
::::** '''''SUptilt (Strong Up ground) ''''' uppercuts enemies to the ceiling blast zone. | |||
::::** '''''SDtilt (Strong Down ground) ''''' spikes opponents (or in case of hitting the sour spot, sends to the side blast zones). | |||
:* '''''Nigel's Grab throws:''''' | |||
::::** ''''' Up Throw ''''' can chain into a lot of moves, but keep in mind that if opponents DI out of it, you'll need a Slime dash to catch them. | |||
::::** '''''Forward Throw''''' launches the opponents away in a downward angle, however the knock-back isn't great so you should never use it over '''''down throw''''' unless the opponent is using a character with a bad or exploitable recovery (like Gertie for example) | |||
::::** '''''Back Throw''''' is a kill throw, also deals the most damage out of any throw in the entire game. | |||
::::** '''''Down Throw''''' is a kill throw as well. | |||
=== Neutral Game === | |||
By far the hardest part about Nigel is learning how to start a combo chain, not because its mechanically intensive... more so his lack of approaching tools and shield pressure make him vulnerable to punishes when trying to do so, plus his light-weightiness leaves no room for mistakes. This factor means good neutral skills are required to perform on Nigel. Some tips to overcome this weakness are the following: | |||
:* '''USE NIGEL'S MULTI-JUMPS:''' | |||
::: A common tactic used in neutral is to not immediately approach an opponent when going into them, normally done by jumping. This acts as a bait to make the opponent whiff a punish move, which gives you a window to punish/start a combo. Nigel can do 5 jumps before having to touch the ground, giving him an edge with the mind games. | |||
:*'''USE NIGEL'S MOBILITY TOOLS:''' | |||
::: These moves can catch opponents off-guard when mixed in with your approaches, just be careful not to spam them or you'll become predictable. | |||
:*''' HIDE NIGEL'S GRAB:''' | |||
::: Some moves like Back Air can have their end-lag cancelled just by touching the ground, this is helpful against opponents who like to spam shield as you could use those moves to pretend you'll hit the opponent when shielding, but instead, you land on the ground just barely not touching the shield and run for a grab. This is not only a quick setup, but also can confuse the enemy into keeping their shield on. | |||
:*'''USE NAIR/GRAB OOS (Out of Shield):''' | |||
::: Nigel's Nair and grab are very quick and can defeat a lot of move's. Ideally you would just grab after your shield gets touched but in the case of them not being in grab range, you can short-hop Nair for the punish (and Nair is a very good tool to start combo's with Nigel as well). | |||
:*''' SPACE YOUR OPPONENTS:''' | |||
::: Even though this is a universal thing within NASB 2, its pretty mandatory on Nigel to be able to punish opponents. The good news is that he also has an edge with his good air mobility, allowing you to dodge moves easily on the air and not being reliant only on wave-dashing/running behind. | |||
---- | |||
== Techniques == | |||
* PLACEHOLDER | * PLACEHOLDER | ||
* PLACEHOLDER | * PLACEHOLDER | ||
* PLACEHOLDER | * PLACEHOLDER | ||
=== Snap (Down Special) setups === | |||
Knowing how to land Nigel's down special is crucial to cheese damage and potentially take early stocks. They maybe precise but with practice, you'll get the hang of it. '''''[NOTE: The clips shown are slowed down so you can analyze the set up]''''' | |||
---- | |||
==== Non-Slime setups ==== | |||
---- | |||
===== Up Throw ===== | |||
[[File:Up_Throw_Snap.gif|center|400px]] | |||
On early damage percents and if the opponent's character isn't floaty, you might be able to sneak in a '''Snap''' from '''Up Throw''' if you are quick enough to react where the opponent DI's (except if they DI Out of the throw). | |||
---- | ---- | ||
===== Up Air ===== | |||
[[File:UpAir_Snap.gif|center|400px]] | |||
On early damage percents and if the opponent's character isn't floaty, you can '''Snap''' from '''Up Air''' if you can predict where the opponent DI's. | |||
---- | |||
===== Jab ===== | |||
== | [[File:Jab_Snap.gif|center|400px]] | ||
| | On Mid damage percents, you can confirm a '''Snap''' from '''Nigel's Jab''' if you react where the opponent DI's (except if they DI Out). | ||
---- | |||
===== Side Special ===== | |||
The way you use this setup depends on how much damage percent the opponent has. | |||
====== Early Percents ====== | |||
[[File:SideB_Ground_Snap.gif|center|400px]] | |||
| | |||
| | |||
Side Special does not have a lot of base knockback, but you are still able to get a '''Snap''' if you perform the move on the ground, all you have to do is quickly run to where the opponent DI's and perform the '''Snap'''. Be careful as if you are not quick enough, they will touch the ground and you will miss the opportunity. | |||
====== Mid-High Percents ====== | |||
[[File:SideB_Air_Snap.gif|center|400px]] | |||
At this point, Side Special will throw opponents high enough for you to jump and catch them in the air, this allows you to get a '''Snap''' if you jump high enough while chasing wherever the opponent DI's. | |||
---- | |||
==== Slime setups ==== | |||
With slime, you have access to much more set ups, but I'll only mention the ones that are consistent/powerful: | |||
---- | ---- | ||
===== Slime Cancel Up Air ===== | |||
[[File:UpAir_Slime_Snap.gif|center|400px]] | |||
== | To perform this setup, '''Slime Cancel''' your '''Up Air''' and move Nigel near your opponent to then perform the '''Snap'''. While this is one of the easier setups to do, since you don't normally Up Air near the side blast zones + Slime Cancel reduces knock-back, this has a hard time taking stocks. My recommendation is to use it as a combo finisher for the extra 20 damage. | ||
---- | |||
===== Slime Cancel Foward Air ===== | |||
[[File:FAir_Slime_Snap.gif|center|400px]] | |||
To perform this setup, '''Slime Cancel''' your '''FAir''' and move Nigel near your opponent to then perform the '''Snap'''. Keep in mind '''''FAir can only be Slime Canceled just before the Strong Hit appears'''''. If you hit this setup near the side blast zone, you guarantee taking a stock. | |||
---- | |||
===== EX Side Special ===== | |||
[[File:EX_SideB_Snap.gif|center|400px]] | |||
Very similar to the normal Side Special set up, just that you gotta keep in mind about the extra distance it covers and the higher knockback. | |||
---- | ---- | ||
===== Slime Dash ===== | |||
[[File:Slime_Dash_Snap.gif|center|400px]] | |||
A very high risk, high reward move to pull off, with this one you try to catch the opponent's trajectory when they are '''recovering/on hit-stun'''. Only use this to finish off the opponent and if you are feeling based. | |||
---- | |||
== | == Combos == | ||
* PLACEHOLDER | * PLACEHOLDER | ||
| Line 652: | Line 923: | ||
---- | ---- | ||
== Matchups == | |||
(Note: List is unordered) [TO DO: Update list as this one is from previous patch and is now outdated] | |||
{| class="wikitable" | |||
|- | |||
| '''+1''' || [[File:NASB2_Beavers-Norbert_Icon.png|x80px]] | |||
|- | |||
| '''0''' || [[File:NASB2_Plankton_Icon.png|x80px]] [[File:NASB2_Ember_Icon.png|x80px]] [[File:NASB2_Krabs_Icon.png|x80px]] [[File:NASB2_Korra_Icon.png|x80px]] [[File:NASB2_Reptar_Icon.png|x80px]] [[File:NASB2_Zuko_Icon.png|x80px]] [[File:NASB2_Rocksteady_Icon.png|x80px]] | |||
|- | |||
| '''-1''' || [[File:NASB2_Patrick_Icon.png|x80px]] [[File:NASB2_Azula_Icon.png|x80px]] [[File:NASB2_April_Icon.png|x80px]] [[File:NASB2_Gertie_Icon.png|x80px]] [[File:NASB2_Garfield_Icon.png|x80px]] [[File:NASB2_Lucy_Icon.png|x80px]] | |||
|- | |||
| '''-2''' || [[File:NASB2_Sponge_Icon.png|x80px]] [[File:NASB2_Raphael_Icon.png|x80px]] [[File:NASB2_Danny_Icon.png|x80px]] [[File:NASB2_Donatello_Icon.png|x80px]] [[File:NASB2_RenStimpy_Icon.png|x80px]] [[File:NASB2_Rocko_Icon.png|x80px]] [[File:NASB2_Zim_Icon.png|x80px]] [[File:NASB2_Jenny_Icon.png|x80px]] [[File:NASB2_ElTigre_Icon.png|x80px]] [[File:NASB2_Beavers-Daggett_Icon.png|x80px]] | |||
|- | |||
| '''-3''' || [[File:NASB2_Aang_Icon.png|x80px]] [[File:NASB2_Jimmy_Icon.png|x80px]] [[File:NASB2_Gerald_Icon.png|x80px]] [[File:NASB2_Squidward_Icon.png|x80px]] | |||
|} | |||
---- | |||
== Other Resources == | == Other Resources == | ||
| Line 658: | Line 945: | ||
* PLACEHOLDER | * PLACEHOLDER | ||
* PLACEHOLDER | * PLACEHOLDER | ||
=== Videos === | |||
PLACEHOLDER | |||
| Line 665: | Line 955: | ||
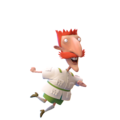
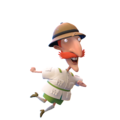
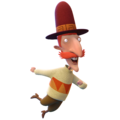
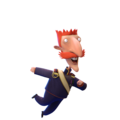
== Costumes == | == Costumes == | ||
<gallery> | |||
File:NASB2 Nigel Costume00.png|500px|thumb|Nigel's Default Outfit. | |||
File:NASB2 Nigel Costume01.png|500px|thumb|Nigel with a Safari Hat. | |||
File:NASB2 Nigel Costume02.png|500px|thumb|Nigel's outfit from "Nigel Knows Best". | |||
File:NASB2 Nigel Costume03.png|500px|thumb|Nigel's outfit from "Sir Nigel" (unlocked by having the Ultimate edition of NASB 2). | |||
File:NASB2 Nigel Costume04.png|500px|thumb|Mind controlled Nigel (unlocked by defeating Nigel twice in campaign mode). | |||
File:NASB2 Nigel Costume05.png|500px|thumb|Nigel's Ghost Clone (unlocked by defeating Nigel thrice in campaign mode). | |||
</gallery> | |||
{{Navbox-NickBrawl2}} | {{Navbox-NickBrawl2}} | ||
[[Category:Nickelodeon All-Star Brawl 2]] | [[Category:Nickelodeon All-Star Brawl 2]] | ||
Latest revision as of 00:09, 9 March 2025
About
A smashing nature narrator with an appetite for adventure!
Sir Nigel Archibald Thornberry, KBE is the patriarch of the Thornberry family. Born to an aristocratic British couple, Nigel has devoted his life to studying animals and other forms of wildlife, and is the host of his own nature show, Nigel Thornberry's Wild World. An expert zoologist, experienced pilot, and general upstanding guy, Nigel travels the world with his family in their RV to see what exciting creatures it has to offer.
Playstyle
Due to his lightweight yet high damage potential, Nigel falls under the glass cannon archetype (particularly in bursting). He excels at hitting opponents in the air while at the same time being good at moving in it. Nigel also has a lot of moves that can either be spammed (Nair, Bair, etc.) or kill opponents early with the proper setups (Supair, Down special, etc).
Metagame
Nigel is ranked 25th out of 29 on the current tier list, in the C tier. This is a critical drop over his 3rd out of 25 placement in the first Nickelodeon All-Star Brawl and is the biggest drop of any veteran in the game.
Nigel is a floaty character that's most threatening in the air. His air mobility is very noteworthy, having 4 jumps and being able to glide around with both his Air Down Strong and his Light Back Air. This, in tandem, gives him a very good recovery, allowing him to mixup his direction depending on how many jumps he uses. Nigel also has a good combo game, being able to juggle his opponent high in the air due to his large amount of jumps. However, this all pales in comparison to his signature move: Smashing! Comboing into this move for an early kill is the M.O of Nigel's gameplan.
Nigel is burdened with a large list of flaws, however. One of his more notable ones is his weight: he is among the lightest in the cast, narrowly being beat out by Zim in terms of base stats. This makes him very easy to KO, and ensures he can't take too many risks. Not helping matters is his large frame, which makes him easy to hit if the opponent has a fair amount of range. Nigel also has bad approach options, with Back Air arguably being his best one, and this is coupled with awful shield pressure as well, with most of his moves being unsafe on shield. These weaknesses make Nigel a very risky character to play, making disadvantage an uphill battle if he ever has the misfortune of being in it.
Nigel has largely been considered a low-tier character for most of the metagame, even being considered the worst character in the game for a large portion of it. In spite of this, however, he has achieved respectable and even strong results in tournament play, notably offline. Perhaps because of this, Nigel has been seen slightly more positively in the present day, no longer considered to be the worst character in the game by many of the playerbase. In spite of this, though, Nigel has yet to escape the bottom 5 characters, and remains a low-tier, albeit a polarizing one.
 | |
| Franchise |
The Wild Thornberrys |
|---|---|
| Home Stage |
Wild Savannah |
| Weight |
0.75 |
| Fall Speed |
0.88 |
| Gravity |
0.8 |
| Run Speed |
0.84 |
| Air Speed |
1.5 |
| Strengths | Weaknesses |
|---|---|
|
|
Moveset
Ground Light Attacks
Light

| Damage | Startup | Active Frames | Total Frames | Safety | |
|---|---|---|---|---|---|
| 7% | 5 | 6-8 | 31 | -0 | |
| |||||
Forward+Light

| Damage | Startup | Active Frames | Total Frames | Safety | |
|---|---|---|---|---|---|
| 8% | 7 | 8-13 | 33 | -0 | |
| |||||
Up+Light

| Damage | Startup | Active Frames | Total Frames | Safety | |
|---|---|---|---|---|---|
| 7% | 7 | 8-11 | 31 | -0 | |
| |||||
Down+Light

| Damage | Startup | Active Frames | Total Frames | Safety | |
|---|---|---|---|---|---|
| 8% | 8 | 9-16 | 38 | -0 | |
| |||||
Light (Running)

| Damage | Startup | Active Frames | Total Frames | Safety | |
|---|---|---|---|---|---|
| 11% | 10 | 11-26 | 49 | -0 | |
| |||||
Air Light Attacks
Light (Airborne)

| Damage | Startup | Active Frames | Total Frames | Safety | |
|---|---|---|---|---|---|
| 7% | 5 | 6-30 | 42 | -0 | |
| |||||
Forward+Light (Airborne)

| Damage | Startup | Active Frames | Total Frames | Safety | |
|---|---|---|---|---|---|
| 2% | 6 | 7-24, 28-29 | 41 | -0 | |
| |||||
Back+Light (Airborne)

| Damage | Startup | Active Frames | Total Frames | Safety | |
|---|---|---|---|---|---|
| 13% | 8 | 9-13 | 41 | -0 | |
| |||||
Up+Light (Airborne)

| Damage | Startup | Active Frames | Total Frames | Safety | |
|---|---|---|---|---|---|
| 9% | 6 | 7-18 | 40 | -0 | |
| |||||
Down+Light (Airborne)

| Damage | Startup | Active Frames | Total Frames | Safety | |
|---|---|---|---|---|---|
| 7% | 11 | 12-14, 17-18 | 45 | -0 | |
| |||||
Ground Strong Attacks
Strong

| Damage | Startup | Active Frames | Total Frames | Safety | |
|---|---|---|---|---|---|
| 16% | 11 | 12-14,19-21 | 45 | -0 | |
| |||||
Up+Strong

| Damage | Startup | Active Frames | Total Frames | Safety | |
|---|---|---|---|---|---|
| 15% | 11 | 12-16 | 46 | -0 | |
| |||||
Down+Strong

| Damage | Startup | Active Frames | Total Frames | Safety | |
|---|---|---|---|---|---|
| 14% | 7 | 8-10 | 48 | -0 | |
| |||||
Air Strong Attacks
Strong (Airborne)

| Damage | Startup | Active Frames | Total Frames | Safety | |
|---|---|---|---|---|---|
| 10% | 10 | 11-12 | 42 | -0 | |
| |||||
Up+Strong (Airborne)

| Damage | Startup | Active Frames | Total Frames | Safety | |
|---|---|---|---|---|---|
| 14% | 9 | 10-11,18-20 | 46 | -0 | |
| |||||
Down+Strong (Airborne)

| Damage | Startup | Active Frames | Total Frames | Safety | |
|---|---|---|---|---|---|
| 12% | 13 | 14-36 | 60 | -0 | |
| |||||
Special Attacks
Special

| Damage | Startup | Active Frames | Total Frames | Safety | |
|---|---|---|---|---|---|
| 12%-26% (depending on charge) | 20 | 21-45 | 76 | -0 | |
| |||||
Forward+Special

| Damage | Startup | Active Frames | Total Frames | Safety | |
|---|---|---|---|---|---|
| 8% | 14 | 15-30 | 46 | -0 | |
| |||||
Down+Special

| Damage | Startup | Active Frames | Total Frames | Safety | |
|---|---|---|---|---|---|
| 20% | 2 | 3-4 | 124 | -0 | |
| |||||
Up+Special

| Damage | Startup | Active Frames | Total Frames | Safety | |
|---|---|---|---|---|---|
| 7% | 40 | Depends on airtime, 1-6 (when landing) | On average 84 | -0 | |
| |||||
Grab/Throws
Grab

| Damage | Startup | Active Frames | Total Frames | Safety | |
|---|---|---|---|---|---|
| 0% | 0 | 0-0 | 0 | -0 | |
| |||||
Grab (Running)

| Damage | Startup | Active Frames | Total Frames | Safety | |
|---|---|---|---|---|---|
| 0% | 0 | 0-0 | 0 | -0 | |
| |||||
Light (Grabbing)

| Damage | Startup | Active Frames | Total Frames | Safety | |
|---|---|---|---|---|---|
| 1% | 0 | 0-0 | 0 | -0 | |
| |||||
Up (Grabbing)

| Damage | Startup | Active Frames | Total Frames | Safety | |
|---|---|---|---|---|---|
| 10% | 0 | 0-0 | 0 | -0 | |
| |||||
Forward (Grabbing)

| Damage | Startup | Active Frames | Total Frames | Safety | |
|---|---|---|---|---|---|
| 9% | 0 | 0-0 | 0 | -0 | |
| |||||
Down (Grabbing)

| Damage | Startup | Active Frames | Total Frames | Safety | |
|---|---|---|---|---|---|
| 11% | 0 | 0-0 | 0 | -0 | |
| |||||
Back (Grabbing)

| Damage | Startup | Active Frames | Total Frames | Safety | |
|---|---|---|---|---|---|
| 18% | 0 | 0-0 | 0 | -0 | |
| |||||
Super
Slime+Light

| Damage | Startup | Active Frames | Total Frames | Safety | |
|---|---|---|---|---|---|
| 40% | 23 | 24-25 | 124 | -0 | |
| |||||
Taunts
Taunt

| Damage | Startup | Active Frames | Total Frames | Safety | |
|---|---|---|---|---|---|
| - | - | - | 64 | -0 | |
| |||||
Down+Taunt

| Damage | Startup | Active Frames | Total Frames | Safety | |
|---|---|---|---|---|---|
| - | - | - | 98 | -0 | |
| |||||
Up+Taunt

| Damage | Startup | Active Frames | Total Frames | Safety | |
|---|---|---|---|---|---|
| - | - | - | 54 | -0 | |
| |||||
Strategy
Air game
As previously stated, this is Nigel's bread and butter. Your goal here is taking advantage of your air mobility being as slippery as you can, while also hitting your opponent to rack up damage for the finishing blow. There's plenty of ways to do this with Nigel's kit that we need to analyze on more detail:
- Neutral Air and Forward Air
- Both moves have the main purpose of catching opponents on the air while being able to chain with other moves.
- Back Air, SUp Air and SNeutral Air
- These are all valid options to end combos or to catch opponents but do have some differences; like Back Air being the more spammable move, SUp Air being more of a kill move and SNeutral air dealing the most damage
- SDown Air, Neutral Special and Side Special
- They are your main mobility moves as Nigel, they all fulfill a different purpose though:
- SDown Air has takes the same path with the same speed regardless of how much you charge it, plus it being somewhat quick makes it a good mix up to go into your opponents.
- They are your main mobility moves as Nigel, they all fulfill a different purpose though:
- Neutral Special might not be great to use when you are trying to attack the opponent, but when you are away from them in the air, it becomes a very good and safe horizontal recovery tool as it gives you enough time to fully charge it and glide through the stage (bonus points if you hit the opponent). However, if the opponent catches on and tries to shield it, you can always cancel it early by pressing Special button again and land safely onto the stage. (Its worth noting that the EX VERSION OF THIS MOVE should not be used, the charge time is really not an issue with the normal version and the other attributes just straight up nerf the move)'
- Side Special works similarly to SDown Air on it having a fixed path and same speed always, but its a lot slower and covers less distance. This however is compensated by the fact that its one the major combo tools Nigel has, making it a High risk high reward move. EX VERSION makes the move less risky because it gains more speed and covers more range.
- Up Air
- Arguably Nigel's best move, Up Air is a spammable juggle that chains into itself or other attacks while covering a huge arc above Nigel's head. AND on top of that it can also take stocks.
- Down Air
- On the flip side, Down Air is without a doubt Nigel's worst move, but that's not to say it doesn't have it's uses. It can be a combo extension move but the timing and positioning is precise and the sweet spot that spikes is there (keep in mind that there has never been a documented ranked/tournament game of this hitbox hitting someone due to how hard it is to actually land it.)
- Slime Dash
- Another universal NASB 2 mechanic but its worth saying that if you ever need the extra distance to catch someone, do not be afraid to use this.
Ground game
Just because Nigel has an incredibly good air game doesn't mean he don't got tools on the ground. When you are grounded, you are mainly looking to either start a combo or use one his explosive ground moves to kill opponents.
- Nigel's light grounded moves:
- These attacks either start combos or serve as get off me tools.
- Jab (Neutral Light) sends opponents upwards and in front of Nigel with great amount of hit-stun, making it a very good move to start a combo (keep in mind that it doesn't have the best range though).
- These attacks either start combos or serve as get off me tools.
- Ftilt (Light Foward ground) creates a big hit box in front of Nigel that knocks away opponents and is spammable, while also being a good out of shield (OOS) option.
- Uptilt (Light Up ground) sends opponent's upwards making it a good combo starter, can also be used to catch rolls.
- Dtilt (Light Down ground) almost same purpose as Ftilt, but the sweet spot makes it a potential burst of damage (has less range and is slightly slower than Ftilt though).
- Nigel's Strong grounded moves:
- All of them server the purpose as finishers, but they do it in different directions:
- SFtilt (Strong Foward ground) deals high damage and knocks-back enemies to the side blast zones.
- All of them server the purpose as finishers, but they do it in different directions:
- SUptilt (Strong Up ground) uppercuts enemies to the ceiling blast zone.
- SDtilt (Strong Down ground) spikes opponents (or in case of hitting the sour spot, sends to the side blast zones).
- Nigel's Grab throws:
- Up Throw can chain into a lot of moves, but keep in mind that if opponents DI out of it, you'll need a Slime dash to catch them.
- Forward Throw launches the opponents away in a downward angle, however the knock-back isn't great so you should never use it over down throw unless the opponent is using a character with a bad or exploitable recovery (like Gertie for example)
- Back Throw is a kill throw, also deals the most damage out of any throw in the entire game.
- Down Throw is a kill throw as well.
Neutral Game
By far the hardest part about Nigel is learning how to start a combo chain, not because its mechanically intensive... more so his lack of approaching tools and shield pressure make him vulnerable to punishes when trying to do so, plus his light-weightiness leaves no room for mistakes. This factor means good neutral skills are required to perform on Nigel. Some tips to overcome this weakness are the following:
- USE NIGEL'S MULTI-JUMPS:
- A common tactic used in neutral is to not immediately approach an opponent when going into them, normally done by jumping. This acts as a bait to make the opponent whiff a punish move, which gives you a window to punish/start a combo. Nigel can do 5 jumps before having to touch the ground, giving him an edge with the mind games.
- USE NIGEL'S MOBILITY TOOLS:
- These moves can catch opponents off-guard when mixed in with your approaches, just be careful not to spam them or you'll become predictable.
- HIDE NIGEL'S GRAB:
- Some moves like Back Air can have their end-lag cancelled just by touching the ground, this is helpful against opponents who like to spam shield as you could use those moves to pretend you'll hit the opponent when shielding, but instead, you land on the ground just barely not touching the shield and run for a grab. This is not only a quick setup, but also can confuse the enemy into keeping their shield on.
- USE NAIR/GRAB OOS (Out of Shield):
- Nigel's Nair and grab are very quick and can defeat a lot of move's. Ideally you would just grab after your shield gets touched but in the case of them not being in grab range, you can short-hop Nair for the punish (and Nair is a very good tool to start combo's with Nigel as well).
- SPACE YOUR OPPONENTS:
- Even though this is a universal thing within NASB 2, its pretty mandatory on Nigel to be able to punish opponents. The good news is that he also has an edge with his good air mobility, allowing you to dodge moves easily on the air and not being reliant only on wave-dashing/running behind.
Techniques
- PLACEHOLDER
- PLACEHOLDER
- PLACEHOLDER
Snap (Down Special) setups
Knowing how to land Nigel's down special is crucial to cheese damage and potentially take early stocks. They maybe precise but with practice, you'll get the hang of it. [NOTE: The clips shown are slowed down so you can analyze the set up]
Non-Slime setups
Up Throw

On early damage percents and if the opponent's character isn't floaty, you might be able to sneak in a Snap from Up Throw if you are quick enough to react where the opponent DI's (except if they DI Out of the throw).
Up Air

On early damage percents and if the opponent's character isn't floaty, you can Snap from Up Air if you can predict where the opponent DI's.
Jab

On Mid damage percents, you can confirm a Snap from Nigel's Jab if you react where the opponent DI's (except if they DI Out).
Side Special
The way you use this setup depends on how much damage percent the opponent has.
Early Percents

Side Special does not have a lot of base knockback, but you are still able to get a Snap if you perform the move on the ground, all you have to do is quickly run to where the opponent DI's and perform the Snap. Be careful as if you are not quick enough, they will touch the ground and you will miss the opportunity.
Mid-High Percents

At this point, Side Special will throw opponents high enough for you to jump and catch them in the air, this allows you to get a Snap if you jump high enough while chasing wherever the opponent DI's.
Slime setups
With slime, you have access to much more set ups, but I'll only mention the ones that are consistent/powerful:
Slime Cancel Up Air

To perform this setup, Slime Cancel your Up Air and move Nigel near your opponent to then perform the Snap. While this is one of the easier setups to do, since you don't normally Up Air near the side blast zones + Slime Cancel reduces knock-back, this has a hard time taking stocks. My recommendation is to use it as a combo finisher for the extra 20 damage.
Slime Cancel Foward Air

To perform this setup, Slime Cancel your FAir and move Nigel near your opponent to then perform the Snap. Keep in mind FAir can only be Slime Canceled just before the Strong Hit appears. If you hit this setup near the side blast zone, you guarantee taking a stock.
EX Side Special

Very similar to the normal Side Special set up, just that you gotta keep in mind about the extra distance it covers and the higher knockback.
Slime Dash

A very high risk, high reward move to pull off, with this one you try to catch the opponent's trajectory when they are recovering/on hit-stun. Only use this to finish off the opponent and if you are feeling based.
Combos
- PLACEHOLDER
- PLACEHOLDER
- PLACEHOLDER
Matchups
(Note: List is unordered) [TO DO: Update list as this one is from previous patch and is now outdated]
| +1 | |
| 0 | |
| -1 | |
| -2 | |
| -3 |
Other Resources
- PLACEHOLDER
- PLACEHOLDER
- PLACEHOLDER
Videos
PLACEHOLDER
Costumes
Nigel's Default Outfit.
Nigel with a Safari Hat.
Nigel's outfit from "Nigel Knows Best".
Nigel's outfit from "Sir Nigel" (unlocked by having the Ultimate edition of NASB 2).

Mind controlled Nigel (unlocked by defeating Nigel twice in campaign mode).
Nigel's Ghost Clone (unlocked by defeating Nigel thrice in campaign mode).


