RaccoonFoot (talk | contribs) mNo edit summary |
|||
| (41 intermediate revisions by 7 users not shown) | |||
| Line 1: | Line 1: | ||
{{NickBrawl2 Character Intro|char=Korra |full=Korra|short=Korra | {{NickBrawl2 Character Intro|char=Korra |full=[[File:NASB2_KorraStock.png|x30px]] Korra|short=Korra | ||
| franchise = The Legend of Korra | | franchise = The Legend of Korra | ||
| homestage = Harmonic Convergence | | homestage = Harmonic Convergence | ||
| weight = | | weight = 0.92 | ||
| fallspeed = 1. | | fallspeed = 1.38 | ||
| gravity = 1. | | gravity = 1.175 | ||
| runspeed = 1.35 | | runspeed = 1.35 | ||
| airspeed = 0.93 | | airspeed = 0.93 | ||
| Line 18: | Line 18: | ||
== About == | == About == | ||
The powerful Avatar of a new generation. | '''''The powerful Avatar of a new generation.''''' | ||
== | Part of the Avatar Legends franchise, Korra is the Avatar after Aang and hails from the Southern Water Tribe. The White Lotus found her at a young age and decided to train her in a secure compound. After mastering 3 of the 4 elements, she went to Republic City to learn airbending from Aang's son Tenzin. Her hard-headed nature and justice sensitivity led to some fierce battles with many people throughout her life, including the masked leader of an anti-bending movement and a secret order dedicated to sending the world into chaos. She may not have won every battle she fought, but she's still credited for many great feats such as reopening the Spirit Portals, bringing back the airbender population, and dividing the world into... Oh wait, she hasn't done that just yet. Let's just say it's something for the next Avatar to worry about... | ||
== Playstyle == | |||
Korra is a fast, heavy, strong and incredibly versatile character, capable of controlling the pace of the match like almost nobody else. Korra's suite of disjointed aerials and nigh unmatched aerial mobility between Air Side Special and her incredible fall speed enable some of the most non-linear and difficult to assess approach options in the game; this combined with solid grounded spacing tools in Forward Light and Forward Strong allow her to apply pressure in a variety of ways. Alongside these traditionally strong traits exists a smorgasbord of more situational options, such as her grounded Neutral Special laying a bed of traction reducing ice on the ground, Grounded Up Special, a strong shield pressure tool and "Shine"-like attack on hit. Her primary weaknesses lie within her well-above average Fall Speed leading to her being combo food versus a skilled opponent, and her exploitable, linear recovery from below causing her to struggle to return to the stage when spiked. | Korra is a fast, heavy, strong and incredibly versatile character, capable of controlling the pace of the match like almost nobody else. Korra's suite of disjointed aerials and nigh unmatched aerial mobility between Air Side Special and her incredible fall speed enable some of the most non-linear and difficult to assess approach options in the game; this combined with solid grounded spacing tools in Forward Light and Forward Strong allow her to apply pressure in a variety of ways. Alongside these traditionally strong traits exists a smorgasbord of more situational options, such as her grounded Neutral Special laying a bed of traction reducing ice on the ground, Grounded Up Special, a strong shield pressure tool and "Shine"-like attack on hit. Her primary weaknesses lie within her well-above average Fall Speed leading to her being combo food versus a skilled opponent, and her exploitable, linear recovery from below causing her to struggle to return to the stage when spiked. | ||
== Metagame == | |||
Korra is ranked 13th out of 29 on the current [[Nickelodeon All-Star Brawl 2/FAQ|tier list]], in the A tier. This is a sizeable improvement over her 20th out of 25 placement in the first [[Nickelodeon All-Star Brawl]]. | |||
Korra is a particularly strong character in many departments. Her movement is tricky for a lot of players to keep up with, being uniquely special-oriented. This ease of movement allows Korra to freely confirm into a kill off of anything, even something as little as a jab. Finally, Korra also has a very strong edgeguarding game, being able to fling rocks at her opponents using her Aerial Up Strong and follow it up with her deadly Aerial Neutral Strong. | |||
Korra is not without her weaknesses, however. Perhaps her most notable flaw is her fast fall speed, which, combined with her tall frame, makes her a combo food character for some of the cast. Korra also has a very linear vertical recovery, though she can mix it up depending on how many resources she has left when offstage. | |||
Overall, Korra's strengths outweigh her weaknesses. While not as dominant as she was previously, her players still achieve notable results in the current metagame. | |||
|content2= | |content2= | ||
| Line 29: | Line 41: | ||
}} | }} | ||
}} | }} | ||
---- | ---- | ||
{{ProConTable | {{ProConTable | ||
|pros= | |pros= | ||
* ''' | * '''Good Movement:''' Between Grounded Up Special, Side Special, and Air Down Strong, Korra has many tools for chasing opponents toward the blastzone. | ||
* ''' | * '''Strong Combos:''' Thanks in part to her great movement, Korra can combo off nearly every move in her kit, at the right percents. She can often force stray hits to become combos by spending slime on Side Special | ||
* '''Edgeguarding:''' Korra has many tools to prevent opponents from reaching the ledge. Air Down Special, Strong Up Air, and (Slime) Neutral Special can wall out opponents. | |||
|cons= | |cons= | ||
* '''Fall Speed:''' Korra's insane fall speed leads to some of the most devastating, consistent & hard to escape combos in the game. | * '''Fall Speed:''' Korra's insane fall speed leads to some of the most devastating, consistent & hard to escape combos in the game. | ||
* '''Linear Recovery:''' Korra's Up Special is one of the few that doesn't snap ledge until the animation has completed, allowing for disjointed pokes that cover the ledge to make recovering a living nightmare for our avatar. | * '''Linear Recovery:''' Korra's Up Special is one of the few that doesn't snap ledge until the animation has completed, allowing for disjointed pokes that cover the ledge to make recovering a living nightmare for our avatar. | ||
}} | }} | ||
---- | ---- | ||
== Moveset == | == Moveset == | ||
| Line 59: | Line 66: | ||
{{MoveData | {{MoveData | ||
|image= NASB2_Korra_LightNeutral-ElementalCombo.png | |image= NASB2_Korra_LightNeutral-ElementalCombo.png | ||
|caption= | |caption= | ||
|name= Elemental Combo | |name= Elemental Combo | ||
|input= Light | |input= Light | ||
| Line 78: | Line 85: | ||
{{MoveData | {{MoveData | ||
|image= NASB2_Korra_LightForward-WaterWhips.png | |image= NASB2_Korra_LightForward-WaterWhips.png | ||
|caption= " | |caption= "Footsies" | ||
|name= Water Whips | |name= Water Whips | ||
|input= Forward+Light | |input= Forward+Light | ||
| Line 96: | Line 103: | ||
{{MoveData | {{MoveData | ||
|image= NASB2_Korra_LightUp-RisingKick.png | |image= NASB2_Korra_LightUp-RisingKick.png | ||
|caption= | |caption= | ||
|name= Rising Kick | |name= Rising Kick | ||
|input= Up+Light | |input= Up+Light | ||
|data= | |data= | ||
{{AttackData-NickBrawl2 | {{AttackData-NickBrawl2 | ||
|Damage= | |Damage= 10% / 7% | ||
|Startup= | |Startup= 9 / 10 | ||
|Active= | |Active= 9-16 / 10-21 | ||
|Total Frames= | |Total Frames= 32 | ||
|Safety= - | |Safety= -13 | ||
|description= | |description= | ||
* | * Korra kicks air upward while rising into the air. Has a direct hit and a gust hitbox | ||
* | * The hop can be used to avoid shield-grabs | ||
}} | }} | ||
}}<br> | }}<br> | ||
| Line 114: | Line 121: | ||
{{MoveData | {{MoveData | ||
|image= NASB2_Korra_LightDown-EarthShatteringPunch.png | |image= NASB2_Korra_LightDown-EarthShatteringPunch.png | ||
|caption= | |caption= | ||
|name= Earth Shattering Punch | |name= Earth Shattering Punch | ||
|input= Down+Light | |input= Down+Light | ||
|data= | |data= | ||
{{AttackData-NickBrawl2 | {{AttackData-NickBrawl2 | ||
|Damage= | |Damage= 6% / 10% | ||
|Startup= | |Startup= 10 | ||
|Active= | |Active= 10-12 / 10-13 | ||
|Total Frames= | |Total Frames= 37 | ||
|Safety=- | |Safety= -22 | ||
|description= | |description= | ||
* | * Korra punches the ground, causing an earth spike to appear in front of her | ||
* | * The melee hit sends outward, the earth hit sends upward | ||
}} | }} | ||
}}<br> | }}<br> | ||
| Line 132: | Line 139: | ||
{{MoveData | {{MoveData | ||
|image= NASB2_Korra_DashAttack-WaterbendingSlide.png | |image= NASB2_Korra_DashAttack-WaterbendingSlide.png | ||
|caption= | |caption= | ||
|name= Waterbending Slide | |name= Waterbending Slide | ||
|input= Light (Running) | |input= Light (Running) | ||
|data= | |data= | ||
{{AttackData-NickBrawl2 | {{AttackData-NickBrawl2 | ||
|Damage= | |Damage=10% / 3% | ||
|Startup= | |Startup=8 / 18 | ||
|Active= | |Active=8-18 / 18-38 | ||
|Total Frames= | |Total Frames=50 | ||
|Safety=- | |Safety=-25 | ||
|description= | |description= | ||
* | * Korra slides forward with a wave of water, then sends forward a small water projectile. | ||
* | * Two hits. The second hit is easy to combo off of | ||
}} | }} | ||
}}<br> | }}<br> | ||
=== Air Light Attacks === | === Air Light Attacks === | ||
{{MoveData | {{MoveData | ||
|image= NASB2_Korra_LightNeutralAir-SpinningSpiritKick.png | |||
|caption= | |||
|image | |name= Spinning Spirit Kick | ||
|caption | |input= Light (Airborne) | ||
| | |data= | ||
| | {{AttackData-NickBrawl2 | ||
|Damage=10% | |||
|Startup=8 | |||
|Active=8-37 | |||
|Total Frames=45 | |||
|data = | |Safety=-4 | ||
|Damage= | |||
|Startup= | |||
|Active= | |||
|Total Frames= | |||
|Safety=- | |||
|description= | |description= | ||
* | * Default Neutral Air Light. | ||
* | * Perform after using a '''Water Attack'''. | ||
* Has the most horizontal range of the four. | |||
}} | |||
}} | }} | ||
{{MoveData | |||
|image= NASB2_Korra_LightNeutralAir-SpinningSpiritKick_Earth.png | |||
|input= <small><small>Light (Airborne)</small></small> | |||
|data= | |||
{{AttackData-NickBrawl2 | {{AttackData-NickBrawl2 | ||
|Damage= | |Damage=8% | ||
|Startup= | |Startup=8 | ||
|Active= | |Active=8-37 | ||
|Total Frames= | |Total Frames=45 | ||
|Safety= | |Safety=+0 | ||
|description= | |description= | ||
* | * Perform after using an '''Earth Attack'''. | ||
* | * Has the most Safety on Block of the four | ||
}} | |||
}} | }} | ||
{{MoveData | |||
|image= NASB2_Korra_LightNeutralAir-SpinningSpiritKick_Fire.png | |||
|input= <small><small>Light (Airborne)</small></small> | |||
|data= | |||
{{AttackData-NickBrawl2 | {{AttackData-NickBrawl2 | ||
|Damage= | |Damage=10% | ||
|Startup= | |Startup=8 | ||
|Active= | |Active=8-37 | ||
|Total Frames= | |Total Frames=45 | ||
|Safety=- | |Safety=-6 | ||
|description= | |description= | ||
* | * Perform after using a '''Fire Attack'''. | ||
* | * Is a multi-hit, and has the greatest knockback of the four. | ||
}} | |||
}} | }} | ||
{{MoveData | |||
|image= NASB2_Korra_LightNeutralAir-SpinningSpiritKick_Air.png | |||
|input= <small><small>Light (Airborne)</small></small> | |||
|data= | |||
{{AttackData-NickBrawl2 | {{AttackData-NickBrawl2 | ||
|Damage= | |Damage=7% | ||
|Startup= | |Startup=8 | ||
|Active= | |Active=8-37 | ||
|Total Frames= | |Total Frames=45 | ||
|Safety=- | |Safety=-4 | ||
|description= | |description= | ||
* | * Perform after using an '''Air Attack'''. | ||
* | * Korra has decreased gravity while using this move. | ||
* Has the least knockback of the four, making it good for combos | |||
}} | }} | ||
}}<br> | }}<br> | ||
| Line 205: | Line 225: | ||
{{MoveData | {{MoveData | ||
|image= NASB2_Korra_LightForwardAir-FireDaggers.png | |image= NASB2_Korra_LightForwardAir-FireDaggers.png | ||
|caption= | |caption= | ||
|name= Fire Daggers | |name= Fire Daggers | ||
|input= Forward+Light (Airborne) | |input= Forward+Light (Airborne) | ||
|data= | |data= | ||
{{AttackData-NickBrawl2 | {{AttackData-NickBrawl2 | ||
|Damage= | |Damage=12% | ||
|Startup= | |Startup=7 | ||
|Active= | |Active=7-14 | ||
|Total Frames= | |Total Frames=36 | ||
|Safety=- | |Safety=-1 | ||
|description= | |description= | ||
* | * Korra jabs forward with a flaming fist. | ||
}} | }} | ||
}}<br> | }}<br> | ||
| Line 223: | Line 242: | ||
{{MoveData | {{MoveData | ||
|image= NASB2_Korra_LightBackAir-ColdEdge.png | |image= NASB2_Korra_LightBackAir-ColdEdge.png | ||
|caption= | |caption= | ||
|name= Cold Edge | |name= Cold Edge | ||
|input= Back+Light (Airborne) | |input= Back+Light (Airborne) | ||
|data= | |data= | ||
{{AttackData-NickBrawl2 | {{AttackData-NickBrawl2 | ||
|Damage= | |Damage=9% | ||
|Startup= | |Startup=6 | ||
|Active= | |Active=6-12 | ||
|Total Frames= | |Total Frames=31 | ||
|Safety= | |Safety=+1 | ||
|description= | |description= | ||
* | * Korra swipes behind her with an icicle. | ||
}} | }} | ||
}}<br> | }}<br> | ||
| Line 241: | Line 259: | ||
{{MoveData | {{MoveData | ||
|image= NASB2_Korra_LightUpAir-SkyHunter.png | |image= NASB2_Korra_LightUpAir-SkyHunter.png | ||
|caption= | |caption= | ||
|name= Sky Hunter | |name= Sky Hunter | ||
|input= Up+Light (Airborne) | |input= Up+Light (Airborne) | ||
|data= | |data= | ||
{{AttackData-NickBrawl2 | {{AttackData-NickBrawl2 | ||
|Damage= | |Damage=13% / 11% / 7% | ||
|Startup= | |Startup=8 / 11 | ||
|Active= | |Active=8-17 / 11-24 | ||
|Total Frames= | |Total Frames=38 | ||
|Safety=- | |Safety=-1 | ||
|description= | |description= | ||
* | * Korra flips, kicking Air upward | ||
* | * Has a melee hit and an Air projectile. | ||
* Can be chained into itself; great for juggling opponents | |||
}} | }} | ||
}}<br> | }}<br> | ||
| Line 259: | Line 278: | ||
{{MoveData | {{MoveData | ||
|image= NASB2_Korra_LightDownAir-EarthSpike.png | |image= NASB2_Korra_LightDownAir-EarthSpike.png | ||
|caption= Ganondorf would be proud | |caption= "Ganondorf would be proud" | ||
|name= Earth Spike | |name= Earth Spike | ||
|input= Down+Light (Airborne) | |input= Down+Light (Airborne) | ||
|data= | |data= | ||
{{AttackData-NickBrawl2 | {{AttackData-NickBrawl2 | ||
|Damage= | |Damage=16% / 10% | ||
|Startup= | |Startup=16 | ||
|Active= | |Active=16-20 | ||
|Total Frames= | |Total Frames=44 | ||
|Safety=- | |Safety=-2 / -10 | ||
|description= | |description= | ||
* | * Korra stomps downward, causing Earth hazards when near the floor. | ||
* | * Melee hit is a strong spike. Earth sends upward | ||
}} | }} | ||
}}<br> | }}<br> | ||
| Line 280: | Line 299: | ||
{{MoveData | {{MoveData | ||
|image= NASB2_Korra_ChargeForward-Inferno.png | |image= NASB2_Korra_ChargeForward-Inferno.png | ||
|caption= " | |caption= "Footsies, but deadlier this time" | ||
|name= Inferno | |name= Inferno | ||
|input= Strong | |input= Strong | ||
|data= | |data= | ||
{{AttackData-NickBrawl2 | {{AttackData-NickBrawl2 | ||
|Damage= | |Damage=14% / 13% | ||
|Startup=18 | |Startup=18 | ||
|Active= | |Active=18-27 | ||
|Total Frames= | |Total Frames=57 | ||
|Safety=- | |Safety=-25 | ||
|description= | |description= | ||
* Amazingly disjointed grounded poke and kill option. | * Amazingly disjointed grounded poke and kill option. | ||
| Line 298: | Line 317: | ||
{{MoveData | {{MoveData | ||
|image= NASB2_Korra_ChargeUp-CrescentGaleKick.png | |image= NASB2_Korra_ChargeUp-CrescentGaleKick.png | ||
|caption= | |caption= | ||
|name= Crescent Gale Kick | |name= Crescent Gale Kick | ||
|input= Up+Strong | |input= Up+Strong | ||
|data= | |data= | ||
{{AttackData-NickBrawl2 | {{AttackData-NickBrawl2 | ||
|Damage= | |Damage=16% | ||
|Startup= | |Startup=7 | ||
|Active= | |Active=7-17 | ||
|Total Frames= | |Total Frames=47 | ||
|Safety=- | |Safety=-26 | ||
|description= | |description= | ||
* | * Strong option when used from Block | ||
* | * Can often be followed up with Grounded Up Special to chase opponents upward | ||
}} | }} | ||
}}<br> | }}<br> | ||
| Line 316: | Line 335: | ||
{{MoveData | {{MoveData | ||
|image= NASB2_Korra_ChargeDown-AxeStomp.png | |image= NASB2_Korra_ChargeDown-AxeStomp.png | ||
|caption= | |caption= | ||
|name= Axe Stomp | |name= Axe Stomp | ||
|input= Down+Strong | |input= Down+Strong | ||
|data= | |data= | ||
{{AttackData-NickBrawl2 | {{AttackData-NickBrawl2 | ||
|Damage= | |Damage=14% / 10% ⏐ 14% / 10% | ||
|Startup= | |Startup=14 / 16 ⏐ 10 / 10 | ||
|Active= | |Active=14-15 / 16-19 ⏐ 10-12 / 10-13 | ||
|Total Frames= | |Total Frames=50 ⏐ 40 | ||
|Safety=- | |Safety=-24 / -29 ⏐ -18 / -25 | ||
|description= | |description= | ||
* | * Korra stomps forward and backward, spawning Earth at her feet | ||
* | * The stomp can spike opponents hanging on ledge | ||
}} | }} | ||
}}<br> | }}<br> | ||
| Line 337: | Line 356: | ||
{{MoveData | {{MoveData | ||
|image= NASB2_Korra_ChargeForwardAir-FlameCannon.png | |image= NASB2_Korra_ChargeForwardAir-FlameCannon.png | ||
|caption= | |caption= "THE Combo Ender" | ||
|name= Flame Cannon | |name= Flame Cannon | ||
|input= Strong (Airborne) | |input= Strong (Airborne) | ||
| Line 343: | Line 362: | ||
{{AttackData-NickBrawl2 | {{AttackData-NickBrawl2 | ||
|Damage=14% | |Damage=14% | ||
|Startup=15 | |Startup=15 / 15 | ||
|Active= | |Active=15-17 / 15-23 | ||
|Total Frames= | |Total Frames=-16 / -18 | ||
|Safety=- | |Safety=-16 / -18 | ||
|description= | |description= | ||
* Kills absurdly early and consistently, AND is extremely convenient to route into | * Kills absurdly early and consistently, AND is extremely convenient to route into | ||
| Line 355: | Line 374: | ||
{{MoveData | {{MoveData | ||
|image= NASB2_Korra_ChargeUpAir-AerialEarthbending.png | |image= NASB2_Korra_ChargeUpAir-AerialEarthbending.png | ||
|caption= A bit of an oxymoron | |caption= "A bit of an oxymoron" | ||
|name= Aerial Earthbending | |name= Aerial Earthbending | ||
|input= Up+Strong (Airborne) | |input= Up+Strong (Airborne) | ||
|data= | |data= | ||
{{AttackData-NickBrawl2 | {{AttackData-NickBrawl2 | ||
|Damage= | |Damage=14% / 12% / (?) | ||
|Startup= | |Startup=19 / 19 / (?) | ||
|Active= | |Active=19-23 / 19-end / (?) | ||
|Total Frames= | |Total Frames=49 / 49 / (?) | ||
|Safety= | |Safety=+2 / +3 / (?) | ||
|description= | |description= | ||
* | * Has 1-2 melee hits. 2nd melee hit is a spike, only used if Korra inputs this move a 2nd time | ||
* | * Rock projectile flies in an arc. Its angle is dependent on Korra's speed at the time of execution. | ||
* (frame data not available for 2nd hit) | |||
}} | }} | ||
}}<br> | }}<br> | ||
| Line 373: | Line 393: | ||
{{MoveData | {{MoveData | ||
|image= NASB2_Korra_ChargeDownAir-DiveBlast.png | |image= NASB2_Korra_ChargeDownAir-DiveBlast.png | ||
|caption= | |caption= | ||
|name= Dive Blast | |name= Dive Blast | ||
|input= Down+Strong (Airborne) | |input= Down+Strong (Airborne) | ||
|data= | |data= | ||
{{AttackData-NickBrawl2 | {{AttackData-NickBrawl2 | ||
|Damage= | |Damage=12% | ||
|Startup= | |Startup=12 | ||
|Active= | |Active=12-36 | ||
|Total Frames= | |Total Frames=53 | ||
|Safety=- | |Safety=-12 | ||
|description= | |description= | ||
* | * Korra uses Air to dive diagonally down. | ||
* | * Offstage, can lead into Forward Aerial for early KO's | ||
}} | }} | ||
}}<br> | }}<br> | ||
=== Special Attacks === | === Special Attacks === | ||
{{MoveData | {{MoveData | ||
|image= NASB2_Korra_SpecialNeutral-Waterbend.png | |||
|caption= | |||
|image | |name= Waterbend | ||
|caption | |input= Special | ||
| | |||
| | |||
|data= | |data= | ||
{{AttackData-NickBrawl2 | {{AttackData-NickBrawl2 | ||
|Damage= | |Damage=1% / 8% | ||
|Startup= | |Startup=6 / 25 | ||
|Active= | |Active=6-15 / 25-27 | ||
|Total Frames= | |Total Frames=49 or 44 (?) | ||
|Safety=- | |Safety=-13 | ||
|description= | |description= | ||
* Korra surrounds herself with a water ring, then sends it down. | * Korra surrounds herself with a water ring, then sends it down. | ||
* Leaves a bed of ice on the ground that heavily reduces traction for anyone (or thing) on it. | * Leaves a bed of ice on the ground that heavily reduces traction for anyone (or thing) on it. | ||
* At low percents, leads to Grab if Korra hits an opponent behind her | |||
}} | }} | ||
}} | |||
{{MoveData | |||
|image= NASB2_Korra_SpecialNeutral-WaterbendAir.png | |||
|input= <small><small>Special (Airborne)</small></small> | |||
|data= | |||
{{AttackData-NickBrawl2 | {{AttackData-NickBrawl2 | ||
|Damage= | |Damage=1% / 10% | ||
|Startup= | |Startup=6 / 26 | ||
|Active= | |Active=6-21 / 26-39 | ||
|Total Frames= | |Total Frames=54 or (?) | ||
|Safety=-0 | |Safety=-46 / -29 / (+0) | ||
|description= | |description= | ||
* | * Korra surrounds herself with a water ring, then sends it forward. | ||
* Jump Cancelable | * '''Jump Cancelable''' from frames 20-22 if Korra is standing on the ground. +0 safety | ||
* Good for killing off the side of the screen when you don't want to risk/don't have the time to follow up. | * Good for killing off the side of the screen when you don't want to risk/don't have the time to follow up. | ||
* Has fewer total frames if the early frames of the water ring hits an opponent. | |||
}} | }} | ||
}} | |||
{{MoveData | |||
|image= NASB2_Korra_SpecialNeutral-WaterbendSlime.png | |||
|input= <small><small>Slime+Special</small></small> | |||
|data= | |||
{{AttackData-NickBrawl2 | {{AttackData-NickBrawl2 | ||
|Damage= | |Damage=2%/ 12% / 8% | ||
|Startup= | |Startup=6 / 25 | ||
|Active= | |Active=6-15 / 25-44 | ||
|Total Frames= | |Total Frames= (?) | ||
|Safety=- | |Safety=-13 to +19 | ||
|description= | |description= | ||
* The '''Slime''' version, sends the water up and then crashing down. | * The '''Slime''' version, sends the water up and then crashing down. | ||
* Pops up for potential combos at the start, has a heavily disjointed and powerful spike near the end, also has a "splash" hitbox at the very end that kills off the side. | * Pops up for potential combos at the start, has a heavily disjointed and powerful spike near the end, also has a "splash" hitbox at the very end that kills off the side. | ||
}} | }} | ||
}}<br> | }}<br> | ||
| Line 441: | Line 470: | ||
|data= | |data= | ||
{{AttackData-NickBrawl2 | {{AttackData-NickBrawl2 | ||
|Damage= | |Damage=0% | ||
|Startup=0 | |Startup=0 | ||
|Active=0-0 | |Active=0-0 | ||
| Line 447: | Line 476: | ||
|Safety=-0 | |Safety=-0 | ||
|description= | |description= | ||
* | * Korra bursts forward with Fire | ||
* | * The move can be interrupted by pressing Block | ||
}} | }} | ||
}}<br> | }}<br> | ||
| Line 454: | Line 483: | ||
{{MoveData | {{MoveData | ||
|image= NASB2_Korra_SpecialDown-Metalbending.png | |image= NASB2_Korra_SpecialDown-Metalbending.png | ||
|caption= | |caption= | ||
|name= Metalbending | |name= Metalbending | ||
|input= Down+Special | |input= Down+Special | ||
|data= | |data= | ||
{{AttackData-NickBrawl2 | {{AttackData-NickBrawl2 | ||
|Damage= | |Damage=9% / 5% | ||
|Startup= | |Startup=16 | ||
|Active= | |Active=16-18 | ||
|Total Frames= | |Total Frames=57 | ||
|Safety=- | |Safety=-33 / -22 | ||
|description= | |description= | ||
* Korra performs a frontal attack with a metal wire. | * Korra performs a frontal attack with a metal wire. | ||
* If the tip connects, she drags her opponent back to her. | * If the tip connects, she drags her opponent back to her. | ||
* Grounded version is useful for clashing with/calling out your opponent using grounded projectiles, inconsistent combo starter however. | * The Slime version will even pull Blocking opponents toward her. | ||
* Grounded version is useful for clashing with/calling out your opponent using grounded projectiles, it functions as inconsistent combo starter however. | |||
}} | |||
}} | |||
{{MoveData | |||
|image= NASB2_Korra_SpecialDown-Metalbending_Air.png | |||
|input= <small><small>Down+Special (Airborne)</small></small> | |||
|data= | |||
{{AttackData-NickBrawl2 | |||
|Damage=9% / 5% | |||
|Startup=16 | |||
|Active=16-18 | |||
|Total Frames=56 / (?) | |||
|Safety=-8 | |||
|description= | |||
* Combos into literally everything on a good connect, '''Up Air Light''' for combo extension, '''Air Strong''' for killing. | |||
* Fantastic tool for catching recovering opponents since it reaches through the stage and pulls them around the ledge into your loving arms. | * Fantastic tool for catching recovering opponents since it reaches through the stage and pulls them around the ledge into your loving arms. | ||
* Has fewer total frames on hit; can act sooner if she hits an opponent | |||
}} | }} | ||
}}<br> | }}<br> | ||
| Line 474: | Line 519: | ||
{{MoveData | {{MoveData | ||
|image= NASB2_Korra_SpecialUp-EarthAirImpulse.png | |image= NASB2_Korra_SpecialUp-EarthAirImpulse.png | ||
|caption= | |caption= | ||
|name =Air Impulse | |||
|name = Air Impulse | |||
|input= Up+Special | |input= Up+Special | ||
|data= | |data= | ||
| Line 483: | Line 526: | ||
|Damage= 6% | |Damage= 6% | ||
|Startup= 13 | |Startup= 13 | ||
|Active= 13-32 | |Active= 13-20 / 15-32 | ||
|Total Frames= 32 | |Total Frames= 32 | ||
|Safety= +20 | |Safety= +20 / +7 | ||
|description= | |description= | ||
* Korra propels herself upwards with | * Korra propels herself upwards with an Earth pillar while on the ground. | ||
* Cancellable into any action as early as | * Earth pillar has a hitbox, and Korra herself becomes a hitbox from 15-32 | ||
* Fantastic combo tool when used after a | * Cancellable into any action as early as '''Frame 15'''. | ||
* Fantastic combo tool when used after a '''Slime Cancel'''. | |||
}} | |||
}} | }} | ||
{{MoveData | |||
|image= NASB2_Korra_SpecialUp-EarthAirImpulseAir.png | |||
|input= <small><small>Up+Special (Airborne)</small></small> | |||
|data= | |||
{{AttackData-NickBrawl2 | {{AttackData-NickBrawl2 | ||
|Damage= | |Damage=2% / 7% | ||
|Startup= | |Startup=10 | ||
|Active= | |Active=10-33 / 34-37 | ||
|Total Frames= | |Total Frames=40 | ||
|Safety=- | |Safety=-112 | ||
|description= | |description= | ||
* Korra propels herself upwards with a gust of wind while in the air. '''Slime''' Version | * Korra propels herself upwards with a gust of wind while in the air. | ||
* '''Slime''' Version carries less horizontal momentum, but travels further and faster upward | |||
* Leaves her in special fall. | * Leaves her in special fall. | ||
* Does not snap to ledge. | * Does not snap to ledge. | ||
* Inconsistent | * Inconsistent for KO's off the top. Slime makes it much more consistent | ||
}} | }} | ||
}}<br> | }}<br> | ||
=== | === Grab/Throws === | ||
{{MoveData | |||
|image= NASB2_Korra_Grab.png | |||
|caption= | |||
|name= Grab | |||
|input= Grab | |||
|data= | |||
{{AttackData-NickBrawl2 | |||
|Damage=0% | |||
|Startup=8 | |||
|Active=8-9 | |||
|Total Frames=35 | |||
|Safety=_ | |||
|description= | |||
* Korra wraps an opponent with water | |||
}} | |||
}}<br> | |||
{{MoveData | |||
|image= NASB2_Korra_DashGrab.png | |||
|caption= | |||
|name= Dash Grab | |||
|input= Grab (Running) | |||
|data= | |||
{{AttackData-NickBrawl2 | |||
|Damage=0% | |||
|Startup=13 | |||
|Active=13-14 | |||
|Total Frames=43 | |||
|Safety=_ | |||
|description= | |||
* Slower, but further reaching than her normal Grab | |||
}} | |||
}}<br> | |||
{{MoveData | |||
|image= NASB2_Korra_Pummel.png | |||
|caption= | |||
|name= Grab Pummel | |||
|input= Light (Grabbing) | |||
|data= | |||
{{AttackData-NickBrawl2 | |||
|Damage=1% | |||
|Startup=11 | |||
|Active=_ | |||
|Total Frames=32 | |||
|Safety=_ | |||
|description= | |||
* A standard pummel that deals 1% | |||
}} | |||
}}<br> | |||
{{MoveData | |||
|image= NASB2_Korra_UpThrow.png | |||
|caption= | |||
|name= Up Throw | |||
|input= Up (Grabbing) | |||
|data= | |||
{{AttackData-NickBrawl2 | |||
|Damage=6% | |||
|Startup=16 | |||
|Active=_ | |||
|Total Frames=50 | |||
|Safety=_ | |||
|description= | |||
* Korra tosses an opponent upward | |||
* Difficult / impossible to follow-up on at low percents | |||
* At high percents, may send straight upward depending on DI | |||
}} | |||
}}<br> | |||
{{MoveData | |||
|image= NASB2_Korra_ForwardThrow.png | |||
|caption= | |||
|name= Forward Throw | |||
|input= Forward (Grabbing) | |||
|data= | |||
{{AttackData-NickBrawl2 | |||
|Damage=6% | |||
|Startup=20 | |||
|Active=_ | |||
|Total Frames=46 | |||
|Safety=_ | |||
|description= | |||
* Tosses the opponent forward | |||
* | |||
}} | |||
}}<br> | |||
{{MoveData | |||
|image= NASB2_Korra_DownThrow.png | |||
|caption= | |||
|name= Down Throw | |||
|input= Down (Grabbing) | |||
|data= | |||
{{AttackData-NickBrawl2 | |||
|Damage=8% | |||
|Startup=27 | |||
|Active=_ | |||
|Total Frames=50 | |||
|Safety=_ | |||
|description= | |||
* Generally Korra's best combo throw at low percents | |||
* At high percents, may send straight upward depending on DI | |||
}} | |||
}}<br> | |||
{{MoveData | |||
|image= NASB2_Korra_BackThrow.png | |||
|caption= | |||
|name= Back Throw | |||
|input= Back (Grabbing) | |||
|data= | |||
{{AttackData-NickBrawl2 | |||
|Damage=6% | |||
|Startup=27 | |||
|Active=_ | |||
|Total Frames=50 | |||
|Safety=_ | |||
|description= | |||
* Korra's best throw for directly securing KO's, without needing a follow-up | |||
}} | |||
}}<br> | |||
=== Super === | |||
| Line 512: | Line 687: | ||
|image= NASB2_Korra_Super.png | |image= NASB2_Korra_Super.png | ||
|caption= "Time to Use the Avatar State!" | |caption= "Time to Use the Avatar State!" | ||
|name= | |name= Super | ||
|input= Slime+Light | |input= Slime+Light | ||
|data= | |data= | ||
| Line 526: | Line 701: | ||
}} | }} | ||
}}<br> | }}<br> | ||
=== Taunts === | === Taunts === | ||
| Line 533: | Line 709: | ||
|image= NASB2_Korra_TauntNeutral.png | |image= NASB2_Korra_TauntNeutral.png | ||
|caption= "I'm the Avatar, you gotta deal with it!" | |caption= "I'm the Avatar, you gotta deal with it!" | ||
|name= | |name= Taunt | ||
|input= Taunt | |input= Taunt | ||
|data= | |data= | ||
| Line 550: | Line 726: | ||
{{MoveData | {{MoveData | ||
|image= NASB2_Korra_TauntDown.png | |image= NASB2_Korra_TauntDown.png | ||
|caption= "You are very... muscular for a woman | |caption= "You are very... muscular for a woman" | ||
|name= | |name= Down Taunt | ||
|input= Down+Taunt | |input= Down+Taunt | ||
|data= | |data= | ||
| Line 568: | Line 744: | ||
{{MoveData | {{MoveData | ||
|image= NASB2_Korra_TauntUp.png | |image= NASB2_Korra_TauntUp.png | ||
|caption= | |caption= "Why don't you come and find out?" | ||
|name= | |name= Up Taunt | ||
|input= Up+Taunt | |input= Up+Taunt | ||
|data= | |data= | ||
| Line 583: | Line 759: | ||
}} | }} | ||
}}<br> | }}<br> | ||
---- | |||
== Strategy == | |||
* In neutral, Korra often uses her safe aerials, such as Earth/Water nair, Fair, and Bair. Dair from a distance works well. Fire nair has a multi-hit property which can be useful, but it's easily punished if blocked | |||
* Up air is a great juggling tool at early to mid percents | |||
* For edgeguarding, Air Down Special, Strong Up Air, and (Slime) Neutral Special can wall out opponents trying to recover. Air neutral special can snipe opponents from far off the ledge. | |||
* For recovery, Side special -> Strong Dair gives her good horizontal momentum. Up special cannot snap to ledge, so good spacing is key. Slime can be used to bypass ledge entirely by boosting her recovery specials, or by overshooting the ledge with Up special and canceling it. | |||
* At high percents, Korra often sets up for KOs by launching an opponent upward. Ground Up Special allows her to chase them toward the blast zone, and follow up with Strong Forward Air for the KO. If they're sent too high, spend slime on Ground Up Special for some extra height. | |||
* Some moves that send upward include Up Strong, Up throw, Down throw, and the rocks spawned by Dair, Down Tilt, and Down Strong. | |||
* Down Throw and Up Throw can both send opponents straight upward, but they depend on DI. If Down throw fails to send them upward, try Up throw next time. | |||
---- | ---- | ||
== Techniques == | |||
* '''Strong Up Air''' sends a rock upward. The trajectory of this rock can be redirected by hitting it with a melee attack. | |||
* '''Strong Down Air''' can be slime cancelled shortly after startup to gain lots of momentum diagonally down. | |||
<hr> | |||
* '''Down air''' can be auto-canceled if inputted close enough to the ground. With precise timing, this will spawn the Earth hazards while allowing Korra to act immediately. Effectively becomes +6 safety on block. | |||
* Down air's auto-cancel window can be buffered if Dair is inputted during a grounded Side Special. | |||
<hr> | |||
* '''Side Special''' can be interrupted by pressing Block, making Korra actionable faster than normal. If side special is immediately interrupted from the ground, Korra can use her aerials close to the ground more quickly and safely. | |||
* If Side Special is interrupted midair, Korra can turn around midair with momentum in either direction. | |||
* If Side Special is slime cancelled soon after startup, Korra gains a huge burst of speed in the inputted direction. Good for recovery, or for chasing opponents to secure KO's | |||
<hr> | |||
* '''(Slime) Grounded Down Special''' has a special property: when used on an oppponent's block, the sweetspot hit will pull the opponent directly next to Korra. | |||
<hr> | |||
* '''Air Neutral Special''' can be jump-canceled. If Korra is grounded, a Jump input from frame 20-22 can interrupt the move. | |||
* The attack normally consists of a spinning attack that hits both sides of Korra, and a projectile that travels forward. The jump-cancel window is just after the spin attack ends. If done correctly, the projectile won't be sent out, but the spin attack can still hit opponents. There are two main benefits to this: | |||
* At close range, the spinning attack gives good Block pressure at +0 safety when jump cancelled, and can lead to combos on hit. | |||
* At long range, Korra gets to decide whether she will jump cancel, or send out a projectile. This pressures opponents to block or jump around the projectile, which she can then attempt to punish. | |||
--- | * One method is to Short-hop, input neutral special at the apex of the hop, then immediately Fastfall to touch the ground. Then input Jump at the correct time to interrupt the attack. | ||
* Another method is to use Side Special -> Block, which places Korra near the ground—no need for a fastfall. | |||
* A final, more difficult method is to buffer Air neutral special during the startup frames of a short-hop, and fastfall within that same shorthop. The timing is tight and easy to mess up, but is overall faster, and harder for opponents to react to. | |||
<hr> | |||
* After Korra jump-cancels the neutral special, she can do anything she would from a normal jump, including aerials or Wavedashing. Grab and Up-strong can be input during a jumpsquat as well. | |||
* | * '''On an opponent's Block''', air neutral special is a multi-hit, which may throw off opponents expecting a single hit aerial. Jump-cancel Grab tends to be a good followup option: it will land if the opponent holds Block for too long, ''or'' if they drop it too early. A well timed roll or spotdodge will counter this. | ||
* '''At a distance''', this tech can be used to put pressure on the opponent's Block. Korra can jump from frame 20-22, and the projectile comes out on frame 25; it's impossible for them to react to Korra's chosen option in time. Korra can bait out a Block, then approach with a Wavedash forward. (Or she can even use neutral special again to set up another 50/50.) | |||
* This tech does not improve the endlag of the move; thus, the safer option is generally to jump cancel. However, the threat of an attack is still there, so the opponent may be pressured to Block. The move is easily punished if the opponent Blocks it, but they can't hold Block forever. | |||
<hr> | |||
* Even without considering jump-cancel, '''Air Neutral Special''' has some odd properties. | |||
* Its first few active frames can deflect projectiles. | |||
* If the spin attack hits the opponent on its first active frames, the endlag of the projectile portion is massively reduced; Korra can shoot the projectile and move quickly afterward. | |||
* For the purposes of this tech, a "hit" also also applies to the Rock spawned from Strong Up Air. If the spin attack hits this rock, Korra can shoot the water projectile and move quickly afterward. | |||
== | == Combos == | ||
* PLACEHOLDER | * PLACEHOLDER | ||
| Line 632: | Line 829: | ||
* PLACEHOLDER | * PLACEHOLDER | ||
---- | |||
== Matchups == | |||
{| class="wikitable" | |||
|- | |||
| '''+2''' || | |||
|- | |||
| '''+1''' || | |||
|- | |||
| '''0''' || [[File:NASB2_Sponge_Icon.png|x80px]] [[File:NASB2_Patrick_Icon.png|x80px]] [[File:NASB2_Squidward_Icon.png|x80px]] [[File:NASB2_Plankton_Icon.png|x80px]] [[File:NASB2_ElTigre_Icon.png|x80px]] [[File:NASB2_Rocko_Icon.png|x80px]] [[File:NASB2_Jimmy_Icon.png|x80px]] [[File:NASB2_Lucy_Icon.png|x80px]] [[File:NASB2_Beavers-Daggett_Icon.png|x80px]] [[File:NASB2_Beavers-Norbert_Icon.png|x80px]] [[File:NASB2_Garfield_Icon.png|x80px]] [[File:NASB2_Aang_Icon.png|x80px]] [[File:NASB2_Korra_Icon.png|x80px]] [[File:NASB2_Azula_Icon.png|x80px]] [[File:NASB2_Raphael_Icon.png|x80px]] [[File:NASB2_Donatello_Icon.png|x80px]] [[File:NASB2_April_Icon.png|x80px]] [[File:NASB2_Danny_Icon.png|x80px]] [[File:NASB2_Ember_Icon.png|x80px]] [[File:NASB2_Gertie_Icon.png|x80px]] [[File:NASB2_Gerald_Icon.png|x80px]] [[File:NASB2_Nigel_Icon.png|x80px]] [[File:NASB2_Zim_Icon.png|x80px]] [[File:NASB2_Jenny_Icon.png|x80px]] [[File:NASB2_Reptar_Icon.png|x80px]] [[File:NASB2_RenStimpy_Icon.png|x80px]] [[File:NASB2_Krabs_Icon.png|x80px]] [[File:NASB2_Zuko_Icon.png|x80px]] [[File:NASB2_Rocksteady_Icon.png|x80px]] | |||
|- | |||
| '''1''' || | |||
|- | |||
| '''2''' || | |||
|} | |||
---- | ---- | ||
| Line 638: | Line 851: | ||
== Other Resources == | == Other Resources == | ||
* [https://docs.google.com/document/d/1udrVsI7QKjvomGUeGVvf56uarRbK4Xe6j6pVqoZoTdo/edit?usp=sharing Korra Guide] | |||
* PLACEHOLDER | * PLACEHOLDER | ||
* PLACEHOLDER | * PLACEHOLDER | ||
=== Videos === | |||
PLACEHOLDER | |||
---- | ---- | ||
== Costumes == | == Costumes == | ||
<gallery> | |||
File:NASB2 Korra Costume00.png| Korra's Default Outfit. | |||
File:NASB2 Korra Costume01.png| Korra wearing her Pro-Bending uniform, first seen in the episode "A Leaf in the Wind". | |||
File:NASB2 Korra Costume02.png| Korra's normal outfit and hairstyle worn throughout Book 4: Balance. First seen in the episode "Reunion". | |||
File:NASB2 Korra Costume03.png| Korra's globetrotting outfit from the first half of Book 4: Balance. First seen in the episode "After All These Years" (Unlocked by having the Ultimate edition of NASB 2). | |||
File:NASB2 Korra Costume04.png| Mind controlled Korra (unlocked by defeating Korra twice in campaign mode). | |||
File:NASB2 Korra Costume05.png| Korra's Ghost Clone (unlocked by defeating Korra thrice in campaign mode). | |||
</gallery> | |||
{{Navbox-NickBrawl2}} | {{Navbox-NickBrawl2}} | ||
[[Category:Nickelodeon All-Star Brawl 2]] | [[Category:Nickelodeon All-Star Brawl 2]] | ||
Latest revision as of 01:21, 9 March 2025
About
The powerful Avatar of a new generation.
Part of the Avatar Legends franchise, Korra is the Avatar after Aang and hails from the Southern Water Tribe. The White Lotus found her at a young age and decided to train her in a secure compound. After mastering 3 of the 4 elements, she went to Republic City to learn airbending from Aang's son Tenzin. Her hard-headed nature and justice sensitivity led to some fierce battles with many people throughout her life, including the masked leader of an anti-bending movement and a secret order dedicated to sending the world into chaos. She may not have won every battle she fought, but she's still credited for many great feats such as reopening the Spirit Portals, bringing back the airbender population, and dividing the world into... Oh wait, she hasn't done that just yet. Let's just say it's something for the next Avatar to worry about...
Playstyle
Korra is a fast, heavy, strong and incredibly versatile character, capable of controlling the pace of the match like almost nobody else. Korra's suite of disjointed aerials and nigh unmatched aerial mobility between Air Side Special and her incredible fall speed enable some of the most non-linear and difficult to assess approach options in the game; this combined with solid grounded spacing tools in Forward Light and Forward Strong allow her to apply pressure in a variety of ways. Alongside these traditionally strong traits exists a smorgasbord of more situational options, such as her grounded Neutral Special laying a bed of traction reducing ice on the ground, Grounded Up Special, a strong shield pressure tool and "Shine"-like attack on hit. Her primary weaknesses lie within her well-above average Fall Speed leading to her being combo food versus a skilled opponent, and her exploitable, linear recovery from below causing her to struggle to return to the stage when spiked.
Metagame
Korra is ranked 13th out of 29 on the current tier list, in the A tier. This is a sizeable improvement over her 20th out of 25 placement in the first Nickelodeon All-Star Brawl.
Korra is a particularly strong character in many departments. Her movement is tricky for a lot of players to keep up with, being uniquely special-oriented. This ease of movement allows Korra to freely confirm into a kill off of anything, even something as little as a jab. Finally, Korra also has a very strong edgeguarding game, being able to fling rocks at her opponents using her Aerial Up Strong and follow it up with her deadly Aerial Neutral Strong.
Korra is not without her weaknesses, however. Perhaps her most notable flaw is her fast fall speed, which, combined with her tall frame, makes her a combo food character for some of the cast. Korra also has a very linear vertical recovery, though she can mix it up depending on how many resources she has left when offstage.
Overall, Korra's strengths outweigh her weaknesses. While not as dominant as she was previously, her players still achieve notable results in the current metagame.
 | |
| Franchise |
The Legend of Korra |
|---|---|
| Home Stage |
Harmonic Convergence |
| Weight |
0.92 |
| Fall Speed |
1.38 |
| Gravity |
1.175 |
| Run Speed |
1.35 |
| Air Speed |
0.93 |
| Charactercord | |
| Strengths | Weaknesses |
|---|---|
|
|
Moveset
Ground Light Attacks
Light

| Damage | Startup | Active Frames | Total Frames | Safety | |
|---|---|---|---|---|---|
| 3% | 4 | 4-5 | 21 | -5 | |
| |||||
Forward+Light

| Damage | Startup | Active Frames | Total Frames | Safety | |
|---|---|---|---|---|---|
| 10% | 10 | 10-17 | 32 | -14 | |
| |||||
Up+Light

| Damage | Startup | Active Frames | Total Frames | Safety | |
|---|---|---|---|---|---|
| 10% / 7% | 9 / 10 | 9-16 / 10-21 | 32 | -13 | |
| |||||
Down+Light

| Damage | Startup | Active Frames | Total Frames | Safety | |
|---|---|---|---|---|---|
| 6% / 10% | 10 | 10-12 / 10-13 | 37 | -22 | |
| |||||
Light (Running)

| Damage | Startup | Active Frames | Total Frames | Safety | |
|---|---|---|---|---|---|
| 10% / 3% | 8 / 18 | 8-18 / 18-38 | 50 | -25 | |
| |||||
Air Light Attacks
Light (Airborne)

| Damage | Startup | Active Frames | Total Frames | Safety | |
|---|---|---|---|---|---|
| 10% | 8 | 8-37 | 45 | -4 | |
| |||||

| Damage | Startup | Active Frames | Total Frames | Safety | |
|---|---|---|---|---|---|
| 8% | 8 | 8-37 | 45 | +0 | |
| |||||

| Damage | Startup | Active Frames | Total Frames | Safety | |
|---|---|---|---|---|---|
| 10% | 8 | 8-37 | 45 | -6 | |
| |||||

| Damage | Startup | Active Frames | Total Frames | Safety | |
|---|---|---|---|---|---|
| 7% | 8 | 8-37 | 45 | -4 | |
| |||||
Forward+Light (Airborne)

| Damage | Startup | Active Frames | Total Frames | Safety | |
|---|---|---|---|---|---|
| 12% | 7 | 7-14 | 36 | -1 | |
| |||||
Back+Light (Airborne)

| Damage | Startup | Active Frames | Total Frames | Safety | |
|---|---|---|---|---|---|
| 9% | 6 | 6-12 | 31 | +1 | |
| |||||
Up+Light (Airborne)

| Damage | Startup | Active Frames | Total Frames | Safety | |
|---|---|---|---|---|---|
| 13% / 11% / 7% | 8 / 11 | 8-17 / 11-24 | 38 | -1 | |
| |||||
Down+Light (Airborne)

| Damage | Startup | Active Frames | Total Frames | Safety | |
|---|---|---|---|---|---|
| 16% / 10% | 16 | 16-20 | 44 | -2 / -10 | |
| |||||
Ground Strong Attacks
Strong

| Damage | Startup | Active Frames | Total Frames | Safety | |
|---|---|---|---|---|---|
| 14% / 13% | 18 | 18-27 | 57 | -25 | |
| |||||
Up+Strong

| Damage | Startup | Active Frames | Total Frames | Safety | |
|---|---|---|---|---|---|
| 16% | 7 | 7-17 | 47 | -26 | |
| |||||
Down+Strong

| Damage | Startup | Active Frames | Total Frames | Safety | |
|---|---|---|---|---|---|
| 14% / 10% ⏐ 14% / 10% | 14 / 16 ⏐ 10 / 10 | 14-15 / 16-19 ⏐ 10-12 / 10-13 | 50 ⏐ 40 | -24 / -29 ⏐ -18 / -25 | |
| |||||
Air Strong Attacks
Strong (Airborne)

| Damage | Startup | Active Frames | Total Frames | Safety | |
|---|---|---|---|---|---|
| 14% | 15 / 15 | 15-17 / 15-23 | -16 / -18 | -16 / -18 | |
| |||||
Up+Strong (Airborne)

| Damage | Startup | Active Frames | Total Frames | Safety | |
|---|---|---|---|---|---|
| 14% / 12% / (?) | 19 / 19 / (?) | 19-23 / 19-end / (?) | 49 / 49 / (?) | +2 / +3 / (?) | |
| |||||
Down+Strong (Airborne)

| Damage | Startup | Active Frames | Total Frames | Safety | |
|---|---|---|---|---|---|
| 12% | 12 | 12-36 | 53 | -12 | |
| |||||
Special Attacks
Special

| Damage | Startup | Active Frames | Total Frames | Safety | |
|---|---|---|---|---|---|
| 1% / 8% | 6 / 25 | 6-15 / 25-27 | 49 or 44 (?) | -13 | |
| |||||

| Damage | Startup | Active Frames | Total Frames | Safety | |
|---|---|---|---|---|---|
| 1% / 10% | 6 / 26 | 6-21 / 26-39 | 54 or (?) | -46 / -29 / (+0) | |
| |||||

| Damage | Startup | Active Frames | Total Frames | Safety | |
|---|---|---|---|---|---|
| 2%/ 12% / 8% | 6 / 25 | 6-15 / 25-44 | (?) | -13 to +19 | |
| |||||
Forward+Special

| Damage | Startup | Active Frames | Total Frames | Safety | |
|---|---|---|---|---|---|
| 0% | 0 | 0-0 | 0 | -0 | |
| |||||
Down+Special

| Damage | Startup | Active Frames | Total Frames | Safety | |
|---|---|---|---|---|---|
| 9% / 5% | 16 | 16-18 | 57 | -33 / -22 | |
| |||||

| Damage | Startup | Active Frames | Total Frames | Safety | |
|---|---|---|---|---|---|
| 9% / 5% | 16 | 16-18 | 56 / (?) | -8 | |
| |||||
Up+Special

| Damage | Startup | Active Frames | Total Frames | Safety | |
|---|---|---|---|---|---|
| 6% | 13 | 13-20 / 15-32 | 32 | +20 / +7 | |
| |||||

| Damage | Startup | Active Frames | Total Frames | Safety | |
|---|---|---|---|---|---|
| 2% / 7% | 10 | 10-33 / 34-37 | 40 | -112 | |
| |||||
Grab/Throws
Grab

| Damage | Startup | Active Frames | Total Frames | Safety | |
|---|---|---|---|---|---|
| 0% | 8 | 8-9 | 35 | _ | |
| |||||
Grab (Running)

| Damage | Startup | Active Frames | Total Frames | Safety | |
|---|---|---|---|---|---|
| 0% | 13 | 13-14 | 43 | _ | |
| |||||
Light (Grabbing)

| Damage | Startup | Active Frames | Total Frames | Safety | |
|---|---|---|---|---|---|
| 1% | 11 | _ | 32 | _ | |
| |||||
Up (Grabbing)

| Damage | Startup | Active Frames | Total Frames | Safety | |
|---|---|---|---|---|---|
| 6% | 16 | _ | 50 | _ | |
| |||||
Forward (Grabbing)

| Damage | Startup | Active Frames | Total Frames | Safety | |
|---|---|---|---|---|---|
| 6% | 20 | _ | 46 | _ | |
| |||||
Down (Grabbing)

| Damage | Startup | Active Frames | Total Frames | Safety | |
|---|---|---|---|---|---|
| 8% | 27 | _ | 50 | _ | |
| |||||
Back (Grabbing)

| Damage | Startup | Active Frames | Total Frames | Safety | |
|---|---|---|---|---|---|
| 6% | 27 | _ | 50 | _ | |
| |||||
Super
Slime+Light

| Damage | Startup | Active Frames | Total Frames | Safety | |
|---|---|---|---|---|---|
| 40% | 26 | 1 or 4? | 48 | N/A | |
| |||||
Taunts
Taunt

| Damage | Startup | Active Frames | Total Frames | Safety | |
|---|---|---|---|---|---|
| 00% | 0 | 0-0 | 0 | -0 | |
| |||||
Down+Taunt

| Damage | Startup | Active Frames | Total Frames | Safety | |
|---|---|---|---|---|---|
| 00% | 0 | 0-0 | 0 | -0 | |
| |||||
Up+Taunt

| Damage | Startup | Active Frames | Total Frames | Safety | |
|---|---|---|---|---|---|
| 00% | 0 | 0-0 | 0 | -0 | |
| |||||
Strategy
- In neutral, Korra often uses her safe aerials, such as Earth/Water nair, Fair, and Bair. Dair from a distance works well. Fire nair has a multi-hit property which can be useful, but it's easily punished if blocked
- Up air is a great juggling tool at early to mid percents
- For edgeguarding, Air Down Special, Strong Up Air, and (Slime) Neutral Special can wall out opponents trying to recover. Air neutral special can snipe opponents from far off the ledge.
- For recovery, Side special -> Strong Dair gives her good horizontal momentum. Up special cannot snap to ledge, so good spacing is key. Slime can be used to bypass ledge entirely by boosting her recovery specials, or by overshooting the ledge with Up special and canceling it.
- At high percents, Korra often sets up for KOs by launching an opponent upward. Ground Up Special allows her to chase them toward the blast zone, and follow up with Strong Forward Air for the KO. If they're sent too high, spend slime on Ground Up Special for some extra height.
- Some moves that send upward include Up Strong, Up throw, Down throw, and the rocks spawned by Dair, Down Tilt, and Down Strong.
- Down Throw and Up Throw can both send opponents straight upward, but they depend on DI. If Down throw fails to send them upward, try Up throw next time.
Techniques
- Strong Up Air sends a rock upward. The trajectory of this rock can be redirected by hitting it with a melee attack.
- Strong Down Air can be slime cancelled shortly after startup to gain lots of momentum diagonally down.
- Down air can be auto-canceled if inputted close enough to the ground. With precise timing, this will spawn the Earth hazards while allowing Korra to act immediately. Effectively becomes +6 safety on block.
- Down air's auto-cancel window can be buffered if Dair is inputted during a grounded Side Special.
- Side Special can be interrupted by pressing Block, making Korra actionable faster than normal. If side special is immediately interrupted from the ground, Korra can use her aerials close to the ground more quickly and safely.
- If Side Special is interrupted midair, Korra can turn around midair with momentum in either direction.
- If Side Special is slime cancelled soon after startup, Korra gains a huge burst of speed in the inputted direction. Good for recovery, or for chasing opponents to secure KO's
- (Slime) Grounded Down Special has a special property: when used on an oppponent's block, the sweetspot hit will pull the opponent directly next to Korra.
- Air Neutral Special can be jump-canceled. If Korra is grounded, a Jump input from frame 20-22 can interrupt the move.
- The attack normally consists of a spinning attack that hits both sides of Korra, and a projectile that travels forward. The jump-cancel window is just after the spin attack ends. If done correctly, the projectile won't be sent out, but the spin attack can still hit opponents. There are two main benefits to this:
- At close range, the spinning attack gives good Block pressure at +0 safety when jump cancelled, and can lead to combos on hit.
- At long range, Korra gets to decide whether she will jump cancel, or send out a projectile. This pressures opponents to block or jump around the projectile, which she can then attempt to punish.
- One method is to Short-hop, input neutral special at the apex of the hop, then immediately Fastfall to touch the ground. Then input Jump at the correct time to interrupt the attack.
- Another method is to use Side Special -> Block, which places Korra near the ground—no need for a fastfall.
- A final, more difficult method is to buffer Air neutral special during the startup frames of a short-hop, and fastfall within that same shorthop. The timing is tight and easy to mess up, but is overall faster, and harder for opponents to react to.
- After Korra jump-cancels the neutral special, she can do anything she would from a normal jump, including aerials or Wavedashing. Grab and Up-strong can be input during a jumpsquat as well.
- On an opponent's Block, air neutral special is a multi-hit, which may throw off opponents expecting a single hit aerial. Jump-cancel Grab tends to be a good followup option: it will land if the opponent holds Block for too long, or if they drop it too early. A well timed roll or spotdodge will counter this.
- At a distance, this tech can be used to put pressure on the opponent's Block. Korra can jump from frame 20-22, and the projectile comes out on frame 25; it's impossible for them to react to Korra's chosen option in time. Korra can bait out a Block, then approach with a Wavedash forward. (Or she can even use neutral special again to set up another 50/50.)
- This tech does not improve the endlag of the move; thus, the safer option is generally to jump cancel. However, the threat of an attack is still there, so the opponent may be pressured to Block. The move is easily punished if the opponent Blocks it, but they can't hold Block forever.
- Even without considering jump-cancel, Air Neutral Special has some odd properties.
- Its first few active frames can deflect projectiles.
- If the spin attack hits the opponent on its first active frames, the endlag of the projectile portion is massively reduced; Korra can shoot the projectile and move quickly afterward.
- For the purposes of this tech, a "hit" also also applies to the Rock spawned from Strong Up Air. If the spin attack hits this rock, Korra can shoot the water projectile and move quickly afterward.
Combos
- PLACEHOLDER
- PLACEHOLDER
- PLACEHOLDER
Matchups
| +2 | |
| +1 | |
| 0 | |
| 1 | |
| 2 |
Other Resources
- Korra Guide
- PLACEHOLDER
- PLACEHOLDER
Videos
PLACEHOLDER
Costumes

Korra's Default Outfit.
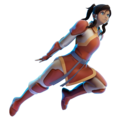
Korra wearing her Pro-Bending uniform, first seen in the episode "A Leaf in the Wind".
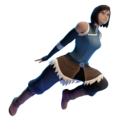
Korra's normal outfit and hairstyle worn throughout Book 4: Balance. First seen in the episode "Reunion".
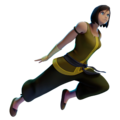
Korra's globetrotting outfit from the first half of Book 4: Balance. First seen in the episode "After All These Years" (Unlocked by having the Ultimate edition of NASB 2).
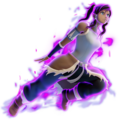
Mind controlled Korra (unlocked by defeating Korra twice in campaign mode).
Korra's Ghost Clone (unlocked by defeating Korra thrice in campaign mode).


