No edit summary |
(Lore.jpg) |
||
| (37 intermediate revisions by 7 users not shown) | |||
| Line 1: | Line 1: | ||
{{NickBrawl2 Character Intro|char=Jenny |full=Jenny Wakeman|short=Jenny | {{NickBrawl2 Character Intro|char=Jenny |full=[[File:NASB2_JennyStock.png|x30px]] Jenny Wakeman|short=Jenny | ||
| franchise = My Life as a Teenage Robot | | franchise = My Life as a Teenage Robot | ||
| homestage = | | homestage = Tremorton Joyride | ||
| weight = | | weight = 0.90 | ||
| fallspeed = | | fallspeed = 1 | ||
| gravity = | | gravity = 1.08 | ||
| runspeed = | | runspeed = 1.15 | ||
| airspeed = | | airspeed = 1.05 | ||
| placeholderone = | | placeholderone = | ||
| placeholdertwo = | | placeholdertwo = | ||
| Line 18: | Line 18: | ||
== About == | == About == | ||
'''''The robot who just wants to live a normal teenage life.''''' | |||
Built as Robotic Global Response Unit XJ-9, Jennifer "Jenny" Wakeman wishes to have the life of a normal teenage girl, in spite of being a robot armed to the teeth with weaponry. This often results in conflicts of interests in between saving Earth from a formidable rogues' gallery of villains, to just wanting to do normal high school girl things. | |||
== Playstyle == | |||
Jenny is a fairly standard zoner who excels in playing keepaway. She has excellent projectiles in her Neutral and Side Specials, and can keep the opponent at bay with her notorious Back Air and her "big move"s, in her own words. She's not lacking on the offense, either: she has some nasty juggles and tech chases with her Up Air and Dash Attack. | |||
If you like maintaining control of the stage and keeping your opponent out, Jenny is for you! | |||
== Metagame == | |||
Jenny is ranked 12th out of 29 on the current [[Nickelodeon All-Star Brawl 2/FAQ|tier list]], in the A tier. This is a marginal drop over her 10th out of 25 placement in the first [[Nickelodeon All-Star Brawl]]. | |||
Jenny is an all-rounder character with a lot of great tools for any situation. She has a strong projectile game in her Missile and her Side Special, respectable stats, hard-hitting strongs, a great recovery, and an insane edgeguarding tool in Back Air. All of these make Jenny a very solid character that's equipped to handle most matchups fairly easily. | |||
However, Jenny does have a few flaws. While she has some kill confirms, getting to that point either requires hard reads or getting in. Jenny has a tough time dealing with characters who get in her face too often. Her recovery also does have a limit, which means she can be countered if she's offstage for too long. | |||
Overall though, Jenny is seen as a great character in the metagame, having a solid matchup spread and very strong tournament results. She remains a popular character at all levels of play. | |||
|content2= | |content2= | ||
| Line 29: | Line 43: | ||
}} | }} | ||
}} | }} | ||
---- | ---- | ||
{{ProConTable | {{ProConTable | ||
|pros= | |pros= | ||
* ''' | * '''Back Air:''' ''HUGE'' move that basically edgeguards for you and sends at a low angle. Among the deadliest edgeguarding tools in the game and a major threat for most characters in this matchup. | ||
* ''' | * '''Projectile Wall:''' Jenny is a zoner, and boy is she good at it! Her missile Neutral Special can keep the opponent out or target them for combo followups, and her hammer Side Special is a massive hitbox and sends a huge shockwave towards the opponent. | ||
* ''' | * '''Recovery:''' Jenny has one of the best recoveries in the game. Her Up Special can go in any direction and lasts for a while. Up Air Light also allows her to glide in the air to stall and mix up her recovery even further. | ||
* ''' | * '''Difficult to kill:''' Due to her projectile wall and recovery, taking out Jenny can be a slow process. The opponent has to play very patient around her options or risk getting blown up. | ||
* '''Strongs hit HARD:''' Her strongs have slow startup, but when they hit, they will more often than not spell death for the opponent. | |||
* '''Speedy''': Jenny has pretty good runspeed and airspeed, so she can run away very easily against a lot of characters slower than her. | |||
|cons= | |cons= | ||
* ''' | * '''Takes a while to kill:''' Jenny takes just as long to kill as she is to kill. She doesn't have a ton of genuine kill confirms due to most of her strongest moves having long startup, and the ones she does have are DI-dependent, which means she often will have to rely on guesswork or edgeguarding to take the stock. | ||
* ''' | * '''Has a tough time keeping rushdowns out once they're in:''' If a character with strong combo routes reaches Jenny, she can have a tough time getting out, taking a lot of damage along the way. | ||
* ''' | * '''Popular:''' Jenny is a fairly common character in the playerbase. While this isn't inherently a weakness on it's own, it might mean that more seasoned players will know the Jenny MU well and punish you hard for making common mistakes. | ||
}} | }} | ||
---- | ---- | ||
== Moveset == | == Moveset == | ||
| Line 61: | Line 72: | ||
{{MoveData | {{MoveData | ||
|image= NASB2_Jenny_LightNeutral-12Laser.png | |image= NASB2_Jenny_LightNeutral-12Laser.png | ||
|caption= | |caption= Keep it clean! | ||
|name= 1, 2, Laser | |name= 1, 2, Laser | ||
|input= Light | |input= Light | ||
| Line 72: | Line 83: | ||
|Safety=-0 | |Safety=-0 | ||
|description= | |description= | ||
* | Jenny throws two punches, followed by a laser blast. | ||
* | * Third hit can be angled up, forward, and downwards. | ||
* Fantastic combo starter that leads into follow-ups. | |||
* Third hit aimed upwards can lead to a kill into Charge Up Air. | |||
}} | }} | ||
}}<br> | }}<br> | ||
| Line 79: | Line 92: | ||
{{MoveData | {{MoveData | ||
|image= NASB2_Jenny_LightForward-JetBladeKick.png | |image= NASB2_Jenny_LightForward-JetBladeKick.png | ||
|caption= | |caption= "Wow! Nice set... of wheels." | ||
|name= Jet Blade Kick | |name= Jet Blade Kick | ||
|input= Forward+Light | |input= Forward+Light | ||
| Line 90: | Line 103: | ||
|Safety=-0 | |Safety=-0 | ||
|description= | |description= | ||
* | Jenny skates forward on her rollerblades. | ||
* | * Deceptively good at cross-ups. | ||
* Kills some characters at 120%. | |||
}} | }} | ||
}}<br> | }}<br> | ||
| Line 97: | Line 111: | ||
{{MoveData | {{MoveData | ||
|image= NASB2_Jenny_LightUp-BlazingBlades.png | |image= NASB2_Jenny_LightUp-BlazingBlades.png | ||
|caption= | |caption= Personally, I'm a big fan. | ||
|name= Blazing Blades | |name= Blazing Blades | ||
|input= Up+Light | |input= Up+Light | ||
| Line 108: | Line 122: | ||
|Safety=-0 | |Safety=-0 | ||
|description= | |description= | ||
* | Jenny creates a big fan to hit opponents above her. | ||
* | * Primarily used as a combo tool. | ||
* Can be comboed into itself depending on DI. | |||
}} | }} | ||
}}<br> | }}<br> | ||
| Line 115: | Line 131: | ||
{{MoveData | {{MoveData | ||
|image= NASB2_Jenny_LightDown-AngryStomp.png | |image= NASB2_Jenny_LightDown-AngryStomp.png | ||
|caption= | |caption= "I'll build some ears myself!" | ||
|name= Angry Stomp | |name= Angry Stomp | ||
|input= Down+Light | |input= Down+Light | ||
| Line 126: | Line 142: | ||
|Safety=-0 | |Safety=-0 | ||
|description= | |description= | ||
* | Jenny stomps on the ground in a fit of frustration. | ||
* | * Not very useful in her combo game. | ||
* Mainly used just for damage. | |||
}} | }} | ||
}}<br> | }}<br> | ||
| Line 133: | Line 150: | ||
{{MoveData | {{MoveData | ||
|image= NASB2_Jenny_DashAttack-GlidingDrill.png | |image= NASB2_Jenny_DashAttack-GlidingDrill.png | ||
|caption= | |caption= DRILL! | ||
|name= Gliding Drill | |name= Gliding Drill | ||
|input= Light( | |input= Light (Running) | ||
|data= | |data= | ||
{{AttackData-NickBrawl2 | {{AttackData-NickBrawl2 | ||
| Line 144: | Line 161: | ||
|Safety=-0 | |Safety=-0 | ||
|description= | |description= | ||
* | Jenny forms a drill to skewer her opponents. | ||
* | * Great option for tech chasing. | ||
* Good at sending people off stage. | |||
* Has a lot of endlag, leaving you wide open on whiff. | |||
}} | }} | ||
}}<br> | }}<br> | ||
=== Air Light Attacks === | === Air Light Attacks === | ||
| Line 155: | Line 173: | ||
{{MoveData | {{MoveData | ||
|image= NASB2_Jenny_LightNeutralAir-DrillKick.png | |image= NASB2_Jenny_LightNeutralAir-DrillKick.png | ||
|caption= | |caption= Use this to scare players from the first game! | ||
|name= Drill Kick | |name= Drill Kick | ||
|input= | |input= Light (Airborne) | ||
|data= | |data= | ||
{{AttackData-NickBrawl2 | {{AttackData-NickBrawl2 | ||
| Line 166: | Line 184: | ||
|Safety=-0 | |Safety=-0 | ||
|description= | |description= | ||
* | Jenny forms her legs into drills, performing a classic neutral air that may look familiar to long-time platform fighter players. | ||
* | * The piece of resistance of Jenny's aerials. | ||
* Fantastic at dealing damage. | |||
* Great option to use out of shield. | |||
* Frame 3. | |||
}} | }} | ||
}}<br> | }}<br> | ||
| Line 173: | Line 194: | ||
{{MoveData | {{MoveData | ||
|image= NASB2_Jenny_LightForwardAir-EnemyPolish.png | |image= NASB2_Jenny_LightForwardAir-EnemyPolish.png | ||
|caption= | |caption= Give 'em the ole' spit-shine and polish. | ||
|name= Enemy Polish | |name= Enemy Polish | ||
|input= | |input= Forward+Light (Airborne) | ||
|data= | |data= | ||
{{AttackData-NickBrawl2 | {{AttackData-NickBrawl2 | ||
| Line 184: | Line 205: | ||
|Safety=-0 | |Safety=-0 | ||
|description= | |description= | ||
* | Jenny pulls out a polisher and holds it outward. | ||
* | * Combo extender. | ||
* Can be used to drag opponents down, leading to an early stock. | |||
* Can be used to build Slime very quickly. | |||
}} | }} | ||
}}<br> | }}<br> | ||
| Line 191: | Line 214: | ||
{{MoveData | {{MoveData | ||
|image= NASB2_Jenny_LightBackAir-LobsterClaws.png | |image= NASB2_Jenny_LightBackAir-LobsterClaws.png | ||
|caption= | |caption= BIG. MEATY. CLAWS! Wait, wrong character. | ||
|name= Lobster Claws | |name= Lobster Claws | ||
|input= | |input= Back+Light (Airborne) | ||
|data= | |data= | ||
{{AttackData-NickBrawl2 | {{AttackData-NickBrawl2 | ||
| Line 202: | Line 225: | ||
|Safety=-0 | |Safety=-0 | ||
|description= | |description= | ||
* | Jenny forms two gigantic lobster claws out of her arms for a devastating attack. | ||
* | * Big move. | ||
* One of Jenny's best kill options. | |||
* Slime dash into back air can lead to very early stocks. | |||
}} | }} | ||
}}<br> | }}<br> | ||
| Line 209: | Line 234: | ||
{{MoveData | {{MoveData | ||
|image= NASB2_Jenny_LightUpAir-OpenShield.png | |image= NASB2_Jenny_LightUpAir-OpenShield.png | ||
|caption= | |caption= Just peachy. | ||
|name= Open Shield | |name= Open Shield | ||
|input= | |input= Up+Light (Airborne) | ||
|data= | |data= | ||
{{AttackData-NickBrawl2 | {{AttackData-NickBrawl2 | ||
| Line 220: | Line 245: | ||
|Safety=-0 | |Safety=-0 | ||
|description= | |description= | ||
* | Jenny forms her hand into a parasol, allowing her to float downwards slowly for a brief time. | ||
* | * Fantastic combo tool. | ||
* Can lead into Charge Up Air. | |||
* Holding the move allows Jenny to float through the air for a brief window. | |||
* Holding this move also allows Jenny to replenish the fuel for her Up Special. | |||
}} | }} | ||
}}<br> | }}<br> | ||
| Line 227: | Line 255: | ||
{{MoveData | {{MoveData | ||
|image= NASB2_Jenny_LightDownAir-JackhammerStrike.png | |image= NASB2_Jenny_LightDownAir-JackhammerStrike.png | ||
|caption= | |caption= Can you dig it? | ||
|name= Jackhammer Strike | |name= Jackhammer Strike | ||
|input= | |input= Down+Light (Airborne) | ||
|data= | |data= | ||
{{AttackData-NickBrawl2 | {{AttackData-NickBrawl2 | ||
| Line 238: | Line 266: | ||
|Safety=-0 | |Safety=-0 | ||
|description= | |description= | ||
* | Jenny forms her legs into a jackhammer. | ||
* | * Pops opponents up fairly well, can lead into certain kill moves at the right percents. | ||
* Safe on shield. | |||
}} | }} | ||
}}<br> | }}<br> | ||
=== Ground Strong Attacks === | === Ground Strong Attacks === | ||
| Line 249: | Line 277: | ||
{{MoveData | {{MoveData | ||
|image= NASB2_Jenny_ChargeForward-FistsOfFury.png | |image= NASB2_Jenny_ChargeForward-FistsOfFury.png | ||
|caption= | |caption= "You never let me do anything I want!" | ||
|name= Fists of Fury | |name= Fists of Fury | ||
|input= Strong | |input= Strong | ||
| Line 260: | Line 288: | ||
|Safety=-0 | |Safety=-0 | ||
|description= | |description= | ||
* | Jenny creates two giant fists and hits the opponent twice. | ||
* | * Very strong Charge attack. | ||
* Highly punishable on whiff. | |||
}} | }} | ||
}}<br> | }}<br> | ||
| Line 267: | Line 296: | ||
{{MoveData | {{MoveData | ||
|image= NASB2_Jenny_ChargeUp-BuzzsawPomPoms.png | |image= NASB2_Jenny_ChargeUp-BuzzsawPomPoms.png | ||
|caption= | |caption= 2, 4, 6, 8, who do we annihilate? You! | ||
|name= Buzzsaw Pom Poms | |name= Buzzsaw Pom Poms | ||
|input= Up+Strong | |input= Up+Strong | ||
| Line 278: | Line 307: | ||
|Safety=-0 | |Safety=-0 | ||
|description= | |description= | ||
* | Jenny forms two saws out of her hands and spins around. | ||
* | * Small hitboxes. | ||
* High kill power, but there are no confirms that really lead into it. | |||
}} | }} | ||
}}<br> | }}<br> | ||
| Line 285: | Line 315: | ||
{{MoveData | {{MoveData | ||
|image= NASB2_Jenny_ChargeDown-MightyMallets.png | |image= NASB2_Jenny_ChargeDown-MightyMallets.png | ||
|caption= | |caption= "Work, work, work! I never get to have any fun!" | ||
|name= Mighty Mallets | |name= Mighty Mallets | ||
|input= Down+Strong | |input= Down+Strong | ||
| Line 296: | Line 326: | ||
|Safety=-0 | |Safety=-0 | ||
|description= | |description= | ||
* | Jenny creates two massive hammers out of her hands and slams them down repeatedly. | ||
* | * Mashing the move allows it to be done endlessly. | ||
* Jenny's strongest kill move. It has an incredible amount of knockback. | |||
* High amount of start-up frames. | |||
}} | }} | ||
}}<br> | }}<br> | ||
=== Air Strong Attacks === | === Air Strong Attacks === | ||
| Line 307: | Line 338: | ||
{{MoveData | {{MoveData | ||
|image= NASB2_Jenny_ChargeForwardAir-ChestLaser.png | |image= NASB2_Jenny_ChargeForwardAir-ChestLaser.png | ||
|caption= | |caption= LASER! | ||
|name= Chest Laser | |name= Chest Laser | ||
|input= | |input= Strong (Airborne) | ||
|data= | |data= | ||
{{AttackData-NickBrawl2 | {{AttackData-NickBrawl2 | ||
| Line 318: | Line 349: | ||
|Safety=-0 | |Safety=-0 | ||
|description= | |description= | ||
* | Jenny creates a huge beam that comes out of her chest. | ||
* | * Can be used for tricky movement, especially when Slime Cancelled. | ||
* Decent at killing. | |||
}} | }} | ||
}}<br> | }}<br> | ||
| Line 325: | Line 357: | ||
{{MoveData | {{MoveData | ||
|image= NASB2_Jenny_ChargeUpAir-BladeVacuum.png | |image= NASB2_Jenny_ChargeUpAir-BladeVacuum.png | ||
|caption= | |caption= "BIG MOVE!" | ||
|name= Blade Vacuum | |name= Blade Vacuum | ||
|input= | |input= Up+Strong (Airborne) | ||
|data= | |data= | ||
{{AttackData-NickBrawl2 | {{AttackData-NickBrawl2 | ||
| Line 336: | Line 368: | ||
|Safety=-0 | |Safety=-0 | ||
|description= | |description= | ||
* | Jenny creates a huge fan out of her hand and thrusts it upwards. | ||
* | * Great kill move, and can kill surprisingly early depending on the stage and character. | ||
* Can be comboed into from her aerials and throws. | |||
* Can be used once in the air to halt some of her momentum. | |||
}} | }} | ||
}}<br> | }}<br> | ||
| Line 343: | Line 377: | ||
{{MoveData | {{MoveData | ||
|image= NASB2_Jenny_ChargeDownAir-ExplosiveFeet.png | |image= NASB2_Jenny_ChargeDownAir-ExplosiveFeet.png | ||
|caption= | |caption= Target: Dunked. | ||
|name= Explosive Feet | |name= Explosive Feet | ||
|input= | |input= Down+Strong (Airborne) | ||
|data= | |data= | ||
{{AttackData-NickBrawl2 | {{AttackData-NickBrawl2 | ||
| Line 354: | Line 388: | ||
|Safety=-0 | |Safety=-0 | ||
|description= | |description= | ||
* | Jenny thrusts her feet downwards for a huge spike. | ||
* | * Can be slime cancelled into itself. | ||
* One of Jenny's strongest kill options. Many characters will simply get KO'd due to the amount of hitstun it creates. | |||
}} | }} | ||
}}<br> | }}<br> | ||
=== Special Attacks === | === Special Attacks === | ||
| Line 365: | Line 400: | ||
{{MoveData | {{MoveData | ||
|image= NASB2_Jenny_SpecialNeutral-RocketPower.png | |image= NASB2_Jenny_SpecialNeutral-RocketPower.png | ||
|caption= | |caption= Still the wrong show! | ||
|name= Rocket Power | |name= Rocket Power | ||
|input= Special | |input= Special | ||
| Line 376: | Line 411: | ||
|Safety=-0 | |Safety=-0 | ||
|description= | |description= | ||
Jenny shoots a rocket forward. | |||
* The rocket can be controlled mid-air with any directional input. | * The rocket can be controlled mid-air with any directional input. | ||
* The Slime version of the move creates a slow-moving homing rocket. Can be used to possibly overwhelm your opponent. | |||
}} | }} | ||
}}<br> | }}<br> | ||
| Line 383: | Line 419: | ||
{{MoveData | {{MoveData | ||
|image= NASB2_Jenny_SpecialForward-MassHammer.png | |image= NASB2_Jenny_SpecialForward-MassHammer.png | ||
|caption= | |caption= BIGGEST MOVE! | ||
|name= Mass Hammer | |name= Mass Hammer | ||
|input= Forward+Special | |input= Forward+Special | ||
| Line 394: | Line 430: | ||
|Safety=-0 | |Safety=-0 | ||
|description= | |description= | ||
* Jenny | Jenny creates a giant hammer out of her arm and slams it down or facing in front of her. | ||
* | |||
GROUND: | |||
* High start-up and endlag. | |||
* A decent kill option and kills lightweights decently well. | |||
* The Slime version has way more start-up and is the slowest of Jenny's moves, but hits extremely hard. | |||
AERIAL: | |||
* Hammer swing creates a projectile that's good for controlling space. | |||
* Start-up is not as high as grounded. | |||
* Slime version can be comboed into depending on DI. | |||
}} | }} | ||
}}<br> | }}<br> | ||
| Line 401: | Line 446: | ||
{{MoveData | {{MoveData | ||
|image= NASB2_Jenny_SpecialDown-ExplosiveLasers.png | |image= NASB2_Jenny_SpecialDown-ExplosiveLasers.png | ||
|caption= | |caption= "I even have Sausage Vision!" | ||
|name= Explosive Lasers | |name= Explosive Lasers | ||
|input= Down+Special | |input= Down+Special | ||
| Line 412: | Line 457: | ||
|Safety=-0 | |Safety=-0 | ||
|description= | |description= | ||
Jenny blasts lasers out of her eyes in a diagonal direction. | |||
* | * Primarily used for dishing out damage. | ||
* Deletes nearly all spawnable objects outside of Goddard and GIR. Great for matchups against zoner-type characters. | |||
}} | }} | ||
}}<br> | }}<br> | ||
| Line 419: | Line 465: | ||
{{MoveData | {{MoveData | ||
|image= NASB2_Jenny_SpecialUp-RobotWings.png | |image= NASB2_Jenny_SpecialUp-RobotWings.png | ||
|caption= | |caption= "I'll catch ya later!" | ||
|name= Robot Wings | |name= Robot Wings | ||
|input= Up+Special | |input= Up+Special | ||
| Line 430: | Line 476: | ||
|Safety=-0 | |Safety=-0 | ||
|description= | |description= | ||
Jenny opens her wings and lifts off with great propulsion. | |||
* | * Press any directional input to freely steer her. | ||
* This move runs on fuel, of which can be fully replenished when she's on stage, or during her Up Air. | |||
* If fuel runs out, Jenny will plummet downwards. Caution is advised. | |||
* The Slime version of this move makes Jenny fly faster for a much shorter duration. | |||
* Ledge-cancellable. | |||
* Can be Slime Cancelled when positioned next to your opponent for a nasty aerial follow-up. | |||
}} | |||
}}<br> | |||
=== Grab/Throws === | |||
{{MoveData | |||
|image= NASB2_Jenny_Grab.png | |||
|caption= Stretchy Arm and Extendo Finger! | |||
|name= Grab | |||
|input= Grab | |||
|data= | |||
{{AttackData-NickBrawl2 | |||
|Damage=00% | |||
|Startup=0 | |||
|Active=0-0 | |||
|Total Frames=0 | |||
|Safety=-0 | |||
|description= | |||
Jenny's grab. | |||
* Can be held to extend her arm outward for an extended grab. | |||
* Extended grab leaves Jenny vulnerable. | |||
}} | |||
}}<br> | |||
{{MoveData | |||
|image= NASB2_Jenny_DashGrab.png | |||
|caption= | |||
|name= Dash Grab | |||
|input= Grab (Running) | |||
|data= | |||
{{AttackData-NickBrawl2 | |||
|Damage=00% | |||
|Startup=0 | |||
|Active=0-0 | |||
|Total Frames=0 | |||
|Safety=-0 | |||
|description= | |||
Jenny's running grab. | |||
}} | |||
}}<br> | |||
{{MoveData | |||
|image= NASB2_Jenny_Pummel.png | |||
|caption= Beep Boop. | |||
|name= Grab Pummel | |||
|input= Light (Grabbing) | |||
|data= | |||
{{AttackData-NickBrawl2 | |||
|Damage=00% | |||
|Startup=0 | |||
|Active=0-0 | |||
|Total Frames=0 | |||
|Safety=-0 | |||
|description= | |||
Jenny smacks her opponent while she's grabbing them. | |||
}} | |||
}}<br> | |||
{{MoveData | |||
|image= NASB2_Jenny_UpThrow.png | |||
|caption= "Buckle up!" | |||
|name= Up Throw | |||
|input= Up (Grabbing) | |||
|data= | |||
{{AttackData-NickBrawl2 | |||
|Damage=00% | |||
|Startup=0 | |||
|Active=0-0 | |||
|Total Frames=0 | |||
|Safety=-0 | |||
|description= | |||
Jenny sends her opponent upwards to the stars. | |||
* Combo throw that can be done at early percents. | |||
* Kill confirm that can be done at mid to high percents. | |||
* Kill throw that can be done at very high percents. This move does it all. | |||
}} | |||
}}<br> | |||
{{MoveData | |||
|image= NASB2_Jenny_ForwardThrow.png | |||
|caption= "Target sighted!" | |||
|name= Forward Throw | |||
|input= Forward (Grabbing) | |||
|data= | |||
{{AttackData-NickBrawl2 | |||
|Damage=00% | |||
|Startup=0 | |||
|Active=0-0 | |||
|Total Frames=0 | |||
|Safety=-0 | |||
|description= | |||
Jenny shoots the opponent forward like an arrow in her crossbow. | |||
* Mainly used for positioning and forcing your opponent off stage. | |||
}} | |||
}}<br> | |||
{{MoveData | |||
|image= NASB2_Jenny_DownThrow.png | |||
|caption= Monkey's Paw | |||
|name= Down Throw | |||
|input= Down (Grabbing) | |||
|data= | |||
{{AttackData-NickBrawl2 | |||
|Damage=00% | |||
|Startup=0 | |||
|Active=0-0 | |||
|Total Frames=0 | |||
|Safety=-0 | |||
|description= | |||
Jenny slams her giant fists down on the opponent. | |||
* Decent combo throw on some characters at low percent. Useful for throw mix-ups. | |||
}} | }} | ||
}}<br> | }}<br> | ||
{{MoveData | |||
|image= NASB2_Jenny_BackThrow.png | |||
|caption= Get outta here! | |||
|name= Back Throw | |||
|input= Back (Grabbing) | |||
|data= | |||
{{AttackData-NickBrawl2 | |||
|Damage=00% | |||
|Startup=0 | |||
|Active=0-0 | |||
|Total Frames=0 | |||
|Safety=-0 | |||
|description= | |||
Jenny blasts her opponent behind her. | |||
* Can be used as a mix-up throw. | |||
* Doesn't kill until surprisingly high percents. | |||
}} | |||
}}<br> | |||
=== Super === | === Super === | ||
| Line 441: | Line 622: | ||
{{MoveData | {{MoveData | ||
|image= NASB2_Jenny_Super.png | |image= NASB2_Jenny_Super.png | ||
|caption= | |caption= Shiva Swords | ||
|name= | |name= Super | ||
|input= Slime+Light | |input= Slime+Light | ||
|data= | |data= | ||
| Line 452: | Line 633: | ||
|Safety=-0 | |Safety=-0 | ||
|description= | |description= | ||
Jenny meditates below her opponent, followed by cutting her opponents with her sword hands. | |||
}} | }} | ||
}}<br> | }}<br> | ||
=== Taunts === | === Taunts === | ||
| Line 463: | Line 642: | ||
{{MoveData | {{MoveData | ||
|image= NASB2_Jenny_TauntNeutral.png | |image= NASB2_Jenny_TauntNeutral.png | ||
|caption= | |caption= "Hi!" | ||
|name= | |name= Taunt | ||
|input= Taunt | |input= Taunt | ||
|data= | |data= | ||
| Line 474: | Line 653: | ||
|Safety=-0 | |Safety=-0 | ||
|description= | |description= | ||
Jenny dances on her opponent, in reference to the My Life as a Teenage Robot episode, "Mist Opportunities". | |||
}} | }} | ||
}}<br> | }}<br> | ||
| Line 481: | Line 659: | ||
{{MoveData | {{MoveData | ||
|image= NASB2_Jenny_TauntDown.png | |image= NASB2_Jenny_TauntDown.png | ||
|caption= | |caption= Wait, can robots even tan? | ||
|name= | |name= Down Taunt | ||
|input= Down+Taunt | |input= Down+Taunt | ||
|data= | |data= | ||
| Line 492: | Line 670: | ||
|Safety=-0 | |Safety=-0 | ||
|description= | |description= | ||
Jenny pulls out shades and begins to tan, in reference to the My Life as a Teenage Robot episode, "Toying with Jenny". | |||
}} | }} | ||
}}<br> | }}<br> | ||
| Line 499: | Line 676: | ||
{{MoveData | {{MoveData | ||
|image= NASB2_Jenny_TauntUp.png | |image= NASB2_Jenny_TauntUp.png | ||
|caption= | |caption= Swiss Mix | ||
|name= | |name= Up Taunt | ||
|input= Up+Taunt | |input= Up+Taunt | ||
|data= | |data= | ||
| Line 510: | Line 687: | ||
|Safety=-0 | |Safety=-0 | ||
|description= | |description= | ||
Jenny forms a swiss army knife out of her arm. Truly a force to be reckoned with. | |||
}} | }} | ||
}}<br> | }}<br> | ||
---- | ---- | ||
== Strategy == | |||
== | |||
* PLACEHOLDER | * PLACEHOLDER | ||
| Line 529: | Line 703: | ||
== | == Techniques == | ||
* PLACEHOLDER | * PLACEHOLDER | ||
| Line 557: | Line 713: | ||
== | == Combos == | ||
* PLACEHOLDER | * PLACEHOLDER | ||
| Line 563: | Line 719: | ||
* PLACEHOLDER | * PLACEHOLDER | ||
---- | |||
== Matchups == | |||
{| class="wikitable" | |||
|- | |||
| '''+2''' || | |||
|- | |||
| '''+1''' || | |||
|- | |||
| '''0''' || [[File:NASB2_Sponge_Icon.png|x80px]] [[File:NASB2_Patrick_Icon.png|x80px]] [[File:NASB2_Squidward_Icon.png|x80px]] [[File:NASB2_Plankton_Icon.png|x80px]] [[File:NASB2_ElTigre_Icon.png|x80px]] [[File:NASB2_Rocko_Icon.png|x80px]] [[File:NASB2_Jimmy_Icon.png|x80px]] [[File:NASB2_Lucy_Icon.png|x80px]] [[File:NASB2_Beavers-Daggett_Icon.png|x80px]] [[File:NASB2_Beavers-Norbert_Icon.png|x80px]] [[File:NASB2_Garfield_Icon.png|x80px]] [[File:NASB2_Aang_Icon.png|x80px]] [[File:NASB2_Korra_Icon.png|x80px]] [[File:NASB2_Azula_Icon.png|x80px]] [[File:NASB2_Raphael_Icon.png|x80px]] [[File:NASB2_Donatello_Icon.png|x80px]] [[File:NASB2_April_Icon.png|x80px]] [[File:NASB2_Danny_Icon.png|x80px]] [[File:NASB2_Ember_Icon.png|x80px]] [[File:NASB2_Gertie_Icon.png|x80px]] [[File:NASB2_Gerald_Icon.png|x80px]] [[File:NASB2_Nigel_Icon.png|x80px]] [[File:NASB2_Zim_Icon.png|x80px]] [[File:NASB2_Jenny_Icon.png|x80px]] [[File:NASB2_Reptar_Icon.png|x80px]] [[File:NASB2_RenStimpy_Icon.png|x80px]] [[File:NASB2_Krabs_Icon.png|x80px]] [[File:NASB2_Zuko_Icon.png|x80px]] [[File:NASB2_Rocksteady_Icon.png|x80px]] | |||
|- | |||
| '''1''' || | |||
|- | |||
| '''2''' || | |||
|} | |||
---- | ---- | ||
| Line 572: | Line 744: | ||
* PLACEHOLDER | * PLACEHOLDER | ||
* PLACEHOLDER | * PLACEHOLDER | ||
=== Videos === | |||
PLACEHOLDER | |||
| Line 578: | Line 753: | ||
== Costumes == | == Costumes == | ||
<gallery> | |||
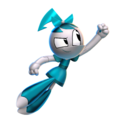
File:NASB2 Jenny Costume00.png| Jenny's Default Outfit. | |||
File:NASB2 Jenny Costume01.png| Jenny in her makeover from the episode "The Great Unwashed". | |||
File:NASB2 Jenny Costume02.png| Jenny in her prom dress from the episode "Dancing With My Shell". | |||
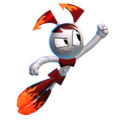
File:NASB2 Jenny Costume03.png| Jenny all rusted from the episode "Armagedroid". | |||
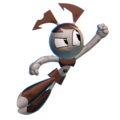
File:NASB2 Jenny Costume04.png| Mind controlled Jenny (unlocked by defeating Jenny twice in campaign mode). | |||
File:NASB2 Jenny Costume05.png| Jenny's Ghost Clone (unlocked by defeating Jenny thrice in campaign mode). | |||
</gallery> | |||
{{Navbox-NickBrawl2}} | {{Navbox-NickBrawl2}} | ||
[[Category:Nickelodeon All-Star Brawl 2]] | [[Category:Nickelodeon All-Star Brawl 2]] | ||
Latest revision as of 12:42, 20 March 2025
About
The robot who just wants to live a normal teenage life.
Built as Robotic Global Response Unit XJ-9, Jennifer "Jenny" Wakeman wishes to have the life of a normal teenage girl, in spite of being a robot armed to the teeth with weaponry. This often results in conflicts of interests in between saving Earth from a formidable rogues' gallery of villains, to just wanting to do normal high school girl things.
Playstyle
Jenny is a fairly standard zoner who excels in playing keepaway. She has excellent projectiles in her Neutral and Side Specials, and can keep the opponent at bay with her notorious Back Air and her "big move"s, in her own words. She's not lacking on the offense, either: she has some nasty juggles and tech chases with her Up Air and Dash Attack.
If you like maintaining control of the stage and keeping your opponent out, Jenny is for you!
Metagame
Jenny is ranked 12th out of 29 on the current tier list, in the A tier. This is a marginal drop over her 10th out of 25 placement in the first Nickelodeon All-Star Brawl.
Jenny is an all-rounder character with a lot of great tools for any situation. She has a strong projectile game in her Missile and her Side Special, respectable stats, hard-hitting strongs, a great recovery, and an insane edgeguarding tool in Back Air. All of these make Jenny a very solid character that's equipped to handle most matchups fairly easily.
However, Jenny does have a few flaws. While she has some kill confirms, getting to that point either requires hard reads or getting in. Jenny has a tough time dealing with characters who get in her face too often. Her recovery also does have a limit, which means she can be countered if she's offstage for too long.
Overall though, Jenny is seen as a great character in the metagame, having a solid matchup spread and very strong tournament results. She remains a popular character at all levels of play.
 | |
| Franchise |
My Life as a Teenage Robot |
|---|---|
| Home Stage |
Tremorton Joyride |
| Weight |
0.90 |
| Fall Speed |
1 |
| Gravity |
1.08 |
| Run Speed |
1.15 |
| Air Speed |
1.05 |
| Strengths | Weaknesses |
|---|---|
|
|
Moveset
Ground Light Attacks
Light

| Damage | Startup | Active Frames | Total Frames | Safety | |
|---|---|---|---|---|---|
| 00% | 0 | 0-0 | 0 | -0 | |
|
Jenny throws two punches, followed by a laser blast.
| |||||
Forward+Light

| Damage | Startup | Active Frames | Total Frames | Safety | |
|---|---|---|---|---|---|
| 00% | 0 | 0-0 | 0 | -0 | |
|
Jenny skates forward on her rollerblades.
| |||||
Up+Light

| Damage | Startup | Active Frames | Total Frames | Safety | |
|---|---|---|---|---|---|
| 00% | 0 | 0-0 | 0 | -0 | |
|
Jenny creates a big fan to hit opponents above her.
| |||||
Down+Light

| Damage | Startup | Active Frames | Total Frames | Safety | |
|---|---|---|---|---|---|
| 00% | 0 | 0-0 | 0 | -0 | |
|
Jenny stomps on the ground in a fit of frustration.
| |||||
Light (Running)

| Damage | Startup | Active Frames | Total Frames | Safety | |
|---|---|---|---|---|---|
| 00% | 0 | 0-0 | 0 | -0 | |
|
Jenny forms a drill to skewer her opponents.
| |||||
Air Light Attacks
Light (Airborne)

| Damage | Startup | Active Frames | Total Frames | Safety | |
|---|---|---|---|---|---|
| 00% | 0 | 0-0 | 0 | -0 | |
|
Jenny forms her legs into drills, performing a classic neutral air that may look familiar to long-time platform fighter players.
| |||||
Forward+Light (Airborne)

| Damage | Startup | Active Frames | Total Frames | Safety | |
|---|---|---|---|---|---|
| 00% | 0 | 0-0 | 0 | -0 | |
|
Jenny pulls out a polisher and holds it outward.
| |||||
Back+Light (Airborne)

| Damage | Startup | Active Frames | Total Frames | Safety | |
|---|---|---|---|---|---|
| 00% | 0 | 0-0 | 0 | -0 | |
|
Jenny forms two gigantic lobster claws out of her arms for a devastating attack.
| |||||
Up+Light (Airborne)

| Damage | Startup | Active Frames | Total Frames | Safety | |
|---|---|---|---|---|---|
| 00% | 0 | 0-0 | 0 | -0 | |
|
Jenny forms her hand into a parasol, allowing her to float downwards slowly for a brief time.
| |||||
Down+Light (Airborne)

| Damage | Startup | Active Frames | Total Frames | Safety | |
|---|---|---|---|---|---|
| 00% | 0 | 0-0 | 0 | -0 | |
|
Jenny forms her legs into a jackhammer.
| |||||
Ground Strong Attacks
Strong

| Damage | Startup | Active Frames | Total Frames | Safety | |
|---|---|---|---|---|---|
| 00% | 0 | 0-0 | 0 | -0 | |
|
Jenny creates two giant fists and hits the opponent twice.
| |||||
Up+Strong

| Damage | Startup | Active Frames | Total Frames | Safety | |
|---|---|---|---|---|---|
| 00% | 0 | 0-0 | 0 | -0 | |
|
Jenny forms two saws out of her hands and spins around.
| |||||
Down+Strong

| Damage | Startup | Active Frames | Total Frames | Safety | |
|---|---|---|---|---|---|
| 00% | 0 | 0-0 | 0 | -0 | |
|
Jenny creates two massive hammers out of her hands and slams them down repeatedly.
| |||||
Air Strong Attacks
Strong (Airborne)

| Damage | Startup | Active Frames | Total Frames | Safety | |
|---|---|---|---|---|---|
| 00% | 0 | 0-0 | 0 | -0 | |
|
Jenny creates a huge beam that comes out of her chest.
| |||||
Up+Strong (Airborne)

| Damage | Startup | Active Frames | Total Frames | Safety | |
|---|---|---|---|---|---|
| 00% | 0 | 0-0 | 0 | -0 | |
|
Jenny creates a huge fan out of her hand and thrusts it upwards.
| |||||
Down+Strong (Airborne)

| Damage | Startup | Active Frames | Total Frames | Safety | |
|---|---|---|---|---|---|
| 00% | 0 | 0-0 | 0 | -0 | |
|
Jenny thrusts her feet downwards for a huge spike.
| |||||
Special Attacks
Special

| Damage | Startup | Active Frames | Total Frames | Safety | |
|---|---|---|---|---|---|
| 00% | 0 | 0-0 | 0 | -0 | |
|
Jenny shoots a rocket forward.
| |||||
Forward+Special

| Damage | Startup | Active Frames | Total Frames | Safety | |
|---|---|---|---|---|---|
| 00% | 0 | 0-0 | 0 | -0 | |
|
Jenny creates a giant hammer out of her arm and slams it down or facing in front of her. GROUND:
AERIAL:
| |||||
Down+Special

| Damage | Startup | Active Frames | Total Frames | Safety | |
|---|---|---|---|---|---|
| 00% | 0 | 0-0 | 0 | -0 | |
|
Jenny blasts lasers out of her eyes in a diagonal direction.
| |||||
Up+Special

| Damage | Startup | Active Frames | Total Frames | Safety | |
|---|---|---|---|---|---|
| 00% | 0 | 0-0 | 0 | -0 | |
|
Jenny opens her wings and lifts off with great propulsion.
| |||||
Grab/Throws
Grab

| Damage | Startup | Active Frames | Total Frames | Safety | |
|---|---|---|---|---|---|
| 00% | 0 | 0-0 | 0 | -0 | |
|
Jenny's grab.
| |||||
Grab (Running)

| Damage | Startup | Active Frames | Total Frames | Safety | |
|---|---|---|---|---|---|
| 00% | 0 | 0-0 | 0 | -0 | |
|
Jenny's running grab. | |||||
Light (Grabbing)

| Damage | Startup | Active Frames | Total Frames | Safety | |
|---|---|---|---|---|---|
| 00% | 0 | 0-0 | 0 | -0 | |
|
Jenny smacks her opponent while she's grabbing them. | |||||
Up (Grabbing)

| Damage | Startup | Active Frames | Total Frames | Safety | |
|---|---|---|---|---|---|
| 00% | 0 | 0-0 | 0 | -0 | |
|
Jenny sends her opponent upwards to the stars.
| |||||
Forward (Grabbing)

| Damage | Startup | Active Frames | Total Frames | Safety | |
|---|---|---|---|---|---|
| 00% | 0 | 0-0 | 0 | -0 | |
|
Jenny shoots the opponent forward like an arrow in her crossbow.
| |||||
Down (Grabbing)

| Damage | Startup | Active Frames | Total Frames | Safety | |
|---|---|---|---|---|---|
| 00% | 0 | 0-0 | 0 | -0 | |
|
Jenny slams her giant fists down on the opponent.
| |||||
Back (Grabbing)

| Damage | Startup | Active Frames | Total Frames | Safety | |
|---|---|---|---|---|---|
| 00% | 0 | 0-0 | 0 | -0 | |
|
Jenny blasts her opponent behind her.
| |||||
Super
Slime+Light

| Damage | Startup | Active Frames | Total Frames | Safety | |
|---|---|---|---|---|---|
| 00% | 0 | 0-0 | 0 | -0 | |
|
Jenny meditates below her opponent, followed by cutting her opponents with her sword hands. | |||||
Taunts
Taunt

| Damage | Startup | Active Frames | Total Frames | Safety | |
|---|---|---|---|---|---|
| 00% | 0 | 0-0 | 0 | -0 | |
|
Jenny dances on her opponent, in reference to the My Life as a Teenage Robot episode, "Mist Opportunities". | |||||
Down+Taunt

| Damage | Startup | Active Frames | Total Frames | Safety | |
|---|---|---|---|---|---|
| 00% | 0 | 0-0 | 0 | -0 | |
|
Jenny pulls out shades and begins to tan, in reference to the My Life as a Teenage Robot episode, "Toying with Jenny". | |||||
Up+Taunt

| Damage | Startup | Active Frames | Total Frames | Safety | |
|---|---|---|---|---|---|
| 00% | 0 | 0-0 | 0 | -0 | |
|
Jenny forms a swiss army knife out of her arm. Truly a force to be reckoned with. | |||||
Strategy
- PLACEHOLDER
- PLACEHOLDER
- PLACEHOLDER
Techniques
- PLACEHOLDER
- PLACEHOLDER
- PLACEHOLDER
Combos
- PLACEHOLDER
- PLACEHOLDER
- PLACEHOLDER
Matchups
| +2 | |
| +1 | |
| 0 | |
| 1 | |
| 2 |
Other Resources
- PLACEHOLDER
- PLACEHOLDER
- PLACEHOLDER
Videos
PLACEHOLDER
Costumes
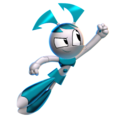
Jenny's Default Outfit.
Jenny in her makeover from the episode "The Great Unwashed".
Jenny in her prom dress from the episode "Dancing With My Shell".
Jenny all rusted from the episode "Armagedroid".
Mind controlled Jenny (unlocked by defeating Jenny twice in campaign mode).
Jenny's Ghost Clone (unlocked by defeating Jenny thrice in campaign mode).


